Avaya 12 Call Management System (CMS) Release Sun Enterprise 3500 Computer CMS Upgrade Express (CUE) To The Manual Daaac8ad C4b8 452f 9fa9 31d8b85b90f6
User Manual: Avaya 12 to the manual
Open the PDF directly: View PDF ![]() .
.
Page Count: 72
- Avaya Call Management System (CMS)
- Release 12
- Sun Enterprise 3500 Computer
- CMS Upgrade Express (CUE)
- Contents
- Preface
- Preparing for the upgrade
- Verifying that the customer has prepared their system for an upgrade
- Required documentation
- Remote support
- Trouble escalation
- Switch compatibility
- Hardware additions
- Software considerations
- Customization issues
- Disk mirroring
- Parts list
- Checking for printer requests and large mail files
- Checking for ACD 1
- Checking for a symbolic link between /etc/hosts and /etc/inet/hosts
- Extracting the customer’s administration and options
- Removing and replacing disk drives
- Prerequisites
- Disk upgrade procedures
- Removing and labeling the old disk drives
- Installing the new boot disk drive
- Booting up the system with the new boot disk drive
- Verifying that the system recognizes the new boot disk drive
- Checking the status of the boot disk drive
- Checking the status of the tape drives
- Verifying that the upgrade can continue
- Copying and activating the customer’s administration and options
- Installing CMS patches
- Copying customer data
- Checking file differences between the old system and the new system
- Linking the /etc/hosts file
- Installing the remaining disk drives
- Verifying that the system recognizes all disk drives
- Checking the status of the disks
- Activating customer options
- Removing temporary ACD 1
- Turning on CMS
- Verifying that CMS is operating
- Checking “manual merge” discrepancies
- Checking Free Space Allocation
- Turning on Visual Vectors server (optional)
- Updating the switch setup
- Setting the Informix configuration parameters
- Removing the upgrade files
- Migrating customer data
- Resetting the CONSOLE parameter
- Replacing the customer’s tapes
- Checking the status of the disks
- Turning the upgraded system over to the customer

Avaya Call Management System (CMS)
Release 12
Sun Enterprise 3500 Computer
CMS Upgrade Express (CUE)
Comcode 700289390
Issue 1.0
December 2003
Compas ID 99956

© 2003 Avaya Inc.
All Rights Reserved.
Notice
While reasonable efforts were made to ensure that the information in this
document was complete and accurate at the time of printing, Avaya Inc.
can assume no liability for any errors. Changes and corrections to the
information in this document may be incorporated in future releases.
Preventing toll fraud
"Toll fraud" is the unauthorized use of your telecommunications system
by an unauthorized party (for example, anyone who is not a corporate
employee, agent, subcontractor, or person working on your company's
behalf). Be aware that there may be a risk of toll fraud associated with
your system and that, if toll fraud occurs, it can result in substantial
additional charges for your telecommunications services.
Avaya fraud intervention
If you suspect that you are being victimized by toll fraud and you need
technical assistance or support, call Technical Service Center Toll Fraud
Intervention Hotline at +1-800-643-2353 for the United States and
Canada. For additional support telephone numbers, see the Avaya Web
site:
http://www.avaya.com
Select Support, then select Escalation Lists. This Web site includes
telephone numbers for escalation within the United States. For escalation
telephone numbers outside the United States, select Global Escalation
List.
Providing telecommunications security
Telecommunications security (of voice, data, and video communications)
is the prevention of any type of intrusion to (that is, either unauthorized or
malicious access to or use of) your company's telecommunications
equipment by some party.
Your company's "telecommunications equipment" includes both this
Avaya product and any other voice/data/video equipment that could be
accessed via this Avaya product (that is, "networked equipment").
An "outside party" is anyone who is not a corporate employee, agent,
subcontractor, or person working on your company's behalf. Whereas, a
"malicious party" is anyone (including someone who may be otherwise
authorized) who accesses your telecommunications equipment with
either malicious or mischievous intent.
Such intrusions may be either to/through synchronous (time-multiplexed
and/or circuit-based) or asynchronous (character-, message-, or
packet-based) equipment or interfaces for reasons of:
• Use (of capabilities special to the accessed equipment)
• Theft (such as, of intellectual property, financial assets, or
toll-facility access)
• Eavesdropping (privacy invasions to humans)
• Mischief (troubling, but apparently innocuous, tampering)
• Harm (such as harmful tampering, data loss or alteration,
regardless of motive or intent)
Be aware that there may be a risk of unauthorized intrusions associated
with your system and/or its networked equipment. Also realize that, if
such an intrusion should occur, it could result in a variety of losses to your
company (including, but not limited to, human and data privacy,
intellectual property, material assets, financial resources, labor costs, and
legal costs).
Your responsibility for your company's telecommunications
security
The final responsibility for securing both this system and its networked
equipment rests with you, an Avaya customer's system administrator,
your telecommunications peers, and your managers. Base the fulfillment
of your responsibility on acquired knowledge and resources from a
variety of sources, including, but not limited to:
• Installation documents
• System administration documents
• Security documents
• Hardware-/software-based security tools
• Shared information between you and your peers
• Telecommunications security experts
To prevent intrusions to your telecommunications equipment, you and
your peers should carefully program and configure:
• Your Avaya-provided telecommunications systems and their
interfaces
• Your Avaya-provided software applications, as well as their
underlying hardware/software platforms and interfaces
• Any other equipment networked to your Avaya products.
Warranty
Avaya Inc. provides a limited warranty on this product. Refer to your
sales agreement to establish the terms of the limited warranty. In
addition, Avaya’s standard warranty language, as well as information
regarding support for this product, while under warranty, is available
through the following Web site:
http://www.avaya.com/support
Link disclaimer
Avaya Inc. is not responsible for the contents or reliability of any linked
Web sites and does not necessarily endorse the products, services, or
information described or offered within them. We cannot guarantee that
these links will work all of the time and we have no control over the
availability of the linked pages.
Trademarks
Avaya is a trademark of Avaya Inc.
All trademarks identified by the ® or ™ are registered trademarks or
trademarks, respectively, of Avaya Inc. All other trademarks are the
property of their respective owners.
Avaya support
Avaya provides a telephone number for you to use to report problems or
to ask questions about your contact center. The support telephone
number is 1-800-242-2121 in the United States. For additional support
telephone numbers, see the Avaya Web site:
http://www.avaya.com
Select Support, then select Escalation Lists. This Web site includes
telephone numbers for escalation within the United States. For escalation
telephone numbers outside the United States, select Global Escalation
List.
Comments
To comment on this document, send e-mail to crminfodev@avaya.com.
Acknowledgment
This document was written by the CRM Information Development group.

Issue 1.0 December 2003 3
Preface . . . . . . . . . . . . . . . . . . . . . . . . . . . . . . . . . . . . . . . . 5
Overview . . . . . . . . . . . . . . . . . . . . . . . . . . . . . . . . . . . . . . . 5
Related documents . . . . . . . . . . . . . . . . . . . . . . . . . . . . . . . . . . . 5
Support . . . . . . . . . . . . . . . . . . . . . . . . . . . . . . . . . . . . . . . . 6
Frequently asked questions (FAQs) . . . . . . . . . . . . . . . . . . . . . . . . . . 6
Customer support for the United States. . . . . . . . . . . . . . . . . . . . . . . . . 6
Technician support for the United States . . . . . . . . . . . . . . . . . . . . . . . . 6
Customer and technician support outside the United States . . . . . . . . . . . . . . . 6
Preparing for the upgrade. . . . . . . . . . . . . . . . . . . . . . . . . . . . . . . . . 7
Verifying that the customer has prepared their system for an upgrade . . . . . . . . . . . 8
Required documentation . . . . . . . . . . . . . . . . . . . . . . . . . . . . . . . . 8
Remote support . . . . . . . . . . . . . . . . . . . . . . . . . . . . . . . . . . . . 8
Trouble escalation . . . . . . . . . . . . . . . . . . . . . . . . . . . . . . . . . . . 8
Switch compatibility. . . . . . . . . . . . . . . . . . . . . . . . . . . . . . . . . . . 9
Hardware additions . . . . . . . . . . . . . . . . . . . . . . . . . . . . . . . . . . . 9
Software considerations . . . . . . . . . . . . . . . . . . . . . . . . . . . . . . . . 10
Customization issues . . . . . . . . . . . . . . . . . . . . . . . . . . . . . . . . . . 10
Disk mirroring . . . . . . . . . . . . . . . . . . . . . . . . . . . . . . . . . . . . . 11
Parts list . . . . . . . . . . . . . . . . . . . . . . . . . . . . . . . . . . . . . . . . 11
Checking for printer requests and large mail files . . . . . . . . . . . . . . . . . . . . . 12
Checking for ACD 1 . . . . . . . . . . . . . . . . . . . . . . . . . . . . . . . . . . 13
Checking for a symbolic link between /etc/hosts and /etc/inet/hosts . . . . . . . . . . . . 14
Extracting the customer’s administration and options . . . . . . . . . . . . . . . . . 17
Removing and replacing disk drives . . . . . . . . . . . . . . . . . . . . . . . . . . . 31
Prerequisites . . . . . . . . . . . . . . . . . . . . . . . . . . . . . . . . . . . . . . 31
Disk upgrade procedures . . . . . . . . . . . . . . . . . . . . . . . . . . . . . . . . 32
Removing and labeling the old disk drives . . . . . . . . . . . . . . . . . . . . . . . 32
Installing the new boot disk drive . . . . . . . . . . . . . . . . . . . . . . . . . . . . 34
Booting up the system with the new boot disk drive . . . . . . . . . . . . . . . . . . . 35
Verifying that the system recognizes the new boot disk drive . . . . . . . . . . . . . . 38
Checking the status of the boot disk drive . . . . . . . . . . . . . . . . . . . . . . . 38
Checking the status of the tape drives . . . . . . . . . . . . . . . . . . . . . . . . . 39
Verifying that the upgrade can continue . . . . . . . . . . . . . . . . . . . . . . . . 39
Avaya Call Management System (CMS)
Release 12
Sun Enterprise 3500 Computer
CMS Upgrade Express (CUE)
Contents

Contents
4 Avaya CMS R12 Sun Enterprise 3500 Computer CMS Upgrade Express
Copying and activating the customer’s administration and options . . . . . . . . . 41
Installing CMS patches . . . . . . . . . . . . . . . . . . . . . . . . . . . . . . . . . 43
Copying customer data . . . . . . . . . . . . . . . . . . . . . . . . . . . . . . . . . 45
Checking file differences between the old system and the new system . . . . . . . . . . 47
Verifying files using pkgchk . . . . . . . . . . . . . . . . . . . . . . . . . . . . . . 47
Comparing directory and file permissions. . . . . . . . . . . . . . . . . . . . . . . . 48
Linking the /etc/hosts file . . . . . . . . . . . . . . . . . . . . . . . . . . . . . . . . 49
Installing the remaining disk drives . . . . . . . . . . . . . . . . . . . . . . . . . . . 50
Verifying that the system recognizes all disk drives . . . . . . . . . . . . . . . . . . . . 51
Checking the status of the disks. . . . . . . . . . . . . . . . . . . . . . . . . . . . . 53
Activating customer options . . . . . . . . . . . . . . . . . . . . . . . . . . . . . . . 54
Recovering from failed installation scripts . . . . . . . . . . . . . . . . . . . . . . 58
Removing temporary ACD 1 . . . . . . . . . . . . . . . . . . . . . . . . . . . . . . 60
Turning on CMS . . . . . . . . . . . . . . . . . . . . . . . . . . . . . . . . . . . . 61
Verifying that CMS is operating . . . . . . . . . . . . . . . . . . . . . . . . . . . . . 61
Checking “manual merge” discrepancies . . . . . . . . . . . . . . . . . . . . . . . . 62
Checking Free Space Allocation. . . . . . . . . . . . . . . . . . . . . . . . . . . . . 63
Turning on Visual Vectors server (optional) . . . . . . . . . . . . . . . . . . . . . . . 64
Updating the switch setup . . . . . . . . . . . . . . . . . . . . . . . . . . . . . . . 64
Setting the Informix configuration parameters . . . . . . . . . . . . . . . . . . . . . . 65
Removing the upgrade files . . . . . . . . . . . . . . . . . . . . . . . . . . . . . . . 65
Migrating customer data . . . . . . . . . . . . . . . . . . . . . . . . . . . . . . . . 67
Migrating system administration data. . . . . . . . . . . . . . . . . . . . . . . . . . 67
Migrating agent and call center administration data . . . . . . . . . . . . . . . . . . . 69
Resetting the CONSOLE parameter . . . . . . . . . . . . . . . . . . . . . . . . . . . 71
Replacing the customer’s tapes . . . . . . . . . . . . . . . . . . . . . . . . . . . . . 72
Checking the status of the disks. . . . . . . . . . . . . . . . . . . . . . . . . . . . . 72
Turning the upgraded system over to the customer. . . . . . . . . . . . . . . . . . . . 72

Issue 1.0 December 2003 5
Preface
Overview
Avaya Call Management System (CMS) Release 12 Sun Enterprise 3500 Computer CMS
Upgrade Express (CUE) is written for technicians who are upgrading an Enterprise 3500
computer from CMS R3V6, R3V8, R3V9, R3V11, or R12 to CMS R12.
Note:
Note: CUE cannot be used to upgrade a Sun SPARCserver, Ultra 5, or
Enterprise 3000 computer to R12. You must follow the procedures found in
Avaya CMS Release 3 Version 11 Platform Upgrade and Data Migration to
upgrade to CMS R12.
Related documents
The following table lists sources for additional information about the Enterprise 3500
computer. To order any of these documents, call the Publications Center
at 1-800-457-1235 (United States and Canada) or +1-207-866-6701 (outside the United
States and Canada).
Title Document
number
Avaya CMS Release 12 CMS Upgrade Express (CUE) Customer Requirements 07-300010
Avaya CMS Sun Enterprise 3500 Computer Hardware Installation, Maintenance,
and Troubleshooting
585-215-873
Avaya CMS Sun Enterprise 3500 Computer Connectivity Diagram 585-215-877

Preface
6 Avaya CMS R12 Sun Enterprise 3500 Computer CMS Upgrade Express
Support
If you need assistance with a problem, use the support information and help lines
presented below.
Frequently asked questions (FAQs)
For solutions to common problems, customers and Avaya technicians can access
technical support FAQs at:
http://www.avaya.com
Select Support > Call Center/CRM and select the product for which you need support.
Please check this information before you call in a trouble ticket. Doing so could save you
time and money.
Customer support for the United States
Customers can report problems and generate trouble tickets by calling:
1-800-242-2121
The customer is prompted to identify the type of problem (that is, Automatic Call
Distribution, hardware, or Avaya CMS) and is then connected to the appropriate service
organization.
Technician support for the United States
Avaya technicians can receive help by calling:
1-800-248-1234
Customer and technician support outside the United States
For customer and technician support outside the United States, see the Avaya Web site:
http://www.avaya.com
Select Support > Escalation Lists. For escalation telephone numbers outside the United
States, select Global Escalation List.

Issue 1.0 December 2003 7
Preparing for the upgrade
Before you begin a CUE upgrade, use the following checklist of topics to prepare for the
upgrade:
Topic
Verifying that the customer has prepared their system for an upgrade on page 8
Required documentation on page 8
Remote support on page 8
Trouble escalation on page 8
Switch compatibility on page 9
Hardware additions on page 9
Software considerations on page 10
Customization issues on page 10
Disk mirroring on page 11
Parts list on page 11
Checking for printer requests and large mail files on page 12
Checking for ACD 1 on page 13
Checking for a symbolic link between /etc/hosts and /etc/inet/hosts on page 14

Preparing for the upgrade
8 Avaya CMS R12 Sun Enterprise 3500 Computer CMS Upgrade Express
Verifying that the customer has prepared their
system for an upgrade
Before a CUE upgrade begins, maintenance backups and a CMSADM backup must be
done by the customer. If the customer has not done these backups, the upgrade cannot
begin. Refer the customer to Avaya Call Management System (CMS) Release 12 CMS
Upgrade Express (CUE) Customer Requirements. Verify that the backups have been done
as described in the Customer Requirements document before you begin the upgrade.
Required documentation
The site technician must have a copy of these instructions before beginning the upgrade.
Remote support
All upgrade procedures are done at the customer site. However, when the upgrade is
being supported by remote personnel, such as CMS Provisioning, the system commands
used in this document should be done by the remote personnel so that they can monitor
the progress of the upgrade. Run the commands from the local console only when
instructed to do so, or when there is no remote support.
Trouble escalation
If problems occur during the upgrade procedure:
1. Escalate the problem through normal channels.
2. Inspect the upgrade log file that is located at /var/log/cvuelog.
3. If the problem persists, shut down the system, reinstall the customer’s old disk
configuration, and bring the system back up under the old CMS load.

Switch compatibility
Issue 1.0 December 2003 9
Switch compatibility
CMS R12 does not support R7 and earlier switches. When upgrading to CMS R12, the
switch must be at least R8 or later. If the current switch is administered in CMS as R7 or
earlier, the upgrade extract tool will recognize this incompatibility and require you to select
a newer switch model before the upgrade can continue.
CMS R12 does not support X.25 switch links. The upgrade extract tool will recognize this
incompatibility and require you to enter a host name or IP address and TCP port before the
upgrade can continue. Determine the host name or IP address and TCP port before you
begin the upgrade.
Note:
Note: If the host name or IP address and TCP port information is not known during
the CUE upgrade, you can enter fictitious information to get through the
upgrade, but the switch links will not become active until you go back and
update the switch setup information with accurate information.
Hardware additions
Avoid hardware additions whenever possible during an upgrade. For example, if the
customer wants to increase the amount of RAM that is in the computer, add it only after
verifying that the upgrade was successful. Install the RAM as described in the
maintenance and troubleshooting document for the computer.

Preparing for the upgrade
10 Avaya CMS R12 Sun Enterprise 3500 Computer CMS Upgrade Express
Software considerations
In addition to the standard set of software installed during a CUE upgrade, the customer
may also purchase the latest version of the Informix SQL software. You must confirm
whether the customer has purchased this software so you can properly answer questions
during the extract process. See the SAP order to verify this information.
The customer may also purchase the latest version of the Open Database Connectivity
(ODBC) software. You must confirm whether the customer has purchased this software so
you can properly answer questions during the extract process. See the SAP order to verify
this information.
Whether or not the customer has purchased Visual Vectors server software, it will be
installed during the upgrade. Any existing layout files will be saved during the upgrade.
Customization issues
If the customer’s CMS computer has third-party software or customization that was added
to the standard set of CMS-related software, such as pseudo-ACDs, those software
packages and customizations are not preserved by the upgrade process. The customer or
PSO must collect, reinstall, recompile, and reconfigure any non-standard CMS software
after the upgrade is completed and approved.
The customer data copied during the upgrade procedure includes information such as the
following:
●License information
●User login IDs and passwords
●System name and IP address
●Serial printer administration
●CMS administration, setup, and authorizations
For a complete list of the files copied during the upgrade, see the /var/log/cvuelog file
after the upgrade is complete. A copy of the old system’s /etc/vfstab file is saved in the
cvuelog file.

Disk mirroring
Issue 1.0 December 2003 11
Disk mirroring
The CUE process can be used to automatically add disk mirroring to a nonmirrored
system. However, the CUE upgrade kit used with the procedures in this document cannot
be used to add mirroring to the system.
If the customer has purchased additional disk drives for the purpose of adding mirroring
independent of the CUE process, you must first upgrade the computer using the CUE
nonmirrored upgrade process before you manually add mirroring to the system.
!Important:
!Important:
Important: During the CUE upgrade, do not insert any disks that were not part of the
CUE kit.
After you have completed the CUE nonmirrored upgrade process, use the instructions
given in CMS R12 Software Installation, Maintenance, and Troubleshooting, 585-215-117,
to add mirroring to the system.
Parts list
The following parts are delivered to the customer’s site:
●One boot disk drive (labeled “Boot Disk - Slot 0”)
●Optionally, up to three blank formatted data disk drives which will become the additional
data disk drives
The quantity of optional data disks depends on how many the customer ordered.
●The following blank tapes (only one is used for the upgrade):
- One 170-meter, 8-millimeter, Mammoth blank tape
- One DDS4, 20/40-GB, 4-millimeter blank tape
●Upgrade tool CD-ROM
●Blank labels that are used to label the old disk drive configuration
●A complete set of system software on CD-ROM, including:
- R12 CMS
- R12 Supplemental Services
- Solaris 9 Upgrade
- Informix IDS
Preparing for the upgrade
12 Avaya CMS R12 Sun Enterprise 3500 Computer CMS Upgrade Express
- Informix ILS
- Informix SQL (optional)
- Open Database Connectivity (ODBC) (optional)
- Hardware Drivers
- Visual Vectors Server
- Call Center 2.0 and CMS R12 Documentation Library
!Important:
!Important:
Important: The release numbers on the upgrade tool CD-ROM and the CMS software
CD-ROM must match the release numbers that are labeled on the new boot
disk drives. If the release numbers do not match, escalate through normal
channels. The following table shows an example of how the CD-ROMs and
disks are labeled.
Checking for printer requests and large mail files
The upgrade extract process first copies the files that are being migrated to the
/var/tmp/new directory for the new system, then copies the files to tape. If the system
does not have enough disk space to create this first copy to /var/tmp/new, the system
may run out of space and the extract will fail.
Before you continue with the upgrade, check the following directories for old print requests
and large, unneeded mail files that may be taking up space:
●/var/spool/lp/requests/<uname>
●/var/spool/lp/tmp/<uname>
●/var/mail/root
●/var/mail/root2
●/var/mail/cms
Delete any unneeded files.
Upgrade tool CD-ROM CMS CD-ROM Boot disk drives
v12cue1d.1
For r3v12ad.d
Load: r3v12ad.d Comcode XXXXXXXXX
R12 - Issue 1.0
For CMS r3v12ad.d
Use CUE v12cue1d.1
Boot Disk

Checking for ACD 1
Issue 1.0 December 2003 13
Checking for ACD 1
The upgrade tool cannot upgrade a system where ACD 1 is not administered.
To determine if the system does not have ACD 1 administered:
1. Log on to CMS.
2. Select System Setup > Switch Setup > List All to display a list of the administered
ACDs. This list will show if ACD 1 is not administered.
3. To add temporary ACD 1:
a. Enter:
cmsadm
b. Select the number that corresponds to the acd_create option.
This adds the first unassigned ACD, which will be ACD 1.
c. Enter the switch name and switch model, enable vectoring, enable disconnect
supervision, and enter 1 for the local port and enter 1 for the remote port.
d. When you select a link device, use either TCP/IP with an invalid IP address, or use
X.25 and select one of the loopback links. Since the ACD is deleted after the
upgrade, it is acceptable to assign an invalid IP address or loopback link.
e. For the remaining options, use the defaults or minimum values.
Preparing for the upgrade
14 Avaya CMS R12 Sun Enterprise 3500 Computer CMS Upgrade Express
Checking for a symbolic link between /etc/hosts and
/etc/inet/hosts
If the CUE extract process detects a unique /etc/hosts file and a unique
/etc/inet/hosts file, the process cannot merge the differences between the two
"hosts" files. The /etc/hosts file must be a symbolic link to /etc/inet/hosts.
To determine if the /etc/hosts file is a symbolic link to the /etc/inet/hosts file:
1. Enter:
ls -l /etc/hosts
A message similar to the following should be displayed:
2. Do one of the following:
●If a symbolic link for /etc/hosts to ./inet/hosts is displayed (similar to what is
shown above), continue with Extracting the customer’s administration and
options on page 17.
●If the system does not display a symbolic link for /etc/hosts to ./inet/hosts
and the system is operating properly, continue with Step 3.
3. Enter:
ifconfig -a
A message similar to the following is displayed:
4. Enter:
more /etc/hosts
A message similar to the following is displayed:
lrwxrwxrwx 1 root root 12 Feb 23 2002 /etc/hosts -> ./inet/hosts
hme0: flags=1000843<UP,BROADCAST,RUNNING,MULTICAST,IPv4> mtu 1500 index 2
inet 192.168.2.1 netmask ffffff00 broadcast 192.168.2.255
ether 8:0:20:7b:ab:dc
127.0.0.1 localhost
192.168.2.1 cvue loghost cvue.tmpdomain.org

Checking for a symbolic link between /etc/hosts and /etc/inet/hosts
Issue 1.0 December 2003 15
5. Compare the host network information from the /etc/hosts file to the output of the
network information displayed with the ifconfig command. If the host IP addresses
match (as highlighted in the above examples), the /etc/hosts file is probably the
correct hosts file. However, since multiple administrators may have independently
modified either file, both files could contain important information.
After the CUE copy process, you will need to ensure that the /etc/hosts file and
symbolic link are restored to their proper state. Inform the customer that two
independent hosts files exist on the original system. Let the customer know that both
files will be preserved, but that the customer is responsible for merging any relevant
information into the /etc/inet/hosts file after the upgrade.
The /etc/hosts file from the original system will be preserved as
/manual_merge/etc/hosts on the new system. The /etc/inet/hosts file from
the original system will be preserved as /etc/inet/hosts on the new system.
Instructions for moving the /etc/inet/hosts file to /etc/inet/hosts.orig are
provided later in this document.

Preparing for the upgrade
16 Avaya CMS R12 Sun Enterprise 3500 Computer CMS Upgrade Express

Issue 1.0 December 2003 17
Extracting the customer’s administration and
options
To minimize the time that the system is out of service during the upgrade, you can extract
the customer’s administration and options while the system is operating, but do not allow
the customer to make any administration changes once the extract process begins.
!Important:
!Important:
Important: If the upgrade is being supported by remote personnel, such as CMS
Provisioning, stop here and contact the provisioning group. When the
upgrade is being supported by remote personnel, the system commands in
this section are for use by remote personnel to monitor the progress of the
upgrade. Run the commands from the local console only when instructed to
do so, or when there is no remote support.
To extract the customer’s administration and options:
1. For the tape being used with the upgrade, check for the following:
●Make sure that you are using the correct tape.
●Make sure that the tape is not write-protected.
2. Label the blank tape “Upgrade Extract,” and insert the tape into the tape drive.
!Important:
!Important:
Important: If the system has more than one tape drive, the upgrade program defaults to
the tape drive that has a tape installed and that has the lowest SCSI ID. To
help prevent using the wrong tape drive, remove the tapes from any other
tape drives.
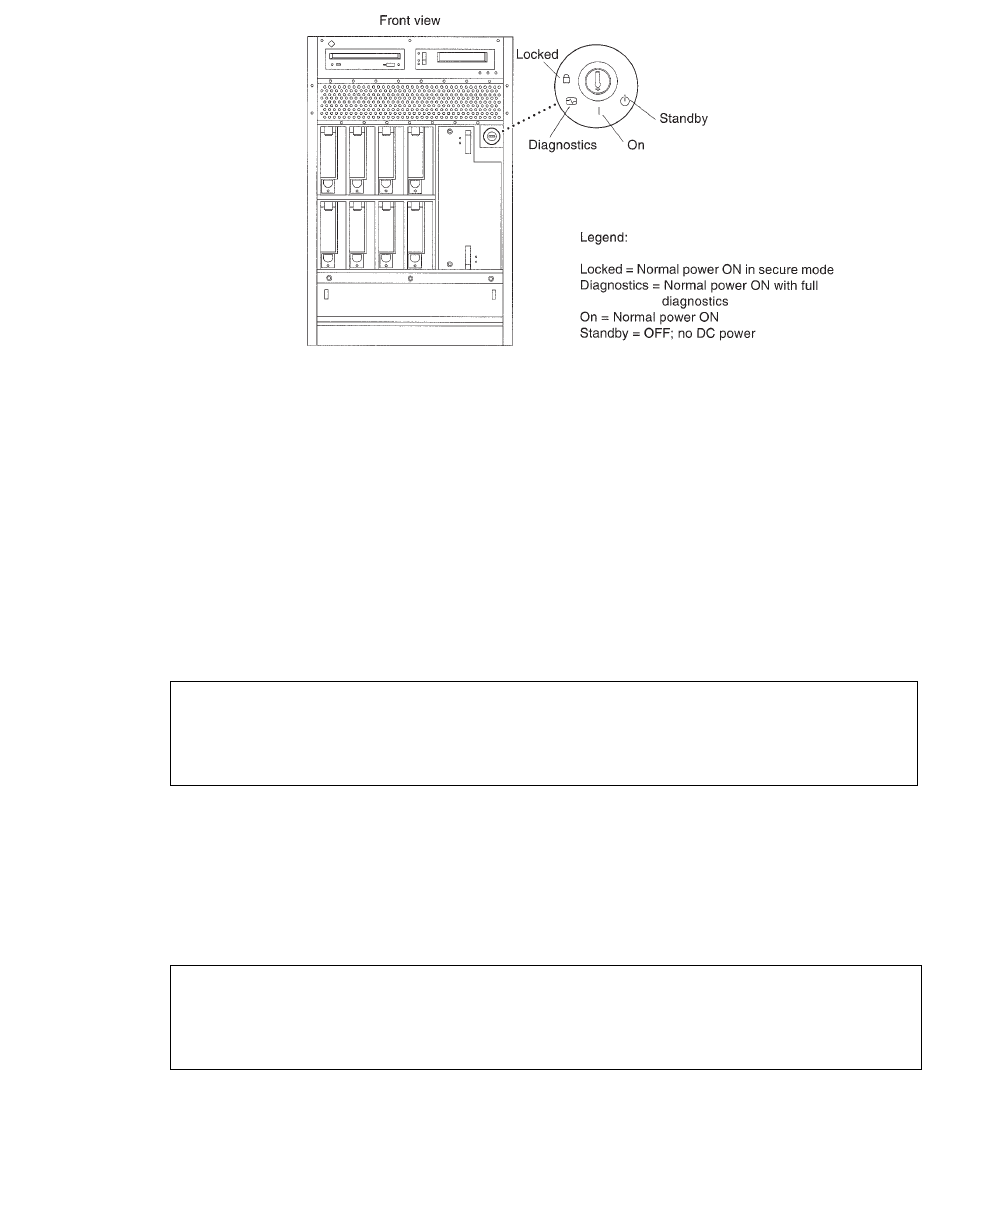
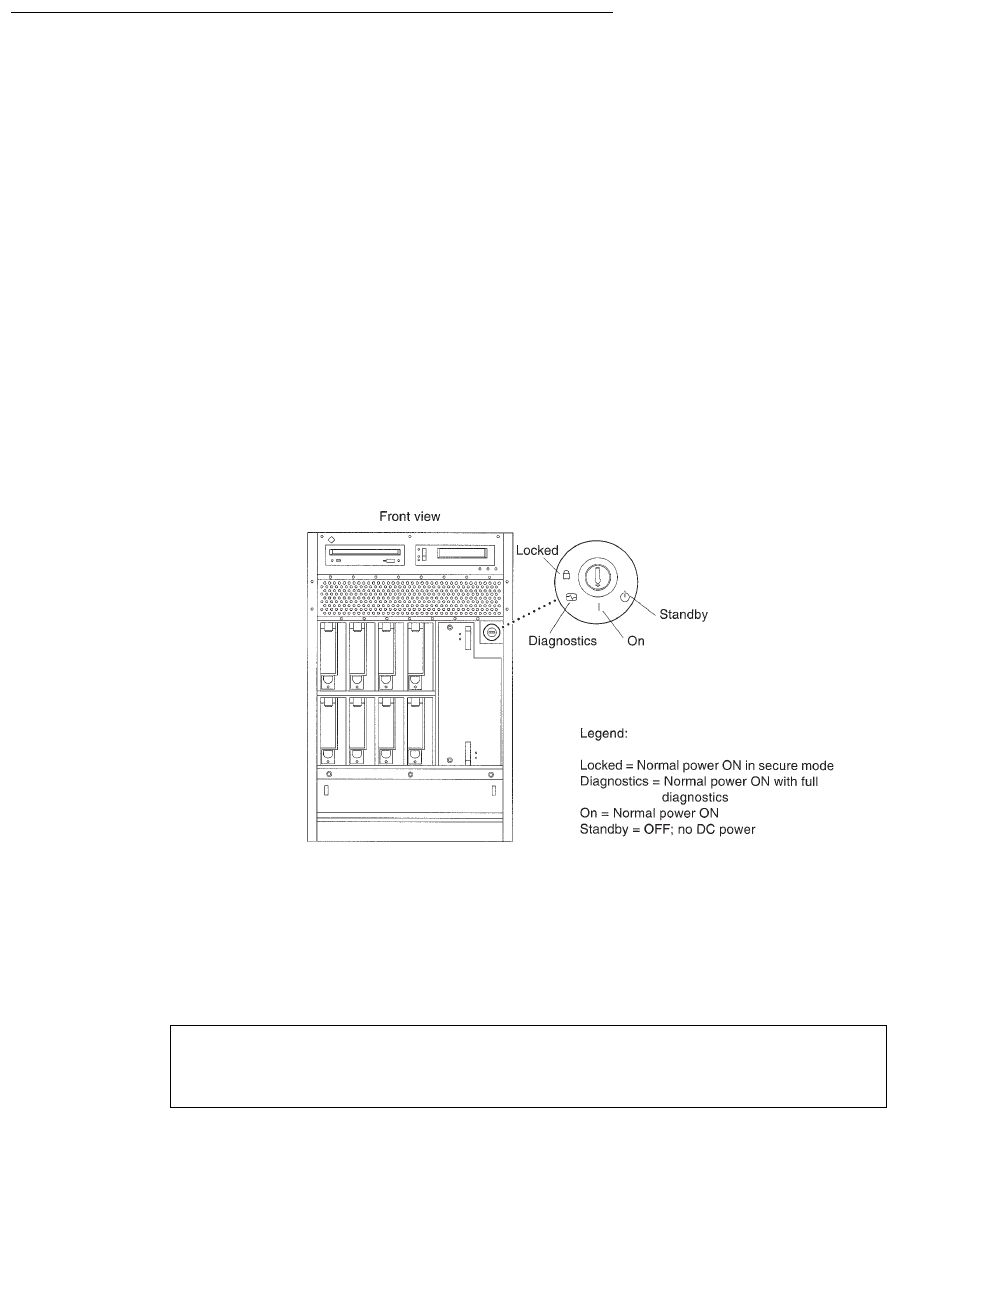
3. Note the original position of the key switch. You must return the key switch to this
original position later during the upgrade.
Extracting the customer’s administration and options
18 Avaya CMS R12 Sun Enterprise 3500 Computer CMS Upgrade Express
4. If the key switch is in the “Locked” or “Diagnostics” position, move the key switch to the
vertical “On” position. See the following figure.
5. Log on as root.
6. Enter:
cd /
7. Load the upgrade tool CD-ROM.
The File Manager window may open. Click the cursor in an XTERM window.
8. After waiting about 15 seconds, enter mount to verify that the CD-ROM is detected.
A list of devices and file systems that are currently mounted is displayed. The final line
should show something similar to the following:
9. Enter the following commands:
cd /cdrom/cdrom0
./cvue_extract
The extract process begins. A message similar to the following is displayed:
.
.
/cdrom/r12cue on /vol/dev/dsk/cNt6d0/r12cue read only/XX/XX/XX on
<time stamp>
Using /var/tmp/new as temporary directory.
CUE VERSION: v12cue1X.N
Current CMS Version is : r3vNNxx.x
Checking for valid platform (get_server_platform)
key_switch.cdr
Issue 1.0 December 2003 19
10. The extract process first verifies whether the platform you are upgrading is supported
by CMS R12. One of the following occurs:
●If the platform is supported for CUE upgrades, the following message is displayed
and the process continues with Step 11.
●If the platform is not supported, a message similar to the following is displayed. You
cannot continue with the CUE upgrade:
11. The extract process then verifies whether the CMS load you are upgrading from can
be upgraded to CMS R12 using CUE. One of the following occurs:
●If the CMS load is supported for CUE upgrades, the following message is displayed
and the process continues with Step 12.
●If the CMS load is not supported, a message similar to the following is displayed and
you cannot continue with the CUE upgrade:
Your system is a(n) Platform_Type. This platform is
supported by CMS R12.
Your system is <a(n) Platform_Type or not supported>. This platform
is no longer supported by CMS R12. Please read the message that
follows ...
ERROR:
You have chosen to upgrade to CMS R12 from a CMS platform no longer
supported by CMS R12. Please consult the Avaya CMS R3V11 Platform
Upgrade and Data Migration manual for instructions on migrating data
from unsupported CMS platforms.
Exiting CMS Upgrade Express ...
Continuing with CMS Upgrade Express ...
You have chosen to upgrade to CMS R12 from a CMS version no longer
supported by CUE. Please consult the Avaya CMS R3V11 Platform
Upgrade and Data Migration manual for instructions on migrating
data from unsupported CMS versions.
Exiting CMS Upgrade Express ...

Extracting the customer’s administration and options
20 Avaya CMS R12 Sun Enterprise 3500 Computer CMS Upgrade Express
12. The following message about supported tape drives is displayed:
13. Do one of the following:
●If the tape drive you are using is not supported, press q. Restart the extract process
after installing a supported tape drive.
●If the tape drive you are using is supported, press Enter to continue.
Tip:
Tip: If you want to track the progress of the extract from a different XTERM
window, or from a remote or local terminal, use the following command:
tail -f /var/tmp/new/var/log/cvuelog
14. The extract process next checks the tape and the tape drive to determine if the tape is
defective, write-protected, or not compatible with the tape drive. The following
message is displayed:
15. One of the following occurs:
●If the tape and tape drive are operational, no error messages are displayed and the
extract continues with Step 16.
●If the tape or tape drive are not operational, messages similar to the following are
displayed:
Make sure the tape is not write-protected and is the correct tape for the tape drive.
Try cleaning the tape drive or using a different tape and start over with Step 1.
##### WARNING #####
Only the following tape drives will be supported in CMS R12:
SCSI cartridge tape - 4-8 GB (SLR5)
SCSI 8mm tape - 14 GB
SCSI 4mm or 8mm tape - 20-40 GB
You must use a supported tape drive to continue with the CUE
upgrade.
Please enter (q) to quit, any other key to continue:
Testing tape on /dev/rmt/N..
tar: /dev/rmt/N: Permission denied
Tape test failed!! Could not write and then read a file
from the tape at /dev/rmt/N.
Check the following items for possible problems:
Verify the tape is not write-protected
Verify the correct type of tape is in the tape drive
Verify the tape is not defective
/cvue_extract[982]:TAPETESTFAILED:not found

Issue 1.0 December 2003 21
16. The extract process next runs the CMS converter tool. Messages similar to the
following are displayed:
17. The extract process next checks to see if ACD 1 is administered. One of the following
occurs:
●If error messages are not displayed, ACD 1 is administered, and the extract
continues with Step 18.
●If the following error messages are displayed, ACD 1 is not administered, and you
must temporarily add ACD 1:
To add temporary ACD 1:
i. Enter:
cmsadm
ii. Select the number that corresponds to the acd_create option.
This adds the first unassigned ACD, which will be ACD 1.
iii. Enter the switch name and switch model, enable vectoring, enable disconnect
supervision, and enter 1 for the local port and enter 1 for the remote port.
iv. When you select a link device, use either TCP/IP with an invalid IP address, or
use X.25 and select one of the loopback links. Since the ACD is deleted after the
upgrade, it is acceptable to assign an invalid IP address or loopback link.
v. For the remaining options, use the defaults or minimum values.
vi. Return to Step 9 and start the extract process again.
Admin data will be spooled to /dev/rmt/N
Converter started <timestamp>
/var/tmp/new/adminsave/cmsadmin.saved
.
.
Converter completed successfully <timestamp>
Converter completed successfully.
ERROR:
ACD 1 is currently administered as a skipped ACD.
CUE cannot upgrade when ACD 1 is a skipped ACD.
Please run cmsadm, add a temporary ACD 1, then run
“./cvue_extract” again.
#

Extracting the customer’s administration and options
22 Avaya CMS R12 Sun Enterprise 3500 Computer CMS Upgrade Express
18. CMS R12 supports switch releases R8 and later, so the switches (ACDs) may need to
be upgraded when the CMS is upgraded to R12. The extract process checks each
ACD to see if any of them are administered with a switch model of R7 or earlier. One of
the following occurs:
●If all of the ACDs are supported by R12, the extract continues with Step 20.
●If any ACD is administered using an unsupported switch model, the following
messages are displayed and the extract continues with Step 19:
19. Enter the upgraded switch model for the ACD. One of the following occurs:
●If another ACD is administered using an unsupported switch model, the extract
returns to Step 18.
●If no other ACDs are administered using an unsupported switch model, the extract
continues with Step 20.
20. CMS R12 supports switch links that use TCP/IP only (CMS R12 does not support X.25
links), so the switch link may need to be upgraded when the CMS is upgraded to R12.
The extract process next checks to see if any ACD switch links use X.25. One of the
following occurs:
●If no ACDs use X.25 for the switch link, the extract continues with Step 26.
●If any ACD uses an X.25 switch link, the following messages are displayed and the
extract continues with Step 21:
The switch release Definity-<release> administered for <acd_name>
(ACD <acd number>) is no longer supported.
Select the model of switch for this ACD:
1) Definity-R8
2) Definity-R9/R10
3) MultiVantage R1
4) Communication Mgr R2
Enter choice (1-4, or q to quit):
Check switch connections (check_x25_con)
WARNING:
CMS R12 no longer supports X.25 as a valid switch connection.
ACD <acd_name> (ACD <acd number>) is linked via X.25 but now
requires a TCP/IP connection. Please provide TCP/IP information
in the prompts that follow:
Enter switch host name or IP Address or q to quit:

Issue 1.0 December 2003 23
21. Enter the host name or IP address of the switch.
Messages similar to the following are displayed:
22. Do one of the following:
●If the assignment is correct, press Enter. The extract continues with Step 23.
●If the assignment is not correct, enter y. The following messages are displayed and
the extract returns to Step 21.
23. The following message is displayed:
24. Enter the switch TCP port number.
Messages similar to the following are displayed:
You have entered the following TCP/IP information for
<acd_name> (ACD <acd number>):
*************************************
Host name or IP address: <host_name or IP_address>
*************************************
If you would like to make changes to the entry above,
please enter "y" for Yes or "n" for No: (default: n)
CMS Upgrade Express is now returning to TCP/IP information prompts...
Revising TCP/IP Host Name <host_name or IP_address> per user request ...
Enter switch host name or IP Address or q to quit:
Enter switch TCP port number (5001-5999 or q to quit): (default: 5001)
You have entered the following TCP/IP information for <acd_name>
(ACD <acd number>):
*************************************
TCP Port Number: <port_number>
*************************************
If you would like to make changes to the entry above,
please enter "y" for Yes or "n" for No: (default: n)

Extracting the customer’s administration and options
24 Avaya CMS R12 Sun Enterprise 3500 Computer CMS Upgrade Express
25. Do one of the following:
●If the assignment is correct, press Enter. The following message is displayed.
One of the following occurs:
- If there are more ACDs that must be converted to TCP/IP, the extract returns to
Step 20.
- If there are no more ACDs that must be converted to TCP/IP, the extract
continues with Step 26.
●If the assignment is not correct, enter y. The following messages are displayed and
the extract returns to Step 24.
26. The extract process continues and a message similar to the following is displayed:
27. The extract process checks to see if you currently have any installed feature packages.
If a feature package is installed, a message similar to the following is displayed:
28. The extract process checks the current version of Solaris and messages similar to the
following are displayed:
...CMS Upgrade Express is updating <acd_name> (ACD <acd number>)
with TCP/IP switch information.
CMS Upgrade Express is now returning to TCP/IP information prompts...
Revising TCP Port Number <port_number> per user request ...
Enter switch TCP port number (5001-5999 or q to quit): (default: 5001)
check_x25_con has validated the setup.out file for further
processing.
The Feature Package file is now being converted to the R12 format.
The current version of Solaris on this system is 5.N
It will be replaced with Solaris 5.9 as part of the upgrade
Issue 1.0 December 2003 25
29. The extract process continues and the following message is displayed:
Extracting the administration files will take several minutes. When finished, the
following messages are displayed:
30. The extract process checks to see if Visual Vectors server software is currently
installed on the system. If Visual Vectors server software is detected, the following
message is displayed:
31. The extract process continues and the following messages are displayed:
32. The extract process checks to see if the /etc/hosts file is a symbolic link to the
/etc/inet/hosts file. If it is not a symbolic link, the following message is displayed:
Please wait as administration files are extracted ...
..........................
NOTE: Be sure to review the cvuelog for any files
to be merged manually in the upgraded system.
INFORMATION:
CUE has detected the existence of the Visual Vectors package.
Files under the /opt/cc/aas/vector directory will be preserved
during this upgrade.
NN blocks
NNNNN blocks
WARNING:
One or more differences were found between
the /etc/hosts and the /etc/inet/hosts files.
The /etc/hosts file has been preserved
and placed in the /manual_merge directory.
The /etc/inet/hosts file has been preserved
and will be placed in /etc/inet/hosts in the upgraded system.
Please review the /manual_merge/README file
to see a more detailed report of the difference(s).
IMPORTANT: The customer is responsible for determining
the proper entries in the /etc/inet/hosts file
and must link /etc/hosts to it for system conformity.

Extracting the customer’s administration and options
26 Avaya CMS R12 Sun Enterprise 3500 Computer CMS Upgrade Express
33. The extract process checks to see if ISQL software version 7.32.UC1 is currently
installed on the system. One of the following occurs:
●If ISQL version 7.32.UC1 is currently on the system, it is automatically installed as
part of the upgrade. Continue with Step 34.
●If an older, incompatible version of ISQL is installed, the following messages are
displayed and you continue with Step 35:
●If ISQL is not currently installed, the following messages are displayed and you
continue with Step 35:
34. The following messages are displayed and you continue with Step 36:
CUE found that ISQL is installed on the current system.
If ISQL will continue to be used after the upgrade, CMS
requires that the customer purchase the new ISQL license.
ISQL will not be installed if the customer has not
purchased or does not agree to the purchase of the
new ISQL license.
Enter 'y' if the customer has purchased or agrees to purchase
the new ISQL license.
Enter 'n' if the customer has not purchased or does not agree
to purchase the new ISQL license.
Enter (y/n):
CUE did not find ISQL installed on the current system.
ISQL will not be installed if the customer has not
purchased or does not agree to the purchase of the
new ISQL license.
Enter 'y' if the customer has purchased or agrees to purchase
the new ISQL license.
Enter 'n' if the customer has not purchased or does not agree
to purchase the new ISQL license.
Enter (y/n):
Your current version of ISQL is 7.32.UC1.
ISQL will be installed.
Issue 1.0 December 2003 27
35. Do one of the following:
●If the optional package ISQL was purchased as part of the upgrade (check the SAP
order), answer y to the question. The following message is displayed and you
continue with Step 36:
●If ISQL was not purchased as part of the upgrade, enter n. If you enter n, ISQL is
not installed and the following message is displayed. Continue with Step 36:
36. The extract process continues and the following message is displayed:
37. The extract process checks to see what version of ODBC, if any, is currently installed
on the system. One of the following occurs:
●If ODBC version 4.2 is currently on the system, it is automatically installed as part of
the upgrade. Continue with Step 39.
●If ODBC is not installed, or if the current version is earlier than version 4.2, the
following messages are displayed and you continue with Step 38:
38. Do one of the following:
●If the optional package ODBC was purchased as part of the upgrade (check the
SAP order), answer y to the question. Continue with Step 39.
●If ODBC was not purchased as part of the upgrade, enter n. If you enter n, ODBC is
not installed and the following message is displayed. Continue with Step 40:
ISQL will be installed.
ISQL will not be installed in the upgraded system.
Supplemental Services cssxXXxx.x will be installed.
************ ODBC INSTALLATION MESSAGES ****************
CUE did not find the supported ODBC version installed on the
current system. ODBC will not be installed if the customer has not
purchased or does not agree to the purchase of the new ODBC
license.
Enter 'y' if the customer has purchased or agrees to purchase
the new ODBC license.
Enter 'n' if the customer has not purchased or does not agree
to purchase the new ODBC license.
Enter (y/n) (default: n):
ODBC will not be installed in the upgraded system.
Extracting the customer’s administration and options
28 Avaya CMS R12 Sun Enterprise 3500 Computer CMS Upgrade Express
39. The following message is displayed:
40. The extract process continues and the following messages are displayed:
41. The extract process next checks to see if the OpenBoot PROM (OBP) must be
patched. The following messages are displayed (no input is required):
ODBC will be installed.
<software package> will be installed.
<software package> will be installed.
.
.
CMS default backup device will be checked.
Sendmail permissions will be fixed.
Serial printers will be administered
Warning: you must close all applications before running this script
Patch configuration started: <time stamp>
Patch configuration in RUN NOW mode. Patch install will
occur immediately (no reboots)
Running in NO REBOOT mode
Issue 1.0 December 2003 29
42. One of the following occurs:
●If the OBP is not up-to-date, messages similar to the following are displayed (no
input is required):
●If the OBP is up-to-date, messages similar to the following are displayed (no input is
required):
43. The extract process continues and the following messages are displayed:
44. Enter:
pg /var/tmp/new/var/log/cvuelog
The temporary upgrade log file is displayed. Check for failure messages (FAIL) or
other indications that the extract process did not successfully complete. This file also
contains a list of files that are being copied to the new system. The list of files may be
useful for later troubleshooting.
45. Remove the tape, set the write-protect switch on the tape to read-only, and reinsert the
tape.
Spooled XXXXXX-XX (OBP)
YYYYYY-YY is not needed on this platform
Solaris patches have been spooled to your machine. The patches will be
installed after rebooting. During the installation of patches your
server will not be available.
.
.
Patch installation completed: <time stamp>
Patches were installed without rebooting.
You should reboot at the earliest convenience. To reboot run:
/usr/sbin/shutdown -i6 -g0 -y
16 blocks
XXXXXX-XX is already installed
YYYYYY-YY is not needed on this platform
There are no Solaris patches to install.
Merging cvue_file_properties with cvuelog
Copying admin to tape.
The cvue_extract process is complete.
#

Extracting the customer’s administration and options
30 Avaya CMS R12 Sun Enterprise 3500 Computer CMS Upgrade Express
46. Enter:
ls -l /dev/dsk/c0t0d0s0
Note whether the path shows sbus@2 (Enterprise 3500) or sbus@3 (Enterprise 3501
or 3503). This information will be used later in the upgrade. Enter the sbus path here:
47. Enter:
/usr/sbin/shutdown -y -i0 -g0
This shuts down the computer. The ok prompt is displayed.
48. Turn the power switch on the CMS computer to off, and turn off the power to any
external SCSI disk drives and tape drives.
49. Continue with Removing and replacing disk drives on page 31.

Issue 1.0 December 2003 31
Removing and replacing disk drives
This section contains the procedures that are required to upgrade the disk drives to CMS
R12. Using these procedures, you must remove the old disk drives in the computer and
replace them with new disk drives that are preloaded with the CMS R12 software.
!CAUTION:
CAUTION: Customers must not reuse their old disk drives as part of the upgrade
procedure. These old disk drives should be saved to be used for system
recovery in case any problems occur during the upgrade procedure.
Prerequisites
Obtain an ESD wrist strap before beginning this procedure.
Removing and replacing disk drives
32 Avaya CMS R12 Sun Enterprise 3500 Computer CMS Upgrade Express
Disk upgrade procedures
To upgrade the disks, use the following checklist to keep track of each procedure:
Removing and labeling the old disk drives
!CAUTION:
CAUTION: All old disk drives must be removed from the system and replaced with the
disk drives from the upgrade kit. Do not leave any old disk drives in the
system.
To remove the existing disk drives from an Enterprise 3500 computer:
1. If you have not already done so, enter the following command to shut down the
computer:
/usr/sbin/shutdown -y -i0 -g0
2. Turn off the power to the computer using the key switch on the front of the computer
and the power switch on the back of the computer.
3. For ESD isolation, verify that the AC power cord is plugged in.
4. Open the front door of the system.
5. Attach an ESD wrist strap to the metal chassis of the computer and to your wrist.
6. While the original disk drives are still in the computer, use the colored labels from the
upgrade kit to label each disk drive with the slot number. Save the old disk drives in
case you have to reinstall the original configuration.
Procedure
Removing and labeling the old disk drives on page 32
Installing the new boot disk drive on page 34
Booting up the system with the new boot disk drive on page 35
Verifying that the system recognizes the new boot disk drive on page 38
Checking the status of the boot disk drive on page 38
Checking the status of the tape drives on page 39
Verifying that the upgrade can continue on page 39

Disk upgrade procedures
Issue 1.0 December 2003 33
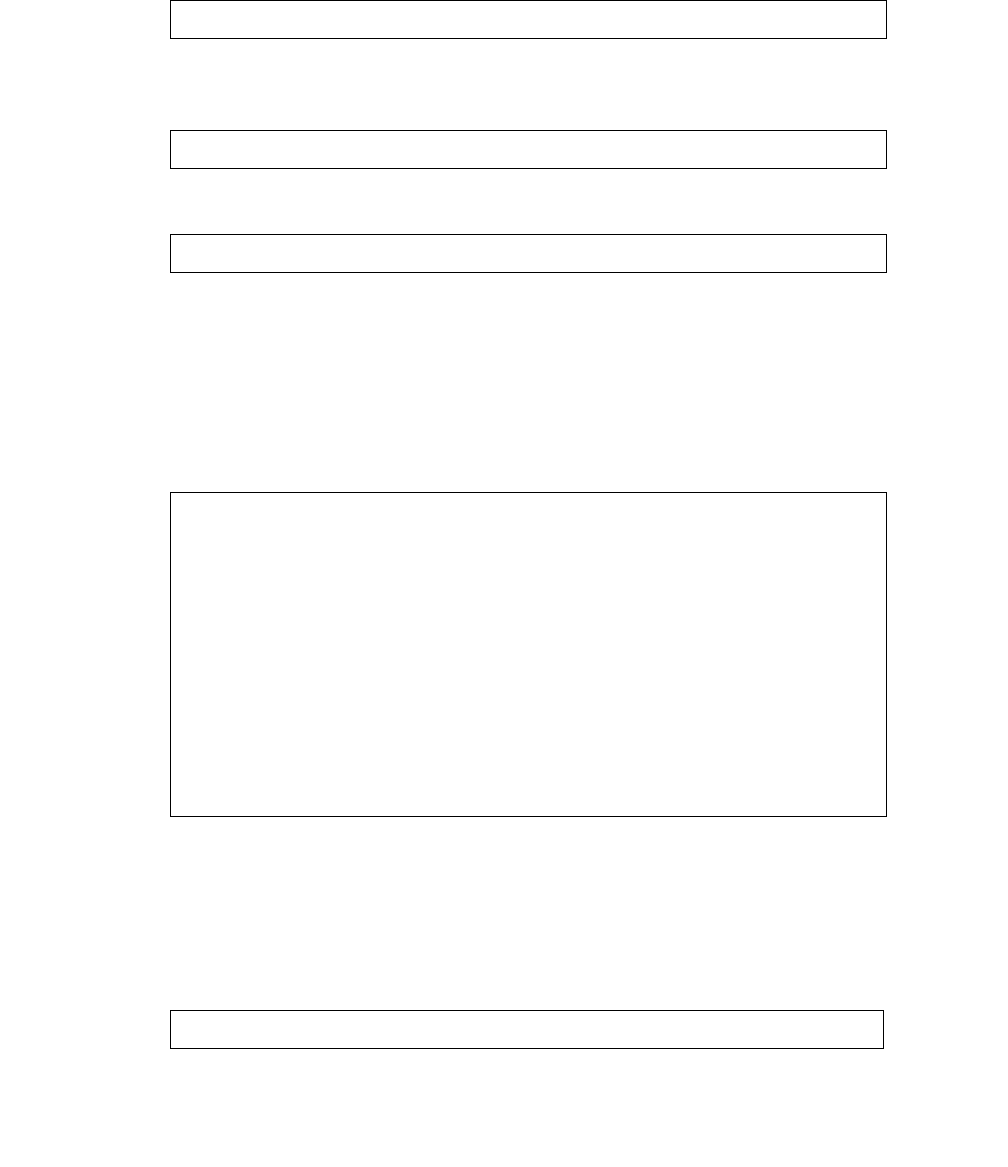
7. Unlatch the disk drive retainer. Use the extended, unlocked retainer as a handle. See
the following figure.
8. Pull on the retainer to slide the disk drive out of the chassis.
9. Repeat this procedure for each disk drive that is installed.
e3500_remove_disk.cdr
Removing and replacing disk drives
34 Avaya CMS R12 Sun Enterprise 3500 Computer CMS Upgrade Express
Installing the new boot disk drive
To install the new boot disk drive:
!CAUTION:
CAUTION: Do not install any other disk drives when installing the boot disk drive. These
other disk drives will be installed later.
1. Attach an ESD wrist strap to the metal chassis of the computer and to your wrist.
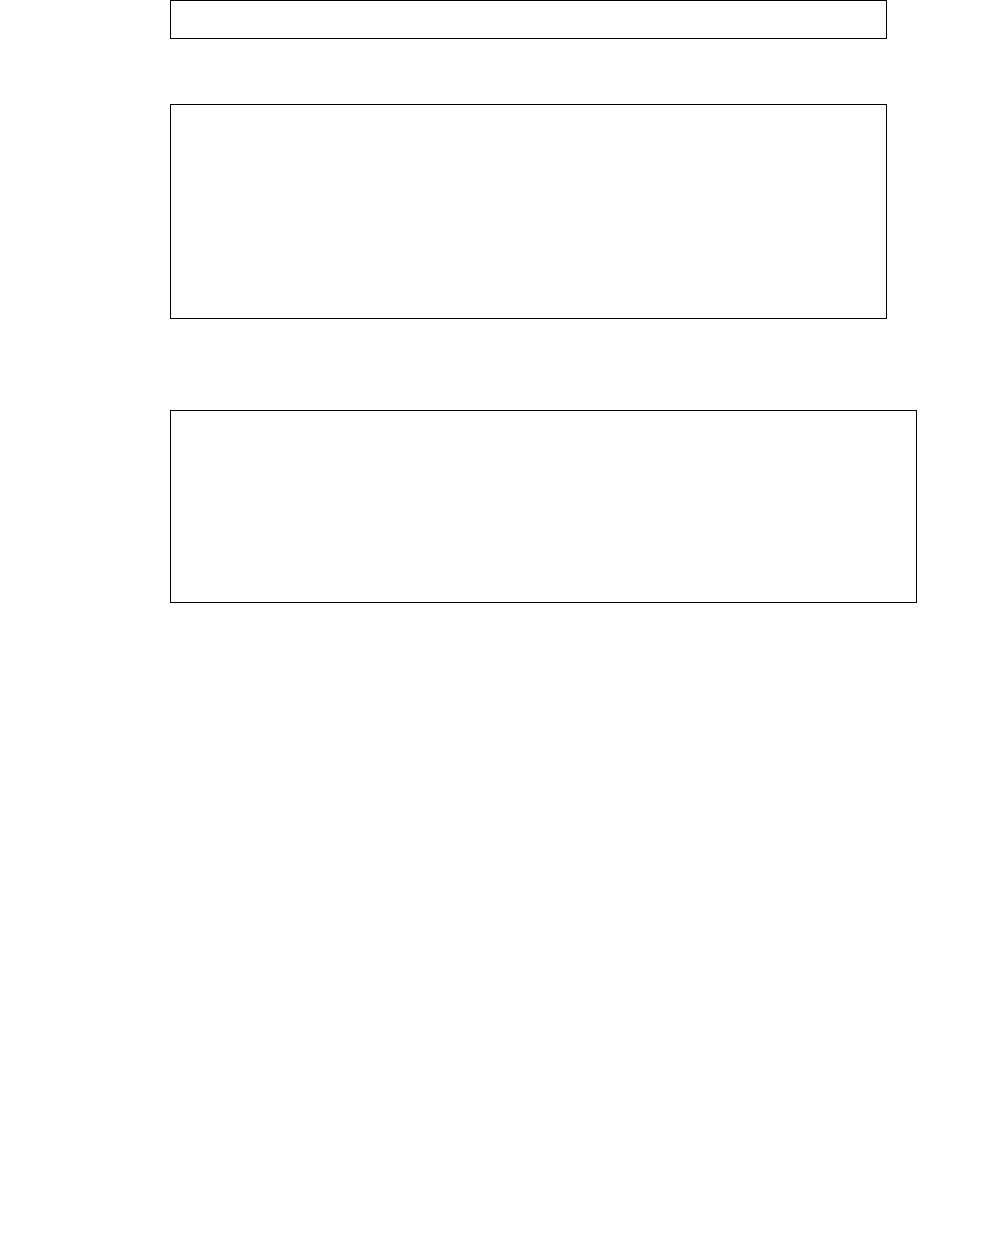
2. Install the primary boot disk drive in Slot 0. This disk is labeled “Boot Disk - Slot 0.” See
the following figure.
3. Disconnect the ESD wrist strap.
4. Continue with Booting up the system with the new boot disk drive on page 35.
0123
7654
Primary boot
disk drive
(Boot Disk - Slot 0)
3500_mir_bootonly.cdr
Caution: Install only
the boot disk drive as
shown in this figure.
Disk upgrade procedures
Issue 1.0 December 2003 35
Booting up the system with the new boot disk drive
Note:
Note: When the upgrade is being supported by remote personnel, such as CMS
Provisioning, the system commands in this section are for use by remote
personnel to monitor the progress of the upgrade. Run the commands from
the local console only when instructed to do so, or when there is no remote
support.
To boot up the system with the new boot disk drive:
1. Turn on all external SCSI devices, starting with the device farthest from the system and
working toward the system.
2. Turn on the system monitor.
3. Turn the key switch to the vertical “On” position. Do not turn the key switch to the
“Locked” or “Diagnostics” position.
4. Close the front door of the system.
The system begins to boot up. One of the following occurs:
●If the EEPROMs are correctly set to recognize the disk boot path, the following
messages are displayed:
Continue with Step 5.
Cannot open ’/etc/path_to_inst’
Program terminated
ok
key_switch.cdr
Removing and replacing disk drives
36 Avaya CMS R12 Sun Enterprise 3500 Computer CMS Upgrade Express
●If the EEPROMs are not correctly set to recognize the disk boot path, the following
messages are displayed:
Do one of the following:
- If the sbus value from Step 46 on page 30 is sbus@2, enter:
boot /sbus@2,0/SUNW,socal@d,10000/sf@0,0/ssd@0,0 -ar
- If the sbus value from Step 46 on page 30 is sbus@3, enter:
boot /sbus@3,0/SUNW,socal@d,10000/sf@0,0/ssd@0,0 -ar
The system resets and begins to boot up again. Messages similar to the following
are displayed:
Continue with Step 6.
5. Enter:
boot -ar
The system resets and begins to boot up again. Messages similar to the following are
displayed:
6. Press Enter to accept the default value.
The following message is displayed:
7. Press Enter to accept the default value.
The following message is displayed:
.
.
Can’t open boot device
ok
Rebooting with command: boot -ar
Boot device: /sbus@X,0/SUNW,socal@d,10000/sf@0,0/ssd@0,0 File and args: -ar
Enter filename [kernel/sparcv9/unix]:
Rebooting with command: boot -ar
Boot device: /sbus@X,0/SUNW,socal@d,10000/sf@0,0/ssd@0,0 File and args: -ar
Enter filename [kernel/sparcv9/unix]:
Enter default directory for modules [/platform/SUNW,Ultra-Enterprise/kernel
/platform/sun4u/kernel /kernel /usr/kernel]:
Name of system file [etc/system]:
Disk upgrade procedures
Issue 1.0 December 2003 37
8. Press Enter to accept the default value.
The following messages are displayed:
!Important:
!Important:
Important: Enter: y
The following message is displayed:
9. Press Enter to accept the default value.
The following messages are displayed:
10. Press Enter to accept the default value.
The system begins to boot up. Note that during boot-up, you might see error messages
concerning hardware for which software is not yet installed. This will be corrected later
in the upgrade procedure when the extracted customer options are installed.
Note:
Note: If the boot fails, turn off the power to the computer and check all device
cables. Cycle power on all external devices. Start again with Step 1.
11. After the system reboots, log in as root.
12. If prompted for a password, press Enter. (At this point in the upgrade, there is no
password.)
13. Enter:
pkginfo -x cms
Note the new CMS load and make sure that it matches the expected upgrade load.
14. Continue with Verifying that the system recognizes the new boot disk drive on page 38.
SunOS Release 5.9 Version Generic_xxxxxx-xx 64-bit
Copyright 1983-2003, Sun Microsystems, Inc. All rights reserved.
Use is subject to license terms.
-
The /etc/path_to_inst on your system does not exist or is empty.
Do you want to rebuild this file [n]?
root filesystem type [ufs]:
Enter physical name of root device
[/sbus@X,0/SUNW,socal@d,10000/sf@0,0/ssd@w<WWN>,0:a]:
Removing and replacing disk drives
38 Avaya CMS R12 Sun Enterprise 3500 Computer CMS Upgrade Express
Verifying that the system recognizes the new boot disk drive
To verify that the system recognizes the new boot disk drive:
1. Enter:
format
A message similar to the following is displayed:
The message displays the boot disk drive.
2. Enter: 0
3. Enter: q
4. Continue with Checking the status of the boot disk drive on page 38.
Checking the status of the boot disk drive
To check the status of the boot disk drive:
1. Enter:
. /opt/informix/bin/setenv
2. Enter:
onstat -d | egrep "On-Line"
A message similar to the following is displayed. If the boot disk is not on-line, escalate
through normal channels.
3. Continue with Checking the status of the tape drives on page 39.
Searching for disks...done
AVAILABLE DISK SELECTIONS:
0. c0t0d0 <SUN36G cyl 24620 alt 2 hd 27 sec 107>
/sbus@X,0/SUNW,socal@d,10000/sf@0,0/ssd@w<WWN>,0
Specify disk (enter its number):
Informix Dynamic Server Version 9.40.UC1 -- On-Line -- Up
00:03:46 -- 78848 Kbytes

Disk upgrade procedures
Issue 1.0 December 2003 39
Checking the status of the tape drives
To check the status of the tape drives:
1. Enter:
ls -l /dev/rmt/*mbn | wc -l
The number of installed tape drives is displayed.
2. Note whether the number of tape drives that is displayed matches the number of tape
drives that are connected to the system.
3. Continue with Verifying that the upgrade can continue on page 39.
Verifying that the upgrade can continue
To continue with the upgrade, do one of the following:
●If the disk drive and tape drive status is correct, continue with Copying and activating the
customer’s administration and options on page 41.
●If the disk drive and tape drive status is not correct, do the following:
a. Enter the following commands. These commands shut down the system and force a
reconfiguration the next time that the system boots.
cd /
touch /reconfigure
/usr/sbin/shutdown -y -i0 -g0
b. Turn off the system.
c. Turn off the system monitor.
d. Turn off any external SCSI devices, starting with the device that is closest to the
system and working toward the farthest device.
e. Check all device cables. Cycle power on all external devices.
f. Restart with Verifying that the system recognizes the new boot disk drive on
page 38. If the number of disks and tape drives still do not match, escalate through
normal channels.

Removing and replacing disk drives
40 Avaya CMS R12 Sun Enterprise 3500 Computer CMS Upgrade Express
Issue 1.0 December 2003 41
Copying and activating the customer’s
administration and options
To copy and activate the customer’s administration and options, use the following checklist
to keep track of each procedure:
Procedure
Installing CMS patches on page 43
Copying customer data on page 45
Checking file differences between the old system and the new system on page 47
Linking the /etc/hosts file on page 49
Installing the remaining disk drives on page 50
Verifying that the system recognizes all disk drives on page 51
Checking the status of the disks on page 53
Activating customer options on page 54
Removing temporary ACD 1 on page 60
Turning on CMS on page 61
Verifying that CMS is operating on page 61
Checking “manual merge” discrepancies on page 62
Checking Free Space Allocation on page 63
Turning on Visual Vectors server (optional) on page 64
Updating the switch setup on page 64
Setting the Informix configuration parameters on page 65
Removing the upgrade files on page 65
Migrating customer data on page 67
Resetting the CONSOLE parameter on page 71

Copying and activating the customer’s administration and options
42 Avaya CMS R12 Sun Enterprise 3500 Computer CMS Upgrade Express
Note:
Note: When the upgrade is being supported by remote personnel, such as CMS
Provisioning, the system commands in this section are for use by remote
personnel to monitor the progress of the upgrade. Run the commands from
the local console only when instructed to do so, or when there is no remote
support.
Replacing the customer’s tapes on page 72
Checking the status of the disks on page 72
Turning the upgraded system over to the customer on page 72
Procedure

Installing CMS patches
Issue 1.0 December 2003 43
Installing CMS patches
If the new CMS load has any patches, those patches must be installed on the system.
These patches are on the CMS software CD-ROM, not the upgrade tool CD-ROM. The
CMS software CD-ROM is included in the upgrade kit.
If there are patches on the CMS software CD-ROM, it will be labeled similar to “CMS Patch
Issue 2.” If there are no patches on the CD-ROM, continue with Copying customer data on
page 45.
If the CMS software CD-ROM does have patches, continue with this procedure.
To install CMS patches:
1. Enter:
cd /
2. Enter:
eject cdrom
3. Remove the upgrade tool CD-ROM. Save the CD-ROM for when you remove the
upgrade files.
4. Load the CMS software CD-ROM.
The File Manager window should open. Click the cursor in an XTERM window.
Note:
Note: If the File Manager window does not open, enter the following commands to
start the volume manager:
/etc/init.d/volmgt stop
/etc/init.d/volmgt start
The File Manager window will open. Click the cursor in an XTERM window.
5. After about 15 seconds, enter:
cmssvc
The CMS services menu is displayed.
6. Enter the number that corresponds to the load_all option.

Copying and activating the customer’s administration and options
44 Avaya CMS R12 Sun Enterprise 3500 Computer CMS Upgrade Express
7. One of the following occurs:
●If no patches are found on the CD-ROM, the following messages are displayed:
Continue with Step 9.
●If patches are found on the CD-ROM, a list of the patches is displayed.
8. Enter: y
The system installs the patches. As it does so, messages similar to the following are
displayed for each patch installed:
9. After all patches are installed, or if there are no patches on the CD-ROM, enter:
eject cdrom
10. Continue with Copying customer data on page 45.
No CMS patches found on the CD.
Please check the CD and try again.
@(#) installpatch 1.0 96/04/01
cmspx-s
Generating list of files to be patched...
Creating patch archive area...
Saving a copy of existing files to be patched...
xxxx blocks
File compression used
Installing patch packages...
Doing pkgadd of cmspx-s package:
Installation of cmspx-s was successful.
Patch packages installed:
cmspx-s
Patch installation completed.
See /cms/patch/cmspx-s/log for more details

Copying customer data
Issue 1.0 December 2003 45
Copying customer data
To copy the customer’s data from the upgrade backup tape onto the system:
1. Verify that the customer’s “Upgrade Extract” tape is write-protected and is inserted in
the correct tape drive. Remove tapes from any other tape drives connected to the
system.
2. Load the upgrade tool CD-ROM. The CD-ROM is already in the drive if you did not
have to install any CMS patches.
The File Manager window should open. Click the cursor in an XTERM window.
Note:
Note: If the File Manager window does not open, enter the following commands to
start the volume manager:
/etc/init.d/volmgt stop
/etc/init.d/volmgt start
The File Manager window will open. Click the cursor in an XTERM window.
3. After about 15 seconds, enter:
cd /cdrom/cdrom0
4. Do one of the following:
●If running the command locally at the console, enter:
./cvue_copy
●Optionally, if running the command remotely on a dial-up line, enter:
nohup ./cvue_copy | tee /nohup.out
!CAUTION:
CAUTION: If the dial-up modem line is dropped after starting this command with nohup,
reconnect to the system, but do not rerun this command. Use tail -f
/nohup.out to view the progress of the command. When finished viewing
the nohup.out file, press Del to break out of the command.
During the copy process, the status lamp on the tape drive flashes, and a list of files
being copied is displayed:
Reading admin data from /dev/rmt/X
.
.
Copying and activating the customer’s administration and options
46 Avaya CMS R12 Sun Enterprise 3500 Computer CMS Upgrade Express
5. After the customer’s files have been copied from tape onto the system, the following
messages are displayed:
6. The copy process then executes the disk_space command to initialize the boot disk,
which will take from three to five minutes. The following messages are displayed:
!CAUTION:
CAUTION: If the tape copy fails, try cleaning the tape drive and restart the copy with
Step 4. If the tape copy continues to fail, the tape is probably faulty. You
must shut down the system, reinstall the original disk drives, boot the
system, and restart the extract with a new blank tape. See Extracting the
customer’s administration and options on page 17.
7. If the tape copy is successful, continue with Checking file differences between the old
system and the new system on page 47.
!Important:
!Important:
Important: Do not open any new windows on the local console. Do not eject the
CD-ROM.
.
.
x ./export/home/.geo, 85 bytes, 1 tape blocks
Finished reading admin data from /dev/rmt/X
Running cmssvc disk_space command to initialize boot disk.
Initializing the boot disk (this may take several minutes!) ....
The CUE Copy process is complete...<time stamp>
cvue#

Checking file differences between the old system and the new system
Issue 1.0 December 2003 47
Checking file differences between the old system
and the new system
When upgrading an older system, file properties may be updated with the new version of
CMS, Solaris, and other software that is installed. In addition, files used on the old system
could be renamed or are not required on the new system. The procedures in this section
show you how to check for these differences.
!Important:
!Important:
Important: The CUE master disks are created with the correct file properties. It is
important to look for discrepancies, but before you change any file
properties, be advised that the upgraded system will operate properly as
installed. Any changes to file properties must be reviewed by a
knowledgeable person to correctly assess the final status of each file.
There are two procedures to check file properties:
●Verifying files using pkgchk on page 47
●Comparing directory and file permissions on page 48
Verifying files using pkgchk
The pkgchk command is a CMS tool that checks specific system files in the new system
for directory/file permissions, modes, ownership, file size, and file checksum
discrepancies. Although the system may display error messages when using this tool, it
does not mean that the system will not function properly.
If you find any permission, mode, and ownership discrepancies between what was
expected and what it actually is, and if you think the discrepancies may cause problems,
use the chmod and chown commands to fix the discrepancies. You can ignore any
modtime, file size, and file checksum discrepancies.
To check files using the pkgchk tool:
1. Enter:
pkgchk -n cms
2. Determine if the files listed require attention.

Copying and activating the customer’s administration and options
48 Avaya CMS R12 Sun Enterprise 3500 Computer CMS Upgrade Express
Comparing directory and file permissions
The verify_fileproperties command is a CMS tool that compares the file
permissions and modes from the old system with the file permissions and modes on the
new system. Any differences found are placed in the /var/log/cvue_file_diff file.
To compare directory and file permissions:
1. Enter:
cd /cdrom/cdrom0
2. Enter:
./verify_fileproperties
To run this command in the background, enter:
nohup ./verify_fileproperties /nohup.out&
This begins the comparison of the directory and file permissions.
3. After the command is finished, one of the following occurs:
●If no differences were found, the following message is displayed:
●If differences were found, the following message is displayed:
4. To view the property differences, enter:
pg /var/log/cvue_file_diff
The file property differences are displayed. If any file properties are not appropriate,
correct them.
5. Continue with Linking the /etc/hosts file on page 49.
No file permission differences were found
#
See /var/log/cvue_file_diff for differences
#

Linking the /etc/hosts file
Issue 1.0 December 2003 49
Linking the /etc/hosts file
If the original system displayed a symbolic link for /etc/hosts to /etc/inet/hosts,
this procedure is not needed. Continue with Checking the status of the disks on page 53.
If the original system did not display a symbolic link for /etc/hosts to ./inet/hosts
and the original system was operating properly, you must restore the /etc/hosts file
temporarily until the customer has time to merge any relevant information into a single
"hosts" file.
To restore the /etc/hosts file:
1. Enter the following commands:
mv /etc/inet/hosts /etc/inet/hosts.orig
cp -p /manual_merge/etc/hosts /etc/inet/hosts
2. Enter:
ls -l /etc/hosts
A message similar to the following is displayed:
3. Do one of the following:
●If a symbolic link for /etc/hosts to ./inet/hosts is displayed (similar to what is
shown above, continue with Step 6.
●If the system does not display a symbolic link for /etc/hosts to ./inet/hosts
and the original system was operating properly, continue with Step 4.
4. Enter the following commands:
cd /etc
ln -s ./inet/hosts /etc/hosts
5. Verify that the files are linked by repeating Step 2.
6. Inform the customer they need to merge any relevant information from the
/etc/inet/hosts.orig file into the /etc/hosts file, and that in the future they
should verify /etc/hosts is a symbolic link to /etc/inet/hosts before making
modifications to the /etc/hosts file.
7. Continue with Checking the status of the disks on page 53.
8. Continue with Installing the remaining disk drives on page 50.
lrwxrwxrwx 1 root root 12 Feb 23 2002 /etc/hosts -> ./inet/hosts
Copying and activating the customer’s administration and options
50 Avaya CMS R12 Sun Enterprise 3500 Computer CMS Upgrade Express
Installing the remaining disk drives
If the customer did not order any extra disk drives, continue with Activating customer
options on page 54.
For any systems where the customer ordered additional disk drives, you must install the
balance of the disk drives at this time.
!CAUTION:
CAUTION:
To install the remaining disk drives:
1. Unlock and open the front door.
2. Attach one end of an ESD antistatic wrist strap to the system chassis sheet metal and
attach the other end to your wrist.
3. Insert all disk drives into the required slots. For an Enterprise 3500 nonmirrored
system, install the first data disk in slot 1, the second data disk in slot 2, and the third
data disk in slot 3 (do not skip any slots).
4. When all of the disks have been inserted, enter:
luxadm insert
A message similar to the following is displayed:
5. Press Enter.
A message similar to the following is displayed:
Note:
Note: The length of the message depends on the number of disk drives you
installed. Ignore the message No new enclosure(s) were added.
Please hit <RETURN> when you have finished adding Fibre Channel
Enclosure(s)/Device(s):
Waiting for Loop Initialization to complete...
New Logical Nodes under /dev/dsk and /dev/rdsk :
cXtXd0s0
cXtXd0s1
cXtXd0s2
.
.
.
cXtXd0s6
cXtXd0s7
No new enclosure(s) were added!

Verifying that the system recognizes all disk drives
Issue 1.0 December 2003 51
6. Disconnect the ESD wrist strap.
7. Close and lock the front door.
8. Continue with Verifying that the system recognizes all disk drives on page 51.
Verifying that the system recognizes all disk drives
To verify that the system recognizes all disk drives:
1. Log in to the system as root.
2. At the system prompt, enter:
format
A message similar to the following is displayed:
The message displays the number of disks recognized by the system. The number of
disks that are installed on the system must match the number that is shown with the
format command. Ignore the controller and boot path values at this time.
3. Enter: 0
4. Enter: q
5. Do one of the following:
●If all of the disks were recognized, continue with Checking the status of the disks on
page 53.
●If not all of the disks were recognized:
i. Enter the following commands. These commands shut down the system and
force a reconfiguration the next time that the system boots.
cd /
touch /reconfigure
/usr/sbin/shutdown -y -i0 -g0
ii. Turn off the system.
iii. Turn off the system monitor.
Searching for disks...done
AVAILABLE DISK SELECTIONS:
0. c0t0d0 <SUN36G cyl 24620 alt 2 hd 27 sec 107>
/sbus@X,0/SUNW,socal@d,10000/sf@0,0/ssd@w<WWN>,0
1. c0t1d0 <SUN36G cyl 24620 alt 2 hd 27 sec 107>
/sbus@X,0/SUNW,socal@d,10000/sf@0,0/ssd@w<WWN>,0

Copying and activating the customer’s administration and options
52 Avaya CMS R12 Sun Enterprise 3500 Computer CMS Upgrade Express
iv. Turn off any external SCSI devices, starting with the device that is closest to the
system and working toward the farthest device.
v. Check all device cables. Cycle power on all external devices.
vi. Restart with Verifying that the system recognizes all disk drives on page 51. If the
number of disk drives still do not match, escalate through normal channels.
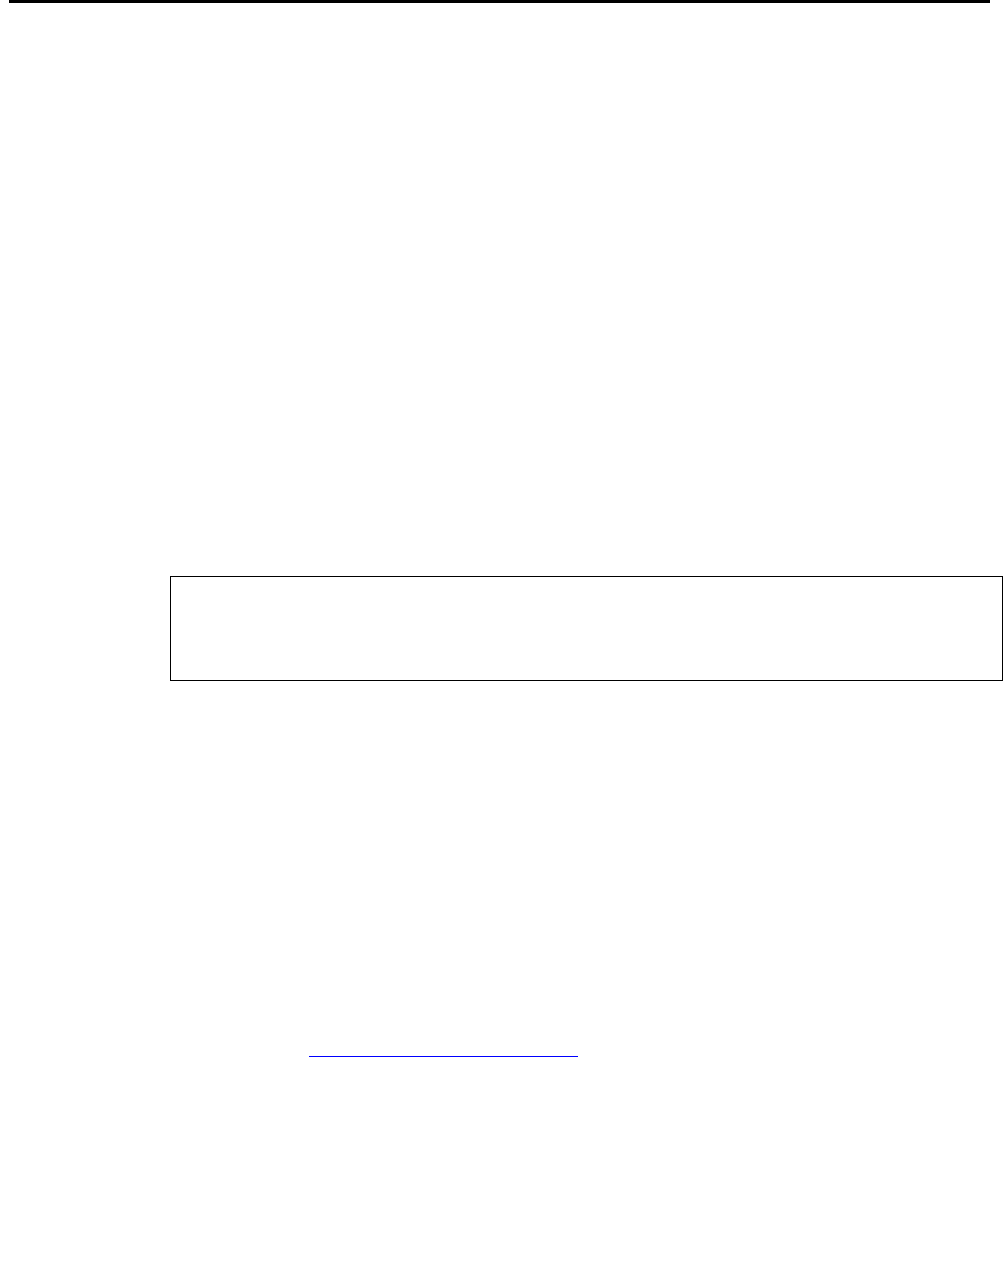
Checking the status of the disks
Issue 1.0 December 2003 53
Checking the status of the disks
Verify that the disk drives are in good condition by checking their status.
To check the status of the disk drives:
1. Enter:
. /opt/informix/bin/setenv
2. Enter:
onstat -d | egrep “PD|X” | pg
One of the following occurs:
●If nothing other than the command prompt is displayed, continue with Step 3.
●If any lines are displayed, the disk may require maintenance. Escalate through
normal channels.
3. Enter:
metadb -i
Messages similar to the following are displayed:
This command shows the database replicas. There should be three replicas for the
boot disk. If the correct number of replicas are not shown, escalate using the normal
channels.
4. Enter:
metastat | grep State: | grep -v Okay | pg
This reports the state of each disk segment and metadevice. One of the following
occurs:
●If nothing is displayed, continue with Step 5.
●If any lines are displayed, the disk may require maintenance. Escalate through
normal channels.
5. Continue with Activating customer options on page 54.
flags first blk block count
a u 16 8192 /dev/dsk/c0t0d0s1
a u 8208 8192 /dev/dsk/c0t0d0s1
a u 16400 8192 /dev/dsk/c0t0d0s1

Copying and activating the customer’s administration and options
54 Avaya CMS R12 Sun Enterprise 3500 Computer CMS Upgrade Express
Activating customer options
The activate process can take from as little as a few minutes to as much as 1 to 2 hours to
complete. The amount of time depends on the number of customer options, the number
and size of the disk drives, the number of ACDs, and so on.
To activate the customer’s software options:
1. Enter:
cd /cdrom/cdrom0
2. Do one of the following:
●If running the command locally at the console, enter:
./cvue_activate
●Optionally, if running the command remotely on a dial-up line, enter:
nohup ./cvue_activate | tee /nohup.out
!CAUTION:
CAUTION: If the dial-up modem line is dropped after starting this command with nohup,
reconnect to the system, but do not rerun this command. Use tail -f
/nohup.out to view the progress of the command. When finished viewing
the nohup.out file, press Del to break out of the command.
For On Site Personnel: If the upgrade is being supported by remote personnel (for
example, CMS Provisioning), use the following command from the local console
during the copy and activate process to view the upgrade log file and track the
progress of the upgrade:
tail -f /var/log/cvuelog
When finished viewing the /var/log/cvuelog file, press Del to break out of the
command.
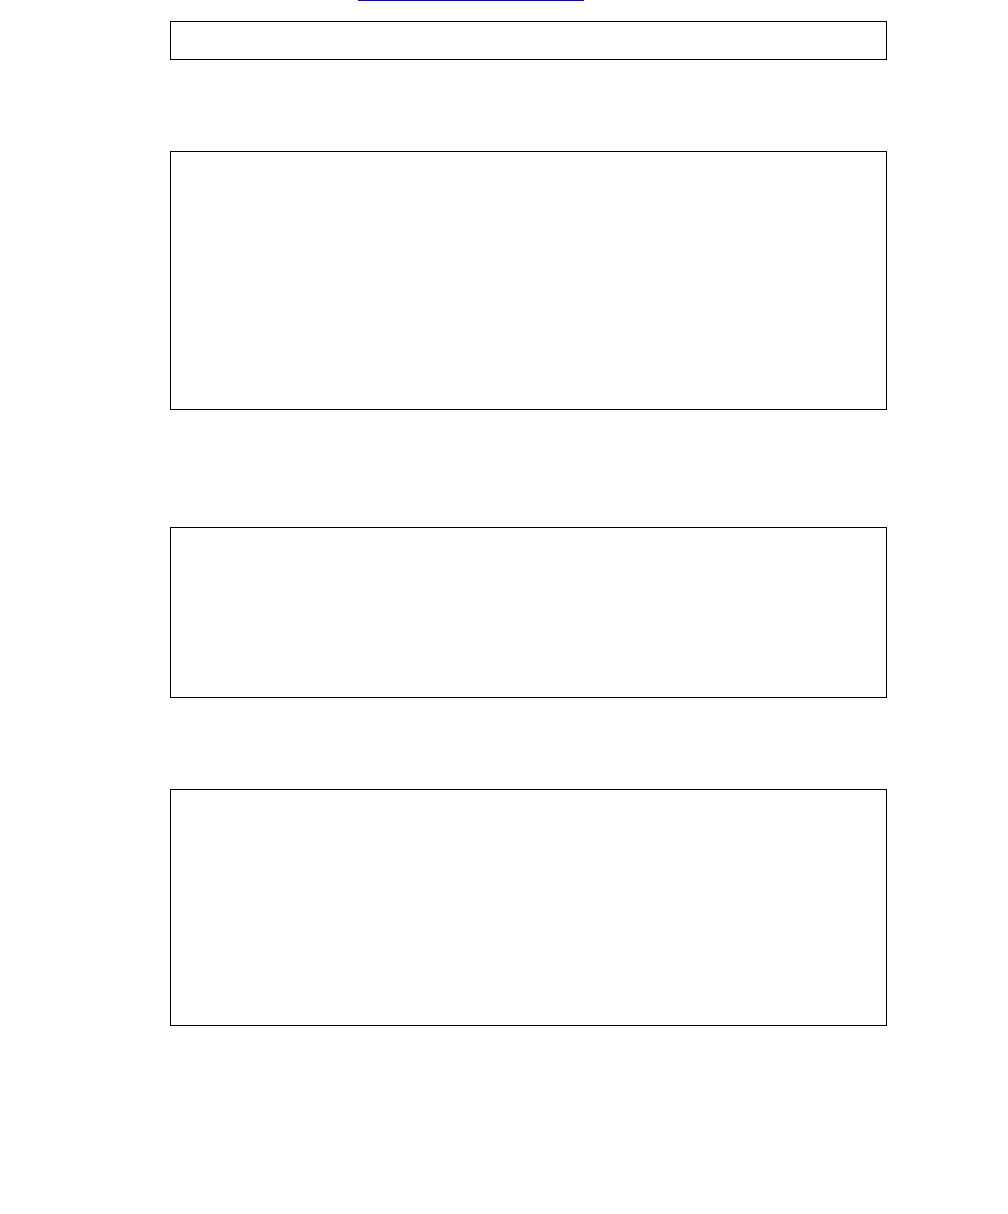
Activating customer options
Issue 1.0 December 2003 55
3. One of the following occurs:
●If the copy was not successful, the following message is displayed and you must run
copy again (see Copying customer data on page 45):
●If the copy completed successfully, the system begins activating the customer’s
options. Messages such as the following are displayed:
4. The system continues activating the customer’s options. Messages similar to the
following are displayed to show that serial printers are readministered (network printers
must be readministered after the upgrade):
5. The system continues activating the customer’s options. Messages similar to the
following are displayed:
If you are looking at the /var/log/cvuelog file during CMS setup (the
S80cmssetup script), you may see failure messages about the SQL database. You
may ignore these messages. CMS setup takes several minutes to complete.
cvue_copy not successful, run the cvue_copy again
CUE VERSION: R12cueXX.X
..
S00Sethostname Start Time -> <time stamp>
S00Sethostname End Time -> <time stamp>
S00install_sql Start Time -> <time stamp>
.
.
.
.
S12AdministerPrinters Start Time -> <time stamp>
S12AdministerPrinters End Time -> <time stamp>
.
.
.
.
S70converter End Time -> <time stamp>
S80cmssetup Start Time -> <time stamp>
CMS setup started <time stamp>
Schema updated started <time stamp>
.
.

Copying and activating the customer’s administration and options
56 Avaya CMS R12 Sun Enterprise 3500 Computer CMS Upgrade Express
6. The system continues activating the customer’s options. Messages similar to the
following are displayed:
7. The system continues activating the customer’s options. Messages similar to the
following are displayed:
8. The system then does an automatic shutdown. Messages similar to the following are
displayed before the system shuts down automatically:
.
.
Customer CMS data successfully initialized <timestamp>
..............................................
Computing space requirements and dbspace availability.
Setup completed successfully.
S80cmssetup End Time -> <time stamp>
.
.
.
.
S81cmsfeatpkg Start Time -> <time stamp>
S81cmsfeatpkg End Time -> <time stamp>
.
.
S99instUSProvisioning Start Time -> <time stamp>
Copying Provisioning upgrade files to /usr/spool/uucppublic
S99instUSProvisioning End Time -> <time stamp>
S99mirror_shutdown Start Time -> <time stamp>
Disk mirroring not authorized, proceeding to shut down system.
Shutting down to init 0 with /usr/sbin/shutdown -y -i0 -g0
Shutdown started. <time stamp>
Changing to init state0-please wait
S99mirror_shutdown End Time -> <time stamp>
The CUE Activate process is complete.
#

Activating customer options
Issue 1.0 December 2003 57
!Important:
!Important:
Important: If the activate process does not complete and the automatic shutdown does
not occur, one or more of the activate scripts failed. To recover from this
condition, see Recovering from failed installation scripts on page 58.
The ok prompt is displayed.
9. Enter the following command at the ok prompt:
copy-clock-tod-to-io-boards
The ok prompt is displayed.
10. Return the key switch to the position that was used by the customer before the
upgrade was started.
11. Enter:
boot
12. The system reboots. Ignore any warning messages during the reboot.
13. Continue with Removing temporary ACD 1 on page 60.
Copying and activating the customer’s administration and options
58 Avaya CMS R12 Sun Enterprise 3500 Computer CMS Upgrade Express
Recovering from failed installation scripts
If an error message is displayed, such as the following, a failure occurred in one of the
installation scripts.
You may be able to recover and continue with the upgrade. Some of the installation scripts
can be skipped during this part of the upgrade. However, any script that is skipped during
this part of the upgrade must be installed later using the standard software installation
procedures found in the CMS software installation document.
The following table lists all of the possible software installation scripts, and explains what to
do if one of them fails during the upgrade. When identifying the installation scripts, be
aware that each script is numbered with a prefix (for example, S04) before the script name.
ERROR[1]: FUNCTION S00install_sql() FAILED at <time stamp>
script /adminsave/init.d/S00install_sql failed
Script name Description How to recover
install_sql ISQL software All of these scripts install optional software or
drivers needed by the customer. You can skip the
script and reinstall the software later. To skip the
script:
1. Enter: cd /adminsave/init.d
2. Enter: mv scriptname /adminsave/ where
scriptname is the name of the script.
3. Enter: cd /cdrom/cdrom0
4. Run the ./cvue_activate command again.
5. Install the software package that you skipped
before you migrate the customer’s data.
After each script is executed, a copy of the script is
automatically moved to the directory
/adminsave/init.d.completed.
install_nts NTS drivers
install_odbcX_X ODBC software
init_visual_vectors Visual Vectors software
Activating customer options
Issue 1.0 December 2003 59
sethostname Sets the host name For these scripts, do not attempt to continue with
the upgrade. Escalate the problem through the
normal channels.
install_supplemental Supplemental services
sqlhosts SQL hosts file setup
dev_links Cleans up WWN and
resets Informix paths
(3500 and Sun Fire only)
fixsendmail Restores proper
permissions
AdministerPrinters Administers serial
printers
modifyfile Restores CMS setup
information
checkdevices Checks for devices
add_disks Adds data disks
storage Data storage allocation
converter Preserves CMS setup
data
cmssetup CMS setup command
cmsfeatpkg Feature package setup Review the support site software considerations
(http://drdtl.dr.avaya.com/trouble.htm) if a
pseudo-ACD was administered on the original
system.
instUSProvisioning Installs United States
provisioning scripts
For these scripts, do not attempt to continue with
the upgrade. Escalate the problem through the
normal channels.
mirror_shutdown Mirrors the disks and
shuts down the system
Script name Description How to recover

Copying and activating the customer’s administration and options
60 Avaya CMS R12 Sun Enterprise 3500 Computer CMS Upgrade Express
Removing temporary ACD 1
If you created temporary ACD 1 during the extract process of the upgrade, you must now
remove that ACD. If you did not add any temporary ACDs, continue with Turning on
CMS on page 61.
To remove temporary ACD 1:
1. Enter:
cmsadm
The CMS Administration menu is displayed.
2. Enter the number that corresponds to the acd_remove option.
3. Enter ACD 1.
A warning message is displayed.
4. Enter: y
5. Continue with Turning on CMS on page 61.

Turning on CMS
Issue 1.0 December 2003 61
Turning on CMS
To turn on CMS:
1. Enter:
cmsadm
The CMS Administration menu is displayed.
2. Enter the number that corresponds with the run_cms option.
3. Enter 1 to turn on CMS.
4. Continue with Verifying that CMS is operating on page 61.
Verifying that CMS is operating
To verify that CMS is operating properly:
1. Enter:
su - cms
The $ prompt is displayed.
2. Enter:
cms
Ignore any messages about backups.
3. Display the CMS main window to verify that the status of the switch links before the
upgrade match the status of the switch links after the upgrade. That is, if a switch link
was operating before the upgrade, it should be operating after the upgrade. If a switch
link that should be operating is not, make sure that data collection is turned on.
4. Continue with Checking “manual merge” discrepancies on page 62.

Copying and activating the customer’s administration and options
62 Avaya CMS R12 Sun Enterprise 3500 Computer CMS Upgrade Express
Checking “manual merge” discrepancies
The cvue_extract command compares customer system files to the new Solaris
operating system files installed on the CUE master disk. The new Solaris operating system
files to be compared are located on the upgrade tool CD-ROM. The files on the upgrade
tool CD-ROM are compared to files located on the customer's current system. Any files
that show a difference between the upgrade tool CD-ROM and the current customer
system are written to a manual merge directory.
Only files which are in the okdiff directory are copied to tape. CUE writes these files to
tape during the cvue_extract process and the files will be copied to the directory
/manual_merge on the CUE master disk during the cvue_copy process. These files are
identified in /var/log/cvuelog file as “manual merge” discrepancies.
!Important:
!Important:
Important: The customer must look at the manual merge discrepancies outlined in the
/var/log/cvuelog to see if they are Solaris changes (which should not
be modified) or customer customization changes (which may need to be
modified). The files that are identified could be important to the new system
and the customer may find that these files need to be copied to a location
that may eventually fix a problem. These files may contain networking
information, customizations, or security settings that are critical to the
customer.
To check for discrepancies between the old system and the new system:
1. Enter:
cat /var/log/cvuelog | grep “merged manually” | pg
2. Check the displayed messages and correct any problems that are found.
3. Continue with Checking Free Space Allocation on page 63.
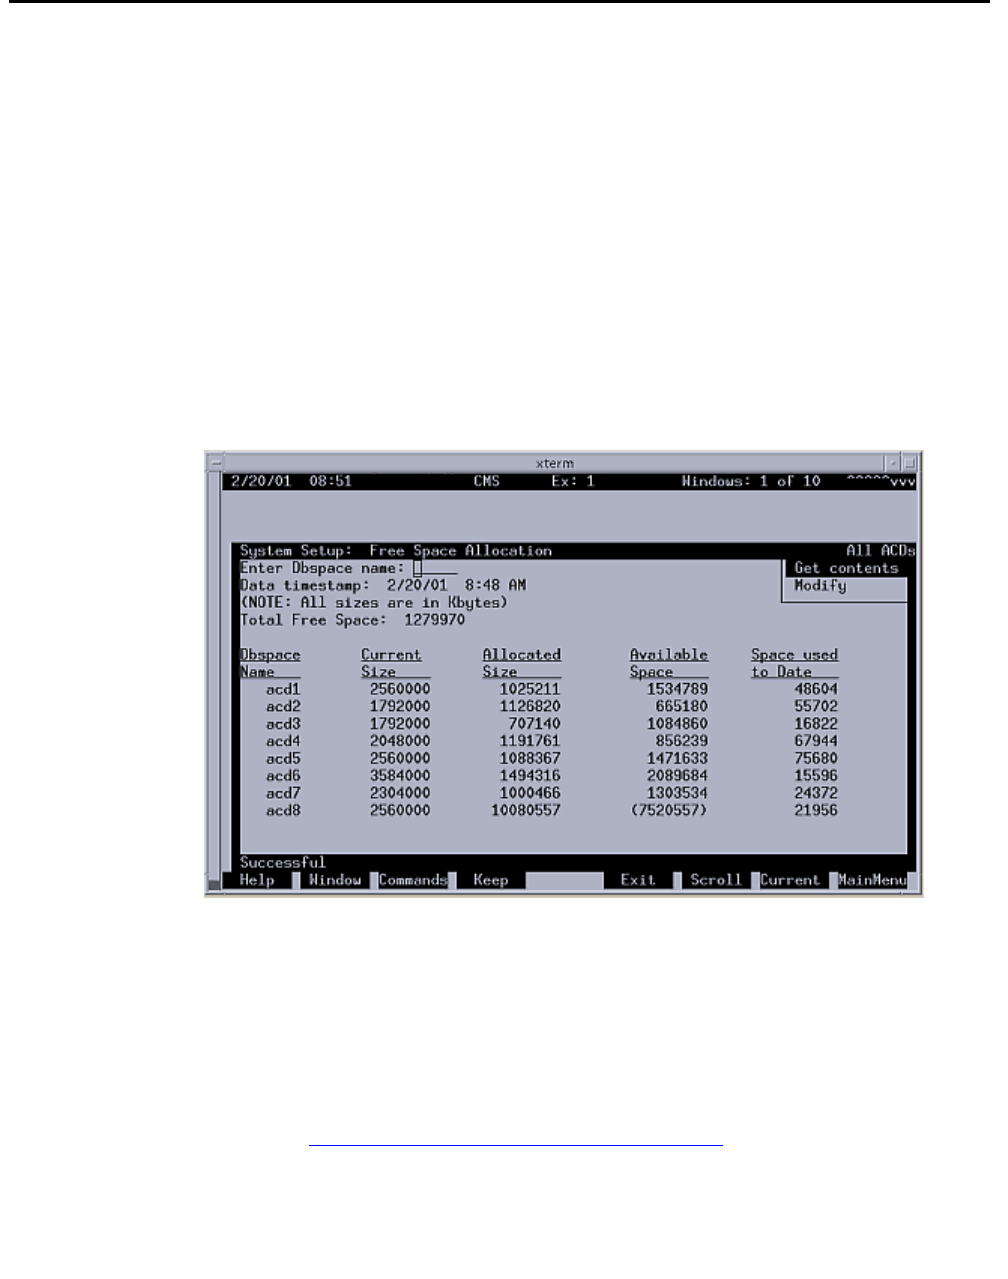
Checking Free Space Allocation
Issue 1.0 December 2003 63
Checking Free Space Allocation
To check Free Space Allocation:
1. Go to the Free Space Allocation window that is located in the CMS System Setup
subsystem.
2. Verify that the amount of available space is positive for each ACD and make any
necessary adjustments.
For more information about Free Space Allocation, see Avaya CMS R3V11
Administration, 585-215-515.
Example:
In the Free Space Allocation window shown below, ACD 8 has negative space
available.
If the Total Free Space: field shows that there is not enough space available to make
the adjustment, it will be necessary to modify Data Storage Allocation or add an
additional hard drive.
3. Log out of CMS.
4. At the $ prompt, enter:
exit
5. Continue with Turning on Visual Vectors server (optional) on page 64.

Copying and activating the customer’s administration and options
64 Avaya CMS R12 Sun Enterprise 3500 Computer CMS Upgrade Express
Turning on Visual Vectors server (optional)
If your installation uses the Visual Vectors server, you must now turn on the software. If you
do not use Visual Vectors, continue with Updating the switch setup on page 64.
To turn on the Avaya Visual Vectors software:
1. Stop and restart AOM by entering the following commands:
aom stop
aom start
2. Enter:
setupaas
The system displays the Avaya Visual Vectors Server System Services Menu.
3. Enter the number associated with the run_vvs option.
4. Enter the number associated with the Turn VVS On option.
5. Continue with Updating the switch setup on page 64.
Updating the switch setup
In many cases, the switch is upgraded to a new release when the CMS is upgraded. In
addition, the links from the switch to the CMS must have been converted to TCP/IP if the
original link was X.25. Verify switch setup for any ACDs where the switch model or link type
was changed.
If the switch model or link type has changed, you must do the following:
●Check the switch links on the CMS main window and verify that the switch links are up.
●If the links are not active, check the administration of each ACD on the CMS using the
swsetup option of the cmssvc command. CMS must be turned off to administer the
ACDs. For more information about converting links, see CMS Switch Connections,
Administration, and Troubleshooting, 585-215-876. Remember to turn CMS on after
setting up the ACDs.
●Readminister the CMS version on the switch using the Feature Parameters form.
●If the conversion from X.25 to TCP/IP involves adding another network card to the CMS
computer, this must be done after the upgrade is completed.
Continue with Setting the Informix configuration parameters on page 65.

Setting the Informix configuration parameters
Issue 1.0 December 2003 65
Setting the Informix configuration parameters
The Informix Dynamic Server (IDS) parameters for CMS must be adjusted to optimize
system performance. Adjusting these parameters allows the system to fully use additional
processors and memory.
Note:
Note: During this procedure, both CMS and IDS must be turned off.
To adjust the IDS parameters, see the section “Setting the Informix configuration
parameters for CMS” in the chapter “Installing CMS and Supporting Software” of CMS R12
Software Installation, Maintenance, and Troubleshooting, 585-215-117.
Continue with Removing the upgrade files on page 65.
Removing the upgrade files
The files used for the upgrade must be removed.
To remove the upgrade files:
1. Enter:
cd /cdrom/cdrom0
Note:
Note: If the above command does not work, enter the following commands to start
the volume manager:
/etc/init.d/volmgt stop
/etc/init.d/volmgt start
2. Do one of the following:
●If running the command locally at the console, enter:
./cvue_cleanup
●Optionally, if running the command remotely on a dial-up line, enter:
nohup ./cvue_cleanup | tee /nohup.out
The following message is displayed:
Beginning cvue_cleanup process...please wait.

Copying and activating the customer’s administration and options
66 Avaya CMS R12 Sun Enterprise 3500 Computer CMS Upgrade Express
!CAUTION:
CAUTION: If the dial-up modem line is dropped after starting this command with nohup,
reconnect to the system but do not rerun this command. Use tail -f
/nohup.out to view the progress of the command. When finished viewing
the nohup.out file, press Del to break out of the command.
3. Note that since the number of files to remove is large, this procedure takes several
minutes to complete. When the files are removed, the following message is displayed:
4. Enter:
cd /
5. Enter:
eject cdrom
6. Remove the upgrade tool CD-ROM. Save the CD-ROM with the other customer
software in case you have to run the upgrade tool again.
7. Continue with Migrating customer data on page 67.
The cvue_cleanup process is complete...Wed Aug 23 13:56:00 MDT 2000
#

Migrating customer data
Issue 1.0 December 2003 67
Migrating customer data
The following customer data must be migrated from the maintenance backup tapes:
●Migrating system administration data on page 67
●Migrating agent and call center administration data on page 69
Migrating system administration data
!CAUTION:
CAUTION: Perform this step only once. Attempting to migrate system administration
data more than once causes catastrophic errors from which you are unable
to recover. Failure to heed this warning may irretrievably destroy data.
To migrate the system administration data:
1. If CMS is not turned on, do the following:
a. Enter:
cmsadm
The CMS Administration menu is displayed.
b. Enter the number for the run_cms option.
c. Enter 1 to turn on CMS.
2. Log on to CMS.
The CMS main window is displayed.
3. From the CMS main menu, select System Setup > CMS State to put CMS into
single-user mode.
4. Insert the most recent incremental maintenance backup tape into the tape drive.
Copying and activating the customer’s administration and options
68 Avaya CMS R12 Sun Enterprise 3500 Computer CMS Upgrade Express
5. From the CMS Main Menu, select System Setup > R3 Migrate Data.
The following is displayed:
6. In the R3 Migrate Data window, select the options and enter the values that are
indicated in the following table:
7. Press Enter to access the action list in the top right corner.
8. Select Run and press Enter.
The progress of the migration is displayed in the Status field. When the migration
ends, the system indicates the success or failure of the migration in this field.
9. Press F3 and select the UNIX option to display the UNIX prompt.
10. Enter:
pg /cms/migrate/r3mig.log
The customer migration log is displayed.
3/ 9/01 21:19 CMS Windows: 1 of 4 vvvv^vvv
System Setup: R3 Migrate Data All ACDs
| Cancel
Device name: default | List devices
|Run
Data type (Select one): +--------------
<x> System Administration data (single-user required)
< > Agent/Call Center Admin data (single-user required)
< > Historical data
Stop date:
Stop time: 11:59 PM
Specify ACD(s) to migrate (Select one):
<x> All ACDs
< > Single ACD
from: to:
Status:
Help Window Commands Keep Exit Scroll Current MainMenu
Field Value to enter or option to select
Device name The tape drive device name
Data Type System Administration data
Specify ACD(s) All ACDs

Migrating customer data
Issue 1.0 December 2003 69
11. Look at the contents of the customer migration log and take any necessary corrective
action. For help with interpreting the log, contact technical support or your customer
representative.
12. To exit the UNIX window, enter:
exit
Migrating agent and call center administration data
To migrate agent and call center administration data:
1. Verify that the most recent incremental maintenance backup tape is in the tape drive.
2. From the CMS Main Menu, select System Setup > R3 Migrate Data.
The following is displayed:
3/ 9/01 21:19 CMS Windows: 1 of 4 vvvv^vvv
System Setup: R3 Migrate Data All ACDs
| Cancel
Device name: default | List devices
| Run
Data type (Select one): +--------------
< > System Administration data (single-user required)
<x> Agent/Call Center Admin data (single-user required)
< > Historical data
Stop date:
Stop time: 11:59 PM
Specify ACD(s) to migrate (Select one):
<x> All ACDs
< > Single ACD
from: to:
Status:
Help Window Commands Keep Exit Scroll Current MainMenu

Copying and activating the customer’s administration and options
70 Avaya CMS R12 Sun Enterprise 3500 Computer CMS Upgrade Express
3. In the R3 Migrate Data window, select the options and enter the values that are
indicated in the following table:
4. Press Enter to access the action list in the top right corner.
5. Select Run and press Enter.
The progress of the migration is displayed in the Status field. When the migration
ends, the system indicates the success or failure of the migration in this field.
6. Press F3 and select the UNIX option to display the UNIX prompt.
7. Enter:
pg /cms/migrate/r3mig.log
The customer migration log is displayed.
8. Look at the contents of the customer migration log and take any necessary corrective
action. For help with interpreting the log, contact technical support or your customer
representative.
9. To exit the UNIX window, enter:
exit
10. Select System Setup > CMS State to put CMS into multiuser mode.
11. Continue with Resetting the CONSOLE parameter on page 71.
Field Value to enter or option to select
Device name The tape drive device name
Data Type Agent/Call Center Admin data
Specify ACD(s) All ACDs
Resetting the CONSOLE parameter
Issue 1.0 December 2003 71
Resetting the CONSOLE parameter
After you have migrated the customer data and you are about to finish the upgrade, you
must reset the CONSOLE parameter in the /etc/default/login file.
To reset the CONSOLE parameter:
1. Enter:
vi /etc/default/login
2. Search for the following lines:
3. Delete the leading pound sign (#) on the CONSOLE=/dev/console line. It should look
like the following:
4. Press ESC.
5. Enter:
:wq!
This writes and quits the file.
6. Continue with Replacing the customer’s tapes on page 72.
.
.
# If CONSOLE is set, root can only login on that device.
# Comment this line out to allow remote login by root.
#
#CONSOLE=/dev/console
.
.
.
.
# If CONSOLE is set, root can only login on that device.
# Comment this line out to allow remote login by root.
#
CONSOLE=/dev/console
.
.

Copying and activating the customer’s administration and options
72 Avaya CMS R12 Sun Enterprise 3500 Computer CMS Upgrade Express
Replacing the customer’s tapes
After migrating the customer’s data, remove the tapes from the tape drives and replace
any tapes that the customer originally had in the tape drives. These tapes that the
customer had in the tape drives may be used for scheduled backups and must be replaced
before leaving the customer site.
Continue with Checking the status of the disks on page 72.
Checking the status of the disks
After migrating the customer’s data, you should verify that the disks have synchronized
successfully or are actively synchronizing.
To check the status of the disk drives:
1. Enter:
. /opt/informix/bin/setenv
2. Enter:
onstat -d | egrep “PD|X” | pg
One of the following occurs:
●If nothing other than the command prompt is displayed, continue with Turning the
upgraded system over to the customer on page 72.
●If any lines display X, the disk requires maintenance. Escalate through normal
channels.
Turning the upgraded system over to the customer
After the data migration is complete, the customer must follow the post-upgrade
procedures found in Avaya Call Management System (CMS) Release 12 CMS Upgrade
Express (CUE) Customer Requirements. Inform the customer that they must follow these
procedures to complete the upgrade.
