Avaya 9641GS IP Deskphone User Manual Using Avaya 9621G 9641G 9641GS IP Deskphones H 323
AVAYA IP Deskphone Using Avaya 9621G 9641G 9641GS IP Deskphones H 323
UserManual.wiki
>
Avaya
>
9641GS User Manual
>
User Manual
Contents
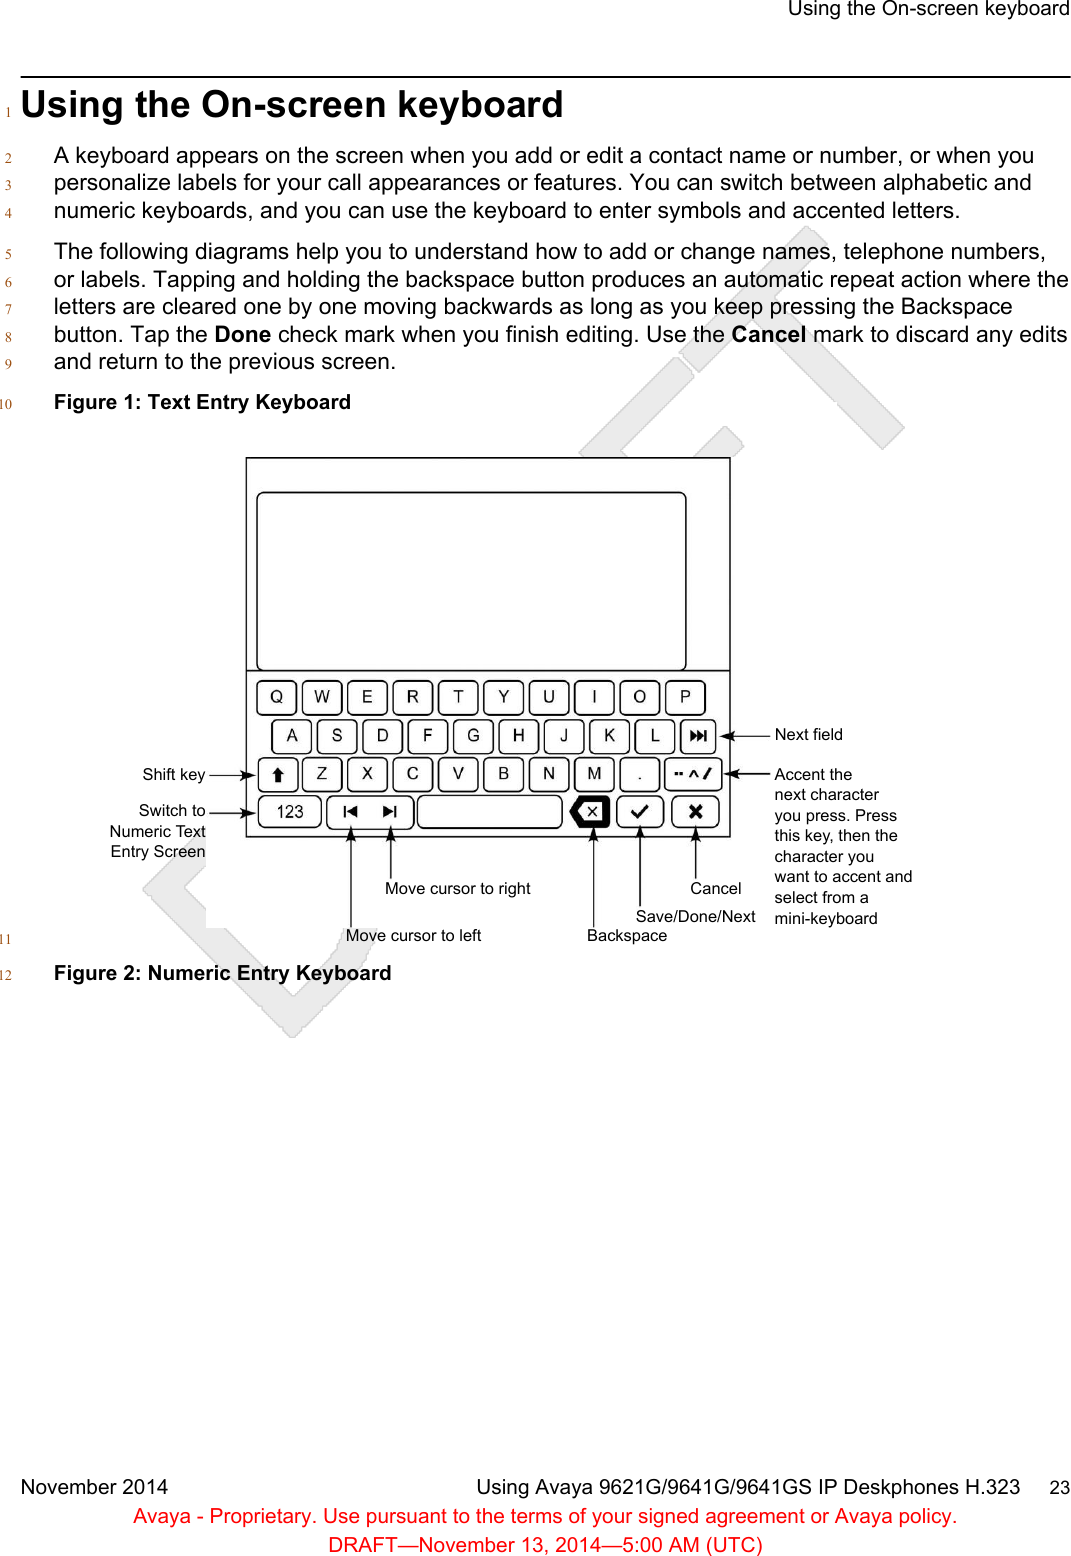
1.
User manual
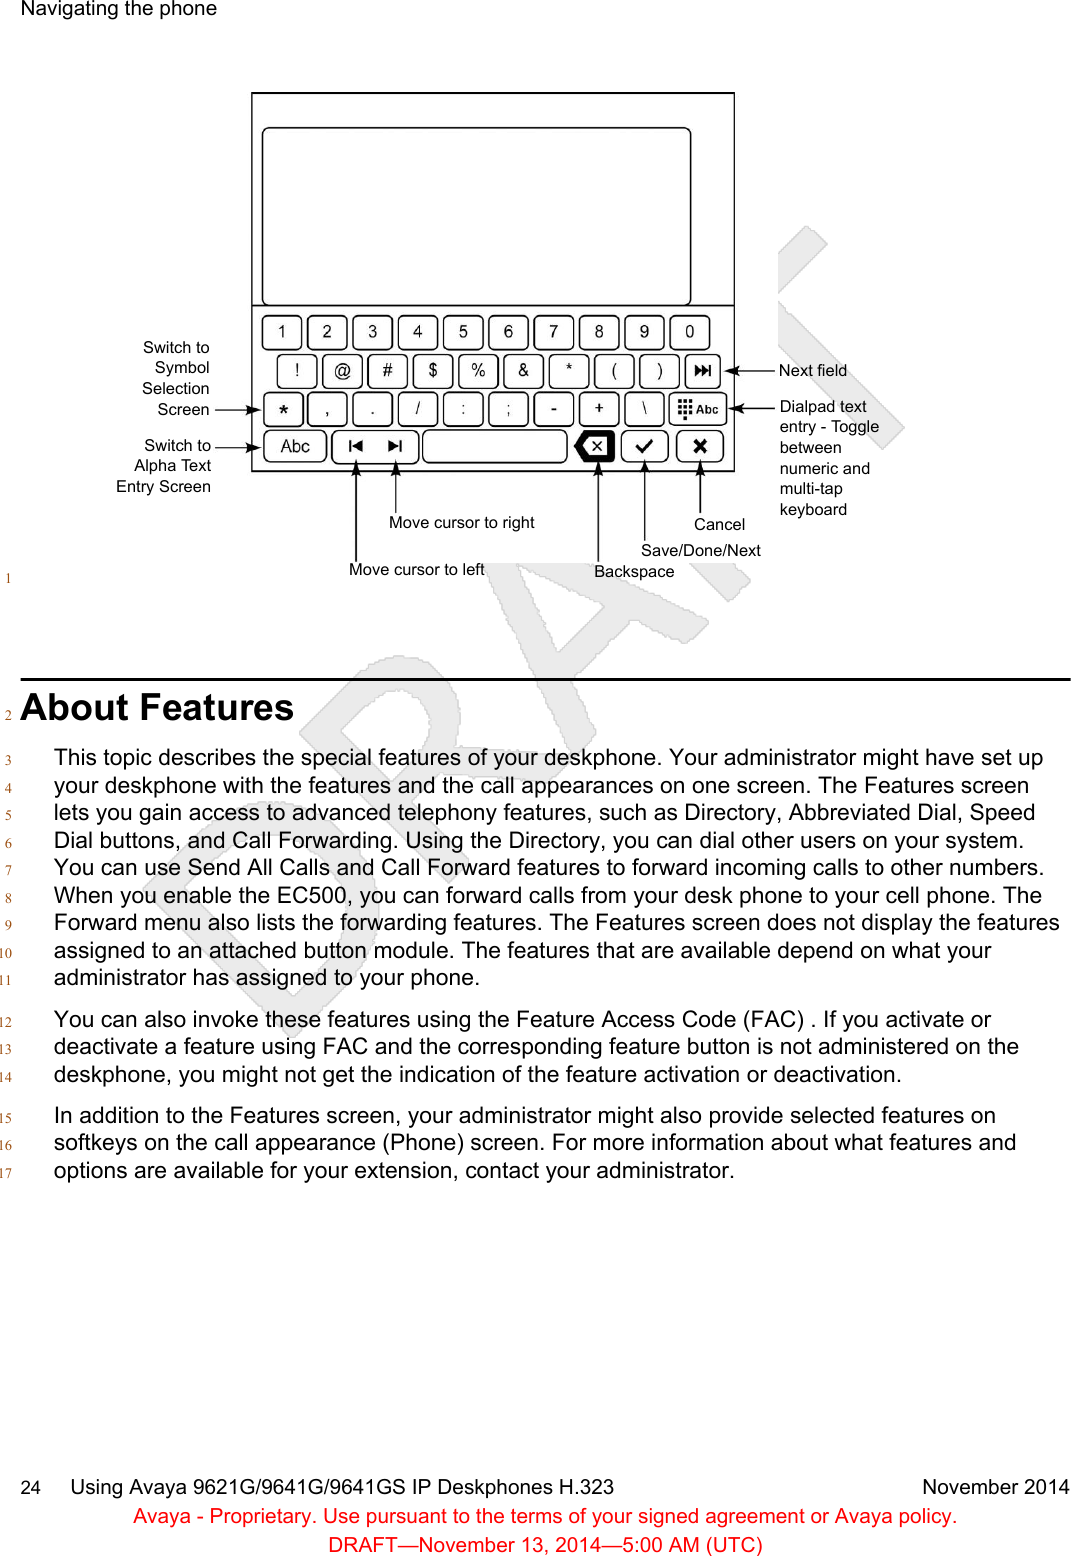
2.
User Manual
User Manual
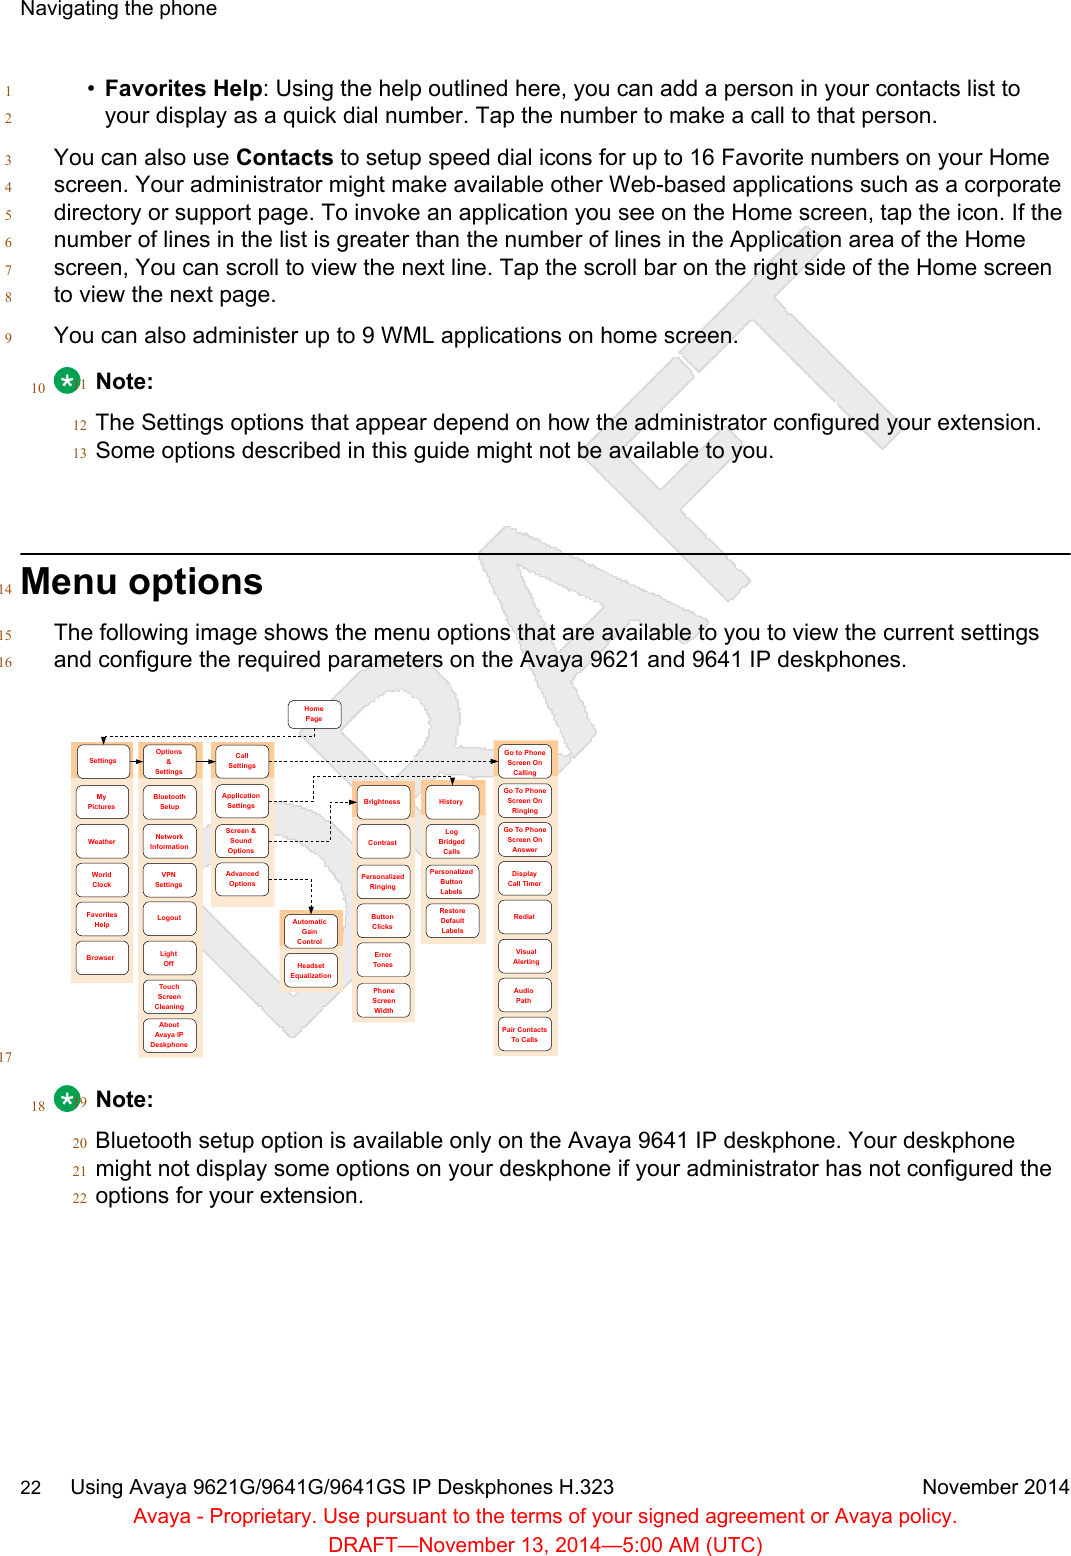
Navigation menu
Upload a User Manual
Namespaces
Wiki Guide
HTML
PDF
Info
Views
User Manual
Discussion / Help
Navigation