Avaya Callpilot Message Networking User Guide
2015-06-01
: Avaya Avaya-Callpilot-Message-Networking-User-Guide-735499 avaya-callpilot-message-networking-user-guide-735499 avaya pdf
Open the PDF directly: View PDF ![]() .
.
Page Count: 22
- CallPilot
- Message Networking User Guide
- CallPilot Message Networking User Guide
- About Message Networking
- How Message Networking works
- Checking which mailbox interface you use
- Sending a message using a Network Delivery Mailbox
- Sending a message using Site-Based Addressing
- Sending a message using Direct Addressing
- Replying to network messages
- Forwarding a Fax Message using Site-Based Addressing
- Forwarding a Fax Message to a Network Delivery Mailbox
- Adding special characters
- CallPilot Message Networking User Guide

Part No. P0919430 04
CallPilot
Message Networking
User Guide

P0919430 04
CallPilot Message Networking User
Guide
Copyright © 2002 Nortel Networks
All rights reserved. 2002.
The information in this document is subject to change without notice. The statements, configurations, technical data, and
recommendations in this document are believed to be accurate and reliable, but are presented without express or implied
warranty. Users must take full responsibility for their applications of any products specified in this document. The information
in this document is proprietary to Nortel Networks NA Inc.
The software described in this document is furnished under a license agreement and may be used only in accordance with the
terms of that license. The software license agreement is included in this document.
Trademarks
NORTEL NETWORKS is a trademark of Nortel Networks.
Microsoft, MS, MS-DOS, Windows, and Windows NT are registered trademarks of Microsoft Corporation.
All other trademarks and registered trademarks are the property of their respective owners.
3
CallPilot Message Networking User Guide
CallPilot Message Networking User Guide
About Message Networking
This guide explains how to use Message Networking with your personal mailbox.
Message Networking links CallPilot or other voicemail systems at different locations.
Digital networking and AMIS
Message Networking uses digital networking and Audio Message Interchange Specification
(AMIS) to exchange messages.
Digital networking
Digital networking uses Transmission Control Protocol/Internet Protocol (TCP/IP) to enable the
exchange of voice and Fax messages between users at different sites on a network.
AMIS
AMIS provides voice messaging to mailboxes at different sites on a communication network.
A network is a collection of offices, locations or sites connected by telecommunication links. Each
site on the network must have AMIS to send, receive and reply to network messages.
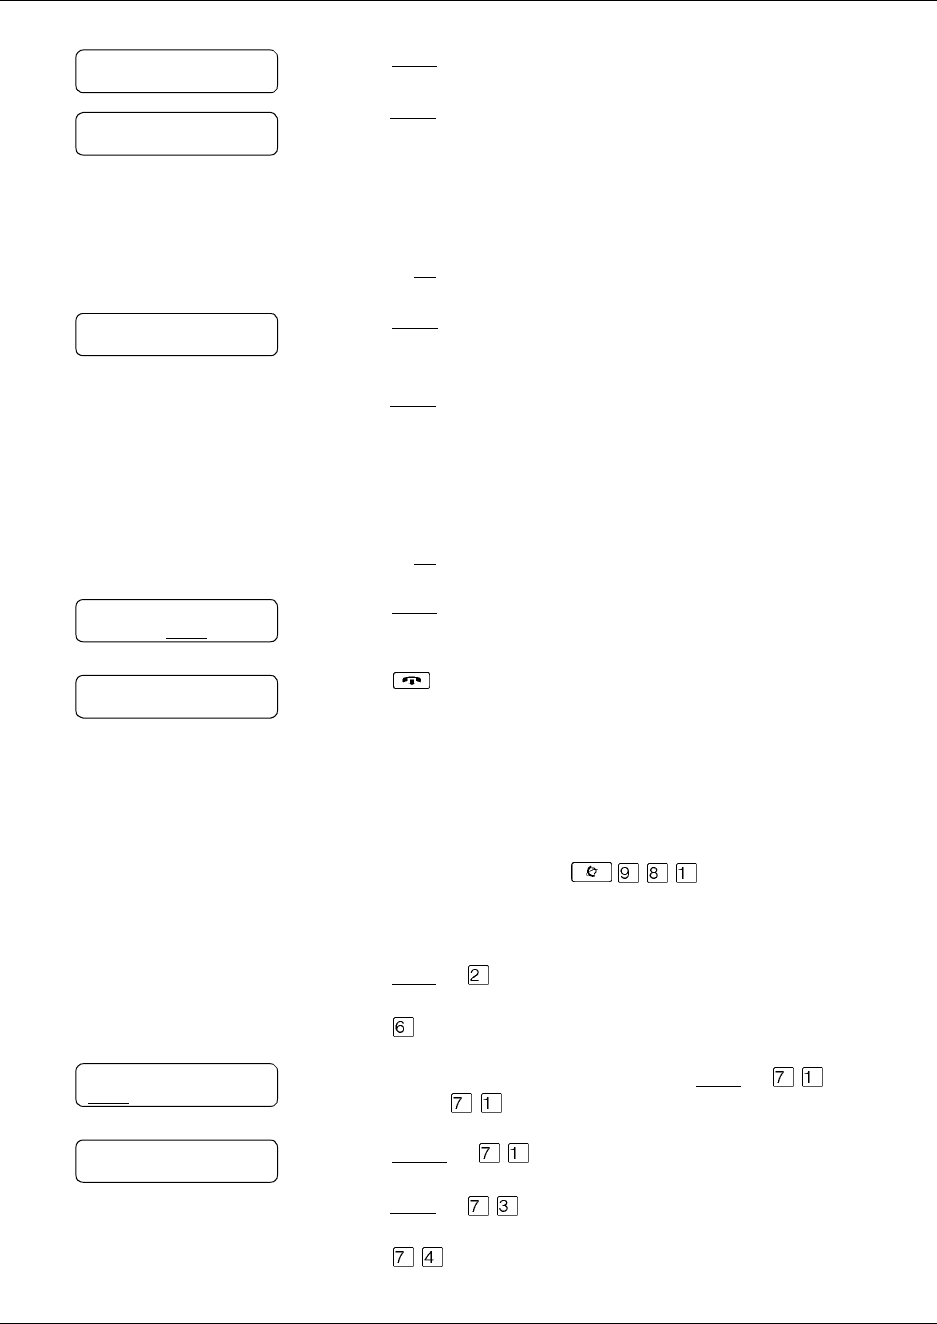
How Message Networking works
Sending a message across a network is as easy as sending a message down the hall.
There are three ways to send a network message.
You can use:
• a Network Delivery Mailbox
• Site-Based Addressing
• Direct Addressing (available for AMIS only)
Note: Any voice message that you use send over the Internet using digital networking
can be subject to interception by unauthorized parties.
Note: Network messages can be composed and sent only from your mailbox.
You cannot send a network message by using the Leave Message feature ( ·°‚).

4 CallPilot Message Networking User Guide
P0919430 04
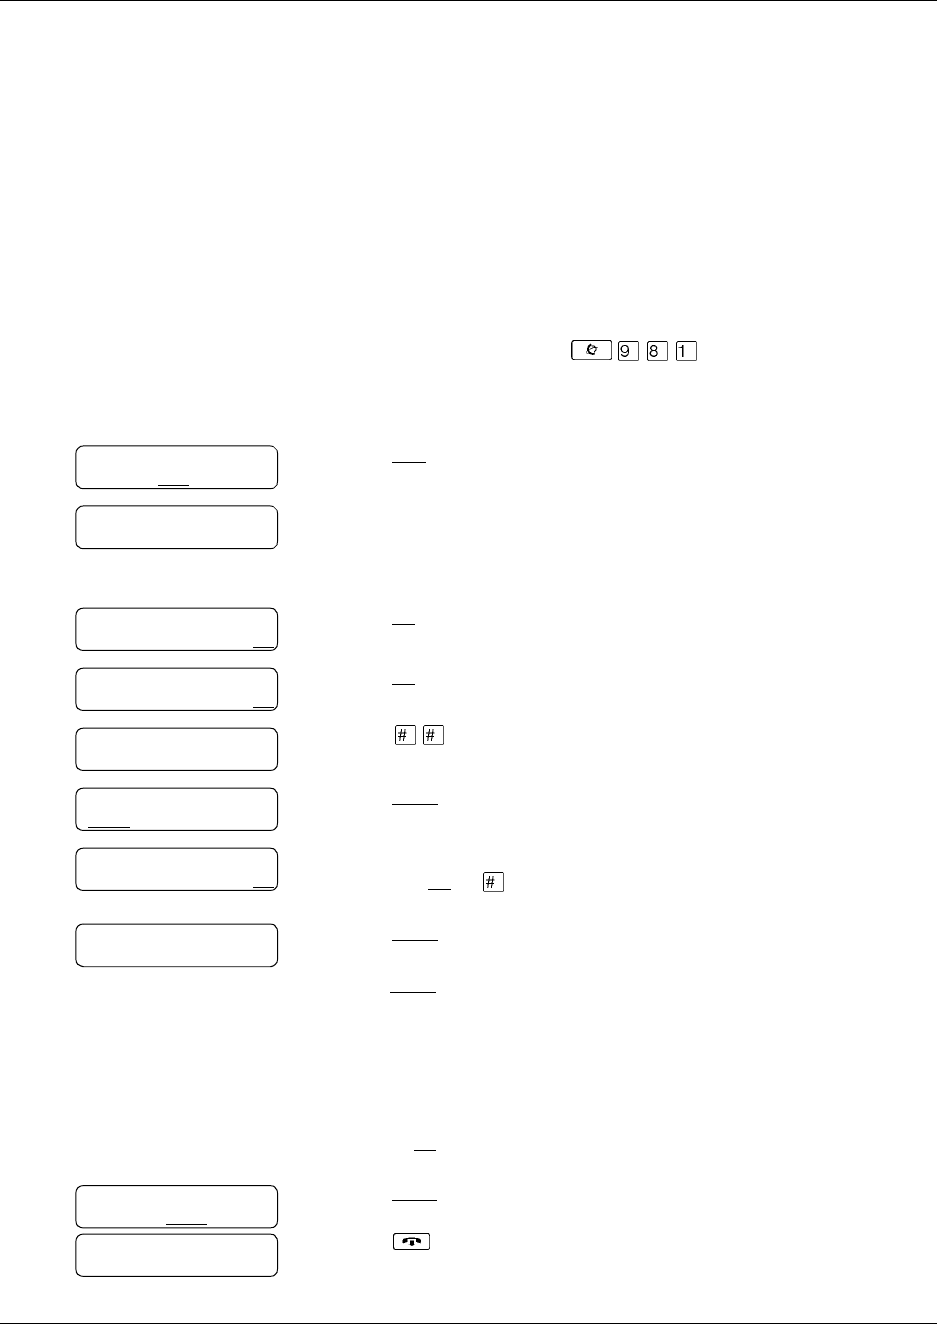
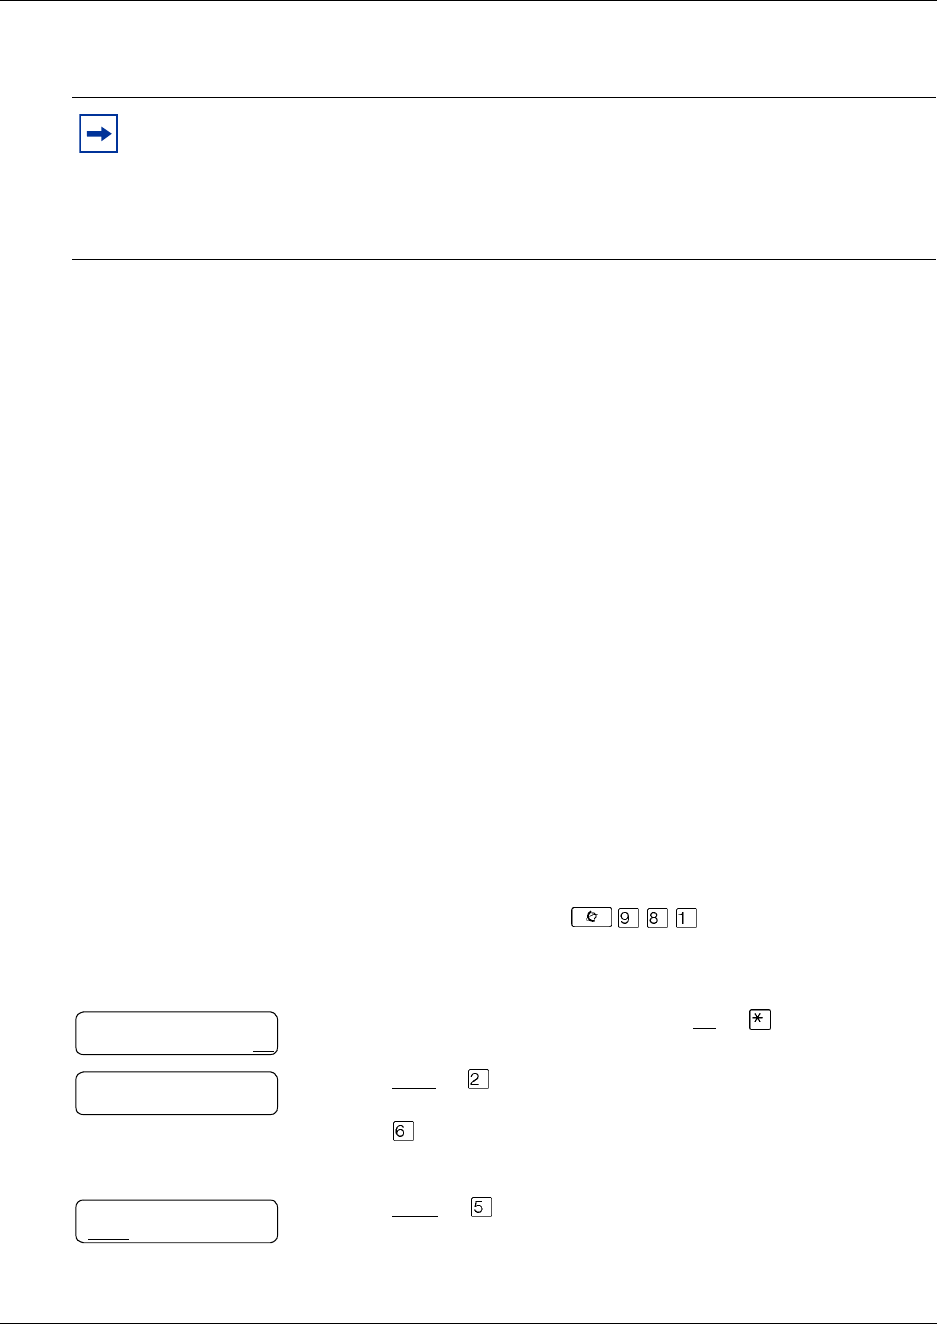
Sending a network message
The diagram Sending a network message shows how messages are sent between different company
sites on the same network. In the example, Sue works in the Vancouver office and Mark works in
the Miami office.
If Sue wants to send Mark a message, she can send the message using Site-Based Addressing,
Direct Addressing, or to Mark’s Network Delivery Mailbox. Since Mark has a Network Delivery
Mailbox on the local Vancouver system, it is convenient for Sue to send the message to Mark’s
Network Delivery Mailbox.
Although Mark’s Network Delivery Mailbox appears on the Vancouver system the message is
automatically delivered to his mailbox in Miami. The network delivery information, such as the
site prefix for the Miami site and Mark’s mailbox number (4546) in Miami, is added to the
Network Delivery Mailbox when you create it.
Sending a message to a Network Delivery Mailbox is as easy as sending a message to anyone at
your site.
If Mark wants to send Sue a message, he must use Site-Based Addressing. Sue does not have a
Network Delivery Mailbox on the Miami system.
Before Mark can send the message he needs to know the site prefix of the Vancouver site and Sue’s
mailbox number in Vancouver. The System Administrator can give Mark the Vancouver site
prefix. After Mark records the message and enters the network delivery information, the network
message is automatically delivered to Sue’s mailbox.
Note: There is a time limit for the length of AMIS messages.
Do not send AMIS messages that are longer than 8 minutes.
Sue
Ext 2222
Vancouver
CallPilot system
Miami
CallPilot system
Mark’s Network Delivery
Mailbox 7222
Sue’s
Mailbox 2222
Mark’s
Mailbox 4546
Mark
Ext 4546
Business
Communications
Manager
or
CallPilot 100/150
server
Business
Communications
Manager
or
CallPilot 100/150
server
Network

CallPilot Message Networking User Guide 5
CallPilot Message Networking User Guide
What you need to know to use Message Networking
You must know how to use CallPilot to send messages to mailboxes at other sites. This includes
knowing how to open your mailbox, record messages, send messages and retrieve messages. For
information about using CallPilot features, refer to the CallPilot Quick Reference Guide for the
interface you use, or the CallPilot Reference Guide.
To use this guide, you must determine which phone interface you use, and follow the procedures
for that interface. For information about determining which interface you use, refer to “Checking
which mailbox interface you use” on page 6.
6 CallPilot Message Networking User Guide
P0919430 04
Checking which mailbox interface you use
CallPilot supports the Norstar Voice Mail and CallPilot interfaces.
Use this procedure to check which mailbox interface you use, then follow the procedures that
apply to your interface.
To check which mailbox interface you use
1Press .
Follow the voice prompts or the display button options to open
your mailbox.
2Check the display to see which interface you use:
This is the Norstar Voice Mail interface.
This is the CallPilot interface.
3Press to end the session.
0 new 0 saved
PLAY REC ADMIN
No messages
COMP MBOX EXIT
CallPilot Message Networking User Guide 7
CallPilot Message Networking User Guide
Sending a message using a Network Delivery Mailbox
Network Delivery Mailboxes make it easy to send messages to a mailbox at a remote location. The
Network Delivery Mailbox makes sending a message across the country as easy as sending it down
the hall. A Network Delivery Mailbox is a pre-programmed direct address to a mailbox at a
different site on the network. Each Network Delivery Mailbox has a local mailbox number. The
destination site user’s name appears in the company directory.
To send a message using a Network Delivery Mailbox, you need the Network Delivery Mailbox
number. Ask your System Administrator to give you a list of Network Delivery Mailboxes or
create a Network Delivery Mailbox for you.
The messages you record must be longer than three seconds. The system times out after five
seconds of silence.
To send a message using a Network Delivery Mailbox-
Norstar Voice Mail
1Open your mailbox using .
Follow the voice prompts or the display button options to open
your mailbox.
2Enter your mailbox password and press OK or .
3Press REC or .
4At the tone record your message.
5Press OK or to end the recording.
6Press OK or to accept the recording.
7Enter the Network Delivery Mailbox number.
8Press SEND to send the message
or
press OPTS to assign message delivery options:
•for digital destinations, Certified, Urgent, Timed Delivery,
or Private.
•for AMIS destinations, Certified, Urgent, or Timed
Delivery, but NOT Private
or press CC to send the message to another recipient.
9Press to end the session.
Pswd:
OTHR RETRY OK
0 new 4 saved
PLAY REC ADMIN
Record message:
Record message:
RETRY PAUSE OK
Accept rec?
RETRY PLAY OK
Mbox:
DIR QUIT
Miami,sales
OPTS CC SEND
Will deliver
0 new 0 saved
PLAY REC ADMIN
8 CallPilot Message Networking User Guide
P0919430 04
To send a message using a Network Delivery Mailbox -
CallPilot
1Open your mailbox using .
Follow the voice prompts or the display button options to open
your mailbox.
2Press COMP or to open the Compose Message menu.
3Enter the Network Delivery Mailbox number and
press DONE or .
4Press REC or to begin recording.
5Press OK or when you are done.
You can press to add message options:
•for digital destinations, Certified, Urgent, Timed Delivery,
or Private
•for AMIS destinations, Certified, Urgent, or Timed
Delivery, but NOT Private.
6Press SEND or to send the message.
7Press to end the session.
No messages
COMP MBOX EXIT
To:
NAME SPEC DONE
Empty
REC
Recording
REREC OK
Rec stopped
PLAY DEL SEND
Will deliver
CallPilot Message Networking User Guide 9
CallPilot Message Networking User Guide
Sending a message using Site-Based Addressing
Site-Based Addressing lets you send a message to a mailbox at another location on the network. To
use Site-Based Addressing to send a message, you must know the network address of the
destination site and the mailbox number of the person you want to send the message to.
Ask your System Administrator for a list of destination sites on your network.
To send a message using Site-Based Addressing -
Norstar Voice Mail
1Open your mailbox using .
Follow the voice prompts or the display button options to open
your mailbox.
2Press REC or ‹.
3At the tone, record your message.
The message you record must be longer than three seconds. The
system times out after five seconds of silence.
4Press OK or £ to end the recording.
5Press OK or £ to accept the recording.
6Press .
7Press NETW .
8Enter the destination site prefix and mailbox number
and press OK or .
9Press SEND to send the message as it is
or
press OPTS to assign message delivery options:
•for digital destinations, Certified, Urgent, Timed Delivery,
or Private.
•for AMIS destinations, Certified, Urgent, or Timed
Delivery, but NOT Private
or press CC to send the message to another recipient.
10 Press SEND to transmit the message.
11 Press to end the session.
0 new 4 saved
PLAY REC ADMIN
Record message:
Record message:
RETRY PAUSE OK
Accept rec?
RETRY PLAY OK
Mbox:
DIR QUIT
Address type?
NETW AMIS
Network:
RETRY OK
<site name>
OPTS CC SEND
Network msg
VIEW SEND
0 new 0 saved
PLAY REC ADMIN
10 CallPilot Message Networking User Guide
P0919430 04
To send a message using Site-Based Addressing -
CallPilot
1Press .
Follow the voice prompts or display options to open your mailbox.
2Press COMP or to open the Compose Message option.
3Enter the site prefix and the mailbox number and
press OK or .
4The display shows the destination mailbox name and mailbox
number.
5You can enter another address
or
press DONE or if you are finished entering addresses.
6Press REC or and record your message at the tone.
The message you record must be longer than three seconds. The
system times out after five seconds of silence.
7Press OK or to end your recording
or
press REREC to erase and re-record your message.
You can press to add message options of Urgent, Private,
Acknowledged or Timed delivery.
8Press SEND or to send the message.
To:
NAME SPEC DONE
Site:<xxxx>
Dest mb:<xxxx>
To:
NAME SPEC DONE
EMPTY
REC
Recording....
REREC OK
Rec stopped
PLAY DEL SEND
CallPilot Message Networking User Guide 11
CallPilot Message Networking User Guide
Sending a message using Direct Addressing
Direct Addressing lets you send a voice message to a mailbox at a different location on a network.
To use Direct Addressing you must know the destination site phone number and the mailbox
number of the person you want to send a message to. Direct Addressing is available for AMIS
only. Ask your System Administrator for the destination site’s phone number and mailbox
numbers.
To send a message using Direct Addressing - Norstar Voice Mail
1Press .
Follow the voice prompts or the display button options to open
your mailbox.
2Enter your mailbox password and press OK or £.
3Press REC or ‹.
4At the tone, record your message.
The message you record must be longer than three seconds. The
system times out after five seconds of silence.
5Press OK or £ to end the recording.
6Press OK or £ to accept the recording.
7Press .
8Press AMIS.
9Enter the destination site phone number and press OK.
10 Press OK or £ to continue or press ADD or to add special
characters. See “Adding special characters” on page 22. Press OK or
£ when you are done adding special characters.
11 Enter the destination mailbox number and press OK.
12 Press OTHR to review or send the message
or
press OPTS to assign message delivery options:
•for digital destinations, Certified, Urgent, Timed Delivery,
or Private.
•for AMIS destinations, Certified, Urgent, or Timed
Delivery, but NOT Private
or press CC to send the message to another recipient.
13 Press SEND to transmit the message.
Pswd:
OTHR RETRY OK
0 new 4 saved
PLAY REC ADMIN
Record message:
Record message:
RETRY PAUSE OK
Accept rec?
RETRY PLAY OK
Mbox:
DIR QUIT
Address type?
NETW AMIS
Ph:
RETRY OK
<xxxxxxx>
ADD OK
Destmb:
RETRY OK
AMIS msg
OPTS CC OTHR
Network msg
VIEW SEND
12 CallPilot Message Networking User Guide
P0919430 04
To send a message using Direct Addressing -
CallPilot
14 Press to end the session.
1Open your mailbox using .
Follow the voice prompts or the display button options to open
your mailbox.
2Press COMP or to open the Compose Message menu.
3Press SPEC or . This is the default number for special
addressing and can be changed by the System Administrator.
4Enter the phone number of the remote site and
press OK or £.
5Press OK or £ to continue
or
press ADD or to add special characters. See “Adding special
characters” on page 22.
Press OK or £ when you are done adding special characters.
6Enter the mailbox number at the remote site.
7Press OK or £ to accept the mailbox number.
8Press DONE or £
or
enter another address to send the message to.
9Press REC or to record your message.
The message you record must be longer than three seconds. The
system times out after five seconds of silence.
10 Press OK or £ when you are done recording
or
press REREC or to rerecord your message.
You can press to add message options of Urgent,
Acknowledged or Timed delivery.
11 Press SEND or to send the message.
12 Press to end the session.
0 new 0 saved
PLAY REC ADMIN
No messages
COMP MBOX EXIT
To:
NAME SPEC CNCL
Dest ph:
RETRY OK
<xxxxxxx>
ADD OK
Dest mb:
RETRY OK
<xxxx>
RETRY OK
To:
NAME SPEC DONE
Empty
REC
Recording...
REREC OK
Rec stopped
PLAY DEL SEND
Msg delivered

CallPilot Message Networking User Guide 13
CallPilot Message Networking User Guide
Replying to network messages
You can reply to a network message using the Reply Feature. You must have the network Reply
Feature enabled in order to reply to a message. For more information, ask your System
Administrator.
To reply to a network message -
Norstar Voice Mail
1Open your mailbox using .
Follow the voice prompts or the display button options to open
your mailbox.
2Press PLAY or to play your new messages
or
press to listen to your saved messages.
3After you listen to the message, press REPLY
.
4Press MSG.
If you are replying to a message with more than one recipient, go
to step 5.
If you are replying to a message with one recipient, go to step 6.
5If you are replying to a message that has more than one recipient:
press SNDR to send your reply only to the sender
or
press ALL to send your reply to all the people that received the
message.
6Record your reply message.
The message you record must be longer than three seconds. The
system times out after five seconds of silence.
7Press OK to end your recording.
8Press OK to accept your recording.
If you are replying to a digital message, go to step 9.
If you are replying to an AMIS message, go to step 10.
1 new 4 saved
PLAY REC ADMIN
End of message
REPLY ERASE NEXT
Reply netwrk msg
MSG QUIT
Reply to:
SNDR ALL
Record message:
Record message:
RETRY PAUSE OK
Accept rec?
RETRY PLAY OK
14 CallPilot Message Networking User Guide
P0919430 04
To reply to a network message -
CallPilot
9Press SEND to send the message
or
press OPTS to assign message delivery options:
•for digital destinations, Certified, Urgent, Timed Delivery,
or Private.
•for AMIS destinations, Certified, Urgent, or Timed
Delivery, but NOT Private
or press CC to send the message to another recipient.
10 Press OTHR to go to the next display and review or send the
message as it is
or
press OPTS to assign message delivery options:
•for digital destinations, Certified, Urgent, Timed Delivery,
or Private.
•for AMIS destinations, Certified, Urgent, or Timed
Delivery, but NOT Private
or press CC to send the message to another recipient.
11 Press SEND to transmit the message.
12 Press to end the session.
1Open your mailbox using .
Follow the voice prompts or the display button options to open
your mailbox.
2Press PLAY or to play your new messages
or
press to listen to your saved messages.
3After you listen to your messages, press RESP or .
If you press , go to step 5.
4Press REPLY or to reply to the message
or
press FORW or to forward the message
or
press to reply to all the recipients of the message.
Networking
OPTS CC SEND
Will deliver
AMIS msg
OPTS CC OTHR
Network msg
VIEW SEND
End of message
REPLY ERASE NEXT
End message
RESP DEL NEXT
Respond by
REPLY FORW

CallPilot Message Networking User Guide 15
CallPilot Message Networking User Guide
5Press REC or to record a message.
The message you record must be longer than three seconds. The
system times out after five seconds of silence.
6Press OK or £ when you are done recording.
You can press to add message options:
•for digital destinations, Certified, Urgent, Timed Delivery,
or Private
•for AMIS destinations, Certified, Urgent, or Timed
Delivery, but NOT Private.
7Press to send the message.
8Press to end the session.
Empty
REC
Recording...
REREC OK
Rec stopped
PLAY DEL SEND
16 CallPilot Message Networking User Guide
P0919430 04
Forwarding a Fax Message using Site-Based Addressing
You can forward a Fax message that you received to a Site-Based Address and add an introductory
voice message. The combined voice and Fax message appears as a Fax message in the destination
mailbox.
You can also forward a received Fax message to a Network Delivery Mailbox. Refer to
“Forwarding a Fax Message to a Network Delivery Mailbox” on page 19.
When you forward a Fax message, a new cover sheet is added to the original Fax message as part
of the new message. However, if the Fax message already has a CallPilot generated Fax cover
sheet, it is replaced by a new Fax forward cover sheet.
The cover sheet contains:
•the date and time the Fax is created
•the directory name and telephone number of the sender
•the telephone number of the recipient
•the Fax identification (ID) number
•the number of pages to follow
To forward a Fax message using Site-Based Addressing -
Norstar Voice Mail
Note: You can send and receive Fax messages only if the Fax option i s available for
your system. Ask your System Administrator if you can use Fax on your system. If Fax
is available, ask your System Administrator for a list of Fax sites on your network.
If the receiving site cannot receive a Fax message, you receive Non Delivery
Notification.
1Open your mailbox using .
Follow the voice prompts or the display button options to open
your mailbox.
2Enter your mailbox password and press OK or .
3Press PLAY or to play your new messages
or
press to play to your saved messages
until you find the Fax message that you want to forward.
4Press COPY or .
Pswd:
OTHR RETRY OK
1 new 4 saved
PLAY REC ADMIN
End of message
COPY ERASE NEXT
CallPilot Message Networking User Guide 17
CallPilot Message Networking User Guide
5Press MBOX or to forward the Fax message.
6Press YES or to record an introduction to the Fax message
or
press NO or if you do not want to record an introduction to the
forwarded Fax message. and go to step 9.
The message you record must be longer than three seconds. The
system times out after five seconds of silence.
7Press OK to end the recording.
8Press OK to accept the recording.
9Press .
10 Press NETW.
This display appears only if AMIS is enabled. If AMIS is not
enabled, the display in step 12 appears.
11 Enter the destination site prefix and the destination mailbox
number and press OK.
12 Press SEND to send the message as it is. Press OPTS to assign
message delivery options of Certified, Urgent or Timed Delivery.
Press CC to send the message to another recipient.
13 Press SEND to send the message now.
Copy fax
MBOX OTHR
Record intro?
YES NO
Record Message:
RETRY PAUSE OK
Accept rec?
RETRY PLAY OK
Address type?
NETW AMIS
Network
RETRY OK
<site name>
OPTS CC SEND
Network msg
OPTS CC SEND
18 CallPilot Message Networking User Guide
P0919430 04
To forward a Fax message using Site-Based Addressing -
CallPilot
1Open your mailbox using .
Follow the voice prompts or the display button options to open
your mailbox.
2Press to play the current message
or
press to play the next message, until you locate the Fax
message you want to forward.
3Press to forward the message.
4Enter the destination site prefix and mailbox number and press OK
or £.
5The display shows the destination site name and mailbox number.
6Press DONE or £.
7Press REC or .
8Press OK or £.
9Press SEND or .
To:
NAME SPEC CNCL
Site:<xxxx>
Dest mb:<xxxx>
To:
NAME SPEC DONE
Empty
REC
Recording...
REREC OK
Rec stopped
PLAY DEL SEND
CallPilot Message Networking User Guide 19
CallPilot Message Networking User Guide
Forwarding a Fax Message to a Network Delivery Mailbox
You can forward a Fax message that you received to a digital networking Network Delivery
Mailbox and add an introductory voice message that becomes part of the new message. The
message appears as a Fax message in the destination mailbox.
You can also forward a received Fax message using Site-Based Addressing. For more information,
refer to “Forwarding a Fax Message using Site-Based Addressing” on page 16.
A forwarded Fax message has a new cover sheet added to the original Fax message. However, if
the Fax message already has a CallPilot-generated Fax cover sheet, it is replaced by the new Fax
forward cover sheet.
The new cover sheet shows:
•the date and time the Fax was created
•the directory name and telephone number of the sender
•the telephone number of the recipient
•the Fax identification (ID) number
•the number of pages to follow
To forward a Fax message to a Network Delivery Mailbox -
Norstar Voice Mail
Note: You can send and receive Fax messages only on CallPilot or Business
Communications Manager systems that have the Fax option installed. Ask your System
Administrator for a list of Fax sites on your network.
If the receiving site cannot receive a Fax message, you receive Non Delivery
Notification.
1Open your mailbox using .
Follow the voice prompts or the display button options to open
your mailbox.
2Enter your mailbox password and press OK or .
3Press PLAY or to play your new messages
or
press NEXT or until you find the Fax message you want to
forward.
4Press COPY or .
Pswd:
OTHR RETRY OK
1 new 4 saved
PLAY REC ADMIN
End of message
COPY ERASE NEXT
20 CallPilot Message Networking User Guide
P0919430 04
5Press MBOX or to forward the Fax message.
6Press YES or to record an introduction to the Fax message
or
press NO or if you do not wish to record an introduction to the
forwarded Fax message and go to step 9.
The message you record must be longer than three seconds. The
system times out after five seconds of silence.
7Press OK to end the recording.
8Press OK to accept the recording.
9Enter the Network Delivery Mailbox number.
10 Press SEND to send the message
or
press OPTS to assign message delivery options of Certified, Urgent
or Timed Delivery
or
press CC to send the message to another recipient.
Miami,sales is an example. The Network Delivery Mailbox name
appears in the display.
Copy fax
MBOX OTHR
Record intro?
YES NO
Record intro:
RETRY OK
Accept rec?
RETRY PLAY OK
Mbox:
DIR QUIT
Miami,sales
OPTS CC SEND
Another copy?
YES QUIT
CallPilot Message Networking User Guide 21
CallPilot Message Networking User Guide
To forward a Fax message to a Network Delivery Mailbox -
CallPilot
1Open your mailbox using .
Follow the voice prompts or the display button options to open
your mailbox.
2Press to play the current message
or
press to play the next message, until you locate the Fax
message you want to forward.
3Press to forward the message.
4Enter the Network Delivery Mailbox number.
5The display shows the mailbox name.
6Press DONE or £.
7Press REC or to record an introductory voice message.
The message you record must be longer than three seconds. The
system times out after five seconds of silence.
8Press OK or £.
9Press SEND or .
To:
NAME SPEC CNCL
<xxxx>
To:
NAME SPEC DONE
Empty
REC
Recording...
REREC OK
Rec stopped
PLAY DEL SEND
22 CallPilot Message Networking User Guide
P0919430 04
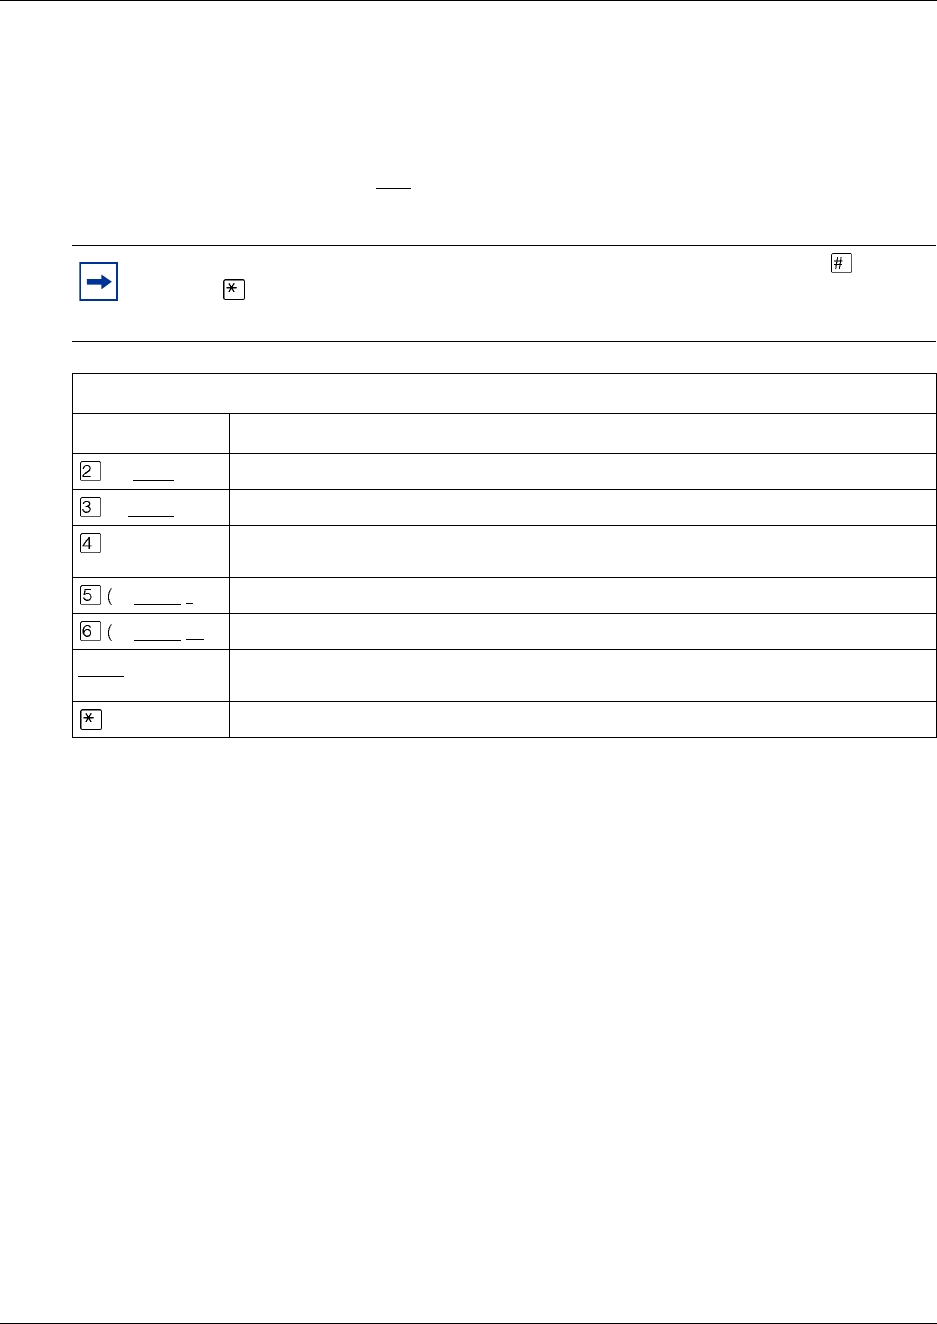
Adding special characters
Special characters are pauses or other dialing instructions that you can add if they are required to
access the network or a telephone number.
Follow the voice prompts or press ADD to add special characters to a telephone number. A
telephone number cannot be longer than 30 characters.
*These options are for two line display telephones only. If you use a one line display telephone,
use the keypad button shown.
Note: If you are adding special characters, do not press the dialpad buttons to enter
a #, or to enter a *. Press the button directly below the option on a two line display
telephone, or listen to the voice prompts for how to enter these characters.
Adding special characters to a telephone number
Press Description
or DI G S *to resume adding digits to the destination phone number
or PAUS*to enter a timed pause that appears as P on the display. Pauses are four seconds long.
to recognize dial tone (behind PBX). The Recognize Dial Tone special character
appears as D on the display.
or OTHR #
)* to enter a #
or OTHR *)*to enter a *
TONE*to recognize dial tone (behind PBX). The Recognize Dial Tone special character
appears as D on the display.
to cancel and retry
