Avaya Multimedia Call Center Users Manual Set Up And Operation Guide
2015-06-01
: Avaya Avaya-Multimedia-Call-Center-Users-Manual-735515 avaya-multimedia-call-center-users-manual-735515 avaya pdf
Open the PDF directly: View PDF ![]() .
.
Page Count: 50
- Multimedia Call Center
- Set Up and Operation Guide
- About Multimedia Call Center
- Setting up Multimedia Call Center
- About setting up Multimedia Call Center
- Enabling a Software Authorization Code
- Setting Multimedia Call Center parameters
- Assigning routing to Multimedia Call Center calls
- Assigning a callback route for Multimedia Call Center
- Assigning an outgoing line to a line pool
- Creating a Multimedia Call Center dial plan
- Understanding how Multimedia Call Center calls work with Intelligent Overflow rules
- Multimedia Call Center agents
- Multimedia Call Center messages
- About Multimedia Call Center messages
- Multimedia Call Center message templates
- Call setup page for first-time callers
- Call setup page for subsequent callers
- Voice button unavailable message
- No agents logged on message
- Off-hours message
- Bad calling preferences message
- Choose how to connect message
- Web refresh message
- Session completed message
- User busy message
- Server busy message
- Make call failed message
- Preferences message
- Alerting message
- No answer message
- Recording Multimedia Call Center announcements
- Customizing web pages
- Web page lists
- Viewing reports, active calls and log files
- Index

Part No. P0935737 02
Multimedia Call Center
Set Up and Operation Guide
Return
to Menu

2
P0935737 02
Multimedia Call Center Set Up and
Operation Guide
Copyright © 2001 Nortel Networks
All rights reserved. 2001.
The information in this document is subject to change without notice. The statements, configurations, technical data, and
recommendations in this document are believed to be accurate and reliable, but are presented without express or implied
warranty. Users must take full responsibility for their applications of any products specified in this document. The information in
this document is proprietary to Nortel Networks NA Inc.
The software described in this document is furnished under a license agreement and may be used only in accordance with the
terms of that license. The software license agreement is included in this document.
Trademarks
NORTEL NETWORKS is a trademark of Nortel Networks.
Microsoft, MS, MS-DOS, Windows, and Windows NT are registered trademarks of Microsoft Corporation.
All other trademarks and registered trademarks are the property of their respective owners.

3
Multimedia Call Center Set Up and Operation Guide
Contents
Chapter 1
About Multimedia Call Center. . . . . . . . . . . . . . . . . . . . . . . . . . . . . . . . . . . . . 5
Overview of Multimedia Call Center . . . . . . . . . . . . . . . . . . . . . . . . . . . . . . . . . . . . . . . 5
How Multimedia Call Center works for callers . . . . . . . . . . . . . . . . . . . . . . . . . . . . . . . . 5
The Multimedia Call Center caller interface . . . . . . . . . . . . . . . . . . . . . . . . . . . . . . 6
How Multimedia Call Center works for agents . . . . . . . . . . . . . . . . . . . . . . . . . . . . . . . . 6
The Multimedia Call Center agent interface . . . . . . . . . . . . . . . . . . . . . . . . . . . . . . 6
Multimedia Call Center call types . . . . . . . . . . . . . . . . . . . . . . . . . . . . . . . . . . . . . . . . . 7
PSTN voice and data calls . . . . . . . . . . . . . . . . . . . . . . . . . . . . . . . . . . . . . . . . . . . 7
How an agent-centric PSTN voice and data call works . . . . . . . . . . . . . . . . . . 7
Data only call . . . . . . . . . . . . . . . . . . . . . . . . . . . . . . . . . . . . . . . . . . . . . . . . . . . . . . 8
How a data only call works . . . . . . . . . . . . . . . . . . . . . . . . . . . . . . . . . . . . . . . . 8
Using CallPilot Manager to set up Multimedia Call Center . . . . . . . . . . . . . . . . . . . . . . 9
System requirements . . . . . . . . . . . . . . . . . . . . . . . . . . . . . . . . . . . . . . . . . . . . 9
Computer requirements . . . . . . . . . . . . . . . . . . . . . . . . . . . . . . . . . . . . . . . . . . 9
Browser requirements . . . . . . . . . . . . . . . . . . . . . . . . . . . . . . . . . . . . . . . . . . . . 9
Chapter 2
Setting up Multimedia Call Center . . . . . . . . . . . . . . . . . . . . . . . . . . . . . . . . 11
About setting up Multimedia Call Center . . . . . . . . . . . . . . . . . . . . . . . . . . . . . . . . . . . 11
Enabling a Software Authorization Code . . . . . . . . . . . . . . . . . . . . . . . . . . . . . . . . . . . 11
Setting Multimedia Call Center parameters . . . . . . . . . . . . . . . . . . . . . . . . . . . . . . . . . 12
Assigning routing to Multimedia Call Center calls . . . . . . . . . . . . . . . . . . . . . . . . . . . . 14
Assigning a callback route for Multimedia Call Center . . . . . . . . . . . . . . . . . . . . . . . . 16
Assigning an outgoing line to a line pool . . . . . . . . . . . . . . . . . . . . . . . . . . . . . . . . . . . 17
Creating a Multimedia Call Center dial plan . . . . . . . . . . . . . . . . . . . . . . . . . . . . . . . . 18
Understanding how Multimedia Call Center calls work with Intelligent Overflow rules 20
Chapter 3
Multimedia Call Center agents . . . . . . . . . . . . . . . . . . . . . . . . . . . . . . . . . . . 21
Setting up Multimedia Call Center agents . . . . . . . . . . . . . . . . . . . . . . . . . . . . . . . . . . 21
Enabling Multimedia Call Center agents . . . . . . . . . . . . . . . . . . . . . . . . . . . . . . . . . . . 21
Requirements for agents using Multimedia Call Center . . . . . . . . . . . . . . . . . . . . 21
Adding Multimedia Call Center agents to the Call Center . . . . . . . . . . . . . . . . . . . . . . 22
Installing Multimedia Call Center software on an agent’s computer . . . . . . . . . . . . . . 23
Configuring Multimedia Call Center on a Windows 95 system . . . . . . . . . . . . . . . 24
Configuring an agent's server settings . . . . . . . . . . . . . . . . . . . . . . . . . . . . . . . . . . . . 25

4 Contents
P0935737 02
Chapter 4
Multimedia Call Center messages . . . . . . . . . . . . . . . . . . . . . . . . . . . . . . . . 27
About Multimedia Call Center messages . . . . . . . . . . . . . . . . . . . . . . . . . . . . . . . . . . 27
Multimedia Call Center message templates . . . . . . . . . . . . . . . . . . . . . . . . . . . . . . . . 27
Call setup page for first-time callers . . . . . . . . . . . . . . . . . . . . . . . . . . . . . . . . . . . 28
Call setup page for subsequent callers . . . . . . . . . . . . . . . . . . . . . . . . . . . . . . . . . 29
Voice button unavailable message . . . . . . . . . . . . . . . . . . . . . . . . . . . . . . . . . . . . 30
No agents logged on message . . . . . . . . . . . . . . . . . . . . . . . . . . . . . . . . . . . . . . . 30
Off-hours message . . . . . . . . . . . . . . . . . . . . . . . . . . . . . . . . . . . . . . . . . . . . . . . . 31
Bad calling preferences message . . . . . . . . . . . . . . . . . . . . . . . . . . . . . . . . . . . . . 31
Choose how to connect message . . . . . . . . . . . . . . . . . . . . . . . . . . . . . . . . . . . . . 32
Web refresh message . . . . . . . . . . . . . . . . . . . . . . . . . . . . . . . . . . . . . . . . . . . . . . 32
Session completed message . . . . . . . . . . . . . . . . . . . . . . . . . . . . . . . . . . . . . . . . 33
User busy message . . . . . . . . . . . . . . . . . . . . . . . . . . . . . . . . . . . . . . . . . . . . . . . 33
Server busy message . . . . . . . . . . . . . . . . . . . . . . . . . . . . . . . . . . . . . . . . . . . . . . 33
Make call failed message . . . . . . . . . . . . . . . . . . . . . . . . . . . . . . . . . . . . . . . . . . . 34
Preferences message . . . . . . . . . . . . . . . . . . . . . . . . . . . . . . . . . . . . . . . . . . . . . . 34
Alerting message . . . . . . . . . . . . . . . . . . . . . . . . . . . . . . . . . . . . . . . . . . . . . . . . . 34
No answer message . . . . . . . . . . . . . . . . . . . . . . . . . . . . . . . . . . . . . . . . . . . . . . . 35
Recording Multimedia Call Center announcements . . . . . . . . . . . . . . . . . . . . . . . . . . 35
Customizing web pages . . . . . . . . . . . . . . . . . . . . . . . . . . . . . . . . . . . . . . . . . . . . . . . 36
An overview of customizing a page . . . . . . . . . . . . . . . . . . . . . . . . . . . . . . . . . . . . 36
Uploading web pages . . . . . . . . . . . . . . . . . . . . . . . . . . . . . . . . . . . . . . . . . . . . . . 37
Web page lists . . . . . . . . . . . . . . . . . . . . . . . . . . . . . . . . . . . . . . . . . . . . . . . . . . . . . . . 39
Creating web page lists . . . . . . . . . . . . . . . . . . . . . . . . . . . . . . . . . . . . . . . . . . . . . 39
Distributing web page lists . . . . . . . . . . . . . . . . . . . . . . . . . . . . . . . . . . . . . . . . . . 39
Chapter 5
Viewing reports, active calls and log files. . . . . . . . . . . . . . . . . . . . . . . . . . 41
About Multimedia Call Center reports . . . . . . . . . . . . . . . . . . . . . . . . . . . . . . . . . . . . . 41
Summary call report - all calls . . . . . . . . . . . . . . . . . . . . . . . . . . . . . . . . . . . . . . . . 41
Summary call report by skillset . . . . . . . . . . . . . . . . . . . . . . . . . . . . . . . . . . . . . . . 42
Detail call report - all calls . . . . . . . . . . . . . . . . . . . . . . . . . . . . . . . . . . . . . . . . . . . 42
Detail call report by skillset . . . . . . . . . . . . . . . . . . . . . . . . . . . . . . . . . . . . . . . . . . 43
Generating Multimedia Call Center reports . . . . . . . . . . . . . . . . . . . . . . . . . . . . . . . . . 44
Monitoring active calls . . . . . . . . . . . . . . . . . . . . . . . . . . . . . . . . . . . . . . . . . . . . . . . . . 46
Viewing log files . . . . . . . . . . . . . . . . . . . . . . . . . . . . . . . . . . . . . . . . . . . . . . . . . . . . . . 47
Index . . . . . . . . . . . . . . . . . . . . . . . . . . . . . . . . . . . . . . . . . . . . . . . . . . . . . . . . 49

5
Multimedia Call Center Set Up and Operation Guide
Chapter 1
About Multimedia Call Center
This guide assists a Call Center administrator with installing and configuring Multimedia Call
Center for Nortel Networks Business Communications Manager 2.5.
In this document the server that Multimedia Call Center is installed on is referred to as
“voicebutton.<domain>”
where:
• <domain> is the domain name of the business, for example nortelnetworks.com
• “voicebutton” is the host name of the server within the domain.
The server is usually called “voicebutton”, although any unique hostname within the domain is
acceptable.
Overview of Multimedia Call Center
With Multimedia Call Center agents and callers can have multimedia calls that include:
• speaking over a Public Switched Telephone Network (PSTN) voice connection
• text chatting
• exchanging and viewing web pages
• viewing screen captures sent by an agent
How Multimedia Call Center works for callers
When callers on a website click a voice button html image the “Call setup page for first-time
callers” on page 28 appears for first-time callers, or the “Call setup page for subsequent callers” on
page 29 appears for subsequent callers.
In the call setup page callers specify their calling preferences. Callers can access the media types
based on their needs and resources. Callers with separate data and PSTN voice lines can have a
PSTN voice call while they view, receive or even send web pages to agents. For information on
Multimedia Call Center call types see “Multimedia Call Center call types” on page 7.
After a caller specifies their preferences, the voice button call enters the Call Center. Based on the
rules created by the Call Center Administrator, the request for an agent is sent to the appropriate
skillset. If an agent is not immediately available, the caller can receive periodic html messages
(web refresh). The Call Center Administrator programs these messages. The messages can thank
callers for their interest, inform them that there are no agents currently available, and tell them that
they will be connected to the first available agent.
When the call is answered by an agent, the “The Multimedia Call Center caller interface” on page
6 appears in the upper frame of the caller’s web browser.
6 Chapter 1 About Multimedia Call Center
P0935737 02
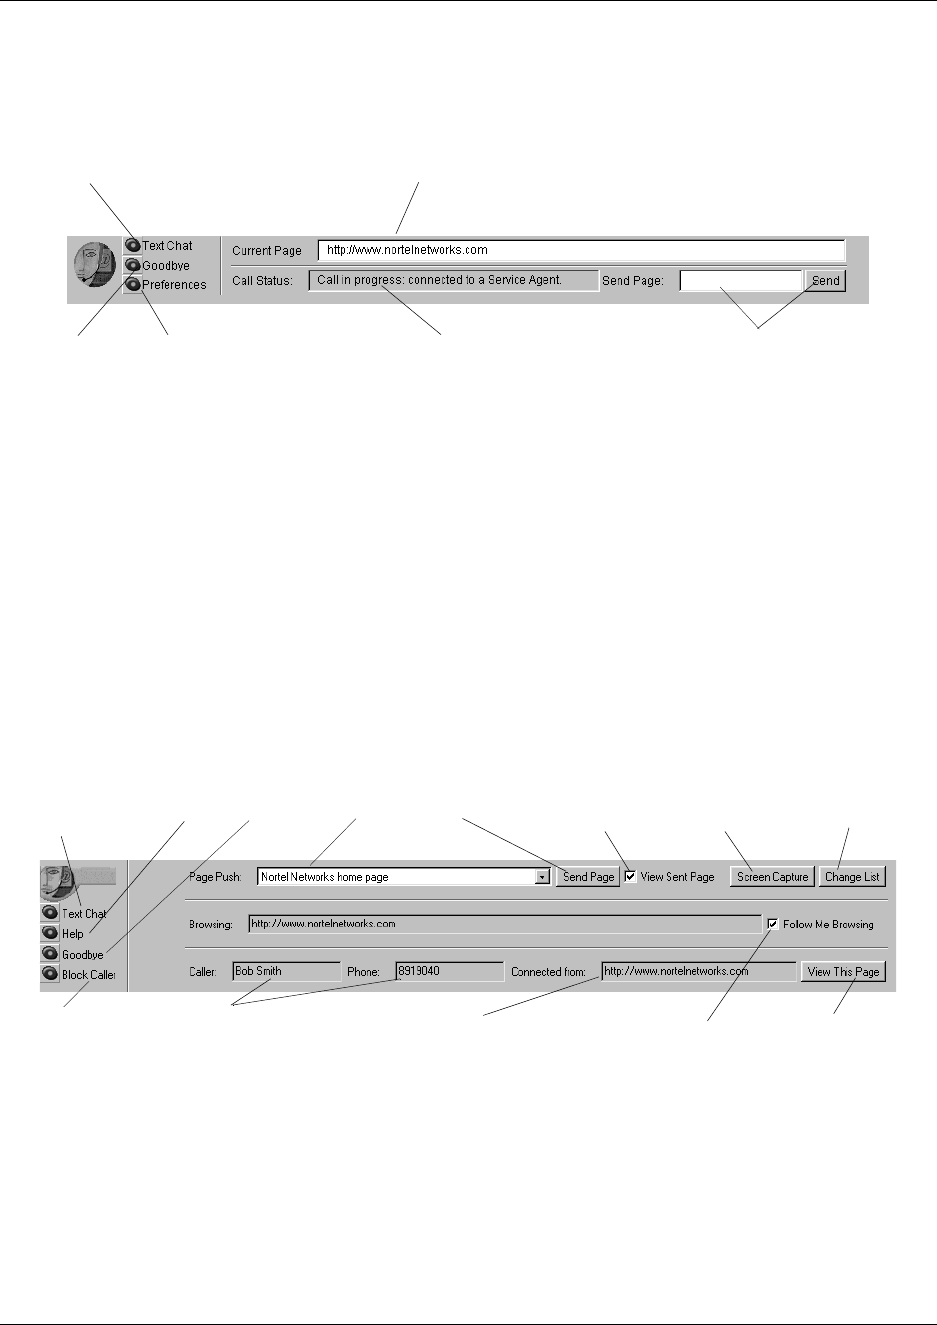
The Multimedia Call Center caller interface
How Multimedia Call Center works for agents
Multimedia Call Center agents communicate with callers through the Multimedia Call Center
agent interface that appears in the top of their web browser.
The Multimedia Call Center agent interface
Ends the
call
Sends a web page
to the agent
Opens the text
chat interface
Displays the caller’s
preferences in the lower
frame of the browser. Callers
can update their preferences.
Shows the url of the currently
displayed web page
Shows the agent’s name and the
caller’s phone number
Shows the url of the
web page the caller
clicked the voice
button on
Takes a screen
capture of a web
page, window,
desktop, etc.
Displays in the
Agent’s browser
the web page the
caller clicked the
voice button on
Opens
online
Help
Shows the name and
phone number the caller
set in the Caller
Preferences page
Initiates a
text chat
with the
caller
Contains a
preset list of
web pages
Ends
the
session
Sends a
web page
from the list
Shows the
web page
pushed to
the caller
Changes
the list of
web
pages
Sends the caller
the web page the
agent clicked the
link for
Blocks a
caller

Chapter 1 About Multimedia Call Center 7
Multimedia Call Center Set Up and Operation Guide
Multimedia Call Center call types
PSTN voice and data calls
Callers with a PSTN voice connection and a data connection, and callers with only a data
connection can have a multimedia session with a Multimedia Call Center agent.
PSTN voice and data calls use agent-centric routing.
How an agent-centric PSTN voice and data call works
For this type of call, the caller has a separate PSTN voice and internet connection, and is not using
their telephone.
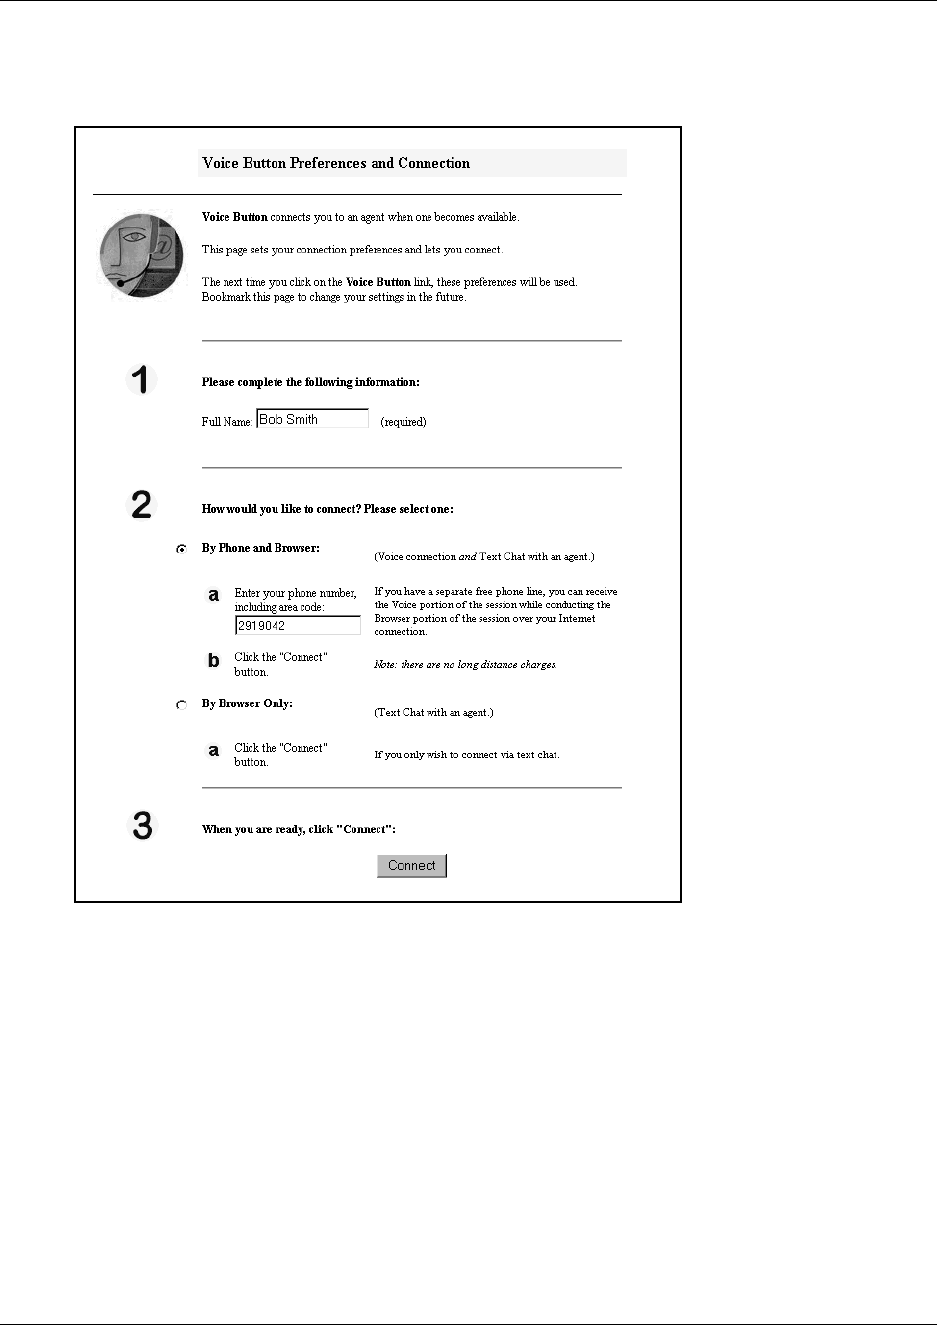
1The caller clicks the voice button icon on a web page.
2The call setup page “Call setup page for first-time callers” on page 28 appears for first-time
callers. If the caller is not a first-time caller, step 4 occurs.
3The caller enters their phone number and area code. The caller can specify that their call is:
•by browser only (a text chat with an agent)
•by phone and browser (a PSTN voice call and text chat with an agent)
4A request for an agent is sent over the IP network to the call center.
5While the caller is waiting web refresh html pages are displayed in their browser that
correspond to the announcement they would hear if they were on a PSTN voice call. A new
web page can be pushed for every Call Center announcement.
6When a Multimedia Call Center agent becomes available, the caller's phone rings.
7The caller answers the call.
8The Call Center routes the PSTN voice portion of the call to the Multimedia Call Center agent.
The agent's set rings and displays “www” to signify that the call is a voice button call.
9The agent answers the call on their set and the agent’s and the caller's audio path are
connected, and the agent and caller's web pages are synchronized. “The Multimedia Call
Center agent interface” on page 6 appears in the agent’s browser and the “The Multimedia Call
Center caller interface” on page 6 appears in the caller’s browser.
10 The agent pushes appropriate web pages to the caller. The agent can have a text chat session
with the caller. Text chat is controlled by the monitor parameter.
Agent-centric call After a caller clicks voice button the Call Center phones the caller when an agent
is available. The Call Center then connects the call to the agent.

8 Chapter 1 About Multimedia Call Center
P0935737 02
Data only call
For this type of call, the caller needs an Internet connection. A data only call can include text chat
and pushed web pages.
How a data only call works
1The caller clicks the voice button icon on a web page.
2While the caller is waiting web refresh html pages are displayed in their browser that
correspond to the announcement they would hear if they were on a PSTN voice call. A new
web page can be pushed for every Call Center announcement along with information such as
the number of agents in the skillset and the number of calls in the skillset. For a full list of CGI
parameters see the Multimedia Call Center Web Developer Guide.
3When a Multimedia Call Center agent is available “The Multimedia Call Center agent
interface” on page 6 appears in the agent’s browser and notifies the agent that they have a call.
4“The Multimedia Call Center caller interface” on page 6 appears in the caller’s browser.
5The agent pushes appropriate web pages to the caller. The agent can have a text chat session
with the caller.

Chapter 1 About Multimedia Call Center 9
Multimedia Call Center Set Up and Operation Guide
Using CallPilot Manager to set up Multimedia Call Center
You set up Multimedia Call Center using CallPilot Manager, the web-based administration tool.
You access CallPilot Manager on a web browser from a computer on your network.
System requirements
Before you use CallPilot Manager to set up Multimedia Call Center, you must have your Business
Communications Manager 2.5 system configured and Professional Call Center enabled. For how
to enable a software authorization code, refer to “Enabling a Software Authorization Code” on
page 11.
Computer requirements
The computer you use to run CallPilot Manager must have:
•WinNT or Windows workstation running P133 or later CPU (or compatible)
•64 MB RAM, 10 MB disk space
•Minimum screen resolution of 1024 X 768 pixels
Browser requirements
To use CallPilot Manager you must have:
•Java Virtual Machine 5.0 (build 5.0.0.3188 or later)
•either Microsoft Internet Explorer 4.0 or later, or Netscape Communicator 4.0.5 or later, but
not Netscape 6.0
If you use Netscape Communicator, set the following parameters:
•Enable Java: on
•Cached document comparison: every time
•If you use Netscape Communicator version 4.77 and not all the Call Center settings shown in
this guide appear in your browser, refresh the browser by clicking the View menu and clicking
Reload. If you still cannot view the settings, upgrade your browser.
If you use Microsoft Internet Explorer, set the following parameters:
•Check for newer versions: every visit to the page
•Java JIT compiler enabled: on
For more information about these settings, refer to your web browser online Help.
For more information about using CallPilot Manager or Nortel Networks Call Center, refer to the
CallPilot Manager Set Up and Operation Guide and the Nortel Networks Call Center Set Up and
Operation Guide.

10 Chapter 1 About Multimedia Call Center
P0935737 02

11
Multimedia Call Center Set Up and Operation Guide
Chapter 2
Setting up Multimedia Call Center
About setting up Multimedia Call Center
Setting up Multimedia Call Center involves:
•Enabling a Software Authorization Code
•Setting Multimedia Call Center parameters
•Assigning routing to Multimedia Call Center calls
•Assigning an outgoing line to a line pool
•Creating a Multimedia Call Center dial plan
•Understanding how Multimedia Call Center calls work with Intelligent Overflow rules
Enabling a Software Authorization Code
You enable Multimedia Call Center by enable the Multimedia Call Center software authorization
code on the Business Communications Manager 2.5 Unified Manager. You must have Professional
Call Center installed before you can set up Multimedia Call Center.
To enable a software authorization code
1Point your web browser to the URL
http://voicebutton.<domain>:6800
where <domain> is the domain name of Business Communications Manager 2.5.
The Business Communications Manager 2.5 Unified Manager screen appears.
2Click the Configure button.
The Login screen appears.
3In the User ID box type your user ID.
The default user ID is supervisor.
4In the Password box type your password.
The default password is visor.
5Click the Login button.
The Unified Manager screen appears.
6Click the System key.
7Click the Licensing heading.
The Licensing Setting screen appears.
8On the Configuration menu click Add a Keycode.
The Applied Keycodes screen appears.
9In the Keycode box type the number of the keycode you want to enable.
10 Click the Save button.
11 Do not log off Business Communications Manager 2.5.
Go to “Setting Multimedia Call Center parameters” on page 12.
12 Chapter 2 Setting up Multimedia Call Center
P0935737 02
Setting Multimedia Call Center parameters
You must set the system name, public host name, signature, and how long the log files are kept.
To set Multimedia Call Center parameters
1On the Unified Manager, click the Services key.
2Click the Voice Button heading.
The Voice Button screen appears.
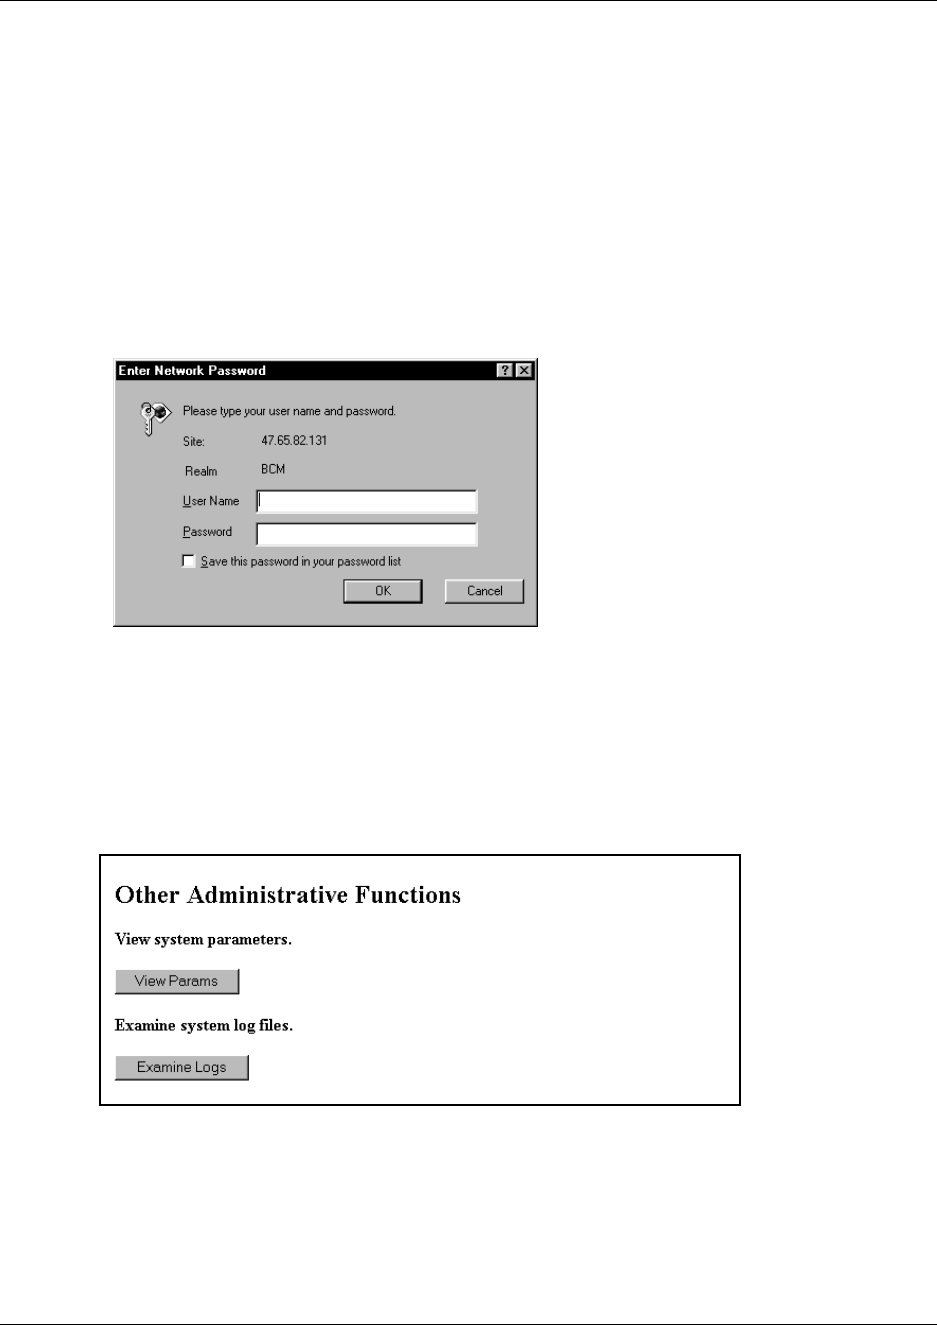
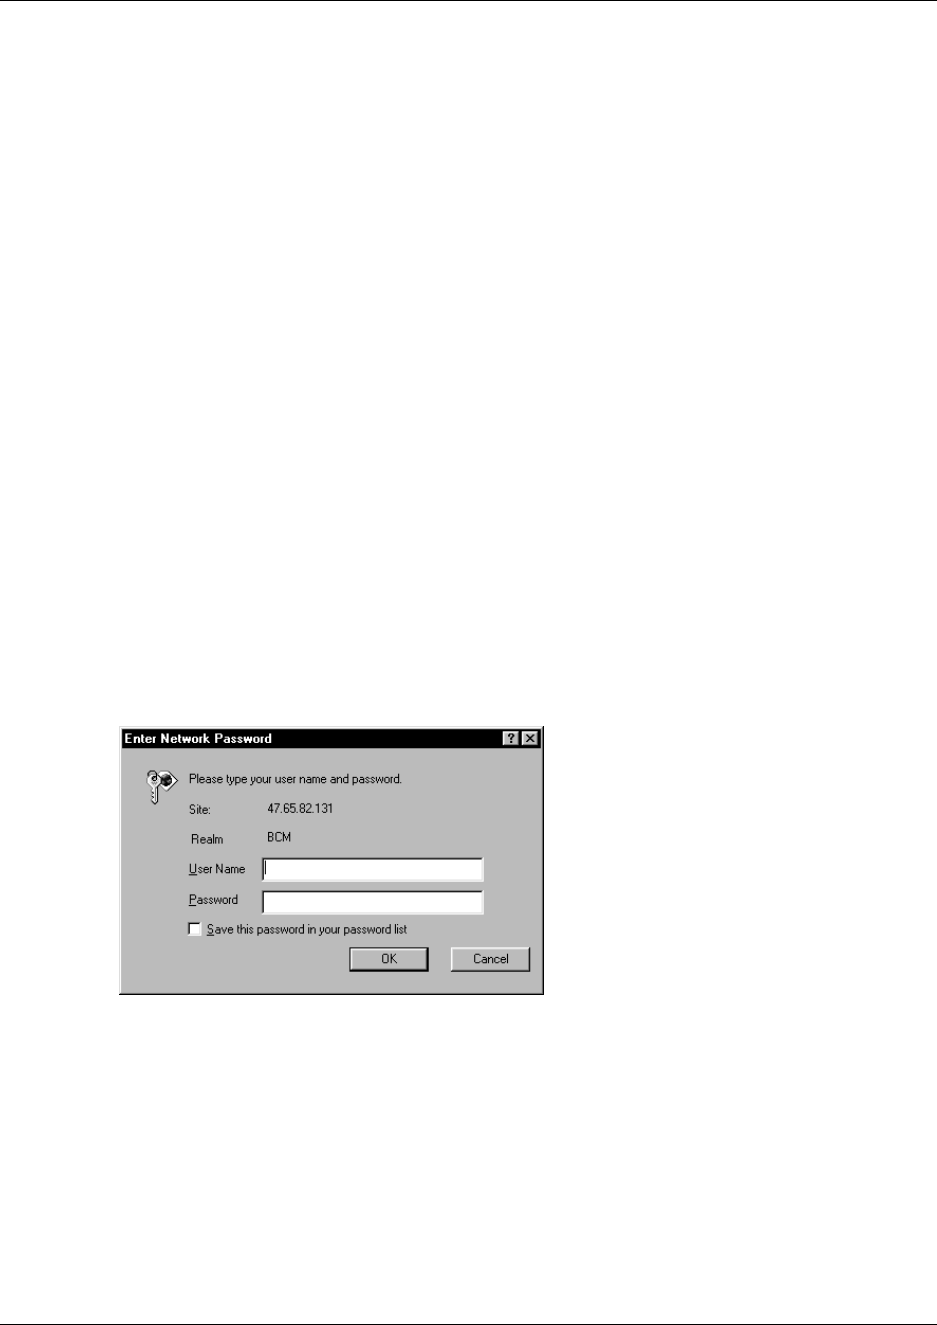
3On the Tools menu click Voice Button Admin.
The Enter Network Password dialog box appears.
4In the User Name box type your user name.
The default user name is supervisor.
5In the Password box type your password.
The default password is visor.
6Click the OK button.
The System Administration page appears.
Chapter 2 Setting up Multimedia Call Center 13
Multimedia Call Center Set Up and Operation Guide
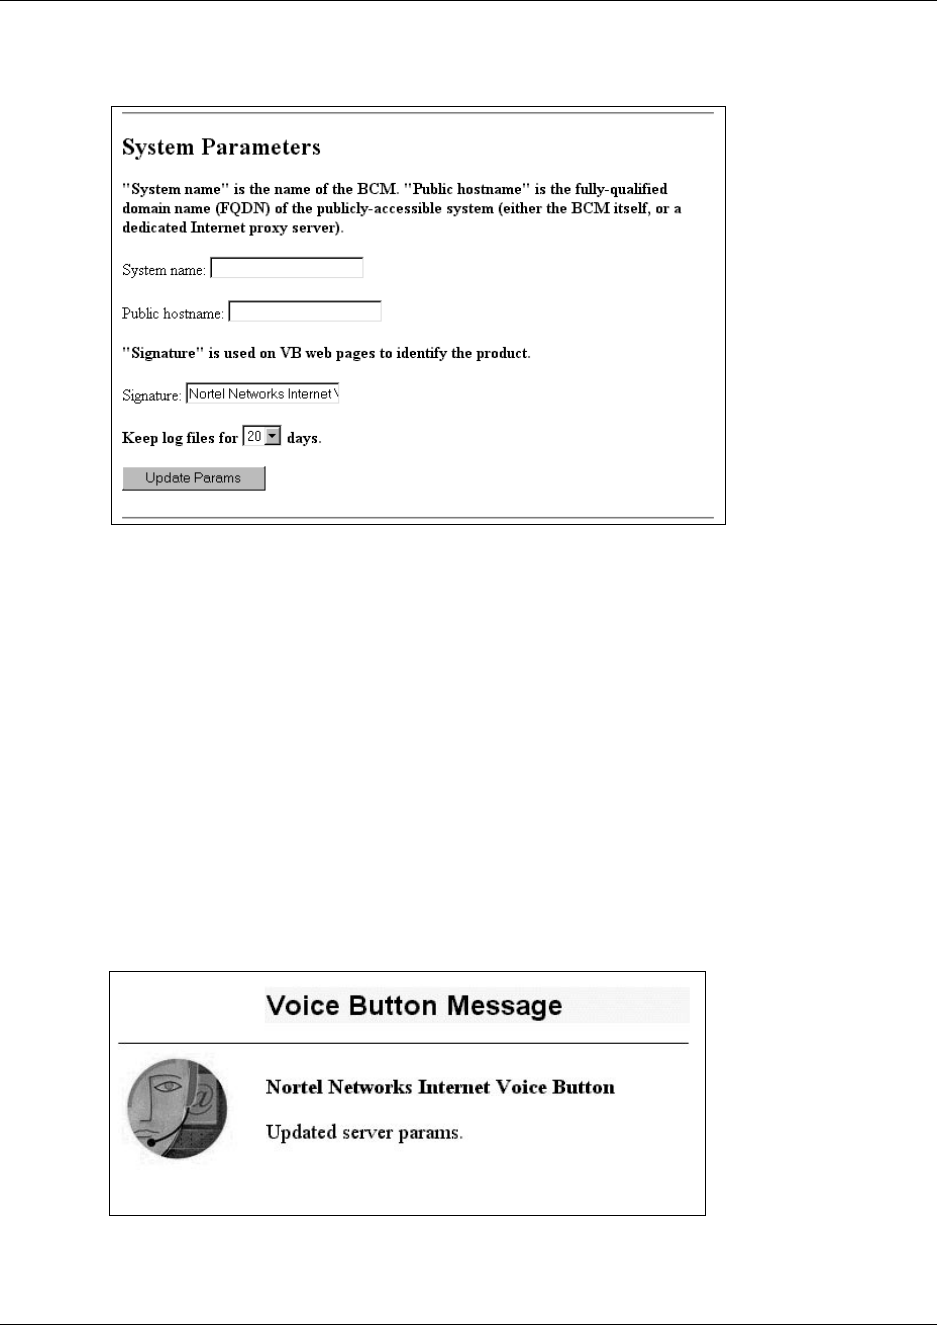
7Under the Other Administrative Functions heading, click the View Params button.
The System Parameters page appears.
8In the System name box type the host name of your Business Communications 2.5 system.
9In the Public host name box type the appropriate public host name for your system. Ask your
network administrator how your system is set up.
•If you have no firewall, or you use Business Communications Manager 2.5 as the firewall,
enter the external IP address of your Business Communications Manager system.
• If you use a dedicated firewall/proxy server, enter its external IP address.
10 In the Signature box enter the signature you want to use. The signature is a tag that appears on
Unified Manager pages for Multimedia Call Center. The default signature is Nortel Networks
Internet Voice Button. You can change the signature.
11 From the Keep log files for list box, select how long you want to keep log files. The default is
20 days.
12 Click the Update Params button.
A message appears that the parameters are updated.
13 Do not log off Business Communications Manager 2.5.
Go to “Assigning routing to Multimedia Call Center calls” on page 14.

14 Chapter 2 Setting up Multimedia Call Center
P0935737 02
Assigning routing to Multimedia Call Center calls
You must assign how Multimedia Call Center calls are routed. The callback number information
for a Multimedia Call Center call can be used to move the call to another skillset or change the
call’s priority within the skillset. The multimedia callback number is processed by the CLID
column.
To assign routing to Multimedia Call Center calls
1On the Unified Manager, click the Services key.
2Click the Voice Mail heading.
The Voice Mail screen appears.
3On the Tools menu click CallPilot Manager Admin.
The Administration Login screen appears.
4In the Password box type your system administrator password.
5Click the Submit button.
The CallPilot Manager screen appears.
6Click the Call Center heading.
7Click the CLID/DNIS Routing Table link.
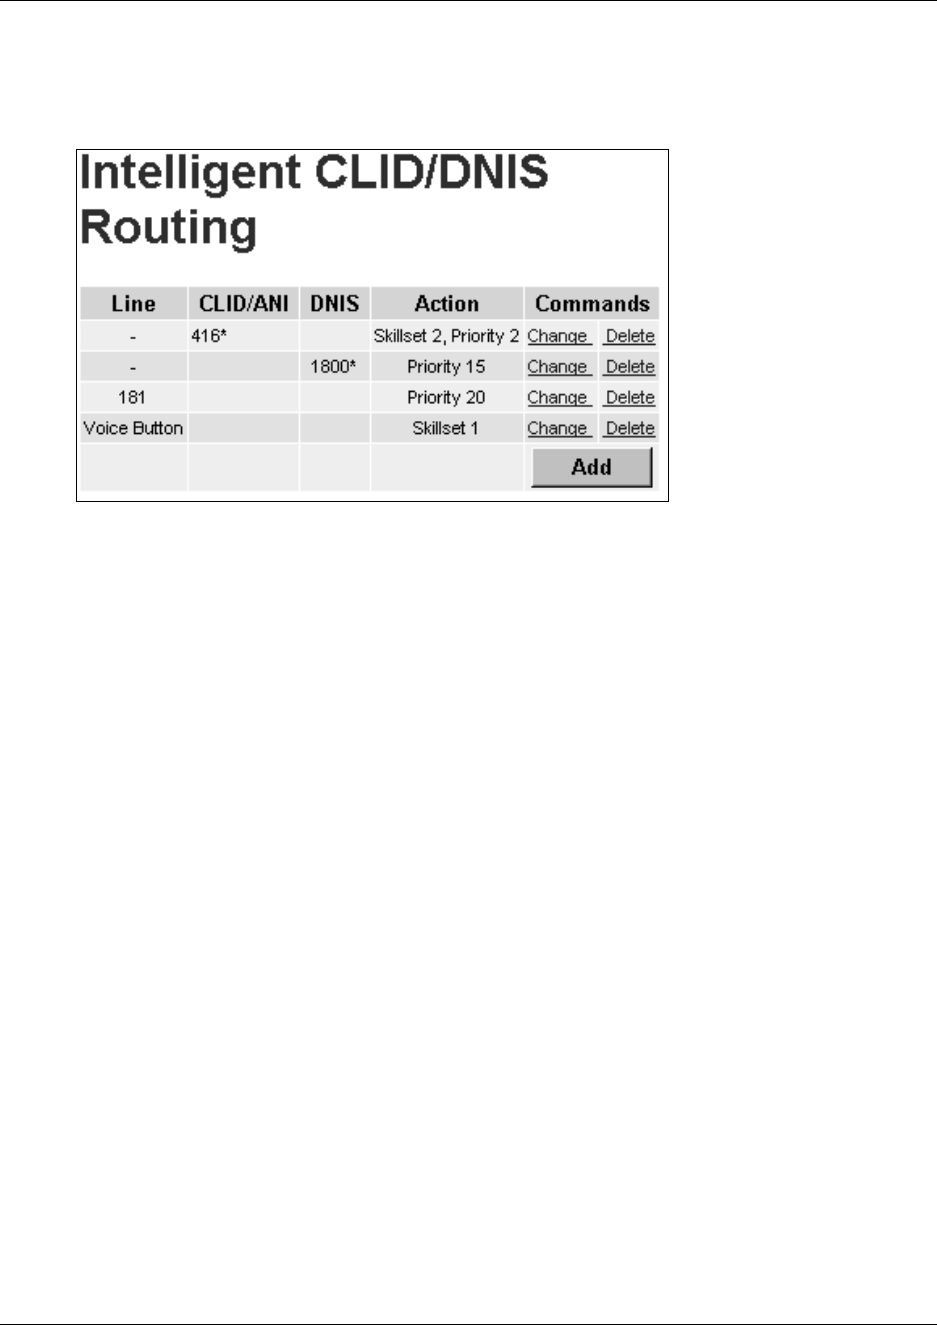
The Intelligent CLID/DNIS Routing page appears.
8Click the Add button to assign how Multimedia Call Center calls are routed.
The CLID/DNIS Setup page appears.
9Select how you want Multimedia Call Center calls to be routed:
•If you want Intelligent CLID/DNIS routing to apply to Multimedia Call Center calls,
select the Voice Button check box and do not enter information in the Line or DNIS
boxes.
•Select the action and call priority.
•Click the Submit button.
The Intelligent CLID/DNIS Routing page appears.
The routing rule you created appears in this table.
10 Do not log off CallPilot Manager.
Go to “Assigning a callback route for Multimedia Call Center” on page 16 and assign a
callback route.
Note: The skillset defined in the html tag is used unless there is an overriding rule in the
CLID/DNIS table.
Chapter 2 Setting up Multimedia Call Center 15
Multimedia Call Center Set Up and Operation Guide
A sample Multimedia Call Center rule appears in the CLID/DNIS Routing table shown below. A
dash ("-") denotes that CLID/ANI or DNIS routing is ignored. The DNIS column always displays
a dash beside Multimedia Call Center rules.

16 Chapter 2 Setting up Multimedia Call Center
P0935737 02
Assigning a callback route for Multimedia Call Center
A callback route must be set up for Call Center to connect to the caller’s phone. You can program
the callback route on a per skillset basis by programming the skillset mailbox, or on a system-wide
basis by using the system administration mailbox.
The callback route is determined as follows:
•If you program a skillset to have a callback route associated with it, Multimedia Call Center
uses the callback route that you have programmed.
•If you do not program a skillset to have a callback route, but you program the system
administration mailbox to have a callback route associated with it, Multimedia Call Center
uses the callback route that you have programmed.
•If you do not program a skillset or the system administrator mailbox to have a callback route,
Multimedia Call Center uses Pool A.
To assign a callback route for a skillset or the system administrator mailbox
1On CallPilot Manager, click the Mailbox Administration heading.
The Mailbox List page appears.
2Click the Change link for the mailbox that you want to assign a callback route to, either the
system administrator mailbox or the skillset mailbox.
3Select an Outdial Type and, if necessary, set the line or pool number to the values you want to
use for the Outdial route. For more information on Outdial route, refer to the CallPilot
Manager Set Up and Operation Guide.

Chapter 2 Setting up Multimedia Call Center 17
Multimedia Call Center Set Up and Operation Guide
Assigning an outgoing line to a line pool
You must assign an outgoing line to a line pool so that Multimedia Call Center accepts callback
calls. In this example, a line is assigned to Pool A.
To assign an outgoing line to a line pool
1On a telset, enter ≤·°fi to display the Voice Mail DN.
2Point your web browser to the URL
http://voicebutton.<domain>:6800
where <domain> is the domain name of Business Communications Manager 2.5.
The Business Communications Manager 2.5 Unified Manager screen appears.
3Click the Configure button.
The Login screen appears.
4In the User ID box type your user ID.
The default user ID is supervisor.
5In the Password box type your password.
The default password is visor.
6Click the Login button.
The Unified Manager screen appears.
7Click the Services key.
8Click the Telephony Services key.
9Click the Terminals & Sets key.
10 Click the key for the Voice Mail DN.
11 Click the Line access heading.
12 From the Prime Line list box select Pool A.
13 Click the Services key.
14 Click the Telephony Services key.
15 Click the General Settings key.
16 Click the Access Codes key.
17 Click the Line pool codes key.
18 Click the Pool A heading.
The Pool A screen appears.
19 Make sure that Access code is set to 9.
20 Click the Services key.
21 Click the Telephony Services key.
22 Click the Lines key.
23 Click the key for the number of the line you want to use for outdialing.
24 Click the Trunk/line data heading.
25 Make sure that Pool A is selected in the Line type list box.

18 Chapter 2 Setting up Multimedia Call Center
P0935737 02
Creating a Multimedia Call Center dial plan
You can create a callback dial plan that restricts Multimedia Call Center from calling certain
numbers. When you create a dial plan you add restrictions to the lines that Business
Communications Manager 2.5 uses for callback.
You add the restrictions to the Voice Mail main DN. You can display the Voice Mail main DN by
entering ≤·°fi on a set.
To add a restriction to the Business Communications Manager system
1Point your web browser to the URL
http://voicebutton.<domain>:6800
where <domain> is the domain name of Business Communications Manager 2.5.
The Business Communications Manager 2.5 Unified Manager screen appears.
2Click the Configure button.
The Login screen appears.
3In the User ID box type your user ID.
The default user ID is supervisor.
4In the Password box type your password.
The default password is visor.
5Click the Login button.
The Unified Manager screen appears.
6Click the Services key.
7Click the Telephony Services key.
8Click the Restriction Filters key.
9Click the key for the filter you want to add a restriction to.
10 Click the Restriction heading.
11 Click the Add button.
The Add Restrictions property sheet appears.
12 In the Digits box, type the digits you want to restrict.
13 Click the Services key.
14 Click the Telephony Services key.
15 Click the Terminals and Sets key.
16 Click the key for the Voice Mail DN.
17 Click the Restrictions key.
Note: If you add a restriction to the Voice Mail DN you also restrict all outcalling calls,
including external transfers from CCR Trees, Off-premise Message Notification and
Outbound Transfers.

Chapter 2 Setting up Multimedia Call Center 19
Multimedia Call Center Set Up and Operation Guide
18 Click the Set Restrictions key.
19 Click the Schedules key.
20 Click the Normal heading.
21 In the Use filter box type the filter number.
For more information on programming dialing plans and filters refer to the “Configuring Business
Communications Manager 2.5 Services" section of the Business Communications Manager 2.5
Programming Operations Guide.

20 Chapter 2 Setting up Multimedia Call Center
P0935737 02
Understanding how Multimedia Call Center calls work with
Intelligent Overflow rules
Some Intelligent Overflow Rules apply only to a call that is connected to the caller with a PSTN
line. Agent-centric calls are not connected over the PSTN network until an agent comes free.
Before an agent-centric call is connected to an agent, these actions do not apply:
•Move to Skillset Mailbox
•Move to external or internal DN
Some Intelligent Overflow Rules apply even if the call is an agent-centric Multimedia Call Center
call without a PTSN connection.
Rules with these actions apply to all calls:
•Overflow to other skillsets
•Move to another skillset
•Change priority of call

21
Multimedia Call Center Set Up and Operation Guide
Chapter 3
Multimedia Call Center agents
Setting up Multimedia Call Center agents
Setting up Multimedia Call Center agents involves:
•Enabling Multimedia Call Center agents
•Adding Multimedia Call Center agents to the Call Center
•Installing Multimedia Call Center software on an agent’s computer
•Configuring an agent's server settings
Enabling Multimedia Call Center agents
With the Nortel Networks Call Center Software Authorization Code you can enable your all Call
Center agents as Multimedia Call Center agents. If you need more agents, you can purchase
additional Agent Software Authorization Codes that enable an additional 1, 4, 8, 16, 32 agents.
To enable Multimedia Call Center agents
1Follow the steps in “Enabling a Software Authorization Code” on page 11 to apply the Call
Center Agent Software Authorization Code for the number of agents you want to enable.
2Do not log off Business Communications Manager 2.5.
Follow the steps in “Adding Multimedia Call Center agents to the Call Center” on page 22 to
add Multimedia Call Center agents to Call Center.
Requirements for agents using Multimedia Call Center
To use Multimedia Call Center, agents must have:
•Internet Explorer 5.5
•any of these operating systems: Windows 95B, Windows 98SE, Windows NT4 SP5 (or later),
Windows 2000 or Windows ME
•a Pentium II processor at 233MHz, minimum (Pentium III at 500MHz or higher
recommended)
•64 MB of RAM, minimum (128 MB or higher recommended)
• 30 MB of free hard drive space
•a network and an Internet connection
22 Chapter 3 Multimedia Call Center agents
P0935737 02
Adding Multimedia Call Center agents to the Call Center
To add Multimedia Call Center agents to the Call Center
1On the Unified Manager, click the Services key.
2Click the Voice Mail heading.
The Voice Mail screen appears.
3On the Tools menu click CallPilot Manager Admin.
The Administration Login screen appears.
4In the Password box type the system administrator password.
5Click the Submit button.
The CallPilot Manager Main page appears.
6Click the Call Center heading.
7Click the Agent List link.
The Agent List page appears.
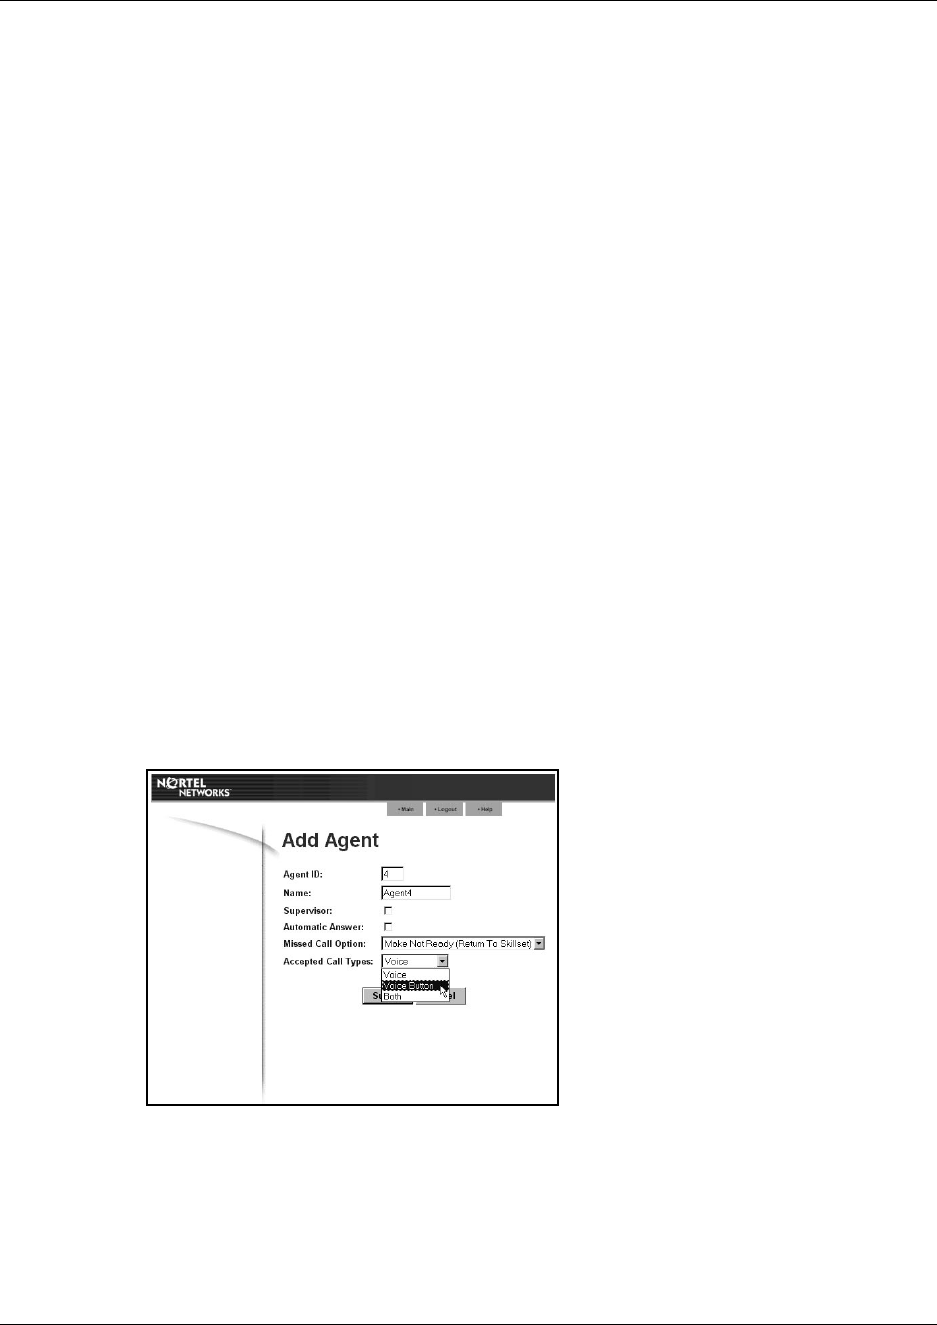
8Add a new Multimedia Call Center agent to the Call Center or change a Call Center agent’s
settings:
•If the agent has been added to Call Center and you want to enable them as a Multimedia
Call Center agent, click the Change link for the agent.
The Change Agent page appears.
•If the agent has not been added to Call Center and you want to add a new agent as a
Multimedia Call Center agent, click the Add button.
The Add Agent page appears.
9From the Accepted Call Types list box select whether the agent takes voice button calls or
Call Center and voice button calls:
•select Voice Button if you want the agent to take voice button calls
•select Both if you want the agent to take voice button and Call Center calls.
10 Click the Submit button.
Chapter 3 Multimedia Call Center agents 23
Multimedia Call Center Set Up and Operation Guide
Installing Multimedia Call Center software on an agent’s
computer
You must install and configure the Multimedia Call Center software on the computer of each
Multimedia Call Center agent.
To install Multimedia Call Center software on an agent’s computer
1On the agent’s computer, point the web browser to the URL
http://voicebutton.<domain>:6800
where <domain> is the domain name of Business Communications Manager 2.5.
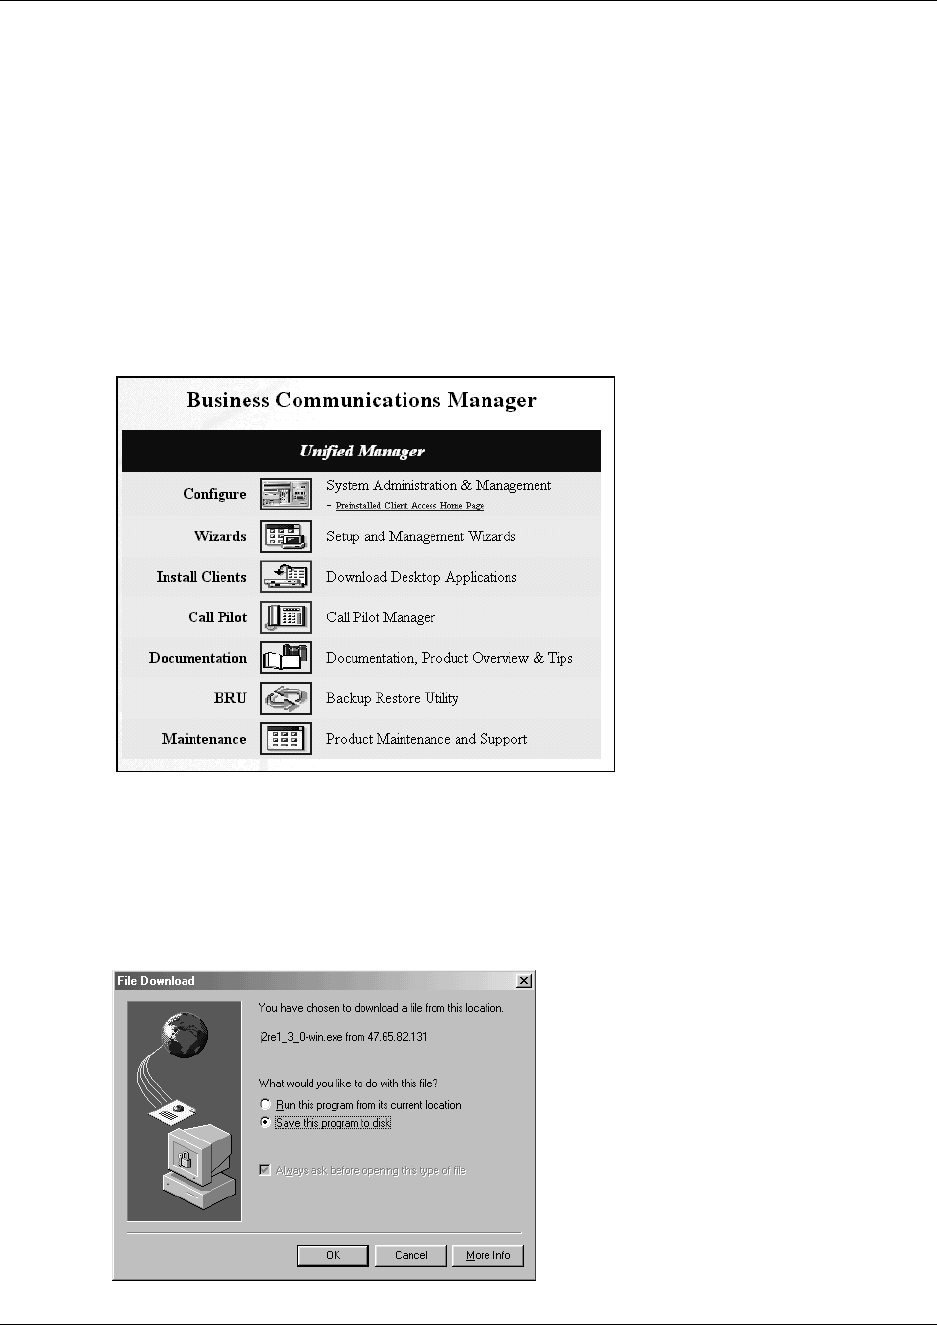
The Business Communications Manager 2.5 Unified Manager screen appears.
2Click the Install Clients button.
The Download Desktop applications page appears.
3In the left frame, click the Voice Button link.
4Click the Java Runtime Environment (JRE) link.
The File Download dialog box appears.

24 Chapter 3 Multimedia Call Center agents
P0935737 02
5Click the Save this program to disk option and then click the OK button.
The Save As dialog box appears.
6Navigate to where you want to download the file to and click the Save button.
7Locate the downloaded file and double-click the icon to install Java Runtime Environment.
8On the Download Desktop Applications page, click the Download Voice Button button.
The File Download dialog box appears.
9Click the Save this program to disk option and then click the OK button.
The Save As dialog box appears.
10 Navigate to where you want to download the file to and click the Save button.
11 Locate the downloaded file and double-click it to unzip it and install the Agent Notification
software on the agent’s computer. We recommend you install the software in C:\Program
Files\Nortel Networks\Voice Button Agent Notification.
Configuring Multimedia Call Center on a Windows 95 system
Download this patch for each Multimedia Call Center agent who uses the Windows 95 operating
system on their computer. This patch upgrades the agent’s WinSock32 to version 4.10.1656.
To download the patch
1On the agent’s computer point the web browser to the Microsoft website at
http://www.microsoft.com
2Search for Windows Socket 2 Update.
3Download the patch and follow the installation instructions.
Chapter 3 Multimedia Call Center agents 25
Multimedia Call Center Set Up and Operation Guide
Configuring an agent's server settings
To configure an agent’s server settings
1To start the Multimedia Call Center software on the agent’s computer, click the Start button,
point to Programs, point to Internet Voice Button and click Agent Notification.
The Agent Login/Logout dialog box appears.
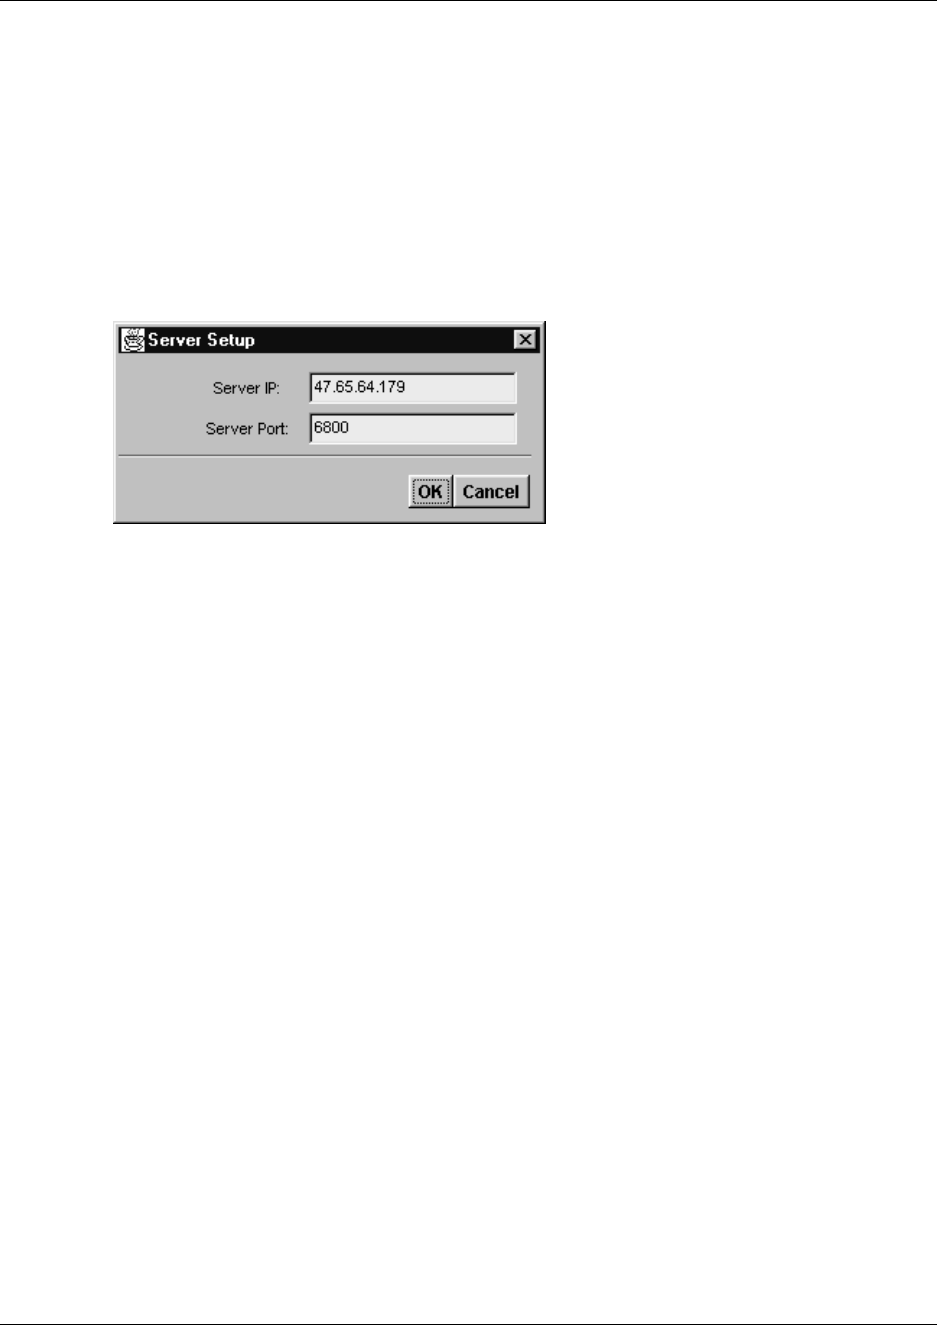
2On the Options menu click Server Setup.
The Server Setup dialog box appears.
3In the Server IP box type the IP address of the voice button server.
4In the VB Port box type the port number.
The default port number is 6800.
5Click the OK button.

26 Chapter 3 Multimedia Call Center agents
P0935737 02

27
Multimedia Call Center Set Up and Operation Guide
Chapter 4
Multimedia Call Center messages
About Multimedia Call Center messages
Multimedia Call Center messages are messages that are sent from a business’ web site to
customers, contacts, or surfers that have contacted the business.
These messages assist customers in making contact with the business, give customers choices in
the type of media they use to contact the business, and provide updates about the progress of the
call.
You or your web developer can:
•customize the default Multimedia Call Center message templates
•create lists of web pages that Multimedia Call Center agents push to callers
For information on:
•default Multimedia Call Center messages see “Multimedia Call Center message templates” on
page 27
•customizing messages see “Customizing web pages” on page 36
•uploading web pages see “Uploading web pages” on page 37
Multimedia Call Center message templates
You can customize the message templates that are included with Multimedia Call Center.
The message templates are located on Business Communications Manager 2.5 in:
•C:\Program Files\Nortel Networks\Voice Button\html
•C:\Program Files\Nortel Networks\Voice Button\html\adm
28 Chapter 4 Multimedia Call Center messages
P0935737 02
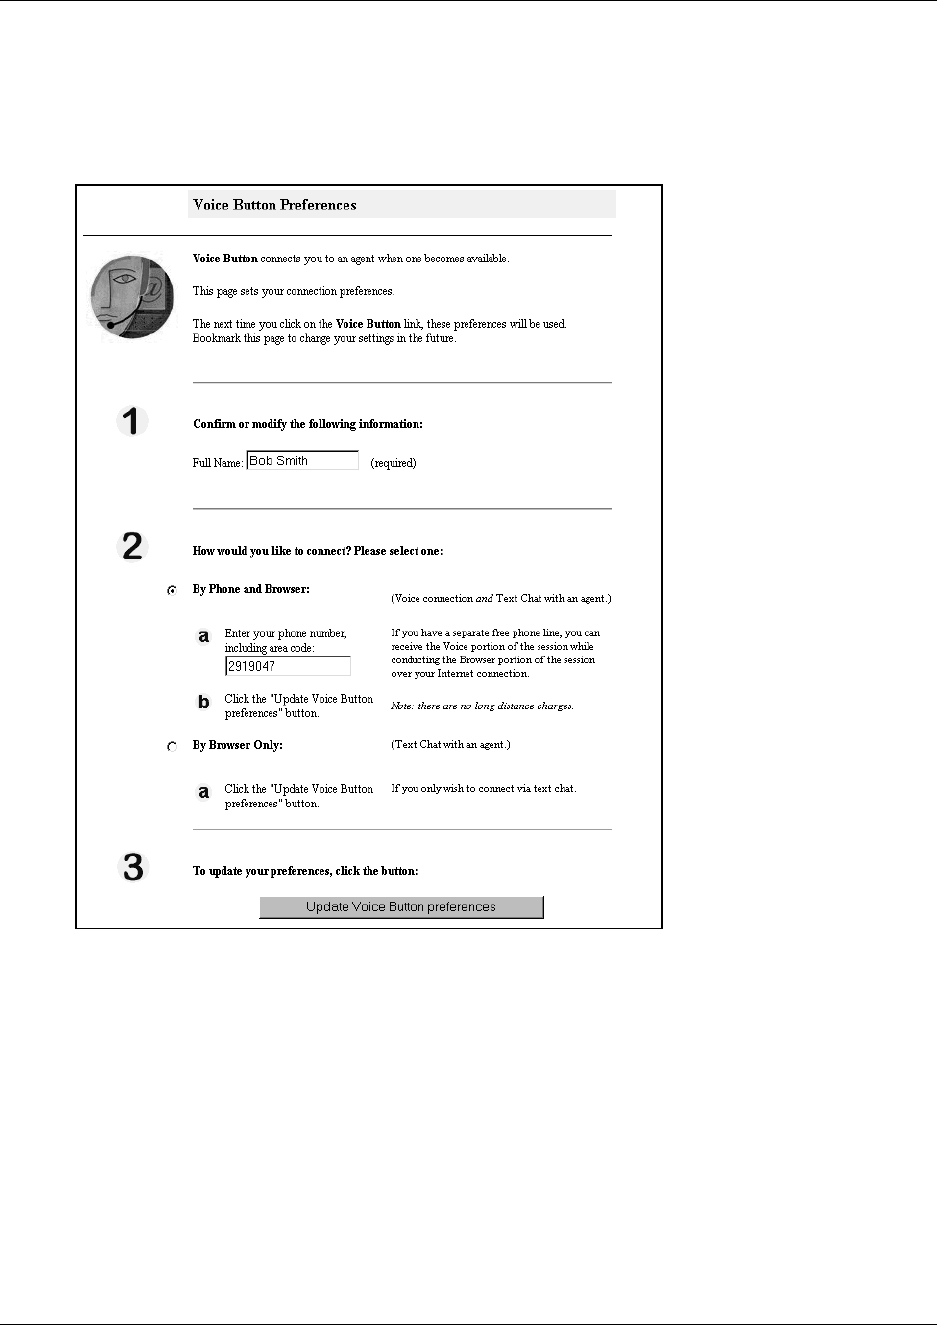
Call setup page for first-time callers
First-time callers see this html form when they click the voice button.
CALL_SETUP1.html
Chapter 4 Multimedia Call Center messages 29
Multimedia Call Center Set Up and Operation Guide
Call setup page for subsequent callers
Subsequent callers see this html form if they click the preferences link. Subsequent callers do not
see this html form if the web developer configures the do_setup parameter so that callers must
enter their calling preferences each time.
CALL_SETUP.html
30 Chapter 4 Multimedia Call Center messages
P0935737 02
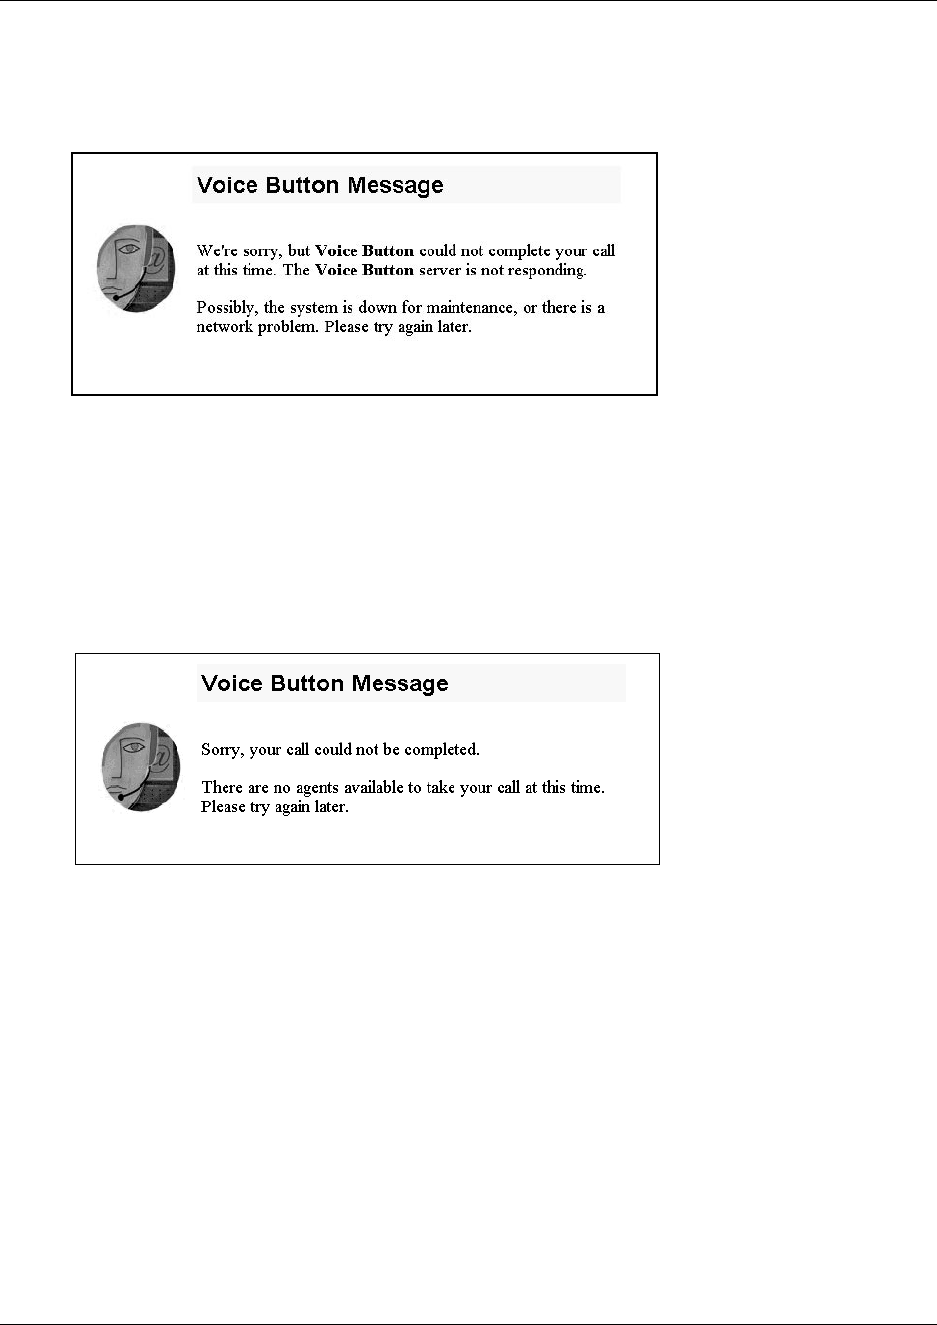
Voice button unavailable message
Callers see this message if they click the voice button while Business Communications Manager
2.5 is not operational.
MSG.html
No agents logged on message
Callers see this message if there are no Multimedia Call Center agents logged on.
MSG.html
Chapter 4 Multimedia Call Center messages 31
Multimedia Call Center Set Up and Operation Guide
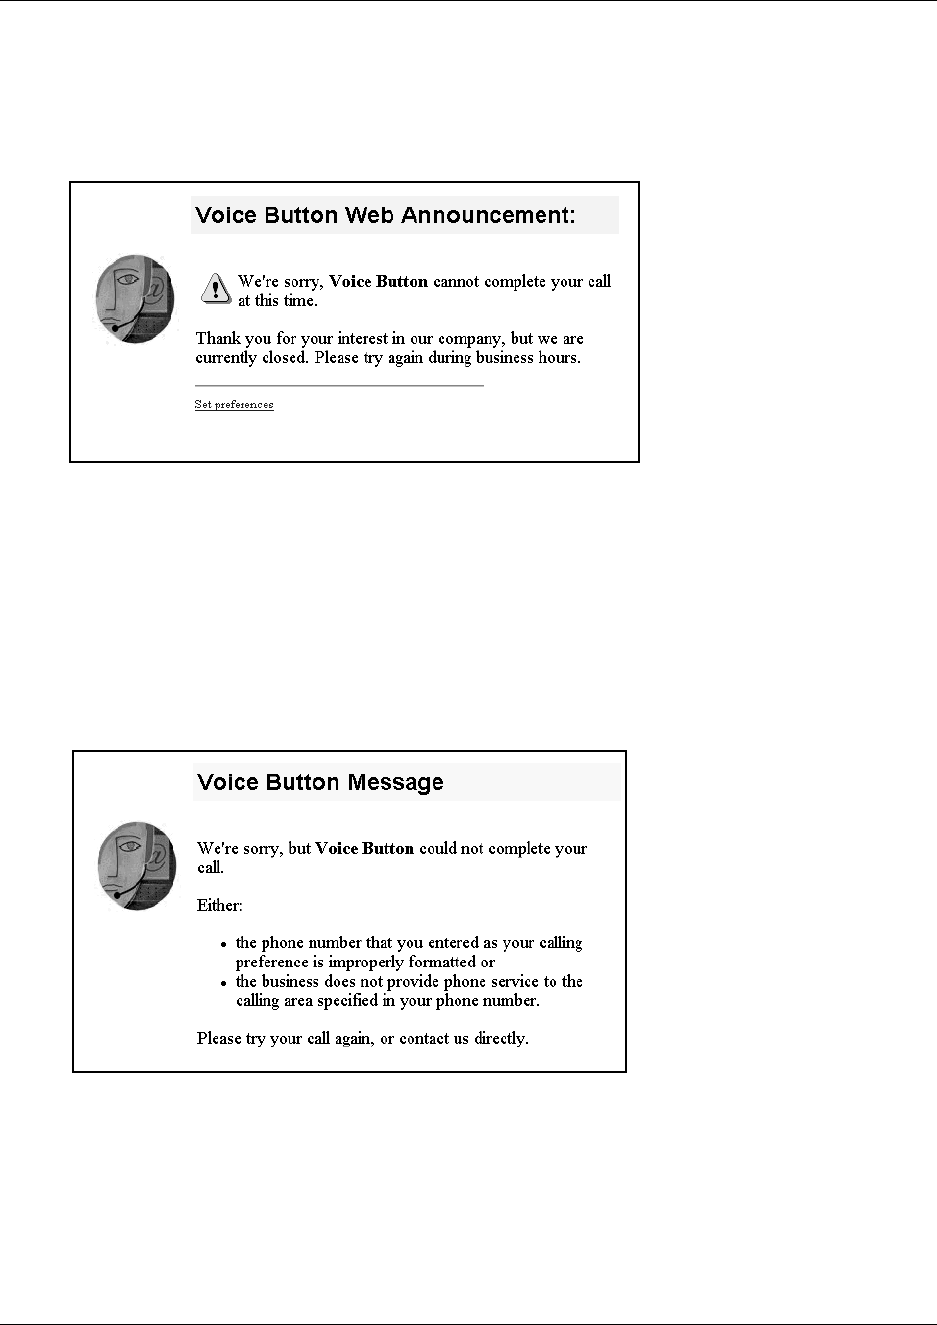
Off-hours message
Callers see this message if they click the voice button outside of business hours. The Call Center
handles the call based on the Night Routing Table steps for the day of the week. You set up
Routing Table in the Call Center Administration settings of CallPilot Manager.
OFF_HOURS.html
Bad calling preferences message
Callers see this message if the phone number they enter in the call setup page is improperly
formatted, or if Multimedia Call Center does not provide service to their calling area.
MSG.html
32 Chapter 4 Multimedia Call Center messages
P0935737 02
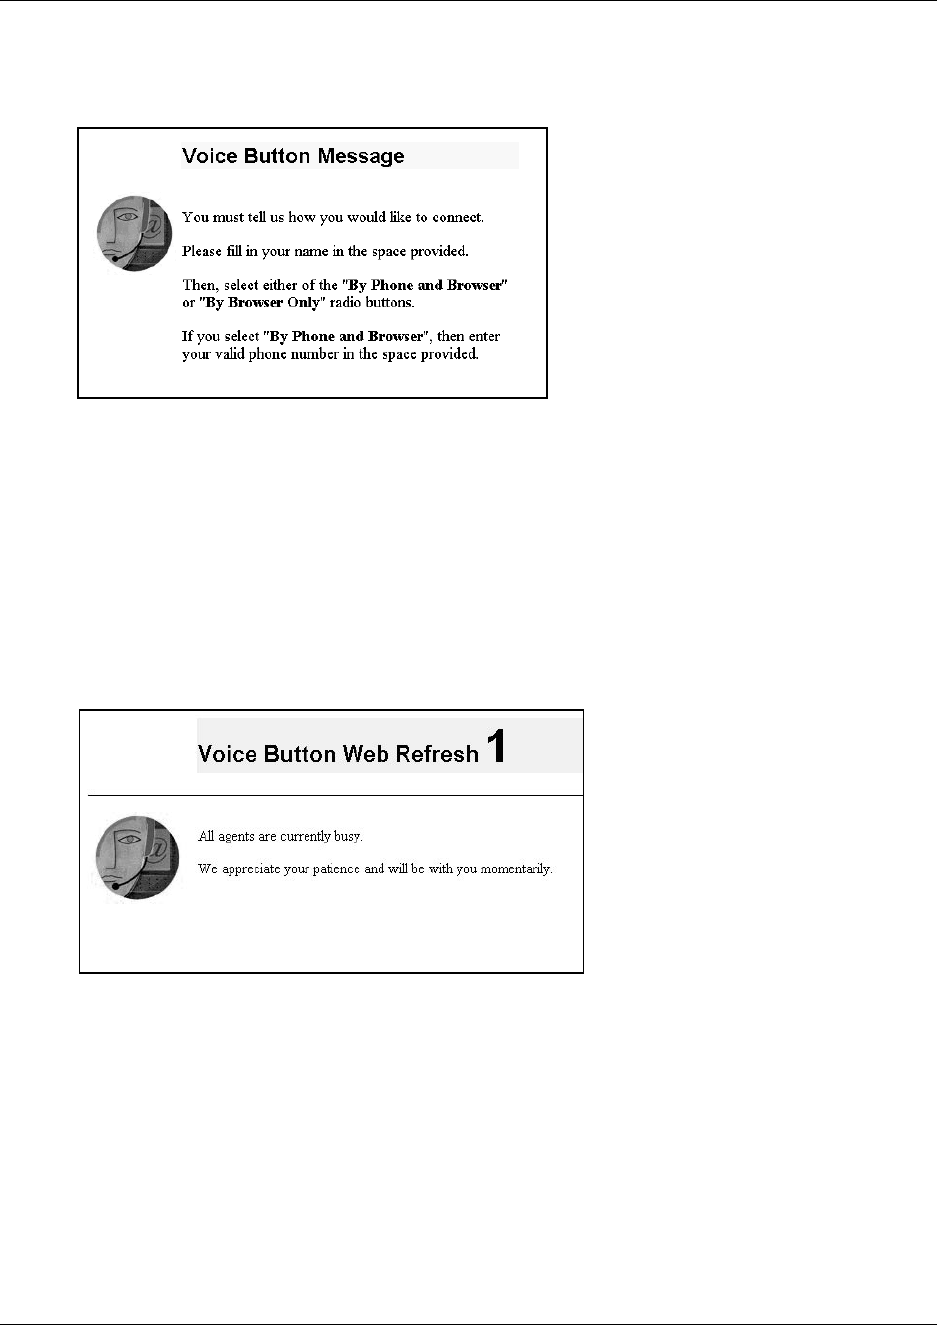
Choose how to connect message
Callers see this message if they do not specify their connection preferences in the call setup page.
MSG.html
Web refresh message
Callers see this message while they are waiting for a Multimedia Call Center agent to become
available. You or your web developer can create variations of this message to assure callers that
their call is important, and all agents are still busy.
MSG.html
Chapter 4 Multimedia Call Center messages 33
Multimedia Call Center Set Up and Operation Guide
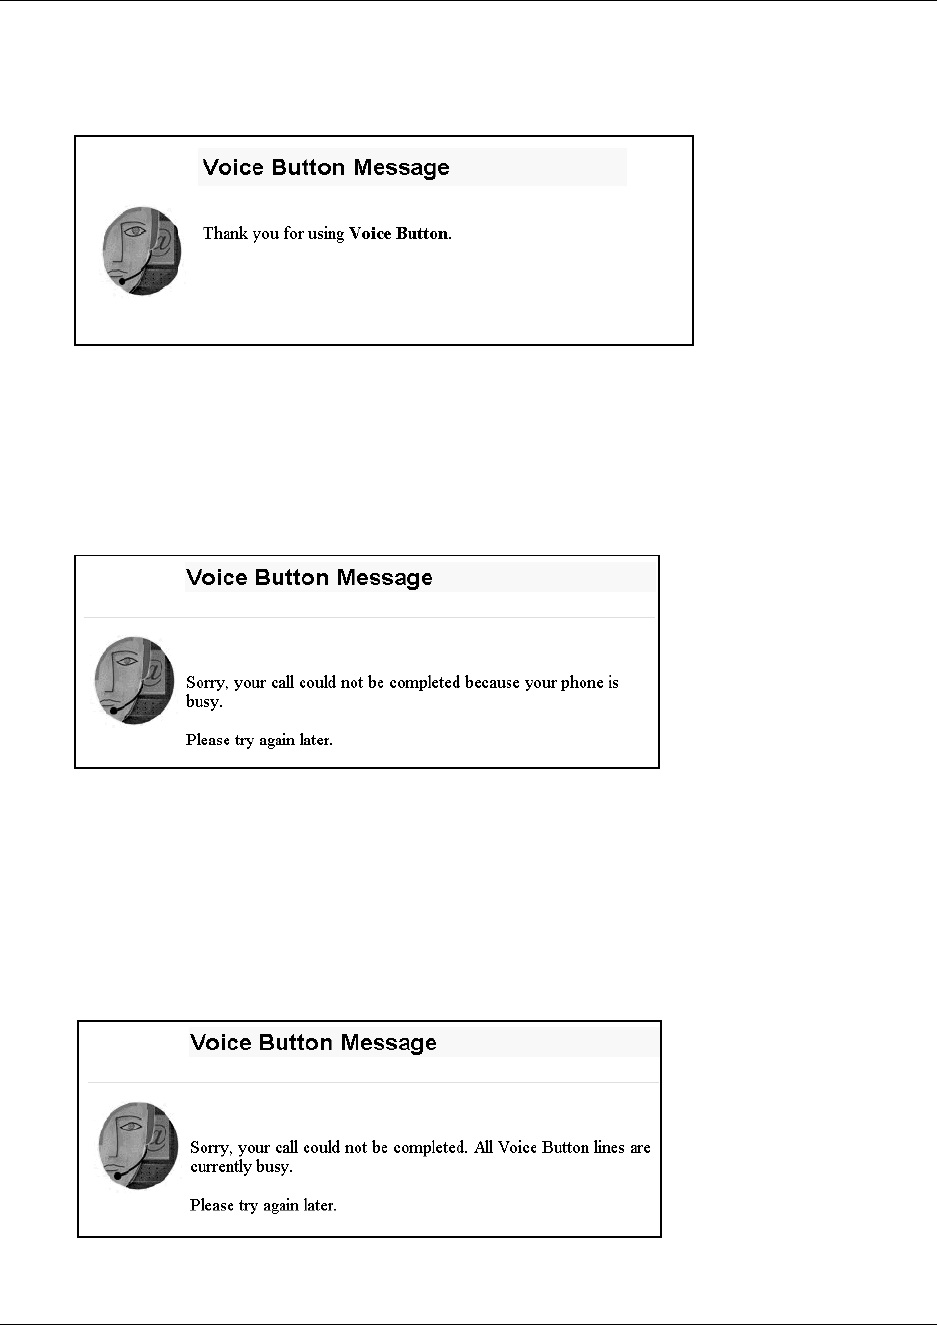
Session completed message
Callers see this message after they click the Hangup button on the voice button caller interface.
MSG.html
User busy message
Callers see this message if their call cannot be completed because their phone line is busy.
MSG.html
Server busy message
Callers see this message if their call cannot be completed because Business Communications
Manager 2.5 has no available phone lines.
MSG.html
34 Chapter 4 Multimedia Call Center messages
P0935737 02
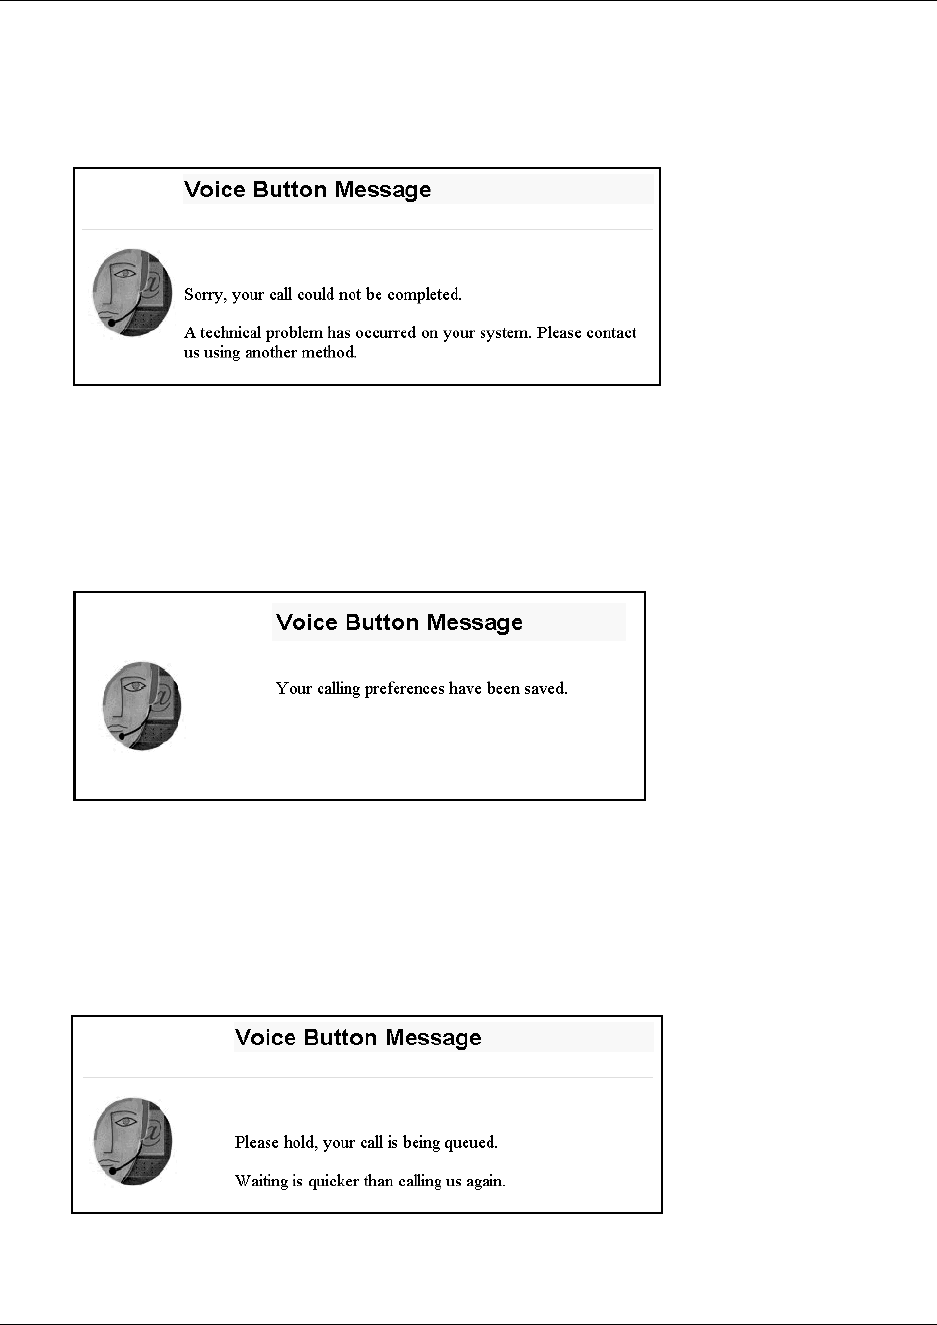
Make call failed message
Callers see this message if their call cannot be connected because there is a problem with the voice
button server.
MSG.html
Preferences message
Callers see this message after they enter their calling preferences in the call setup page.
MSG.html
Alerting message
Callers see this message if the call fails after they click the voice button.
MSG.html

Chapter 4 Multimedia Call Center messages 35
Multimedia Call Center Set Up and Operation Guide
No answer message
Callers see this message if they do not answer their phone.
MSG.html
Recording Multimedia Call Center announcements
When you record announcements for Multimedia Call Center, record announcements that
correspond to the web refresh messages. This way, callers hear a voice announcement while they
view a related message.
You record Call Center messages using CallPilot Manager. For information on recording Call
Center announcements see the CallPilot Manager Set Up and Operation Guide.

36 Chapter 4 Multimedia Call Center messages
P0935737 02
Customizing web pages
You or your web developer can customize web pages and upload them to Business
Communications Manager 2.5. You can customize the default Multimedia Call Center web pages
or create your own.
To customize web pages
1In your browser, open the URL that contains the default file you want to customize.
2View the source code for the web page:
•if you use Internet Explorer, on the View menu click Source.
The source code for the page appears in a Notepad window.
•if you use Netscape Navigator, on the View menu click Page Source.
The source code for the page appears in a Netscape window. Copy and paste the code to a
Notepad window.
3On the File menu click Save As.
The Save As dialog box appears.
4Save the file to a directory on your computer.
Do not change the name of the file.
5Customize the file.
6Upload the customized files to Business Communications Manager 2.5 using the procedure in
“Uploading web pages” on page 37.
An overview of customizing a page
This is an example of customizing an off_hours.html file for the ABC Computer Company:
1Download the off_hours.html template from Business Communications Manager 2.5 to your
desktop using your browser's View Source functionality.
2Customize the off_hours.html file.
3Save the new customized file in your local directory as acme_hours.html.
4Log on to Business Communications Manager 2.5 using the ABC Computer Company name
and password.
5Upload the file.
Note: Do not directly edit web pages.
Do not change the location of the Multimedia Call Center default files on Business
Communications Manager 2.5.
Chapter 4 Multimedia Call Center messages 37
Multimedia Call Center Set Up and Operation Guide
Uploading web pages
You can upload customized web pages from a computer to Business Communications Manager
2.5, or view a list of the customized files that are on Business Communications Manager 2.5.
To upload customized files
1Point your web browser to the URL
http://voicebutton.<domain>:6800
where <domain> is the domain name of Business Communications Manager 2.5.
The Business Communications Manager 2.5 Unified Manager screen appears.
2Click the Configure button.
The Login screen appears.
3In the User ID box type your user ID.
The default user ID is supervisor.
4In the Password box type your password.
The default password is visor.
5Click the Login button.
The Unified Manager screen appears.
6Click the Services key.
7Click the Voice Button heading.
8On the Tools menu click Voice Button Admin.
The Enter Network Password dialog box appears.
9In the User Name box type your user name.
The default user name is supervisor.
10 In the Password box type your password.
The default password is visor.

38 Chapter 4 Multimedia Call Center messages
P0935737 02
11 Click the OK button.
The System Administration page appears.
12 Under the Customize heading:
•click the Browse button to browse for files on your desktop that you want to upload and
click the Upload button
or
•if you want to view a list of the files that are uploaded, click the List Files button to
generate a list of the files that are uploaded to Business Communications Manager 2.5.
The list appears in a new browser page
or
if you want to customize msg.html, call_setup.html, call_setup1.html, off_hours.html,
launch_monitor.html or refresh.html:
—In the Remote File name box enter the name of the file you want to customize, for
example, off_hours.html.
—Click the Browse button and browse to the location of the file you customized, for
example, acme_hours.html.
—Click the Upload button.

Chapter 4 Multimedia Call Center messages 39
Multimedia Call Center Set Up and Operation Guide
Web page lists
You or your web developer can create lists of web pages that agents can push to callers. Each list
can include up to 100 web pages.
Creating web page lists
You can create lists of web pages that agents can push pages to customers from. Agents can change
the list that they push web pages from by clicking the Change List button on the Multimedia Call
Center agent interface.
Each web page list is stored in a text file. To create or modify a web page list file, use a text editor
such as Notepad.
Name the web page list file according to this format:
•name: a name for the URL (Web Page)
•url: a valid URL (Web Page address)
For example:
•name: Nortel Networks Home page
•url: http://www.nortelnetworks.com/
Distributing web page lists
After you create a web page list, store it in a shared directory on your network.
Tell the Multimedia Call Center agents where the web page list is located on the network. Tell the
agents to copy it to their computer to the C:Program files\Nortel Networks\Voice Button Agent
Notification folder.
Whenever you create or update a web page list, notify the agents the agents to copy the list to their
computer.

40 Chapter 4 Multimedia Call Center messages
P0935737 02
41
Multimedia Call Center Set Up and Operation Guide
Chapter 5
Viewing reports, active calls and log files
This chapter is about how to generate Multimedia Call Center reports and log files, and how to
monitor active calls.
About Multimedia Call Center reports
There are four reports you can generate that show the Multimedia Call Center activity on Business
Communications Manager 2.5:
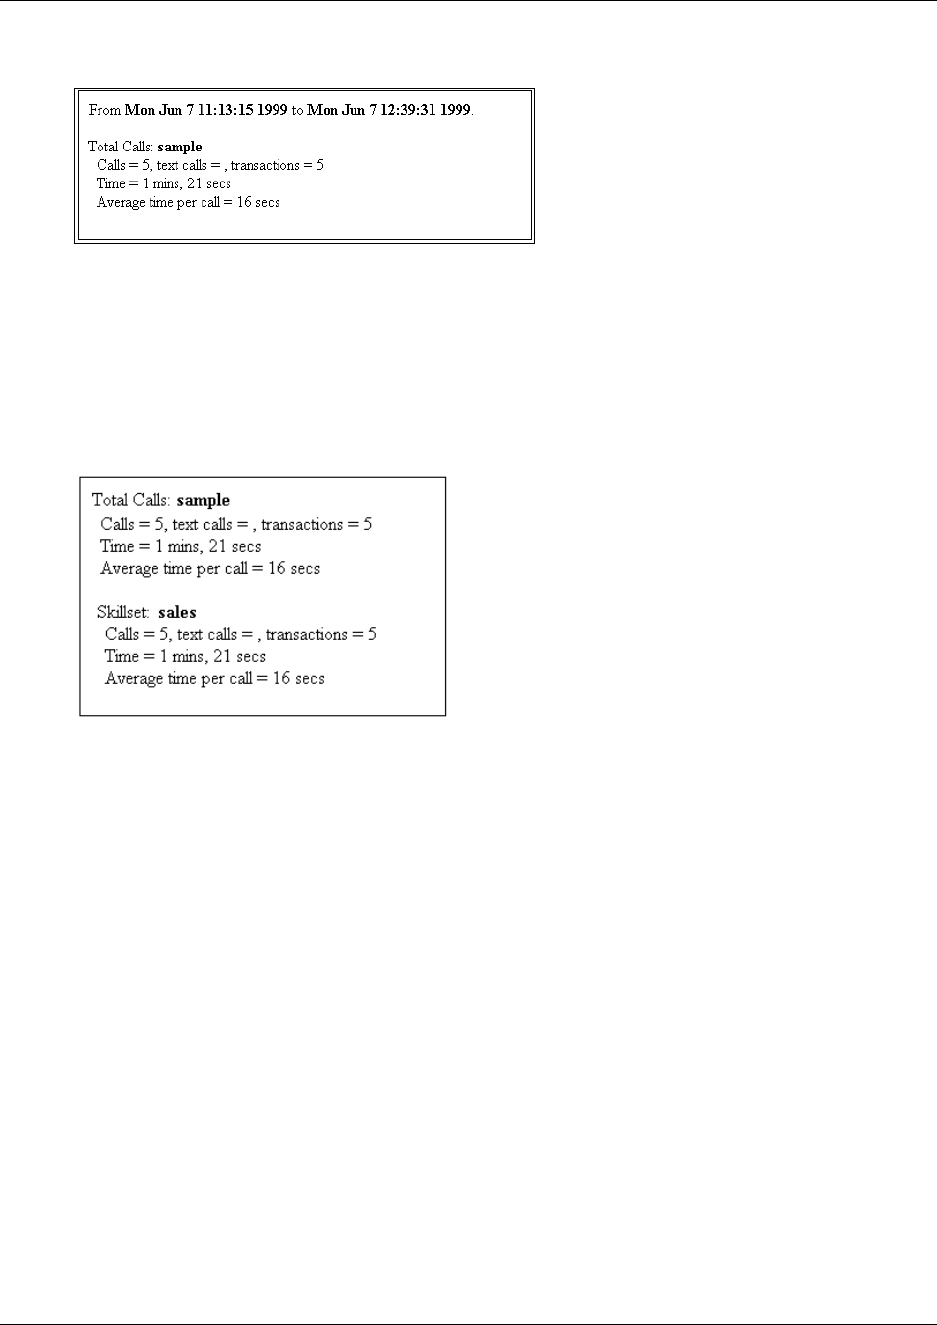
Summary call report - all calls
The Summary call report for all calls shows:
•total number of Multimedia Call Center calls completed
•total number of text calls completed
•total number of calls ("transactions")
•total time of all calls
•average time per call
Report Contains
Summary call report - all
calls
a summary of call statistics over a specified time
Summary call report by
skillset
a summary of call statistics for all skillsets over a specified time
Detail call report - all calls a detailed list of all calls made over a specified time
Detail call report by skillset a detailed list of all calls made by all skillsets over a specified time
Note: Calls waiting in skillsets are not included in reports.
To see all calls, including Multimedia Call Center calls waiting in skillsets, press
≤·‚· on a Business Communications Series terminal.
Browser Only calls are not shown when you use ≤·‚·.
42 Chapter 5 Viewing reports, active calls and log files
P0935737 02
An example of a Summary call report for all calls
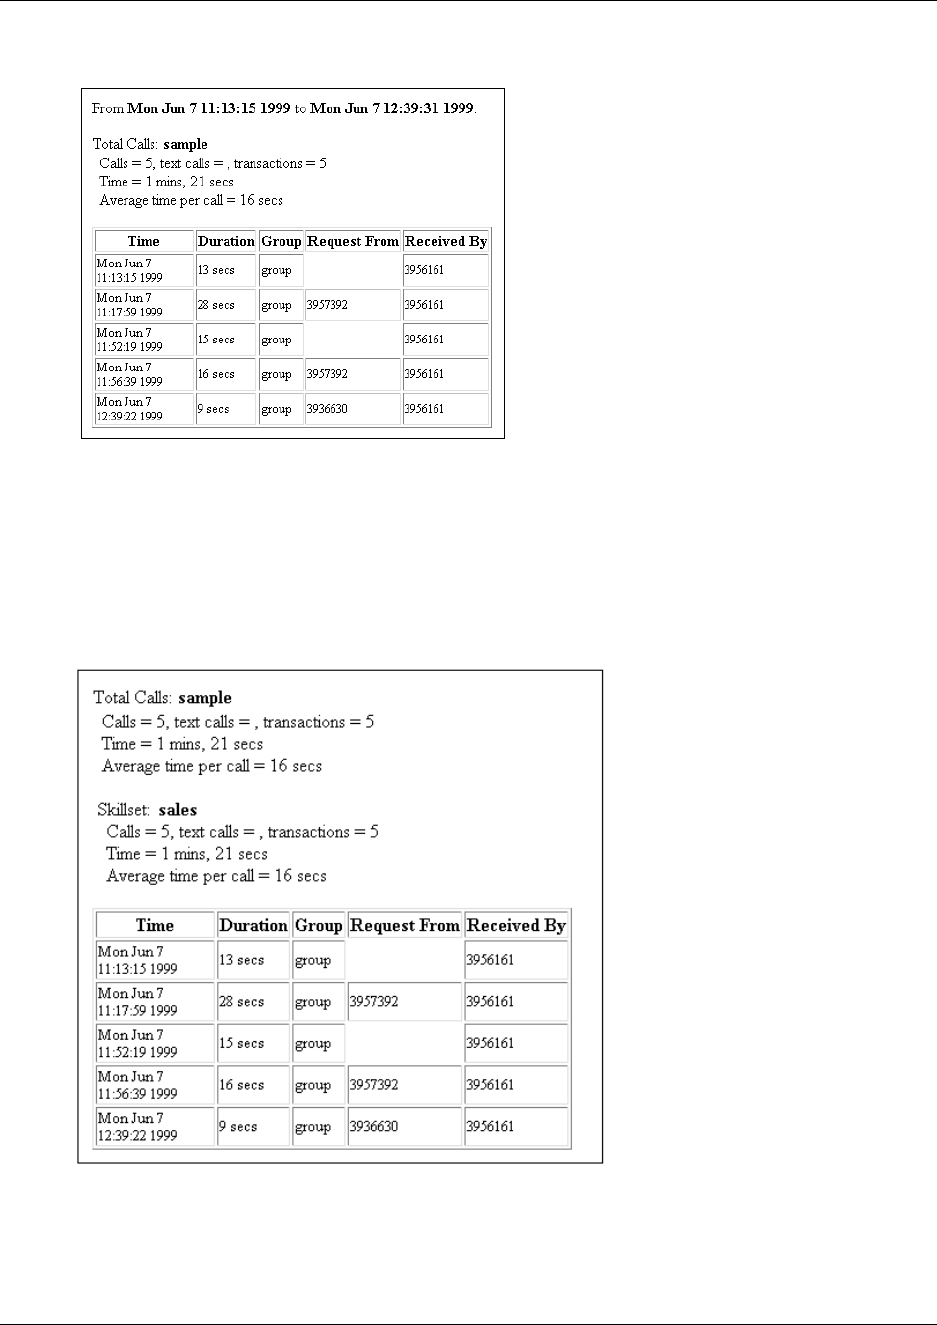
Summary call report by skillset
The Summary call report by skillset shows the information in the Summary call report for all calls,
and the information by skillset.
An example of a Summary call report by skillset
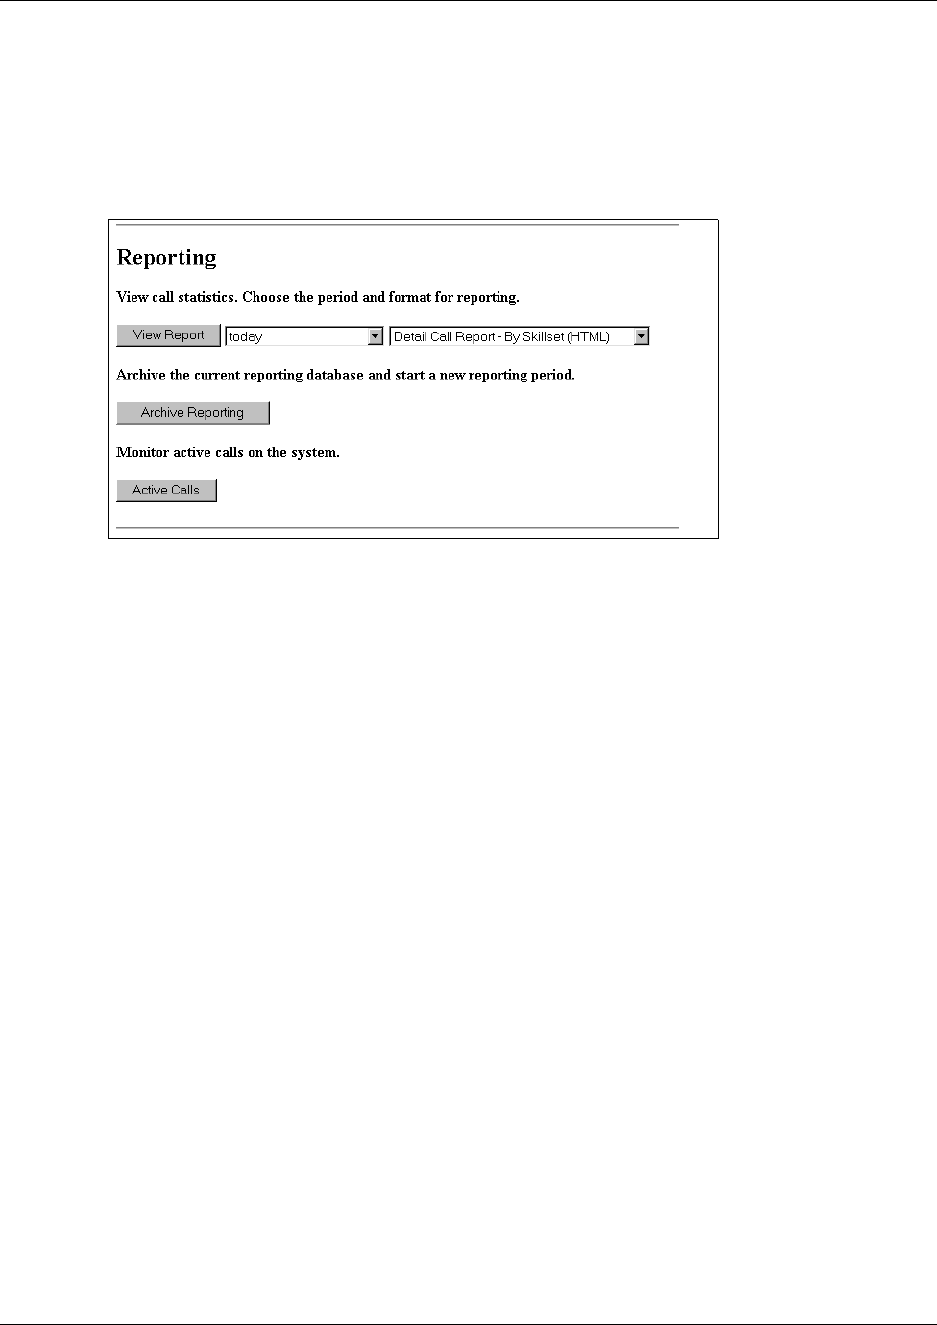
Detail call report - all calls
The Detail call report for all calls shows the information in the Summary call report for all calls,
and a detailed list of each call completed during the time period of the report. For each call, the
report shows:
•Time - the time and date the call started
•Duration - the duration of the call
•Request from - the caller's phone number
•Received by - the agent's phone number
Chapter 5 Viewing reports, active calls and log files 43
Multimedia Call Center Set Up and Operation Guide
An example of a Detail call report for all calls
Detail call report by skillset
The Detail call report by skillset shows the information in the Detail call report for all calls and
summarizes the information by skillset.
Example of a Detail call report by skillset

44 Chapter 5 Viewing reports, active calls and log files
P0935737 02
Generating Multimedia Call Center reports
To generate a Multimedia Call Center report
1Point your web browser to the URL
http://voicebutton.<domain>:6800
where <domain> is the domain name of Business Communications Manager 2.5.
The Business Communications Manager 2.5 Unified Manager screen appears.
2Click the Configure button.
The Login screen appears.
3In the User ID box type your user ID.
The default user ID is supervisor.
4In the Password box type your password.
The default password is visor.
5Click the Login button.
The Unified Manager screen appears.
6Click the Services key.
7Click the Voice Button heading.
The Voice Button screen appears.
8On the Tools menu click Voice Button Admin.
The Enter Network Password dialog box appears.
9In the User Name box type your user name.
The default user name is supervisor.
10 In the Password box type your password.
The default password is visor.
11 Click the OK button.
The System Administration page appears.
Note: Generating reports can put an additional load on Business Communications
Manager 2.5. Avoid generating reports during periods of peak activity. If possible,
generate reports after hours.
Chapter 5 Viewing reports, active calls and log files 45
Multimedia Call Center Set Up and Operation Guide
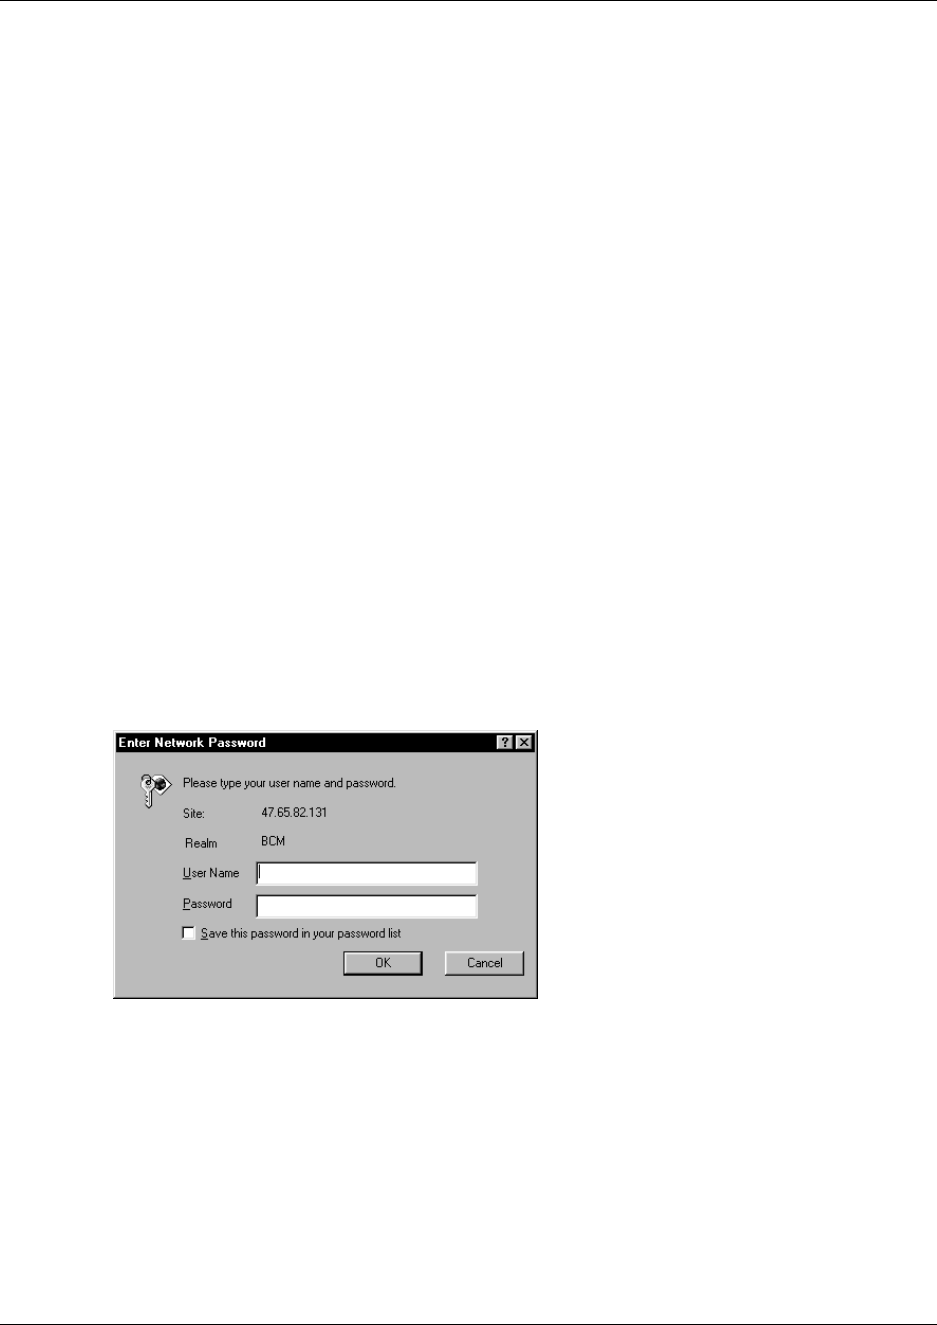
12 Under the Reporting heading, select the type of report you want to generate:
•Summary Call Report - All Calls
•Detail Call Report - All Calls
•Summary Call Report By Skillset
•Detail Call Report By Skillset
13 From the View Report list box, select the time period for the report:
•today - includes calls completed on the current day up to the time the report is generated
•current reporting period - includes calls made since the last time the reporting period
was archived
14 Press the View Report button to generate the report.
15 If you want to archive the file used to generate the reports, click the Archive Reporting
button. A message appears that asks you to confirm your request. Click the OK button.
46 Chapter 5 Viewing reports, active calls and log files
P0935737 02
Monitoring active calls
You can monitor active Multimedia Call Center calls.
To monitor active calls
1Point your web browser to the URL
http://voicebutton.<domain>:6800
where <domain> is the domain name of Business Communications Manager 2.5.
The Business Communications Manager 2.5 Unified Manager screen appears.
2Click the Configure button.
The Login screen appears.
3In the User ID box type your user ID.
The default user ID is supervisor.
4In the Password box type your password.
The default password is visor.
5Click the Login button.
The Unified Manager screen appears.
6Click the Services key.
7Click the Voice Button heading.
The Voice Button screen appears.
8On the Tools menu click Voice Button Admin.
The Enter Network Password dialog box appears.
9In the User Name box type your user name.
The default user name is supervisor.
10 In the Password box type your password.
The default password is visor.
11 Click the OK button.
The System Administration page appears.
12 Under the Reporting heading, click the Active Calls button.
A report of all the currently active Multimedia Call Center calls appears in a separate window.

Chapter 5 Viewing reports, active calls and log files 47
Multimedia Call Center Set Up and Operation Guide
Viewing log files
Log files are automatically generated daily by Multimedia Call Center. You can use log files to
diagnose system problems. The log files include all activity that occurs with its CGI interface and
its telephony server.
Multimedia Call Center Log files are generated in C:\Program Files\Nortel Networks\Voice
Button\logs.
The logs are named:
•cgilog_YYYY_MM_DD.txt: log file of CGI activity
•nslog_YYYY_MM_DD.txt: log file of NSACD service
•vwlog_YYYY_MM_DD.txt: log file of VBServer service
where YYYY is a 4-digit year
MM is a 1- or 2-digit month
DD is a 1- or 2-digit day
The Call Center log file is generated in D:\st\stlog.out.
To view a log file
1Point your web browser to the URL
http://voicebutton.<domain>:6800
where <domain> is the domain name of Business Communications Manager 2.5.
The Business Communications Manager 2.5 Unified Manager screen appears.
2Click the Configure button.
The Login screen appears.
3In the User ID box type your user ID.
The default user ID is supervisor.
4In the Password box type your password.
The default password is visor.
5Click the Login button.
The Unified Manager screen appears.
6Click the Services key.
7Click the Voice Button heading.
The Voice Button screen appears.
48 Chapter 5 Viewing reports, active calls and log files
P0935737 02
8On the Tools menu click Voice Button Admin.
The Enter Network Password dialog box appears.
9In the User Name box type your user name.
The default user name is supervisor.
10 In the Password box type your password.
The default password is visor.
11 Click the OK button.
The System Administration page appears.
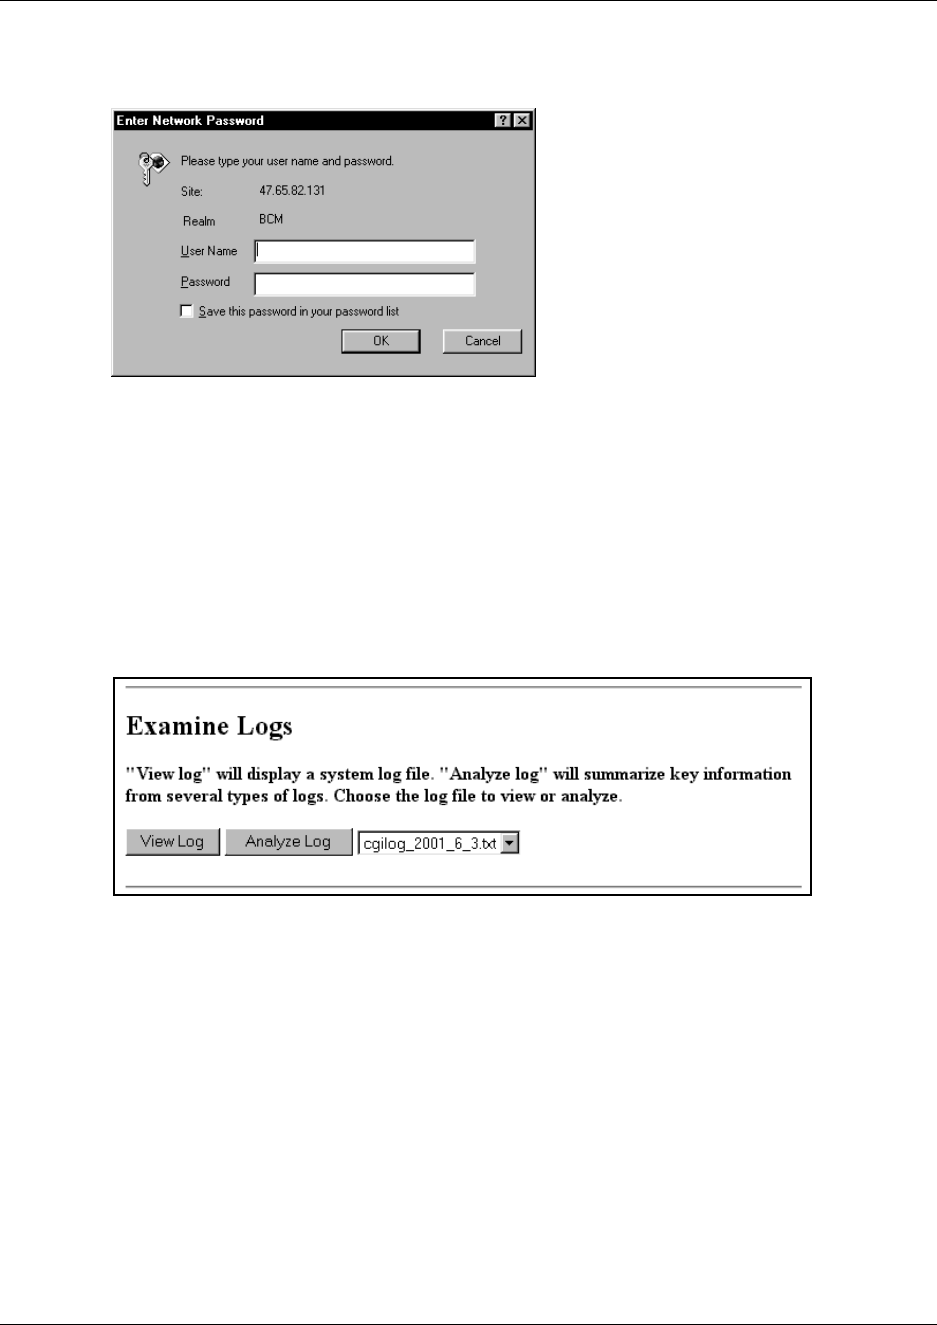
12 Under the Other Administrative Functions heading, click the Examine Logs button.
The Examine Logs screen appears.
13 Select the log file you want to view. you want to view:
•click the view log button to view the log you select
•click the analyze log button to see a summary for the log you select
14 If you want to archive the log and reset the statistics, click the archive reporting button.
A message appears that asks you to confirm the reset.
15 Click the OK button.

Multimedia Call Center Set Up and Operation Guide
49
Index
A
Agent
server settings 25
software, installing 23
Agents
about 21
adding to Call Center 22
enabling 21
Announcements
about 27
Call Center 35
recording 35
C
Call types
agent-centric 7, 20
caller-centric 7
voice and data 7
Caller preferences
Call Setup page 5
CallPilot Manager
browser requirements 9
computer requirements 9
system requirements 9
D
Detail call report (all calls) 42
Detail call report (by skillset) 43
Dial plan
about 18
creating 18
restrictions 18
I
IP address 25
L
Log files
about 47
M
Messages
alerting 34
announcements 35
busy phone line 33
call being queued 34
Call Setup page 28, 29
caller preferences improperly formatted 31
choose how to connect 32
customizing 36
first-time callers 28
no agents logged on 30
no answer 35
no available phone lines 33
off-hours 31
off-hours, customizing 36
saved preferences 34
server busy 33
server down 30, 34
session completed 33
subsequent callers 29
template locations 27
uploading 37
user busy 33
waiting in a skillset 32
web refresh 32
Multimedia Call Center
agent 25
agent interface 6
agent software 23
agents 21, 22
Call Setup page 5
call types 7
caller interface 6
dial plan 18
installing 11
IP address 25
overview 5
port address 25
proxy server 25
reports 41
Detail call report (all calls) 42
Detail call report (by skillset) 43
Summary call report (all calls) 41
Summary call report (by skillset) 42
reports, generating 44
setting up 11
software authorization code 11
Multimedia Call Center agents
about 21
Multimedia Call Center calls
assigning outgoing line 17
CLID/DNIS routing 14
enabling call-back 17

50 Index
P0935737 02
Intelligent CLID/DNIS routing table 15
Intelligent Overflow rules 20
routing 14
P
Port address 25
Proxy server 25
PSTN line
and Multimedia Call Center calls 20
R
Reports 41
about 41
Detail call report (all calls) 42
Detail call report (by skillset) 43
generating 44
Summary call report (all calls) 41
Summary call report (by skillset) 42
S
Software code 11
Software codes
installing 21
Summary call report (all calls) 41
Summary call report (by skillset) 42
T
Troubleshooting
skillset settings 9
W
Web page lists
about 39
naming 39
uploading 37
Web pages
customization example 36
customizing 36
