Axesstel PG131N Fixed Wireless Phone User Manual Manual PG13xN x1
Axesstel Inc Fixed Wireless Phone Manual PG13xN x1
Axesstel >
User Manual
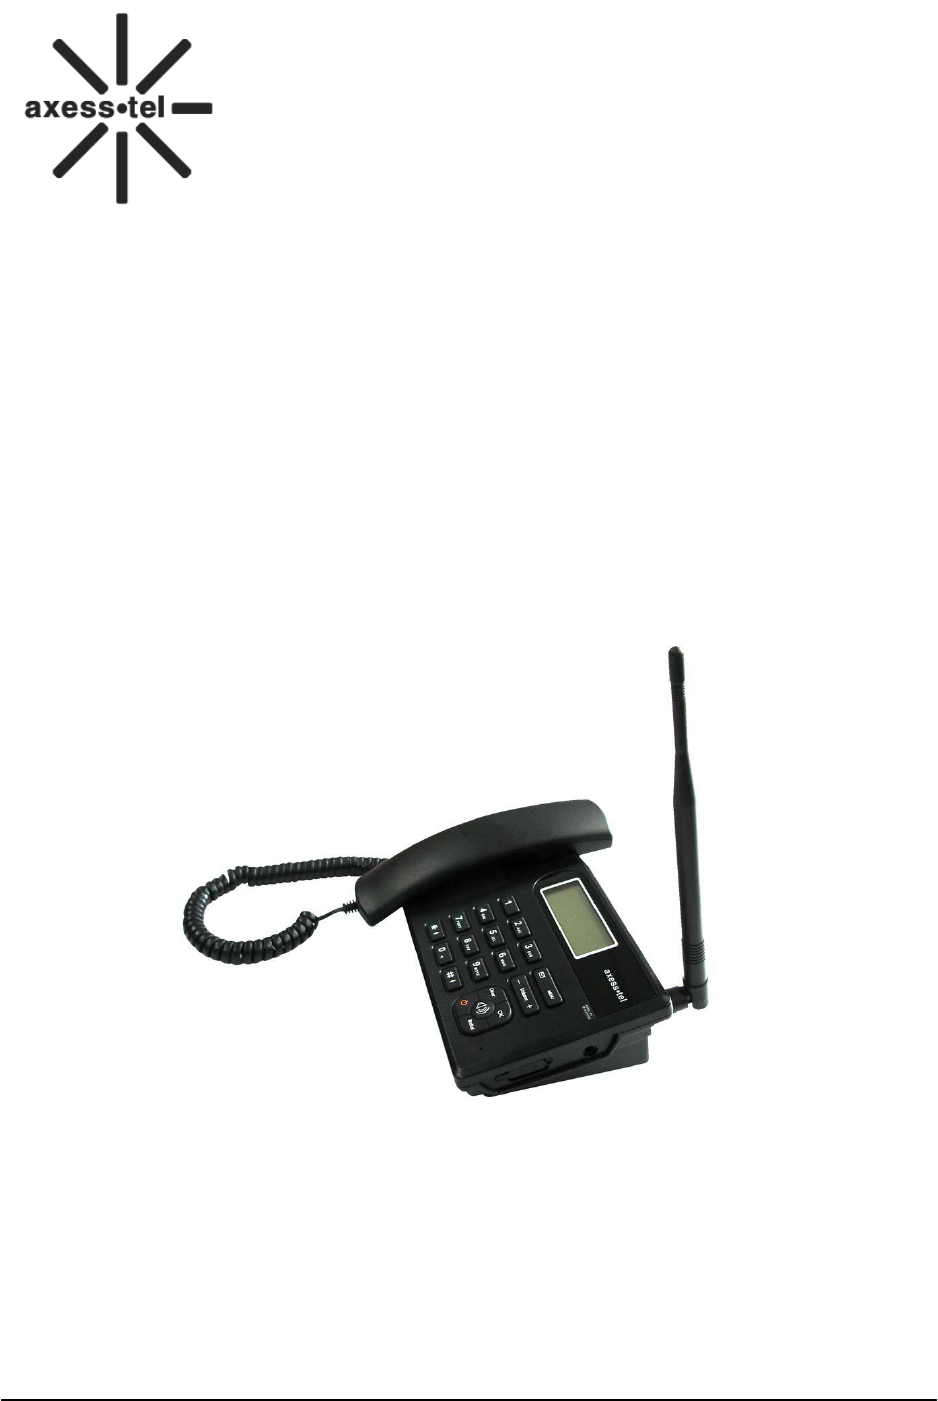
Axesstel Fixed Wireless Phone
GSM PG130/131N
User Manual

GSM FWP
PG130/131N
Index
1 GENERAL INTRODUCTION ................................................................................................................... 1
2 IMPORTANT INFORMATION ................................................................................................................ 2
3 PRODUCT OVERVIEW ............................................................................................................................ 3
3.1 PACKING LIST ........................................................................................................................................ 3
3.2 SETTING UP YOUR PHONE .............................................................................................................. 4
3.3 PRODUCT INTRODUCTION ...................................................................................................................... 6
3.3.1 Appearance ....................................................................................................................................... 6
3.3.2 Key Definition ................................................................................................................................... 6
3.3.3 FUNCTION KEYS ............................................................................................................................ 7
3.3.4 GETTING TO KNOW YOUR PHONE ............................................................................................. 8
3.3.5 Display Icon ...................................................................................................................................... 9
4 BASIC OPERATIONS ................................................................................................................................ 9
4.1 POWER ON/OFF ..................................................................................................................................... 9
4.2 MAKE A CALL ........................................................................................................................................ 9
4.3 ANSWER A CALL .................................................................................................................................... 9
4.4 END A CALL ........................................................................................................................................... 9
5 MAIN MENU ............................................................................................................................................. 10
6 CALL LOG ................................................................................................................................................ 11
6.1 ALL CALLS ........................................................................................................................................... 11
6.2 DIALED CALLS ..................................................................................................................................... 11
6.3 RECEIVED CALLS ................................................................................................................................. 12
6.4 MISSED CALLS ..................................................................................................................................... 13
6.5 DELETE CALL LOG................................................................................................................................ 13
6.6 CALL DURATION .................................................................................................................................. 13
7 CONTACTS ............................................................................................................................................... 14
7.1 SEARCH FOR A CONTACT ..................................................................................................................... 14
7.2 ADD A NEW CONTACT ......................................................................................................................... 14
7.2.1 Add a New Contact from the Menu ................................................................................................. 14
7.2.2 Add a New Contact in Standby Mode ............................................................................................. 14
7.3 VIEW A CONTACT ................................................................................................................................ 15
7.4 SERVICE NUMBER ................................................................................................................................ 15
7.5 EDIT A CONTACT ................................................................................................................................. 15
7.6 SPEED DIAL ......................................................................................................................................... 15
7.7 COPY CONTACT .................................................................................................................................... 16
7.8 DELETE ................................................................................................................................................ 16
7.9 SAVE TO ............................................................................................................................................... 16
7.10 MEMORY STATUS ................................................................................................................................. 16
8 MESSAGES ................................................................................................................................................ 17
8.1 SEND A MESSAGE ................................................................................................................................ 17
8.2 RECEIVE A MESSAGE ........................................................................................................................... 17
8.3 VIEW SENT MESSAGES ........................................................................................................................ 18
8.4 SEND A MESSAGE BY USING TEMPLATES ............................................................................................. 18
8.5 SMS SETTINGS .................................................................................................................................... 18
8.6 VOICE MESSAGE .................................................................................................................................. 19
9 TIME AND ALARM ................................................................................................................................. 19
9.1 SET TIME/DATE ................................................................................................................................... 19
9.2 SET ALARM .......................................................................................................................................... 20
10 SOUNDS ..................................................................................................................................................... 20
10.1 RINGER ................................................................................................................................................ 20
10.2 VOLUME .............................................................................................................................................. 21

GSM FWP
PG130/131N
10.3 RING TYPE ........................................................................................................................................... 21
10.4 ALERT .................................................................................................................................................. 21
11 CONFIGURATION ................................................................................................................................... 21
11.1 GREETING ............................................................................................................................................ 21
11.2 SET LANGUAGE ................................................................................................................................... 22
11.3 SET LCD BACKLIGHT .......................................................................................................................... 22
11.4 SET LCD CONTRAST ............................................................................................................................ 22
11.5 AUTO SEND TIME ................................................................................................................................. 22
11.6 CALL WAITING .................................................................................................................................... 23
11.7 CALL DIVERT ....................................................................................................................................... 23
11.8 CALL BARRING .................................................................................................................................... 24
12 SECURITY (INITIAL PASSWORD: 0000) ............................................................................................ 24
12.1 OWNER NUMBER .................................................................................................................................. 25
12.2 PHONE LOCK........................................................................................................................................ 25
12.3 PIN1 LOCK .......................................................................................................................................... 25
12.4 AUTO KEYPAD LOCK ............................................................................................................................ 25
12.5 CHANGE PIN LOCK .............................................................................................................................. 25
12.6 BARRED DIAL ....................................................................................................................................... 26
12.7 HOTLINE/PLAR ................................................................................................................................... 26
12.8 GUARD SYSTEM ................................................................................................................................... 26
12.9 PHONE INFO ......................................................................................................................................... 26
12.10 CLEAR MEMORY .............................................................................................................................. 26
12.11 RESTORE FACTORY SETTINGS ......................................................................................................... 26
13 SERVICES ................................................................................................................................................. 27
13.1 STK(SIM TOOL KIT) ........................................................................................................................ 27
14 FM RADIO(OPTIONAL) ......................................................................................................................... 27
14.1 FM STATUS.......................................................................................................................................... 27
14.2 CHANNEL LIST ..................................................................................................................................... 27
14.3 MANUAL INPUT .................................................................................................................................... 28
14.4 PRESET AUTO SEARCH .......................................................................................................................... 28
14.5 SETTINGS ............................................................................................................................................. 28

1
GSM FWP
PG130/131N
1 General Introduction
Thank you for choosing the Axesstel GSM PG130/131N Desktop Phone. Please read this user
manual carefully before using your phone .
The phone has been designed to operate with the latest digital communication technology - GSM.
The phone provides the following advanced features:
128×48 LCD with backlight, easy to read
Status Indicators
Two-way SMS, voice mail
Call Divert, Call Waiting, Three-Way Calling, Call Barring
Emergency call
Menu driven interface for easy operation and configuration
Store 200 contacts
Save 200 SMS
Last call redials
Choice of 15 ring tones and 10 power On/Off musical tones
Adjustable ring and voice volume
AC power supply
Indoor antenna (Outdoor antenna is optional)
Speaker phone for hands-free operation
User friendly keypad
Battery provides long stand-by and talk time
Easy to service and repair

2
GSM FWP
PG130/131N
2 Important Information
The product can only be installed indoors.
Do not place the phone near high temperature objects, under direct sunlight, near source of
water, near fire or near inflammable and explosive materials. Avoid using the phone in high
temperature or humidity.
The phone may interfere with heart pacemaker, hearing aid and other electronic medical devices.
Therefore please follow the instructions given by your equipment suppliers or consult your doctor.
Turn your phone OFF in health care centers if any regulations posted in the area instruct you to
do so. Hospitals or health care centers may be using equipment that may be sensitive to external
RF energy.
Place the phone away from other electronic devices like TV and Radio to avoid interference.
Keep the product away from magnetic field and static electricity.
Place the phone out of the reach of small children.
Do not attempt to reassemble the phone by yourself. Only authorized personnel should service
the phone and its accessories. Faulty installation or service can be dangerous and may invalidate
the warranty.
Do not clean the phone while in operation. Before attempting to clean the phone, turn the phone
off, disconnect the external power adapter and take out the battery. Use a dry, soft cloth for
cleaning. Do not use liquid or aerosol cleaners.
Do not drop, knock or shake the phone. Rough handling may break the phone body and internal
circuit boards.
Do not use the phone if the antenna is damaged. Replace the damaged antenna immediately by
using a qualified technician. Use only a manufacturer approved antenna. Non-approved
antennas, modifications or attachments may impair call quality and damage the phone.
Do not hold the antenna during operation. This may affect call quality and cause the phone to
operate at unintended power levels.
Keep the antenna free from obstructions and position the antenna straight up. This will ensure
best call quality.
Only use the battery and the power adapter approved by the manufacturer. If not, it may cause
an explosion or result in a short circuit.
It is highly recommended to fully charge the battery before initial use. The battery might have
been discharged during storage and delivery.
Do not throw battery. Batteries are not to be disposed off by putting them in fire. It may explode
or catch fire.
The power adapter must be used within the specified AC voltage range.
Take out the battery if you won’t use your phone for a long time and keep the battery well.
During lightning, do not touch the power plug. It may result in an electric shock or death.
Do not touch the plug with wet hands. Always grasp and pull the plug, not the cord. Do not put
heavy things on the power cord or bend it too much.
During daily use, do not pull out the power adapter. The battery is used for backup power, which
will not cause the increased consumption of electricity.
Don’t use the power adapter if the power cable is damaged. Contact the maintenance center
immediately and replace the adapter.
3
GSM FWP
PG130/131N
3 Product Overview
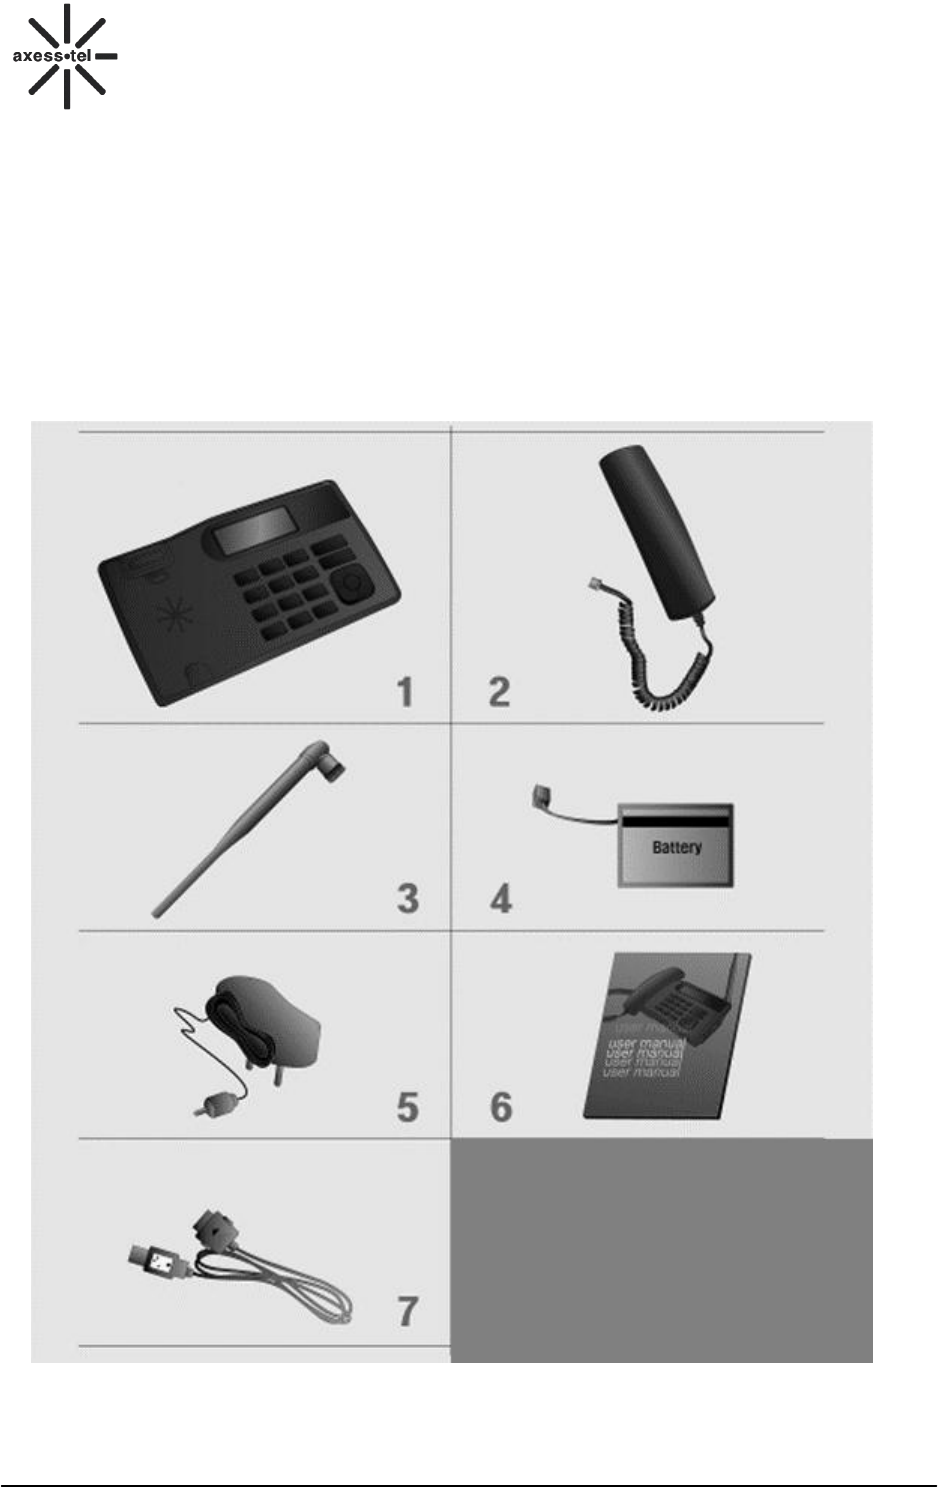
3.1 Packing List
Once you open the product package, please check the packing list to make sure there is no part
missing. If any part is missing or broken, please contact customer service. The packing list is as
follows:
1. Main Unit 2. Handset
3. Antenna 4. Battery
5. Power Adaptor 6. Manual
7. Data Cable
4
GSM FWP
PG130/131N
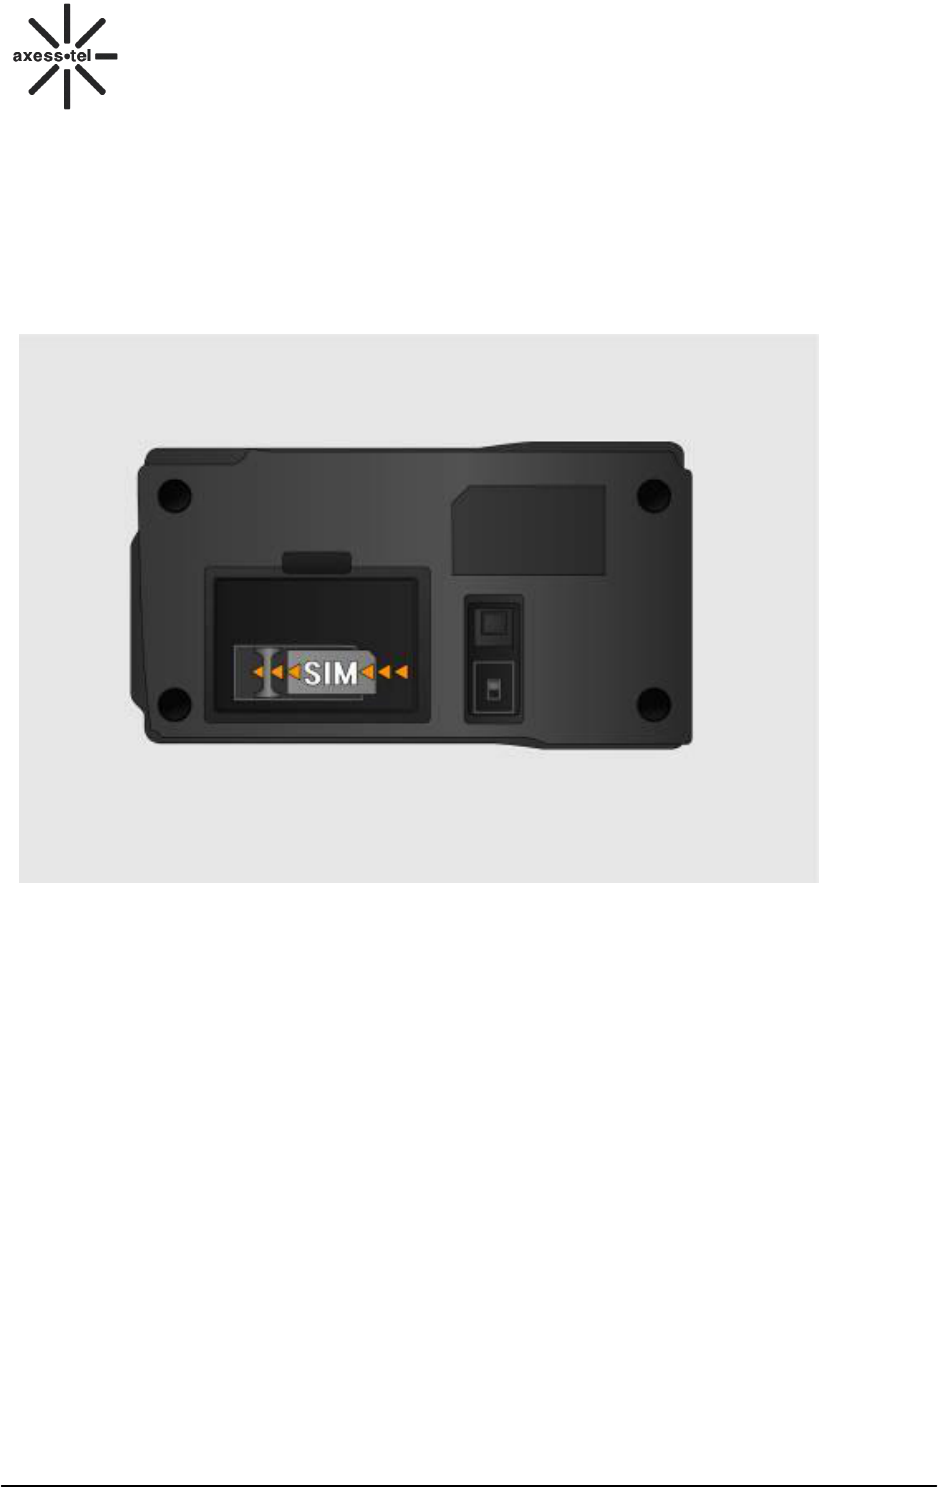
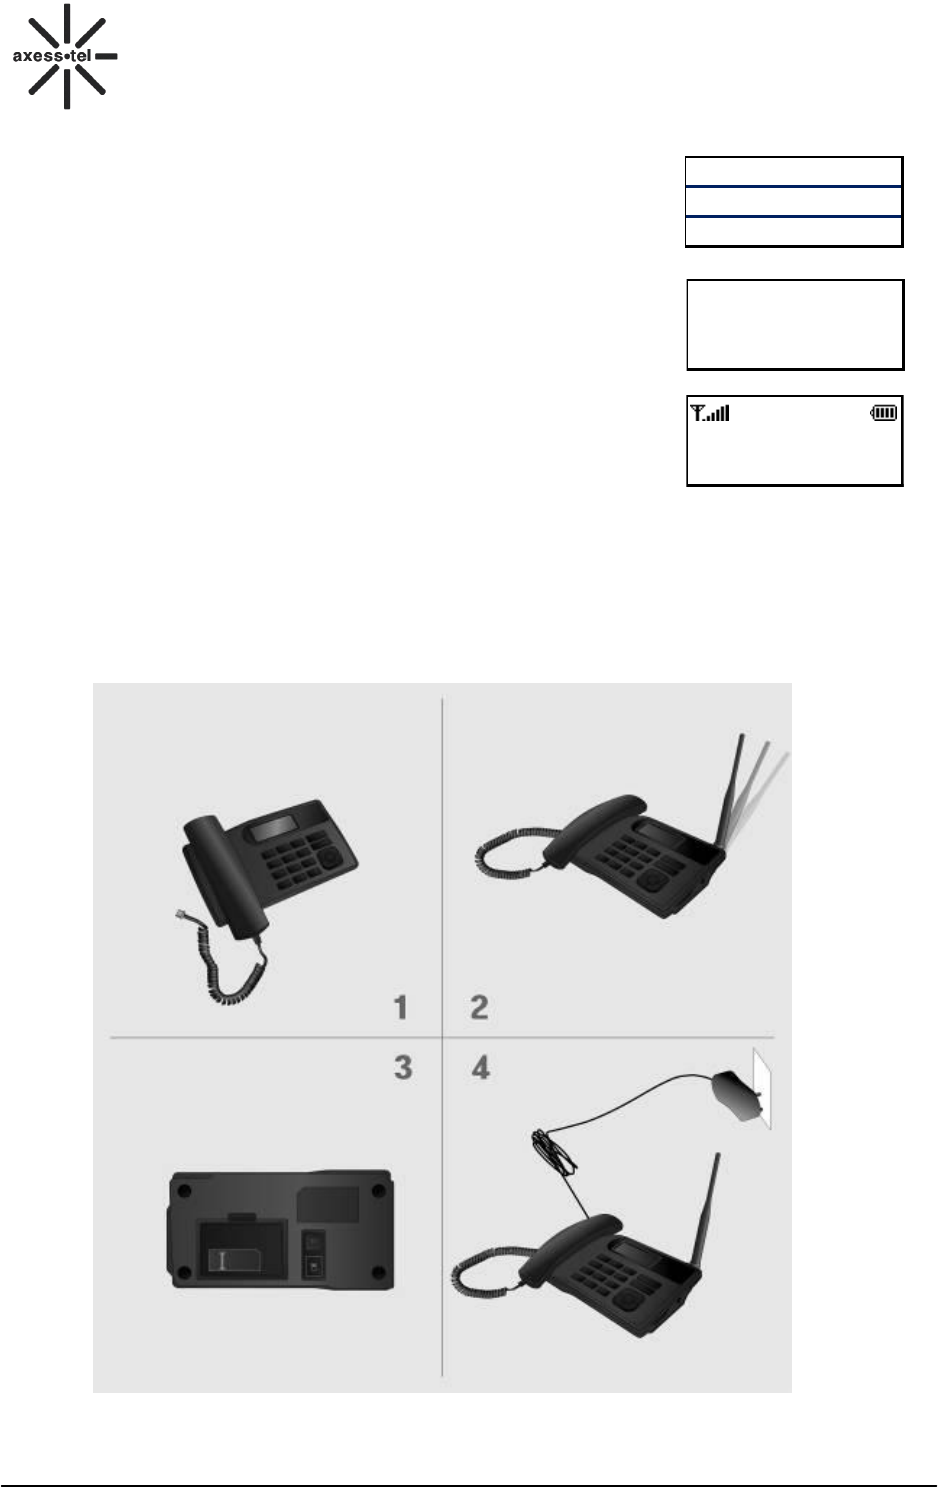
3.2 SETTING UP YOUR PHONE
Installing SIM card
1. Remove SIM bracket cover.
2. Lift SIM bracket by pulling.
3. Insert proper SIM card.
4. Put the bracket back in place.
5. Close the cover.
5
GSM FWP
PG130/131N
Connect the antenna
Attach the handset
ON/OFF power switch is located
on the bottom side of the phone.
Please turn on the power switch to
"ON" for operation
Plug the Power adaptor into an
appropriate Wall outlet
USING SIM CARD FOR THE FIRST TIME
1. Entering PIN code.
NOTE1: The PIN feature function can be set on/off in
PIN setup menu.
NOTE2: PIN code can be changed in PIN setup menu.
2. If an incorrect PIN code is entered, an error message
displays.
NOTE: There are 3 chances to enter the correct
PIN code. If incorrect PIN codes are entered
3 times, the SIM card will be locked. To unlock
3. The phone is ready to use after entering the correct
PIN code.
* Default PIN code is provided by your service provider.
Installing the phone
This phone operates by receiving DC power from the AXESSTEL power adaptor,
The phone is equipped with a rechargeable
Battery as a backup in case of an AC power failure.
Desktop installation
ABC
13/01/2010 08:05 PM
Enter PIN:Remain:3
Clear
Wrong PIN!
6
GSM FWP
PG130/131N
3.3 Product Introduction
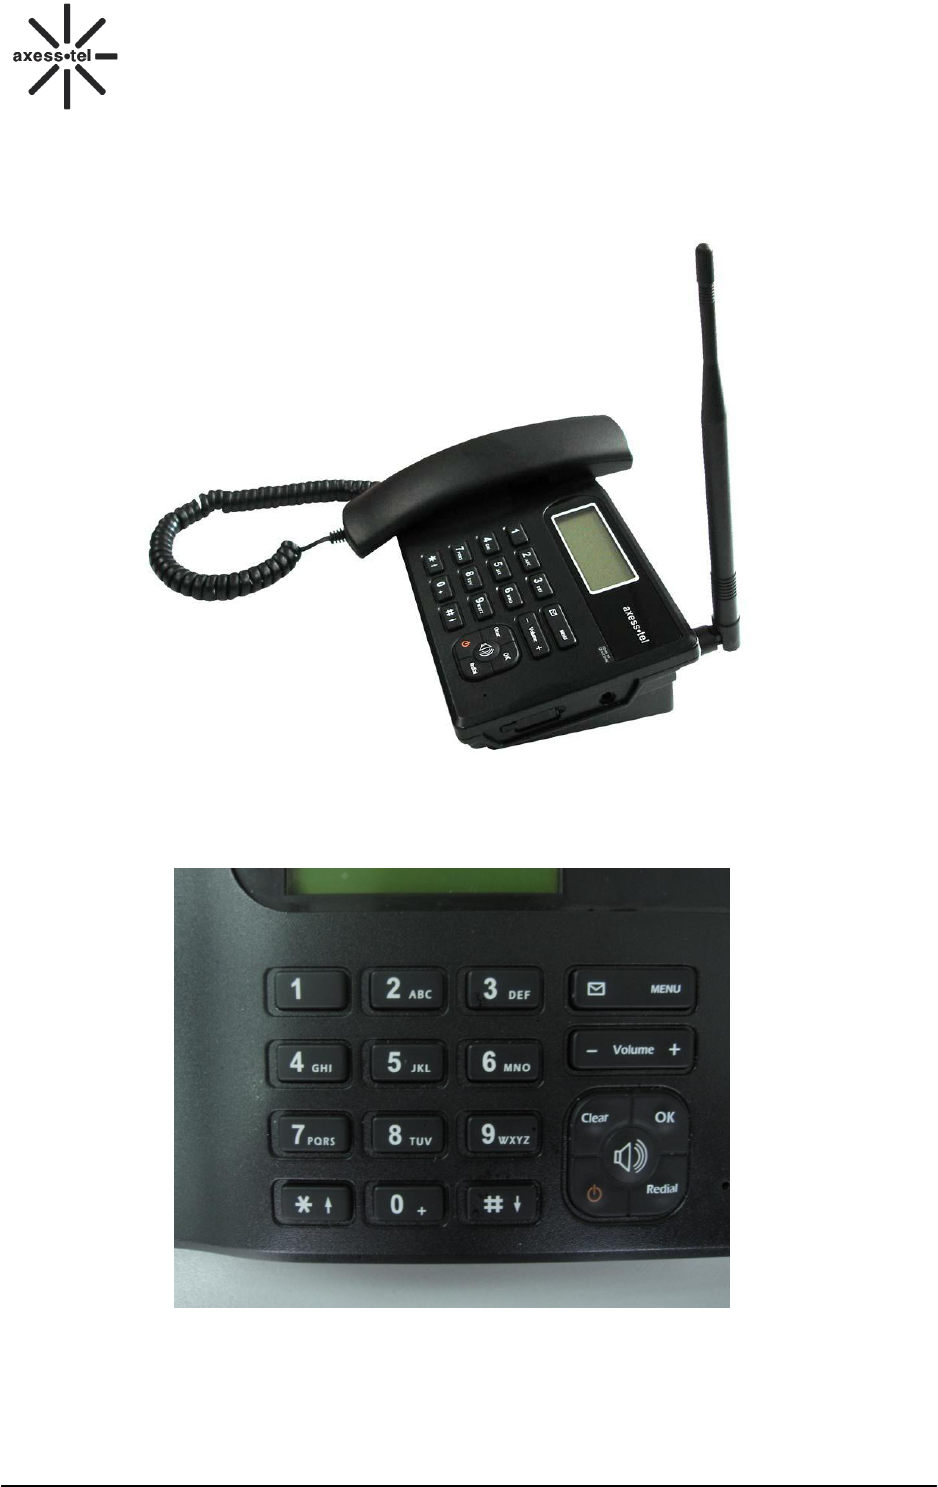
3.3.1 Appearance
Figure 1 GSM PG130/131N Fixed Wireless Phone Appearance
3.3.2 Key Definition
Figure 2 Key Layout
7
GSM FWP
PG130/131N
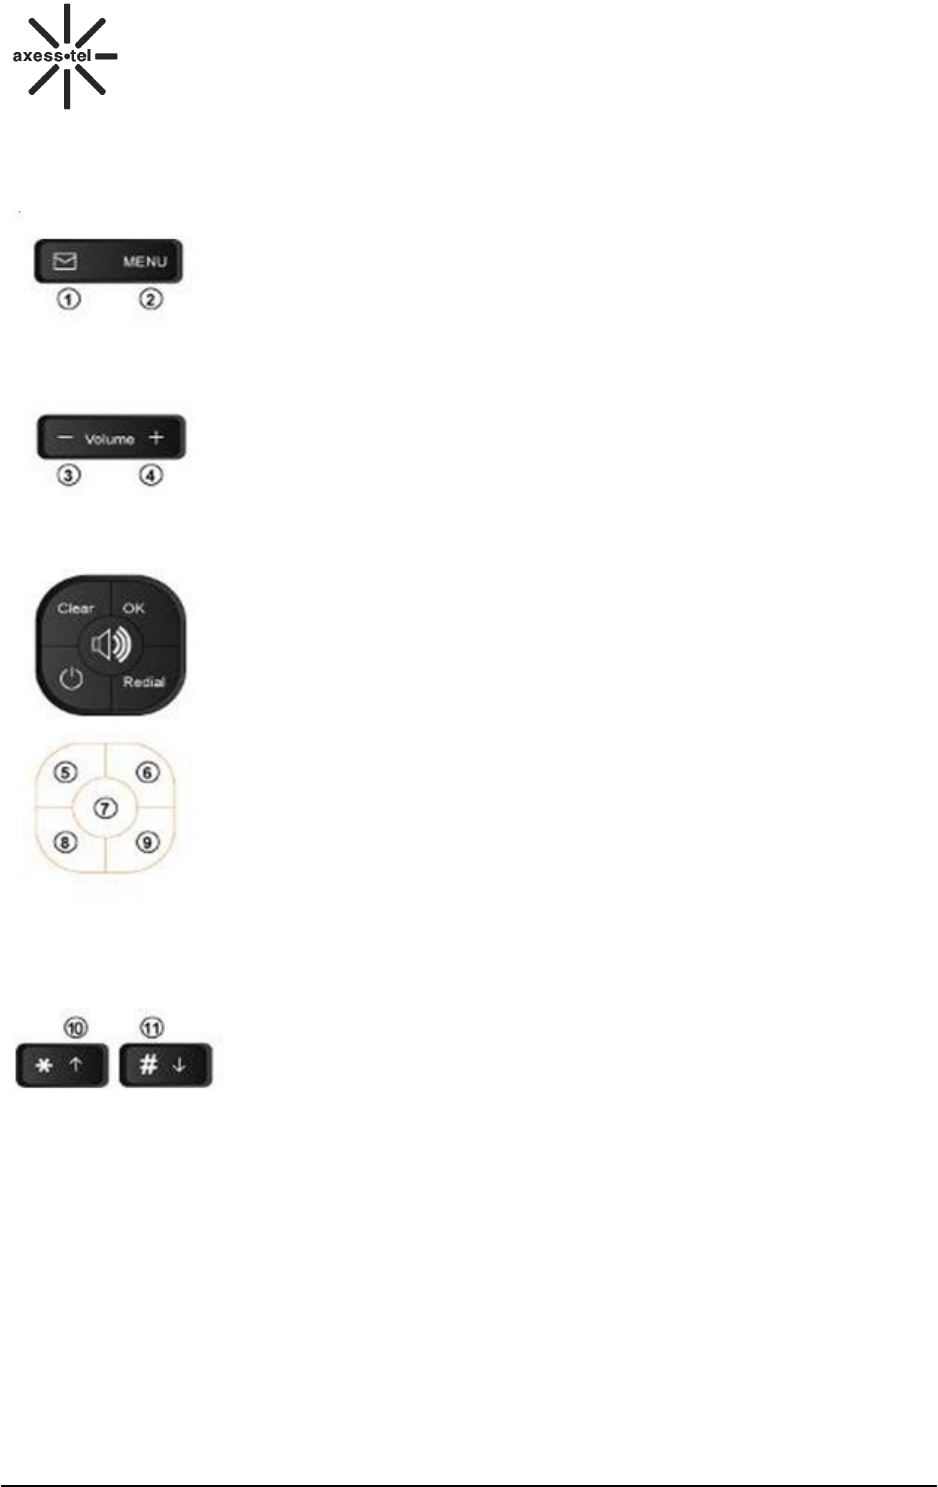
3.3.3 FUNCTION KEYS
1. <Message> KEY: Press this key to retrieve messages.
2. <MENU> KEY: Press this key to display the phone's main menu.
3/4. <Volume - +> KEY: Press this key to control the volume of keypad,
earpiece and speaker. In the menu mode, use this key to scroll through
the menu items.
5. <Clear> KEY: Clears information from display screen.
- To erase one character from the display screen, press it once.
- To erase all characters on the screen, press and hold.
- To go back one step in the menu mode, press it once.
- To select some options at the lower left corner of the screen.
6. <OK> KEY: Press this key to store a phone number in the phone book,
to save menu settings.
- To select some options at the lower right corner of the screen.
7. <SPEAKER> KEY: The Speaker button is used to place or receive a
call without using the handset. The integrated microphone and speaker
on the Main unit allows hands free conversation.
8. <POWER On/Off>: Press this key to turn ON or OFF the phone.
9. <Redial> KEY: Press this key to redial the last number called or to
connect a call right after dialing the number without waiting until the call
is connected automatically.
10/11. <*>KEY /<#> KEY: In the menu mode, use this key to scroll
up/down through the menu items. In the edit mode, use this key for
special characters

8
GSM FWP
PG130/131N
3.3.4 GETTING TO KNOW YOUR PHONE
1. Antenna: Adjusting the position of antenna improves the sound quality of the call.
2. Message: Press to access message related menus.
3. MENU: Press to access the phone's menus.
4. Volume Up/Down: Lets you adjust sound levels and scroll through the menu options and displays.
5. Clear: Lets you clear your last entry.
6. OK: Stores phone numbers, and any settings you select in the menu with in the Phone’s memory.
7. Speaker: Allows you to place or receive a call without using the handset.
8. Power: End or reject the call and Turn On or Off the phone.
9. Redial: Allows you to redial the last.
10. Scroll: Lets you scroll through the menu options and displays.
9
GSM FWP
PG130/131N
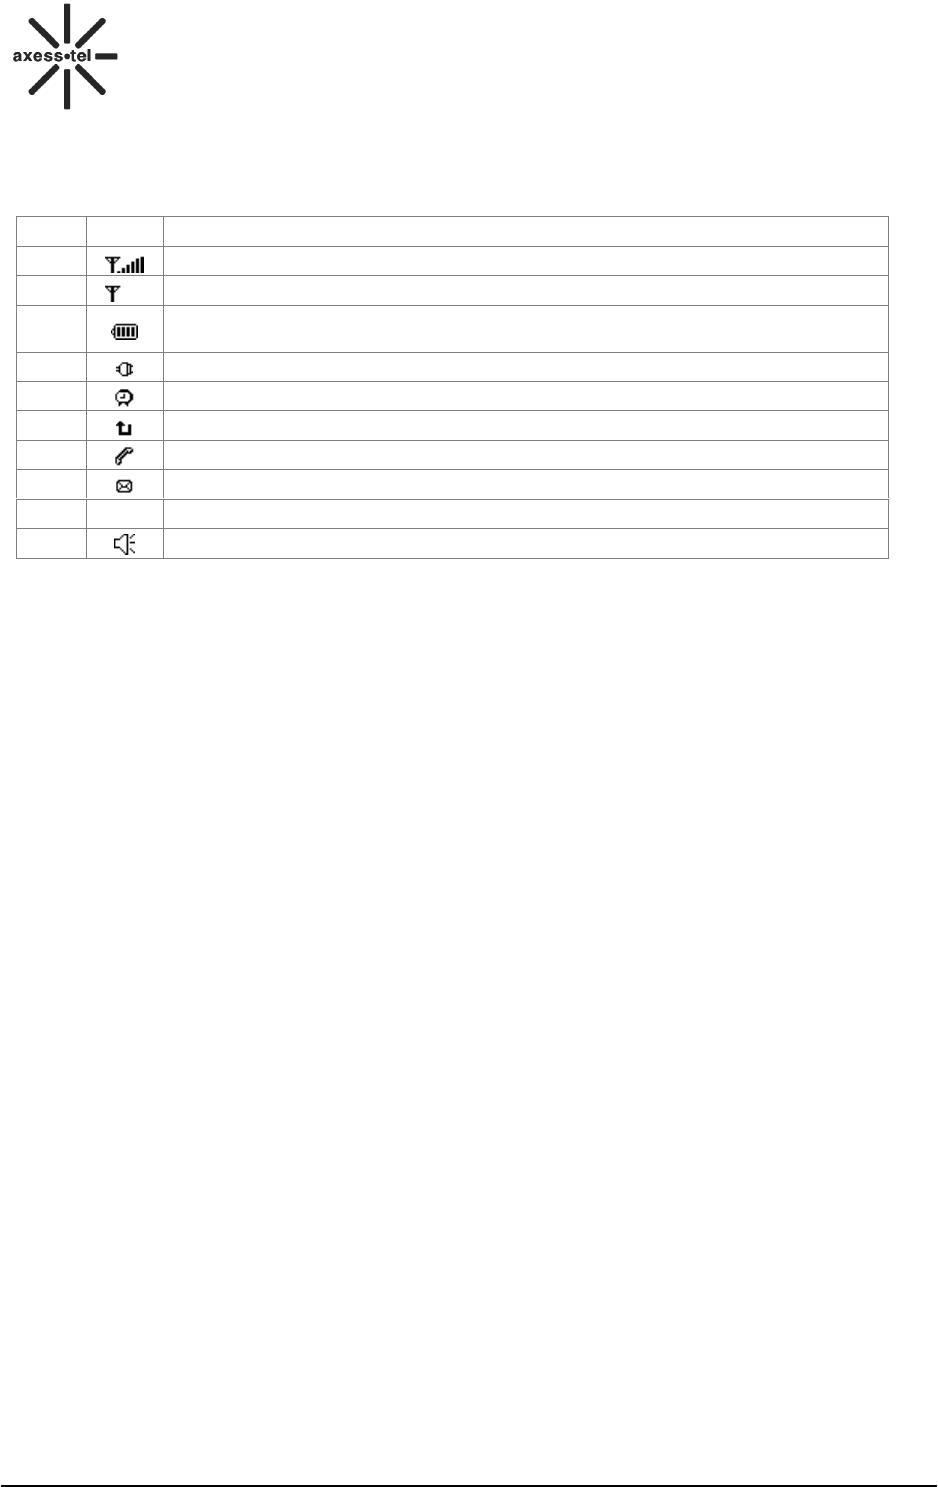
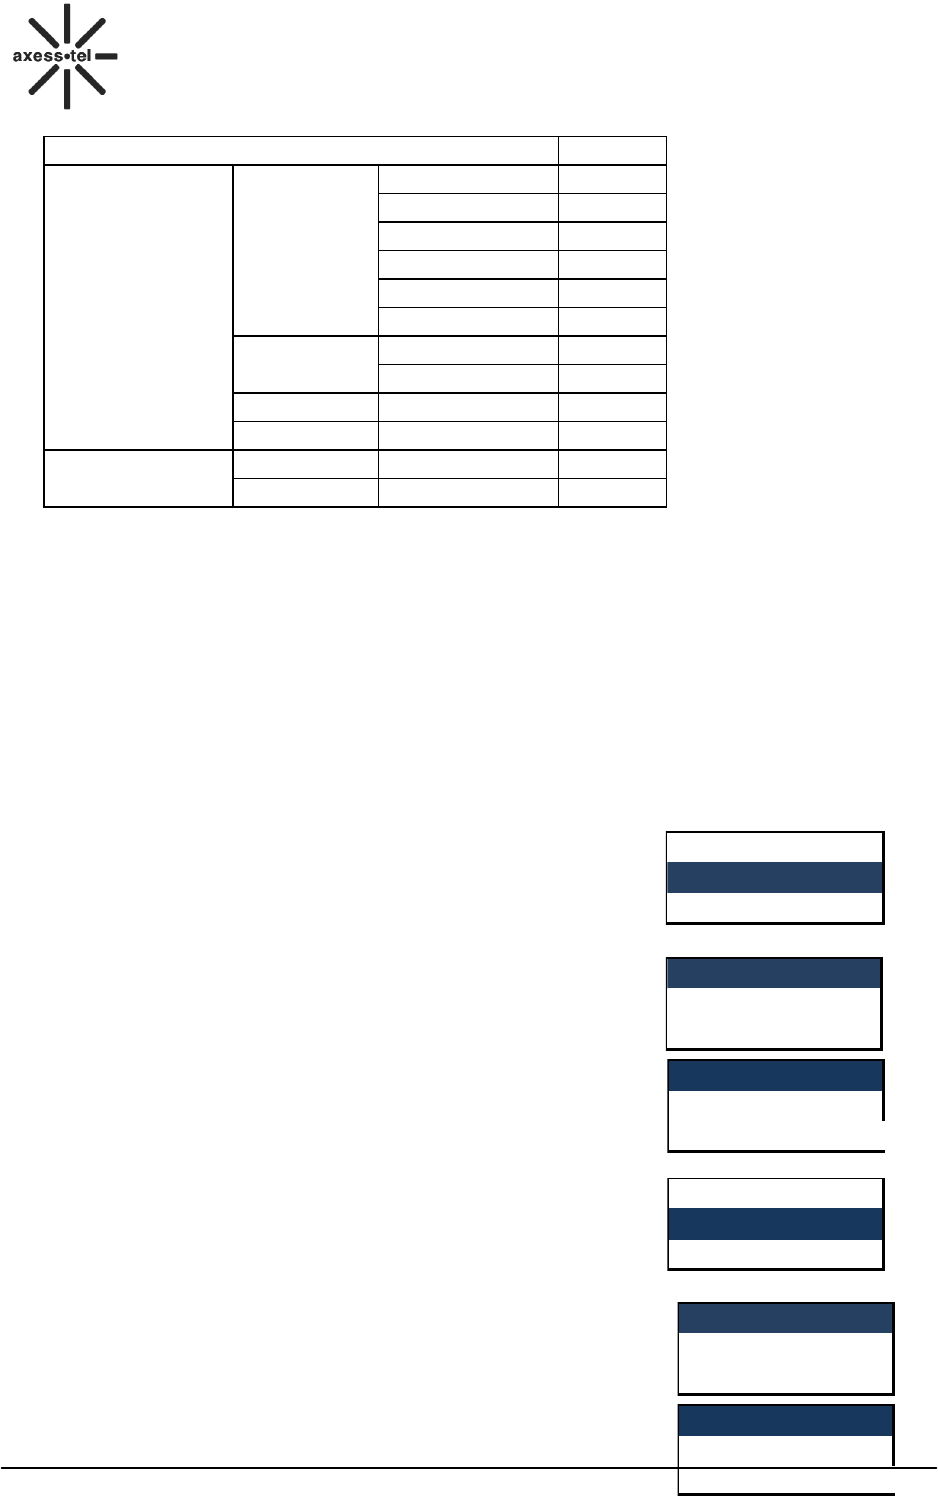
3.3.5 Display Icon
The following icon may appear on the display of the phone:
No.
Icon
Description
1
Current signal strength. The more bars there are, the stronger the signal is.
2
No signal.
3
Battery capacity indicator. The more bars there are, the more capacity the
battery has.
4
Supplied by charger
5
Alarm on
6
Call forwarding
7
Missed call
8
Unread message
9
RM
Roaming
10
Speakerphone active
Figure 3 Display Icon
4 Basic Operations
4.1 Power On/Off
Connect the handset to the underside of the phone, then open the battery door and connect the
battery. Plug in the power adapter into AC outlet, and then connect the other end of the power
adapter into the right side of the phone.
Switch the <Power> switch (on the underside of the Phone) to ON, then press the <Power On/Off>
Key on the panel for 3 seconds to power on the phone, your phone should go to standby screen and
is ready to use.
You can turn the phone off directly by switching the <Power On/Off> switch (on the rear of the phone)
to OFF position. If the phone will not be used for long time, please turn this switch to OFF. Or you can
press the <Power On/Off> Key for 3 seconds to power off the Phone.
Note: Before press the Power ON, please turn the hardware switch to ON which in the bottom side of
the phone.
4.2 Make a Call
While your phone is power on and at idle screen, enter a destination number you wish to call and then
press <Redial> Key. (Note: To modify digits you enter, you can press <CLEAR> Key to delete wrong
digits first and then enter new digits). Once the call is connected, the phone’s screen will display the
number you have dialed, and the time duration the call has lasted.
The phone also has a speaker. To use the speaker to make a call, press <SPEAKER> Key, enter a
phone number, and press <REDIAL> Key.
4.3 Answer a Call
When there is an incoming call, the phone will ring and display the Phone number of the incoming call
(if the number is available). You can pick up the handset or press <SPEAKER> Key to answer the
incoming call. The ring tone and ring-tone volume can be changed in the sounds menu.
4.4 End a Call
You can end a call by pressing <Clear> KEY to select End. If you are using the handset for a phone
call, hanging up the handset will end the call automatically.

10
GSM FWP
PG130/131N
5 Main Menu
1) Press <<MENU> KEY to enter the main menu from the idle screen. The main menu includes:
Contacts, Messages, Recent Calls, Tools, and Settings. The menu tree is as follow:
Menu
Call log
All calls
Dialled calls
Received calls
Missed calls
Delete call log
Call Duration
Contacts
Search
New
Service Number
Speed dial
Copy
Delete
Save to
Memory status
Messages
Time and alarm
New Message
Inbox
Outbox
Drafts
Templates
Voice Mail
SMS settings
Set time/date
Set format
Alarm
Sounds
Ringer
Volume
Ring Type
Alert
Configuration
Greeting
Language
Backlight
Contrast
Auto send time
Call waiting
Call divert
Call barring
Security
Owner number
Phone lock
PIN Lock
Auto keypad lock
Change PIN Lock
Barred dial
Hotline/PLAR
Guard System
Phone info
Clear memory
Restore factory settings
11
GSM FWP
PG130/131N
Services
STK
Menu
FM Status
Channel list
FM Radio(Optional) Manual input
Preset auto search
Settings
Figure 4Main Menu Tree
6 Call Log
You can find- All Calls, Dialled Calls, Received Calls, Missed Calls,
Delete all Log, and Call Duration in the Call Log menu.
In standby screen, press <Menu> KEY, Press<Volume - +> KEY scroll to Call log item and
press<OK> KEY.
6.1 All calls
1) In Call log menu, Scroll to All calls via <Volume - +> KEY, press
<OK> KEY.
2) The All calls List will be displayed; you can scroll to the desired number,
3) Press <OK> KEY to: View the call information; Press <OK> KEY into
Option: Delete the call log, Save the Number to Phone Book, Call,
Edit this number, and Send SMS to this number.
6.2 Dialed calls
1) In Call log menu, Scroll to Dialed Calls via <Volume - +> KEY, press <OK> KEY.
Back OK
1 Call log
2 Contacts
Back OK
1 All call
2 Dialled calls
Back Option
1 123456789
2 1 time
Back OK
1 Delete
2 Save to Phonebook
Back OK
3 Call
4 Edit
Back OK
4 Edit
5 Send SMS
12
GSM FWP
PG130/131N
2) The Dialed Calls List will be displayed; you can scroll to the desired number,
3) Press <OK> KEY to: View the call information; Press <OK> KEY to select
Option: Delete the call log, Save the Number to Phone Book, Call, Edit this
number, and Send SMS to this number.
NOTE: In standby screen, press <OK>KEY enter the Dialed calls.
6.3 Received calls
1) In Call log menu, Scroll to Received Calls via <Volume - +> KEY,
press <OK> KEY.
2) The Received Calls List will be displayed; you can scroll to the
desired number,
3) Press <OK> KEY to: View the call information; Press <OK> KEY to
select Option: Delete the call log, Save the Number to Phone Book,
Call, Edit this number, and Send SMS to this number.
Back OK
Back OK
Back Option
Back OK
Back OK
Back OK
1 Delete
2 Save to Phonebook
3 Call
4 Edit
4 Edit
5 Send SMS
1 123456789
2 987654321
1 All call
2 Dialled calls
1 123456789
2 1 time
Back OK
Back OK
Back Option
Back OK
Back OK
Back OK
3 Call
4 Edit
4 Edit
5 Send SMS
2 Dialled calls
3 Received calls
1 123456789
2 987654321
1 01/01/2010
2 06:23 AM
1 Delete
2 Save to Phonebook
13
GSM FWP
PG130/131N
6.4 Missed calls
1) In Call log menu, Scroll to Missed Calls via <Volume - +> KEY, press
<OK> KEY.
2) The Missed Calls List will be displayed; you can scroll to the desired
number,
3) Press <OK> KEY to: View the call information; Press <OK> KEY to
select Option: Delete the call log, Save the Number to Phone Book,
Call, Edit this number, and Send SMS to this number.
6.5 Delete call log
In Call log menu, Scroll to Delete call log via <Volume - +> KEY, press
<OK> KEY. You can scroll the cursor to erase All calls, Dialed calls,
Received calls and Missed calls.
1) Press <OK>KEY to select erase item.
2) Press <OK>KEY to confirm Delete(Yes)
3) Press <Clear>KEY to cancel Delete(No)
Note: If no call log, press <OK>KEY, will pop up the “Empty” dialog box.
6.6 Call Duration
In Call log menu, Scroll to Call Duration via <Volume - +> KEY, press
<OK> KEY. You could scroll the cursor to view duration of Last call Time,
Total Dialed, Total Received, scroll to Erase All to erase all duration.
Back OK
5 Delete call log
6 Call Duration
Back OK
0:00:00
Back OK
Back OK
Back Option
Back OK
Back OK
Back OK
1 Delete
2 Save to Phonebook
3 Call
4 Edit
4 Edit
5 Send SMS
3 Received calls
3 Missed calls
1 123456789
2 987654321
1 01/01/2010
2 06:23 AM
Back OK
Back OK
Back OK
5 Delete call log
6 Call Duration
1 All calls
2 Dialled calls
Delete all?
14
GSM FWP
PG130/131N
7 Contacts
Contacts can be used to store contact’s name and contact’s phone numbers,
home number, email address, office number and associate sound. You can
store up to 200 entries to phone memory.
In standby screen, press <Menu> KEY, Press<Volume - +> KEY scroll to
Contacts item and press<OK> KEY.
7.1 Search for a Contact
You can search a contact by name or number
1) In Contacts menu, Scroll to Search via <Volume - +> KEY, press <OK>
KEY.
2) Select Name or Number, press <OK> KEY to input the Name or
Number for search,
3) Press <OK> KEY to search or Press <#> KEY change input method,
press OK to start search.
7.2 Add a New Contact
7.2.1 Add a New Contact from the Menu
1) In Contacts menu, Scroll to New via <Volume - +> KEY, press <OK>
KEY, then you can choose the contact store to SIM or to Phone(if in the
save to options you choose Ask on saving),
2) Scroll to Name via <Volume - +> KEY, press <OK> KEY to input the
name, and then press <OK> KEY when done.
You can press<Clear>KEY to delete a character.
3) Scroll to Number via <Volume - +> KEY, input the phone number, and then press <OK>
KEY ,select Done
4) Scroll to this item you need to add to input or edit.
5) Then Press <OK> KEY to finish adding a contact, press <Clear> KEY
select Done, press <OK> KEY to save the contact.
NOTE: Press “0”KEY to select add a “blank space”, and “#” key to change
input method.
7.2.2 Add a New Contact in Standby Mode
1) In standby screen, after inputting the phone number, press <OK> KEY to
save the number directly.
2) Save the number to SIM card or to Phone. If you select To Phone,
press<OK> KEY, and press <OK> KEY again to edit the name
3) When done editing the name (press “#” key to change input method),
press<OK> KEY, press <Clear> key to the next option: Save.
4) Select Save, and press <OK> KEY
5) And press<Clear>KEY, <OK> KEY to save the contact.
Back OK
2 Contacts
1 Call log
Back OK
1 Search
2 New
Back OK
1 Name
2 Number
Back OK
1 Search
2 New
Back OK
2 To Phone
1 To SIM
Back Edit
1 Name
2 Number
123456789
Back Save
Back OK
Edit
OK
Back OK
ABC 3/14
AAA
1 Done
2 Input method
1 To SIM
2 To Phone
1 Name
2 123456789
15
GSM FWP
PG130/131N
NOTE: If this operation in press <SPEAKER> or lift the HANDSET state of complete, May be conflict
whit Auto send time function.
7.3 View a Contact
In Contacts menu, Scroll to Search via <Volume - +> KEY, press <OK> KEY, input nothing,
press <OK> KEY to view the contact list. Scroll to the desired contact via <Volume - +> KEY,
press <OK> KEY to view the contact information.
7.4 Service Number
1) In Contacts menu, Scroll to Service Number via <Volume - +> KEY,
press <OK> KEY, it will display the service number.
7.5 Edit a Contact
1) Refer to 7.3 View a contact, view the contacts list, press <OK> KEY, scroll to Edit via <Volume
- +> KEY, and then press <OK> KEY,
2) Scroll to the item you need to edit, press <OK> KEY to edit.
7.6 Speed Dial
The phone supports the speed dial function. You can dial the stored number
by pressing just one key.
a) Pick up handset or press <Speaker>
b) Press and hold a number-key (That you previously assigned) for a
moment.
1) In Contact menu, scroll to Speed Dial via <Volume - +>KEY, press
<OK>KEY.
2) If you want to use the speed dials function, you need to enable this
function first. Scroll to Enable Speed Dial via <Volume - +> KEY, press
<OK> KEY to enable this function to On.
3) Then scroll to Set Number via <Volume - +> KEY, press <OK> KEY,
scroll to the number which you need to assign. Press <OK> KEY to
enter options, and select assign contact and press <OK> KEY to enter
contact list, scroll to contact list to contact you want to set, press <OK>
KEY to save your contact into speed dial.
4) You also can delete a contact from Speed Dial list.
In Speed Dial list, select any contact, press <OK> KEY to Option,
scroll to Delete via <Volume - +> KEY and press <OK> KEY, then
press <OK> KEY again to confirm.
Note:When done editing, press the <Power> KEY to return to the standby screen.
Back OK
2 New
3 Service Number
OK
SN:
Back OK
Back Off
Back On
Back Off
Back Option
Back OK
1 Assign Contact
3 Service Number
4 Speed dial
1 Enable speed dial
2 Set number
1 Enable speed dial
2 Set number
1 Enable speed dial
2 Set number
2 <Empty>
3 <Empty>
16
GSM FWP
PG130/131N
7.7 Copy contact
1) In Contact menu, scroll to Copy via <Volume - +>KEY, press
<OK>KEY.
2) You can copy the contact form SIM or phone via <Volume - +>KEY
3) If you select the From SIM, press<OK> KEY, and press <OK>KEY
again to confirm.
7.8 Delete
1) In Contact menu, scroll to Delete via <Volume - +>KEY, press
<OK>KEY .
2) There are 3 options:
All SIM: delete all SIM contacts
All phone: delete all phone contacts
One by one: delete the contact one by one.
3) If you select the All SIM and All phone, press <OK> KEY, it will pop up
a dialog box, you must input the password.
The password is:0000
4) After input password, press <OK> KEY, and press <OK> KEY again to confirm.
5) If you select the One by one, press <OK> KEY, enter the contacts list, and select the contact
which you want to delete via <Volume - +>KEY, and press <OK> KEY, press <OK> KEY again
to confirm.
7.9 Save to
1) In Contact menu, scroll to Save to via <Volume - +>KEY, press
<OK>KEY .
2) There are 3 options:
SIM card: save to SIM card. When you enter a new contact, it will save to SIM
card immediately.
Phone memory: save to phone. When you enter a new contact, it will save to
phone memory immediately.
Ask on saving: ask when you saving. When you enter a new a contact, it will ask you save to SIM
card or phone.
3) Press <OK>KEY to save you setting.
7.10 Memory status
1) In Contact menu, scroll to Memory status via <Volume - +>KEY, press
<OK> KEY .
Back OK
Back OK
1 From SIM
2 From phone
5 Copy
6 Delete
Back OK
Back OK
Back OK
2 All phone
3 One by one
5 Copy
6 Delete
1 All SIM
2 All phone
Back OK
Back OK
Back OK
o Phone memory
o Ask on saving
7 Save to
8 Memory status
o SIM Card
o Phone memory
Back OK
Back
7 Save to
8 Memory status
SIM: 0/200
Phone:0/200
17
GSM FWP
PG130/131N
2) The screen will display the memory status.
SIM: 0/200 (current/total)
Phone: 0/200 (current/total)
8 Messages
You could build a new message, view the inbox、drafts、outbox and templates, perform SMS setting,
voice mail broadcast message.
In standby screen, you can enter Messages function through Press <SMS> key directly.
8.1 Send a Message
You could send a message to one recipient or multiple recipients.
1) In Messages, press New Message and <OK> KEY to compose a new
message,
2) Input the text, or press <OK> KEY to select “Option”:
1 Done
2 User Template
3 Insert PhoneBook Number
4 Insert PhoneBook Name
Press <OK> KEY and select Done to finish inputting the text,
3) You can choose
1 Send Only to send to one recipient without saving
2 Save and Send to send to one recipient with saving the message to Outbox
3 Save to save the message to Drafts without sending out
4 Send to Many to send multiple recipients
5 Send by group to send multiple recipients by group
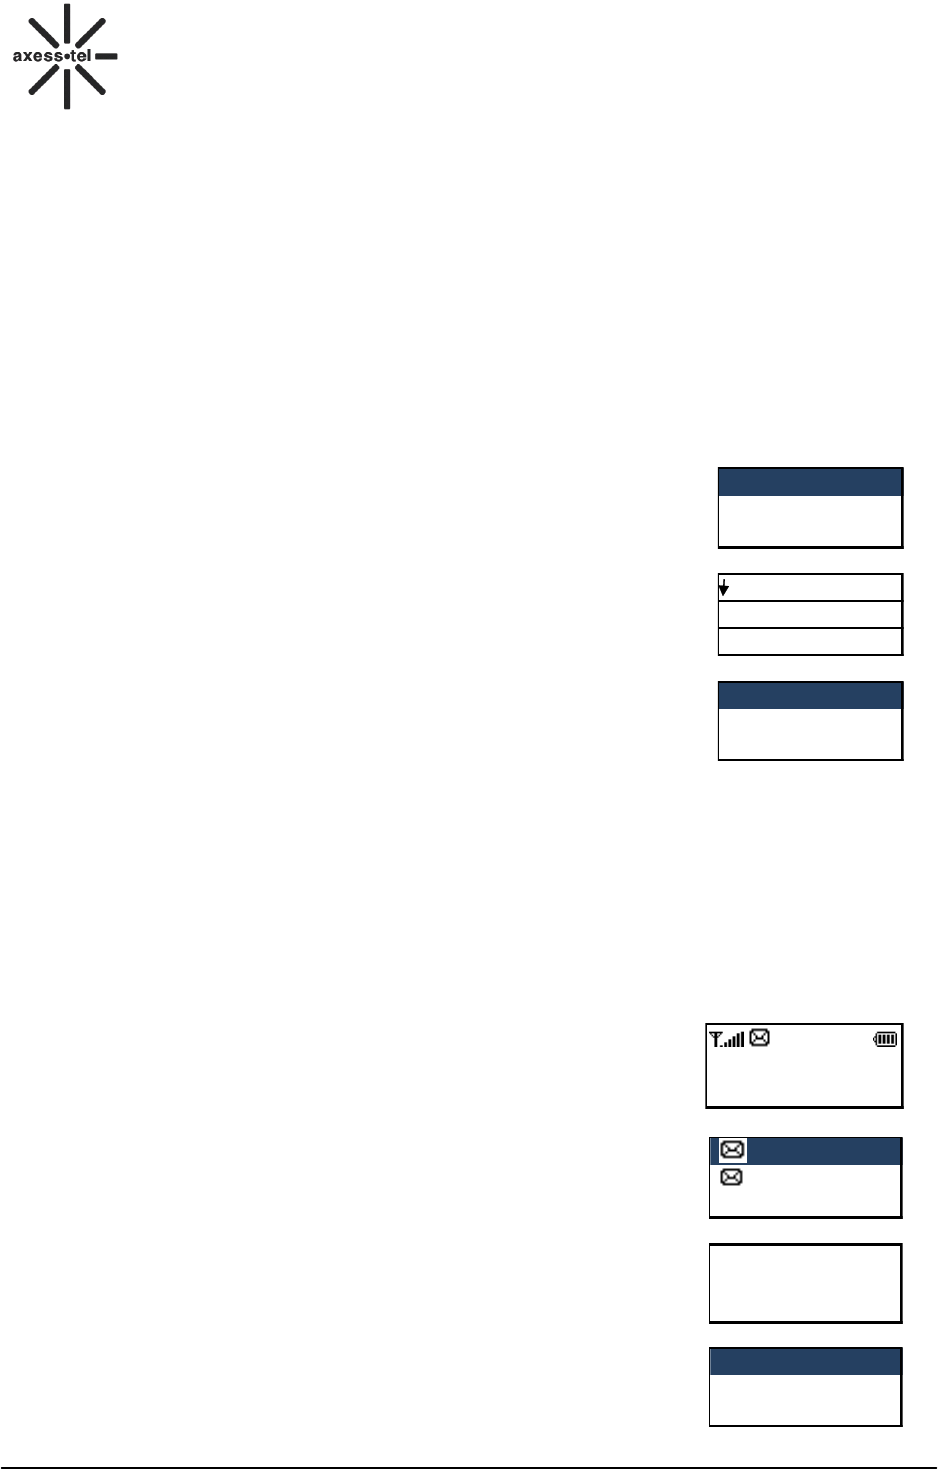
8.2 Receive a Message
1) If there is a new message, the phone will ring alert. In idle mode, press
<OK> KEY to read the message,
2) Or you could read the new message in the Inbox. Press <SMS> Key,
scroll to Inbox via <Volume - +> KEY, press <OK> KEY, scroll to the
message which is you want to read via <Volume - +> KEY. Then press
<OK> KEY to read message.
3) Then press <OK> KEY into Option you can
1. Reply: reply to the message
2. Delete: delete the message
3. Edit: edit in the message and then save or send
4. Forward: forward the message to other recipient(s)
5. Erase All: erase all message in the Inbox
Back OK
Option
Back OK
1 New Message
2 Inbox
ABC 160/1
1 Done
2 User Template
Back OK
Back Option
Back Option
2 Delete
123456789
987654321
11:10 AM
Hello!
1 Reply
1 New Message
Cancel
Read
18
GSM FWP
PG130/131N
6. Use Number: get all numbers in the message includes the sender’s number. You can dial
directly, or Send SMS directly, or save the number to phone book.
8.3 View Sent Messages
1) In Messages, scroll to Outbox via and press <OK> KEY to view the
outbox
2) Scroll to the message you want to read, press <OK> KEY to Send,
Edit, Delete, Erase All, and Use Number.
8.4 Send a Message by using Templates
1) In Messages, scroll to Templates via <Volume - +> KEY, press <OK>
KEY to enter template menu,
2) There are 10 template messages in Templates menu, you could edit
the template or delete the template,
1 Please call me, urgently
2 How are you?
3 Call we have lunch today at …
4 Be right back.
5 Please sms me, I am at meeting right now
6 Sorry!
7 Thank you
8 How was the day?
9 Long time no see.
10 Lots of luv
3) Scroll to the template message which is you want to use via <Volume -
+> KEY, then press <OK> KEY, scroll to:
1 Edit: Edit the template message
2 Remove: Delete the template message
3 Insert Message: Insert the template message into the message
8.5 SMS Settings
In standby screen, press<SMS>KEY , scroll the SMS Settings via
<Volume - +> KEY. You can set Delivery report; Delete all, Memory
status in Message Settings.
1) Delivery report: scroll via <Volume - +> KEY and press <OK> KEY
into this item, Press <OK> KEY marked this option and press
<Clear> KEY to Save.
is on.
is off.
2) Delete All
Scroll Delete All via <Volume - +> KEY and press <OK> KEY twice,
you can delete all messages.
3) Memory status
Back OK
Back Option
Back ok
Back ok
Option
Back OK
2 User Template
2 Remove
2 Remove
3 Write message
ABC 136/1
urgently
1 Done
5 Template
6 Voice Mail
1 Please call me, urgently
2 How are you?
1 Edit
Back OK
Back OK
Back On
6 Voice Mail
7 SMS settings
1 Delivery report
2 Delete all
[] Delivery report
Back OK
Back
2 Delete all
3 Memory status
SIM : 0/50
Phone : 0/200
19
GSM FWP
PG130/131N
Scroll Memory status via <Volume - +> KEY and press <OK> KEY, you will check the SIM and
Phone memory status
8.6 Voice Message
In standby screen, press<SMS>KEY, scroll to Voice mail item via<Volume
- +> KEY, and press <OK>KEY to enter the menu.
Press <OK>KEY to the two option:
1) Edit Voice mail number,
Press<OK>KEY, scroll the name or number via<Volume - +> KEY,
and press<OK>KEY to edit.
2) Connect to voice
Press<OK>KEY, to call the voice mail number.
Note: In standby screen, if you voice mail number is empty, hold the
number NO.1 KEY down until pop up “Set voice mail?”screen to set the
voice mail number. Refer the step 1 to complete.
9 Time and alarm
In standby screen, press <Menu> KEY, Press<Volume - +> KEY scroll to
Time and alarm item and press<OK> KEY.
9.1 Set Time/Date
1) Select Time and alarm in main menu, select Set Time/date in Time
and alarm,
2) Scroll to Set Time/Date via <Volume - +> KEY, press <OK> KEY,
and scroll to 1 to set time, scroll to 2 to set date.
Back OK
2 Contacts
3 Time and alarm
Back OK
OK
OK
1 HH:MM
0:00
2 YYYY/MM/DD
1/1/2010
1 Set time/date
2 Set format
Back OK
Back OK
Back OK
Back OK
Back OK
Back OK
Back OK
o YYYY/MM/DD
o YYYY-MM-DD
1 Time Format
2 Date Format
o DD/MM/YYYY
o MM/DD/YYYY
o 12
o 24
o MM/DD/YYYY
o YYYY/MM/DD
1 Set time/date
2 Set format
1 Time Format
2 Date Format
Back OK
Back Option
Back OK
6 Voice Mail
7 SMS settings
1 <Empty>
1 Connect to Voice
2 Edit
20
GSM FWP
PG130/131N
3) If you want to change the format of time and date, select Set format in Time and alarm, press
<OK> KEY. Scroll to Time format and press <OK> KEY to set time format, 12hr or 24hr; scroll
to date format via <Volume - +> KEY and press <OK> KEY to set date format, DD/MM/YYYY,
MM/DD/YYYY, YYYY/MM/DD, YYYY-MM-DD.
Note: If your Language is Spanish, then date format should be: DD/MM/AAAA, MM/DD/AAAA,
AAAA/MM/DD, AAAA-MM-DD.
9.2 Set Alarm
You can set 5 alarms.
1) In Time and alarm, Select Alarm via <Volume - +> KEY,
2) Select any one from 5 alarms, press <OK> KEY to edit the alarm,
3) Scroll to 1 via <Volume - +> KEY, press <*> KEY or <#> KEY to
active/deactivate the alarm,
4) Scroll to 2 to set alarm time via <Volume - +> KEY,
5) Scroll to 3 to set alarm repeat way, press <*> KEY or <#> KEY to switch
the alarm repeat way, includes Once, Everyday, Days (If the repeat way
is Days, Press to select the days).
10 Sounds
In standby screen, press <Menu> KEY, Press<Volume - +> KEY scroll to
Sound item and press<OK> KEY.
Here you can set the ring tone and volume.
10.1 Ringer
In Sound menu, select Ringer, and then press <OK> KEY , you can scroll to
the ringer for Incoming Call, Alarm, Power On, Power Off, Message Tone,
Keypad Tone.
Press <OK> KEY enter the setting screen, select the ringer via <Volume - +>
KEY, press <OK> KEY to save.
Back OK
Back OK
Back OK
Done
Done
1 <Off>
2 00:00
Days
S M T W T F S
3 Repeat
<Once>
2 Set format
3 Alarm
[]1# 12:00 AM
[]2# 12:00 AM
Back OK
3 Time and alarm
4 Sound
Back OK
Back OK
Back OK
1 Incoming call
2 Alarm
10 Ring 10
11 MIDI 11
1 Ringer
2 Volume
21
GSM FWP
PG130/131N
10.2 Volume
In Sound menu, select Volume, and then press <OK> KEY , you can scroll to
the volume for Ring Tone, Key Tone via <Volume - +> KEY.
Press <OK> KEY enter the setting screen, press <Volume - +> KEY to set the
volume, press <OK> KEY to save.
10.3 Ring Type
In Sound menu, select Ring Type, and then press <OK> KEY, you can scroll
to the ring type as Single, Repeat, Ascending via <Volume - +> KEY, and
press <OK> KEY to save.
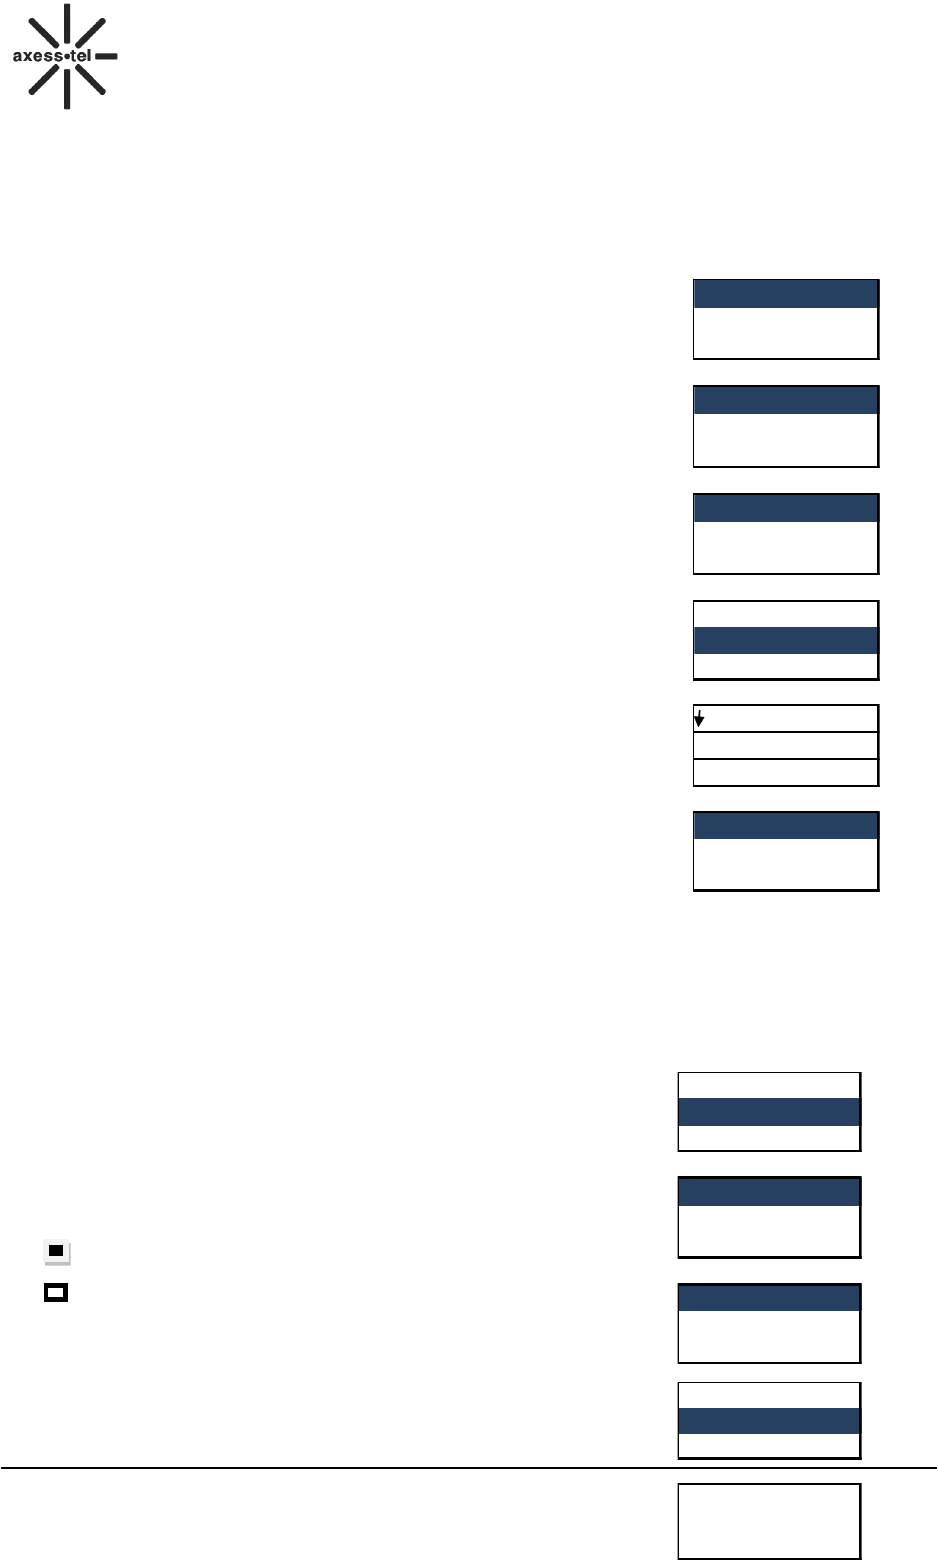
10.4 Alert
In Sound menu, select Alert, and then press <OK> KEY, you can turn on/off
the alert of Warning, Error, and Call Connect..
1) Scroll to any one which you want to alert, press <OK> KEY to on or off .
is on.
is off.
2) Press <Clear>KEY to done.
11 Configuration
In standby screen, press <MENU> KEY, Press<Volume - +> KEY scroll to
Configuration item and press<OK> KEY.
11.1 Greeting
In Configuration menu, press<Volume - +> KEY scroll to Greeting item and
press<OK> KEY.
You can on/off the Greeting, and edit it
Back OK
Back OK
2 Volume
3 Ring type
1 Ring Tone
2 Key tone
Back OK
Back OK
o Repeat
o Ascending
3 Ring type
4 Alert
Back OK
Back OK
Back OK
[]Error
[]Call Connect
3 Ring type
4 Alert
[]Warning
[]Error
Back OK
4 Sound
5 Configuration
Back OK
Back OK
Edit
1 Status
<Off>
2Greeting text
Welcome
1 Greeting
2 Language
22
GSM FWP
PG130/131N
11.2 Set Language
In Configuration menu, press<Volume - +> KEY scroll to Language item
and press<OK> KEY.
1) Select Language in Configuration,
2) Scroll to desired language via <Volume - +> KEY, press <OK> KEY to
set language.
11.3 Set LCD Backlight
In Configuration menu, press<Volume - +> KEY scroll to Backlight item
and press<OK> KEY.
1) Select Backlight in Configuration,
2) Scroll to the time you want to switch off the backlight via <Volume - +>
KEY, press <OK> KEY to save the setting. The time includes 5 Sec, 15 Sec, 30 Sec, 45 Sec.
11.4 Set LCD Contrast
In Configuration menu, press<Volume - +> KEY scroll to Contrast item and
press<OK> KEY.
1) Select Contrast in Configuration,
2) Press <Volume - +>to decrease/increase the contrast of the LCD. Press <OK> KEY to save the
setting.
11.5 Auto send time
In Configuration menu, press<Volume - +> KEY scroll to Auto send time
item and press<OK> KEY.
The phone can autodial after you input a number; you can set the time delay
for autodial after you input the number by setting Dial Delay.
Select Auto send time in Configuration,
1) Scroll to the time which you desired via <Volume - +> KEY, press <OK>
KEY to save the setting. The time includes 1s~9s or close autodial.
Back OK
Back OK
2 Language
3 Backlight
o Automatic
o English
Back OK
Back OK
o 5 Sec
o 15 Sec
3 Backlight
4 Contrast
Back OK
4 Contrast
5 Auto send time
Back OK
Back OK
5 Auto send time
6 Call waiting
o 1 Sec
o 2 Sec
23
GSM FWP
PG130/131N
11.6 Call Waiting
In Configuration menu, press<Volume - +> KEY scroll to Call waiting item
and press<OK> KEY.
If an incoming call is received while on another call, and the call waiting feature
is enabled, you can suspend the current telephone call and switch to the new
incoming call, you can then negotiate with the new or the current caller an
appropriate time to call back if the message is important, or to quickly handle a
separate incoming call.
There are 3 options in Call Waiting menu, Activate, Deactivate, Query
Status.
1) Select Activate, press <OK>, the screen will pop up “Please wait” dialog
box, and then will pop up “Call waiting Activated” dialog box.
2) Select Deactivate, press <OK>, the screen will pop up “Please wait” dialog box, and then will pop
up “Call waiting Deactivated” dialog box.
3) Select Query, press <OK>, the screen will pop up “Please wait” dialog box, and will pop up a
dialog box about the call waiting status.
Note: Three-Way Calling
Three-way Calling is a feature that lets you set up a three-way conversation with two different parties.
While you’re in conversation with a party, press the number you want to dial, then press <Redial> to
connect the three parties together .
Ex If you want to make a three-way calling with A and B,
1) Make a call with A
2) Dial B’s number when in conversation with A
3) When B received the call, the conversation with A is hold
4) press <OK> Key, and select the Conference with <*> Key or <#> Key
5) Press <OK> Key and then you can set up the three-way calling
11.7 Call Divert
In Configuration menu, press<Volume - +> KEY scroll to Call divert item and
press<OK> KEY.
Call Divert allows you to divert an incoming call to any other phone. You will
receive calls through the specified phone when Call Divert is activated.
1) Press<MENU>KEY,<Configuration>,<Call Divert>, press <OK>KEY.
2) There are 5 options in Call Divert menu, Divert All Voice Calls, Divert If
Unreachable, Divert If No Answer, Divert If Busy, and Cancel All Divert.
3) Press <OK>KEY, to select Active and Deactivate
4) If you select Active, press <OK>KEY, to set new number and check
voice mail
Back OK
Back OK
Back OK
2 Deativate
2 Deativate
3 Query status
6 Call waiting
7 Call divert
1 Activate
Back OK
Back OK
Back OK
Back OK
7 Call divert
8 Call barring
1 Divert all voice calls
2 Divert if unreachable
3 Divert if no answer
4 Divert if busy
4 Divert if busy
4 Cancel All Divert
24
GSM FWP
PG130/131N
11.8 Call Barring
In Configuration menu, press<Volume - +> KEY scroll to Call barring
item and press<OK> KEY.
Call Barring allows the user to prevent Incoming Calls and Outgoing
Calls.
There are 4 options in Call Barring menu, Outgoing calls, Incoming
calls, Cancel All, and Change Barring Password. Please contact your
local operator to apply for this service. Please consult your operator for
details on the operations.
Note: This function is dependent on operator. The password, please
contact the operator.
EX. Operation
1) Select Outgoing calls,
2) Select All calls
3) Input the password
4) If the password correct, it will success.
12 Security (Initial Password: 0000)
In standby screen, press <Menu> KEY, Press<Volume - +> KEY scroll to
Security item and press<OK> KEY. You will check the Security menu:
Owner number
Back OK
5 Configuration
6 Security
Back OK
Back OK
Back OK
Back OK
1 All calls
2 International calls
2 International calls
3 International calls except to home PLMN
7 Call divert
8 Call barring
1 Outgoing calls
2 Incoming calls
Back OK
Back OK
2 Incoming calls
3 Cancel all
Back OK
3 Cancel all
4 Change Barring Password
Back OK
1 All calls
2 When roaming
2 Incoming calls
3 Cancel all
25
GSM FWP
PG130/131N
Phone lock
PIN Lock
Auto keypad lock
Change PIN Lock
Barred dial
Hotline/PLAR
Phone info
Clear memory
Restore factory settings
12.1 Owner number
In Security menu, scroll to Owner Number item via <Volume - +> KEY,
press <OK> KEY.
You can edit 2 numbers about owner number
Press <OK> KEY, you can Edit and Delete the number.
12.2 Phone Lock
In Security menu, scroll to Phone Lock item via <Volume - +> KEY, press
<OK> KEY.
You must input the password“0000”and press <OK> KEY to enable the
phone lock. And then, you can input password again and press <OK> KEY to disable the phone lock.
12.3 PIN1 Lock
In Security menu, scroll to PIN Lock item via <Volume - +> KEY, press <OK> KEY.
1) Input the PIN code, you can try 3 times
2) If you input the right PIN, the PIN will lock
3) If you want PIN unlock, please enter the PIN Lock menu, and input the PIN code again
12.4 Auto keypad lock
In Security menu, scroll to Auto keypad lock item via <Volume - +> KEY, press <OK> KEY.
You can select the :
None
5 sec
30 sec
1 min
5 min
If you want to unlock, in standby screen, press <Clear> KEY with <*> KEY.
12.5 Change PIN Lock
In Security menu, scroll to Change PIN Lock item via <Volume - +> KEY, press <OK> KEY.
You can change
1) PIN1 code
You must have the old PIN to change the PIN. Input old PIN and press <OK> KEY , and input
new PIN, press <OK> KEY to enter again, press <OK> KEY to save
the new PIN.
2) Phone password
You should have the old password. Change method, please refer
change PIN1 code.
Back OK
Enter Password
Back OK
Back Option
2 <Empty>
1 Owner number
2 Phone lock
1 <Empty>
Back OK
Back Option
Back Option
5 Change PIN Lock
6 Barred dial
1 Bar incoming
2 Bar outgoing
o On
o Off
26
GSM FWP
PG130/131N
12.6 Barred dial
In Security menu, scroll to Barred dial item via <Volume - +> KEY and press<OK> KEY.
You can on/off bar incoming or outgoing.
12.7 Hotline/PLAR
Hotline/PLAR is a feature that lets the phone autodial a call you set.
In Security menu, scroll to Hotline/PLAR item via <Volume - +> KEY and press<OK> KEY.
1) Scroll to Mode, press <OK>KEY to On or press<OK>KEY again to Off.
2) Scroll to Dial Number, press<OK>KEY, and input a number. Press <OK>KEY to save the
number.
3) Return the standby screen, if you set the Mode to On, hook up the handset, it will autodial a call
to the number which you input in Dial Number.
12.8 Guard system
In Security menu, scroll to Guard System item via <Volume - +> KEY and press<OK> KEY.
For Guard System’s operation, please refer to the special user manual of Guard System.
12.9 Phone info
In Security menu, scroll to Phone info item via <Volume - +> KEY and press<OK> KEY.
You will check the SW Version and HW Version.
12.10 Clear memory
In Security menu, scroll to Clear memory item via <Volume - +> KEY and
press<OK> KEY.
You can clear phone memory, contain: Contacts; SMS; Call Log
12.11 Restore Factory Settings
In Security menu, scroll to Restore Factory settings item via <Volume - +>
KEY and press<OK> KEY.
1) The initial password is “0000”. Input the password to restore factory
settings.
2) The Factory Default:
Back OK
No Yes
8 Phone Info
9 Clear memory
Clear Memory?
Back OK
Back OK
1o Restore factory
9 Clear memory
Enter Password
27
GSM FWP
PG130/131N
Default
Incoming call MIDI 1
Alarm MIDI 3
Power on Tone 1
Power off Tone 2
Message tone Tone 5
Keypad tone Tone
Ring Tone 4
Key tone 2
Ring type Repeat
Alert off
Greeting Welcome
Contrast 7
List
Ringer
Sounds
Volume
Configuration
13 Services
13.1 STK(SIM TOOL KIT)
In standby screen, press <Menu> KEY, Press<Volume - +> KEY scroll to Service item and
press<OK> KEY.
.You can get basic information about STK (SIM tool kit).
Note: The service is related to operator, different regions have different card services, here we
do not provide instructions.
14 FM Radio(Optional)
You can listen to FM radio in this option
In standby screen, press <Menu> KEY, Press<Volume - +> KEY scroll
to FM Radio item press <OK> KEY in to Option:
Note: You can control the volume by <Volume - +> KEY.
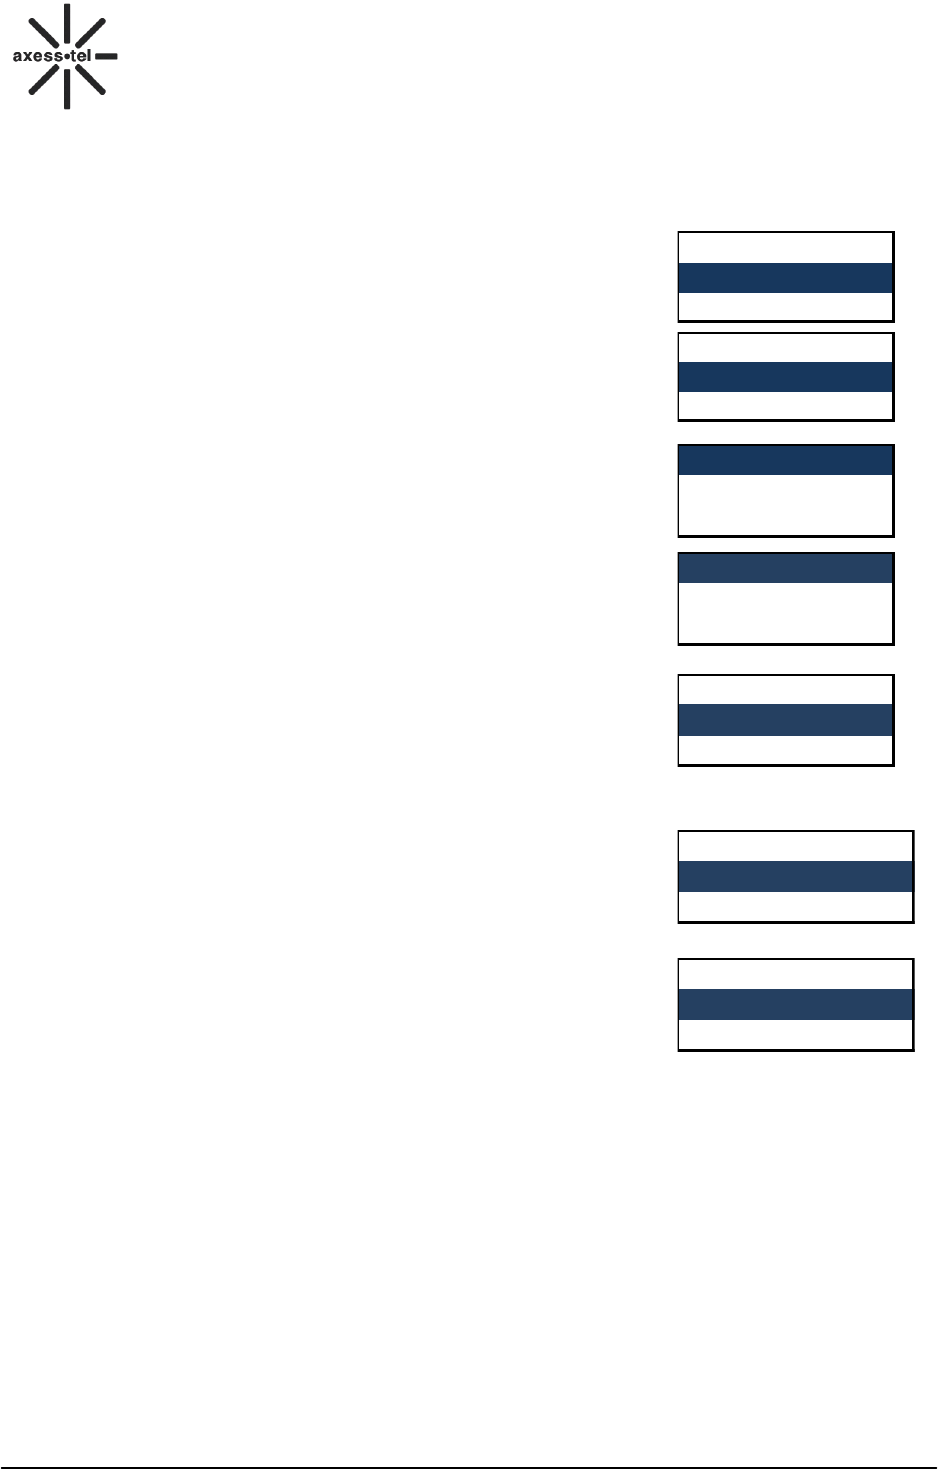
14.1 FM Status
In this menu, you can turn on/off the radio.
Select FM Status and press <OK> KEY to enter into it, scroll to
ON/OFF via <Volume +-> Key, press <OK> KEY to save your setting.
14.2 Channel list
In this menu, you can save your favorite channel.
Press <OK> KEY into Channel list
Scroll to a Empty item via <Volume - +> KEY. Press <OK> KEY into
Option Press <OK> KEY to Edit and Press <OK> KEY to Edit a
Channel name
Back OK
8 Services
9 FM radio
Back OK
1 FM Status
2 Channel list
O Off
O On
Back
OK
Back OK
1 FM Status
2 Channel list
Back Option
19 <Empty>
20 <Empty>
1 Edit
Back OK
28
GSM FWP
PG130/131N
Press < Volume - +> KEY scroll to Frequency press Numeric Keys and <#> KEY input a proper
frequency
Note: press <#> key input “.”
Press <OK> KEY to save this channel.
Into Channel list again select saved channel press <OK> KEY play,
delete or edit this channel.
14.3 Manual input
In this menu, input you want frequency.
Select Manual input input you want frequency with Numeric Keys and
<#> KEY press <OK> KEY to play.
14.4 Preset auto search
Auto search correct frequencies and auto saved to Channel list.
Select Preset auto search press <OK> KEY and press <OK> KEY
again to Preset list.
Press Clear KEY select NO to cancel Preset auto search.
14.5 Settings
Set the FM radio for Background play.
Select Settings press <OK> KEY into this item.
1. Background play : use <*> KEY and <#> KEY to change options
and press <OK> KEY to select <On> enable background play or
select <Off> disable the FM background play
Note: Background play FM radio will play in standby screen.
1 Channel
Name
Back Edit
2 Frenquency
Back Edit
Back OK
3 Manual input
4 Preset auto search
Back OK
3 Manual input
4 Preset auto search
Back OK
97
Back OK
4 Preset auto search
5 Settings
Back OK
1 Background play
<Off>