Aztech Associates S000-0271 802.11b Modem User Manual Welcome
Aztech Associates Inc. 802.11b Modem Welcome
Contents
- 1. Installation Guide 1
- 2. Installation Guide 2
Installation Guide 2

TRIPMASTER
ranger 802.11b
Hardware Installation Guide
January 25, 2005
1

Welcome
Welcome to the installation guide for the TRIPMASTER ranger 802.11b, WLAN radio, which can be added to the TRIPMASTER DT-240 GPS system (or other
compatible TRIPMASTER OBC), to transfer vehicle data from the truck to the terminal.
Important Safety and Compliance Information
Before you install or use the TRIPMASTER ranger 802.11b product, read the FCC and other regulatory material found below, as well as in the other documents that
accompanied your order.
This section provides information on the following topics
• FCC compliance statement (USA);
• Industry Canada Certification.
FCC Complicance Statement (USA)
This device complies with Part 15 of the FCC Rules. Operation is subject to the following two conditions: (1) This device may not cause harmful
interference and (2)
This device must accept any interference received, including interference that may
cause undesired operation.
WARNING:
This device has been tested with the antenna listed below for professional
Installation only, and only this antenna may be used.
Caution : Changes or modifications to this unit not expressly approved by the party responsible for compliance, could void your authority to operate this equipment.
Industry Canada Certification
This Class B digital apparatus complies with Canadian ICES ICES-003 and RSS 210.
Unpacking the TRIPMASTER ranger 802.11b Components
When you unpack your installation kit :
2
• Check all items against your shipping order to ensure that you have received all the components. If a component is missing, contact customer support.
• Inspect the equipment for visible shipping damage. If you notice any damage, contact customer support.
Your TRIPMASTER ranger 802.11b installation kit includes the following components:
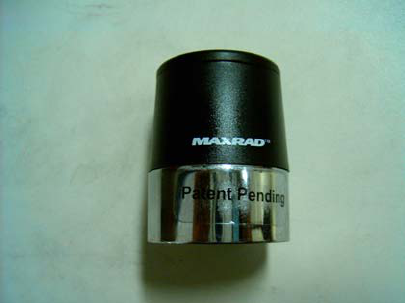
A. A7025-A-0000
ranger 802.11b WLAN radio
B. A7024-A-0901 or A7025-A-0901
Connection cable between ranger 802.11b and DT240
C. MLPVDB902/2400S (Black) or WMLPVDB902/2400S (White) low profile exterior antenna.
This antenna will be supplied with an antenna mount, which will be one of the following types depending on the installation requirements:
NMO mount with up to 10 feet RG58/U cable and SMA M connector
Or
Magnetic Mount Antenna Base such as Z1065B with up to 10 feet RG58/U cable and SMA M connector
Or
Mirror Mount Antenna Base such with up to 10 feet RG58/U cable and SMA M connector
D. Ferrite noise supressor, Steward HFA150068-OA2 or equivalent
Safety Recommendations
Before installing the TRIPMASTER ranger 802.11b, please review the following guidelines to protect the equipment and ensure your safety.
• Turn off the vehicle;
• Make sure that the parking brake is fully engaged;
• Disconnect the vehicle’s battery prior to connecting any wires to the vehicle’s power supply.
Tools Required
Make sure you have the following tools and supplies on site, before installing the TRIPMASTER ranger 802.11b WLAN :
• Drill;
• ¾ inch-diameter drill bit;
• Multimeter;
• Phillips screwdriver;
• Tie-Wraps;
• Weather-resistant sealant or caulking;
• Self-drilling; self-tapping screws.
3
ranger 802.11b Location
• The ranger 802.11b needs to be installed at a minimum of 1 foot from the DT-240 unit. The maximum distance will be determined by the length of the
connection cable and the intended routing.
• Allow some slack/extra cable length room for routing the wiring harness. It would be a good idea to lay the cable out over the planned path, and determine
also at this time how to securely coil or store any extra length of cable.
• Choose a site that protects this equipment from moisture, excessive heat or foreign substances. This unit is not designed for direct contact with water, such
as power washing. It must be mounted inside the cab of the vehicle, to protect it from direct contact with the outside environment, such as dust, water
spray, etc.
• Choose a location where the unit can be easily accessed, there is sufficient room to connect the cables, and if need be, the unit can be removed to perform
maintenance or troubleshooting activity.
Antenna Location and Installation Planning
• Do not attempt to choose the location or do the antenna installation if you have not received training in the location and installation of antennas for this type
of application. In that case, refer this work to another qualified member of your installation team.
• The ranger 802.11b antenna must be installed so as to provide a minimum of 20cm (8 inches) separation distance from all persons. It must not be co-
located or operating in conjunction with any other antenna or transmitter. Choose an antenna location as far as possible from any other antennas and
obstructions such as steel brackets for wind deflectors.
• Make sure you have the correct antenna mount, for the intended installation method.
• A metal ground plane of at least 6 inches by 6 inches square must be available under the antenna. When mounting on a steel or aluminum truck roof, the
roof metal itself will provide a good ground plane. When mounting on a fibreglass roof or mirror-mount, a metal ground plate must be installed.
• Check for the best route for the antenna coax cable from the antenna to the ranger 802.11b. For an antenna, which is not mounted through the roof of the
cab, (for example: bracket or mirror-mount), choose the location, such as the rear wall of the cab, for the hole to be made to pass the coax cable through to
the interior of the cab. Some considerations when choosing the coax entry hole location: What is on the inside of the intended hole location? Is there
room to make a drip loop outside? Is the location not subject to contact with the driver or interference with other equipment? Also, make sure there is
enough space according to the size of the grommet or cable gland to be used.
• Make sure that the coax will not be subject to pinching or abrasion at its intended location. Determine the best use of the existing or added plastic
moulding to hide and protect the coax cable inside the cab. Make sure that the coax is long enough to reach the ranger 802.11b, but not more than 1 foot
longer than required, to avoid additional signal loss.
4
Antenna Installation :
• Drill the hole to pass the coax cable into the truck, according to the size of the grommet or cable gland to be used, or for the NMO mount on the roof top.
Before drilling, make sure that no damage will be caused on the other side.
• Install the grommet or gland in the hole, if applicable.
• Install the antenna mount and pass the coax cable inside the cab. Except for a roof-top NMO mount, ensure that water will not seep through the seal by
letting the cable hang a little below the level of the seal (make a « drip loop ».).
• If not pre-done, cut the coax to the required length (not over 10 feet) , strip the end with the proper tool and crimp on the SMA connector, again using the
correct tool intended for this size connector and coax cable.
• Seal the area of the grommet or gland with a silicone seal caulking or other suitable long-life flexible sealant.
• Consider adding protection to the external coax cable if there is any risk of damage from contact with other cables or equipment.
ranger 802.11b Installation
1. Mount the ranger 802.11b at the chosen location, keeping in mind the constraints of cable routing and access for service mentioned above.
2. Connect the white connector of the A7024-A-0901 cable to the J2 connector of the DT-240 unit. Or, connect the white connector of the A7025-A-0901
cable to the J1 connector of the DT-240 unit.
3. Connect the black wire to the TB1-2 connector.
4. Connect the red wire to the TB1-1 connector.
5. Connect the black circular connector (marked ‘obc’), to the ranger 802.11b.
Take care to correctly align the connector with its socket and plug it gently, to avoid bending or breaking the miniature pins.
6. Connect the antenna coax cable to the ranger 802.11b, with the SMA connector marked ‘ant’. Place the ferrite supplied around the antenna coax cable,
close to the antenna connector, and snap it shut. Apply one or two tie wraps to the coax cable if needed to ensure the ferrite will not slide out of position
next to the antenna connector.
7. Reconnect power to the truck.
5
6
LED Display
WLAN OK : Indicates that the ranger 802.11b sees a WLAN access point.
RX : Status of the Receive line of the modem. Indicates that data is being received from the WLAN networkWLAN and sent to the DT-240 or OBC.
TX : Status of the Transmit line of the modem. Indicates that data is being transmitted to the WLAN network and received from the DT-240 or OBC.
DTR : Indicates the status of the DTR signal from the DT-240 or OBC. It is lit to indicates that the DT-240 or OBC is active with some messages and may
communicate (or may be in-communication to the server).
uP OK : Indicates the status of the Ranger 802.11b application (also called the ‘heart-beat’ and normal operation). When it is working properly, it flashes
continuously at approximately one second intervals. It stays ON or OFF for longer periods, if the Ranger is busy with some critical communication or
processing.
SERVER : Toggles while while setting up the internal radio and while attempting to connect to the server. Steady On indicates that the ranger 802.11b is
successfully connected with a server.
Data : ON for an extraction message from the server to the OBC. Blink/OFF for a response from OBC to server or disconnect stateIndicates that the ranger
802.11b is sending or receiving data.
GP3 : ON when a data extraction has been requested by the OBC.
GP4 : Reserved for special functions or future use
Connector Labels :
OBC : OBC circular connector location.
ANT : WLAN antenna cable connector location.