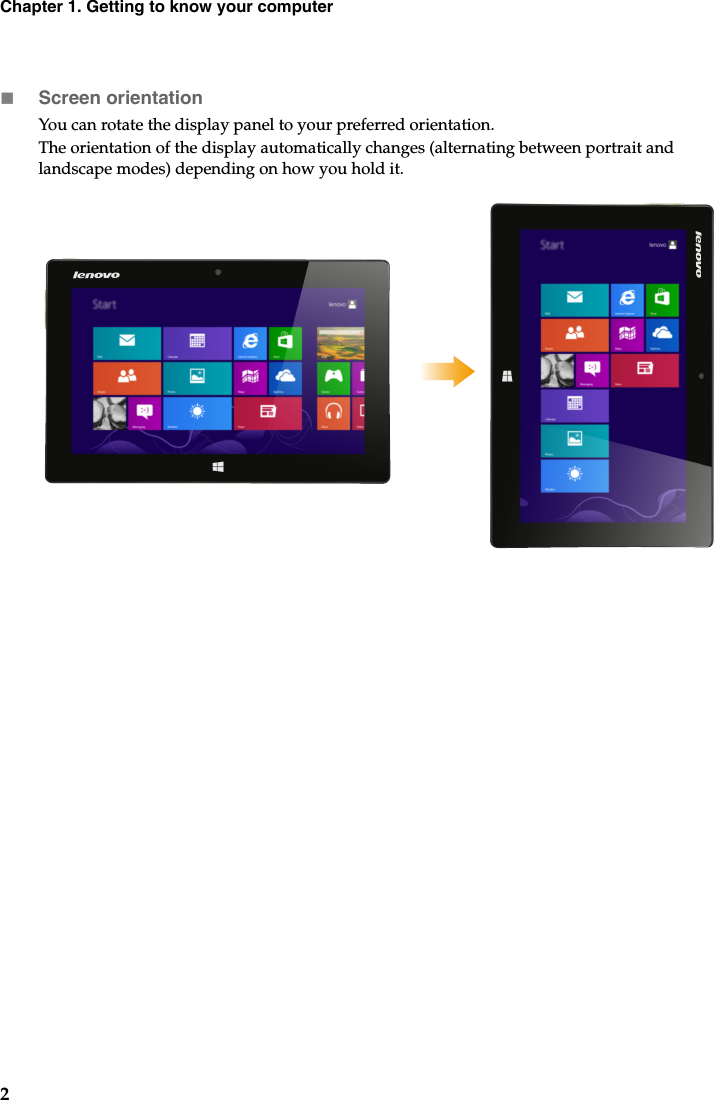
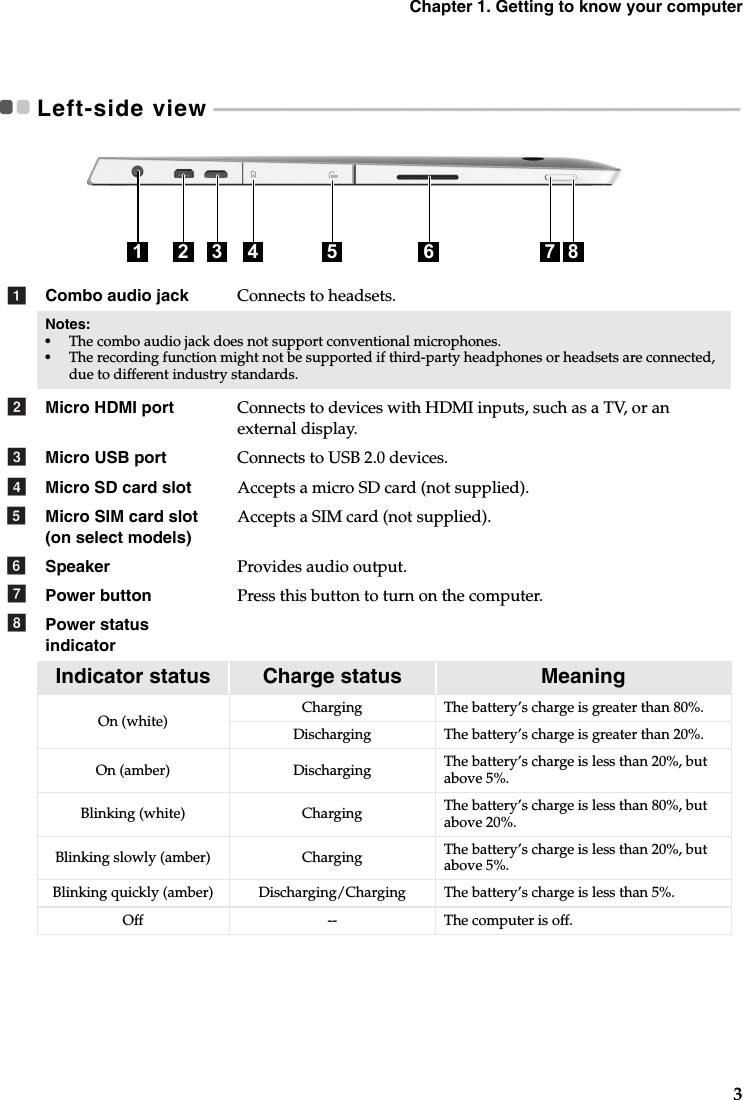
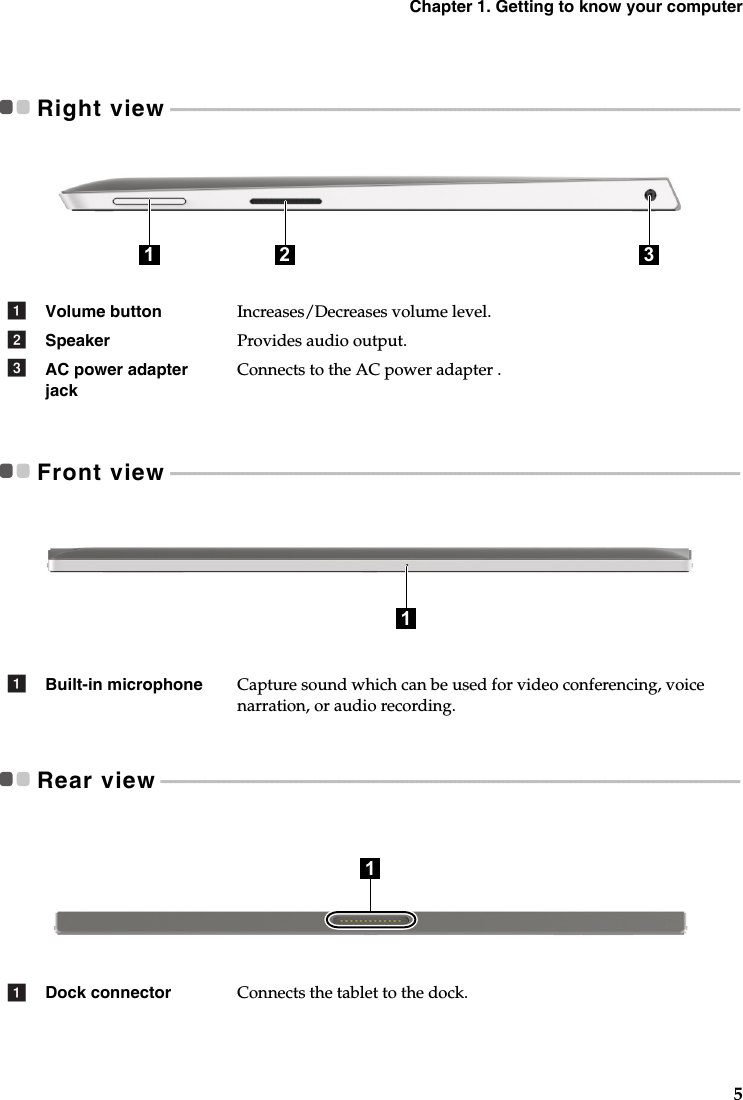
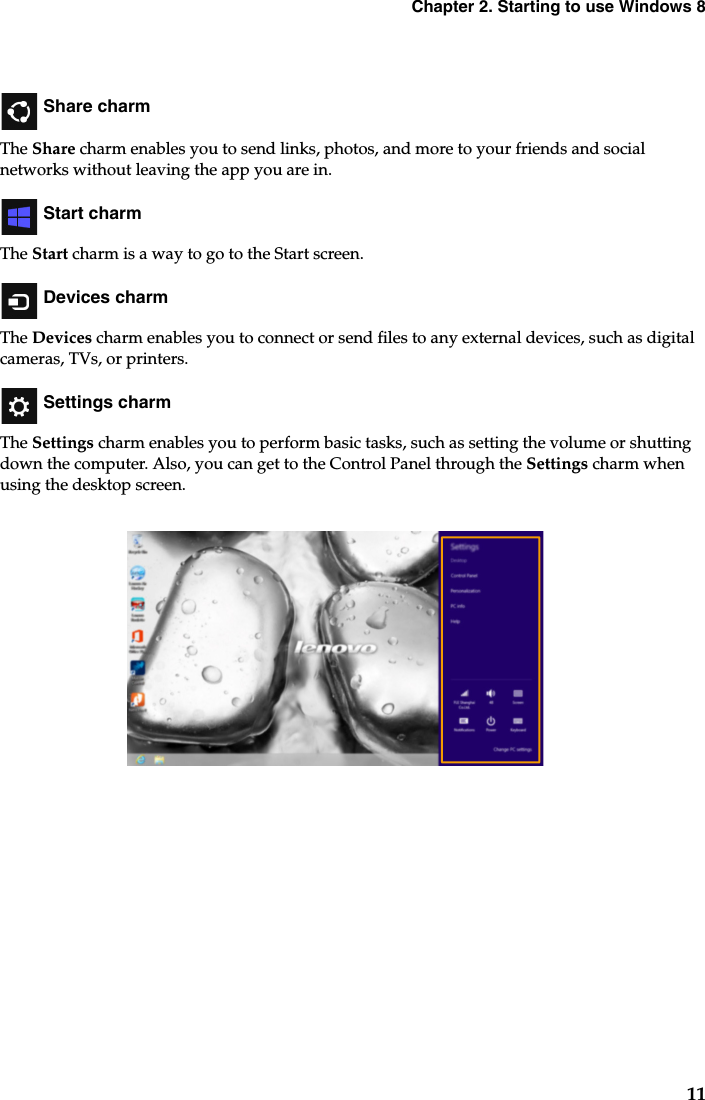
AzureWave Technologies AM691NF IEEE 802.11 a/b/g/n Wireless LAN and Bluetooth Combo LGA Module User Manual Miix 2 10 UG EN
AzureWave Technologies, Inc. IEEE 802.11 a/b/g/n Wireless LAN and Bluetooth Combo LGA Module Miix 2 10 UG EN
UserManual.wiki
>
AzureWave Technologies
>
AM691NF User Manual
>
Manual 2
Contents
1.
User Manual.pdf
2.
User Manual
3.
User manual
4.
Manual
5.
Manual 2
6.
User Manual (System) rev.pdf
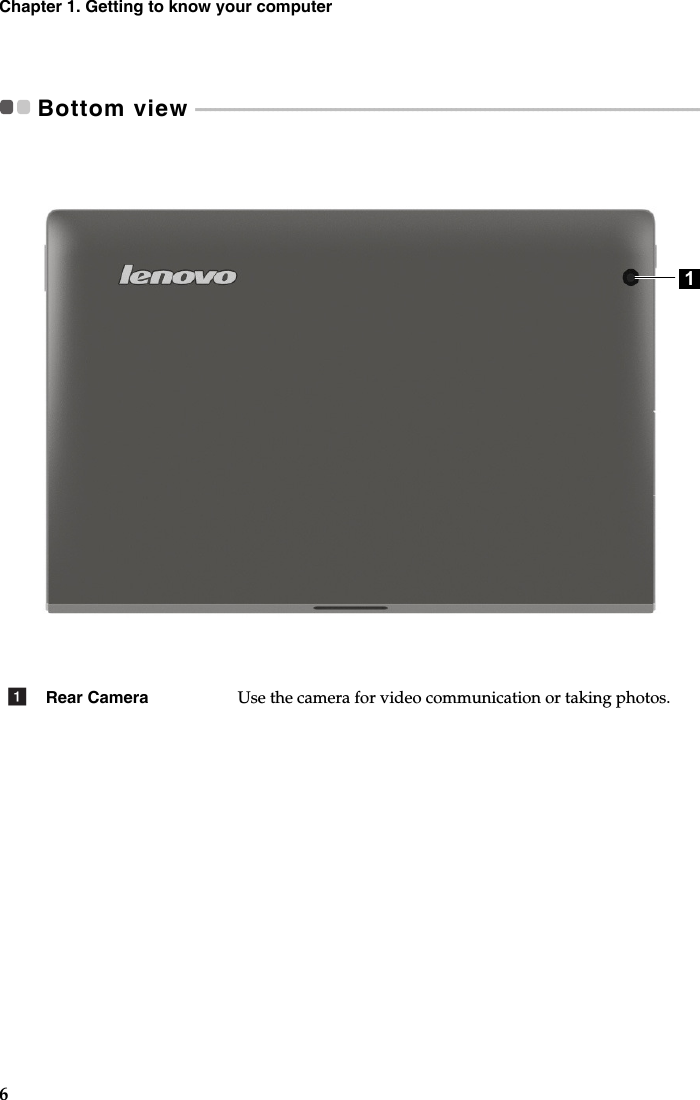
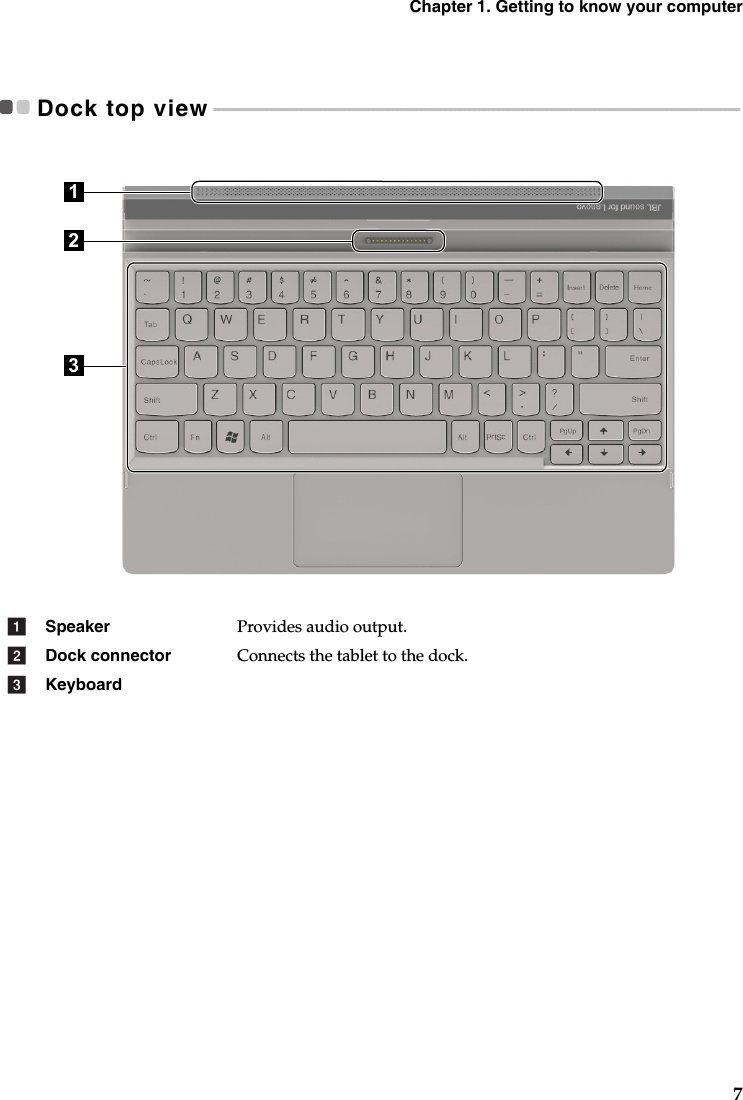
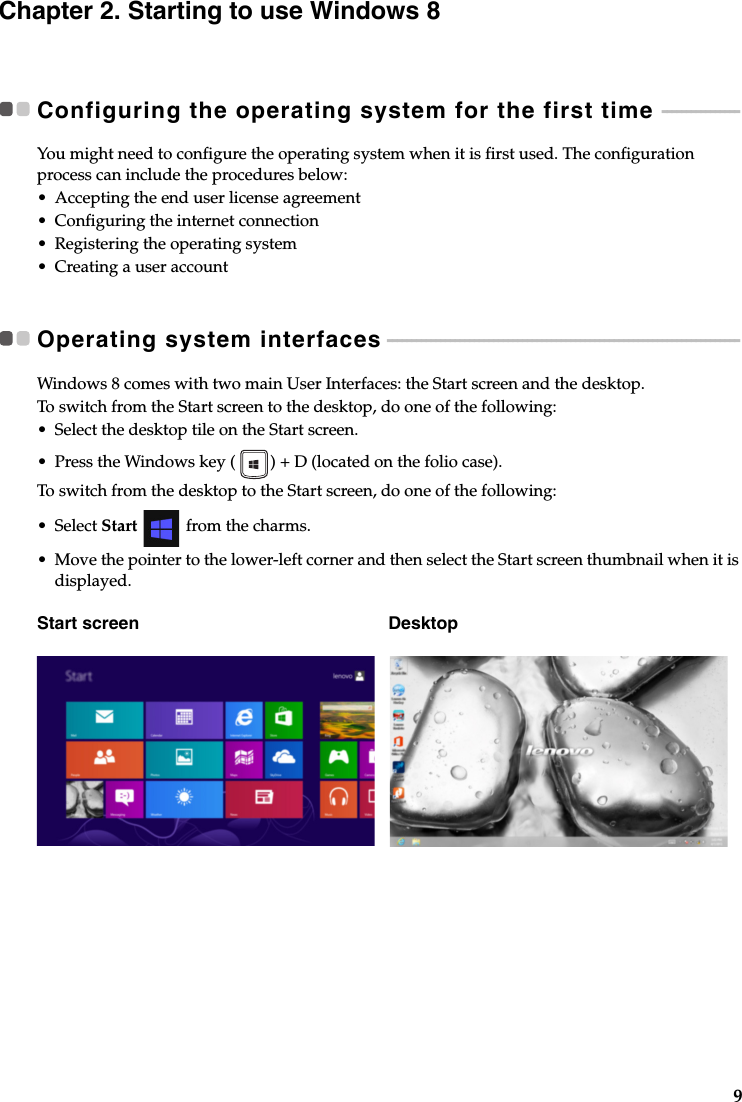
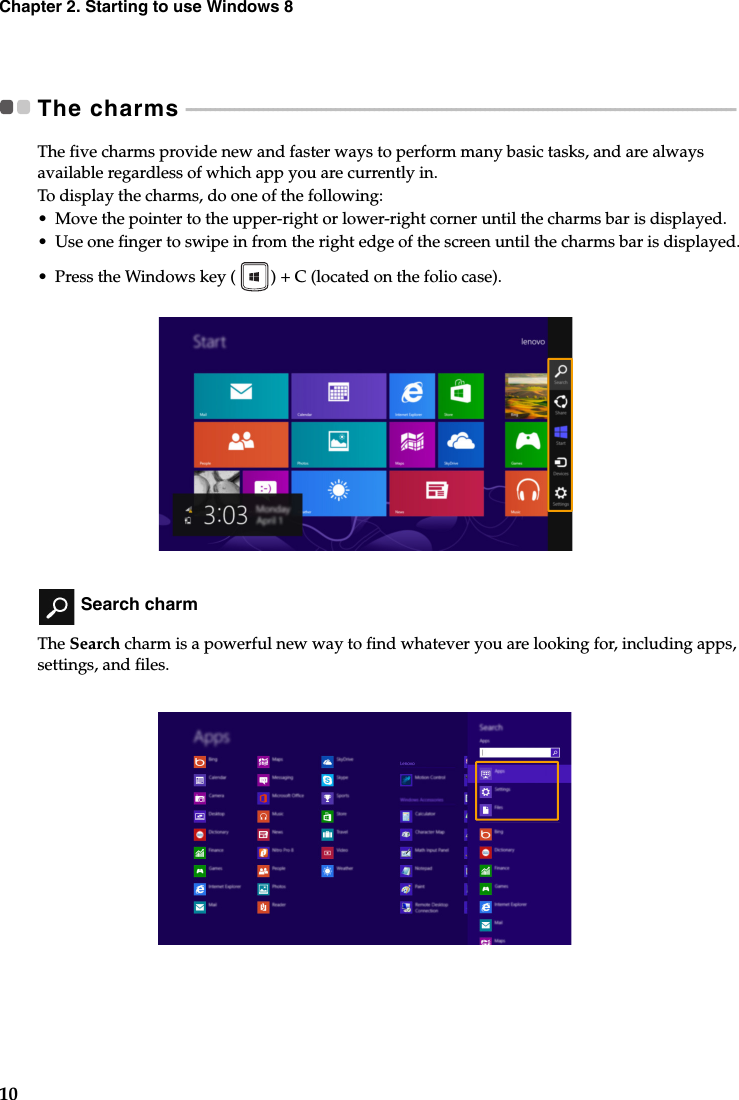
Manual 2
Navigation menu
Upload a User Manual
Namespaces
Wiki Guide
HTML
PDF
Info
Views
User Manual
Discussion / Help
Navigation