BANKEN HEI-28Y Tour MIC 900 User Manual
BANKEN CO., LTD Tour MIC 900
UserManual.wiki
>
BANKEN
>
HEI 28Y User Manual
User Manual
Navigation menu
Upload a User Manual
Namespaces
Wiki Guide
HTML
PDF
Info
Views
User Manual
Discussion / Help
Navigation
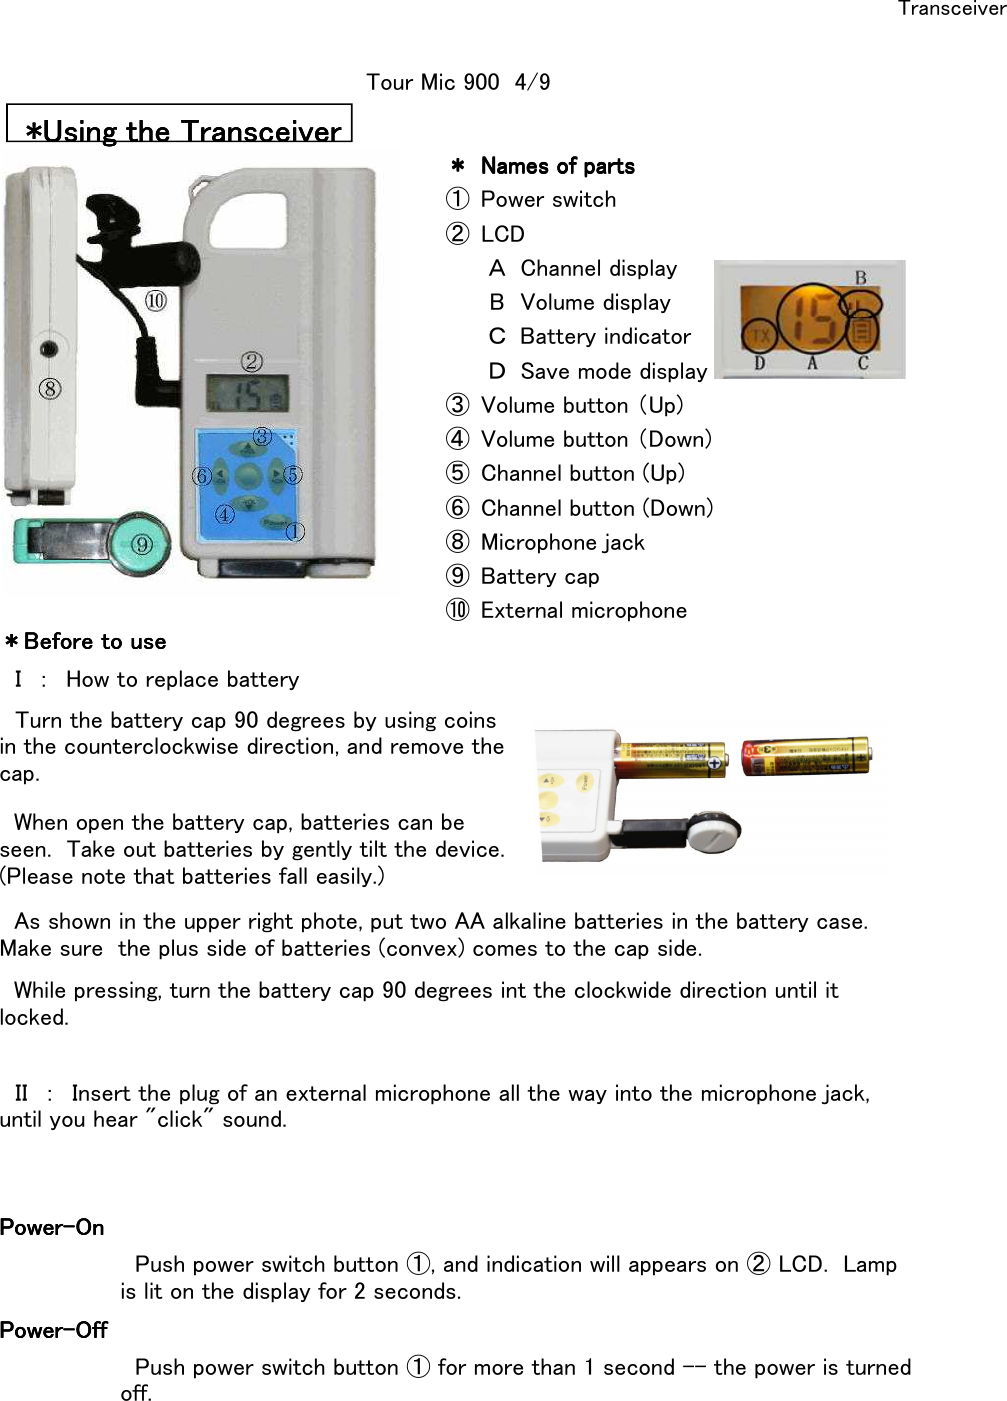
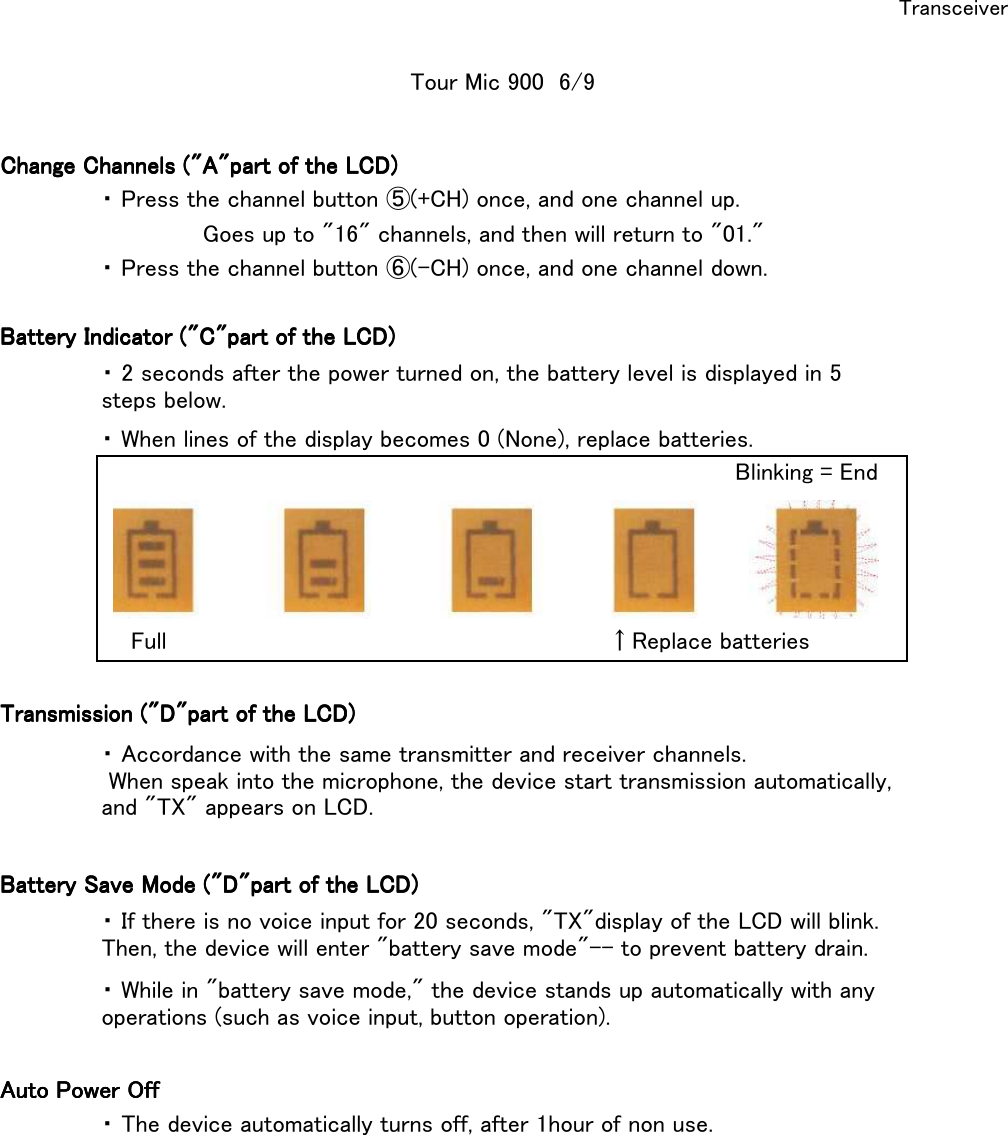
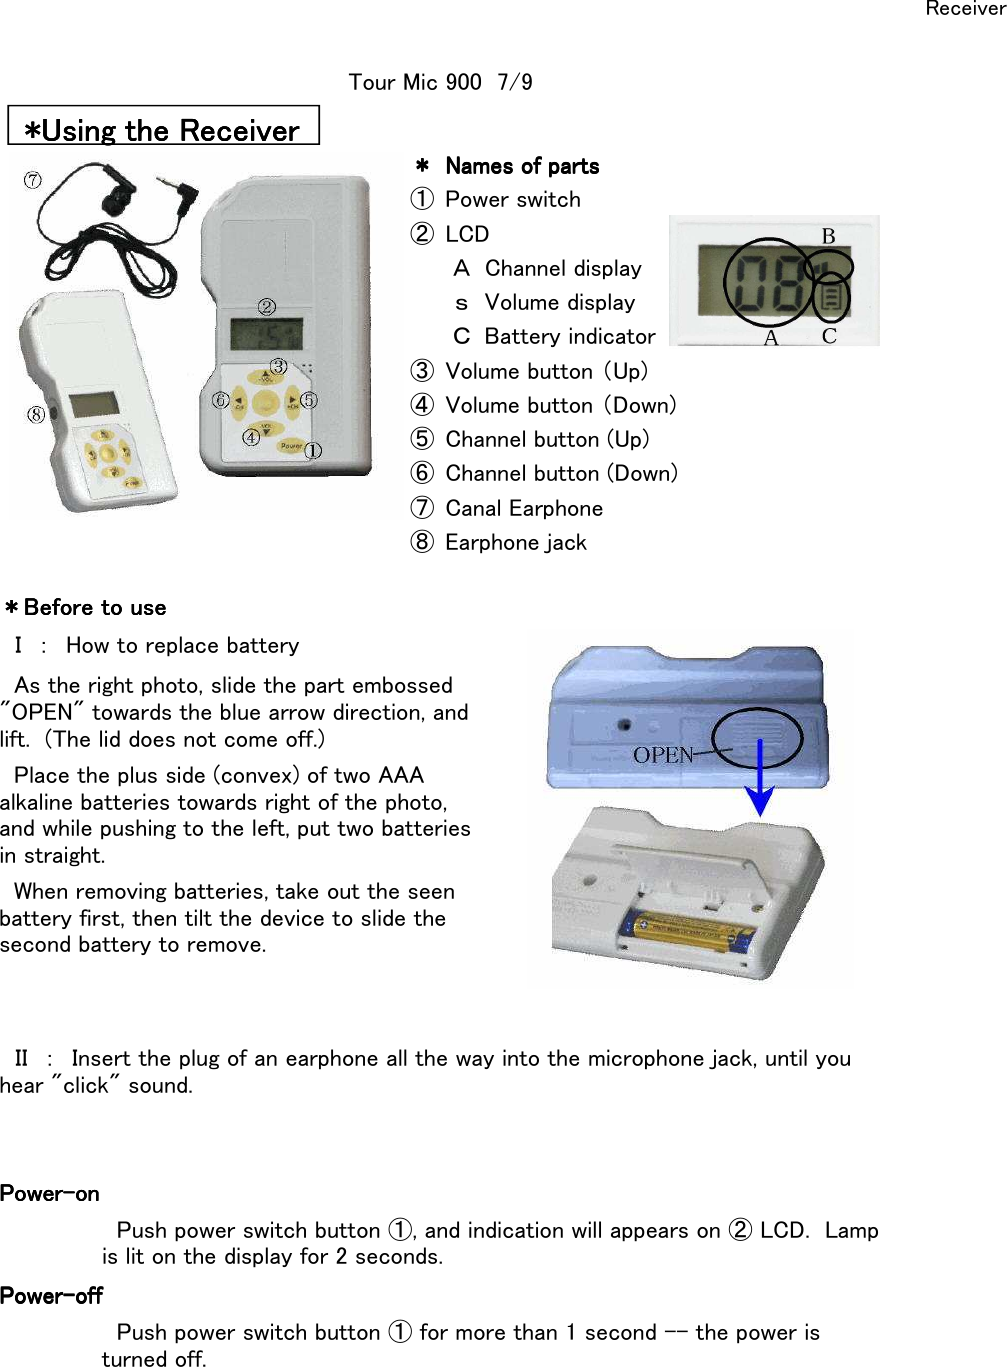
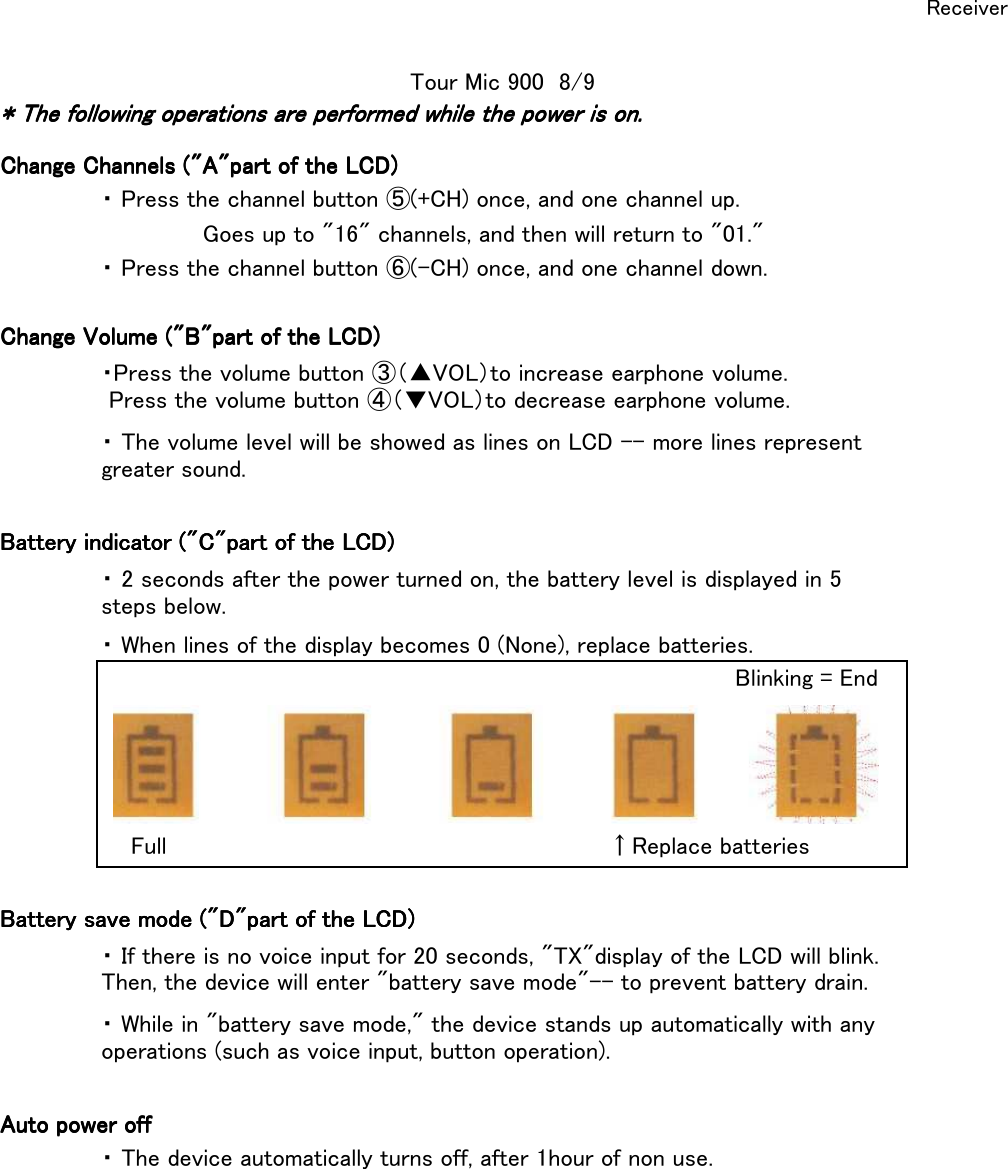
![Transceiver* The following operations are performed while the power is on.* The following operations are performed while the power is on.* The following operations are performed while the power is on.* The following operations are performed while the power is on.! Notes when using the transceiver.! Notes when using the transceiver.! Notes when using the transceiver.! Notes when using the transceiver.・Two or more machines in the same channel cannot be sent at the same time.・Please use insert an earphone-microphone in the jack.[Alternate mode][Alternate mode][Alternate mode][Alternate mode][Momentarily mode] [Momentarily mode] [Momentarily mode] [Momentarily mode] *Conventional general transceiver modeInitial receiving mode:To press the central button ⑪ when you talk to send signals.Initial transmission mode:To press the central ⑪button while you receiving signals.*During not touching the central button ⑪, the machine is state of initial mode.Tour Mic 900 5/9*Taking advantage of a digital feature, this machine can be used to change the mode.*Taking advantage of a digital feature, this machine can be used to change the mode.*Taking advantage of a digital feature, this machine can be used to change the mode.*Taking advantage of a digital feature, this machine can be used to change the mode.However, please only person responsible is to change the mode.However, please only person responsible is to change the mode.However, please only person responsible is to change the mode.However, please only person responsible is to change the mode.* Every time a central button ⑪ is pressed, transmission⇔ receiving is switched over.・While "D" part of LCD is displayed as "TX", it hasbecome transmittable・Pressing the middle button ⑪ while "TX" is displayed, tochange to receiving state. While in the receiveing state,you can find volume bars in the "B" part・During receiving state, please press ⑪ button to changeto transmittable state again.](https://usermanual.wiki/BANKEN/HEI-28Y/User-Guide-3100062-Page-5.png)