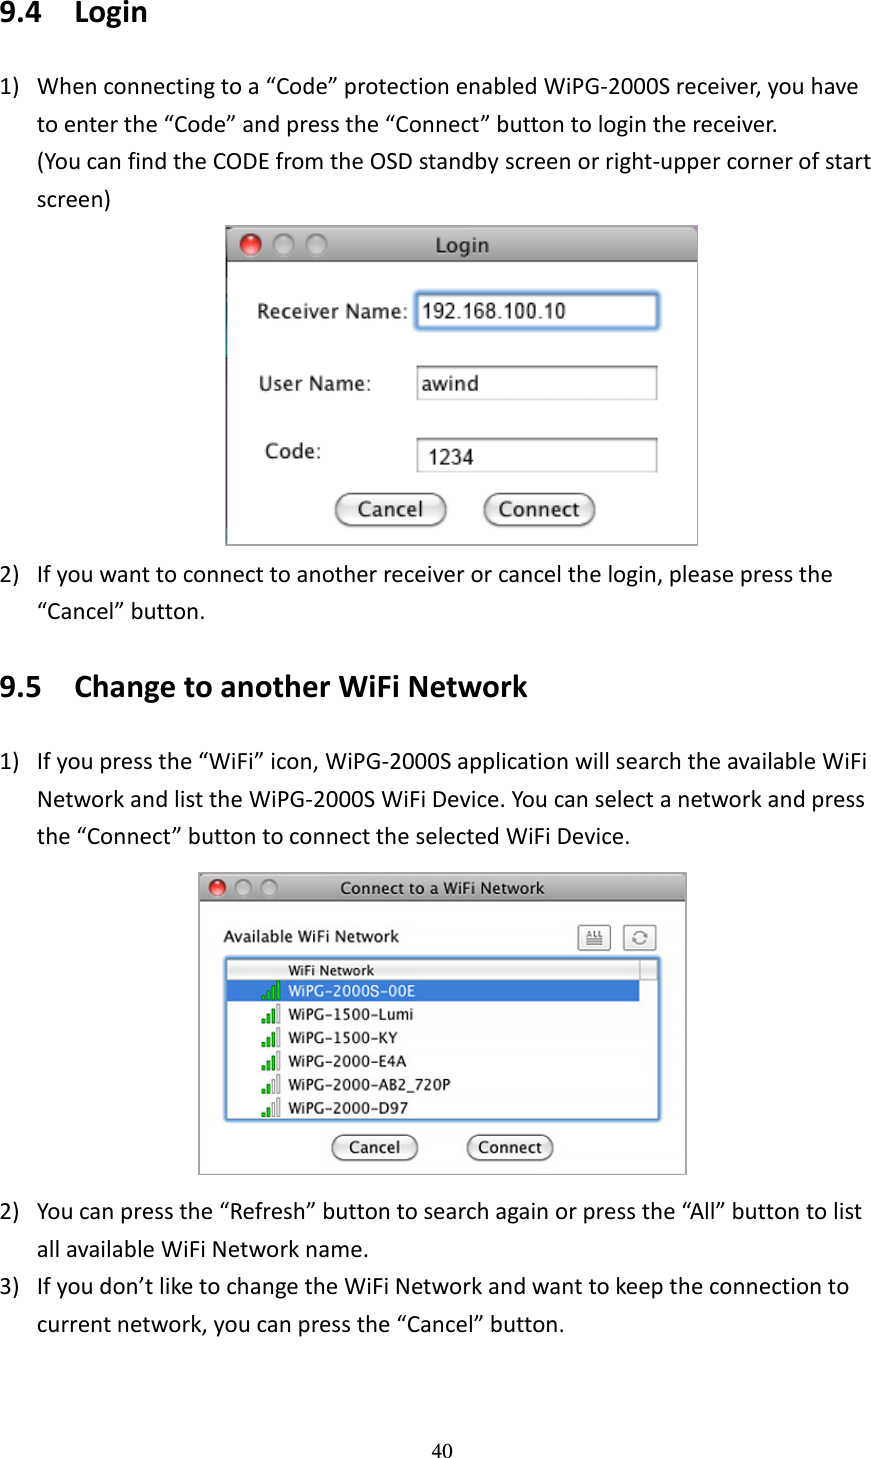
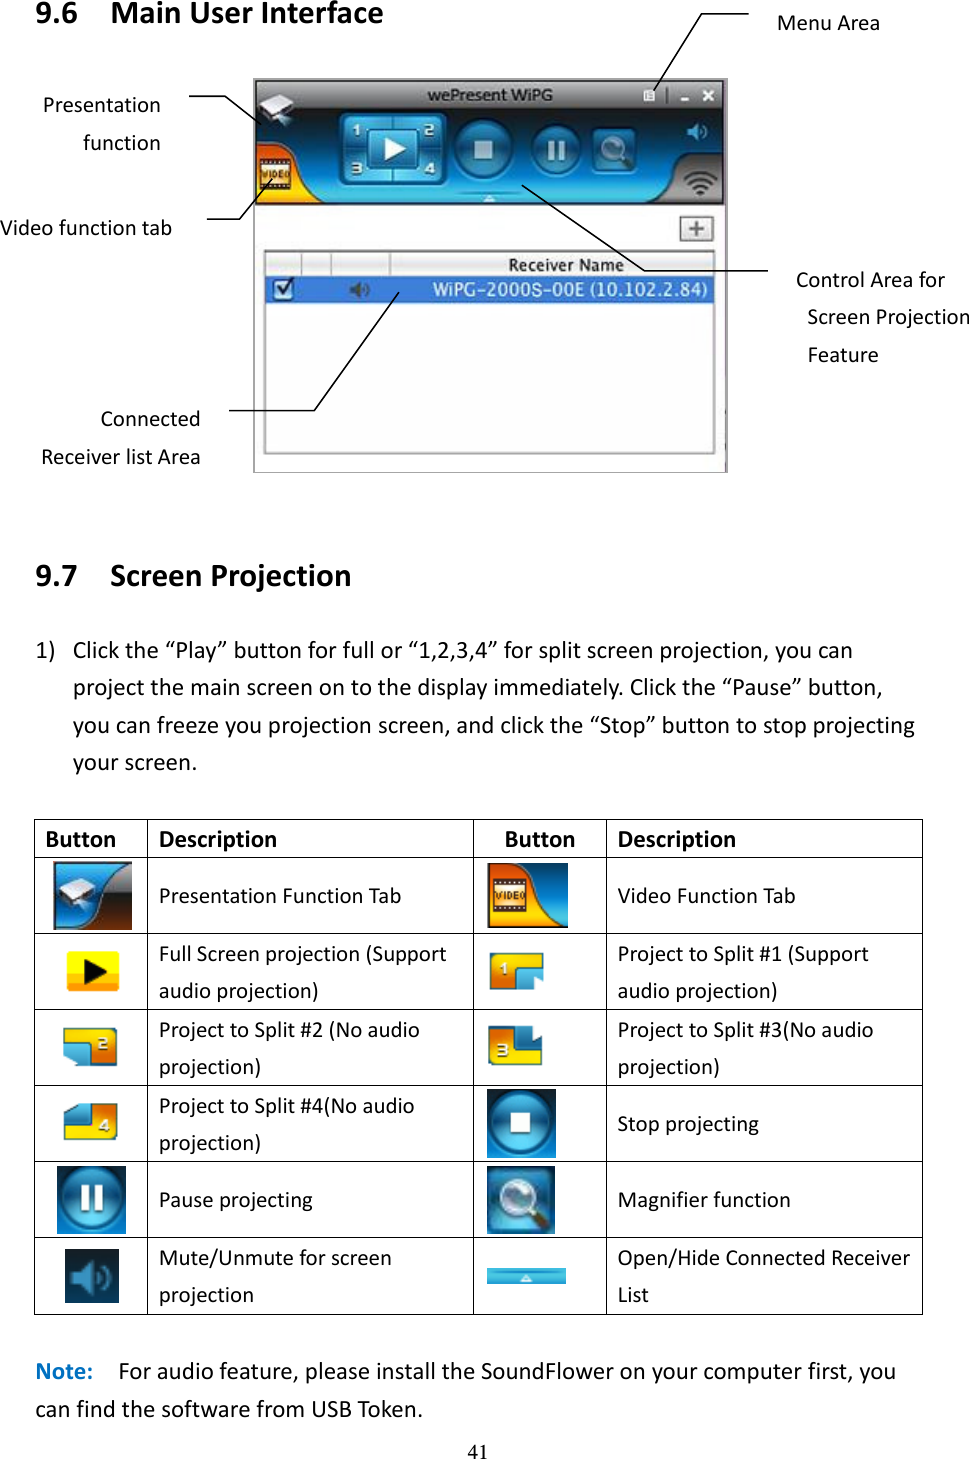
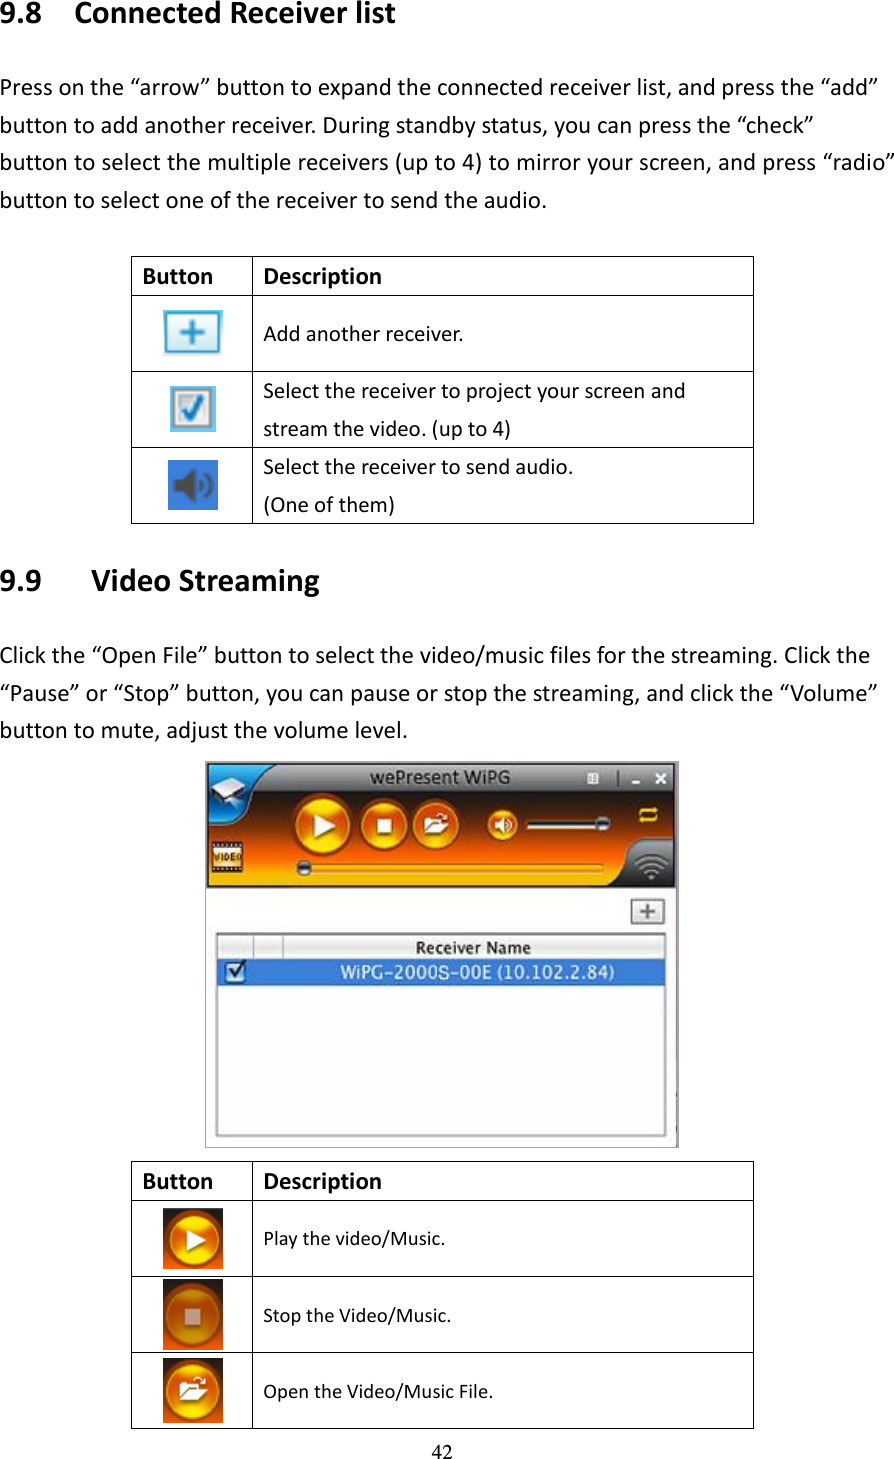
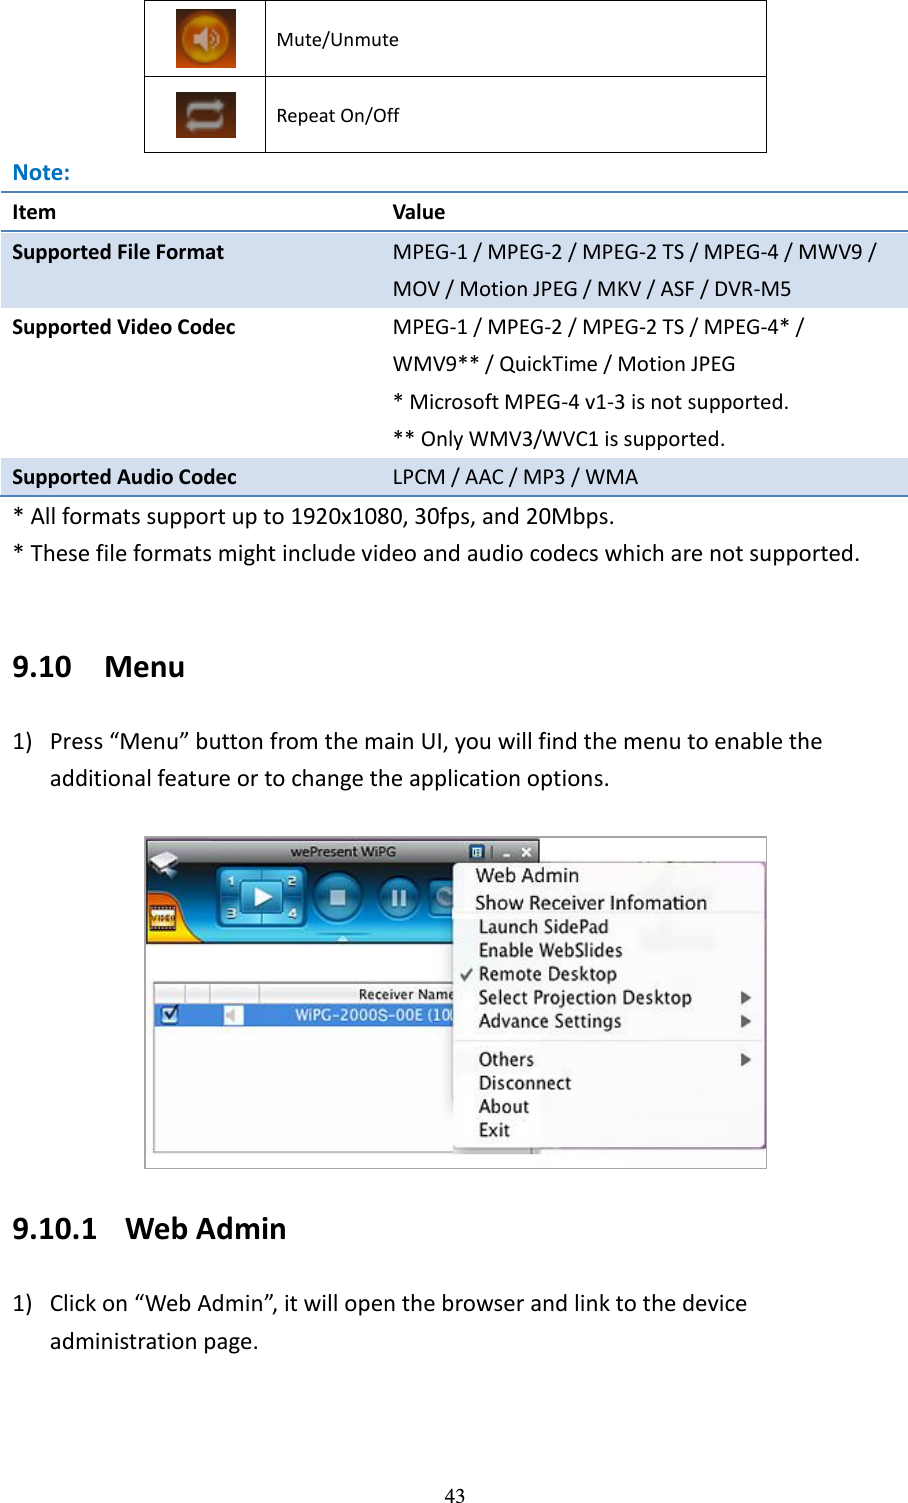
BARCO WP2KS15 Wireless Interactive Presentation Gateway User Manual
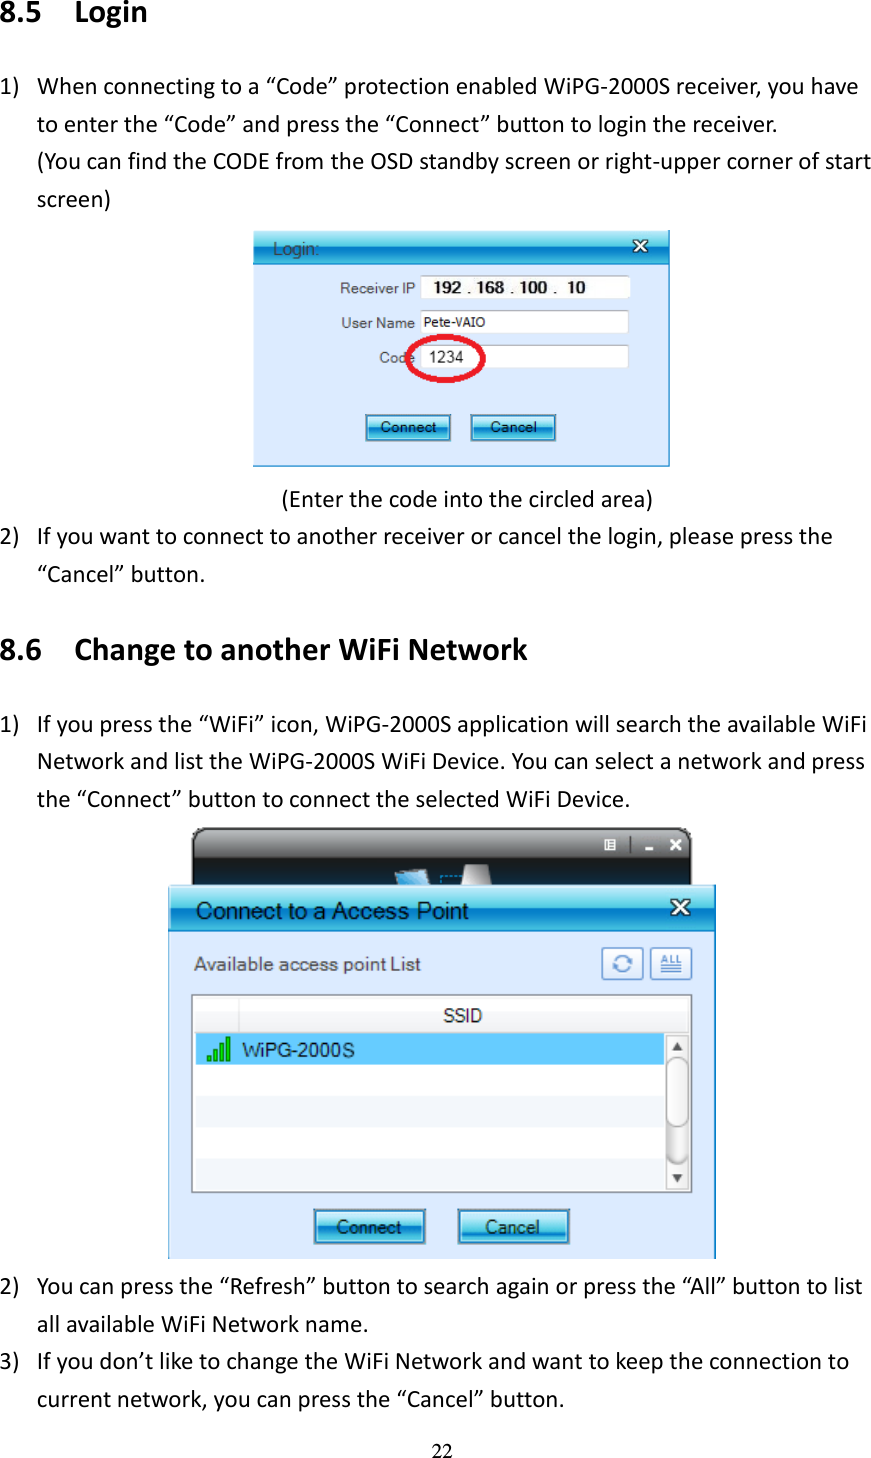
AWIND Incorporated Wireless Interactive Presentation Gateway Users Manual
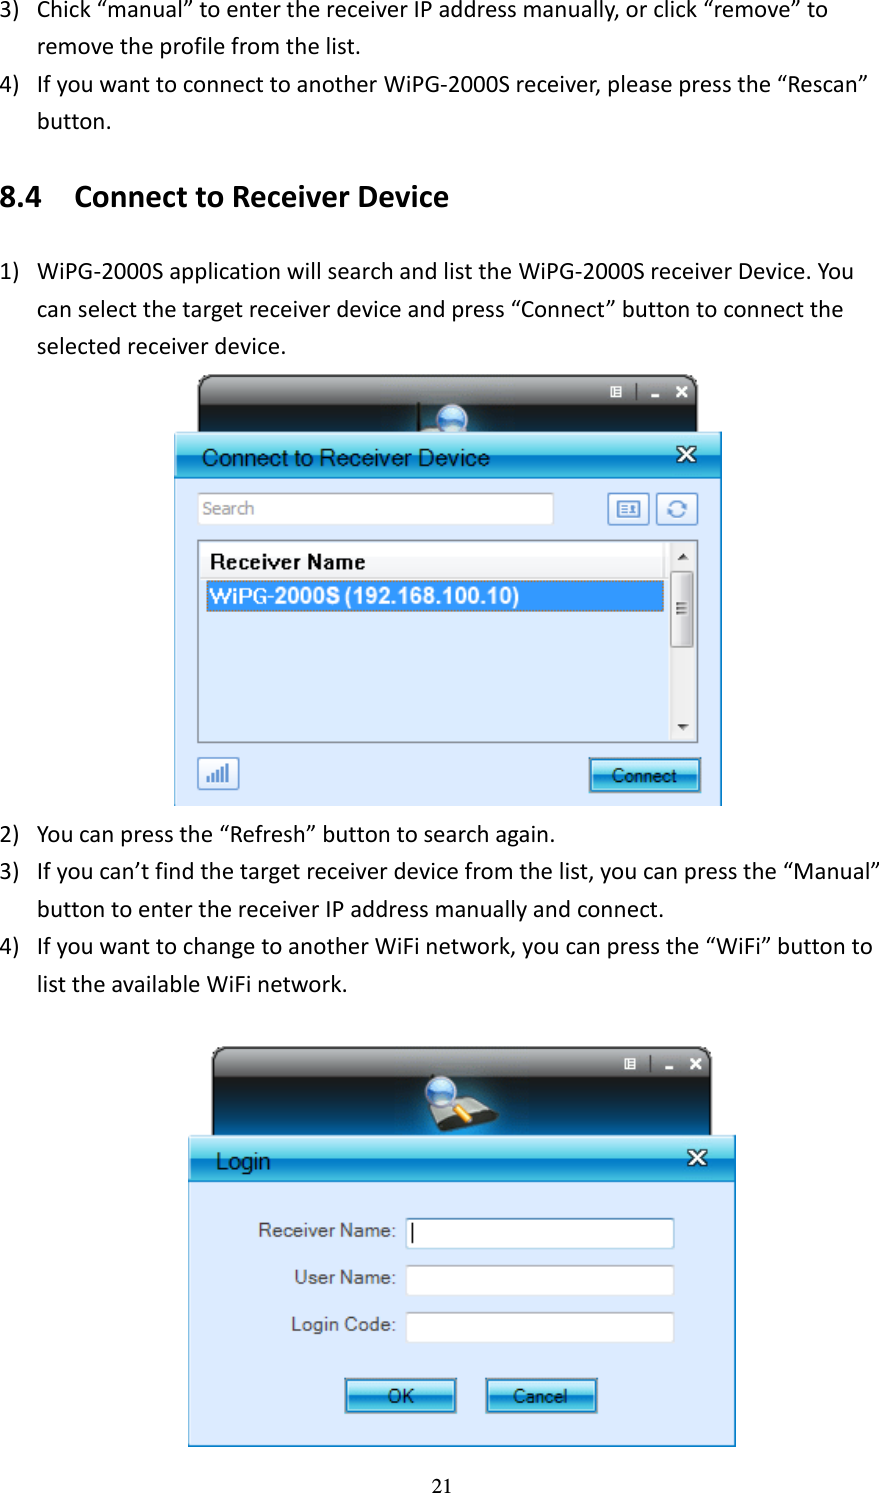
UserManual.wiki
>
BARCO
>
WP2KS15 User Manual
Users Manual
Navigation menu
Upload a User Manual
Namespaces
Wiki Guide
HTML
PDF
Info
Views
User Manual
Discussion / Help
Navigation


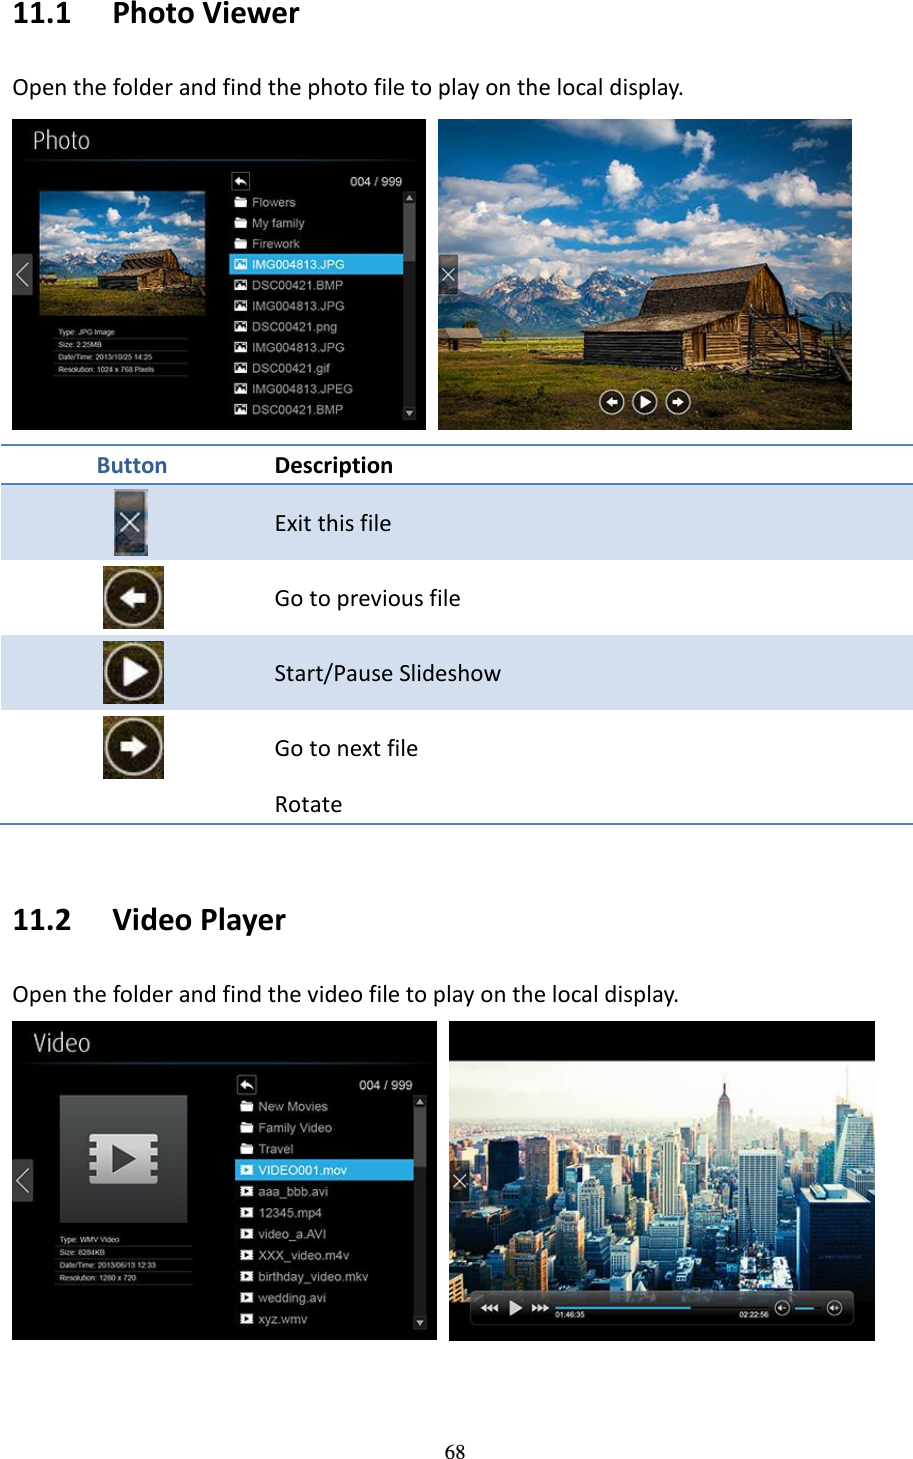
![52 on this page. Please make sure the lock on the start page is disabled. 2) Enter password and then press [Login]. (default password: moderator) 3) After login, you can see a User List on the screen which indicates all of the users connected to wePresent WiPG-2000S box. 4) The default setting is “allow control from this page only”. When this function is checked, the moderator can control all the login users’ projection. 5) There are three columns, “Computer Name”, “Play Control” and “IP Address”. a. Play Control: There are six buttons, including Play(Full) , Screen #1 , Screen#2 ,Screen #3 , Screen#4 and Stop .](https://usermanual.wiki/BARCO/WP2KS15/User-Guide-2589802-Page-52.png)

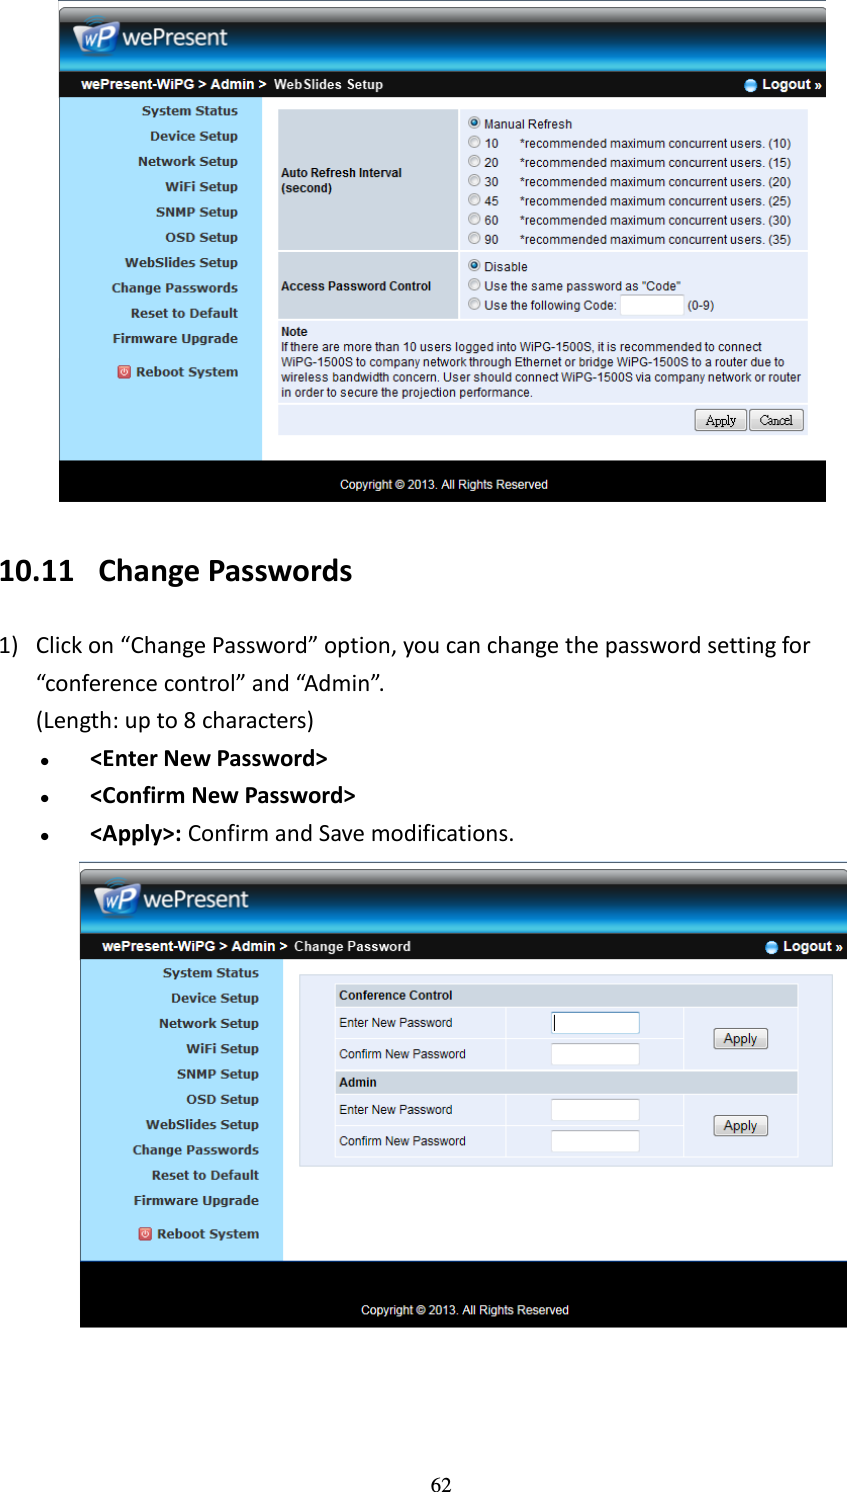
![63 10.12 Reset to Default 1) Click on “Reset to Default” option to restore factory default settings. <Apply>: Confirm and take action. *** You can also restore factory default setting from WiPG-2000S box reset button. You can find the reset button underneath the box. Please follow below procedures. 1. Press [Reset] button and Hold. 2. Turn on wePresent WiPG-2000S box. 3. Press more than 10 seconds and relief [Reset] button. 4. It will take effect to restore factory default settings. 10.13 Firmware Upgrade 1) Click on” Firmware Upgrade” option to “import/export” system configuration and upgrade firmware. 2) System Configuration Import and Export Export: Export the system configuration to a configuration file Import: Import the system configuration file to WiPG-2000S 3) You can find the firmware version and release date here. 4) Firmware Upgrade 1) Firstly, you have to get latest firmware image file from your vendor. 2) Click <Browse> to specify file name you want to upgrade.](https://usermanual.wiki/BARCO/WP2KS15/User-Guide-2589802-Page-63.png)