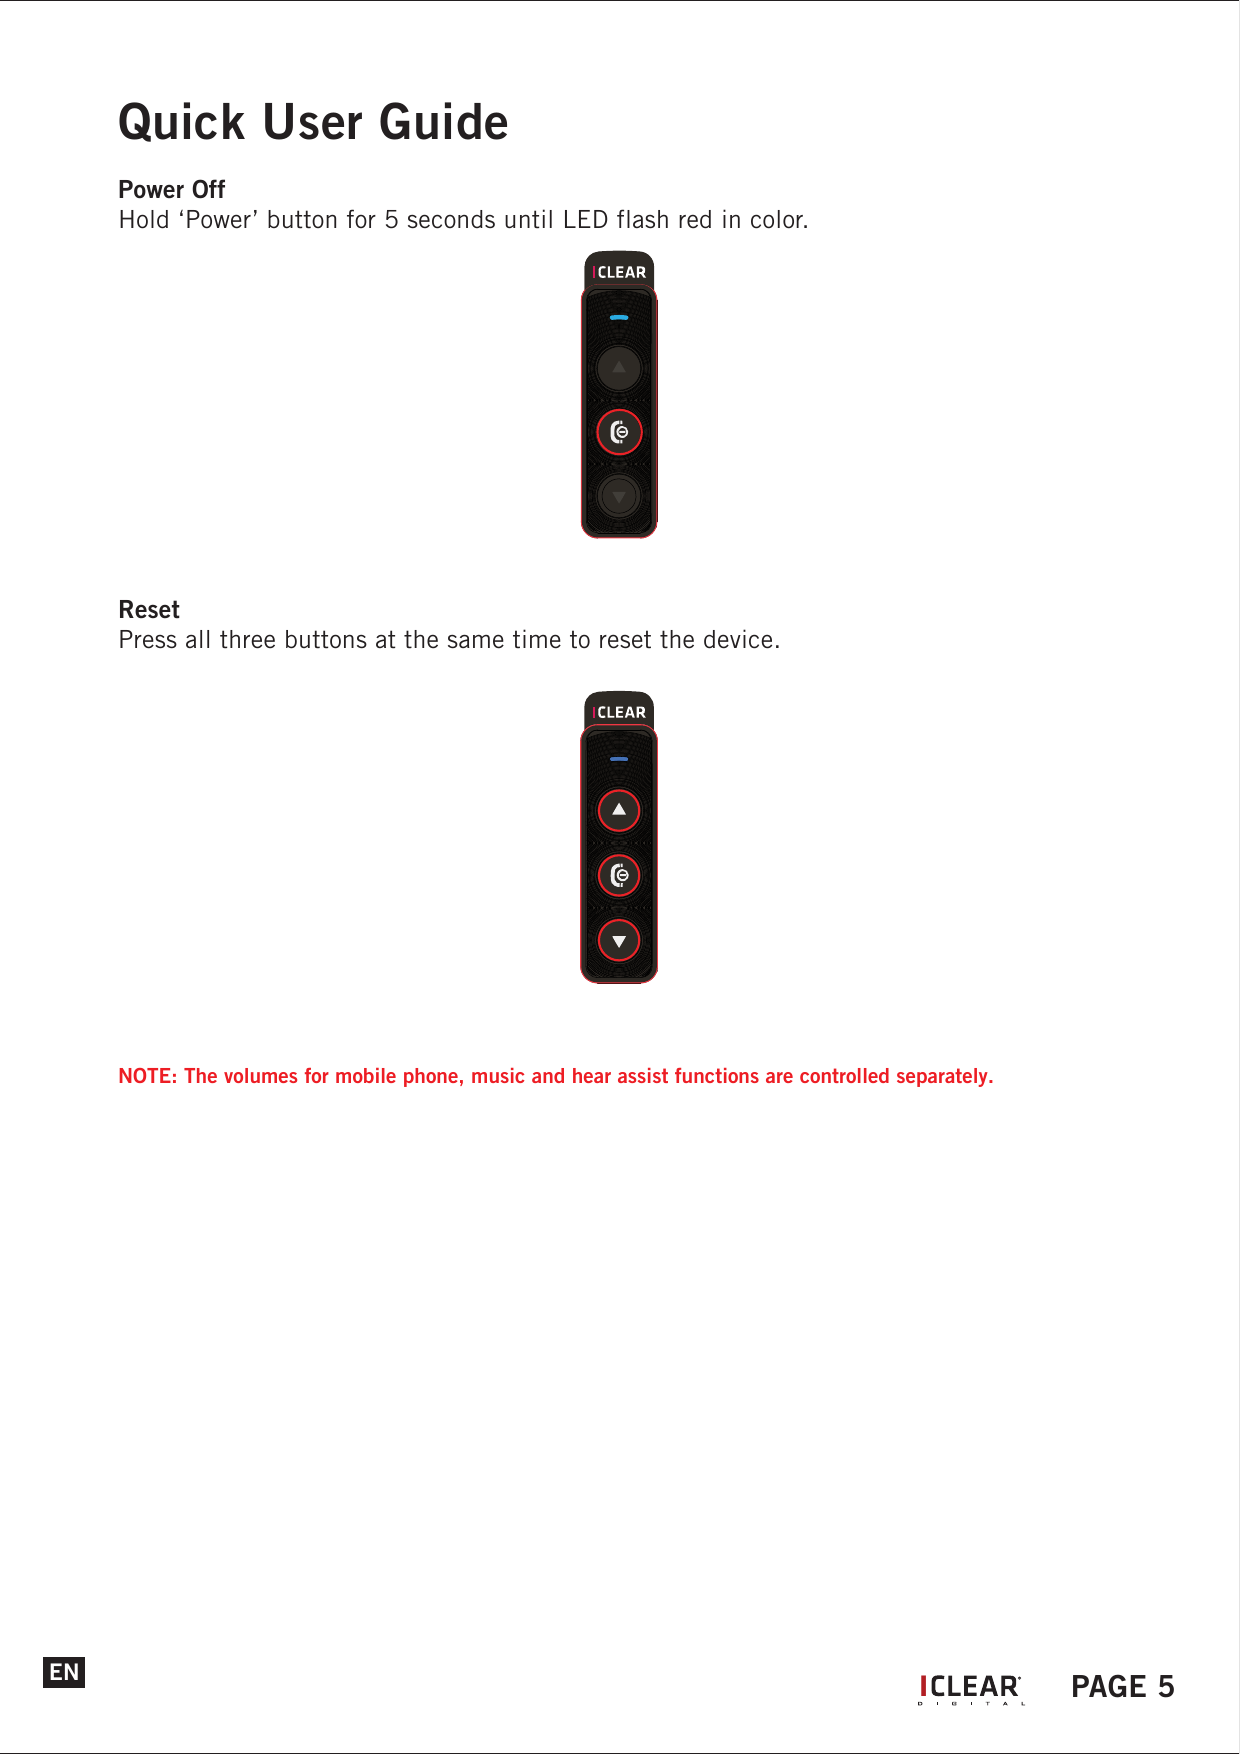
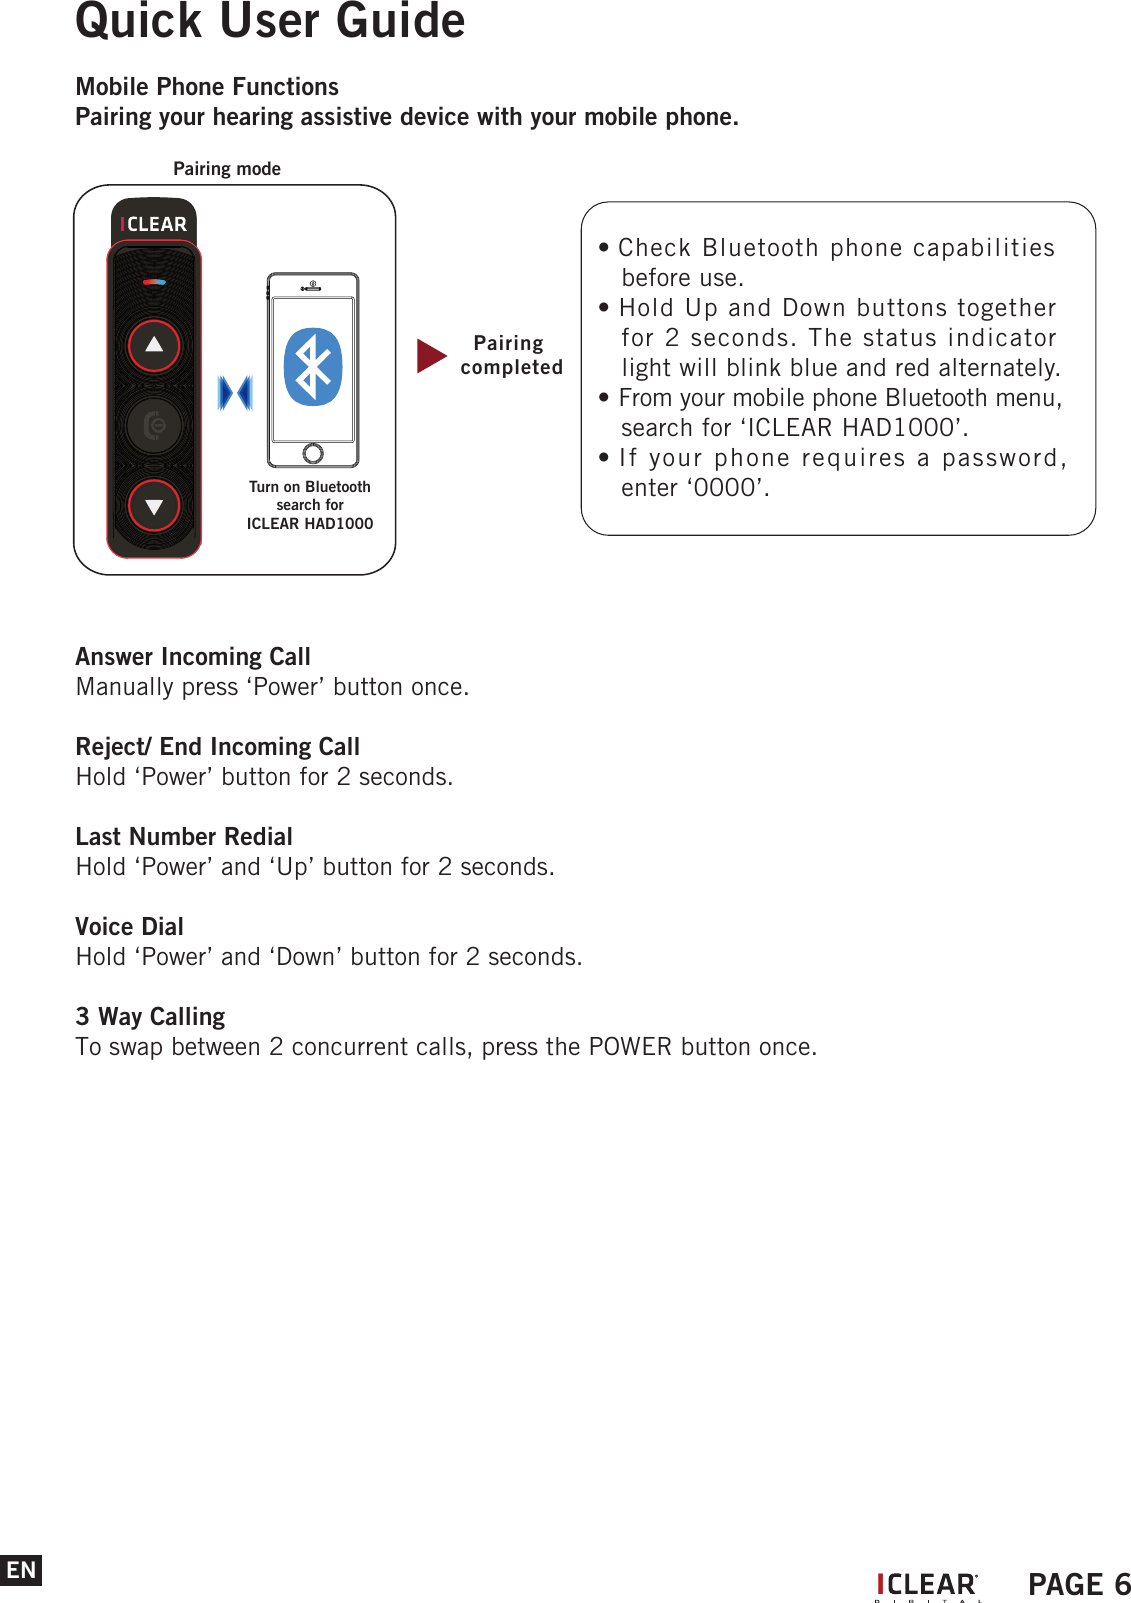
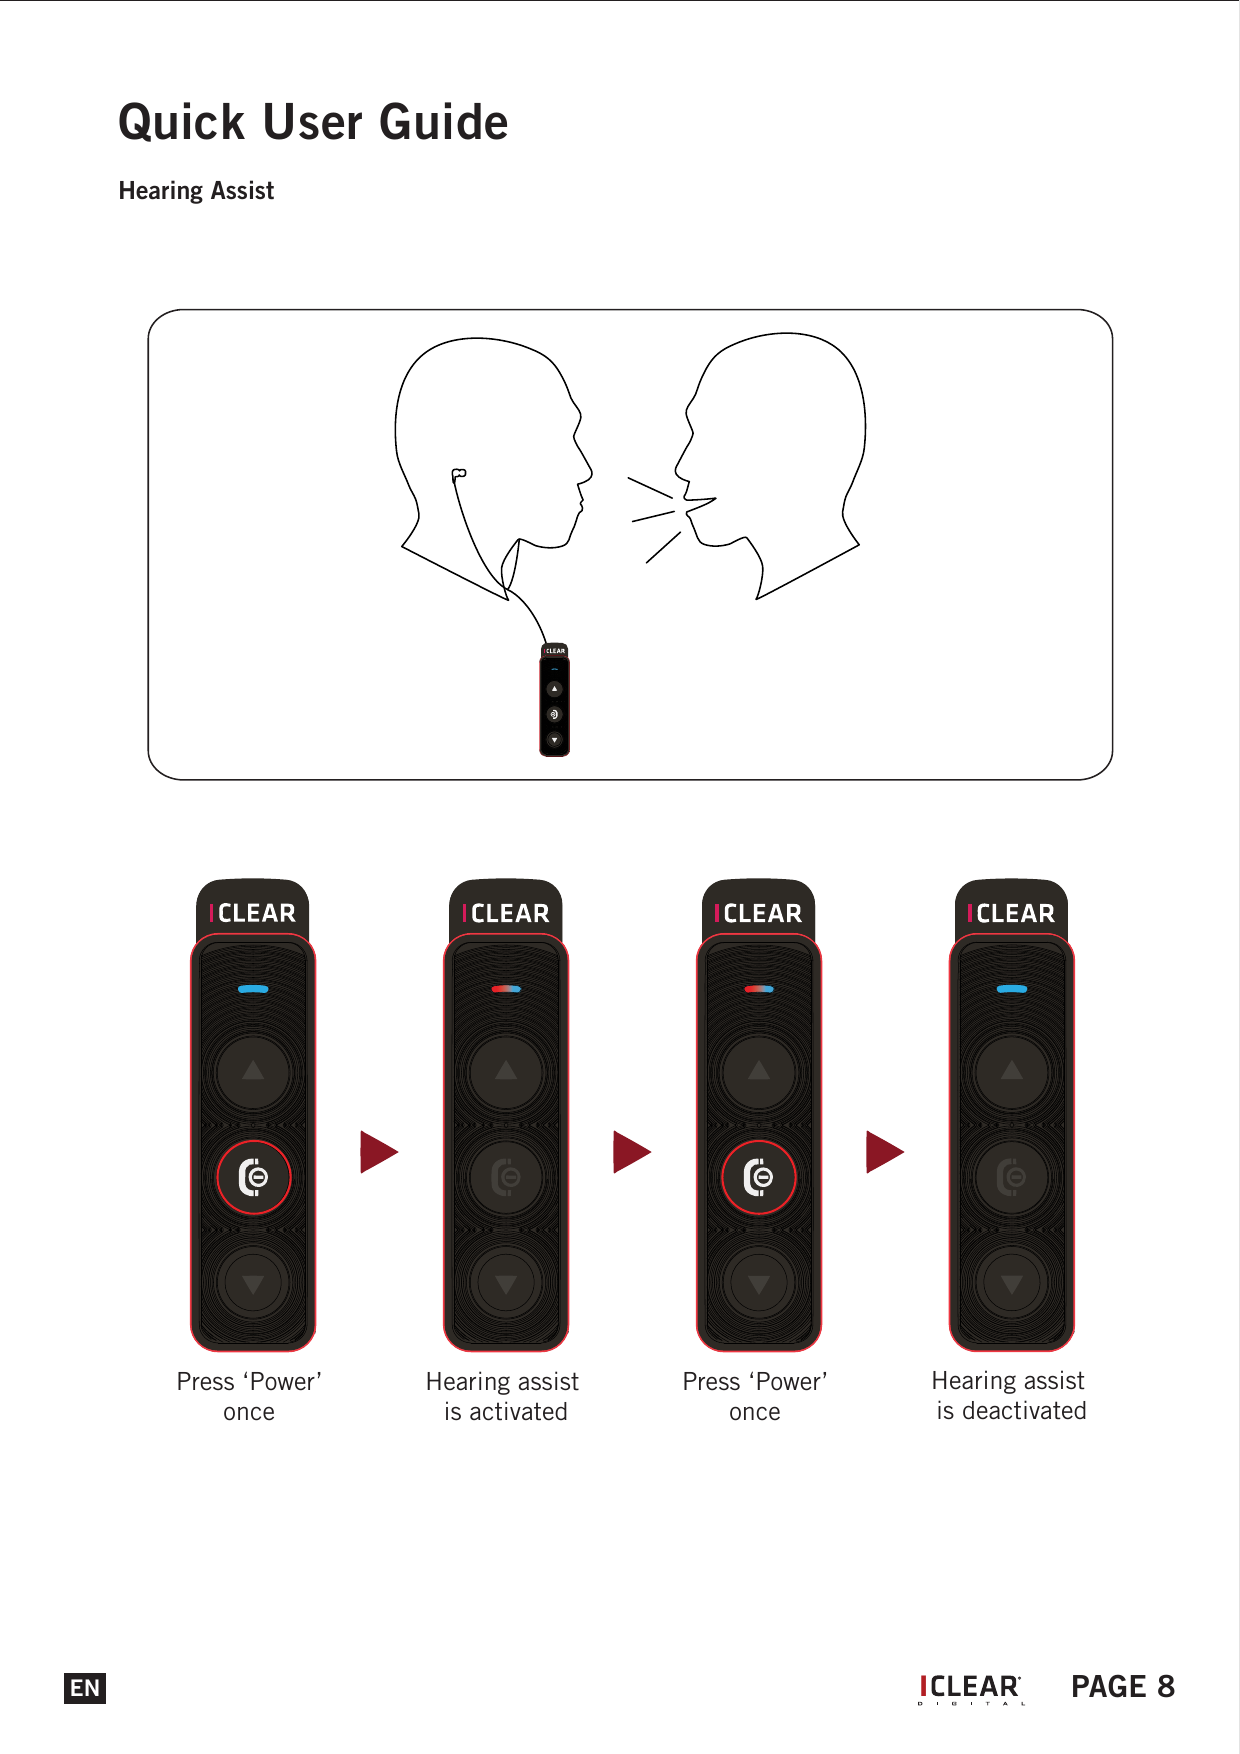
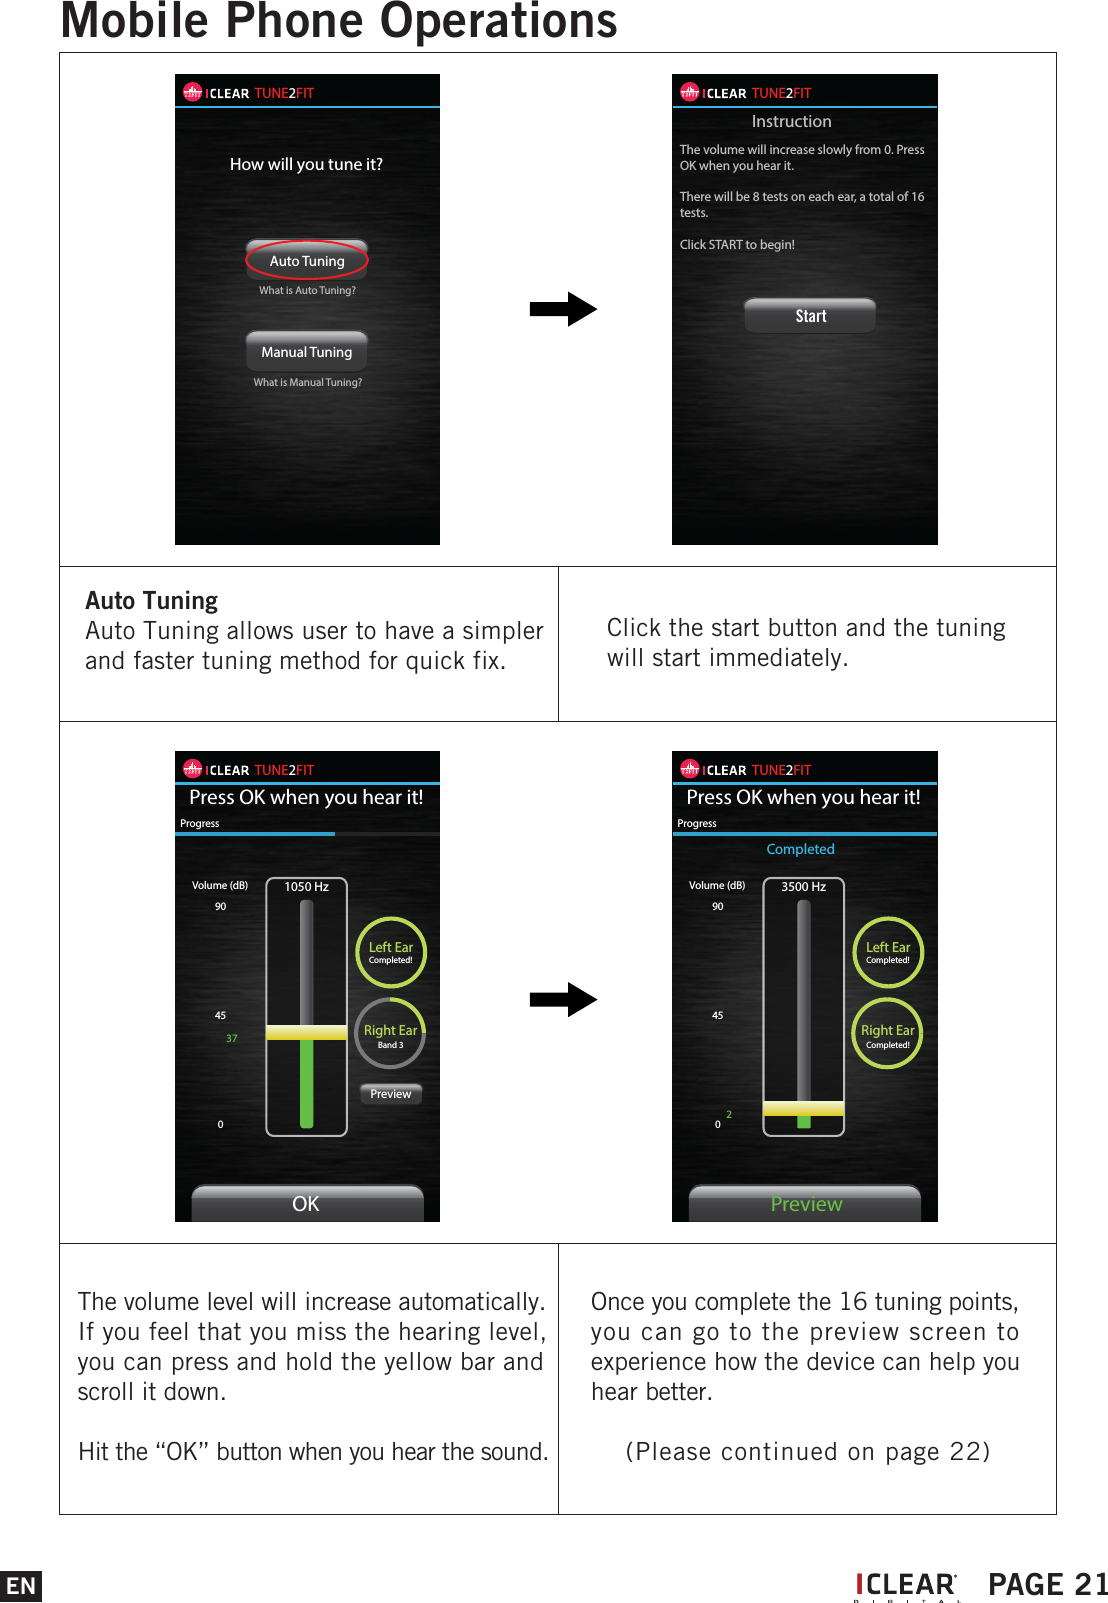
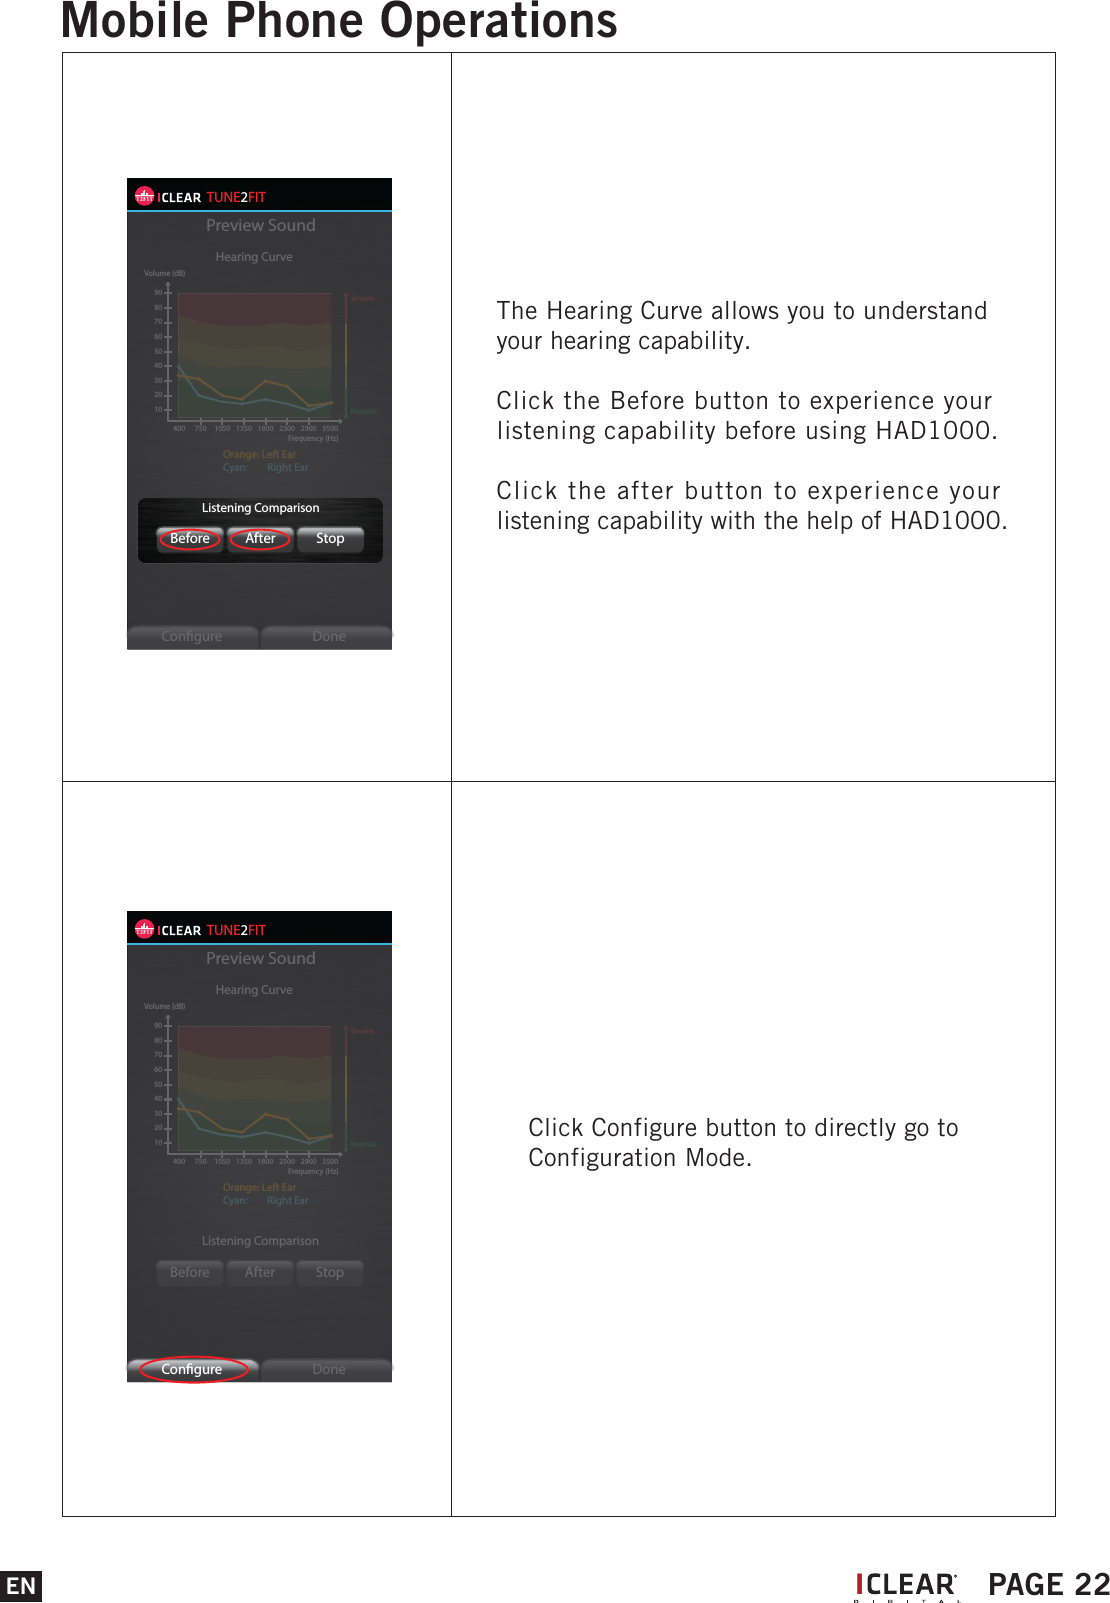
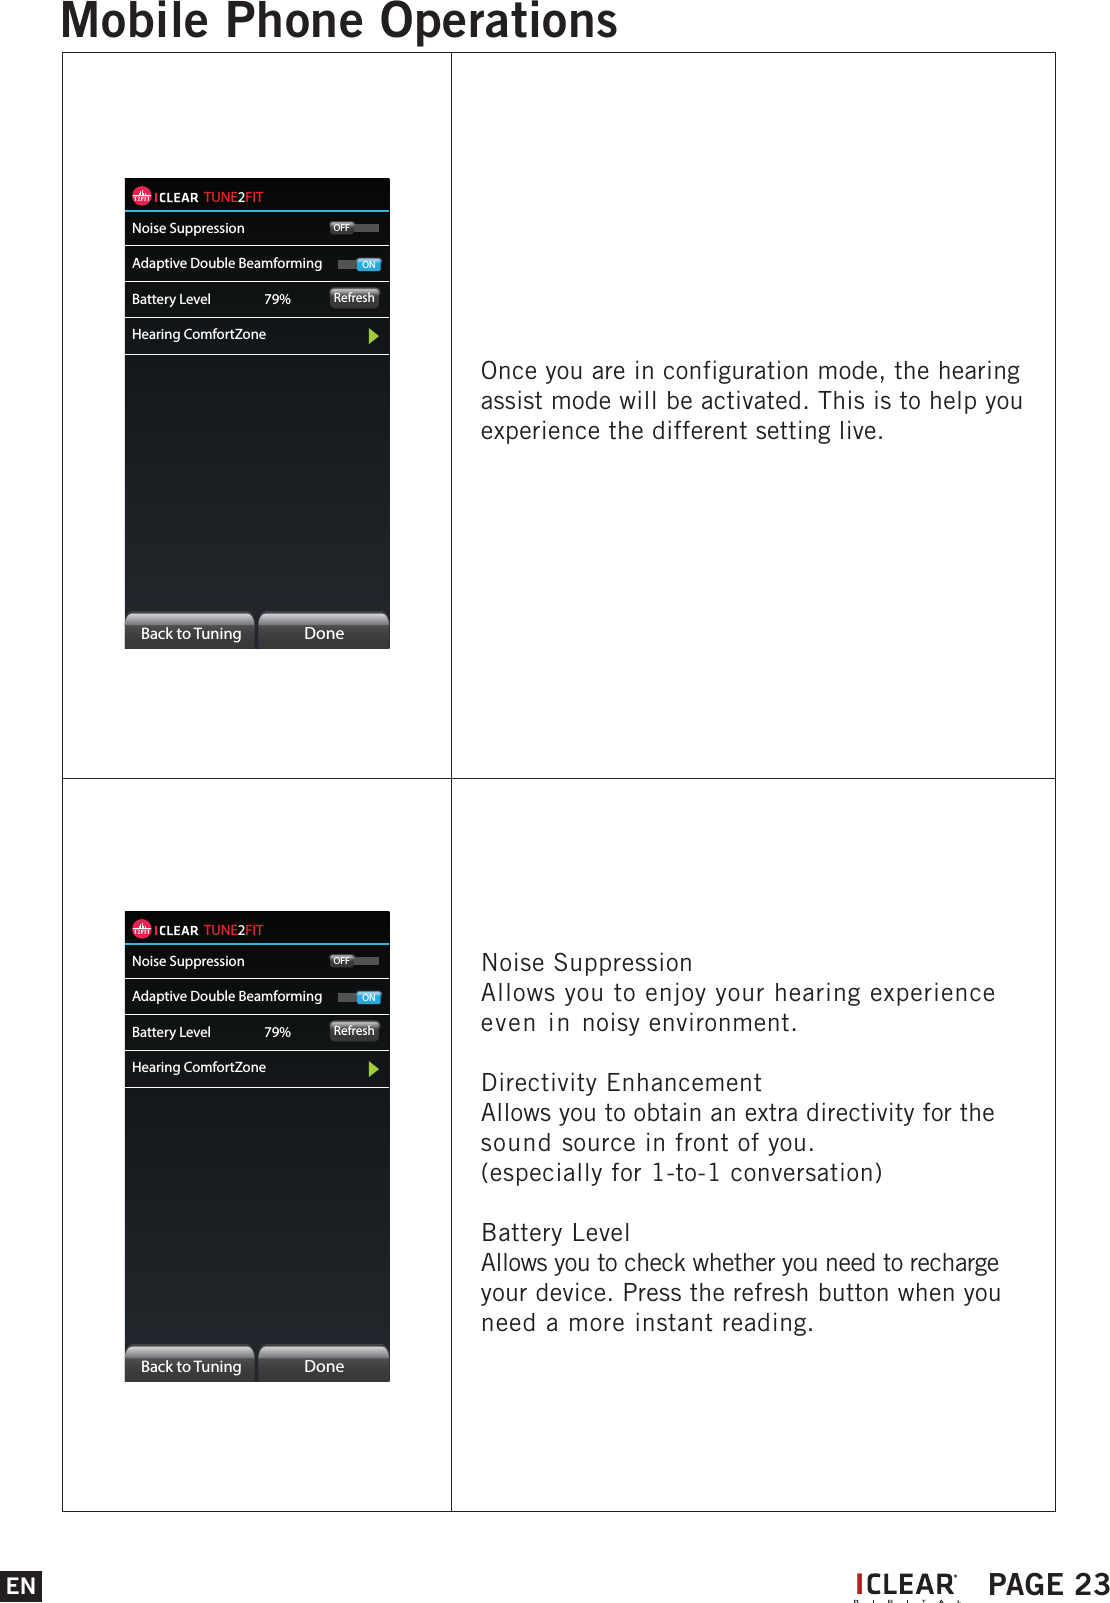
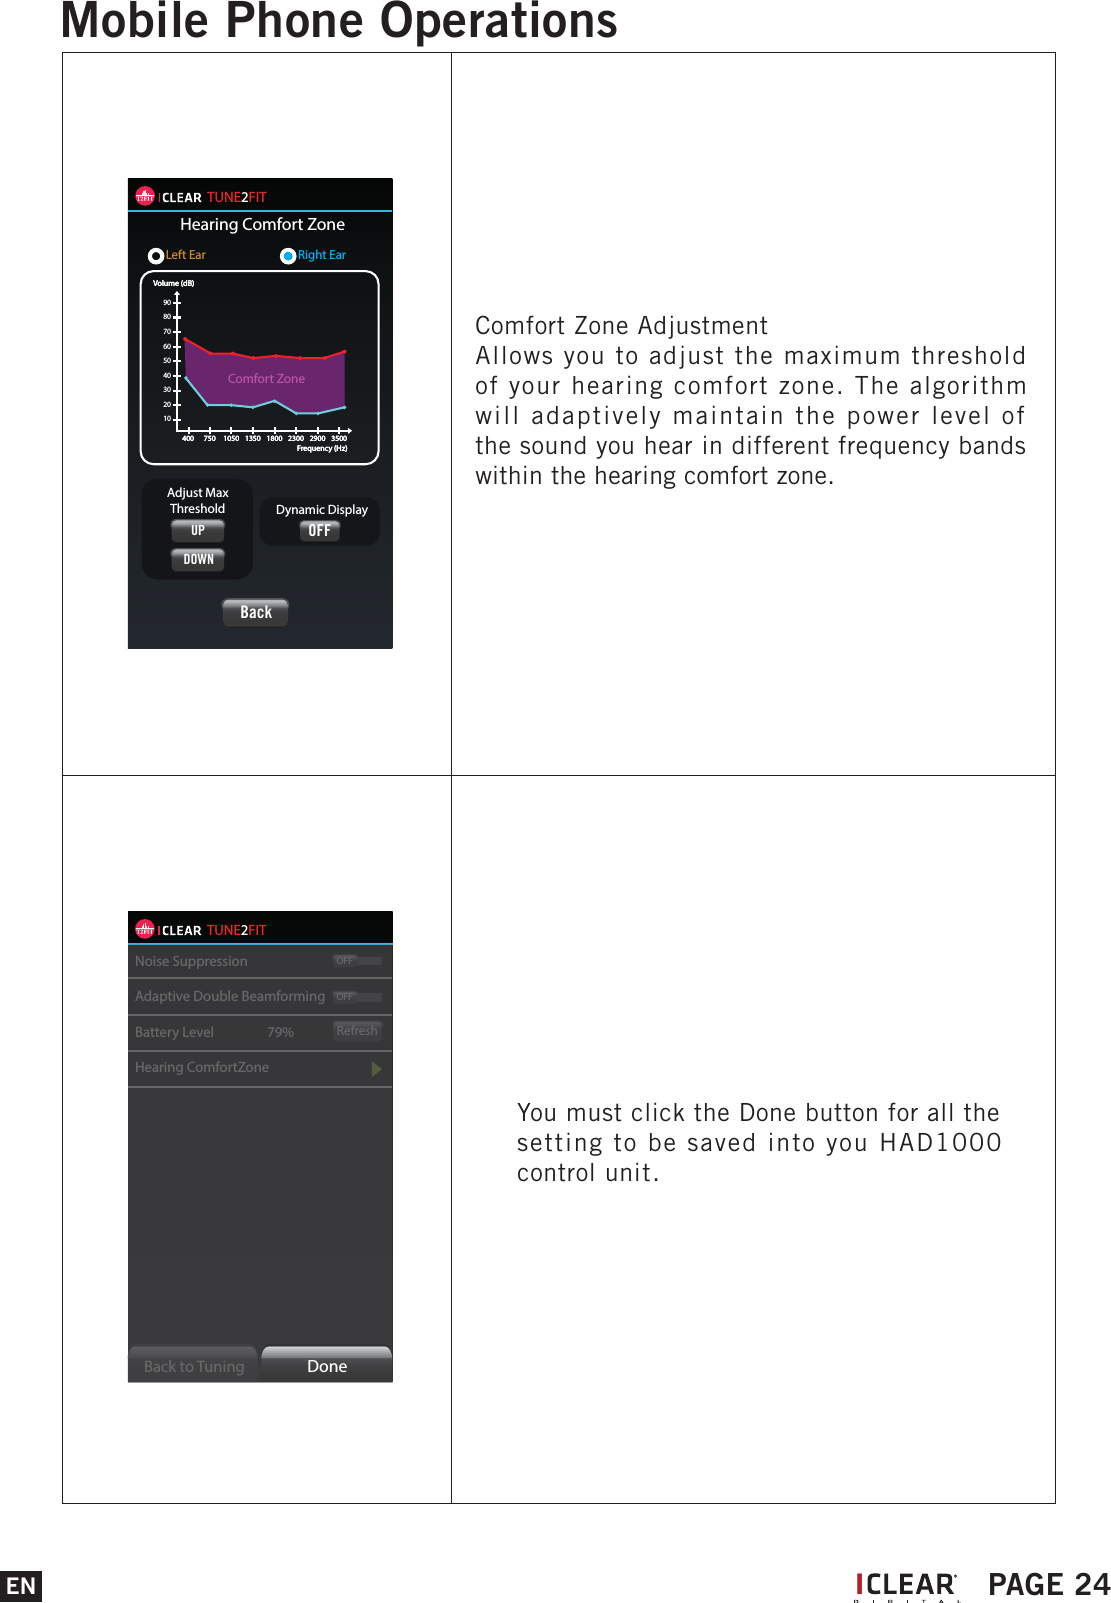
BITWAVE HAD1000 Hearing Assistive Device User Manual T2F UM 1 1 11032015 new
Bitwave Private Limited Hearing Assistive Device T2F UM 1 1 11032015 new
UserManual.wiki
>
BITWAVE
>
HAD1000 User Manual
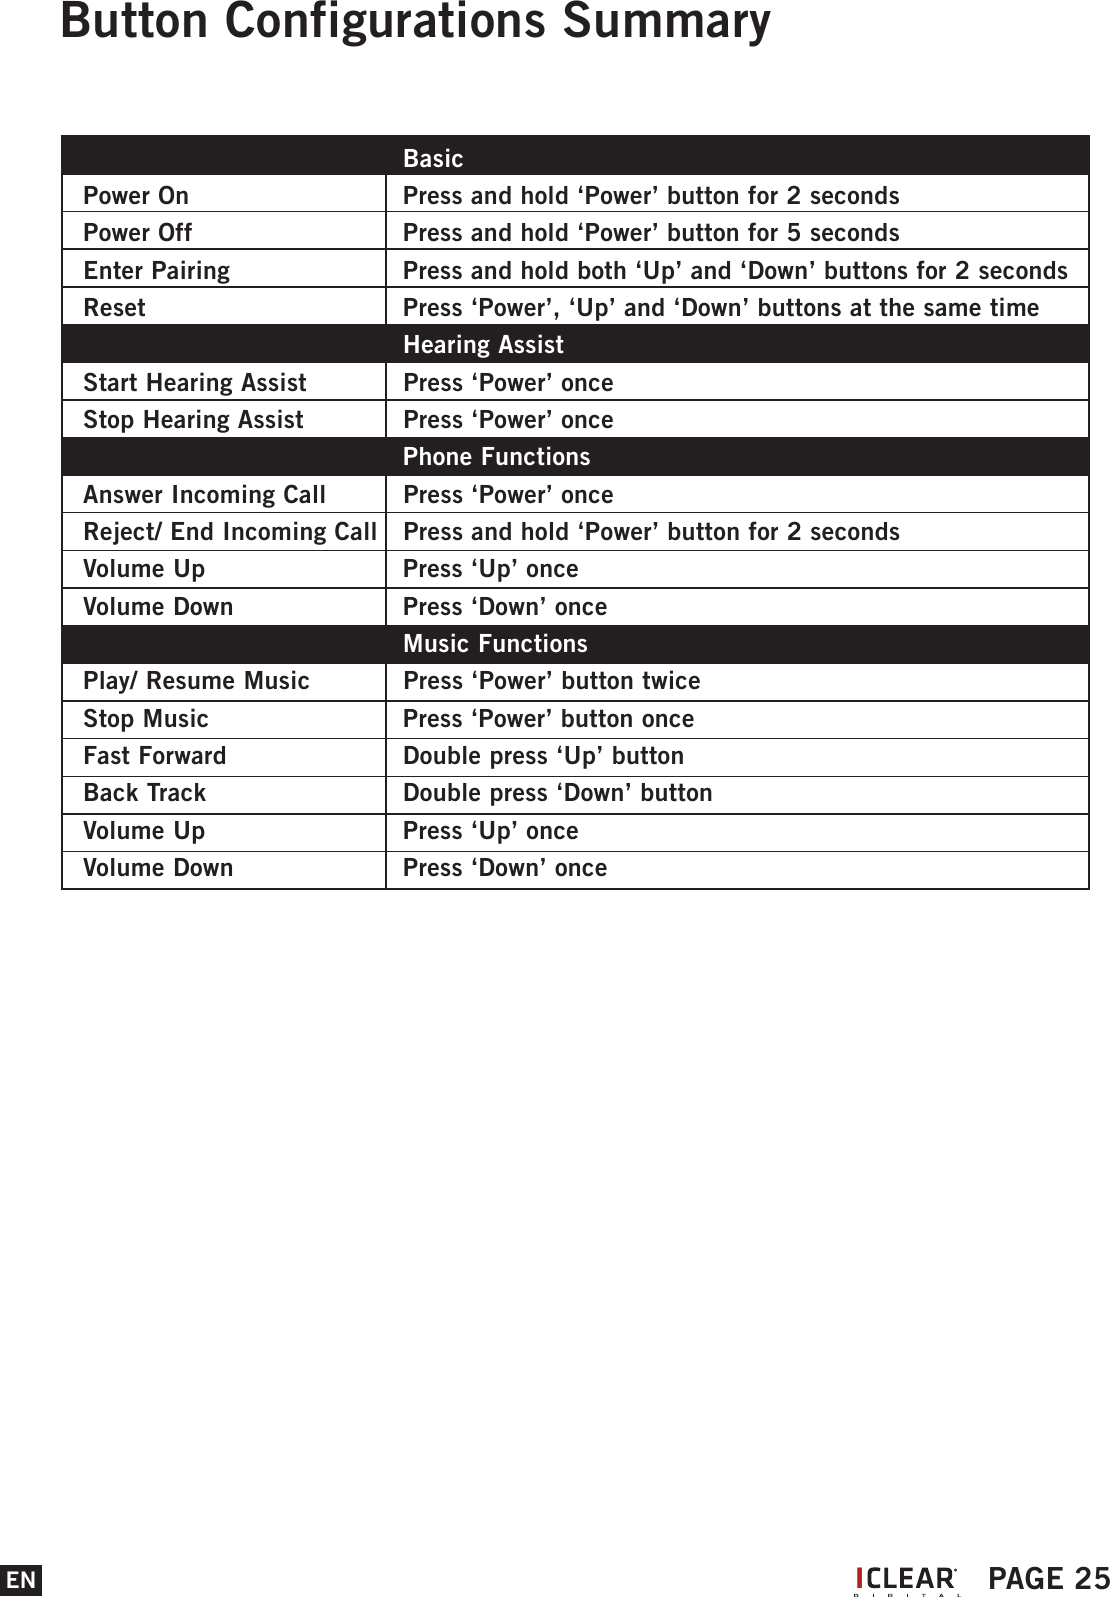
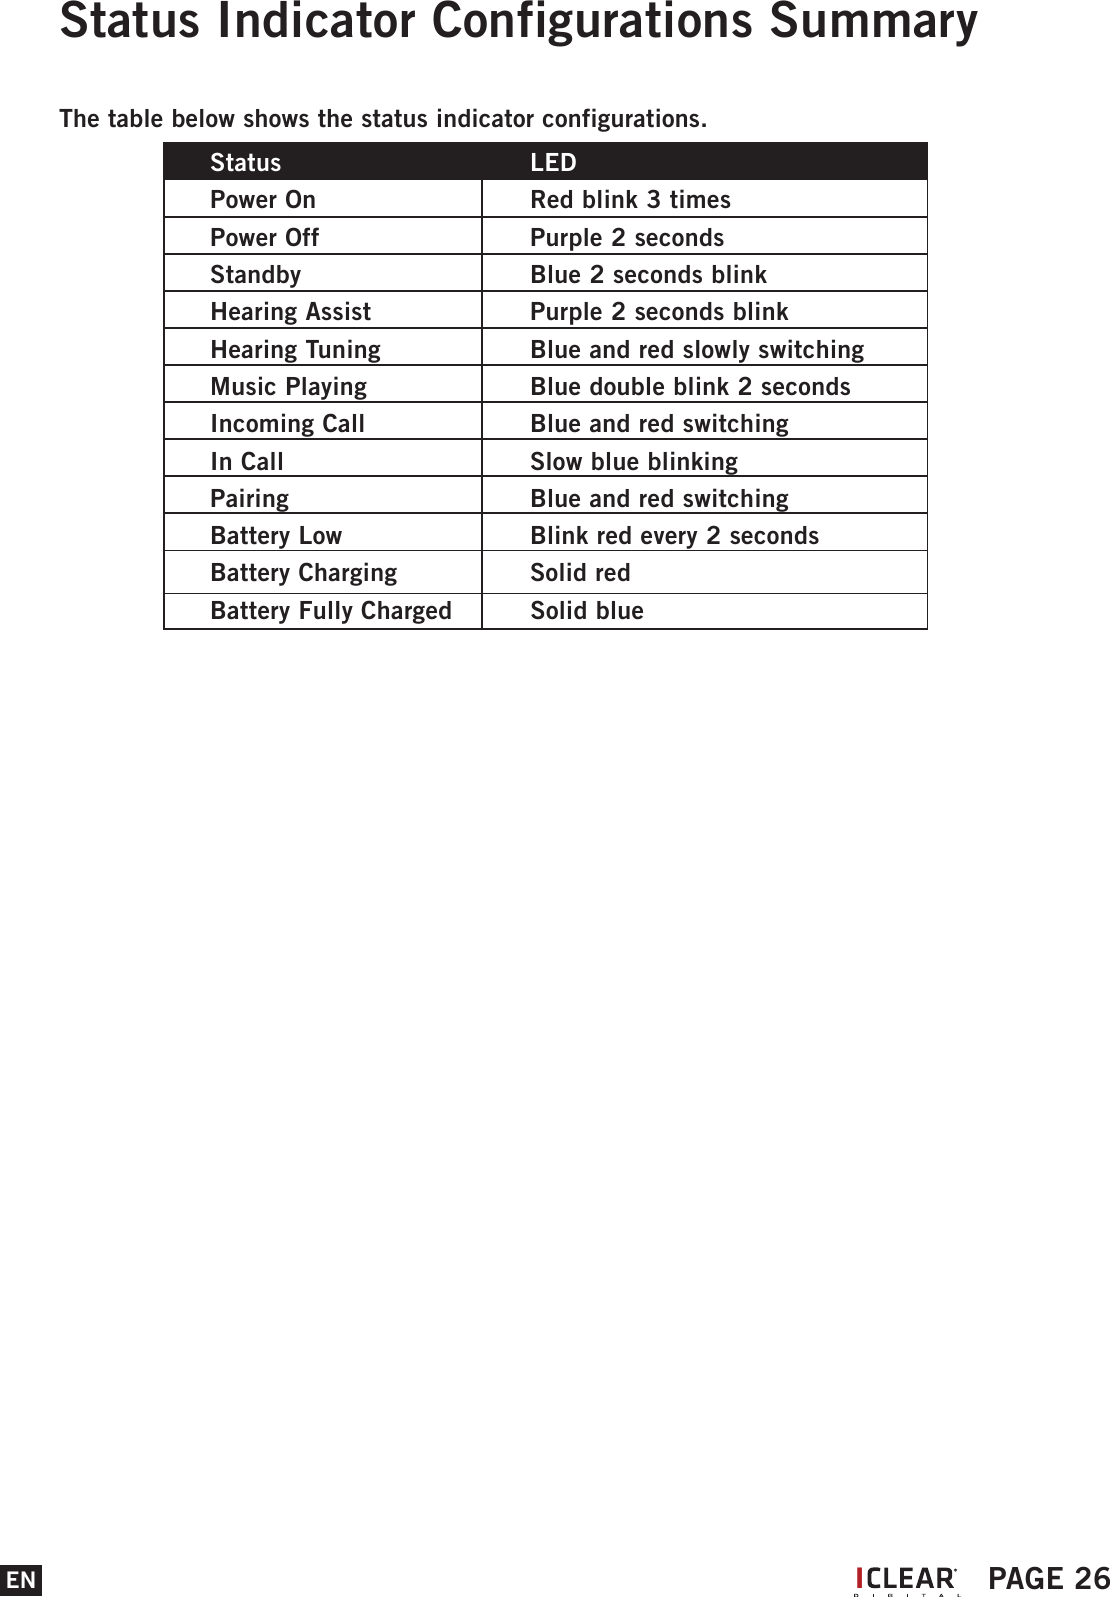
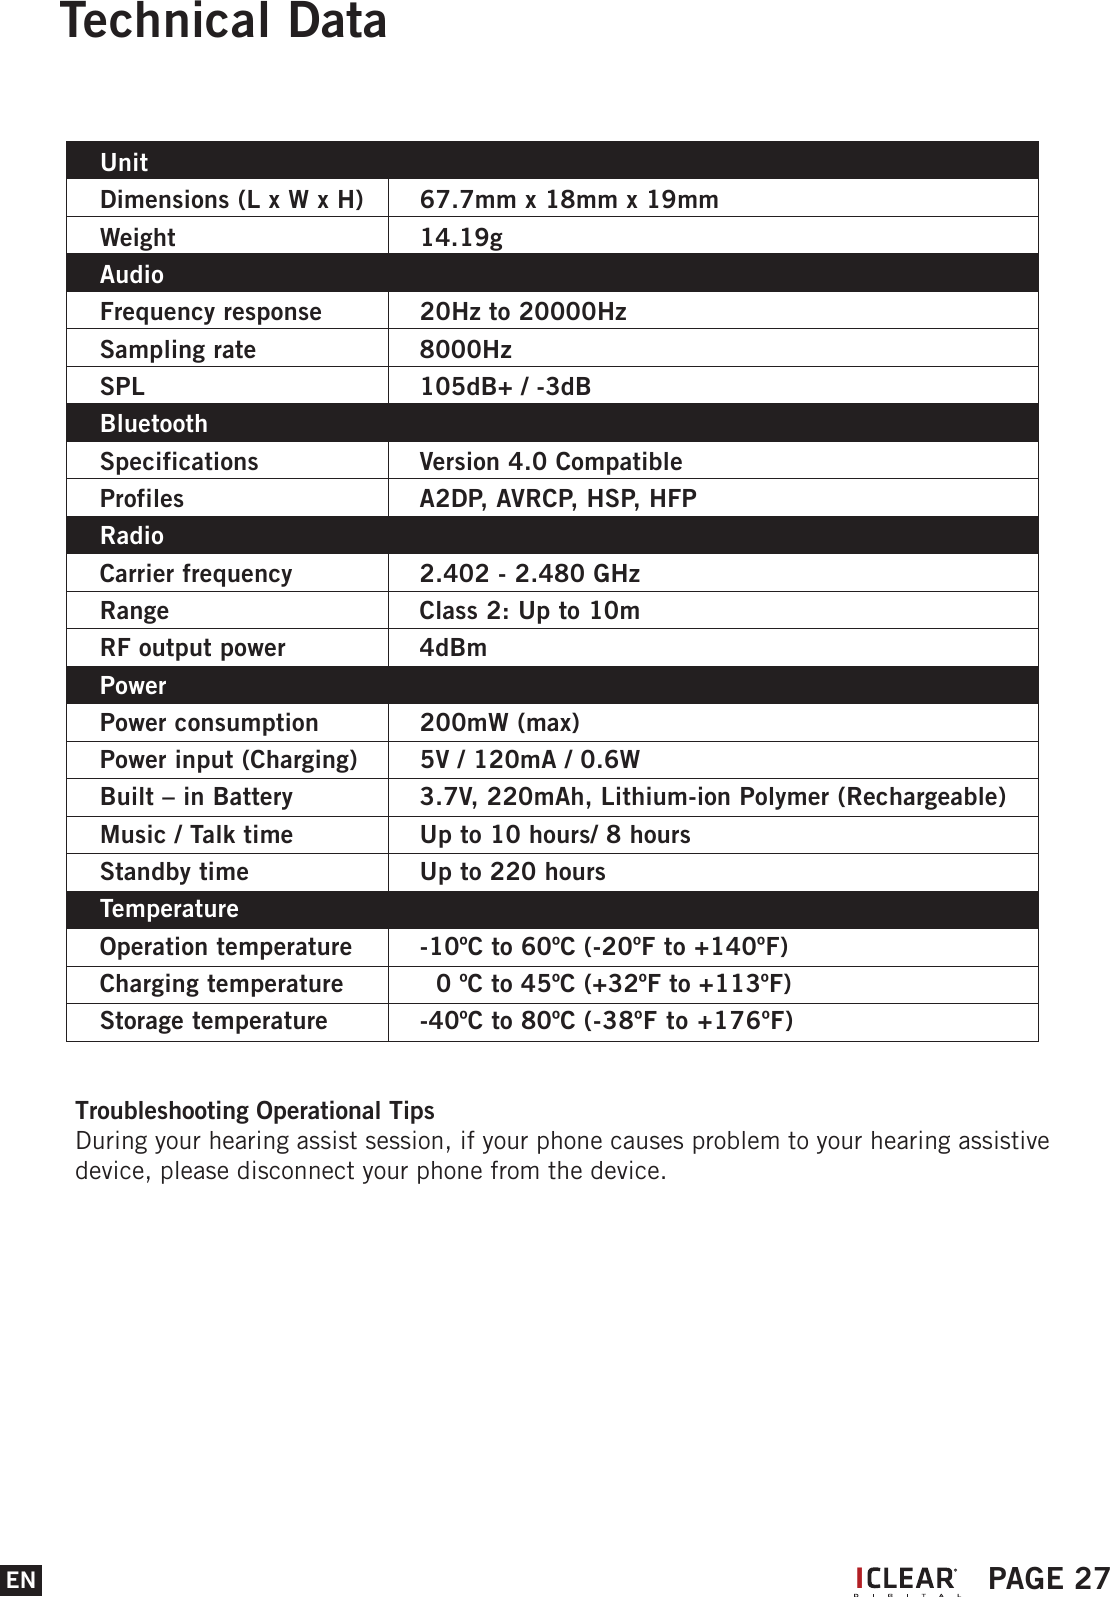
User Manual
Navigation menu
Upload a User Manual
Namespaces
Wiki Guide
HTML
PDF
Info
Views
User Manual
Discussion / Help
Navigation