BLU BLUNEO45 Mobile phone User Manual GO M1
CT Asia Mobile phone GO M1
UserManual.wiki
>
BLU
>
BLUNEO45 User Manual
User manual
Navigation menu
Upload a User Manual
Namespaces
Wiki Guide
HTML
PDF
Info
Views
User Manual
Discussion / Help
Navigation


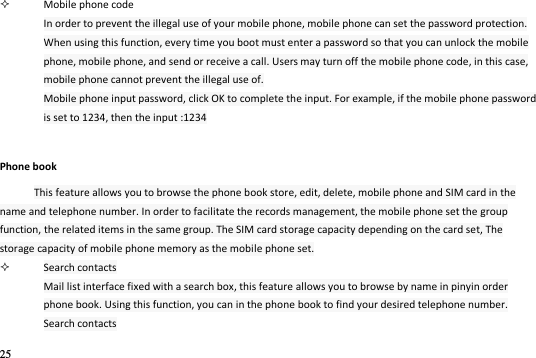
![8 Standby screen Mobile phone is in the standby mode, it will display the standby screen, it can view the mobile phone status and access application. Standby screen has a plurality of panels. Scroll left or right to choose a standby panel. add items to the standby screen standby You can add the application, small parts or folder shortcut to customize the standby screen. If you want to add an item to a standby screen: 1Press the [ menu ] → Add( or live screen blank area ). 2Select item categories: 1Shortcuts: applications, contacts, bookmarks and music play lists and other projects to add a shortcut. 2Widget: as analog clock, photo frame, music and other projects to add widgets. 3Folder: for the contacts to create a new folder or add folder. 4Wallpaper: selection of wallpaper, pictures set the background picture. In the standby screen of mobile project 1Touch and hold the item you want to move. 2The project will become larger and dragged to the desired location. the standby screen deleting items](https://usermanual.wiki/BLU/BLUNEO45/User-Guide-2215609-Page-14.png)

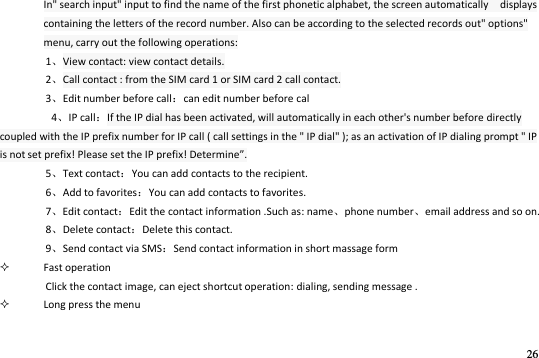
![11 1For the use of Google application, you must have a Google account. 2If no Google account, please register an account. 3When the application icon added to the standby screen, you can live the icon and drag it to the appropriate position on the standby screen. access recently used applications 1Press the [ the home key ] open access list of the applications. 2Choose the application that want to visit Custom mobile phone According to personal preferences to customize mobile phone. Set time and date 1Standby mode, open up the application list to select settigs →data and tie. 2Set the date and time as well as other options. adjusting the ringing volume Standby mode, you can [ press the volume keys ] and regulate ring volume. starting or cancel the silent mode](https://usermanual.wiki/BLU/BLUNEO45/User-Guide-2215609-Page-17.png)
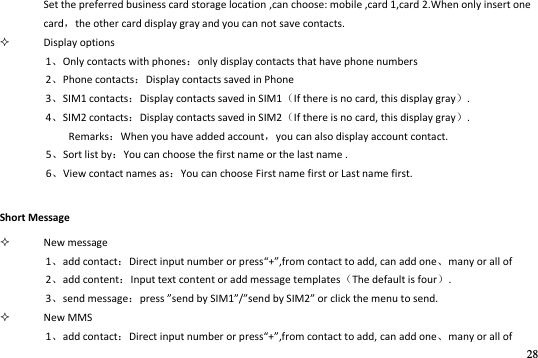
![12 Standby mode, long press[the power button] →“ilet ode, and you can start mobile phone silent mode. If you want to cancel the mobile phone silent mode, you must make the operation again. Change ringing Be careful If use silent mode, that you cannot change ringing . 1Standby mode, open up the application list and select settigs →soud →phoe igtoe 2Choose the bell from the list, then select ok. change wallpapers 1Standby mode, press the [ menu ] →allpape. 2Choose the source of the wallpaper 3Choose to set the wallpaper. start switching window display animation Standby mode, open up the application list, select “ettigs → Displa → Aiatio→ No aiatios“oe aiatiosAll aiatios. Adjusting the brightness of the display screen Standby mode, open up the application list, select settigs→ Displa → Bightess. Setting the lock screen](https://usermanual.wiki/BLU/BLUNEO45/User-Guide-2215609-Page-18.png)
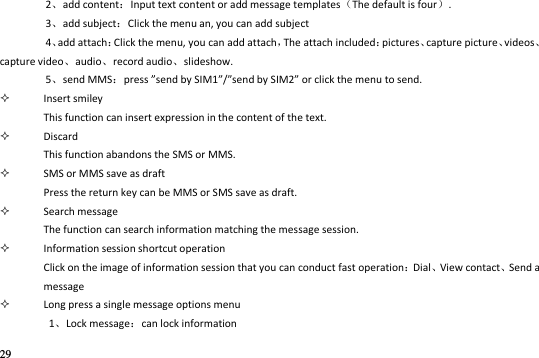
![13 Can set the pattern, PIN or password to prevent unauthorized use of your mobile phone. Be careful Set screen lock, It will require the input pattern to unlock, PIN or password. when each booting or lifting touch the screen mobile phone. If the mobile phone is no longer required to enter unlock pattern so, PIN or password, select settigs → Loatio ad seuit →“et up “ee lok →Noe. To set the pattern 1Standby mode, open up the application list, select “ettigs→Loatio ad seuit→ “et up “ee lok → patte. 2View settings descriptions and examples of patterns, and then select the next step. 3Draw pattern to unlock .drag the fingers are connected to at least 4 points, draw the pattern. According to the [ menu ] watch the screen and click on OK ( when necessary). 4Drawing is complete, choose to continue. 5Redraw the pattern, and then select the confirm. Set PIN 1Standby mode, open up the application list, selet settigs→ Loatio ad seuit→ “et up “ee lok → PIN. 2Enter at least4 digits, choose to continue. Set password 3To enter the PIN, and then select the confirm.](https://usermanual.wiki/BLU/BLUNEO45/User-Guide-2215609-Page-19.png)
![15 Change text input method According to the input box, select Iput Method → Select the input method that you need Be careful When entering text, press the [ menu ] to show or hide a virtual keyboard. The use of Android Keyboard 1According to the input box, select Iput ethod→ Android Keyboard 2When the Android Keyboard displays, select the appropriate virtual keypad input text. Copying and pasting text When entering text, you can use the copy and paste function in other applications using the text. 1Touch and hold the text input field. 2From the list of options to select text. 3Drag the finger to select text. 4Touch and hold the highlighted text. 5Select Cop, Copy text to the clipboard. 6In another application, touch and hold the text input field. 7Choose the paste and insert the text into the field](https://usermanual.wiki/BLU/BLUNEO45/User-Guide-2215609-Page-21.png)
![16 The downloading of files from Internet The downloading of files from the Internet or Internet application, mobile phone will be stored in the memory card. Warning Downloaded files from the Internet may contain the virus that will damage the mobile phones. In order to reduce risk, please only trusted sources to download the file. Be careful Some media files include" digital rights management" That it is to protect copyright .This protection will prevent the mobile phone to download, copy, modify or transmission some documents. download files from the Internet 1Standby mode, open up the application list, select the browser. 2Click on the address bar that above the screen, enter the Internet address, and then click. 3Select file or application and download. View download history 1In the main browser screen, press the [menu ]→ Moe → Doloads 2If you wish to remove download history list, press the [menu] → Clea If you want to cancel the download, press the [ menu ] →ael all doload.](https://usermanual.wiki/BLU/BLUNEO45/User-Guide-2215609-Page-22.png)
![19 To use of WLAN to get on the internet Open Wi-Fi 1Press[ Menu ]→settigs 2pess ieless ad etoks, select the Wi-Fi marquee. Be careful If you have opened the wireless local area network and supplied by the operators of the data service, wireless business priorities, supplied by the operators of the data service in wireless LAN connection after an interruption. Connect to Wi-Fi 1After opening Wi-Fi,pess→settigs 2press Wieless ad etok settigs →Wi-Fi settings. Mobile phone will list search within a wireless local area network. 3You have to choose the connected network: • If you choose an open network, you can directly connect to the network. • If you choose an encrypted network, you need to enter a password to access connection. Be careful In the Wi-Fi setup, click the add Wi-Fi network and you can add new Wi-Fi network.](https://usermanual.wiki/BLU/BLUNEO45/User-Guide-2215609-Page-25.png)
![20 Hotspot Open the hotspot 1Press[ Menu ] → “ettigs 2press Wieless ad etok settigs, select Tethering & portable hotspot ,open Portable Wi-Fi hotspot . The top mobile phone screen indicative of the status bar will display the hotspot icon. 3pess Portable Wi-Fi hotspot settigs →Configure Wi-Fi hotspot. Setup hotspot state. Connect to hotspot 1Other devices open Wi-Fi to search the hotspot and connect it. 3Choose the connected network: • If you choose an open network, you can directly connect to the network. • If you choose an encrypted network, you need to enter a password to access connection. Bluetooth Open the Bluetooth 1Press[ Menu ] → “ettigs](https://usermanual.wiki/BLU/BLUNEO45/User-Guide-2215609-Page-26.png)

![23 During a call, you can use the side key to adjust the volume. The use of options during voice call For voice calls may use the following options: 1If you want to adjust the voice volume, you can press the [volume keys ]. 2If you want to open the dialing screen, you can select a dialing keyboard. 3If you want to start the hands-free function, you can choose a hands-free. 4If you want to close the microphone so that the other party can not hear their own voice, you can choose silence. 5If you want to keep the call, you can choose to remain. 6If you want to return to keep call, you can select restore. 7If you want to make a second call, select Add call, and then dial the number. 8If you want to answer the second call, call waiting in bell sound from time to time, choose to answer. Mobile phone will be the first call. Must be customized call waiting service in order to use this function. 9For switching between the two calls, you can choose ehage. 10As for multi-party call( call ), dial or answer the second party's phone, and on second party options combined call. 11Open / close the hands-free function. Click < hands-free >, < hands-free> highlight, hands-free function open. Click again on the < hands-free >, < hands-free> is not bright, hands-free function off.](https://usermanual.wiki/BLU/BLUNEO45/User-Guide-2215609-Page-29.png)
![27 Long press contacts menu options includeview contactcall contactedit number before callIP calltext contactadd to favoritesedit contactdelete contactsend contact via SMS. Add contact 1press+add otat,add contacts can be saved to mobile phone or SIM card 2Import contactsImport from SIM card/SD card. Delete contacts With this feature,you can delete oneseveralor all contacts. Import/Export contact 1Import from SIM card(SIM1/SIM2) 2Import from SD card 3Export to SIM card(SIM1/SIM2) 4Export to SD card Groups 1This function can be added with different packet. 2Long press the added grouping, you can set the group name and dissolve the group. 3Entry for the group, press [ Menu ],ou a set eoe eesadd ees ring toand otifiatio Preferred storage location](https://usermanual.wiki/BLU/BLUNEO45/User-Guide-2215609-Page-33.png)
![32 3send text messagecan send text message. 4view contactthe stored contacts can view the contacts 5add to contacta strange number can add to contacts. 6remove from call logthis record can be removed from the mail list. Clear all call log This function can clear all call log. Email Learn how to personal or corporate email account to send email or view email information. Account settings 1Standby mode, open up the application list and select an email. 2Input address and password, and then select the et step. 3Follow the on-screen instructions. Send email messages 1Standby mode, open up the application list, select email →email account. 2Press[ Menu ] → compose. 3Choose recipient field and enter the name or email address.](https://usermanual.wiki/BLU/BLUNEO45/User-Guide-2215609-Page-38.png)
![33 4Select the subject field and enter the subject . 5Choose the field that it is to write the message, and enter text 6If you want to add sound or picture attachment, press [ Menu] → add attahet → select the file and add 7Select send to send message Be careful If the user is disconnected or not in service area,before on line or to enter the service area, information will be kept in the information session list. Check email information Open the email account, can be off-line viewing email that have retrieved some time ago, or connected to an email server to check for new messages. After extracting mail, you can view email offline. 1Standby mode, open up the application list, select email 2Press[ Menu ] → Refresh, a new email message will update to your inbox 3Select the email message from the information list. In view of the mail, can use the following options: 1If you want to reply to the message, select reply 2If you want to forward the mail to other people, press [ Menu ] → foad. 3If you want to delete message, press [ Menu ] → delete.](https://usermanual.wiki/BLU/BLUNEO45/User-Guide-2215609-Page-39.png)
![34 4If you want to mark as unread mail ,press[ Menu] → Mak as uead. 5If you want to see pictures in the message, select sho pitues. To delete the email account 1Standby mode, open up the application list, select email 2Touch and hold the account that will be deleted. 3Choose to delete account. Add other account Add a new email account 1Standby mode, open up the application list, select email →eail aout. 2Press[ Menu] → aout 3In the account list interface, press[ Menu ] → Add aout Custom email account settings 1Standby mode, open up the application list, select email →eail aout. 2Press[ Menu ] → Aout settigs. 3Customize the following options General settings: 1Account nameChange the account name. 2Your nameChange your name.](https://usermanual.wiki/BLU/BLUNEO45/User-Guide-2215609-Page-40.png)
![37 Open playlist Start random mode Change the duplicate mode The volume keys Adjust the Volume Menu key Access options The progress bar Moving figure from progress, you can play document from a particular point Create a playlist: 1In the standby screen, open the application list and select music. 2Can choose various categories of label card →Select the music file. 3Press [ Menu ] → Add to playlist→ New playlist. 4Enter the new name for the playlist, and select save. Tips: also can touch and hold the file and then choose add to playlist, to add a music file.](https://usermanual.wiki/BLU/BLUNEO45/User-Guide-2215609-Page-43.png)
![38 Using party shuffle: All the music files can be added to the current playing playlist. 1In the standby screen, open the application list and select music. 2Can choose various categories of label card → Select the music file. 3Press [ Menu] → Party shuffle 4If you want to close the party shuffle function, select The music file is set as a ring tone If you want to be a playlist of music files to set as a ring tone: 1、In the standby screen, open the application list and select music. 2、Can choose various categories of label card →Select the music file. 3、Touch and hold the music file, then select Use as ringtone. For the current play music files to set as a ring tone, In the music player screen, press[ Menu ] →Use as ringtone. Camera Understanding the basic operation of the filming and viewing photos and videos . If you want to use the camera, you have to insert SD memory card. Take photo 1In the standby screen, open the application list and select camera.](https://usermanual.wiki/BLU/BLUNEO45/User-Guide-2215609-Page-44.png)
![41 Play video 1In the standby screen, open the application list and select Video. 2Choose the video that will be played. 3Counterclockwise rotation mobile phone into a flat screen mode. Sharing pictures or videos: 1In the standby screen, open the application list and select Gallery. 2Select the folder and click[ Menu ]. 3Select the picture or video files. 4Select share. You can select file via MMS, e-mail sent or uploaded to the community. Sound recorder Learn how to use mobile phone recorder. You can set the voice memo as an incoming call ring. Voice memo 1In the standby screen, open the application list and select sound recorder. 2Select to begin recording. 3Speak to the microphone 4Select ,end recording and select save. 5To record more memos, choose again Play voice memos](https://usermanual.wiki/BLU/BLUNEO45/User-Guide-2215609-Page-47.png)
![42 1In the standby screen, open the application list and select music. 2In the play list, choose the voice memo that you want to play. Browser Learn how to access common Internet pages, and how to add it to the bookmarks. Be careful 1If access to the Internet or to download media, may have other costs. 2Browser application label may vary, depending on the service provider. 3Available options may be vary due to local or service providers . Browsing the Internet page 1In the standby screen, open the application list and select Browser. 2Access to the Internet page: 3Press[ Menu ] → Bookmarks→ select a bookmarks. 4Touch screen above the address bar, enter the Internet address, and then click 5If you want to return to the previous page, press [ return key ] Open multiple pages Can open multiple pages, and switch between pages. Open multiple pages 1In the standby screen, open the application list and select Browser.](https://usermanual.wiki/BLU/BLUNEO45/User-Guide-2215609-Page-48.png)
![43 2If you want to open more Internet page, press [ Menu ] → windows→New window. 3Open in a new window to another web page. 4Press [ Menu ] → windows. 5Select the page that you want to visit or press to close the page. In the Internet page search text 1In the standby screen, open the application list and select Browser. 2Press [ Menu ] → more → find on page. 3Enter the keyboard. Web page will display the text that conform to the input content. Take the inter page that you like as bookmarks. 1In the standby screen, open the application list and select Browser. 2Press [ Menu ] → Bookmarks → Add bookmarks. 3Input webpage name and Internet location, choose OK. Copy text from web pages. Available from the internet page copy text and insert it into another application, for example to create a note. 1Browsing the Internet page, press [ Menu ] → More→ Select Text. 2Drag the finger to select the text that it is required. The highlighted text that is copied to the clipboard. 3In another application, touch and hold the text input field.](https://usermanual.wiki/BLU/BLUNEO45/User-Guide-2215609-Page-49.png)
![44 4Choose the paste and inserted text into the field. Clock To understand how important event set and control alarm clock. Set a new alarm clock 1In the standby screen, open the application list and select Clock. 2Press[ Menu ] →Add clock. 3In each field in the set alarm details ( time, bell, vibration, repetition and label). 4Select Done. Stop alarm clock. The ala lok igs , hoose Cael to ed ala, hoose to susped igs agai i iutes sooze alarm. Remove the alarm clock. 1In the standby screen, open the application list and select Clock. 2Press [ Menu ] → Clock. 3Touch and hold to delete an alarm clock. 4Select delete alarm → OK. Play alarm even when the phone is in silent mode.](https://usermanual.wiki/BLU/BLUNEO45/User-Guide-2215609-Page-50.png)
![45 1In the standby screen, open the application list and select Clock. 2Press[ Menu] → settings→ Alarm in silent mode. Calculator Learn how to do mathematics. 1In the standby screen, open the application list and select Calendar. 2Use button and contact the basic arithmetic operations. 3As for advanced computing,press [ Menu ] → Advanced panel. Calendar Use the calendar to create activities In the calendar interface ,press [ Menu ],Click the day weekmonth or the calendar to switch view mode Create activity 1In the standby screen, open the application list and select Calendar. 2Press[ Menu] → More → New event ,or hold the certain time or date and click New event. 3Set active items.](https://usermanual.wiki/BLU/BLUNEO45/User-Guide-2215609-Page-51.png)
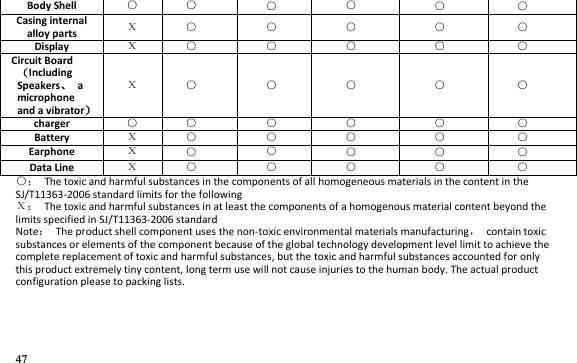
![46 4Click Done. Viewing activities. In the program , day, week, month view ,click activity can view detailed information. Delete activity 1In the standby screen, open the application list and select Calendar. 2Press[ Menu ] →Day ,switch to the schedule view. 3Click to the event that would be deleted. 4Press[ Menu ] →Delete event. 5Click OK. Non environmental protection material or element name and content description 1. Environmental description The products according to the national laws and regulations electronic information products pollution control management measures of the relevant provisions. Using the national industry standard SJ/T 11364-2006 of the pollution control of electronic information products in the pollution control of electronic information products logo. 2. Produces of environmental protection type of substance or element name and content Component Name Non environmental substances and elements Lead P b Mercury H g Cadmium C d Hexavalent Chromium CrVI Polybrominat biphenylsPBB Polybrominated diphenylethersPBDE](https://usermanual.wiki/BLU/BLUNEO45/User-Guide-2215609-Page-52.png)