BMORN TECHNOLOGY W7421 Tablet PC User Manual W7421 EN
SHENZHEN BMORN TECHNOLOGY CO.,LTD. Tablet PC W7421 EN
User manual
1
Tablet PC
W7421
User manual
Important Declaration
1. Before using the tablet PC, please read all
information provided by us first so that you can use this
product correctly. Please make sure that you have read this
manual carefully before using this product.
2. Our company reserves the copyright of this manual,
any random duplication or interpretation of the full or
partial manual is forbidden in commercial activities.
3. The information covered in this manual is all based
on the latest information when compiling the manual, and
products are subject to change without notice for further
improvement. We are not committed to any mistakes or
2
incidences caused by the manual. For additional product
information, visit the company’s web site.
4. When using this product, please make backup for
the data by yourself and this company will just be
responsible for the product's hardware itself, and will not
undertake any responsibility for any loss or damage of
personal data and information due to wrong operations of
hardware.
Precautions
This manual includes important information on
safety precautions and proper usage of this product. To
prevent any accident, please make sure that you have read
this manual carefully before using this product.
Do not keep this product in a place with a high
temperature, humidity or too much dust. Especially
3
do not place this product in a car with all windows
closed in summer, and keep out direct sunlight.
Avoid dropping or shocking this product heavily and
avoid shaking the TFT display violently, otherwise,
the TFT display may be damaged or cannot play
correctly.
Please choose a suitable volume. Avoid excessively
high volume when using a headset. If you feel any
ear noise, please decrease the volume or stop using.
Do not break the connection suddenly when this
product is conducting formatting, uploading or
downloading operations, otherwise there may be
program errors.
This company will not undertake any responsibility
for any memory loss due to product damage,
repairing or other reasons.
4
Do not dissemble this product by yourself and do not
clean the surface of this product with alcohol, thinner
or benzene.
Do not use this product in a place where the using of
electronic device is prohibited, such as on a plane.
Do not use this product while driving a car or
walking on the street, otherwise traffic accident may
occur.
※ This Company reserves the right to make any
improvement on this product. No further notice will
be provided on any variation on the specification and
design of this product!
★ (This product has no water-proof function)
5
Main functions:
●7 inch HD TFT capacitive screen, 1024*600 definiton;
●Support built-in 0.3 Mega front camera and 2 Mega rear
camera (optional);
●Support microphone recording function.
●Support USB mouse, keyboard, bluetooth headset, USB
peripherals, operation more convenient, more powerful.
●Support OTG function, support U-disc, portable hard disc
by OTG to transfer data. (While connecting to portable
hard disc, DC power must be connected to supply power
for the product; otherwise the tablet PC will get crashed
due to insufficient power supply)
6
●Multiple network access to the Internet. Supporting Wi-Fi,
you can enjoy the internet life anywhere, anytime.
●Gravity sensor (G-sensor), in addition to the horizontal,
vertical screen switch, you can also install various software
to extent this function, such as turning the text, switching
songs, and funny games, etc.
●With Google Android intelligent operating system,
abundant software extension function, you can you're your
personalized space with apks by yourself.
●Supporting apk installation and application, abundant
software can be downloaded and installed from Google
player store in your MID or from your PC to download
from the Internet.
7
●With this product, you can easily have business and
entertainment via abundant applications, such as E-Mail,
word, website browsing, news, instant messaging, financial,
blog, games online, video online, stock market , weather
report , mobile TV, maps, fun software, etc.
●Supporting
MP3,WMA,MP2,OGG,AAC,M4A,MA4,FLAC,APE,3GP,
WAV etc.
● Supporting full HD video decoding Mpeg1, Mpeg2,
Mpeg4 SP/ASP GMC, XVID, H.263, H.264 BP/MP/HP,
WMV7/8, WMV9/VC1 BP/MP/AP, VP6/8, AVS,
JPEG/MJPEG etc.
● Supporting JPG, JPEG, GIF, BMP, PNG
● Supporting TF Card, with capacity up to 32GB.
● Personalized settings-freely adjustable brightness, key
tone on or off, changing wallpaper and so on.
8
● Supporting multi-languages.
● More functions could be added by Firmware updating
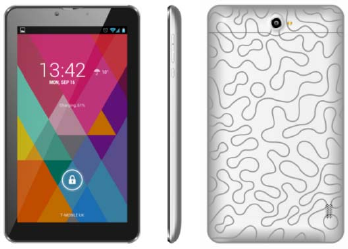
Appearance and Buttons:
Definition:
1.USB Port: Micro USB 5 Pin data cable supports external
2.Earphone Jack

9
3.“V+”:Volume up;
4.“V-”:Volume down;
5.“”:Power Button--long press this button to turn On/Off
the player, short press this button to lock screen in order to
avoid operation error.
6.Front 0.3MP camera
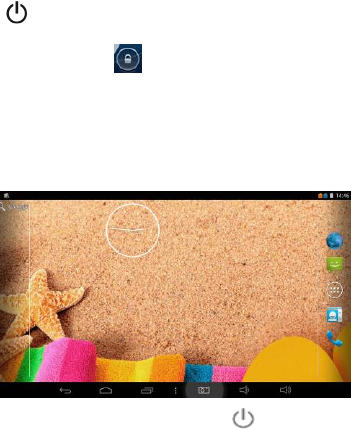
1.Quick Start:
1-1.Power On/Off and unlock:
At the status of power off, long press “ ” for three seconds
to turn on. It will take some time to power on, please wait. It
will take about 100 seconds to enter system, drag unlock icon
“” to the camera icon on the left to take photo and to the
unlocking icon on the right to unlock, see below.
Energy-saving and locking mode:at the process of using,
system will automatically enter energy-saving mode, press
10
“” to wake up the screen, system will enter unlocking mode
in one second, slip “ ” to unlock.
Notes: At the status of energy saving mode, the main operation
won’t stop, only LCD screen will be off, showing black screen.
Music or film continues playing.
Power Off: At the status of using, press “ ” for 5 seconds,
the screen will show power off option. Select “Power off”
option, confirm your choice and system will automatically turn
11
off. Select “Cancel” to cancel power off operation.
1-2.Battery and Charge
Battery should be charged for 8 to 12 hours for the first time in
order to make sure battery with enough power.
Please use charger approved by our company for charging.
Before charging, insert the miniport of the adaptor into DC jack
and the other side into power socket. Then the device is being
charged, the battery icon will show the charging status. Please
don’t disconnect the charger until device is fully charged.
Battery icon will show whether it is fully charged.
Please note the following precautions for protecting lithium
battery
1-3.Computer Connection & File Transfer
Connecting the product to the computer with USB cable, the
12
top status bar will show USB has connected. The product’s
default is charging for USB connection mode. If connecting
external mobile hard disk, you need to pull automatic running
list at the top status, then can see “USB connected” option.
Click the option, show USB status switch interface; according
to the note icon on the right bottom “Open USB storage
equipment”, switch into USB storage status. At this time the
users can access the external hard disk. At the status of USB
storage, click the icon again to disconnect USB and recover to
charge mode. USB storage mode system will limit the users’
1-4.Use of Touch Screen
There are various operation methods. You can view the main
screen, menu and application program.
1-4-1.Click
13
When you want to use screen keyboard input or select the
application program in the main interface, it can be realized
just use the fingers or stylus to click.
1-4-2.Press
When you want to open one available option or shortcut and
main application in the main interface, just press the option is
ok.
1-4-3.Quick sway or sway
Quick sway or sway with your finger or stylus to make the
vertical or horizontal drag fast action.
1-4-4.Drag
Before dragging, please use your finger or stylus to press, until
get to the wanted location.
1-5.G-Sensor
The product has the function of G-sensor. After opening the
function in the setting (default is open), rotating the machine
14
into 90 degree, the screen will realize horizontal and vertical
screen switching automatically.
Besides screen switching, it can support more function, such as
turning the text, switching music and funny games.
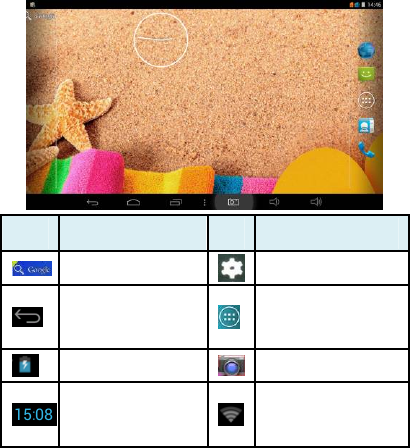
2.The function of the Main Interface&Icon Usage
2-1: The icon defined description of the main interface
function
15
icon Fucntion description icon Fucntion description
Google search Setting
Home Button
Function Module
Menu
Battery icon Camera
The current system
time
Wifi signal Display
16
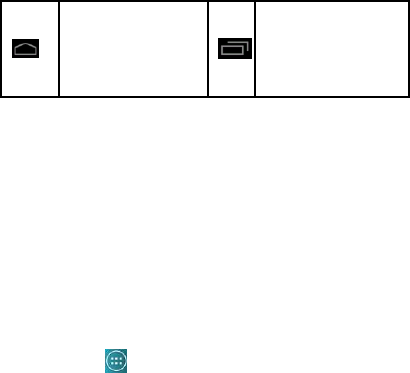
Return to the main
page at any interface
The recent
implemented
application window
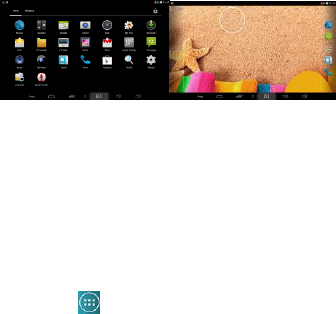
2-2. The introduction of the main interface
Long press power button, after startup, the screen is locked.
Slide the unlock icon to enter into the main interface as the
following pics shows. In this interface, you can view the state,
open the program and so on.
2-3. To add, move,or delete the desktop icon
Click the icon then you can enter to the function menu list
which shows all the application icon. Holding and Dragging
the icon can copy the it onto the current desktop. For example,
in a shortcut to desktop setting
17
We can delete the icon added onto the main interface. Hold the
icon all the time, at the same time, the deleting icon X will
appear among the above, dragging the icon onto the X can
delete the icon.
2-4.Short-cut Key
Press the icon to enter into the a fully functional menu as
following:
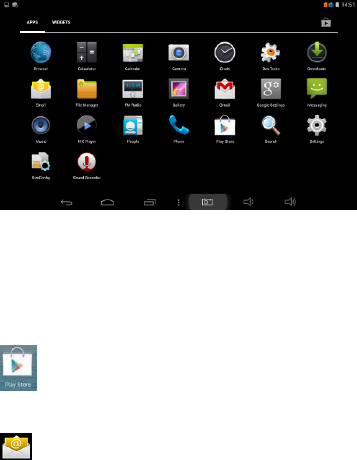
18
All the functional icon can be displayed within the window.
Pressing any icon can enter into the relative function interface.
The following are the simple introduction with the relative
icon:
Player store: Install the new application
Manage the Apk installed in the device。
Email:Sending&Receiving Email

19
Browser: Click it to enter into the interface of the website
Calendar:View the calendar and Setting
Calculater:Click the icon to achieves the computer
operations
O’clock:Click the icon to set the alarm o’clock
:Music Player。As for the operation method, please refer
to the introduction(5-1 Music)
Video Player:Click the icon can make the video player,
as for the operation, please refer to the introduction (5-2 Video)
Pics Browser:As for the operation method, please refer to
the introduction(5-3 Pics browser)
Camera :As for the operation method, please refer to
the introduction(5-4 camera)

20
Recording:Click the icon to enter into the recording
interface. As for the operation method, please refer to the
introduction(5-5 Recording)
File Manager: View all the files and catalogue
Setting: Click it to enter into the interface of the system
setting
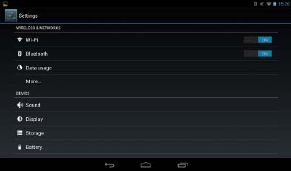
3 Internet
3.1. Network Setting
Click the shortcut in the main interface, choose
“Setting/Wireless and Network” to enter network setting
interface:
21
3-1-1. WI-FI Connection
Click the main interface shortcut, select “Internet connects
manager”, click “WIFI setting”, enter WIFI setting interface,
select the “WI-FI” and turns it on.
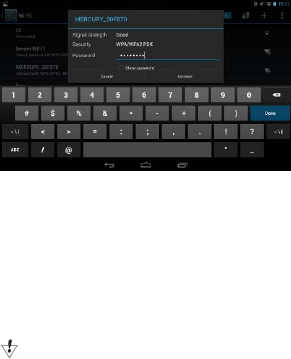
22
After WIFI opened, it will automatically search for the wireless
Internet, and show in the list, click the wireless Internet , enter
the password interface, input the password and connect it,
seconds later it will connect to the wireless Internet
automatically.
When open the WIFI, it will add about 1/4 power
consumption to the palyer. When not using the WIFI, please
turn it off to extend the using time of the player.

23
3-2. 3G Connection
a. External USB dongle 3G card
First, connect USB 3G card to the product through OTG-USB
cable. One moment later, the system will detect this device and
automatically switch the mode. After successful switch, enter
“Setting / Wi-Fi and Network”, select “Mobile Network” and
the system will connect to the network automatically.
Connection completed, you can use 3G.
Before connecting 3G, please close Wi-Fi.
Before connecting 3G, please make sure the product is with
enough power or connected to DC charger charging. Since 3G
will consume more power (add about 1/3 more), If you don't
use 3G, unplug the dongle to save power to extend battery life.
3-3. Webpage browser
Set up the network according to the method of 2-1 chapters,
you can use the browser to browse web pages. .
Click shortcuts in the main interface, select the "browser" into
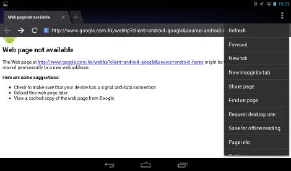
24
the browser interface, click the "Menu" button, pop-up browser
settings menu; Click "Start" pop-up address bar, enter the URL
to be determined. Open a Web page; slide your finger up and
down the screen to view other parts of the page. Drag web
pages, the bottom of the browser will appear zoom button; you
you can click it to browse the Web.
3-3-1.Bookmark manager
●Setting bookmark
In the browsing interface, if you want to add the current
address to bookmark. Click “Menu” to select “Bookmark”,
25
then click “Add bookmark”. Click “Yes” to confirm.
●Open bookmark
In the interface of browser, click “Menu” to select “Bookmark”,
select the bookmark which you want and open the webpage.
●Edit bookmark
In the interface of browser, click “Menu” to select “Bookmark”,
click and press bookmark to open the menu option. Select the
bookmark which you like to edit, select “Edit bookmark” to
edit it, and click “Yes” to confirm.
Set up the network according to the method of 2-1 chapters,
you can use the browser to browse web pages. .
Click shortcuts in the main interface, select the "browser" into
the browser interface, click the "Menu" button, pop-up browser
settings menu; Click "Start" pop-up address bar, enter the URL
to be determined. Open a Web page; slide your finger up and
down the screen to view other parts of the page. Drag web
26
pages, the bottom of the browser will appear zoom button; you
can click it to browse the Web.
3-3-2.Open new window
●Open new browser window
In the interface of browser, click “Menu”, select “New
window” to open a new browser window.
●Switching the browser window
In the browser window, click the “Menu” and click “window”
to open a new browser window.
3-3-3.Change your browser homepage
In the interface of browser, click “Menu” and pop up browser
setting menu, click “More” and then click “Setting”, click
“Setting homepage” in the setting interface, then enter URL,
click “Yes” to save it.
27
3-3-4.Setting of browser
In the interface of browser, click “Menu” and click “More”,
then click “Setting” to set browser.
3-3-5.E-mail
You can receive and send E-Mail with this player. There are
E-Mail setting guide in the application program, it can add
POP3 OR IMAP E-Mail account of normal WEB E-Mail
server (Such as Yahoo, Gmail, Hotmail).
Notes: Before setting E-Mail guide, please ensure your Internet
is working and the device time is right.
28
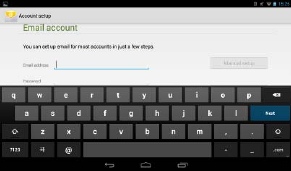
3-3-6.E-mail setting guide
Click shortcut icon in the main interface, an E-Mail setting
guide will appear to help your setting.
Click the button “Next”, input your E-Mail address and
password of your E-Mail account. Click the button “Next”;
select your E-Mail form, POP3 or IMAP. Click the button
“Next”, to check whether the E-Mail sending and receiving
servers can be used or not, input account name and sending
E-Mail name, click “Finish”. If E-Mail is available, it will enter
29
your inbox automatically.
3-3-7. Receiving and sending E-mail
Click shortcut key in the main interface, select icon “E-mail” to
enter inbox, it will refresh new E-Mail automatically, click it to
read.
In the inbox, click “Menu”, click “Writing” to enter writing
new E-Mail interface. Input the receiver’s E-Mail, subject and
information in the receiver’s field; if you want to add
attachment, click “Menu” to pop up the menu option, click
“Add attachment” to select the attachment. Then click “Send”
to send the E-Mail.
Notes: If you have more than one account, and hope to send
E-Mail using one specific account, click and choose the
account name and write the E-Mail.
30
3-3-8.Delete E-mail account
You can delete the POP3 OR IMAP E-Mail account from your
E-Mail program.
Click shortcut icon in the main interface, select “E-Mail” icon
to enter your inbox, click “Menu”, then click “Account”,
choose the account you want to delete , then it will pop-up the
menu list, click “Delete account” , then click “Yes” to delete.
4-3-9. Instant message
You can send instant messages with friends through the built-in
“Google Talk” or “Mobile QQ” or other apks.
4.Operating Details of Main Interface
4-1. Music
Select the icon of music, enter music list, select the music
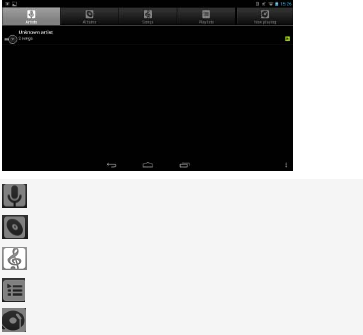
31
which you want to play, as the picture shown below:
Icon:List music files by artists classification
Icon:List music files by album category;
Icon:List all the song files;
Icon:You can see the music files added recently
Icon: You can see the music is playing
32
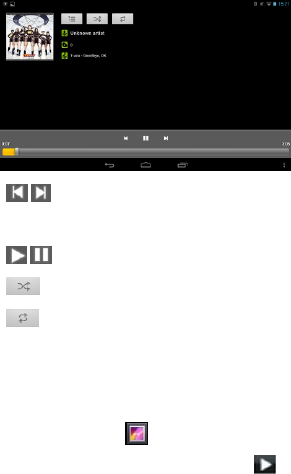
“ / ”:previous / next song, rewind / fast-forward; click
the progress bar directly can also fast rewind / fast forward.
“/ ”:Play/Pause the music;
“”: Random playing;
“”:Repeat All;
4-2. Video
Choose Video Player icon, clock to enter video list. Select
video to enter video playing interface. Click to play
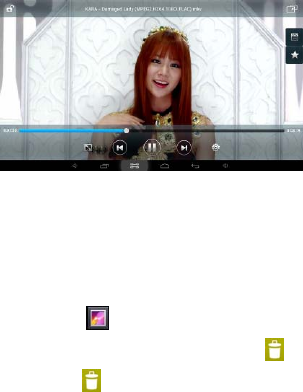
33
video.
In the current video, clicking the progress bar directly can
realize fast rewind/fast forward function
4-3. Photo browser
Click the icon in the main interface in to the photo
browser list, long press video files to pop up a in the video
list, and click to delete the video files.
Click “ cancel” to cancel the option. Select a picture file, view
the interface in full-screen picture, click on the upper right
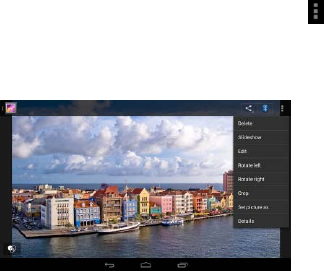
34
corner of the screen brings up the Settings menu. Click
bring up sub-menu: slide show, edit, rotate Left, rotate Right,
crop, set picture as ,details.
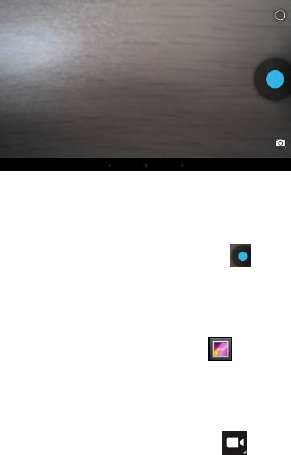
5-4.Camera
Select camera icon, enter camera mode.
35
4-4-1.Self-time photos
At the status of self-times photos, click “ ”to take the picture.
The picture will automatic .png picture, and saved into
DCIM/Camera menu, the files will named by year month day
hour minutes second. Click the icon to browser all the
photos.
4-4-2. Self-time videos
At the status of self-time videos, click “ ” to enter record
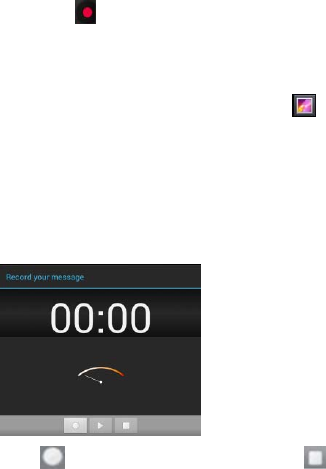
36
mode, click “ ” to begin record, after record, it will save
files automatically, then back to camera status. The video will
be saved to DCIM/Camera menu, the files will be named by
year month day hour minutes second. Click the icon to
browser all the videos.
Click “Home” key to go back to main interface.
4-5.Recording
Click the recording icon to enter recording interface.
Click “ ” to start recording. After recording, click

37
again and pop out to select whether to keep this recording or
not; at the same time, you can click to play and click
to stop playing. Select “Save” to keep this file or select
“Cancel” not to save.
Recording files will be saved as “recordingxxxxx.3gpp” format
in Files Manager.
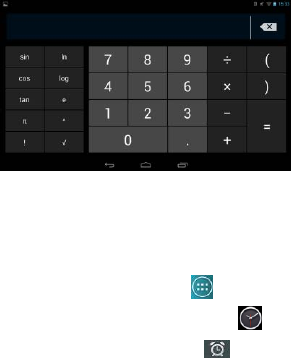
4-6:Calculator
Click the application program icon in the main interface
to enter application program management interface, select and
click icon to enter calculator interface.
38
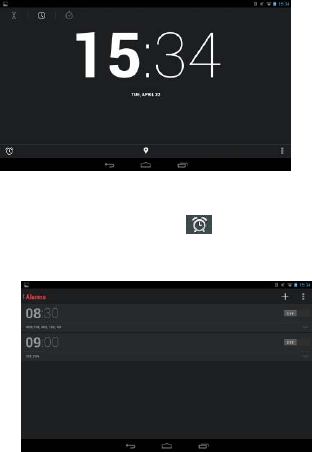
4-7.Clock
In the main interface click icon to enter the interface of
application list. Select the clock icon in to the time
setting interface, see below. Click enter the interface to
setting the clock below:
39
In the interface above click to enter alarm setting as
below, in this interface you can add alarm and set alarm.
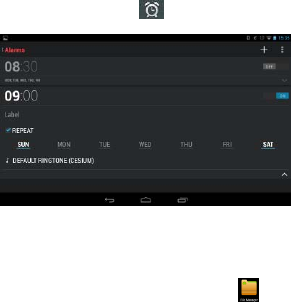
40
Within the alarm interface can click the display time, set the
alarm clock time . click open the alarm clock.
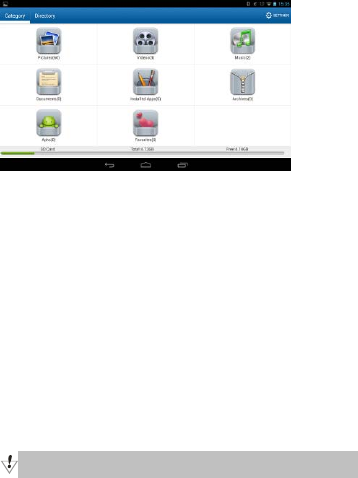
4-8.File Manager
In main interface, click file manager icon , select [TF
Card] or [Local Disk], [Mobile Disk] to expand the drop-down
folders and related files. Here you can copy, move, paste or
rename files. Long press a single folder or file, the Edit dialog
box will pop up with choices to delete, rename, copy, paste and
send E-Mail.
41
5.OTG Function
This product has OTG function, It can support USB disk and
some other devices like MP3, MP4, self-powered hard disk,
etc.
This product will automatically detect the USB device after
connecting to it via OTG cable. And you can have access to
the USB device files like the files on the player.
With low battery or DC charger not charging, please

42
don’t use OTG function, or the player may turn off
automatically because of low power.
6. External USB Mouse/Keyboard Function
After mouse connected, mouse pointer will appear on the
screen. The left button is confirm button, the right button to
return and the middle slider to slide up and down .
Note: Some keys cannot work on this player. And keyboard
code will be revised as per the definition of Android system.
We recommend a standard USB keyboard to be used.
7. Usage of TF Card
This product comes with TF card slot. It supports reading the
files in TF card. When using, inset the TF card to the product.
43
To drag out the TF card, push the TF card inside a little and
release; TF card will pop out automatically and you can take it
out. This product supports TF card from 1GB to 16GB.
Tips:
A. Please insert TF card to the card slot on the right correctly.
B. When TF card is working (such as reading, copying, etc.),
please do not pull out the card or it will lead to data errors.
C. Avoid using the memory card in high temperature or high
humidity environment.
D. Keep the memory card away from liquid or corrosive
material.
Note: If you cannot take out the memory card, or it’s stuck with
other material or smudged and so on, you can use tweezers or
other tools to pull it out slowly and carefully.

44
E
N
8. 3G call function
• built-in SIM card slot, under the shutdown status, insert
corresponding SIM card.
•Turn on the device and signal icon appears in the notification
file.
•Enter into the main menu interface, click on the notification
icon.
•Then you can dial telephone directly.
9、Bluetooth Connection
•On the homepage interface, select and click the menu key.
•Select and click the Setting icon.
•Click Bluetooth to turn it on. Then searched
equipment will be scanned automatically and show up on
page.
•Click the name of searched equipment, after a few second ,it

45
will connect with device .
10 Basic Setting
Click icon to enter menu setting: Wireless & Networks,
Sound, Display, Storage, Battery, Applications, Accounts &
sync, Location services, Security, Language & input, Backup
& reset, Date & time, Accessibility, Developer options, about
tablet. Press and hold the screen up or down to turn pages.
10-1. Wireless & Network Setting
Click Wireless & network in “Settings” menu to enter the
interface (as follows).
1. Wi-Fi: Click “ON” to open Wi-Fi.
2. Wi-Fi setting: Please refer to the operation of 4-1 Wi-Fi
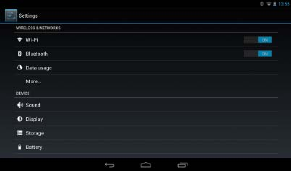
46
Setting.
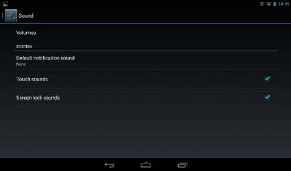
10-2.Sound & Display Setting
Click “Sound” in Settings Menu to enter the setting interface
(as follows):
47
A:Volumes: Click here for all the volume settings.
B:Ringtone & Notifications: Click here to set Phone ringtone,
Default notification, Vibration and ring.
C:System: Click here to set touch sound, screen lock sound.
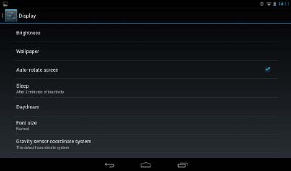
10-3. Display
Click Display in Settings menu to enter the setting interface (as
follows)
48
A. Brightness: click here to adjust the brightness of this
product.
B. Wallpaper: Click here to set Live Wallpaper, Super-HD
Player, Wallpapers.
C. Screen Auto-rotation: Click here to open or close screen
auto-rotation function.
D. Sleep: Click here to adjust the time for automatic screen
lock with choices of 15 seconds, 30 seconds, 1 minute, 2
minutes, 5 minutes, 10 minutes, 30 minutes.
E. Font size: Click here to adjust the font size for the player.
49
F. Accelerometer coordinate system: Click here to set a special
coordinate for some games.
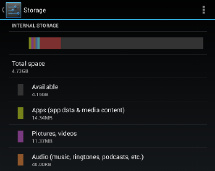
10-4. Storage
Click here to check the space for SD card or internal storage
of the player, uninstall the SD card, format the SD card.
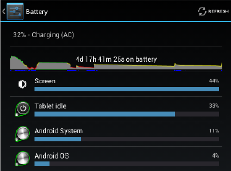
10-5. Battery
Click here to check battery usage.
50
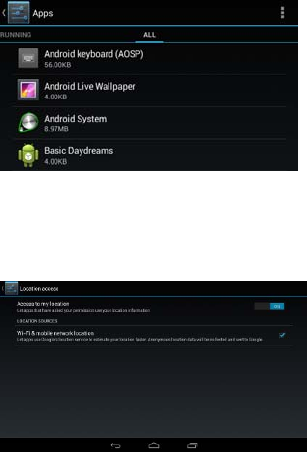
10-6. Apps
Click here to set “whether to allow third-party applications to
be installed”, “manage/delete the installed applications, view
and manage running services.
51
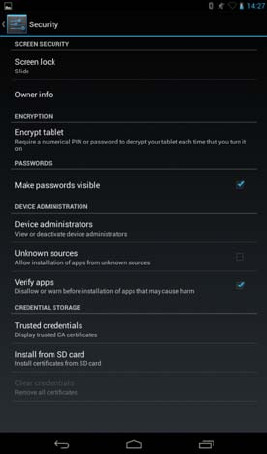
10-7.Location access
Google’s location service, Location & Google search.
52
10-8. Security
You can set up device administration, screen lock and password
visibility.
53
Unknown sources: Allow installation of non-Market
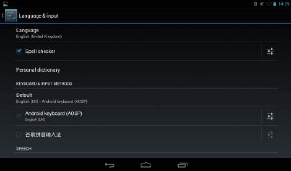
54
applications.
Screen Unlock:
Click【Set up screen lock】to enter interface shown below:
A:None:Disable screen unlock security
B:Pattern:Draw pattern to unlock screen
C:Slide:Slide to unlock screen
D:Password:Enter a password to unlock screen
10-9.Language & Keyboard
Set up languages & input keyboard
55
10-10.Backup and Reset
Set up “whether to show my location, back up my data &
Factory reset”.
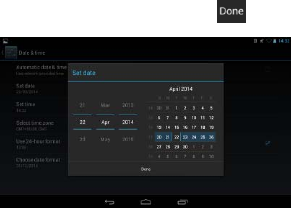
10-11.Date and Time
A:Set Date;
Slide to set up year, month, day, click to confirm.
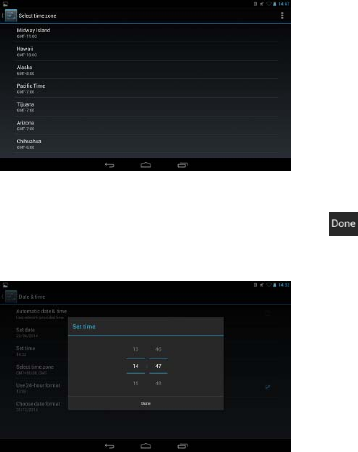
B:Select Time Zone;
Select your time zone and confirm.
56
C: Set Time
Slide to set up hour, minute,for example:19:34,click
to confirm.
D: Set Date Format:Click the date format you prefer and
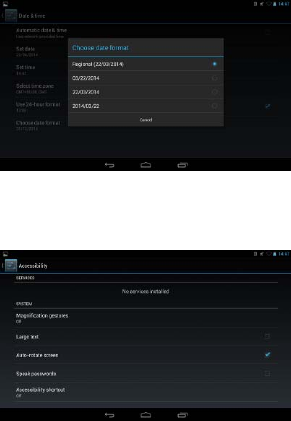
57
confirm.
10-12.Accessibility
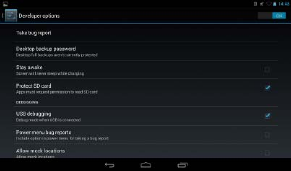
58
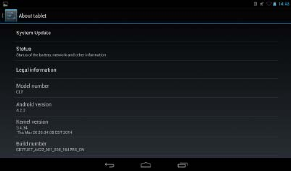
10-13.Developer Options
10-14.About Tablet
You can check legal information, model number, Android
version, Baseband version.
59
11. Trouble Shooting
1. The tablet turns on slowly at first time
●After system update, factory restore, it takes about 2-3
minutes to install some pre-install applications at the first time,
then starting time will be quicker.
2. Unable to connect WIFI or weak signal
●Ensure the Network is working properly.
●Ensure the user name and password is correct.
60
●Ensure the internal antenna is not blocked.
●Ensure the tablet is within the proper distance of the Network
and there is no wall or other obstructions between.
3. Unable to connect 3G or weak signal
●Ensure the 3G USB Dongle is connected to the tablet
correctly and the SIM card with enough fees to access to the
Internet.
●Ensure the 3G USB Dongle is among the models supported
by the tablet.
●Ensure you are in an area that gets access to the signal
●Check if the “Wireless and Network” is correctly set.
4. Indicator light does not turn on after 3G USB dongle is
plugged in.
●Check whether the OTG cable is connected properly, 3G
USB Dongle can work well, 3G connects successfully.
5. 3G connection fails-it indicates failure or it stay at the same
61
status all the time
●Check whether the 3G card is with enough fee.
●Ensure you are in a location with stable and strong signal.
●Close and restart the 3G
●Close 3G, and then plug OTG cable and re-plug in the cable
and 3G card again correctly.
●Close 3G and restart the tablet
6. Fail to copy files
●Ensure the tablet is connected to the computer correctly.
●Ensure there is still disk space.
●Ensure the USB cable is functionally well.
7. No sound in the earphone
●Ensure that the volume is not set to 0.
●Check whether the headset is correctly connected and the
wire is broken.
8. The system has some trouble
62
●When you install some third-party applications it may lead to
some functional problems. You can restart the tablet or
uninstall the applications.
9. Unable to set E-mail or use registration applications.
●Ensure your Network is working properly.
●Ensure the E-Mail account is correctly set.
●Ensure your system time is the same with the local time.
●Please run the “Advanced Task Manager” to stop some other
running applications.
10. The memory capacity is different from the nominal figure.
●Just like hard disk on computer, the capacity shown on the
computer is usually less than the nominal capacity; this is due
to different unit conversion used by computer and storage
device manufacturers.
In computer, 1GB=1024MB, but storage device manufacturers
use 1GB=1000MB as default. The actual capacity is not
63
lessened.
●The OS of this tablet pre-installs some applications, games
and the OS itself occupies some capacity. This is also one
reason why the capacity that can be used for storage is less than
the nominal figure.
FCC RF Exposure Information and Statement
The SAR limit of USA (FCC) is 1.6 W/kg averaged over one gram of tissue. Device
types: W7421 (FCC ID: 2ACPR-W7421) has also been tested against this SAR limit.
The highest SAR value reported under this standard during productcertification
for use at the ear is 0.396W/kg and when properly worn on the body is 1.197W/kg.
This device was tested for typical body-worn operations with the back of the handset
kept 0 cm from the body. To maintain compliance with FCC RF exposure
requirements, use accessories that maintain a 0 cm separation distance
between the user's body and the back of the handset. The use of belt clips, holsters
and similar accessories should not contain metallic components in its assembly. The
use of accessories that do not satisfy these requirements may not comply with FCC
RF exposure requirements, and should be avoided.
This device complies with part 15 of the FCC rules. Operation is subject to the
following two conditions: (1) this device may not cause harmful interference,
and (2) this device must accept any interference received, including interference that
may cause undesired operation.
NOTE: The manufacturer is not responsible for any radio or TV interference caused
by unauthorized modifications to this equipment. Such modifications
could void the user’s authority to operate the equipment. NOTE: This equipment has
been tested and found to comply with the limits for a Class B digital device, pursuant
to part 15 of the FCC Rules. These limits are designed to provide reasonable
protection against harmful interference in a residential installation. This equipment
generates uses and can radiate radio frequency energy and, if not installed and used in
accordance with the instructions, may cause harmful interference to radio
communications. However, there is no guarantee that interference will not occur in a
particular installation. If this equipment does cause harmful interference to radio or
television reception, which can be determined by turning the equipment off and on,
the user is encouraged to try to correct the interference by one or more of the
following measures:
- Reorient or relocate the receiving antenna.
- Increase the separation between the equipment and receiver.
-Connect the equipment into an outlet on a circuit different from that to which the
receiver is connected.
-Consult the dealer or an experienced radio/TV technician for help.