BTC Korea Co 190M LCD Monitor User Manual 190M
BTC Korea Co Ltd LCD Monitor 190M
UserManual.wiki
>
BTC Korea Co
>
190M User Manual
Users Manual
Navigation menu
Upload a User Manual
Namespaces
Wiki Guide
HTML
PDF
Info
Views
User Manual
Discussion / Help
Navigation

![PREPARATION Connection 1. Power Connection : Connect the [POWER Cable] to the power terminal on the back of the monitor. 2. Connection of PC : Connect the signal cable(D-SUB cable) to the monitor output socket of the computer and the other end to D-SUB on the back of the monitor. 3. AUDIO IN : Connect an audio cable to AUDIO IN on the back of the Monitor and the other end to AUDIO OUT terminal of the sound card on your computer. AUDIO OUT : Connect an audio cable to the AUDIO OUT of the back of the Monitor and the other end to the external speakers.](https://usermanual.wiki/BTC-Korea-Co/190M/User-Guide-542752-Page-9.png)
![PREPARATION Mounting Device [Separation] & [Union] 1. Separation 1) Turn off your monitor and unplug its power cord. 2) Lay the monitor face-down ward on a flat surface with a cushion beneath it to protect the screen. 3) Remove the screws( A ) and then remove the Mounting Device from the monitor. 4) Remove the screws( B ) and then remove the Mounting Device from the monitor. 2. Union 1) Align the Mounting Device with the holes( B ) in the Rear Cover and secure it with the screws. 2) Cover the Mounting Device with the Mounting Device cover and secure it with screws( D ).](https://usermanual.wiki/BTC-Korea-Co/190M/User-Guide-542752-Page-10.png)

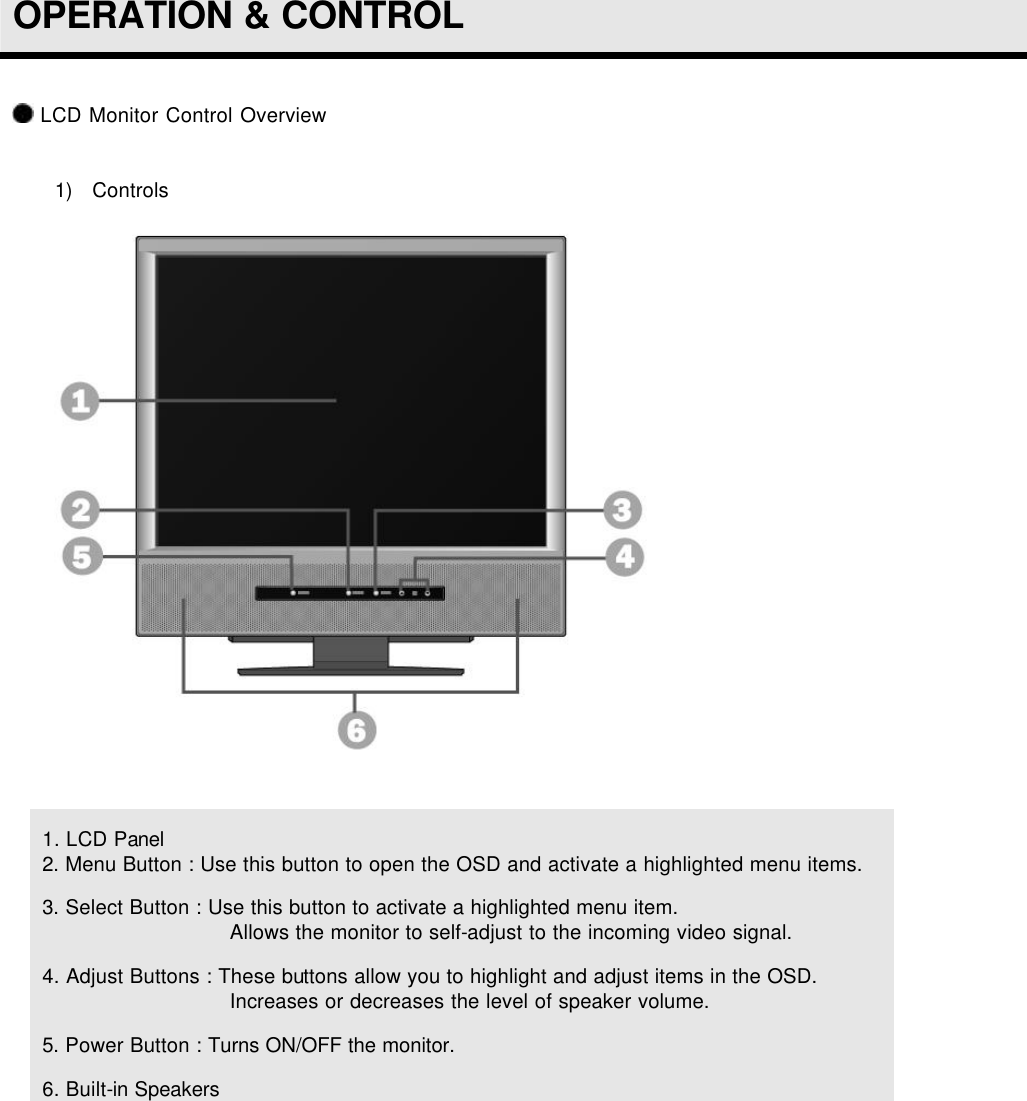
![OPERATION & CONTROL 2) Terminals 1. Power In Terminal : Connect the [POWER Cable] to the power terminal on the back of the monitor. 2. D-SUB Terminal : Connect the monitor D-SUB connector and the PC using the D-SUB signal cable. 3. AUDIO IN Terminal : Connect the audio output of the PC. 4. AUDIO OUT Terminal : Connect the stereo speaker system to Audio output. 5. VESA HOLE for fixing on the wall. : Supports VESA mounting standard for use with various VESA mounting devices.](https://usermanual.wiki/BTC-Korea-Co/190M/User-Guide-542752-Page-13.png)