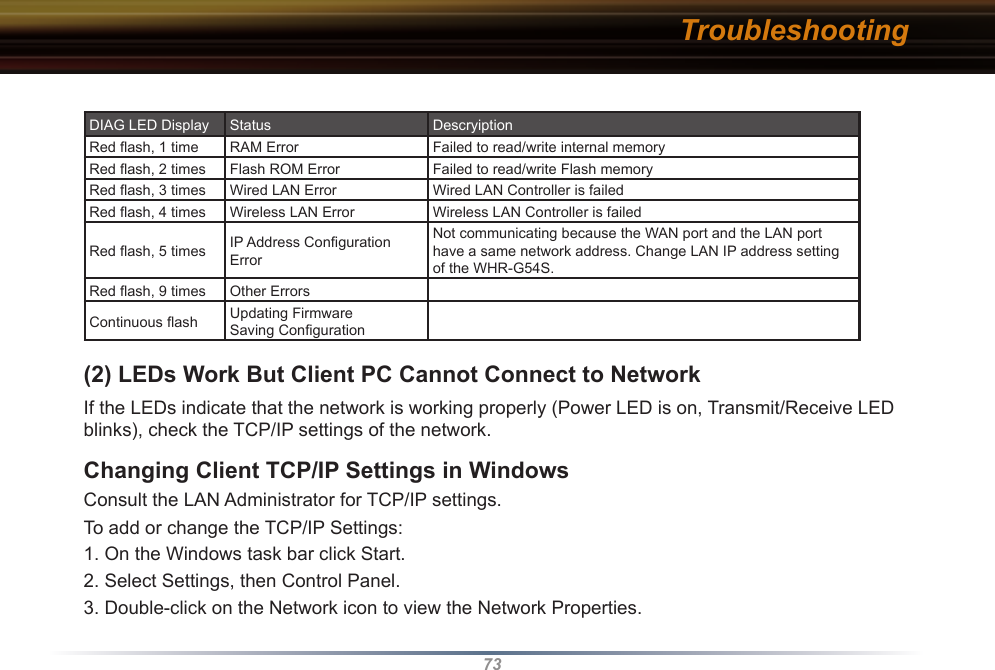
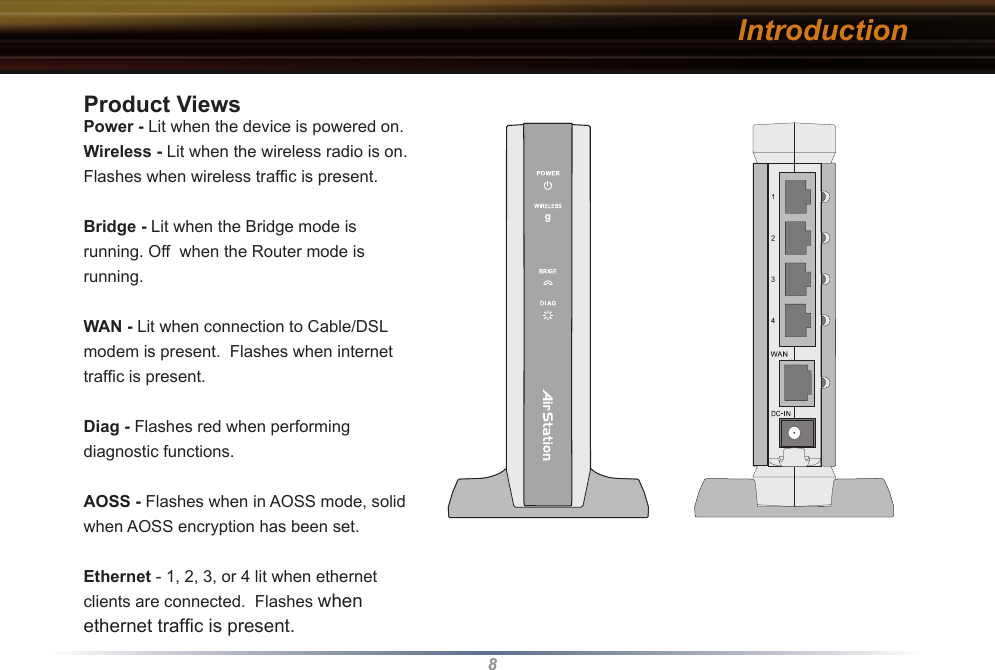
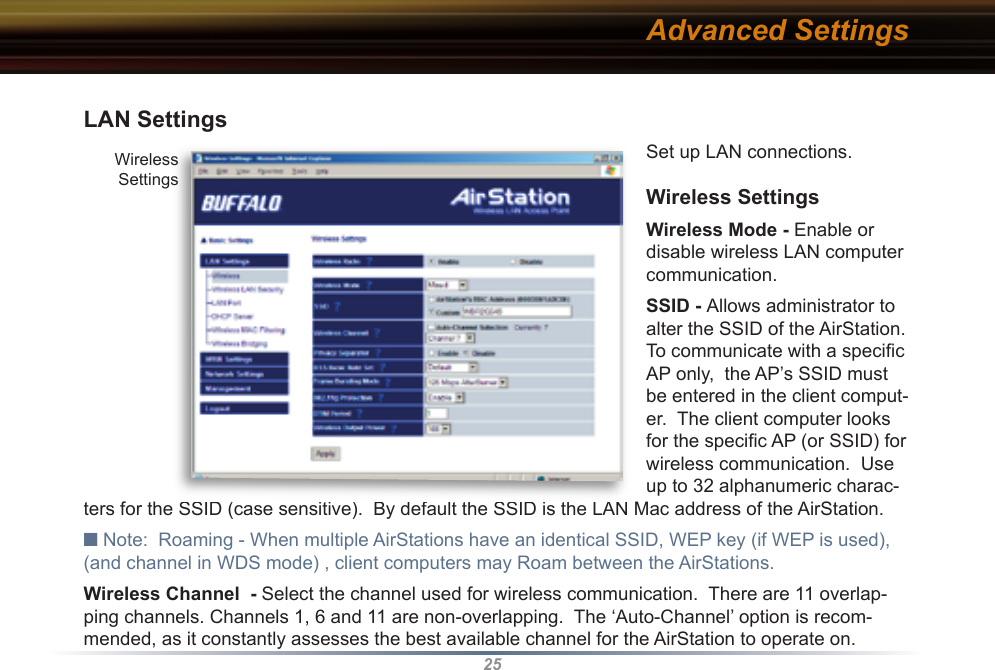
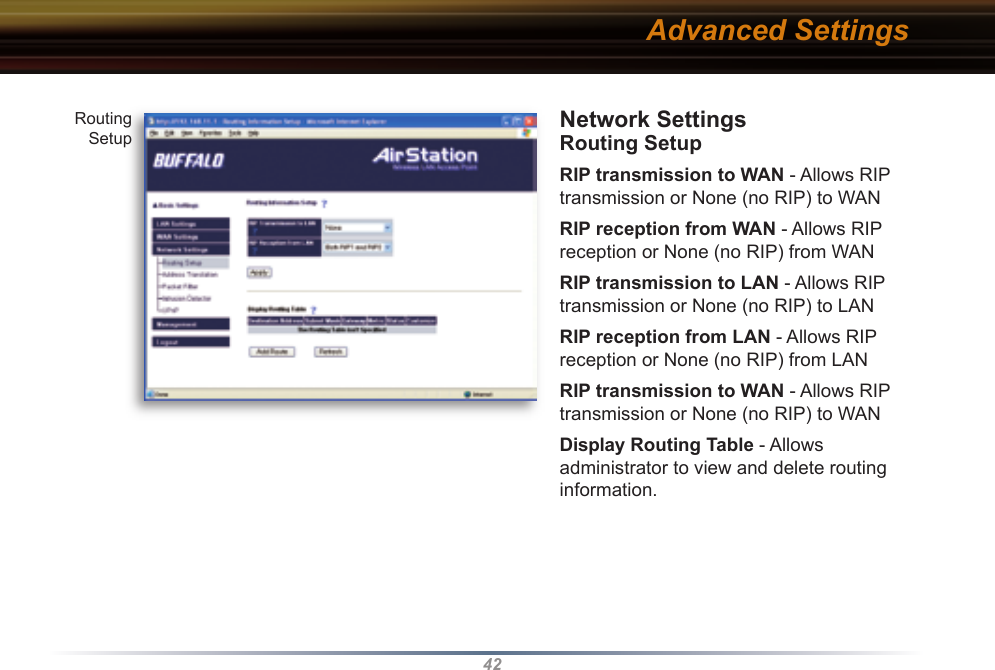
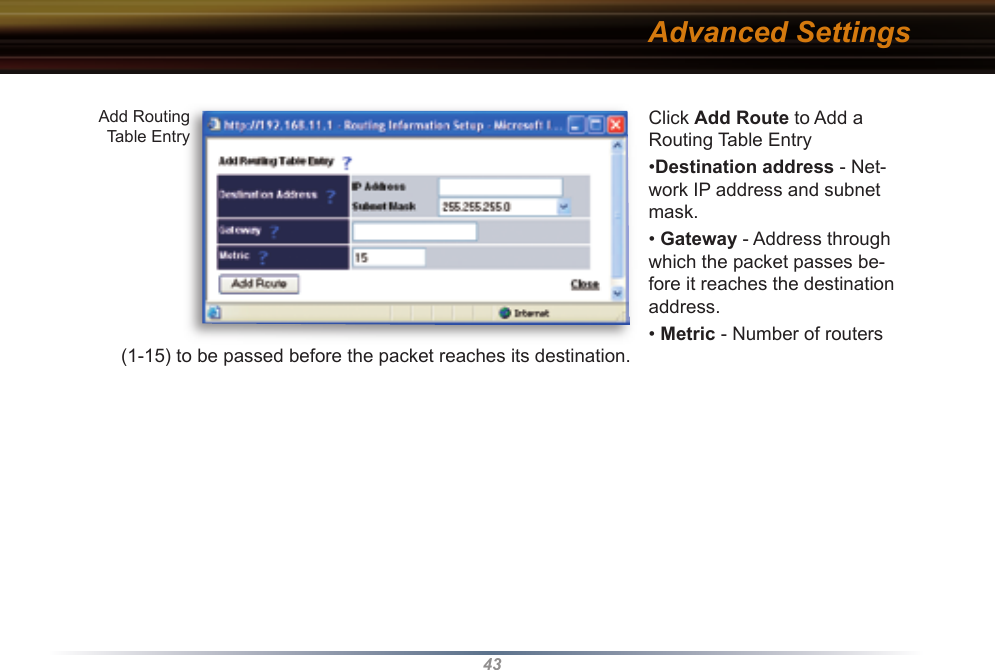
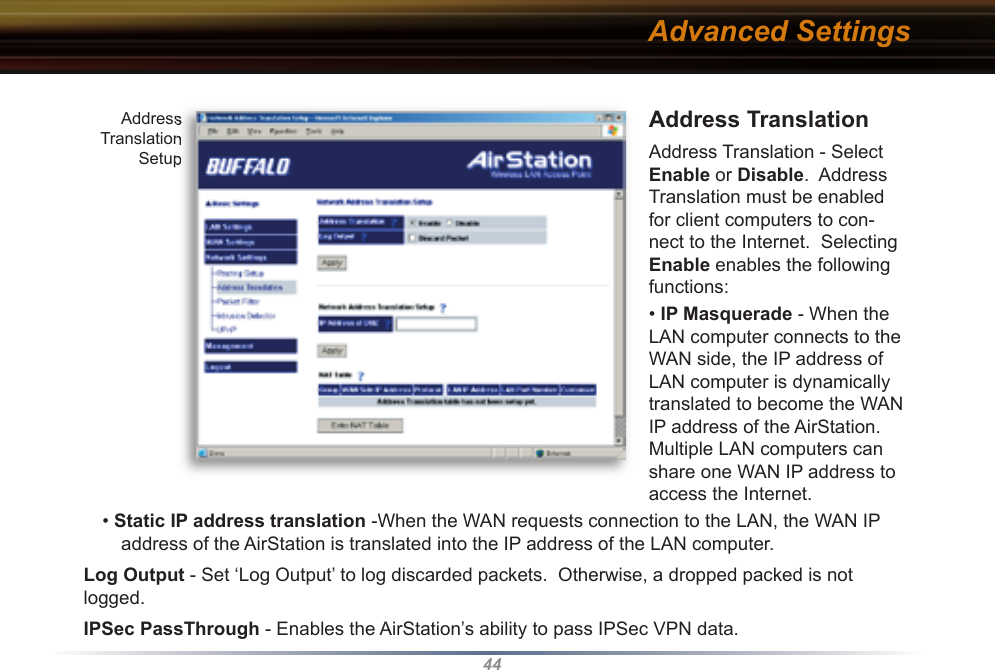
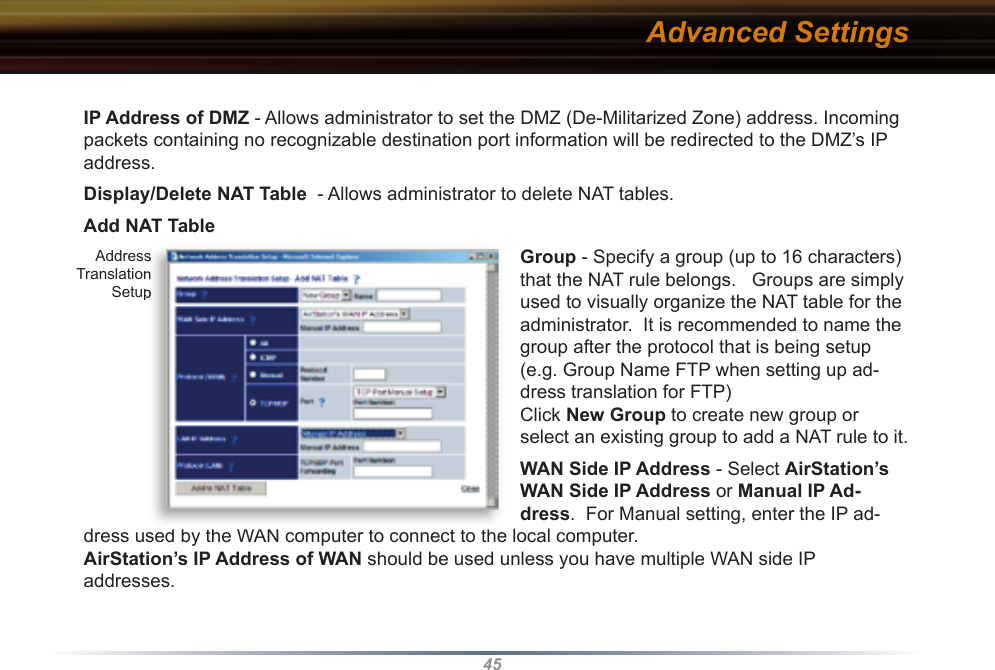
BUFFALO 04600264-0 802.11g 54Mbps Wireless Router User Manual WZR HP G54 Manual indd
BUFFALO INC. 802.11g 54Mbps Wireless Router WZR HP G54 Manual indd
UserManual.wiki
>
BUFFALO
>
04600264 0 User Manual
Users Manual
Navigation menu
Upload a User Manual
Namespaces
Wiki Guide
HTML
PDF
Info
Views
User Manual
Discussion / Help
Navigation

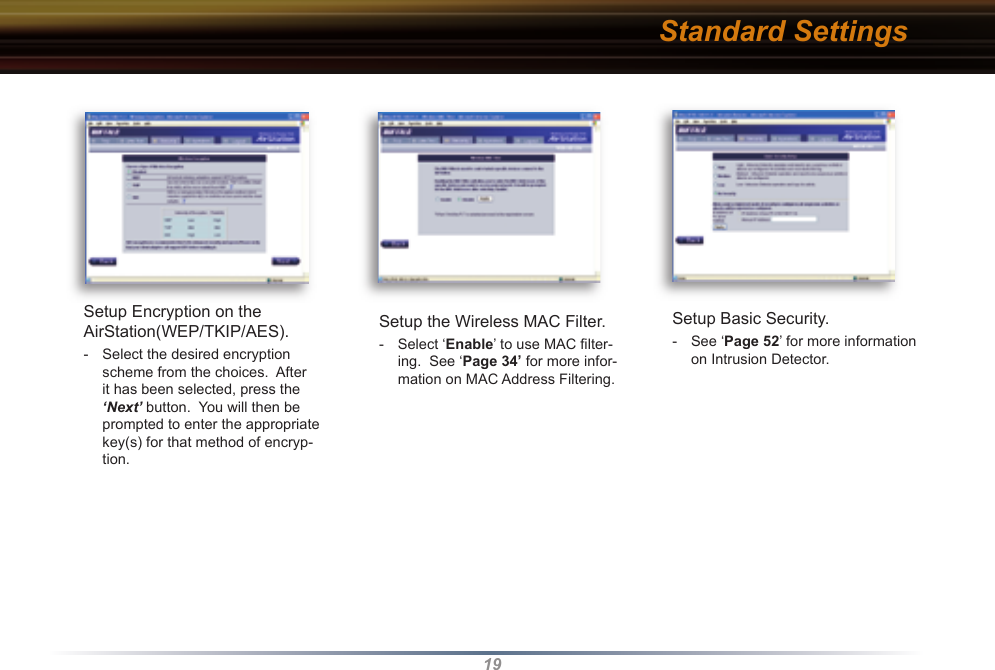

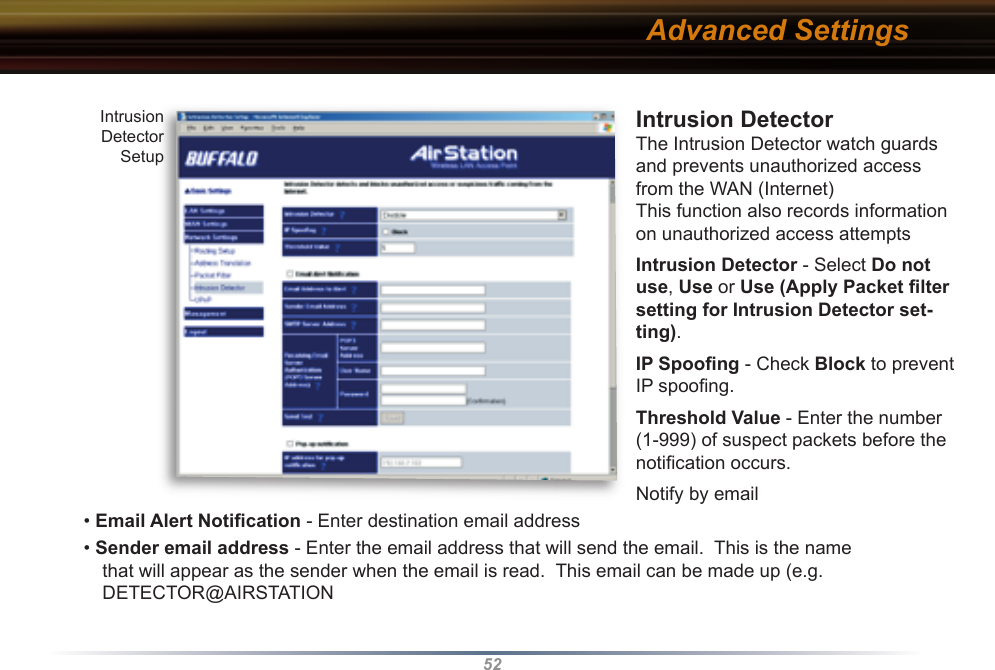
![29128-bit HEX: 26 digits, using characters 0-9 and a-f, “20123456789abcdeabcdeabcde” TKIP - TKIP (Temporal Key Integrity Protocol) is a WEP expanded encryption technique. TKIP has greatly improved WEP’s weaknesses by rotating secret keys between every packet. TKIP uses WPA-PSK (pre-Shared Key).Characteristics: - The Initialization Vector is expanded from 24-bits to 48-bits. - The Initialization Vector is randomized. - Uses a different RC4 key for every packet. AES - AES further improves TKIP by using AES (Advanced Encryption Standard) encryption method. Due to its hardware co-processor, AES uses the toughest encryption without sacrificing throughput like WEP and TKIP.TKIP & AES require an 8 to 63 character passphrase in ASCII or 64 digits hexadecimal key. Example 1: [ airstation -WPA-PSK ]Example 2: [0123456789abcdef0123456789abcdef0123456789abcdef0123456789abcdef]WPA Rekey Interval - When TKIP is selected, the encryption key is renewed at this interval. This interval is in seconds; the range of acceptable values is 0-3600. If 0 is entered, the key is never renewed. ■ Note: The lower the rekey interval, the more often a rekey occurs. Setting a low rekey interval may affect performance negatively. Advanced Settings](https://usermanual.wiki/BUFFALO/04600264-0/User-Guide-558944-Page-29.png)


![55Management - System InformationSystem information of the AirStation is obtained here.• Model - Displays model and fi rmware version • AirStation Name - Displays AirStation host name• DHCP Server - Displays On or Off • Wireless Settings - Displays the wireless LAN settings such as wireless MAC address and wireless fi rmware. The wireless MAC address is required for setting up WDS with other access points. This is the best place to determine the wireless MAC address. If High Speed mode is enabled, then the [AfterBurner] color will be red or grey. When it is red, High Speed mode is running. When it is grey, High Speed mode is enabled but not running due to a client being connected at 54 Mbps or another access point running on the same channel.• LAN Settings - Displays the AirStation LAN settings .• WAN Settings - Displays the AirStation WAN settings and PPTP client settings if available.• Default Gateway - Displays the default gateway settings.• WAN side IP address auto acquisition - This is the method to acquire the IP address from the WAN (Internet) side DHCP server. Press Release to release current DHCP WAN information. Press Advanced SettingsSystemInformation](https://usermanual.wiki/BUFFALO/04600264-0/User-Guide-558944-Page-55.png)