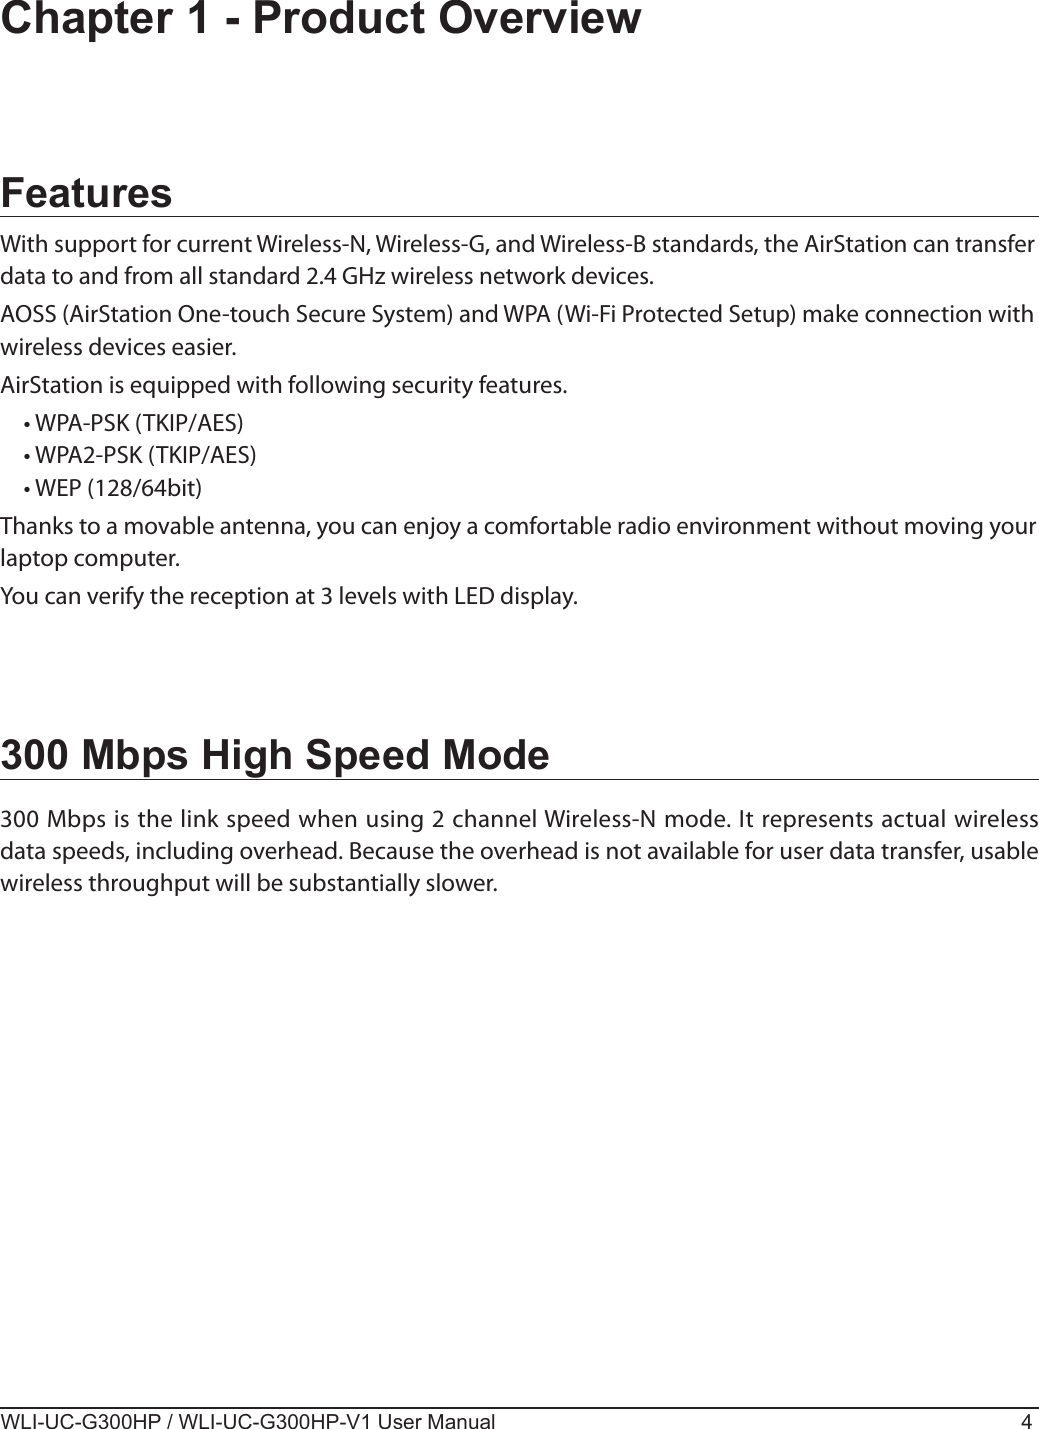
BUFFALO 09102034-1 AirStation Wireless-N NFINITI HighPower Keychain USB 2.0 Adapter User Manual Part 1
BUFFALO INC. AirStation Wireless-N NFINITI HighPower Keychain USB 2.0 Adapter Part 1
BUFFALO >
Contents
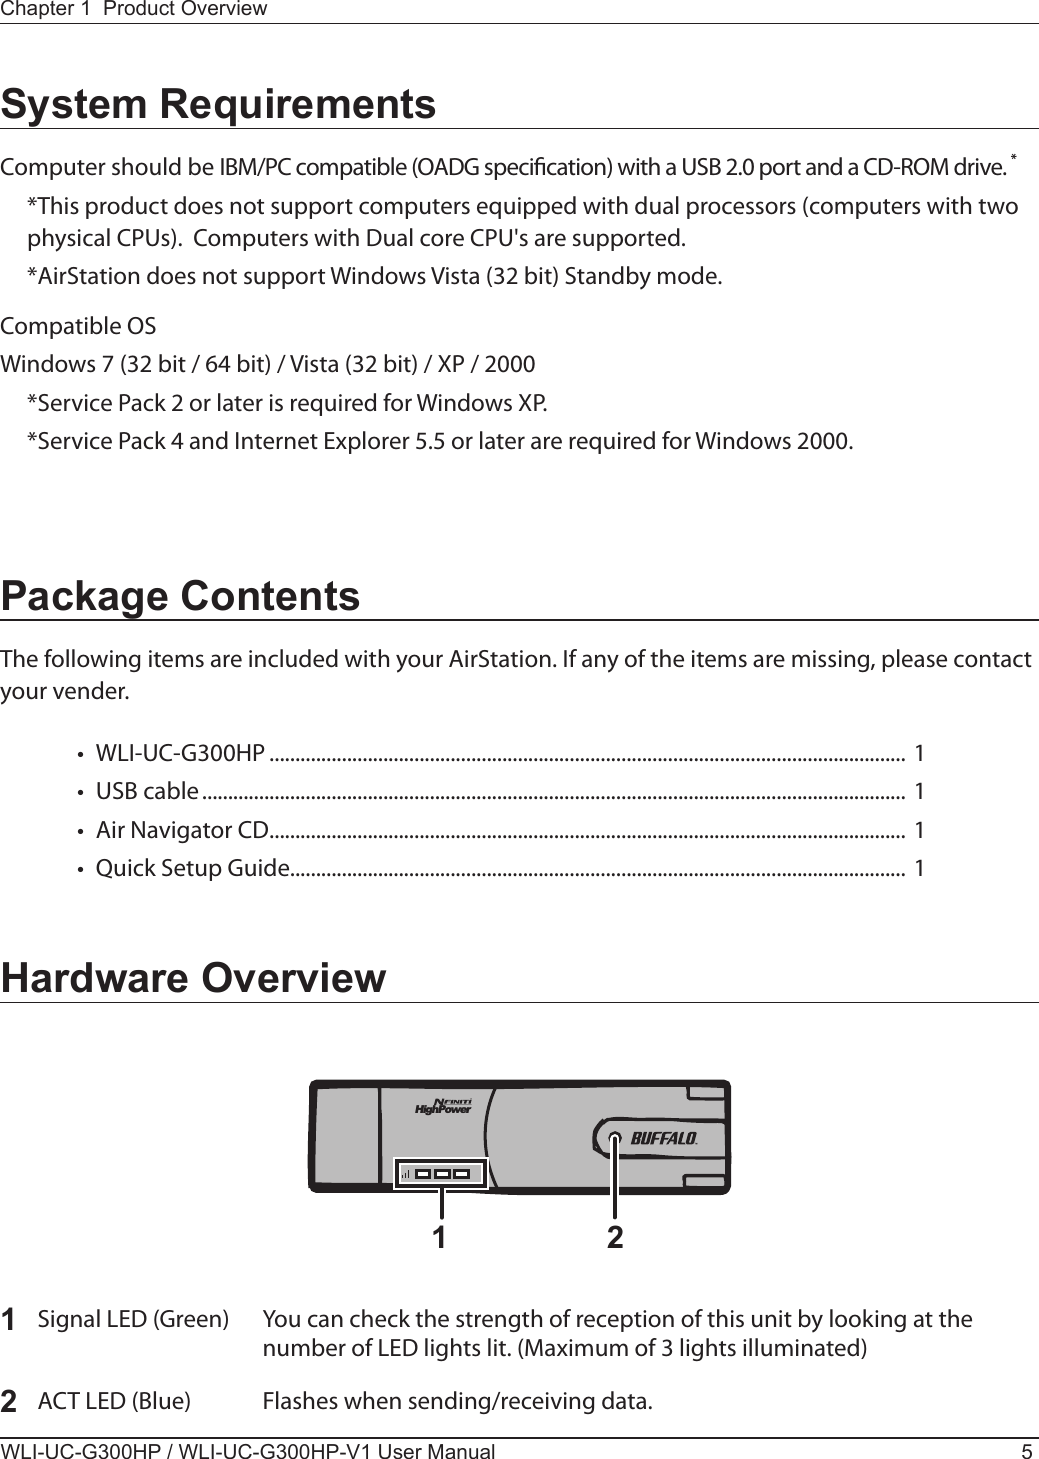
- 1. User Manual Part 1
- 2. User Manual Part 2
User Manual Part 1
![WLI-UC-G300HP / WLI-UC-G300HP-V1 User Manual 6Chapter 2 - InstallationInstalling Wireless DriversFollow the instruction below to install drivers. Do not connect the unit to your computer yet.12Boot your computer and insert AirNavigator CD. The AirNavigator Setup Wizard will launch automatically.Note: If the AirNavigator Setup Wizard doesn’t launch, double click [My Computer] > CD-ROM drive icon > [AirNavi.exe] to launch manually.Click [Begin Installation].3Click [AirStation Wireless LAN Adapters].](https://usermanual.wiki/BUFFALO/09102034-1.User-Manual-Part-1/User-Guide-1315473-Page-6.png)
![Chapter 2 InstallationWLI-UC-G300HP / WLI-UC-G300HP-V1 User Manual 74Disable any rewalls, and click [Next].5Click [Install].Note: • If you insert the check mark into the check box for Install Wireless Client Manager, you can install Client Manager as well as drivers. • Refer to the instructions on page 11 to install Client Manager after installing drivers.6Click [Next].](https://usermanual.wiki/BUFFALO/09102034-1.User-Manual-Part-1/User-Guide-1315473-Page-7.png)
![WLI-UC-G300HP / WLI-UC-G300HP-V1 User Manual 8Chapter 2 Installation7Read the license agreement, select [Agree], then click [Next].8When the screen to the left is displayed, put a check mark next to “Always trust software from BUFFALO INC.", and click [Install].9When the screen to the left is displayed, attach the AirStation to your computer. Drivers will be installed automatically.](https://usermanual.wiki/BUFFALO/09102034-1.User-Manual-Part-1/User-Guide-1315473-Page-8.png)
![Chapter 2 InstallationWLI-UC-G300HP / WLI-UC-G300HP-V1 User Manual 910 Click [OK].11 After the drivers are installed, the screen at left will be displayed. Click [Finish].Note: If you checked the box to Install Wireless Client Manager (page 8), then the installation screen for Client Manager will be displayed after this screen. Follow the instructions on the screen to install Client Manager.Drivers are now installed.](https://usermanual.wiki/BUFFALO/09102034-1.User-Manual-Part-1/User-Guide-1315473-Page-9.png)
![WLI-UC-G300HP / WLI-UC-G300HP-V1 User Manual 10Chapter 2 InstallationInstalling UtilityFollow the procedure below to install Client Manager.1Boot your computer and insert the AirNavigator CD. The AirNavigator Setup Wizard will launch automatically.Note: If AirNavigator Setup Wizard is not displayed, double click [My Computer] icon > CD-ROM drive icon > [AirNavi.exe].Click [Options].Click [Advanced Installation].23](https://usermanual.wiki/BUFFALO/09102034-1.User-Manual-Part-1/User-Guide-1315473-Page-10.png)
![Chapter 2 InstallationWLI-UC-G300HP / WLI-UC-G300HP-V1 User Manual 114Check the box for [Install Wireless Client Manager] and click [Install].Note: Use Client Manager V with Windows Vista or Client Manager 3 with Windows XP/2000.5Click [Next].6Read the license agreement and select [Agree].](https://usermanual.wiki/BUFFALO/09102034-1.User-Manual-Part-1/User-Guide-1315473-Page-11.png)
![WLI-UC-G300HP / WLI-UC-G300HP-V1 User Manual 12Chapter 2 Installation789Click [Next].Click [OK].Click [Back].10 Click [X] at the top right corner of the window to close it.Client Manager is now installed.](https://usermanual.wiki/BUFFALO/09102034-1.User-Manual-Part-1/User-Guide-1315473-Page-12.png)
![WLI-UC-G300HP / WLI-UC-G300HP-V1 User Manual 14Chapter 3 Connect to a Wireless Network 12Click [Start] > [All Programs] > [BUFFALO] > [AirStation Utility] > [Client Manager V].Windows 7/Vista (Client Manager V)If you are using Windows 7/Vista, use the included Client Manager V software to connect wirelessly with AOSS/WPS(PBC).When the screen at left is displayed, click [Create Prole].3When the message “A Program needs your permission to continue” appears, click [Continue].4When the screen shown at left is displayed, click the [WPS AOSS] button.](https://usermanual.wiki/BUFFALO/09102034-1.User-Manual-Part-1/User-Guide-1315473-Page-14.png)
![Chapter 3 Connect to a Wireless Network WLI-UC-G300HP / WLI-UC-G300HP-V1 User Manual 15Follow the instructions displayed on the screen. After you congured and if the message "Connection has been Completed" is displayed on Client Manager V, then you have completed the connection by AOSS/WPS (PBC).(If “Set Network Location” screen is displayed, select “Home”, “Work”, or “Public location” depending on the environment in which the AirStation will be used.2Windows XP/2000 (Client Manager 3)If you are using Windows XP, use the included Client Manager 3 software to connect wirelessly with AOSS/WPS.1Right click on the icon in the system tray, and select [Prole].When the screen shown at left is dis-played, click [WPS AOSS] button. Follow the instructions displayed on the screen.You have completed the AOSS/WPS (PBC) connection when the message "Security setup and con-nection have been Completed" is displayed in Client Manager 3.Note: Windows 2000 does not support wireless connection using WPS (PBC). (It uses AOSS wireless connection in-stead).](https://usermanual.wiki/BUFFALO/09102034-1.User-Manual-Part-1/User-Guide-1315473-Page-15.png)
![WLI-UC-G300HP / WLI-UC-G300HP-V1 User Manual 16Chapter 3 Connect to a Wireless Network Automatic Secure Setup (WPS (PIN) )WPS (Personal Identication Number) uses the mechanism which register the unique number gen-erated by the utility program (Client Manager) included with this product to an access point and connect wirelessly.Use this feature when connecting to an access point which supports WPS (PIN).You need to have Client Manager V and Client Manager 3 installed from the CD attached to this unit in advance in order to connect wirelessly using WPS (PIN). (page 11)Windows 7/Vista (Client Manager V)If you are using Windows 7/Vista, use Client Manager which comes with this package and follow the procedure below to connect wirelessly with WPS (PIN).12Click [Start] > [All Programs] > [BUFFALO] > [AirStation Utility] > [Client Manager V].When the screen on the left is displayed, click [Create Prole] button.3When the message "A Program needs your permission to continue", click [Continue].](https://usermanual.wiki/BUFFALO/09102034-1.User-Manual-Part-1/User-Guide-1315473-Page-16.png)
![Chapter 3 Connect to a Wireless Network WLI-UC-G300HP / WLI-UC-G300HP-V1 User Manual 174When the screen which looks like the illustration on the left displayed, click [Advanced Setup] button.5When the screen which looks like the illustration on the left displayed, click [WPS-PIN] button.](https://usermanual.wiki/BUFFALO/09102034-1.User-Manual-Part-1/User-Guide-1315473-Page-17.png)
![WLI-UC-G300HP / WLI-UC-G300HP-V1 User Manual 18Chapter 3 Connect to a Wireless Network 6When the PIN code is displayed, write it down.After you write the PIN code down on a piece of paper, click [Next].7Select the access point you are going to connect, and click [Next].This screen will be displayed.](https://usermanual.wiki/BUFFALO/09102034-1.User-Manual-Part-1/User-Guide-1315473-Page-18.png)
![Chapter 3 Connect to a Wireless Network WLI-UC-G300HP / WLI-UC-G300HP-V1 User Manual 198Use an administrative computer which is connected to an access point with a wire in order to login to that access point. The screen to enter the PIN code will be displayed.Note: If the access point you are trying to connect is the AirStation, click [Wireless Cong]> [WPS] on the TOP of the conguration screen. The screen to enter the PIN code will be displayed.9On the conguration screen of the access point, enter the PIN code you write down in step 6.Follow the instructions displayed on the screen to congure.You have completed the connection with WPS (PIN) after you congured and when the message "Connection has been Completed" is displayed in Client Manager V.(If “Set Network Location” screen is displayed, select “Home”, “Work”, or “Public location” depending on the environment in which the AirStation will be used.)Note: If the access point you are trying to connect is the AirStation, enter the PIN code in [Enrollee PIN] and click [OK].](https://usermanual.wiki/BUFFALO/09102034-1.User-Manual-Part-1/User-Guide-1315473-Page-19.png)
![WLI-UC-G300HP / WLI-UC-G300HP-V1 User Manual 20Chapter 3 Connect to a Wireless Network Windows XP (Client Manager 3)If you are using Windows XP, use Client Manager 3 which comes with this package and follow the procedure below to connect wirelessly with WPS (PIN).Note: Windows 2000 does not support WPS (PIN).1Right click on the icon displayed in the system tray, and select [Easy Connection] > [WPS PIN Code type].2When the PIN code is displayed, write it down. Then, click [Next].3Select the access point you are going to connect, and click [Next].](https://usermanual.wiki/BUFFALO/09102034-1.User-Manual-Part-1/User-Guide-1315473-Page-20.png)
![Chapter 3 Connect to a Wireless Network WLI-UC-G300HP / WLI-UC-G300HP-V1 User Manual 21This screen will be displayed.4Use a computer with a wired Ethernet connection to log in to the access point. The screen to enter the PIN code will be displayed.Note: If the access point you are trying to connect is a Bualo AirStation, click [Wireless Cong] > [WPS] on the TOP of the conguration screen. The screen to enter the PIN code will be displayed.5On the conguration screen of the access point, enter the PIN code you wrote down in step 2.Follow the instructions displayed on the screen to congure. When "Connection has been completed" is displayed, you are connected.Note: If the access point you are trying to connect is a Bualo AirStation, enter the PIN code in [Enrollee PIN] and click [OK].](https://usermanual.wiki/BUFFALO/09102034-1.User-Manual-Part-1/User-Guide-1315473-Page-21.png)
![WLI-UC-G300HP / WLI-UC-G300HP-V1 User Manual 22Chapter 3 Connect to a Wireless Network Manual Setup (Client Manager)You may also connect to an Access point manually, without using AOSS/WPS. The procedure varies depending on the version of Windows used.First, install Client Manager from the included CD. (page 11)Windows 7/Vista (Client Manager V)With Windows 7/Vista, use Client Manager V to connect wirelessly.12Click [Start] > [All Programs] > [BUFFALO] > [AirStation Utility] > [Client Manager V].When this screen is displayed, click [Create Prole].3When the message "A Program needs your permission to continue", click [Continue].](https://usermanual.wiki/BUFFALO/09102034-1.User-Manual-Part-1/User-Guide-1315473-Page-22.png)
![Chapter 3 Connect to a Wireless Network WLI-UC-G300HP / WLI-UC-G300HP-V1 User Manual 234Click [Advanced Setup].5Click [Connect Manually].](https://usermanual.wiki/BUFFALO/09102034-1.User-Manual-Part-1/User-Guide-1315473-Page-23.png)
![WLI-UC-G300HP / WLI-UC-G300HP-V1 User Manual 24Chapter 3 Connect to a Wireless Network 6Select your access point, and click [Next].7Enter your [Encryption Key] (passphrase) and click [Connect].Follow the instructions in the wizard to connect. When "Connection Complete" is displayed, setup is completed. If “Set Network Location” is displayed, then select “Home”, “Work”, or “Public location” de-pending on the environment in which the AirStation will be used.](https://usermanual.wiki/BUFFALO/09102034-1.User-Manual-Part-1/User-Guide-1315473-Page-24.png)
![Chapter 3 Connect to a Wireless Network WLI-UC-G300HP / WLI-UC-G300HP-V1 User Manual 25Windows XP/2000 (Client Manager 3)Client Manager 3 is a wireless connection utility for Windows XP/2000.21Right click on the icon in the system tray, and select [Scan].Select the access point that you are going to connect to and click [Next].3Choose your [Encryption Method] and enter an [Encryption Key]. Click [Connect].Follow the instructions on the screen to connect.](https://usermanual.wiki/BUFFALO/09102034-1.User-Manual-Part-1/User-Guide-1315473-Page-25.png)
![WLI-UC-G300HP / WLI-UC-G300HP-V1 User Manual 26Chapter 3 Connect to a Wireless Network Manual Setup (Windows Utility)You can connect to an access point without installing or using Client Manager. Windows includes a built-in wireless utility. The procedure varies depending on the version of Windows used.Windows 7 (WLAN AutoCong)With Windows 7, use WLAN AutoCong to connect to the AirStation.1Click on the network icon in the system tray.2Select the target AirStation’s name and click [Connect]. If you will be connecting to this device in the future, checking [Connect automatically] is recommended.3Enter the encryption key and click [OK]. Follow the instructions on the screen to connect.](https://usermanual.wiki/BUFFALO/09102034-1.User-Manual-Part-1/User-Guide-1315473-Page-26.png)
![Chapter 3 Connect to a Wireless Network WLI-UC-G300HP / WLI-UC-G300HP-V1 User Manual 271Right click on the wireless network icon in the system tray.2Click [Connect to a network].Select your wireless network and click [Connect].3Windows Vista (WLAN AutoCong)You can use WLAN AutoCong to connect to a wireless Access Point:](https://usermanual.wiki/BUFFALO/09102034-1.User-Manual-Part-1/User-Guide-1315473-Page-27.png)
![Chapter 3 Connect to a Wireless Network WLI-UC-G300HP / WLI-UC-G300HP-V1 User Manual 29Enter the encryption key and click [Connect].4Follow the instructions displayed on the screen to nish conguration. If the “Set Network Location” screen is displayed, select “Home”, “Work”, or “Public location“ depending where you’re using the AirStation.](https://usermanual.wiki/BUFFALO/09102034-1.User-Manual-Part-1/User-Guide-1315473-Page-29.png)
![WLI-UC-G300HP / WLI-UC-G300HP-V1 User Manual 30Chapter 3 Connect to a Wireless Network Windows XP (Wireless Zero Conguration)Windows XP includes a built-in utility to connect to your wireless Access Point.Note: If Client Manager 3 is installed on your computer, then Windows Zero Cong is disabled. Uninstall Client Manager 3 to use Windows Zero Cong, or just use Client Manager 3 to connect to the AirStation.1Right click on the wireless network icon in the system tray.2Click [View Available Wireless Networks].Select a wireless network to connect to and click [Connect].3Enter the encryption key (passphrase) and click [Connect].4Follow the instructions on the screen to connect.](https://usermanual.wiki/BUFFALO/09102034-1.User-Manual-Part-1/User-Guide-1315473-Page-30.png)
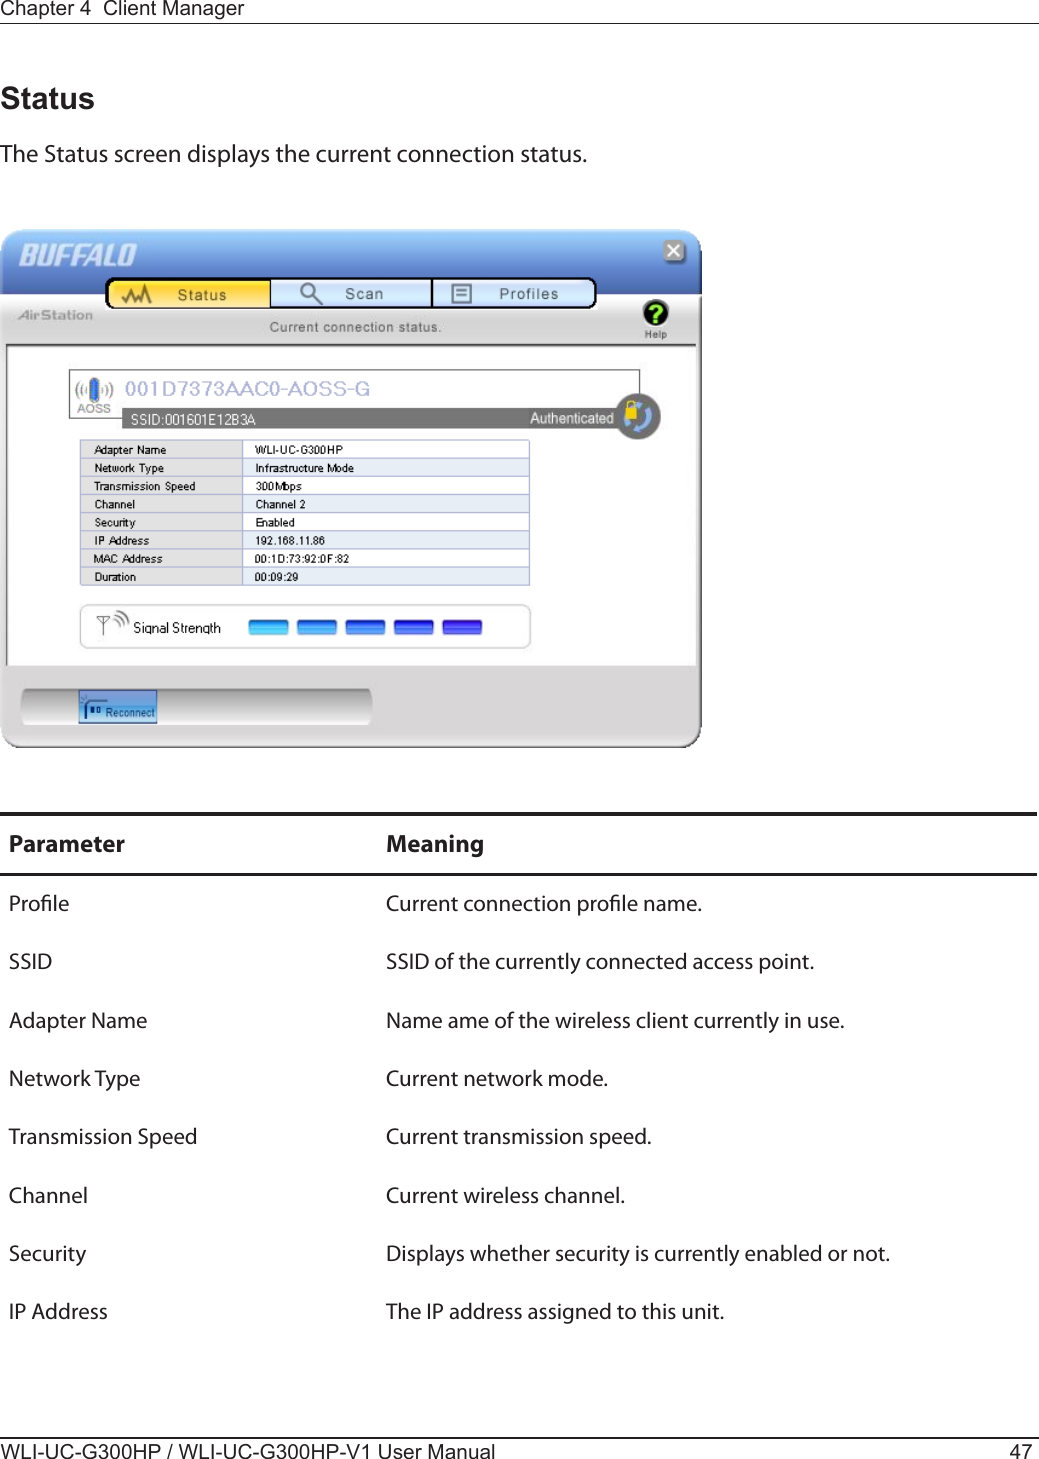
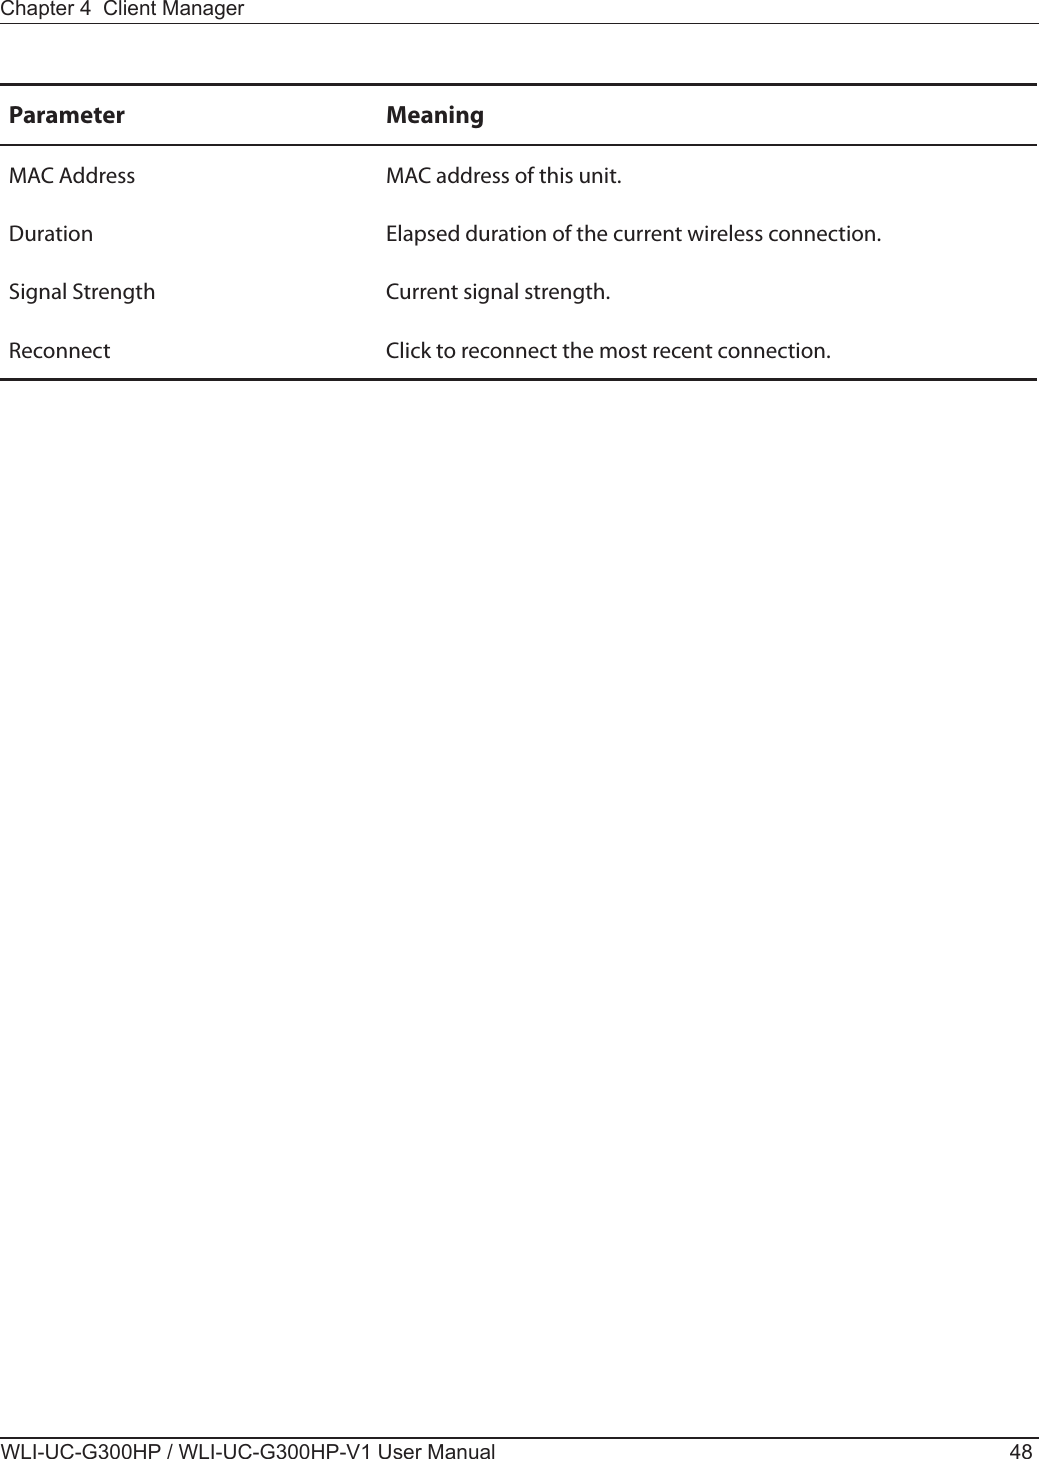
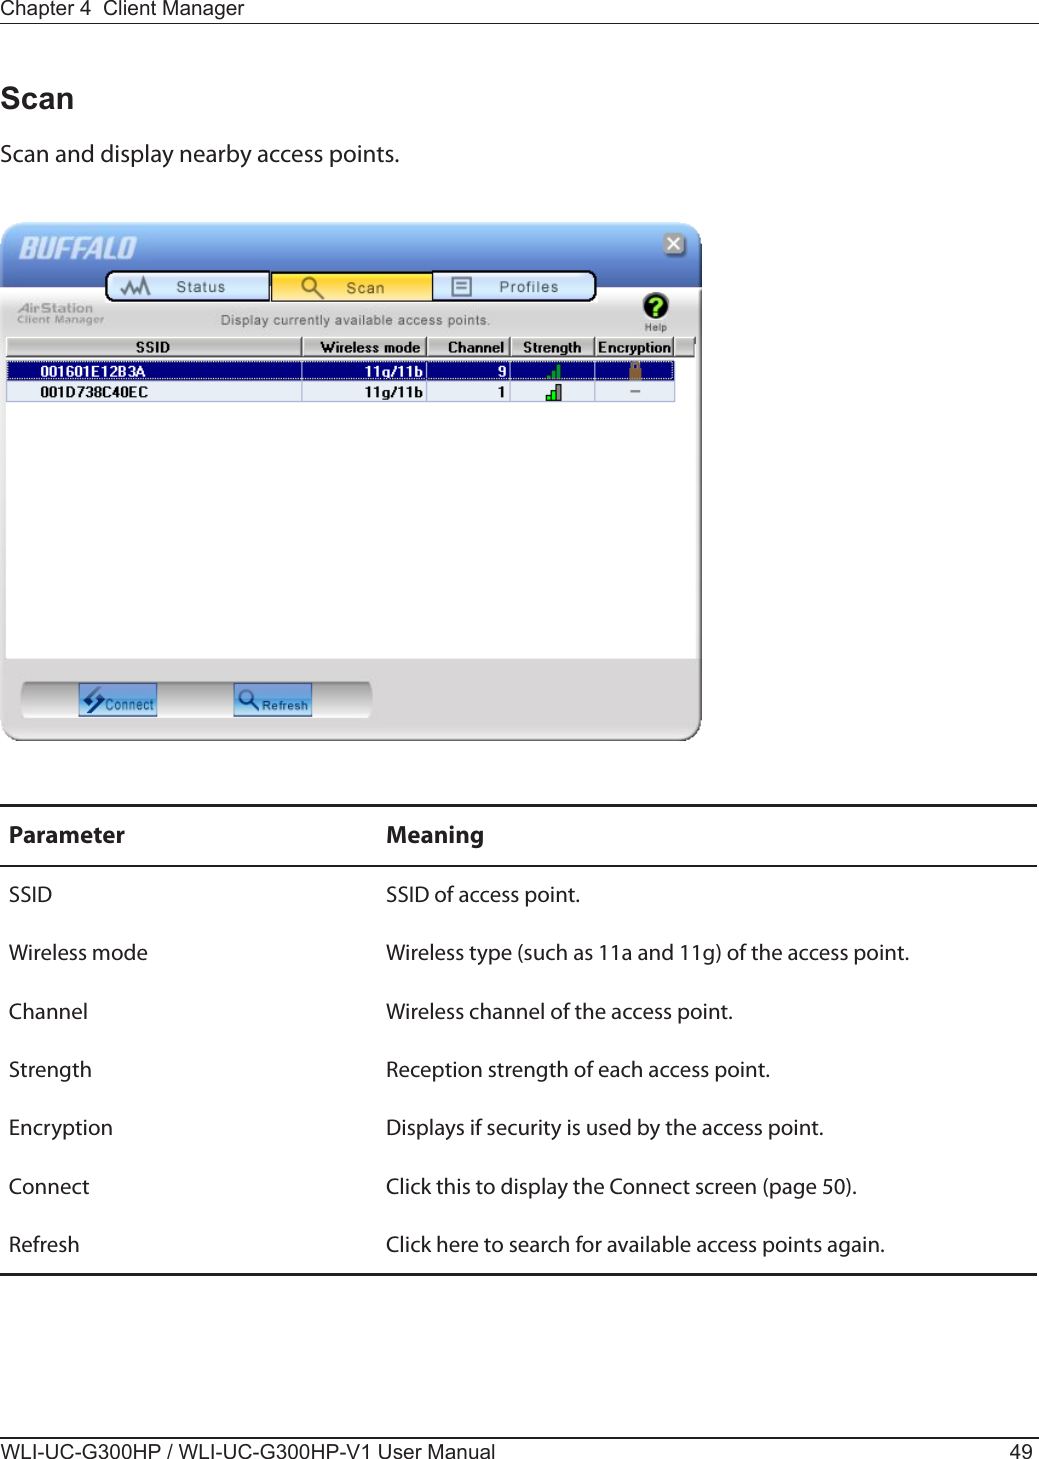
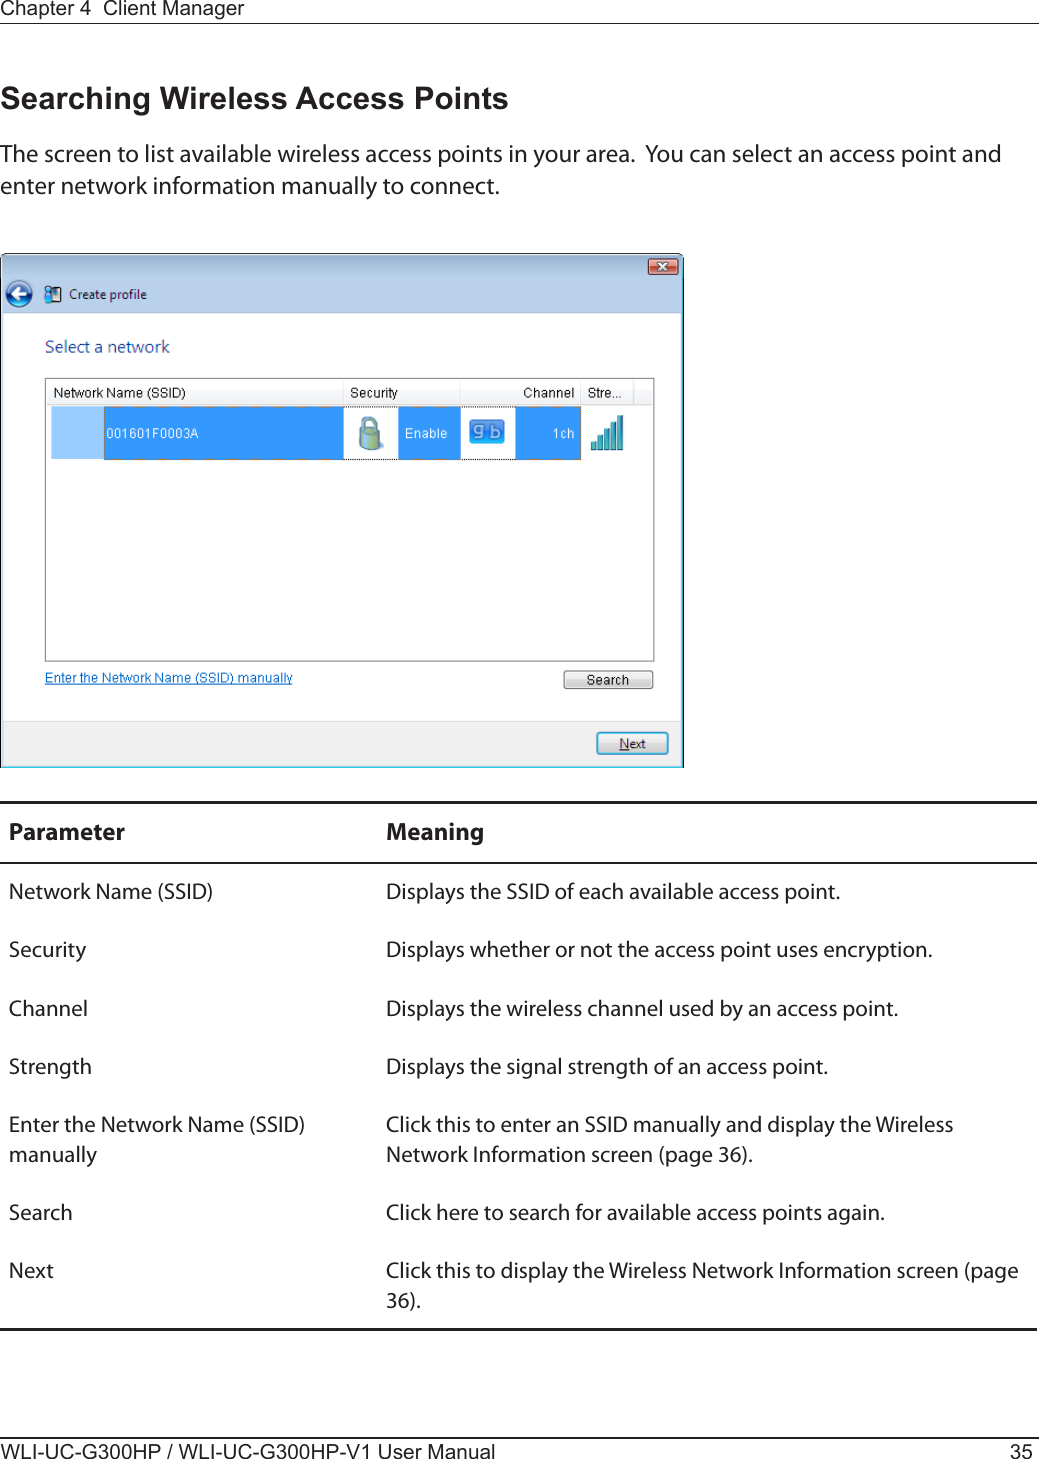
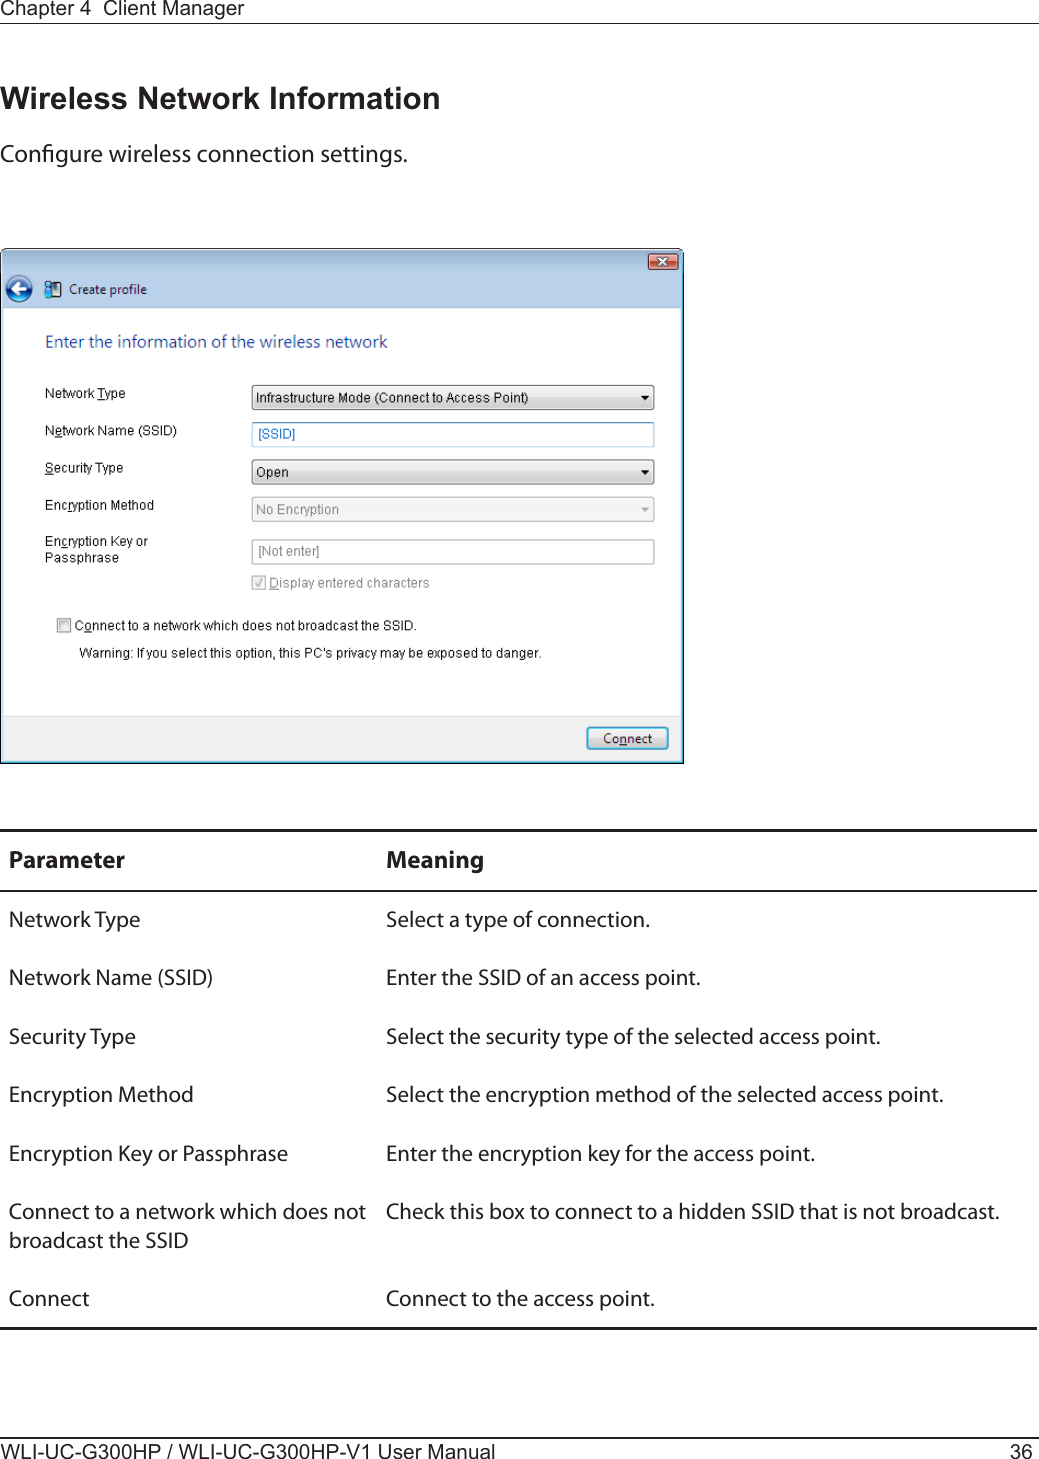
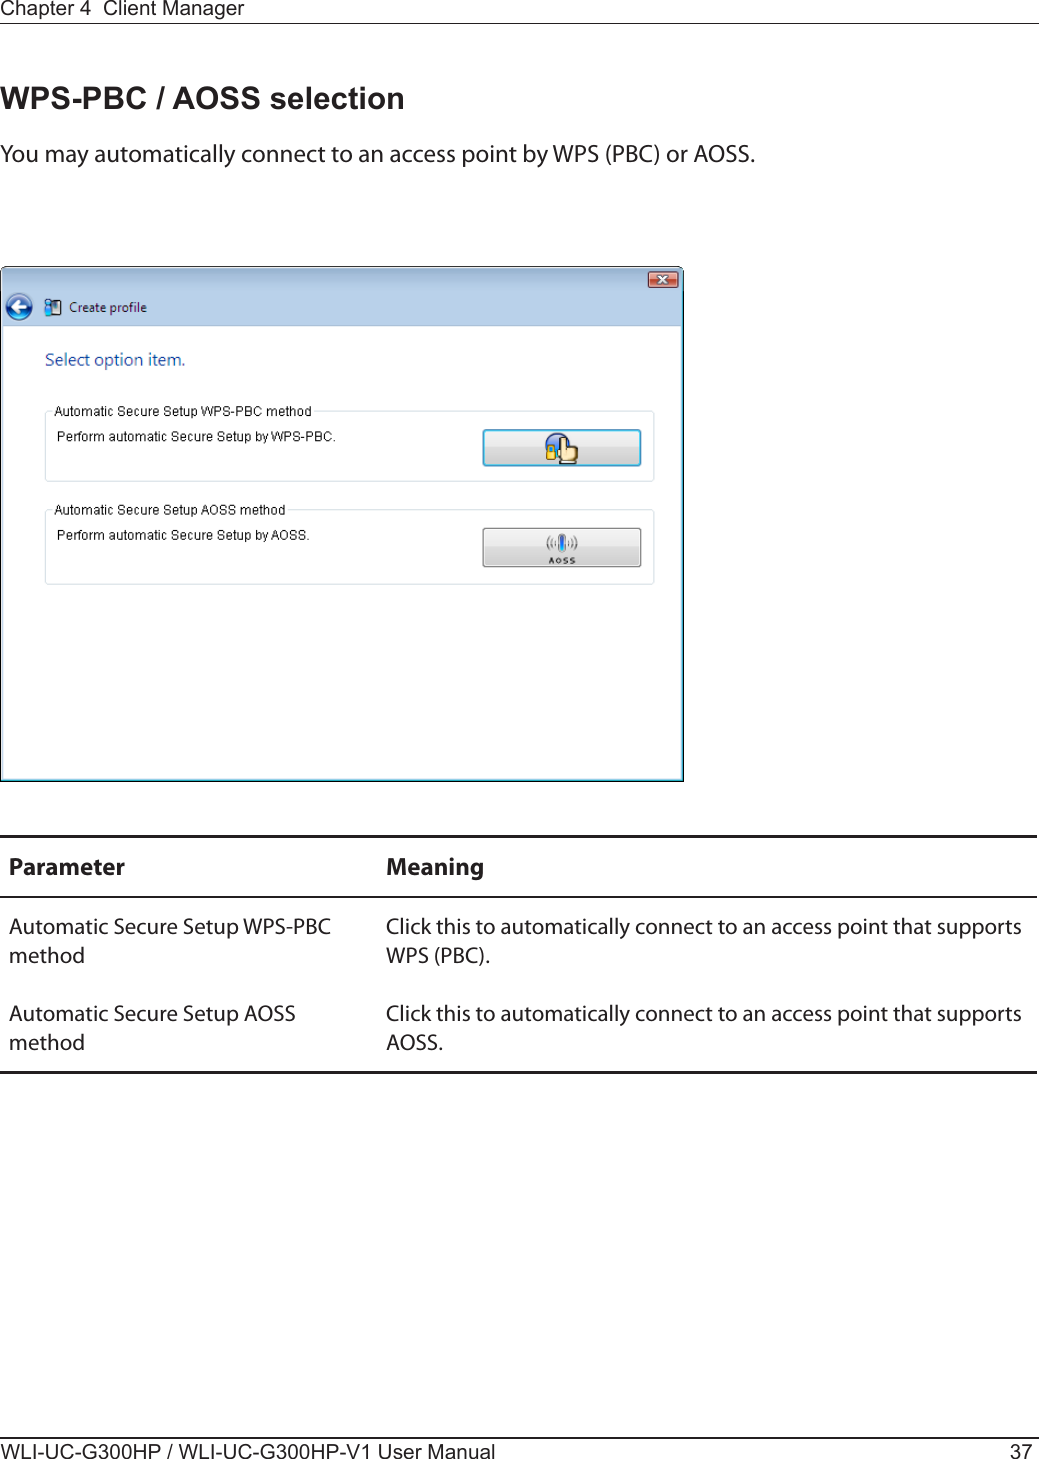
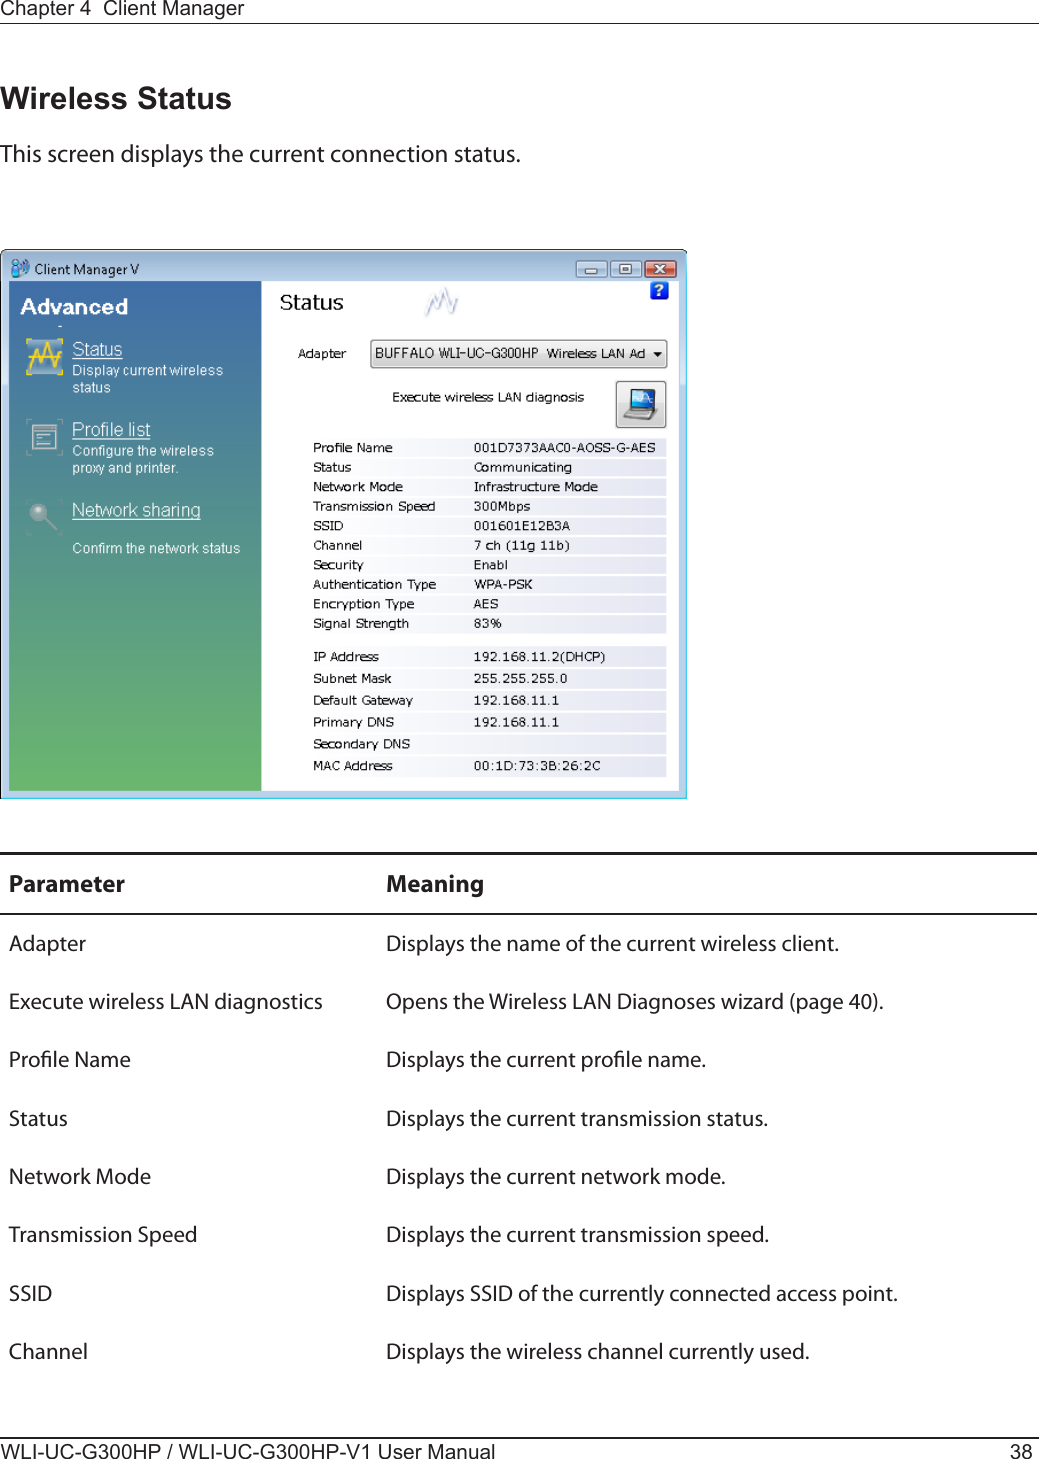
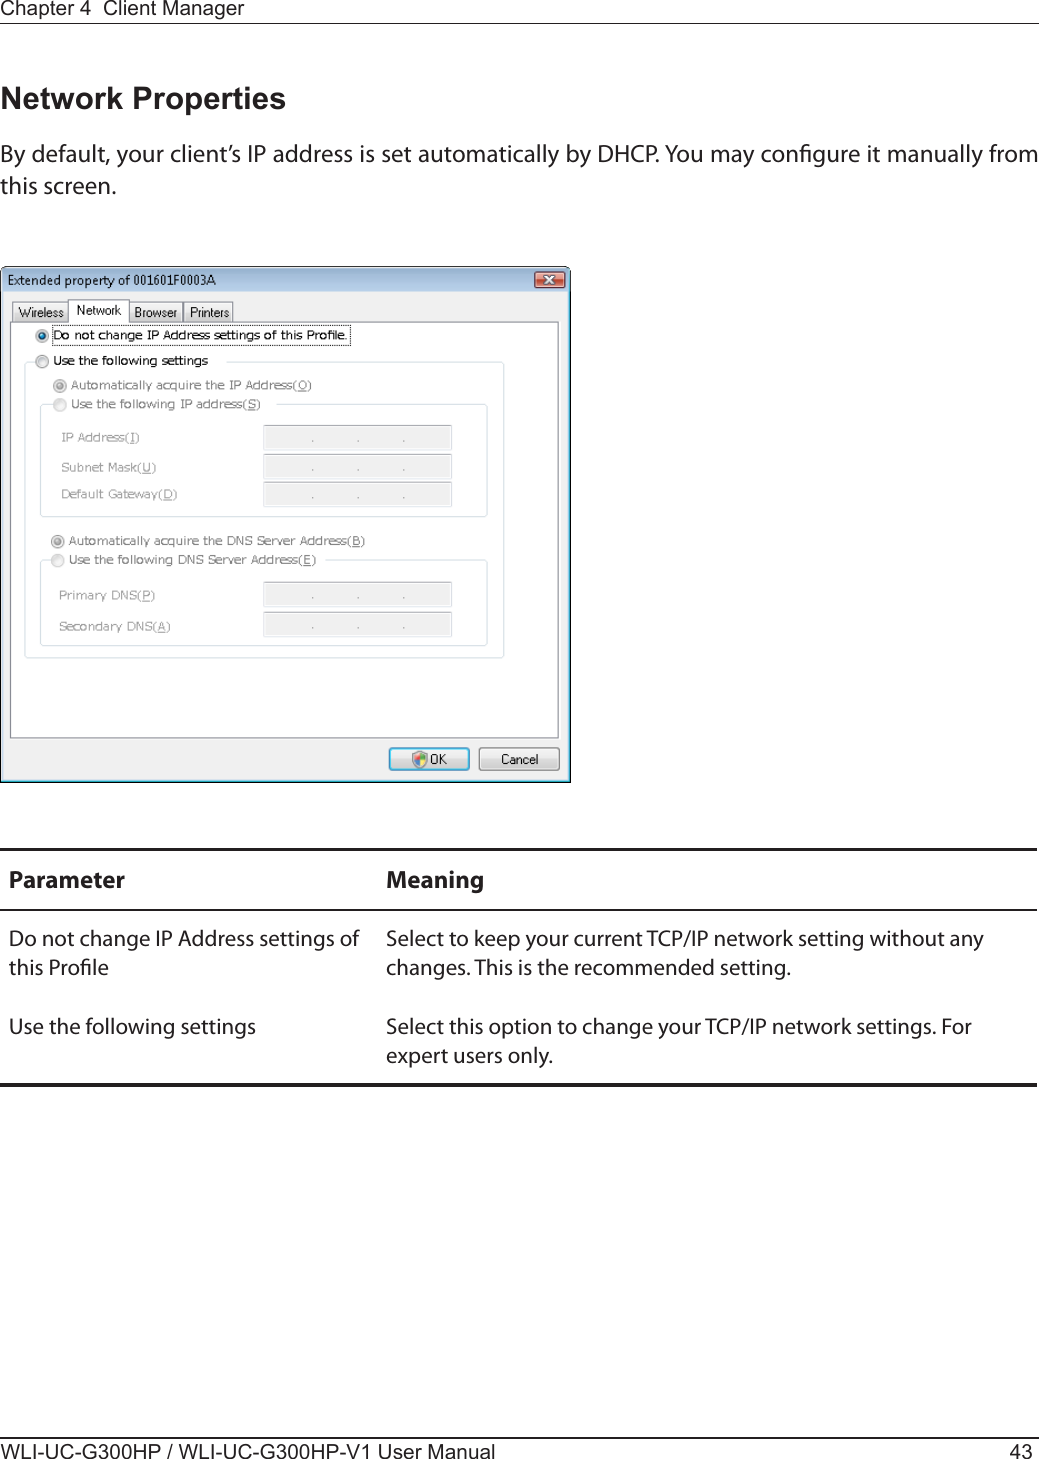
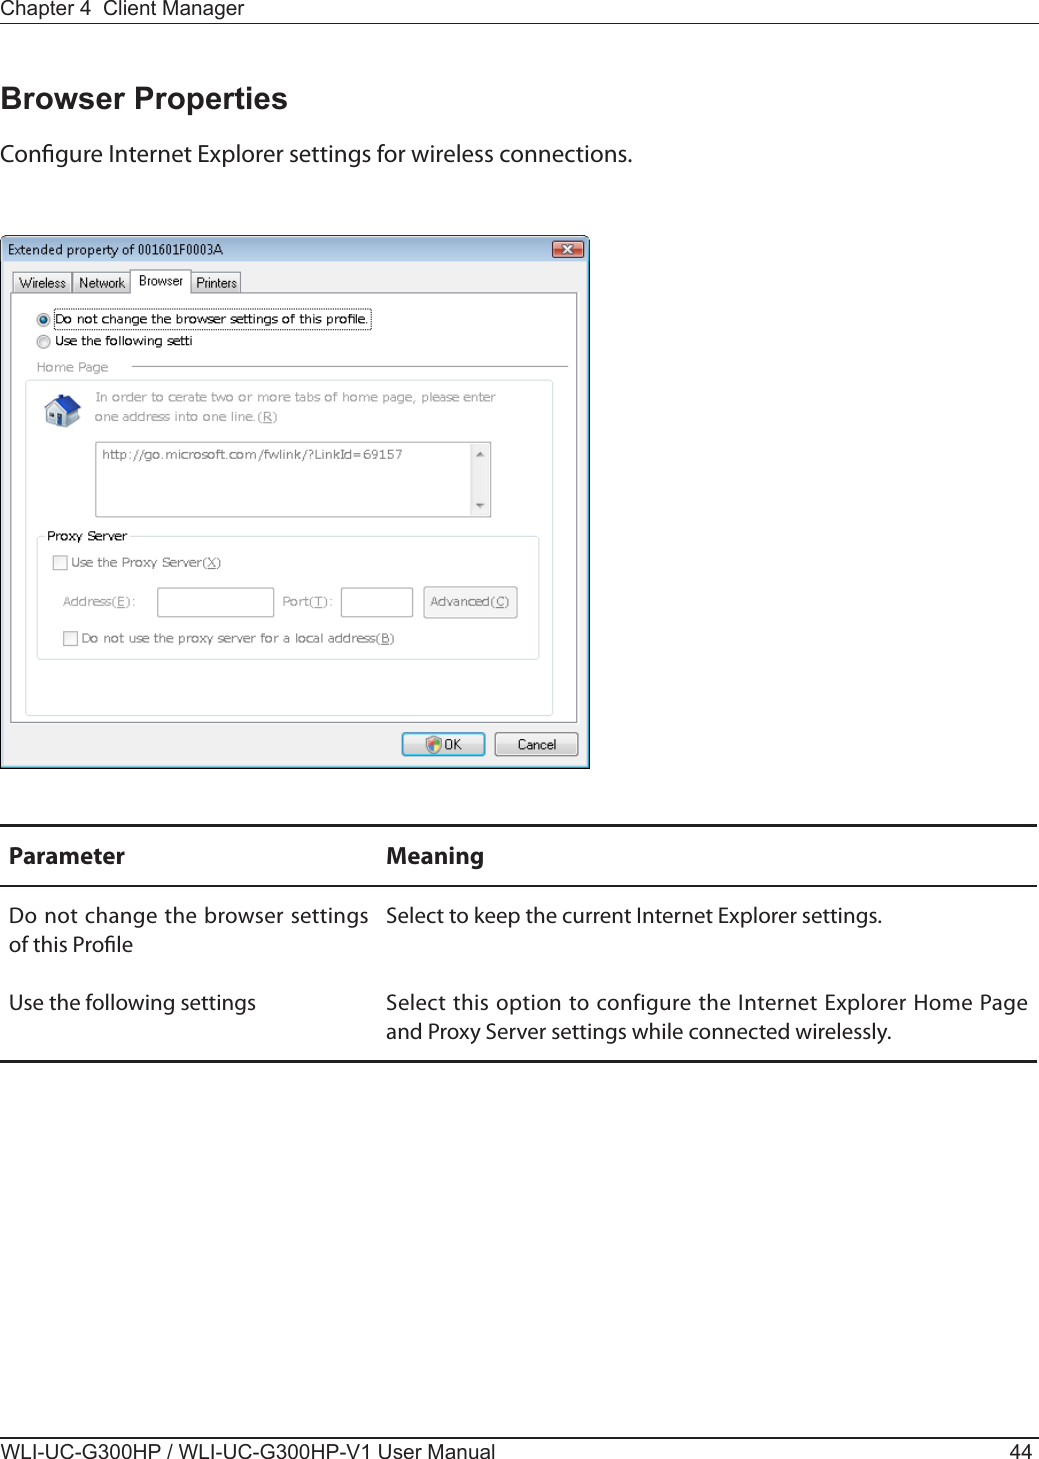
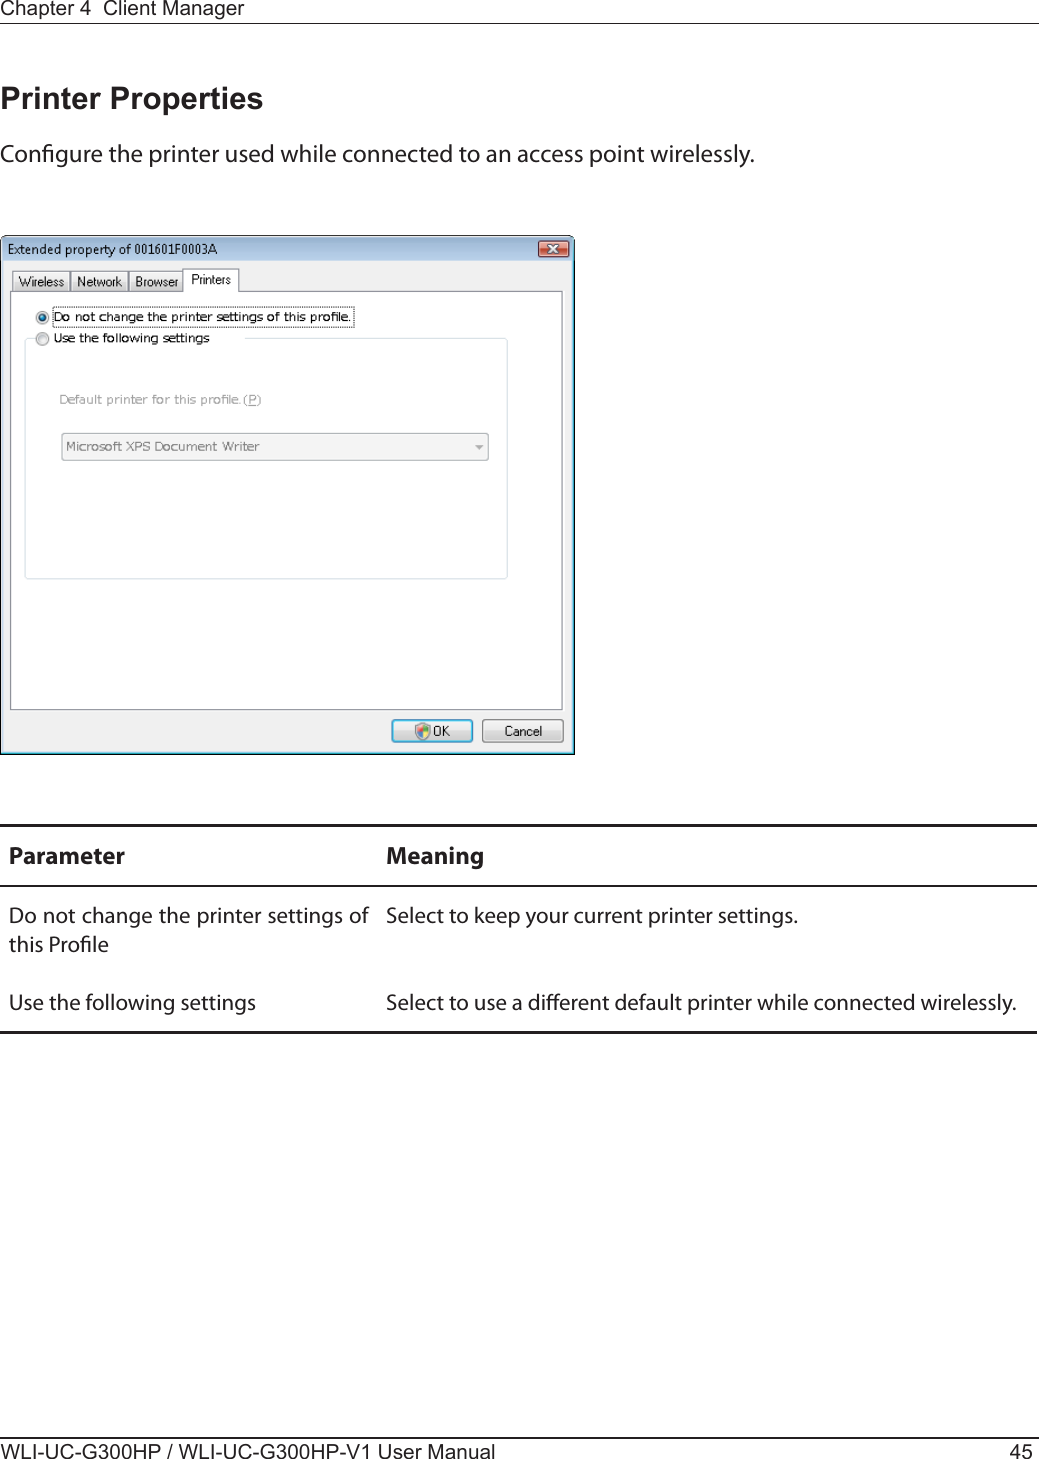
![WLI-UC-G300HP / WLI-UC-G300HP-V1 User Manual 31Chapter 4 - Client ManagerSoftware OverviewClient Manager is utility software used to connect to an access point on the network or to verify the connection between an access point and your computer. It is included with this device. Note: There are two versions of Client Manager with this unit, "V" and "3". Client Manager V supports Windows 7/Vista. Client Manager 3 supports Windows XP/2000.Using Client Manager V for Windows 7/VistaOpening and Closing Client Manager• When you install Client Manager, it will be added to your Startup folder and will automatically launch with Windows. If Client Manager does not launch automatically, click [Start] > [All Programs] > [BUFFALO] > [AirStation Utility] > [ClientManager V] .• Right click on the icon of Client Manager in the system tray and click [Exit] to close Client Manager. The appearance of Client Manager according to its connection status: : No wireless connection. Communicating via an access point.](https://usermanual.wiki/BUFFALO/09102034-1.User-Manual-Part-1/User-Guide-1315473-Page-31.png)

![WLI-UC-G300HP / WLI-UC-G300HP-V1 User Manual 46Chapter 4 Client ManagerUsing Client Manager 3 with Windows XP / 2000• When you install Client Manager, it will be added to your Startup folder and will automatically start with Windows. To launch Client Manager manually, click [Start] > [All Programs] > [BUFFALO] > [AirStation Utility] > [ClientManager 3] .• Right click on the Client Manager icon in the system tray and click [Exit] to close Client Manager. The Client Manager icon will change appearance according to its connection status: : No wireless client installed : Not connected to an access point : Transmitting to an access point with TKIP/AES encryption : Transmitting to an access point with WEP, or not encrypted : Transmitting in ad-hoc mode (not supported with this wireless client) : Authenticating](https://usermanual.wiki/BUFFALO/09102034-1.User-Manual-Part-1/User-Guide-1315473-Page-46.png)