Behavior Tech Computer KB9128CRF Wireless Keyboard User Manual
Behavior Tech Computer Corporation Wireless Keyboard
UserManual.wiki
>
Behavior Tech Computer
>
KB9128CRF User Manual
User Manual
Navigation menu
Upload a User Manual
Namespaces
Wiki Guide
HTML
PDF
Info
Views
User Manual
Discussion / Help
Navigation

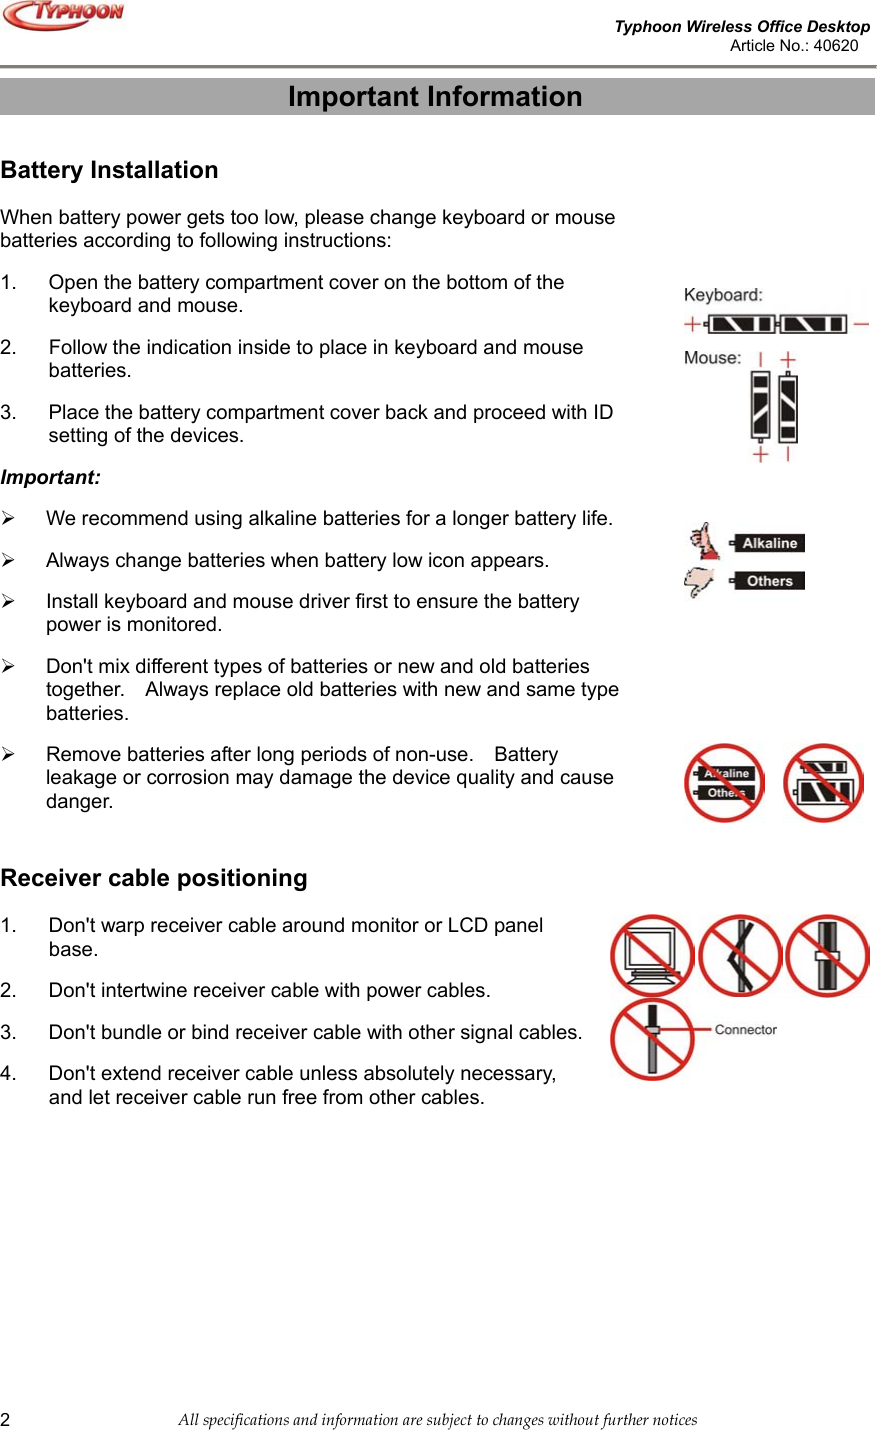


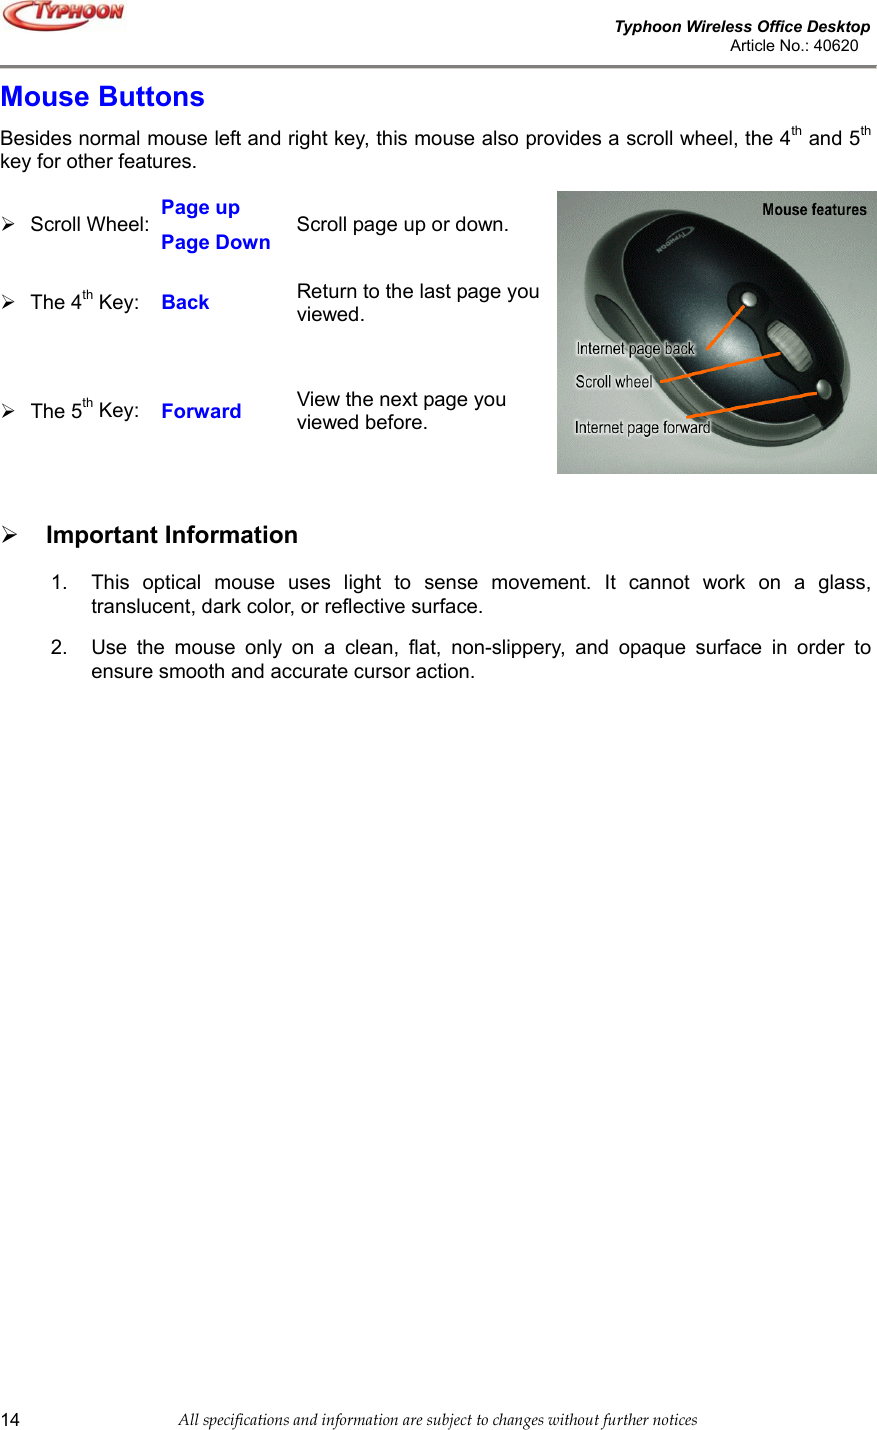
![Typhoon Wireless Office Desktop Article No.: 40620 All specifications and information are subject to changes without further notices 15Commands in the Menu If you right-click on KeyMaestro icon on taskbar, a menu will pop up with the following commands. Configure Click on this command, a customization dialogue box will pop up with following functions. 1. Select a Hotkey This function contains the default function of a key. You can click on "Display Label" to re-define the key functions. When you click it, a Configure Button box will appear. * Label In "Button Label" box, type the name of application that the button will launch, or any name that will help you remember the function of the button. This label will appear on screen each time you press the button. * Functions You can see a list of pre-defined functions and set one of it for the button. * Launch Application or Website Type in the path to an often-used application or click the Browse button to select any file in your computer. If you want to attach a web page to the button, just simply type in the website address in the dialogue box. * Combination Key In many Windows application, there are many hot keys to execute some often-used commands. Some of the hot keys are combined with two keys pressed simultaneously, and some are three. It is not easy to press and to remember those hot keys. Now you can define those complicated hot keys you always forgot. Any kind of combination is available. For example, [Alt] + [F4] = close window, [Ctrl] + [A] = select all. * String You may define the button as a string of texts that needs to be input often. The maximum characters are 500. Taking good advantages of this function can save much your text input time and makes your works more efficient. 2. Enable Display Label This command is to show or hide OSD (On Screen Display). When OSD is enabled, each time you press any one of the multimedia buttons, its function name (button label) will show on the right-bottom corner on the screen. The default of this function is enabled. 3. Enable Taskbar Icon This command is to show or hide taskbar driver icon. When the function is enabled, you can see a driver icon its function name (button label) will show on the right-bottom corner of the screen. If you want to reload it again, you can select Start => Program =>](https://usermanual.wiki/Behavior-Tech-Computer/KB9128CRF/User-Guide-455545-Page-15.png)