Belkin DXNRUTER Dynex Wireless N Router User Manual 12
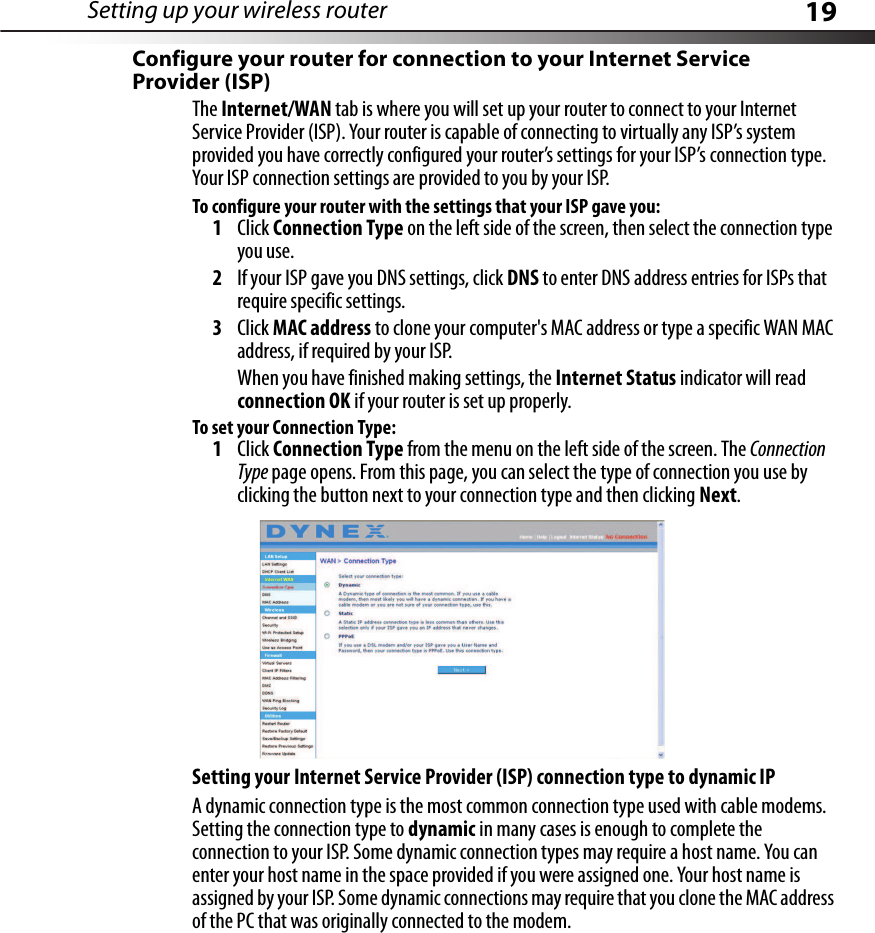
Belkin International, Inc. Dynex Wireless N Router 12
UserManual.wiki
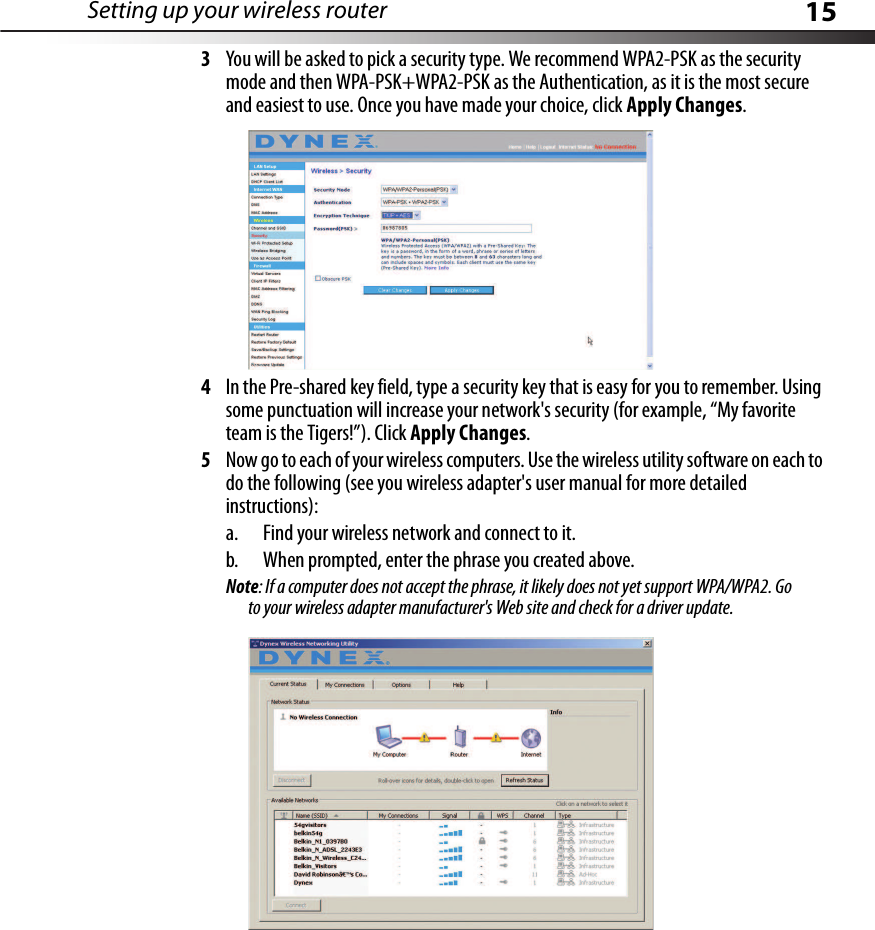
>
Belkin
>
DXNRUTER User Manual
User Manual
Navigation menu
Upload a User Manual
Namespaces
Wiki Guide
HTML
PDF
Info
Views
User Manual
Discussion / Help
Navigation

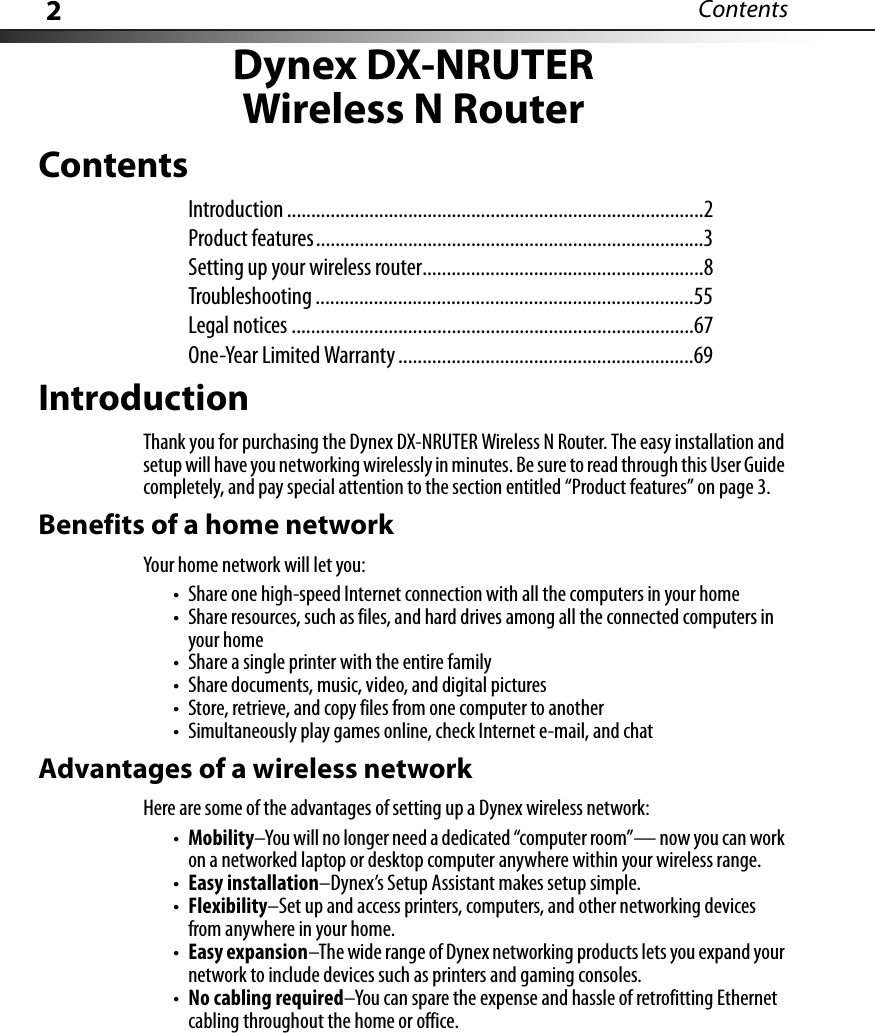

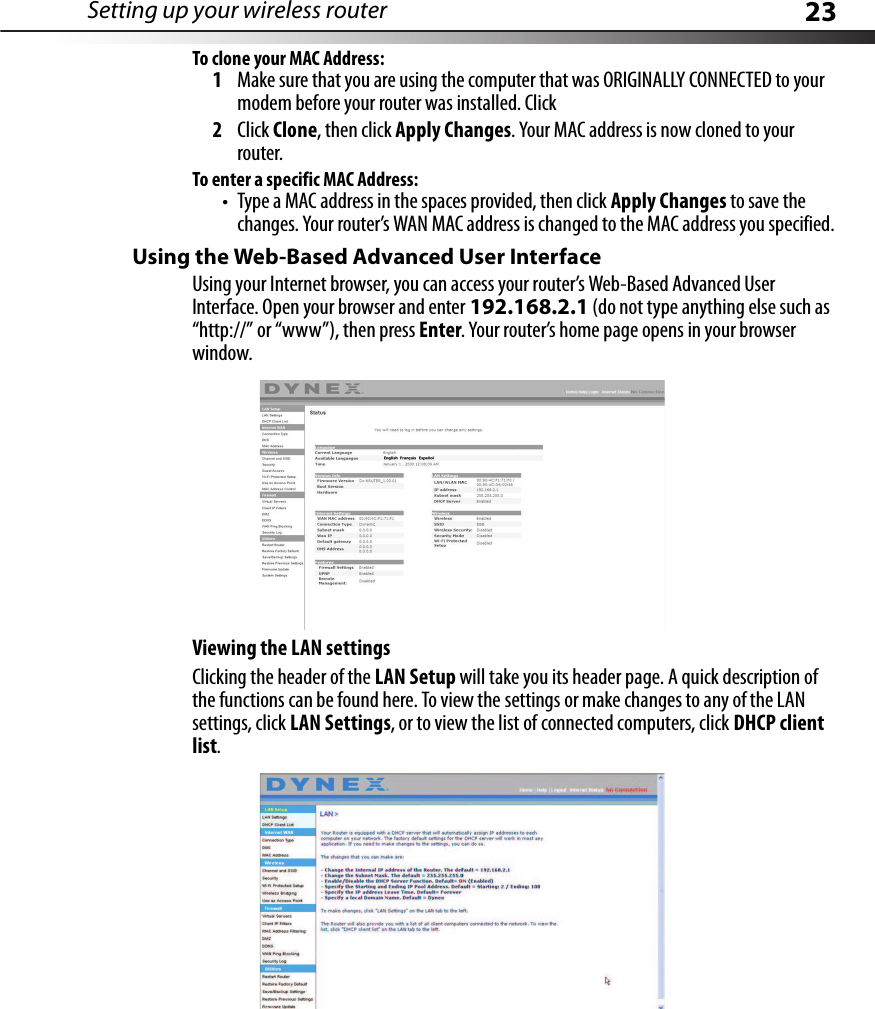
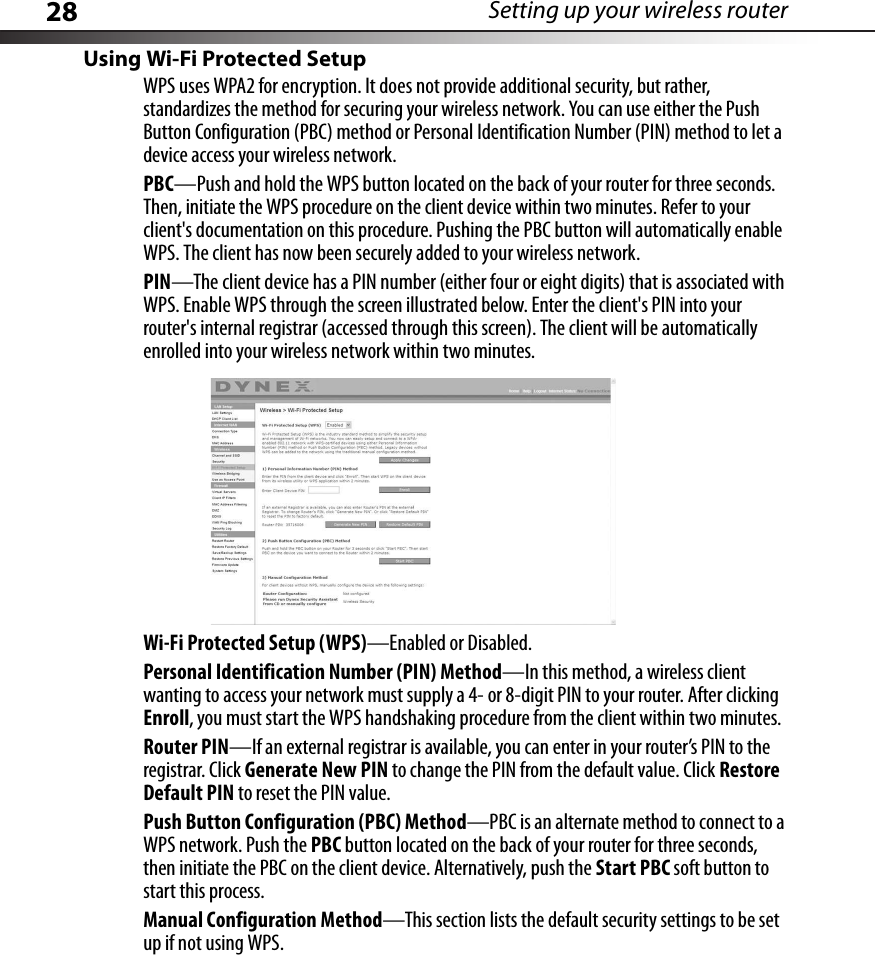
![Setting up your wireless router 13To use the optional assistance to connect to other computers:1This optional step will help you to connect additional wired and wireless computers to your network. Follow the on-screen instructions.At this point, your router is set up and working properly. It is now time to connect your other computers.Connecting computers wirelesslyComputers with wireless network adapters can use this network. If you still need to install those adapters, do this now. Then follow their instructions on how to connect. When you do so, look for your network: John's Home Wi-Fi. Connecting computers with wired cables Computers with wired network adapters can use this network. If you still need to install those adapters, do this now. Then connect an Ethernet cable between your computer's network port and one of the available LAN ports (labeled connections to computers) on the back of your router.]Once you have verified that your other wired and wireless computers are properly connected, your network is set up and working. You can now surf the Internet. Click Next to go back to the main menu.](https://usermanual.wiki/Belkin/DXNRUTER/User-Guide-993894-Page-13.png)
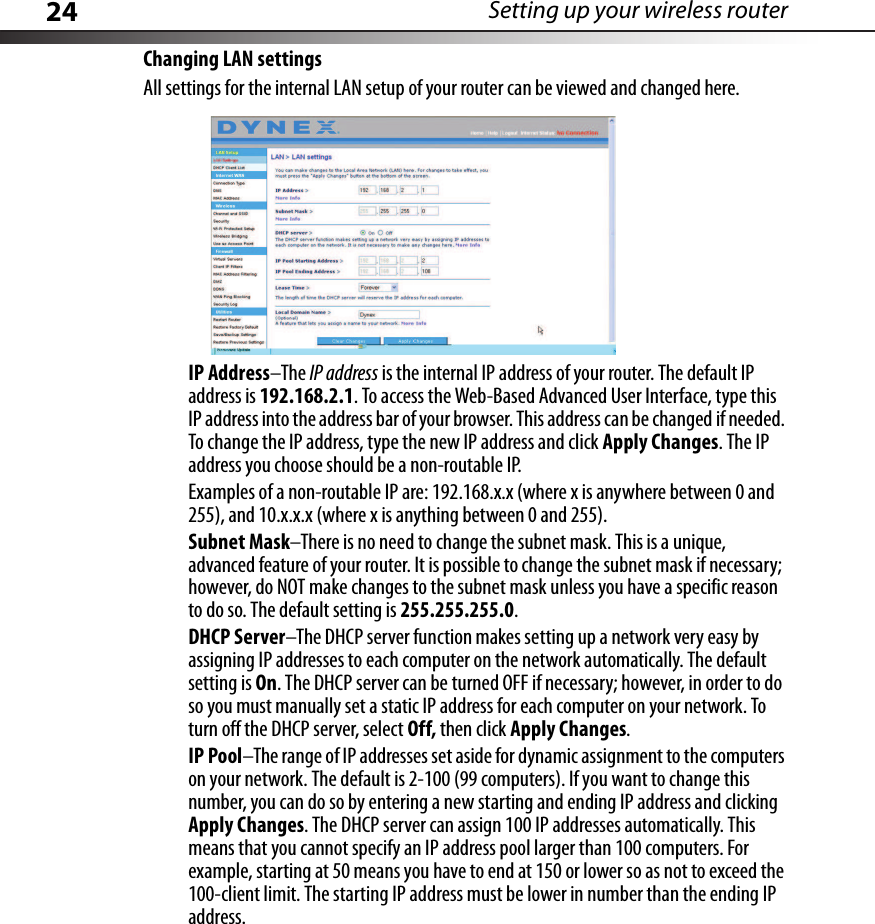

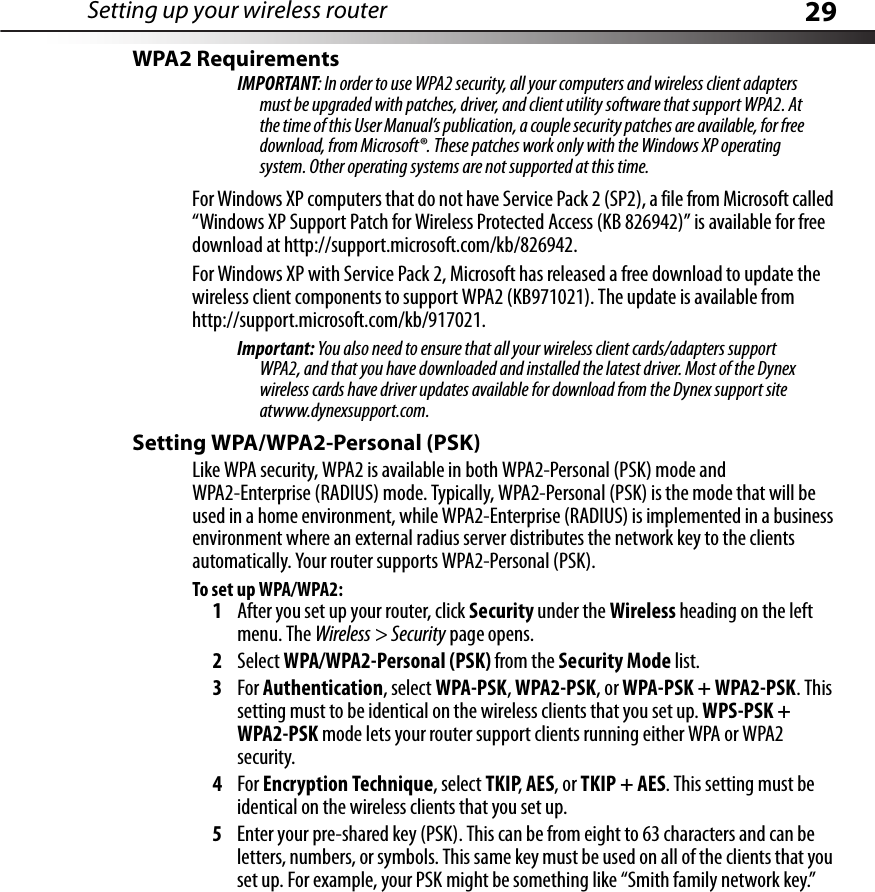
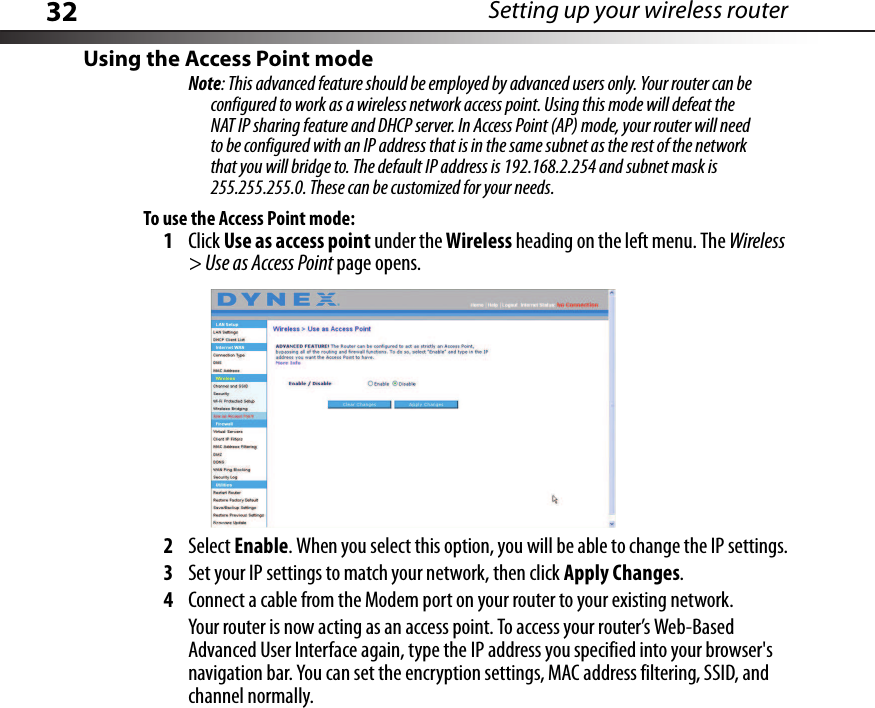
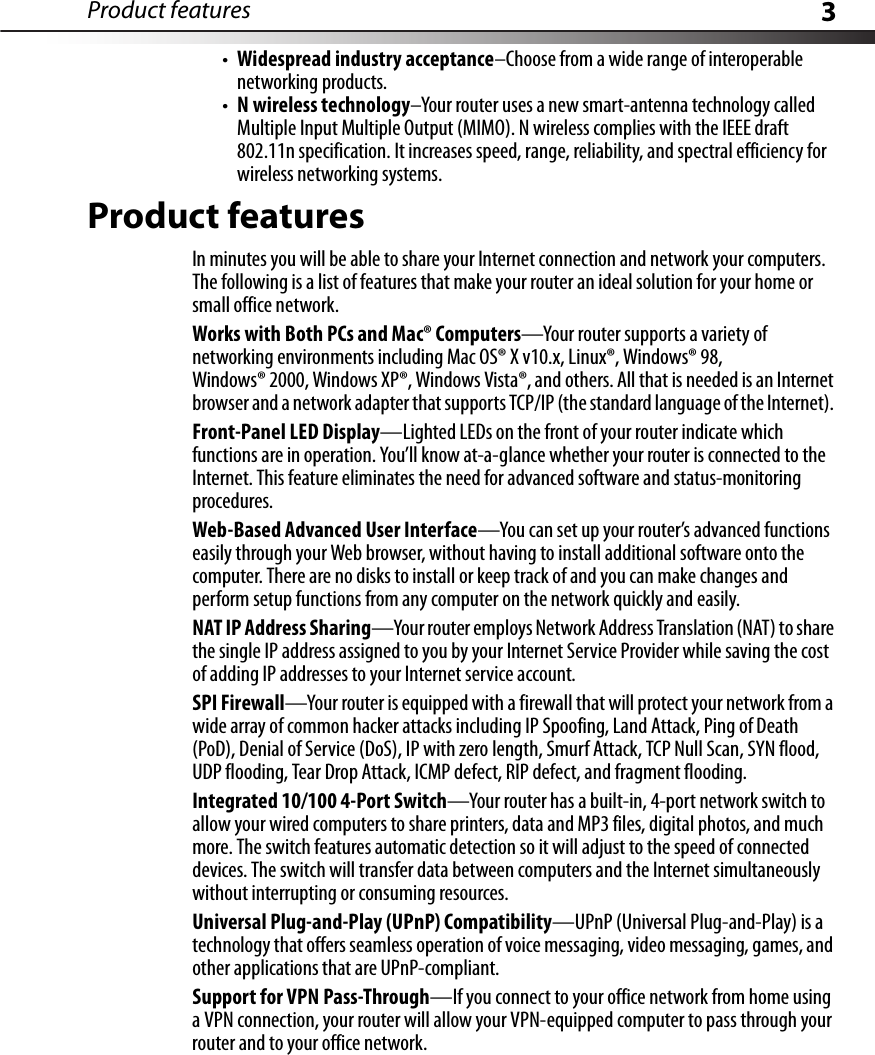
![Setting up your wireless router 35Configuring Internal Forwarding settingsThe Virtual Servers function lets you route external (Internet) calls for services such as a Web server (port 80), FTP server (Port 21), or other applications through your router to your internal network. Since your internal computers are protected by a firewall, computers outside your network (over the Internet) cannot get to them because they cannot be seen. A list of common applications has been provided in case you need to configure the Virtual Server function for a specific application. If your application is not listed, you will need to contact the application vendor to find out which port settings you need.To enter settings into the virtual server:1Open the Virtual Servers page, then enter the IP address in the space provided for the internal (server) machine, and the port(s) required to pass. 2Select the port type (TCP or UDP), check the Enable box, then click Apply Changes. Each inbound port entry has two fields with five characters maximum per field that allows a start and end port range, for example [xxxxx]-[xxxxx]. For each entry, you can enter a single port value by filling in the two fields with the same value (for example, [7500]-[7500]) or a wide range of ports (for example [7500]-[9000]). If you need multiple single port values or a combination of ranges and a single value, you must use multiple entries up to the maximum of 20 entries (for example, 1. [7500]-[7500], 2. [8023]-[8023], 3. [9000]-[9000]). You can only pass one port per internal IP address. Opening ports in your firewall can pose a security risk. You can enable and disable settings quickly. It is recommended that you disable the settings when you are not using a specific application.](https://usermanual.wiki/Belkin/DXNRUTER/User-Guide-993894-Page-35.png)