Belkin F5D7001A Wireless PCI Adapter User Manual P74485 F5D7001 man last indd
Belkin International, Inc. Wireless PCI Adapter P74485 F5D7001 man last indd
Belkin >
Contents
- 1. Users Manual Part 1
- 2. Users Manual Part 2
- 3. Users Manual Part 3
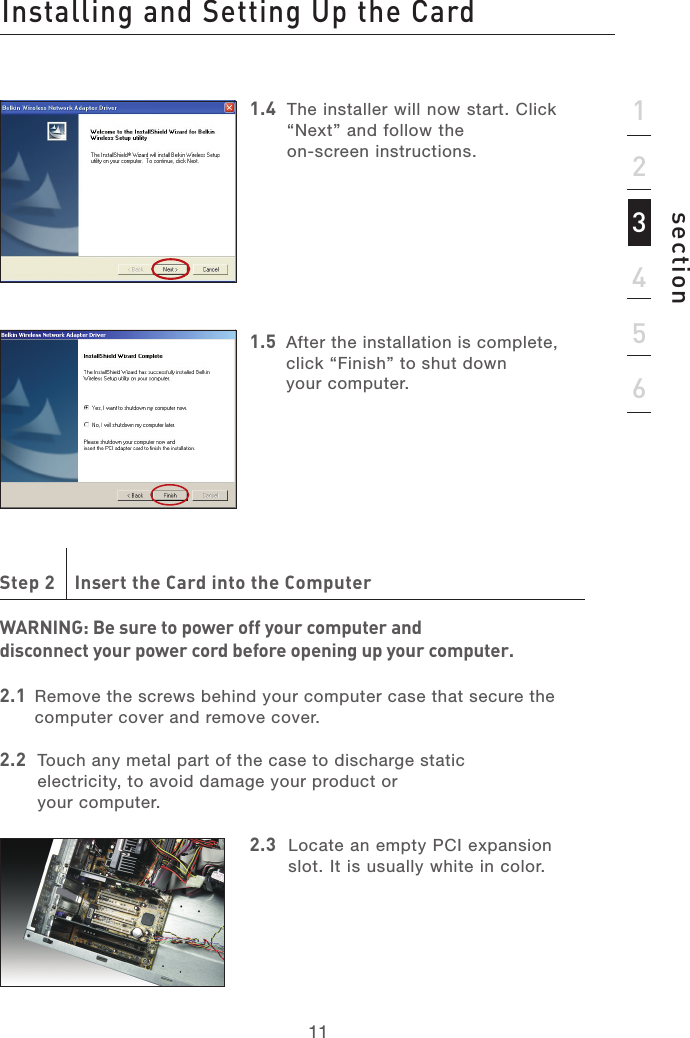
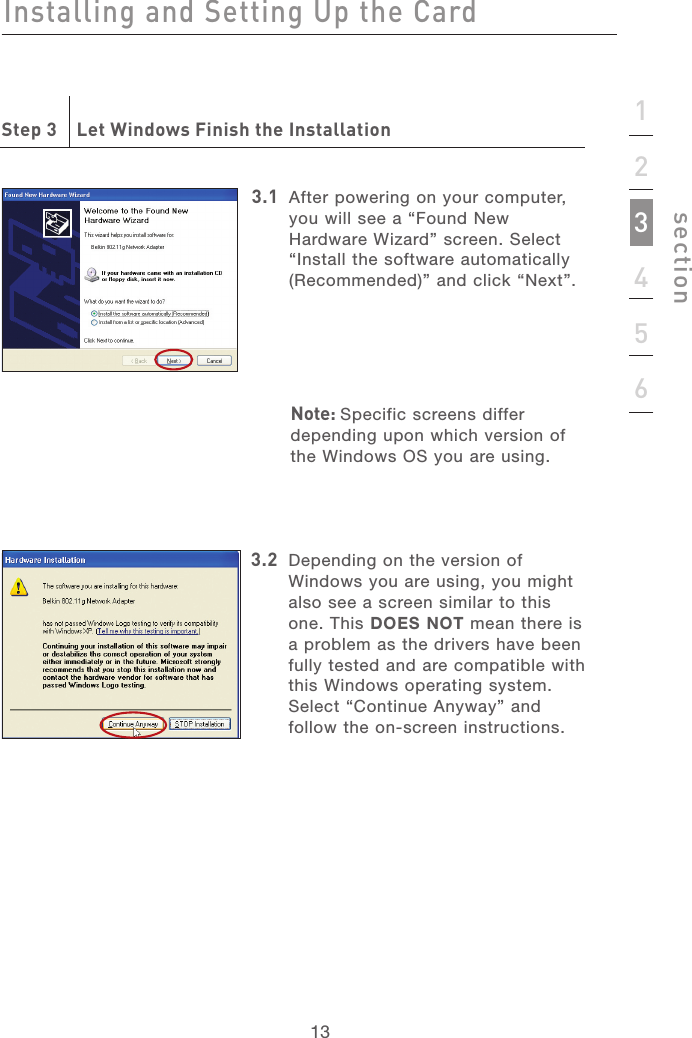
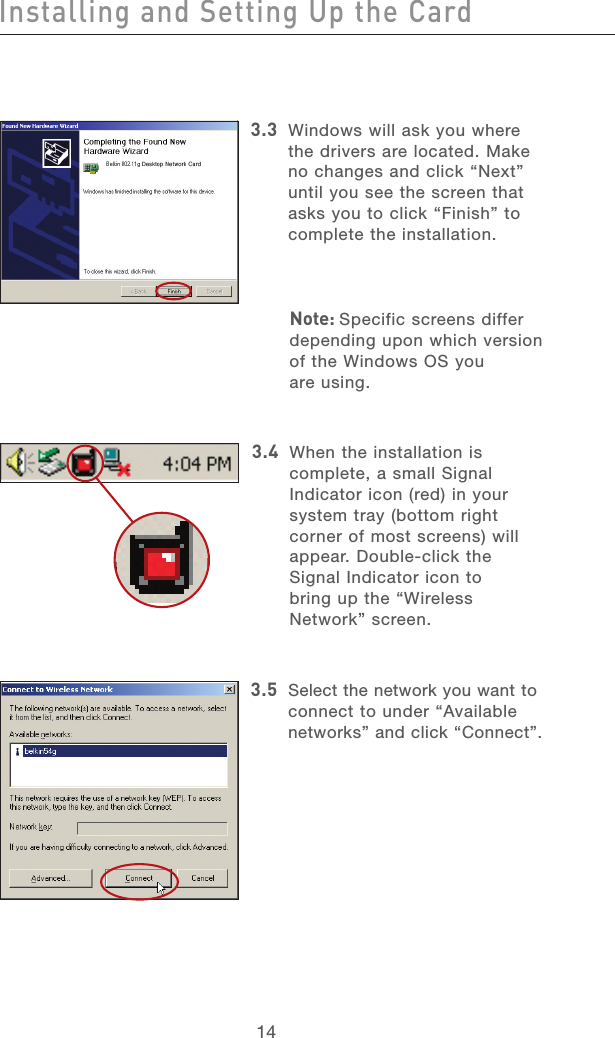
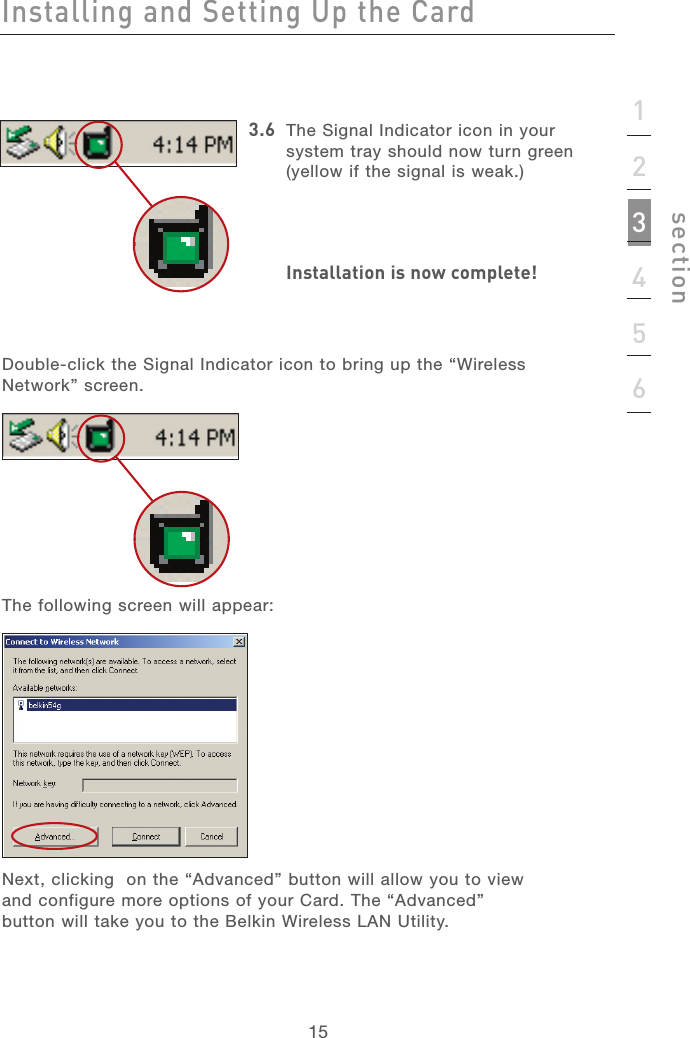
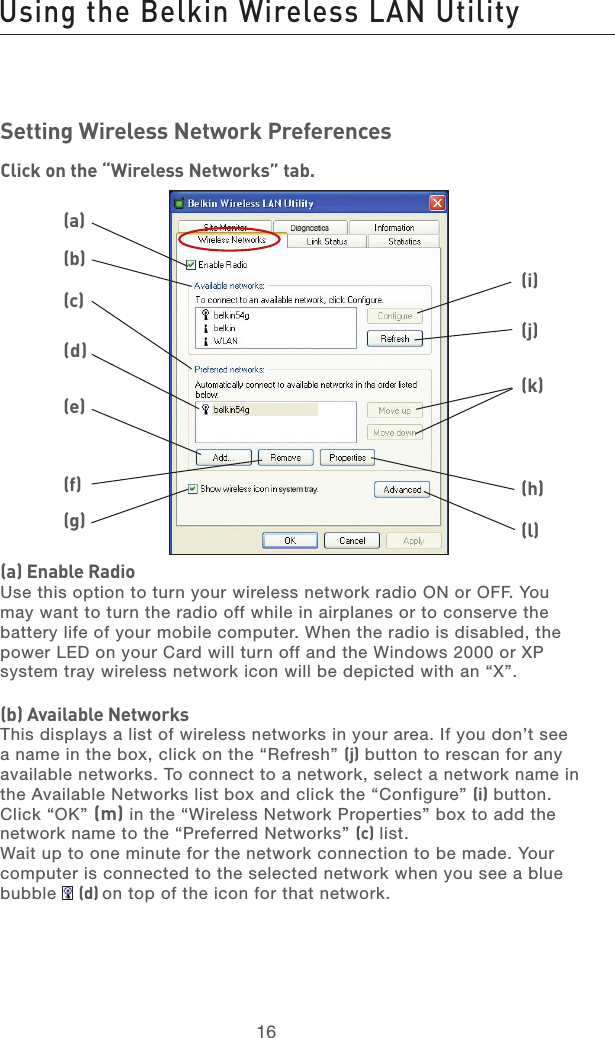
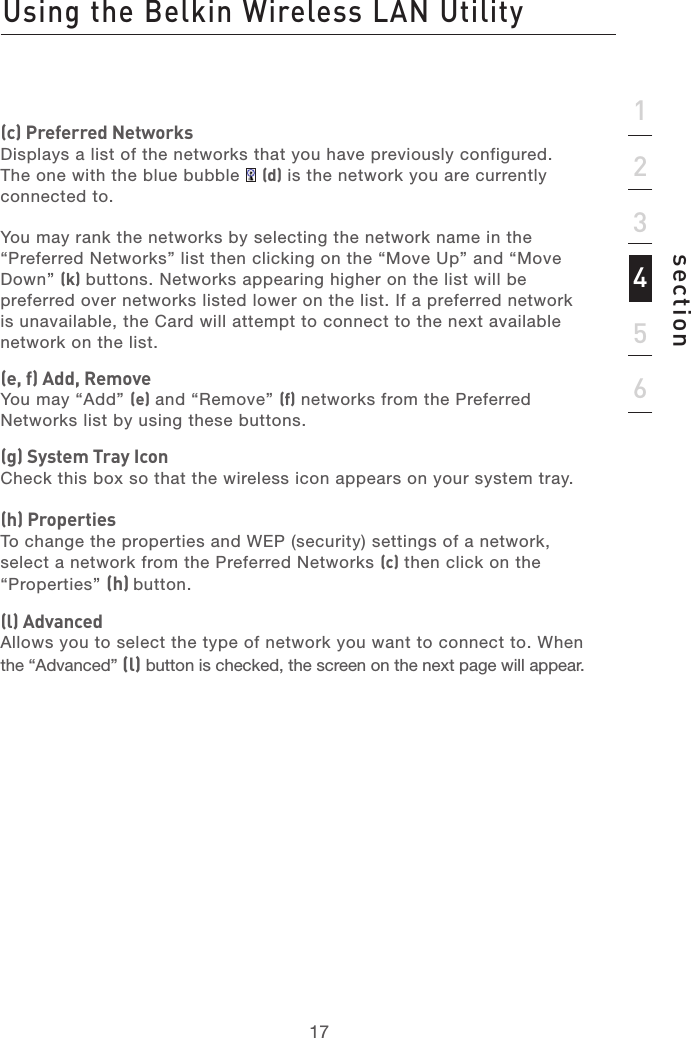
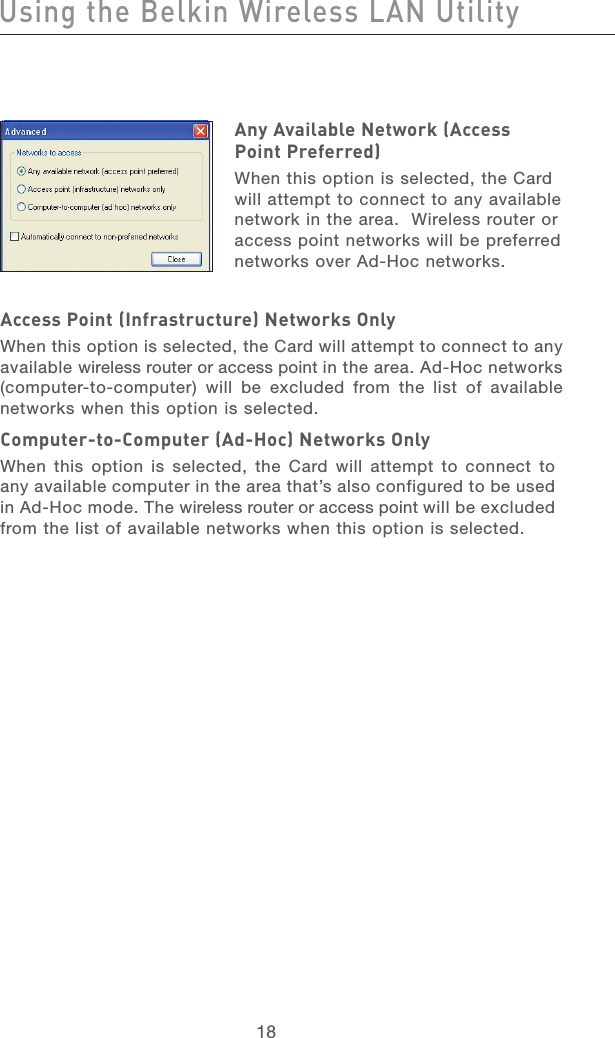
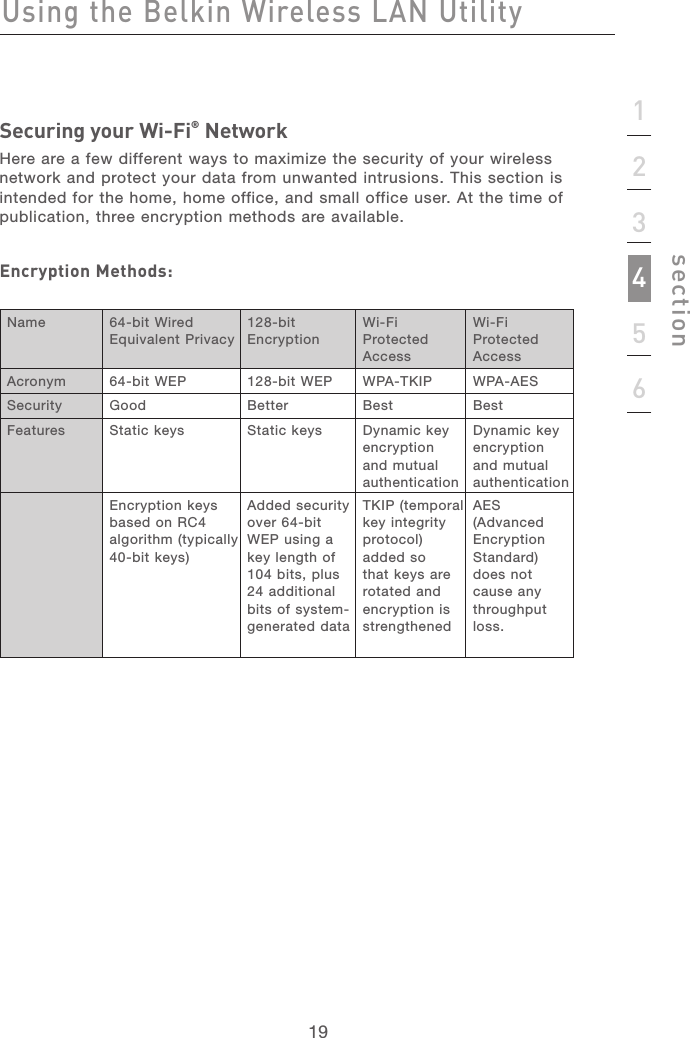
Users Manual Part 2