Belkin F5D8013D N Wireless Notebook Card User Manual P75448 A F5D8013 man indd
Belkin International, Inc. N Wireless Notebook Card P75448 A F5D8013 man indd
Belkin >
Contents
- 1. Manual part 1
- 2. Manual Part 2
- 3. Manual Part 3
Manual Part 2
Using the Belkin Wireless Networking Utility
28
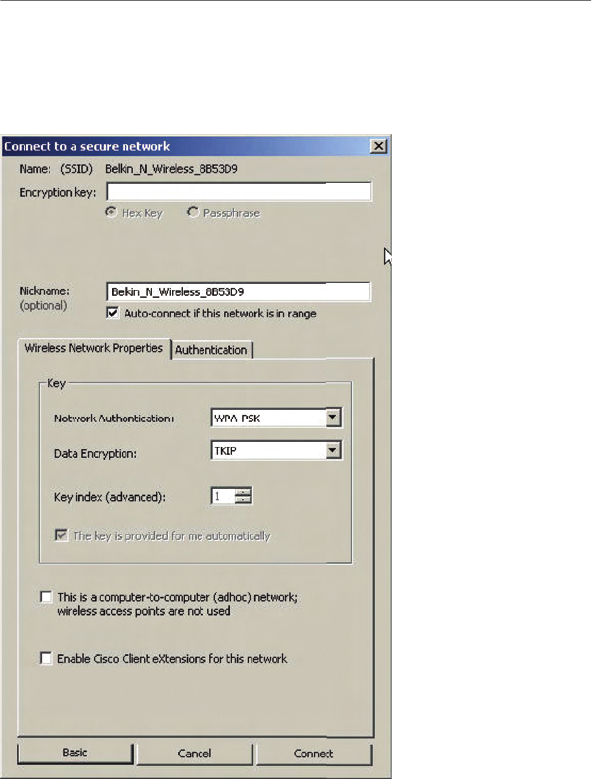
If desired, you may connect manually to a WPS-enabled network.
Click on the “Advanced” tab to open the following window:
Enter in the encryption key and security method in order to join this
network. The following section describes how to connect to a secure
network that does not support WPS.
Using the Belkin Wireless Networking Utility
section
29
1
2
3
4
5
6
The Belkin N Wireless Notebook Card supports the latest WPA
security feature as well as the legacy WEP security standard. By
default, wireless security is disabled.
To enable security, you will first need to determine which standard
is used by the router (or access point). (See your wireless router’s
or access point’s manual for directions on how to access the
security settings.)
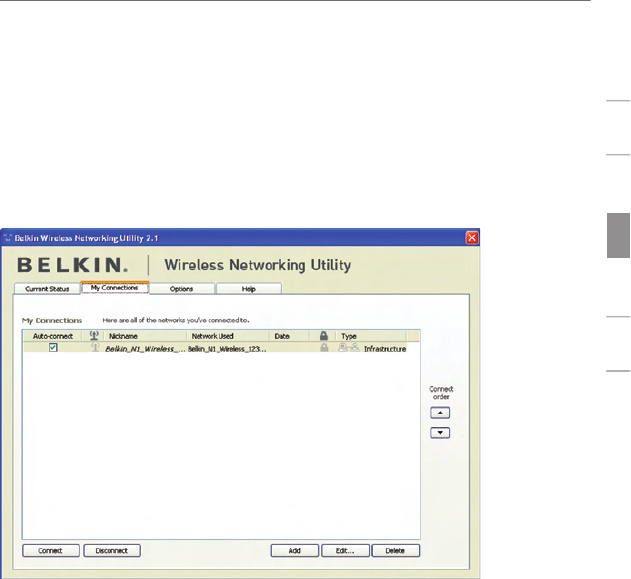
To access the security settings on your Card, click the “My
Connections” tab and point to the connection for which you want to
change security settings. Click “Edit” to change settings.
Using the Belkin Wireless Networking Utility
30
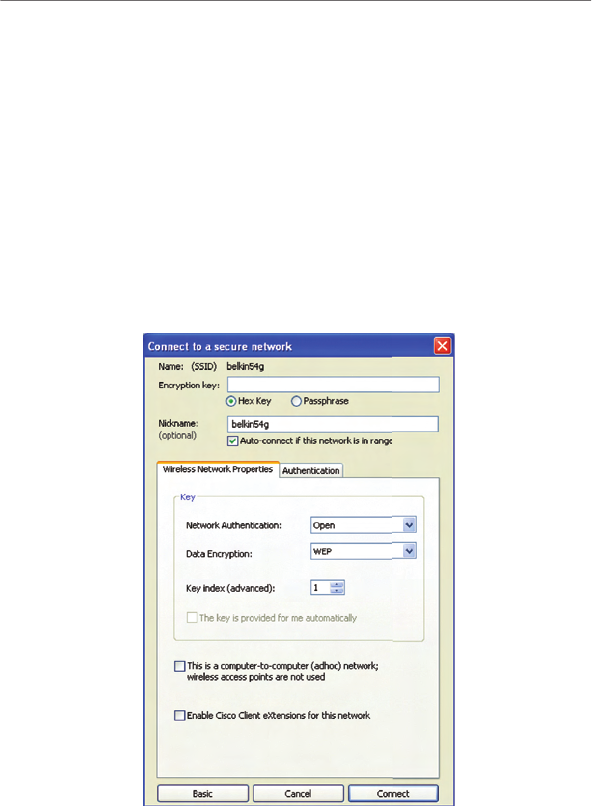
WEP Setup
64-Bit WEP Encryption
1.
Select “WEP” from the “Data Encryption” drop-down menu.
2.
After selecting your WEP encryption mode, you can enter your
key by typing in the hex key manually.
A hex (hexadecimal) key is a combination of numbers and letters
from A–F and 0–9. For 64-bit WEP, you need to enter 10 hex keys.
For instance:
AF
0F
4B
C3
D4
= 64-bit WEP key
3.
Click “Save” to finish. Encryption in the wireless router
(or access point) is now set. Each of your computers on your
wireless network will now need to be configured with the same
security settings.
Installing and Setting up the Card
section
15
1
2
3
4
5
6
C. Configuration
Using the Belkin Wireless Networking Utility
C.1
After restarting your computer,
double-click the Belkin Wireless
Networking Utility icon on the
desktop screen.
Note
: The Belkin Wireless
Networking Utility icon can also be
found on the system tray.
C.2
The Belkin Wireless Networking
Utility screen will appear.
C.3
Select a network to which to
connect from the “Available
Networks” list and click “Connect”.
Note: In order to see your
available networks, you must be
near a working wireless router
or access point.
Using the Belkin Wireless Networking Utility
16
After successfully installing the Belkin Wireless Networking Utility
(WNU), configurations for wireless connection and security are just a
few easy clicks away.
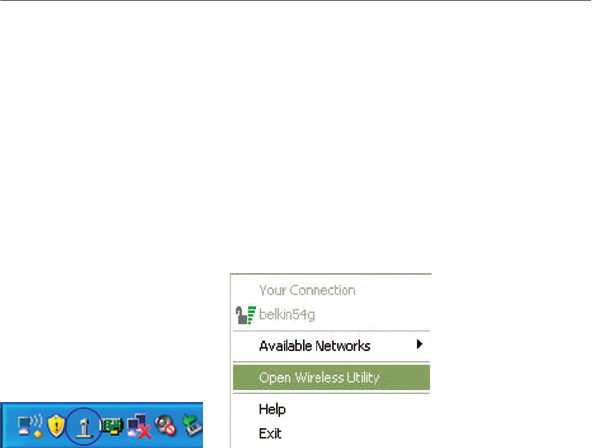
Accessing the Belkin Wireless Networking Utility
from the Windows System Tray
To access the WNU, simply place your mouse pointer and right-click
over the WNU icon on the Windows task tray.
If the icon is not present, click on “Start > Programs > Belkin >
Belkin Wireless Utility”.
Using the Belkin Wireless Networking Utility
section
17
1
2
3
4
5
6
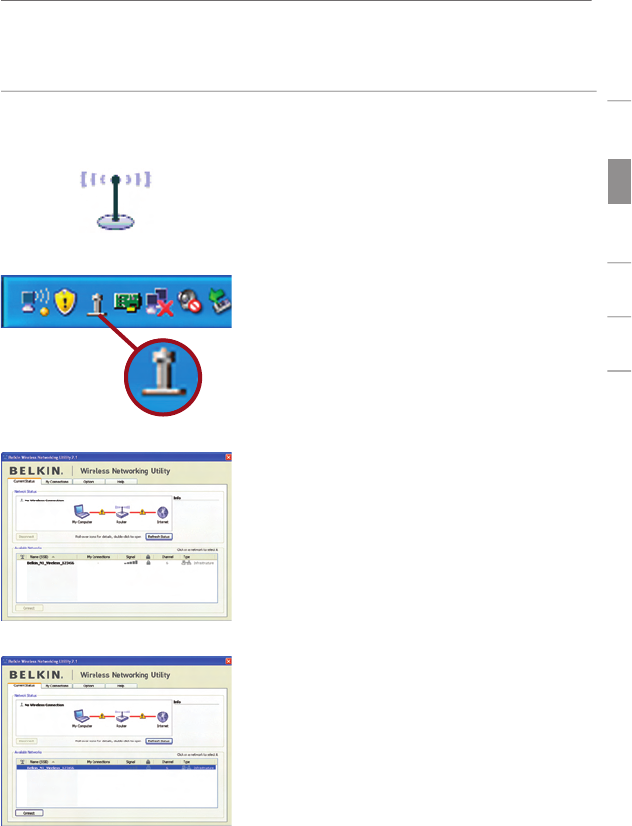
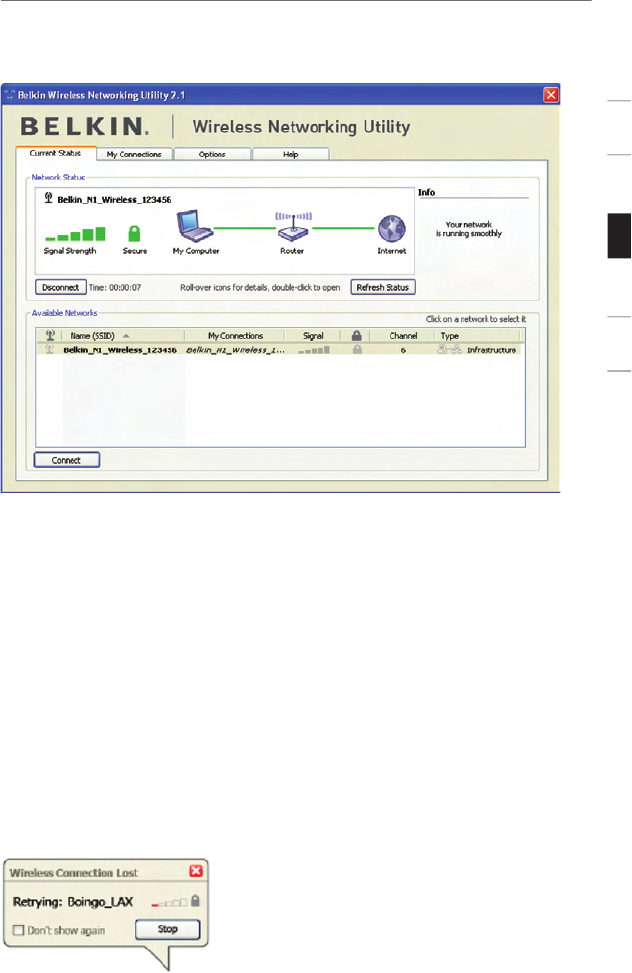
The WNU’s default screen is the “Current Status” tab. The
“Current Status” tab displays the current network status and
available networks.
Network Status
This window displays the connectivity status of the current network. It
even displays connectivity between the computer and router, and router
and Internet. In the event of a connectivity problem, this window can
be used to determine the problem’s source (e.g. computer, router, or
Internet/modem).
Available Networks
This window displays the available networks at the current location
as well as their SSID, Signal Strength, Security Type, Channel, and
Network Type.
Lost Wireless Connection
If the current wireless connection is lost, a window will pop up and the
WNU will attempt to reconnect.
Using the Belkin Wireless Networking Utility
18
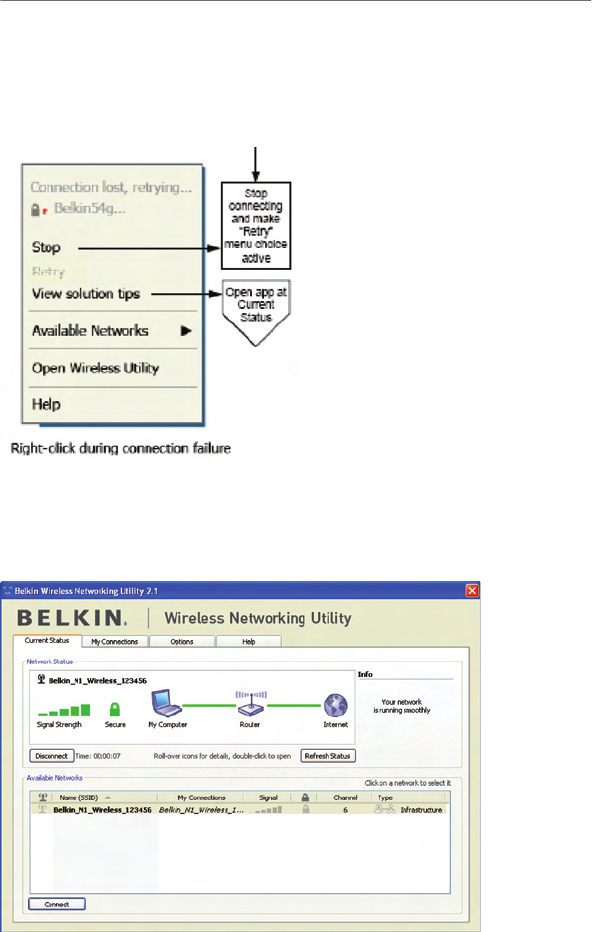
Connection Failure
Other options will appear during attempts to reconnect. To stop connecting,
click “Stop” and to reattempt connection, click “Retry”.
Network Status and Solution Tips
To further understand the current Network Status, click “Open Wireless Utility”.
The default screen will be the “Current Status” tab and the “Network Status”
section determines which connections are good and/or faulty.

Using the Belkin Wireless Networking Utility
section
19
1
2
3
4
5
6
The WNU also features a “Solution Tips” section that provides
troubleshooting guidelines.
Setting Wireless Network Profiles
The “My Connections” tab on the WNU allows you to add, edit, and
delete connection profiles. It also displays signal strength, security, and
network type.
Securing your Wi-Fi
®
Network
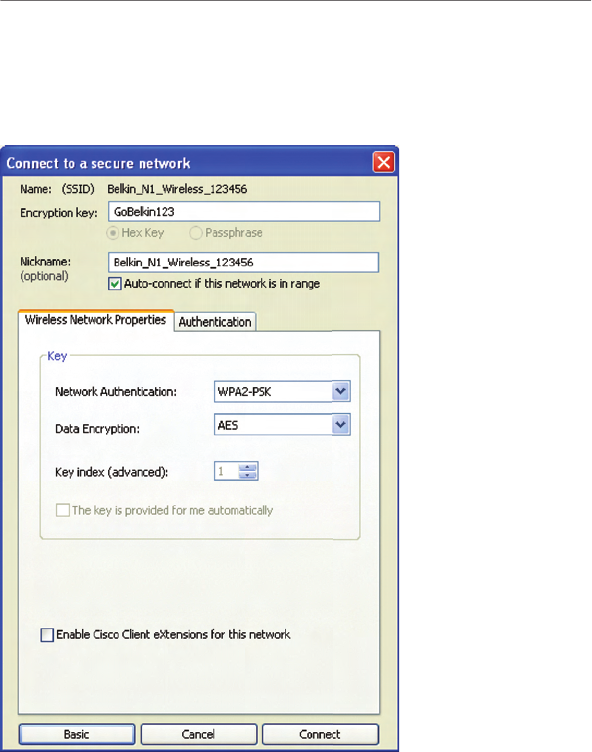
If you choose to connect to a secure network, determine the type of
security (WPA or WEP*) and use the appropriate field in the dialog box.
*Note: Types of security
Using the Belkin Wireless Networking Utility
20
Note:
When you select a network using encryption, you will first see
the simple security screen. Click the “Advanced” button to see other
security options (below).
Wired Equivalent Privacy (WEP)
is a less secure, but more
widely adopted wireless security protocol. Depending on the security
level (64- or 128-bit), the user will be asked to input a 10- or 26-
character hex key. A hex key is a combination of letters, a–f, and
numbers, 0–9.

Using the Belkin Wireless Networking Utility
section
21
1
2
3
4
5
6
Wireless Protected Access (WPA)
is the new standard in
the wireless security. However, not all wireless cards and adapters
support this technology. Please check your wireless adapter’s user
manual to check if it supports WPA. Instead of a hex key, WPA uses
only passphrases, which are much easier to remember.
The following section, intended for the home, home office, and small
office user, presents a few different ways to maximize the security of
your wireless network.
At the time of publication, four Encryption Methods are available:
Encryption Methods:
Name
64-Bit Wired
Equivalent
Privacy
128-Bit
Encryption
Wi-Fi Protected
Access
Wi-Fi
Protected
Access 2
Acronym
64-bit WEP
128-bit
WPA-TKIP/AES
WPA2-AES
Security
Good
Better
Best
Best
Features
Static keys
Static keys
Dynamic key
encryption
and mutual
authentication
Dynamic key
encryption
and mutual
authentication
Encryption
keys based
on RC4
algorithm
(typically
40-bit keys)
Added security
over 64-bit
WEP using a
key length of
104 bits, plus
24 additional
bits of system-
generated data
TKIP (Temporal
Key Integrity
Protocol) added
so that keys
are rotated and
encryption is
strengthened
AES
(Advanced
Encryption
Standard)
does not
cause any
throughput
loss
WEP
WEP
is a common protocol that adds security to all Wi-Fi-compliant
wireless products. WEP gives wireless networks the equivalent level
of privacy protection as a comparable wired network.
64-Bit WEP
64-bit WEP was first introduced with 64-bit encryption, which includes
a key length of 40 bits plus 24 additional bits of system-generated data
(64 bits total). Some hardware manufacturers refer to 64-bit as 40-bit
encryption. Shortly after the technology was introduced, researchers
found that 64-bit encryption was too easy to decode.

Using the Belkin Wireless Networking Utility
22
128-Bit Encryption
As a result of 64-bit WEP’s potential security weaknesses, a
more secure method of 128-bit encryption was developed.
128-bit encryption includes a key length of 104 bits plus 24
additional bits of system-generated data (128 bits total). Some
hardware manufacturers refer to 128-bit as 104-bit encryption.
Most of the new wireless equipment in the market today
supports both 64-bit WEP and 128-bit WEP encryption, but
you might have older equipment that only supports 64-bit WEP.
All Belkin wireless products will support both 64-bit WEP and
128-bit encryption.
Encryption Keys
After selecting either the 64-bit WEP or 128-bit encryption mode, it is
critical that you generate an encryption key. If the encryption key is
not consistent throughout the entire wireless network, your wireless
networking devices will be unable to communicate with one another.
You can enter your key by typing in the hex key. A hex (hexadecimal)
key is a combination of numbers and letters from A–F and 0–9. For
64-bit WEP, you need to enter 10 hex keys. For 128-bit WEP, you
need to enter 26 hex keys.
For instance:
AF
0F
4B
C3
D4
= 64-bit WEP key
C3
03
0F
AF
0F
4B
B2
C3
D4
4B
C3
D4
E7
= 128-bit WEP key
Write down the hex WEP key from your wireless router (or access
point) and enter it manually into the hex WEP key table in your Card’s
configuration screen.

Using the Belkin Wireless Networking Utility
section
23
1
2
3
4
5
6
WPA
WPA
is a new Wi-Fi standard that improves upon the security
features of WEP. To use WPA security, the drivers and software of
your wireless equipment must be upgraded to support it. These
updates will be found on your wireless vendor’s website. There are
three types of WPA security: WPA-PSK (no server),WPA (with radius
server), and WPA2.
WPA-PSK (no server)
uses what is known as a pre-shared key
as the network key. A network key is a password that is between
eight and 63 characters long. It can be a combination of letters,
numbers, or characters. Each client uses the same network key to
access the network. Typically, this is the mode that will be used in
a home environment.
WPA (with radius server)
works best in a business environment,
in which a radius server automatically distributes the network key
to clients.
WPA2
requires Advanced Encryption Standard (AES) for encryption of
data, which offers much greater security than WPA. WPA uses both
Temporal Key Integrity Protocol (TKIP) and AES for encryption.
Setting up your Belkin Wireless Router (or Access Point)
to use Security
To start using security, you need to first enable WEP or WPA for your
wireless router (or access point). For Belkin Wireless Routers (or
Access Points), these security features can be configured by using
the web-based interface. See your wireless router’s (or access point’s)
manual for directions on how to access the management interface.
IMPORTANT:
You must now set all wireless network cards/adapters
to match these settings.
Configuring your Card to use Security
At this point, you should already have your wireless router (or access point) set
to use WPA or WEP. In order for you to gain wireless connection, you will need
to set your N Wireless Notebook Card to use the same security settings.
Using the Belkin Wireless Networking Utility
24
Changing the Wireless Security Settings
Your Belkin N Wireless Notebook Card supports advanced security
technology, including Wi-Fi Protected Access
TM
2 (WPA2
TM
), Wired
Equivalent Privacy (WEP), and Wi-Fi Protected Setup
TM
(WPS),
which simplifies the setup of a wireless network. WPS uses familiar
methodologies, such as typed Personal Identification Number (PIN)
entry and push-button network-name configuration. This automatically
enables strong WPA/WPA2 data encryption and authentication.
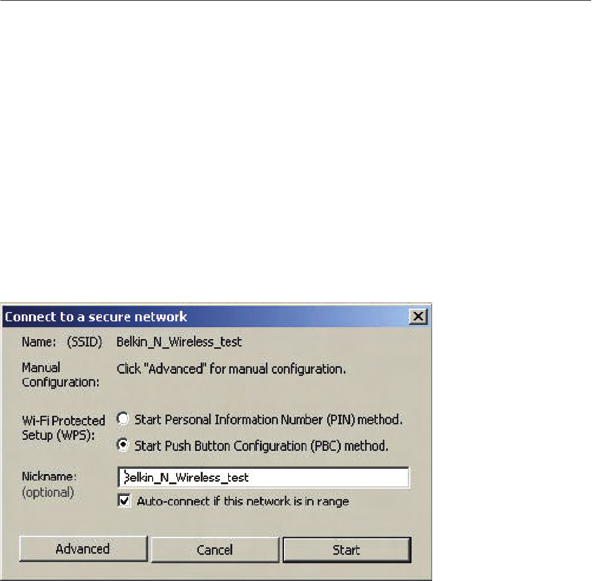
Using Wi
-Fi Protected Setup
When attempting to connect to a WPS-enabled network, the following
screen will appear:
1.
Personal Identification Number (PIN) Method: In this method, your
N Wireless Notebook Card generates a PIN to be entered into
your router.
2.
Push-Button Configuration (PBC) Method.
3.
Advanced Configuration Method: For manual connection
to a secured network.
Using the Belkin Wireless Networking Utility
section
25
1
2
3
4
5
6
WPS uses WPA2 (described below) for encryption. It does not provide
additional security. Instead, it standardizes the method for securing
your wireless network. On your client utility, WPS-enabled networks
are denoted with the key icon. You may use either the PBC method
or PIN method to allow a device access to your wireless network. The
two methods work as follows:
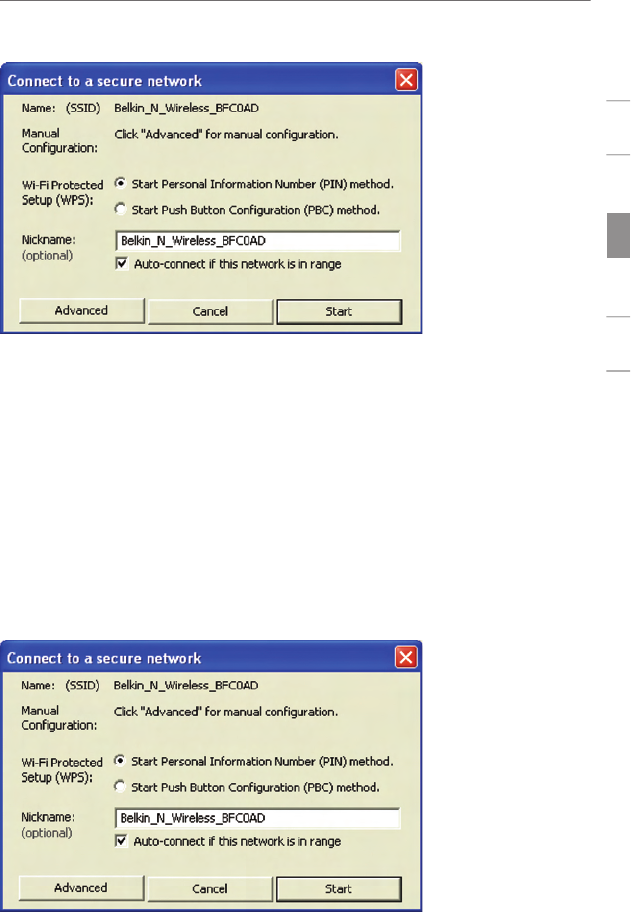
PBC: Push and hold the WPS button located on the back of your
router for three seconds. Then, initiate the WPS procedure on the
client utility within two minutes. Select the network name in the utility
and click “Connect”. Your client will automatically exchange the
security information and be added to your wireless network. The PBC
method can also be initiated from the client device.
You will see the following message if the procedure is initiated from
the router:
Using the Belkin Wireless Networking Utility
26
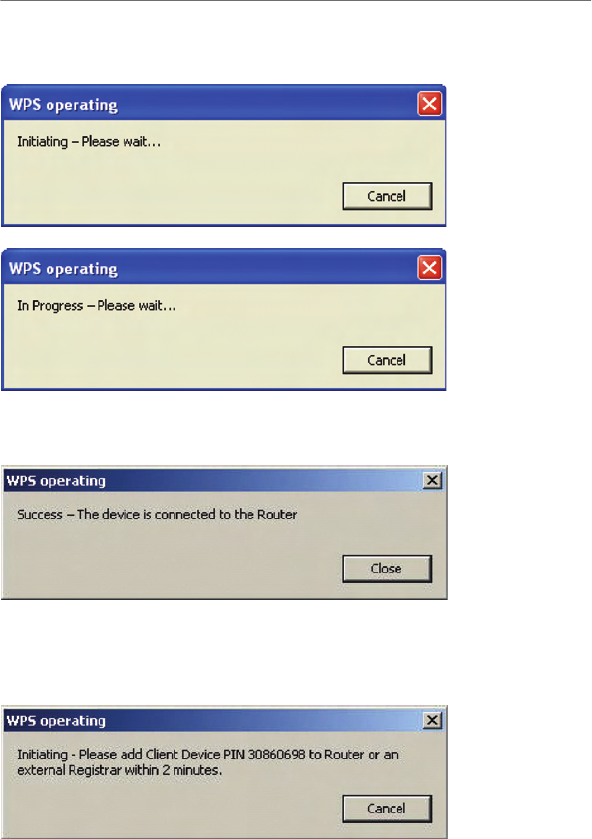
If the process is started from the client, you will see this message:
The client will be automatically enrolled into your wireless network
within two minutes.
PIN: Your notebook computer has an 8-digit PIN that is associated
with WPS. Select the WPS-enabled network and click “Connect” to
start the WPS process. Choose the PIN-method option and complete
the WPS procedure on your router’s setup utility.
Using the Belkin Wireless Networking Utility
section
27
1
2
3
4
5
6
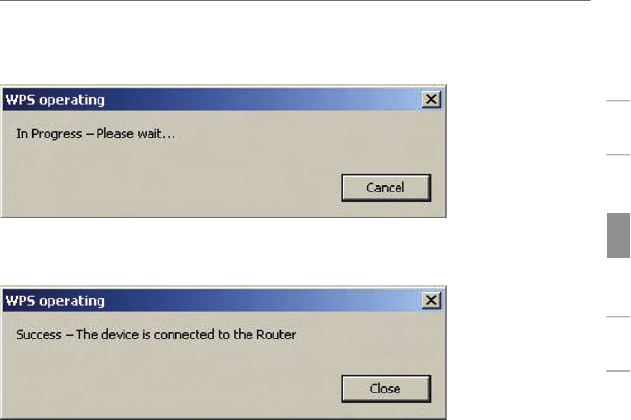
You will see the following message during the connection process:
The client will be automatically enrolled into your wireless network
within two minutes.