Belkin F8Z919 TuneStage® 2 for iPod® User Manual
Belkin International, Inc. TuneStage® 2 for iPod®
UserManual.wiki
>
Belkin
>
F8Z919 User Manual
User Manual
Navigation menu
Upload a User Manual
Namespaces
Wiki Guide
HTML
PDF
Info
Views
User Manual
Discussion / Help
Navigation
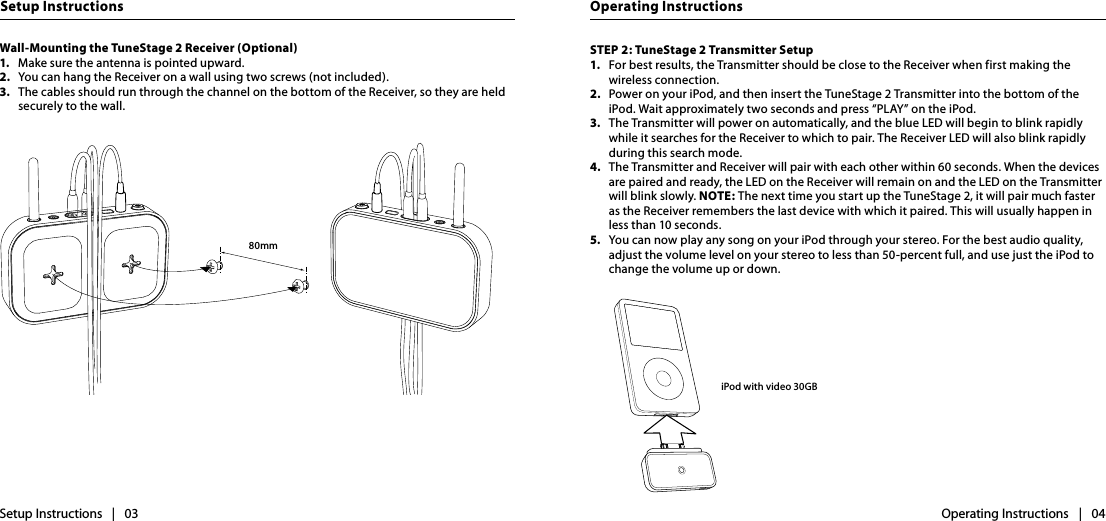
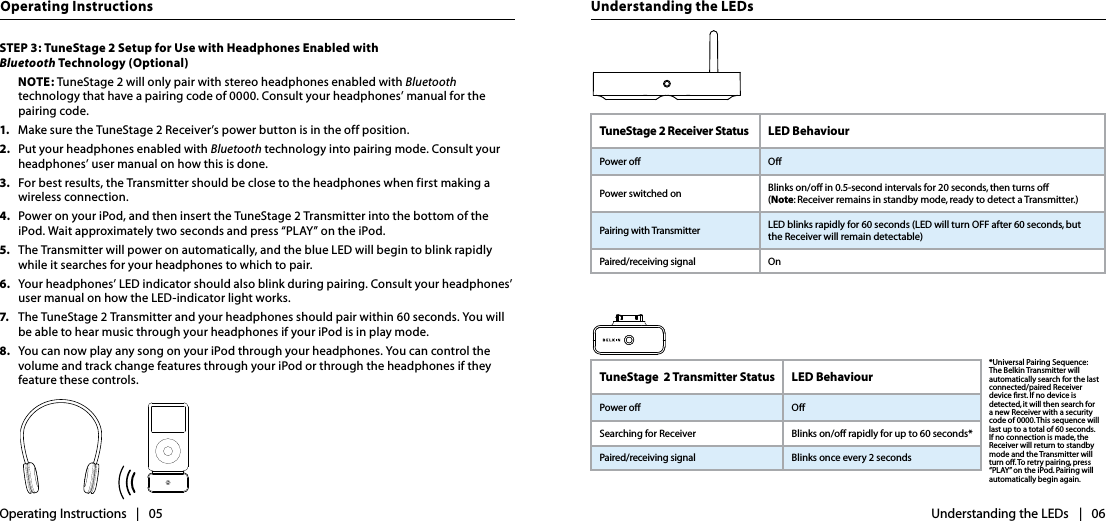
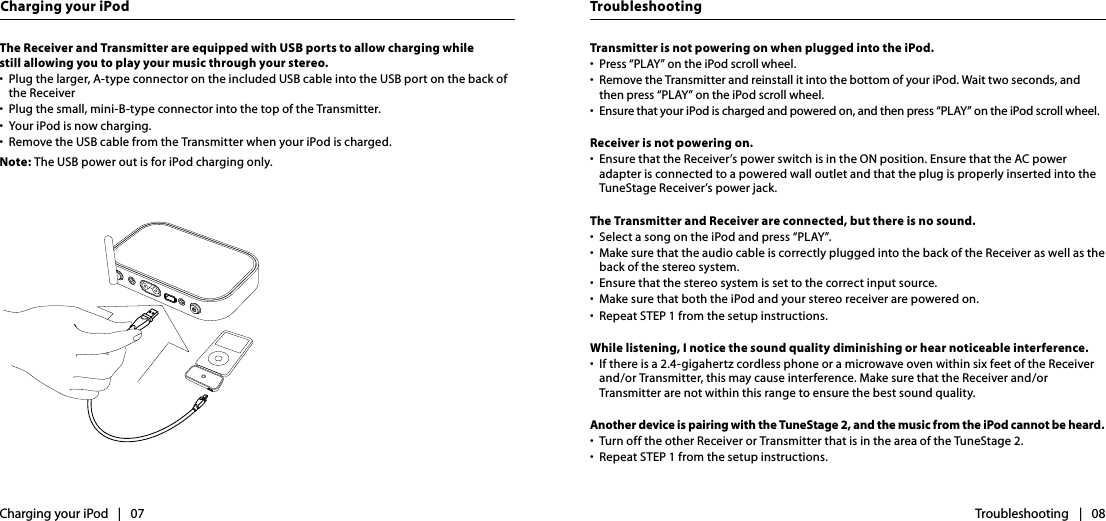
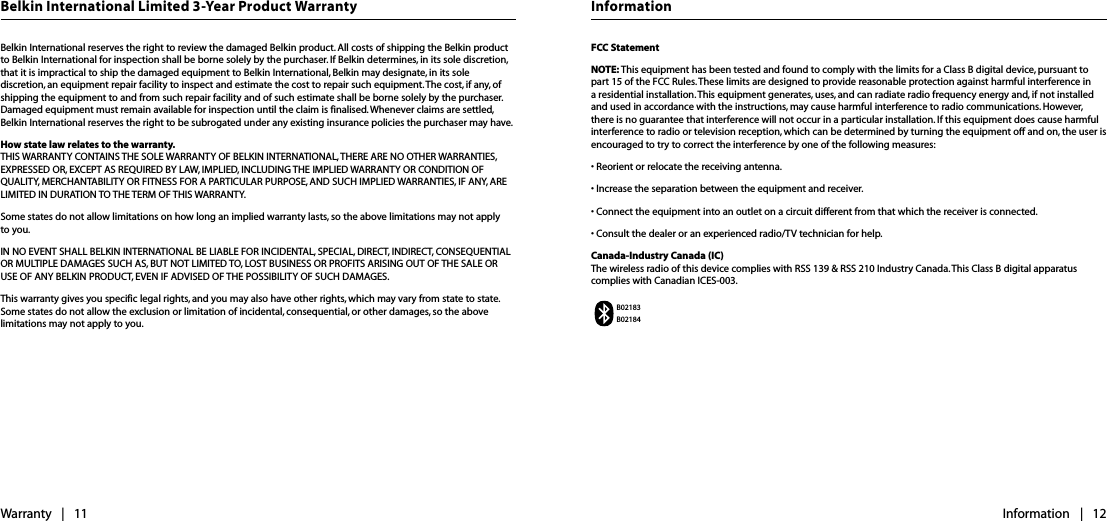
![Setup Instructions | 02Introduction | 01IntroductionTuneStage 2 provides a stylish, easy way to play your iPod tunes through your home stereo—without wires. Setup takes only minutes and requires no software or custom configuration. Just plug it in and enjoy your music.TuneStage 2 from Belkin delivers the pristine, CD-quality sound that iPod users demand. Featuring advanced Bluetooth 2.0 technology for enhanced audio quality, the TuneStage 2 provides improved rejection of interference, and lower power consumption compared to the Bluetooth 1.2 standard. TuneStage 2 transmits wirelessly from up to 10m away from your stereo, even through walls. Please review this User Manual carefully so that you can be sure to get the most from your TuneStage 2.The TuneStage 2 works with any iPod that has a dock connector on the bottomPackage IncludesSTEP 1: TuneStage 2 Receiver Setup1. Power off your stereo system.2. Plug the TuneStage 2 Receiver into one of your home-stereo, audio-source inputs using the supplied audio cable, usually the “aux” input is a good choice. Do not connect TuneStage 2 to your receiver’s “phono” input. 3. Plug the included power adapter into the TuneStage 2 Receiver and then plug the other end into an AC outlet.4. Press in the power button located at the back of the TuneStage 2 Receiver. 5. Power on your home stereo and select the audio-source input to which the TuneStage 2 Receiver is connected. Setup Instructions1.8m Dual RCA-to-3.5mm Stereo Cable12V/1.0A AC Power AdapterTuneStage 2 Bluetooth™ TransmitterTuneStage 2 Bluetooth Receiver2 RCA or 3.5mm Mini-Jack Stereo ConnectionsDC-Power-Adapter Connection ^EdY^EdYb^c^bV`^c\XdccZXi^dch XdccZXii]ZIjcZHiV\ZIgVchb^iiZgidi]Z^EdY jcYZghiVcY^c\i]ZA:9h"dg"e^X`dcZ/IjcZHiV\ZbVcjVa^aajhigVi^dch7Za`^c>9<%)$%*$%*dYh0.9m USB A-to-Mini-B CableiPod with video 30GB](https://usermanual.wiki/Belkin/F8Z919/User-Guide-756209-Page-2.png)