Belkin F9K1102V2 N600 DB Wireless N + Router User Manual
Belkin International, Inc. N600 DB Wireless N + Router
Belkin >
User manual

WIRELESS DUAL-BAND N+ ROUTER
N600 DB
USER MANUAL
8820-00777 Rev. CB00
F9K1102V21
Ok mk 1/12/11
TABLE OF CONTENTS
Getting Started
What’s in the Box
Initial Setup
Advanced Tools & Settings
The Belkin Router Manager
Adding Computers to Your Network
Manually Set Up Your Internet Connection
Adding USB Devices
Bundled Software
Getting to Know Your Router
Front Panel
Back Panel
Technical Details
Technical Features
System Requirements
Using Your Router
Enabling Auto Update on Your Router
Updating Your Router via Your System Tray
Updating the Router’s Firmware via the Web Interface
Resetting the Router
Restoring your Router to Factory Defaults
Restoring the Router to Default Settings Using the Web Interface
Troubleshooting, Support, and Warranty
Troubleshooting
Technical Support
Belkin International, Inc., Limited 2-Year Product Warranty
Regulatory Information
FCC Statement
Getting Started
What’s in the Box
N600DBWirelessDual‐BandN+Router
Ethernetcable(attachedtorouter)
Powersupply(attachedtorouter)
Networkinformationcard(attachedtorouter)
BelkinSetupCDwithUserManual
Quick Setup Guide
Initial Setup
WheretoPlaceYourRouter
Forthebestresults,placetheRouternexttoyourmodeminan
openlocationawayfromlargemetalobjectsandmagnetssuchas
thosefoundinspeakers.RaisingtheRouterabovefloorlevelcan
improvethestrengthofyourwirelesssignal.
HowtoSetItUp
Connect Your N600 DB Router
1. Turn off your modem by
disconnecting its power supply.
2. Connect your Router to your
modem using the cable (already attached).

[You can get the actual artwork from the N900DB QIG “QIG_F9K1104_8830-06656_N900.pdf”]
3. Power up your modem by
plugging in its power supply.
4. Power up your Router by
plugging in its power supply.
[You can get the actual artwork from the N900DB QIG “QIG_F9K1104_8830-06656_N900.pdf”]
Run the Installer Software
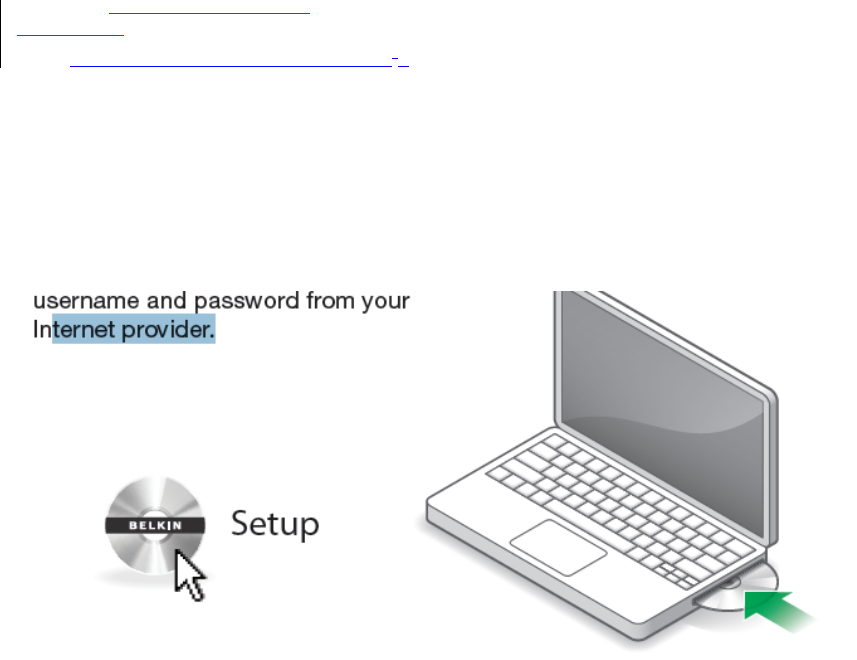
Insert the included CD into your
computer. Find the setup program
and open it. It should run automatically;
if not, find the setup program and open it. fFollow the prompts.
The setup software will configure your
Internet connection and let you know
when things are working.
If you have DSL, you may need a
username and password from your Internet provider.
[Image of laptop and CD]
[You can get the actual artwork from the N900DB QIG “QIG_F9K1104_8830-06656_N900.pdf”]
[SCREENSHOTOFSETUPMENUsetupmenu.png]
1) ClicktheSetupiconontheCDmenu.
[Diagramofbottomoftheroutershowingservice
card–canbeobtainedfrom“TestedQIG201107
14.pdf”provided]
2) Afterabriefinstallation,thesetupsoftwarewillaskyoufor
thenetworknameandpasswordfromthenetwork
informationcardthatisstoredinthefootofyournewBelkin
Router.StorethecardunderthebaseofyourRouterfor
futurereference.
[SCREENSHOTOFSUCCESSsetupsuccess.png]
3) Aprogressscreenwillappearwhileadditionalsoftwareis
installed.Thismaytakeafewminutestocomplete.Once
finished,a“Success”messagewillappearindicatingthatyou
areconnectedtotheInternetviayournewBelkinRouter.
Duringsetupyoumaybeaskedforadditionalinformation.
YoumayneedtoenterausernameandpasswordprovidedbyyourISP.
Thisusernameandpasswordislikelytobefoundonmaterialsthatcame
fromyourISPwhenyousignedupforservice.Ifnecessary,youmayneed
tocontactyourISPtoretrieveyourusernameandpassword.
IfyouhaveastaticIPaddress,youmayneedtoenteradditional
informationalsoprovidedbyyourISP.
Ifyourcomputerdoesn’thaveawirelessadapter,orthesetupsoftwareis
unabletocontrolit,youmaybeaskedtoconnectyourcomputertothe
Routerwithanetworkcable.
Advanced Tools & Settings
[SCREENSHOTOFADVANCEDMENUsetupadvanced2.png]
Aftertheinitialsetupiscomplete,youhavetheoptiontochangesettingslike
yournetworkname,securitytype,andpassword.Tomakethesechangesand
others,clickontheAdvancedToolsiconattheCDSetupmenuandselectone
ofthefollowingsettingsthatyouwouldliketochange:
NetworkName&Security
Personalizeyournetworkname(SSID),password,andstrengthof
wirelesssecurity.
InternetServiceProvider&LoginSettings
HaveyoumovedorchangedInternetServiceProviders?Ifyou’dliketo
changethesesettingswithoutrunningthroughthesetupprocessagain,
thisistheplace.
The Belkin Router Manager
[N600SCREENSHOTOFTRAYAPPMENU(TBD)]
TheBelkinRouterManagerappearsinyoursystemtray(Windows)ormenubar
(Mac).ItsiconindicatesthecurrentstatusofyourRouterandalsoallowsyouto
accessyourRouter’ssettingstomakechanges.Italsoprovidesquickaccessto
softwarethatcamebundledwithyourRouter.
ToaccesstheRoutersettings,clickontheiconandselectfromthemenuthat
appears.
ThestatusofyourRouterisshownbytheBelkinRouterManagericon,which
closelymimicsthelightonthefrontoftheRouter.
Blue: You are connected to your Belkin Router and it is connected to the Internet.
Amber: You are connected to your Belkin Router, but it is not connected to the
Internet.
Adding Computers to Your Network
Wirelessdevicessuchascomputers,networkprinters,andgamingsystemscan
connecttoyourRouterwithafewsimplesteps.
UsingtheCD
1) PuttheSetupCDintoyourcomputer.IftheCDdoesn’topen
automatically,browsetoyourCDdriveandopentheBelkin
SetupCDicon.
2) ClicktheSetupiconontheCDmenu.
3) Afterabriefinstallation,thesetupsoftwarewillaskyoufor
thenetworknameandpasswordfromthenetwork
informationcardthatcamewithyourRouter.Thiscardis
mostlikelynowlocatedunderneaththefootofyourRouter
intheprovidedcardslot.
4) Aprogressscreenwillappearwhileadditionalsoftwareis
installed.Thismaytakeafewminutestocomplete.Once
finished,a“Success”messagewillappearindicatingthatyou
areconnectedtotheInternetviayournewBelkinRouter.
Note:ThesetupsoftwarerunsonlyonWindowsandMacOSX
systems.
Manual Setup
If you know what sort of Internet service you have, you
might try a manual setup. For this you will need a Wi-Fi-
enabled smartphone, tablet, or computer.
Connect to Your Router
Retrieve the network ID card from the foot of your new Belkin
Router.
[Diagram of bottom of the router showing service card – can be
obtained from “Tested QIG 2011 07 14.pdf” provided]
Can’t find the card? The default network name and password are also printed on the foot of
the Router.
Use your computer, tablet, or smartphone to connect to the
wireless network shown on the network ID card.
[Diagram of connecting to SSID screenshot – needs creating, take
direction from “Tested QIG 2011 07 14.pdf” provided]
When requested, please enter the password (security key) provided
on the card.
Take a moment to look at the light on the front of the Router. If it
is solid blue, your Router was able to connect to the Internet
automatically.
[Image of front of the router with blue LED (needs creating)]

If not, please proceed to “Manually Set Up Your Internet
Connection” on page XX.
UsingtheWPSButton
1) StartWPSPushButtonConnection(WPSPBC)onyour
computerorotherWi‐Fidevicethatyouwouldliketo
connectwirelesslytoyourRouter.Oftentherewillbea
buttonforthispurposeinsoftwarethatcamewiththedevice,
oraphysical“WPS,”“PBC,”or“Security”buttononthedevice
itself.
2) Withintwominutes,presstheWPSbuttononyourRouter
andholdfortwoseconds.
TheWPSlight(smalllightaboveWPSbutton)willblinkblue
whileitlistensforyourWi‐Fidevice.Onceaconnectionis
established,thelightwillturnblueandthengoout.Ifa
connectionisnotestablished,thelightwillblinkamber.You
mayrepeattheprocesstotryagain.
YoucanrepeatthisprocessforeachWPS‐enableddeviceyou’d
liketoaddtoyournetwork.
Manually Set Up Your Internet
Connection
Use a browser to visit http://router/. The router homepage
should appear.
[Image of browser showing the router homepage – see “Tested
QIG 2011 07 14.pdf” provided for guideline]

You can also try visiting http://192.168.2.1/.
The status of your Internet connection is shown in the
upper right corner of the router homepage. If after a few
moments it says “Connected,” you’re done! You can surf
the Internet.
[Image of browser showing “connected” homepage – see “Tested QIG 2011 07
14.pdf” provided for guideline]
If not, select “Connection Type” from the menu on the left.
[Zoomed in image of the “Connection Type” option in the
homepage – see “Tested QIG 2011 07 14.pdf” provided for
guideline]
If a password screen appears, press “Submit.”
[Image of the login screen showing the submit button – see
“Tested QIG 2011 07 14.pdf” provided for guideline]
Dynamic Connection
Cable and fiber customers generally require a dynamic
connection. Some DSL customers require a PPPoE
connection. Let’s try dynamic first. Select “Dynamic” from the
menu that appears and press “Next.”
[Image of the connection type screen with dynamic
selected – see “Tested QIG 2011 07 14.pdf” provided for
guideline]
A service name is generally not required. Hit “Apply Changes.”
The Router will restart.
[Image of the service name page – see “Tested QIG 2011 07
14.pdf” provided for guideline]
If after a few minutes your Internet Status says “Connected,”
you’re done! You can surf the Internet.
[Image of browser showing “connected” homepage – see “Tested QIG 2011 07
14.pdf” provided for guideline]
If these steps do not work, try restarting your modem and
repeating the process.
If not, we’ll try a PPPoE connection next.
PPPoE Connection
Some DSL customers require a PPPoE connection. Select
PPPoE this time and press “Next.”
[Image of the connection type screen with PPPoE
selected – see “Tested QIG 2011 07 14.pdf” provided for
guideline]
Enter the username and password supplied by your Internet
provider and click “Apply Changes.” Ignore the other fields. The
Router will restart.
[Image of the PPPoE page – see “Tested QIG 2011 07 14.pdf”
provided for guideline]

If after a few minutes your Internet Status says “Connected,”
you’re done! You can surf the Internet.
[Image of browser showing “connected” homepage – see “Tested QIG 2011 07
14.pdf” provided for guideline]
If these steps do not work, try restarting your modem and
repeating the process.
[Be sure to use the correct icons, see the QIG F9K1104_8830-06656_N900.pdf for an
idea]
Connect Your Wireless Devices
iOS
(iPhone, iPad, and iPod touch)
1. Open the Settings app and select the Wi-Fi menu item.
2. Select your wireless network from the list that appears there. If
asked to do so, enter the network password.
Mac OS® X
Your Mac® provides a menu of available wireless networks at the right
end of the menu bar.
1. Click on the icon showing wireless waves.
2. Select your wireless network from the list that appears there. If
asked to do so, enter the network password.
Android
(phones and tablets)
1. Open the Settings app and select Wireless and Network.
2. From there, select Wi-Fi to see the list of available networks.
3. Select your wireless network from the list. If asked to do so, enter
your network password
Windows® 7
Your computer provides a menu of available wireless networks at the
right end of the task bar.
1. RightLeft-click on the icon that looks like signal strength bars.
2. Select your wireless network from the list. If asked, enter your
network password (network key).
Windows Vista® and Windows XP
Your device provides a menu of available wireless networks at the
right end of the task bar.
1. Right-click on the icon that shows a computer with wireless
waves (XP) or two computers (Windows Vista).
2. Choose “View Available Wireless Networks (XP)” or “Connect to a
network (Vista)” from the menu.
3. Select your wireless network from the list. If asked, enter your
network password (network key).
Adding USB Devices
[USBINVITATIONDIAGRAM(TBD)]
AddingaDrive
YoucanshareaUSBharddriveorflashdrivetoyournetworkvia
yourRouter’sUSBport.Onceconnected,youcansharefilesand
musicwithothercomputersanddeviceswithinyournetwork.
PlugyourUSBharddriveintotheUSBportonthebackofyour
Router.WhenthelightabovetheUSBportislit,yourdriveis
availabletocomputersonyournetwork.
Youcanmanuallycheckthestatusofyourshareddriveby
visitingtheUSBPrintandStorageManager,foundunderthe
BelkinRouterManagericondisplayedinyoursystemtray
(Windows)ormenubar(Mac).Ifyouhavedifficultysharinga
driveonyournetwork,pleaseseethe“Troubleshooting”
sectionofthismanual.
A few USB hard disks require more power than the Router’s USB port provides. In these
cases, you may notice the drive failing to come on or remaining on for a short time. If
your disk has an optional power supply, please use it while the disk is attached to your
Router.
AddingaPrinter
YoucanaddaprintertoyournetworkviayourRouter’sUSBport.
Onceconnected,youcanprintfromvariouscomputersand
wirelessdeviceswithinyournetwork.
Plugyourprinter’sUSBcableintotheUSBportlocatedontheback
ofyourRouter.WhenthelightabovetheUSBportislit,your
printerisavailabletocomputersonyournetwork.
Youcanmanuallycheckthestatusofyourprinterbyvisitingthe
USBPrintandStorageManager,foundundertheBelkinRouter
Managericondisplayedinyoursystemtray(Windows)ormenu
bar(Mac).Ifyouhavedifficultysharingaprinteronyournetwork,
pleaseseethe“Troubleshooting”sectionofthismanual.
Note:Eachcomputerthatwillusetheprintermusthaveboththe
Belkinsoftwareandtheprinter’sdriverinstalled.Iftheprint
driverisnotinstalled,youwillbeaskedtoinstallitbytheBelkin
USBPrintandStorageManager.
AddingOtherUSBDevices
OtherUSBdevicesmayalsobesharedviayourRouter.Plugyour
deviceintotheUSBportlocatedonthebackofyourRouter.When
thelightabovetheUSBportislit,yourdeviceisavailableto
computersonyournetwork.
ComputersrunningtheBelkinUSBPrintandStorageManagerwill
beabletomakeuseoftheshareddevicebyvisitingtheUSBPrint
andStorageManager,foundundertheBelkinRouterManagericon
displayedinyoursystemtray(Windows)ormenubar(Mac).
Bundled Software
USBPrintandStorageManager
TheUSBPrintandStorageManagerhelpstomanageandmonitor
theuseofyourUSBprinters,scanners,harddrives,andother

devicesthatareconnectedtoyourRouter’sUSBportandshared
acrossyournetwork.USBPrintandStorageManagerisfoundin
theBelkinRouterManagericondisplayedinyoursystemtray
(Windows)ormenubar(Mac).
WhenyouhaveoneormoreUSBdevicesattachedtoyourRouter,
themainactionsforthosedevicesareavailabledirectlyfromthe
BelkinRouterMonitormenu.
MemorySafe
MemorySafeallowsyoutosetuparoutinebackupofyourfilestoa
harddriveorflashdriveattachedtoyourRouter.MemorySafeis
foundintheBelkinRouterManagericondisplayedinyoursystem
tray(Windows)ormenubar(Mac).
Additional Capabilities
GuestAccess
YoucanallowgueststouseyourInternetconnectionwithout
joiningyourpersonalnetwork.Thenetworknameandpassword
fortheguestnetworkislocatedonthenetworkinformationcard
foundunderthefootofyourRouter.
Apersonusingyourguestnetworkwillbeabletojoinwithouta
password,butwillbeshownaloginpagewhentheyattempttosurf
theWeb.Theywillneedtoentertheguestpasswordintothispage
tocontinue.
VideoMover
Video Mover sends media from a USB drive attached to your Router to any UPnP
(Universal Plug-and-Play) or DLNA-compatible device on your network. These devices
include certain gaming systems, televisions, Blu-ray players, and cell phones.
Getting to Know Your Router
Front Panel
[DIAGRAMfront.ai]
A)RouterStatusLight
YourRouter’sstatusisshownbythelightonthefront.
Off:TheRouterisnotpluggedintoapowersource.
BlinkingBlue:TheRouterisstartingup.
SolidBlue:TheRouterisconnectedtotheInternet.
BlinkingAmber:TheRoutercan’tdetectthemodem.Eitherthemodemis
off,isnotpluggedintotheRouter,orisunresponsive.
B)Wi‐FiProtectedSetup(WPS)LightandButton
TheWPSbuttononthefrontofyourRoutercanbeusedtohelp
establishasecureconnectionbetweenyourRouterandotherWPS‐
enabledWi‐Fidevicessuchascomputers.TousetheWPSfeature
onyourRouter,see“GettingStarted>AddingComputerstoYour
Network>UsingtheWPSButton”.
ThesmalllightneartheWPSbuttonshowswhatishappening
whileyouareusingWPStoestablishaconnection.
Off:Idle
BlinkingBlue:TheRouterislisteningforaWPS‐enabledcomputeror
otherdevice.
SolidBlue:TheRouterhasmadeasecureconnectionwiththecomputeror
otherdevice.
Amber:Aconnectionwasnotcreated.
Back Panel
[RDIAGRAMFORSHAREANDPLAYr_shareplay_back.ai]
A)Modem(WAN)Connector
ConnectyourmodemtothisportusinganEthernetcable.
B)Wired(LAN)Connectors
Connectcomputersandotherwirednetworkdevicestotheseports
usingEthernetcables.
C)USBPort
USBprinters,disks,andotherUSBdevicespluggedintothisport
willbesharedonyournetwork.EachUSBporthasalightthat
indicatesitsstatus.
Off:NoUSBdeviceisconnectedortheattachedUSBdeviceisnotinuse.
Blinking:Pleasewaittounplugthedeviceuntilthelightturnsoff.
On:TheUSBdeviceisconnectedandbeingsharedonyournetwork.
D)ResetButton
ThisbuttonisusedtorestartyourRouterinrarecaseswhenit
functionsincorrectly.ResettingtheRouterwillpreserveyour
settings.Thisbuttonmayalsobeusedtorestorethefactorydefault
settings.PleaseseetheTroubleshootingsectionformore
information.
E)PowerConnector
Connecttheincludedpowersupplytothisjack.
Technical Details
Technical Features
Integrated 802.11n Wireless Access Point
Utilizing Dual-Band Network technology, your Router creates two
separate networks (one at 2.4GHz band and the other at 5GHz band),
allowing increased bandwidth to all your connected wireless devices and
computers.

NAT IP Address Sharing
To save you the cost of adding IP addresses per computer in your house,
your Belkin Router uses Network Address Translation (NAT) technology,
allowing you to share a single IP address across your network.
SPI Firewall
Your Router is equipped with a firewall that will protect your network
from a wide array of common attacks and viruses.
Universal Plug-and-Play (UPnP) Compatibility
The UPnP (Universal Plug-and-Play) feature in your Router offers
seamless operation of voice and video messaging, games, and other
applications that are UPnP-compliant.
Web-Based Advanced User Interface
You can easily make changes to your Router’s advanced settings through
your web browser. These changes can be made from any computer on your
network.
Belkin Router Monitor
The Belkin Router Monitor application helps you to monitor your
Router’s status and change network settings.
Integrated 4-Port 10/100 Switch
Your Router has a built-in, 4-port network switch to allow your wired
computers to share: printers, data, MP3 files, digital photos, and much
more.
USB Port
The USB port lets you plug in printers, hard drives, and other USB
devices to share across your network.
System Requirements
Router
Broadband Internet connection such as a cable or DSL modem with RJ45
(Ethernet) connection
At least one computer with an installed network interface adapter
TCP/IP networking protocol installed on each computer
RJ45 Ethernet networking cable
Internet browser
Setup Software
A computer running Windows® XP SP3 or higher, Windows Vista®, or
Windows 7; or Mac OS® X v10.5 or above
Minimum 1GHz processor and 512MB RAM
600MB of free hard-drive space for installation
Memory Safe and USB Print and Storage Manager
Windows XP SP3 or higher, Windows Vista, or Windows 7; or Mac OS X
v10.5 or above only
Minimum 1GHz processor and 512MB RAM
50MB of free hard-drive space for installation
Using Your Router
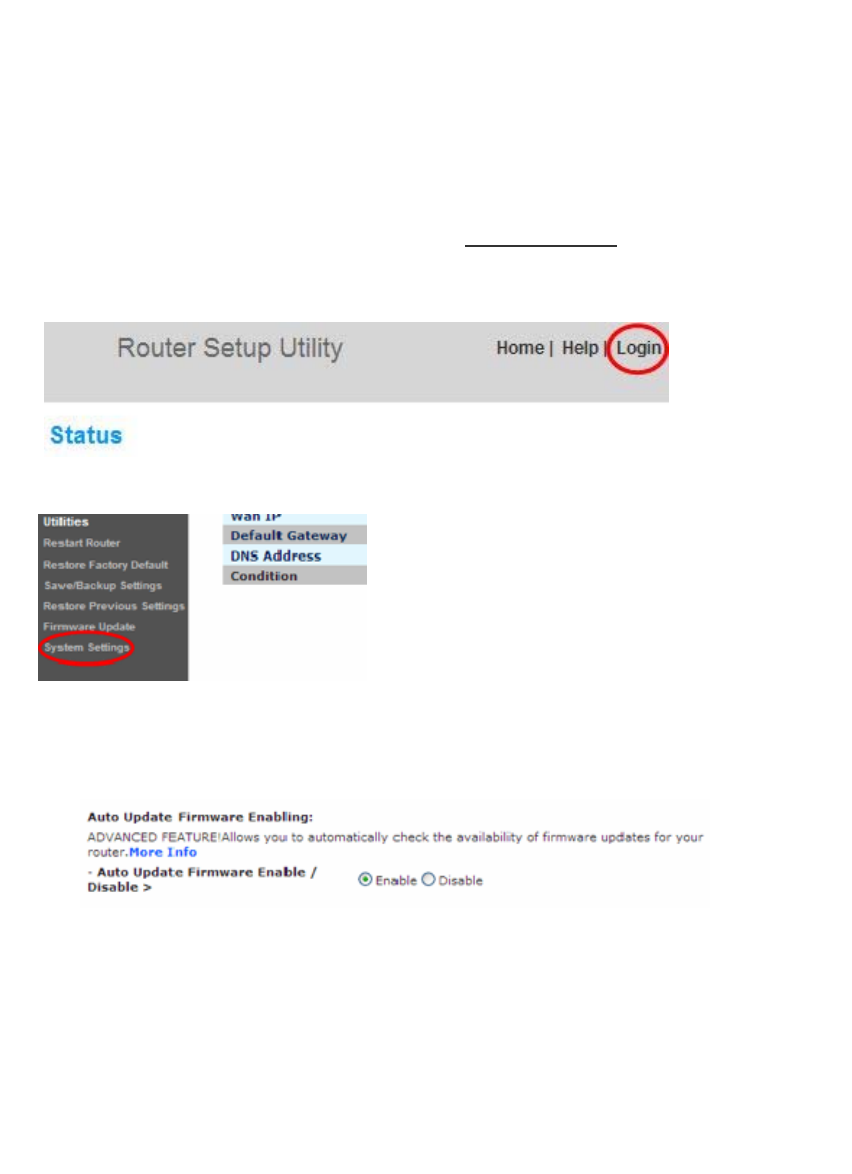
Enabling Auto Update on Your Belkin Router
The Router has the capability to automatically check for a newer version of firmware and alert
you when it’s available. You can choose to download the new version or ignore it. By default
this feature is disabled. If you want to enable it, select “Enable” and click “Apply Changes”.
Note: We recommend you use a computer that has a wired connection to the Router.
Setup steps:
1. Open a web browser on the computer.
2. In the address bar of the web browser, type “http://192.168.2.1”.
3. Click “Login” in the upper right-hand corner of the page. The Router does not ship with a
password, so just click “Submit”.
4. Click on “System Settings” in the left-hand column under the “Utilities” heading.
5. Toward the lower-half side of the screen you will find “Auto Update Firmware Enabling”.
6. Select “Enable” by clicking the radio button and then click “Apply Changes” at the bottom of
the screen.
Updating Your Router via Your System Tray (Windows) or Menu Bar (Mac)
Once you have completed the setup process, you will need to update the new software for
your Router. This can be done easily via your computer’s system tray or menu bar.
Setup steps:
1. Click on the blue Belkin Router Manager icon (right-click for Windows) in your system
tray (Windows) or menu bar (Mac).
2. Select “Check for Updates” or “Update Available” from the menu.
3. You should now see the Belkin Updater window.
4. Click on the “Install Update” icon.
Updating the Router’s Firmware via the Web Interface
The following steps show you how to update your Router’s firmware using its web interface.
You do not need to be connected to the Internet as this interface is built into the Router
itself.
Setup steps:
1. Locate and download the firmware file from the Belkin support site. (Type your part
number into the search box in the top right corner and look for “Firmware” in the title.)
2. Save the file to a location on your computer where you can get to it easily, such as your
desktop.
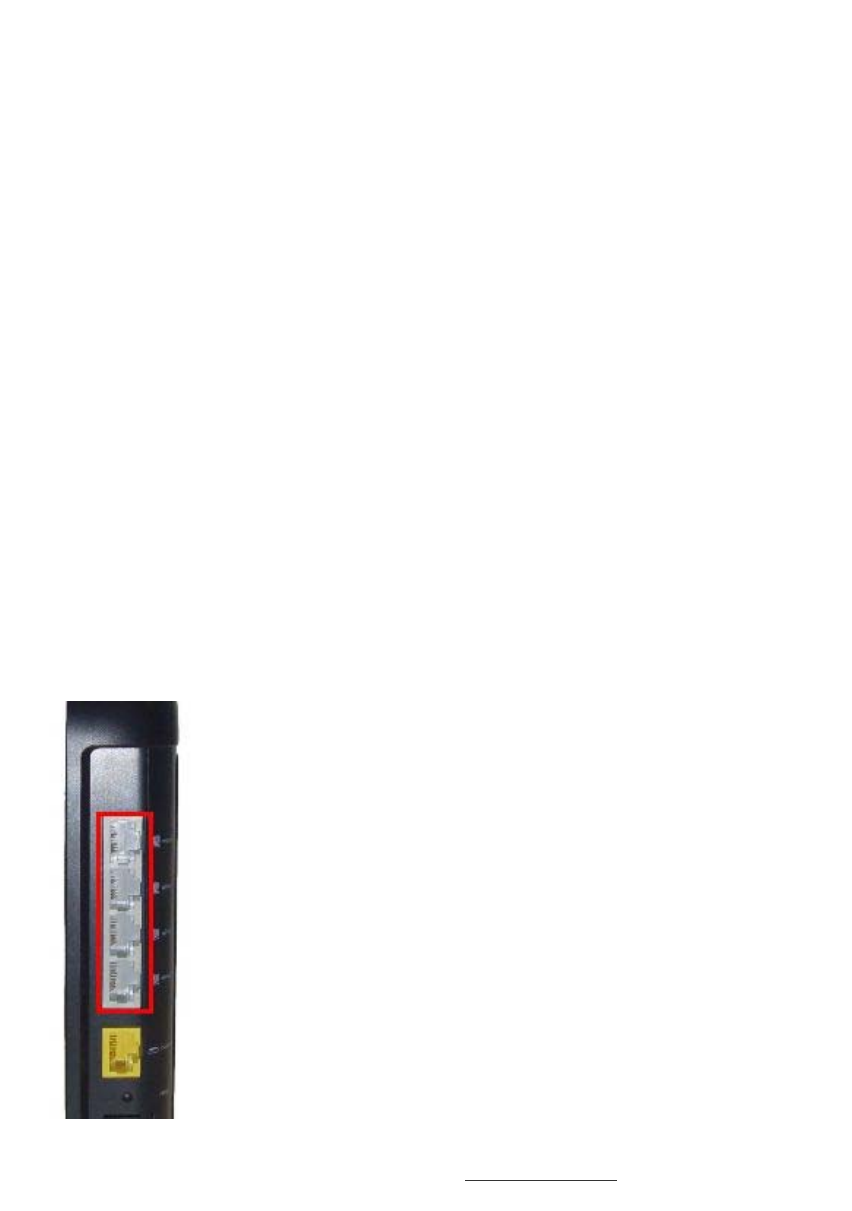
3. Connect the computer to one of the four LAN ports on the Router.
4. Open a web browser on the computer.
5. In the address bar of the web browser, type “http://192.168.2.1” and press “Enter” on your
keyboard.
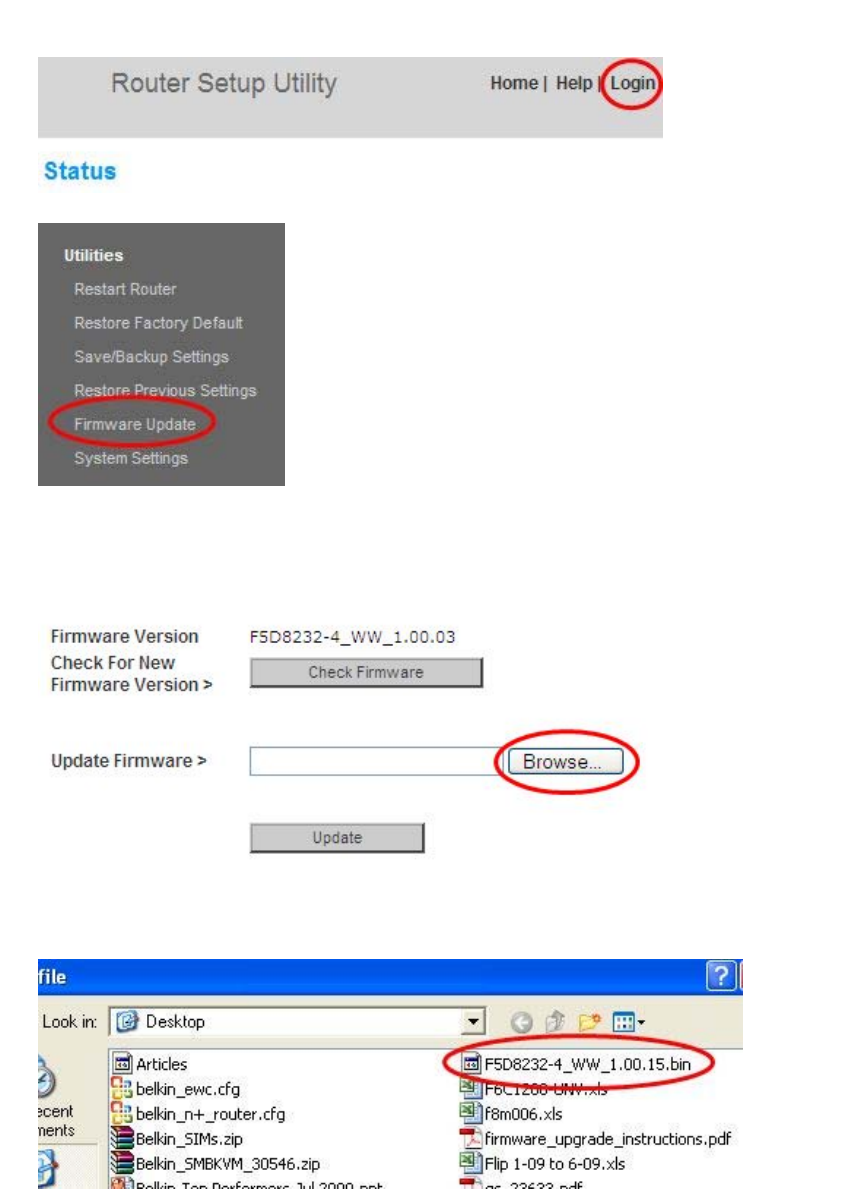
6. Click “Login” in the upper right-hand corner of the page. The Router does not ship with a
password, so just click “Submit”.
7. Click on “Firmware Update” toward the bottom of the left-hand menu.
8. Click the “Browse” button toward the middle of the screen to search for the file you saved
previously.
Note: The firmware version in the images below is depicted as an example. Your file name
will vary depending on your model and version.
9. Select the firmware file by left-clicking on it and then click the “Open” button in the lower-
right corner of the window. This will take you back into the Router’s interface.
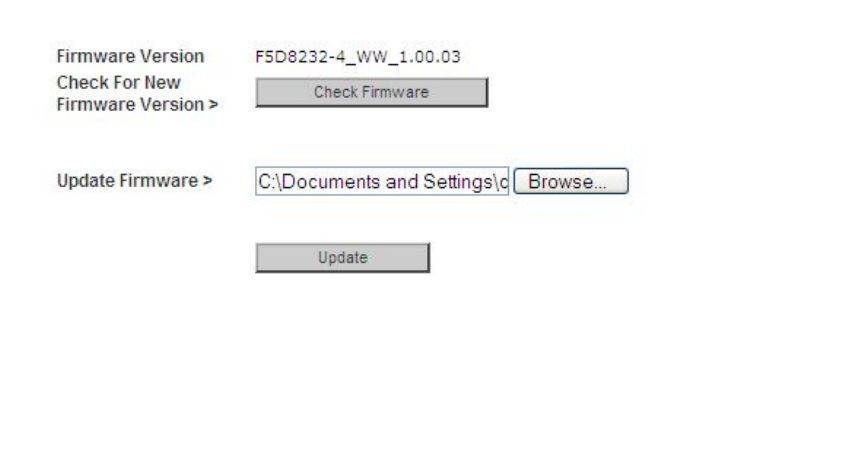
10. Click the “Update” button.
11. A prompt asking, “Are you sure you want to continue with upgrading?” will appear. Click
“OK”.
12. A second prompt will open telling you the Router will not respond during the upgrade and
warning you not to remove the power supply from the Router. Click “OK” once more.
Congratulations. The firmware has been updated successfully.
Resetting the Router
Reset Button – Red
The “Reset” button is used in rare cases when the Router may function improperly. Resetting the
Router will restore the Router’s normal operation while maintaining the programmed settings. You
can also restore the factory default settings by using the “Reset” button. Use the restore option in
instances where you may have forgotten your custom password.
Resetting the Router
Push and release the “Reset” button. The lights on the Router will momentarily flash. The
“Router” light will begin to blink. When the “Router” light becomes solid again, the reset is
complete.
Restoring Your Router to Factory Defaults
Press and hold the “Reset” button for at least 5 seconds, and then release it. The lights on the
Router will momentarily flash. The “Router” light will begin to blink. When the “Router” light
becomes solid again, the restore is complete.
Restoring the Router to Default Settings Using the Web Interface
Symptoms
You need to restore the factory defaults using the web interface. This may be because the
Router is not performing as expected or you wish to remove all previously configured
settings.
Setup steps:
1. Open a web browser on the computer.
2. In the address bar of the web browser, type “http://192.168.2.1”.
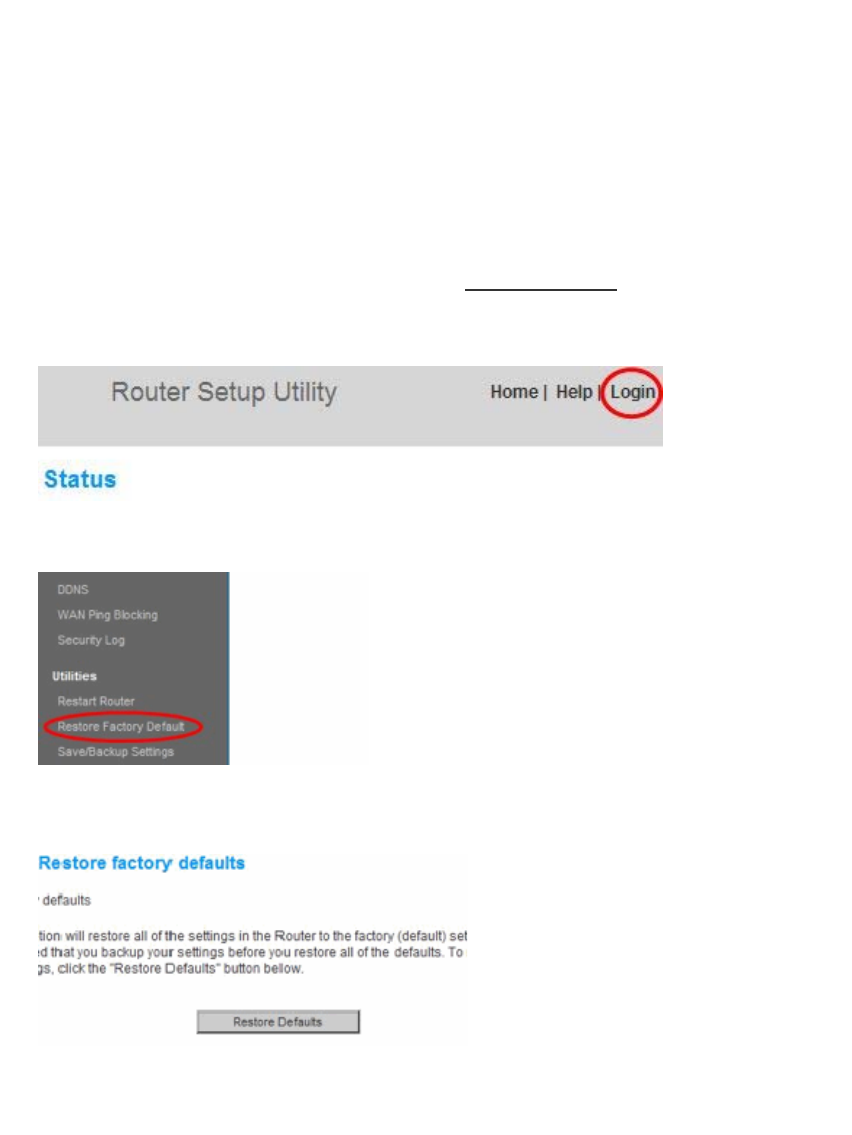
3. Click “Login” in the upper right-hand corner of the page. The Router does not ship with a
password, so just click “Submit”.
4. Click on “Restore Factory Defaults” in the left-hand column under the “Utilities” heading.
5. Click on the “Restore Defaults” button.
6. A warning box will open that says, “Warning: All your settings will be lost. Are you sure
you want to do this?” Click “OK”.

7. The Router will begin the restoring process. Once the restore is complete, the Router will
reboot.
Note: This may take several minutes.
Your Router has successfully been restored to its factory settings.

Troubleshooting, Support, and Warranty
Troubleshooting
TheSetupCDdoesnotautomaticallystart.
IfBelkinSetupdoesnotrunwhenyouinserttheCD‐ROM,your
computermaynotbeconfiguredtoopenCDsautomatically.
IfBelkinSetupdoesnotappearwithin15seconds,browsetoyour
CD‐ROMdriveandopenthe“BelkinSetup”icon.Alternatively,you
mayvisithttp://router/andperformthesetupmanually.Please
see“ManualSetupUsingYourBrowser”earlierinthismanualfor
moreinformation.
BelkinSetupcannotfindmyRouter.
IfBelkinSetupisnotabletocommunicatewithyourRouterduring
theinstallationprocess,pleasecheckthefollowingitems.
1) Makesurethatthewirelesshardwareonyourcomputeristurned
on,ifavailable.
2) Tryconnectingyourcomputertooneofthefour“wired”portson
theRouterwithanEthernetcable.
3) EnsurethattheRouterison.Thefront‐panellightshouldbeon.
4) UnplugtheRouter’spowersupplyfor10seconds,thenplugitback
in.
5) Theremaybefirewallsoftwareonyourcomputerpreventingan
outgoingconnection.Youmaychoosetotemporarilydisablethis
softwarebeforeattemptingsetup.
IfBelkinSetupstillcannotfindtheRouter,youmightchoosetodo
amanualsetup.Referto“ManuallyConfiguringNetworkSettings”
inthismanualfordetails.
BelkinSetupcannotconnectmyRoutertotheInternet.
IfBelkinSetupisnotabletoconnecttheRoutertotheInternet,
pleasecheckthefollowingitems:
1) Use the troubleshooting suggestions within Belkin Setup.
2) If your ISP requires a user name and password, make sure that
you have typed in your user name and password correctly.
Some user names require that the ISP’s domain may be at the
end of the name. Example: “myname@myisp.com”. The
“@myisp.com” part of the user name may need to be typed as
well as your user name.
3) If you continue to have no Internet connection, refer to
“Manually Configuring Network Settings” in this manual for an
alternative setup method.
BelkinSetupcompletedinstallation,butIcannotbrowsetheWeb.Thelighton
thefrontofmyRouterisblinkingamber.
1) MakesuretheRouterisconnectedtoyourmodemwithan
EthernetcableviatheRouter’soneWAN(modem)port.
2) Unplugthemodemfromitspowersourceandmakesurethat
itgoesdark.Thenreapplypowertothemodem.
3) UnplugyourRouter’spowersupply,wait10seconds,and
plugitbackin.ThiswillcausetheRoutertotrytoreestablish
communicationwiththemodem.
BelkinSetupcompletedinstallation,butIcannotbrowsetheWeb.Thelighton
thefrontofmyRouterissolidamber.
1) Use the troubleshooting suggestions within Belkin Setup.
2) If your ISP requires a user name and password, make sure
that you have typed in your user name and password
correctly. Some user names require that the ISP’s domain
may be at the end of the name. Example:
“myname@myisp.com”. The “@myisp.com” part of the
user name may need to be typed as well as your user name.
3) If you have a static connection, your ISP will have assigned
you an IP address, subnet mask, and gateway address.
Please re-run Belkin Setup and enter this information when
a static connection is mentioned.
4) You may need to configure your Router to meet the
specific requirements of your ISP. To search our
knowledge base for ISP-specific issues, go to:
http://www.belkin.com/support and type in “ISP”.
5) If you continue to have no Internet connection, refer to
“Manually Configuring Network Settings” in this manual for
an alternative setup method.
Ican’tconnecttotheInternetwirelessly.
IfthelightonthefrontoftheRouterissolidblue,thenyourRouter
isconnectedtotheInternet.Youmaynotbeconnectedtothe
Router’swirelessnetwork.Pleasereferto“AddingComputersto
YourNetwork”inthismanualforinstructions.
If your Windows XP computer is running SP2, you will not be able to set up the Router
via the wireless setup process. You will need to either update to Windows XP SP3 or
complete the setup via a wired connection.

Ican’tconnecttotheInternetwirelesslyandmynetworknameisnotlistedin
AvailableNetworks.
1) VerifythatyourRouterisonandthefront‐panellightshows
solidblue.
2) IfyouarefarfromtheRouter,youmighttrymovingcloserto
seeifyoumighthavebeenoutofrange.
3) UsingacomputerattachedtotheRouterviaanetworkcable,
visithttp://router/andensurethat“BroadcastSSID”isON.
Thissettingisfoundonthe“ChannelandSSID”page.
Mywirelessnetworkperformanceisslow,inconsistent,suffersfromweak
signal,orI’mhavingdifficultymaintainingaVPNconnection.
Wireless technology is radio-based, which means connectivity
and the throughput performance between devices decreases
when the distance between devices increases. Other factors that
will cause signal degradation (metal is generally the worst
culprit) are obstructions such as walls and metal appliances.
Note also that connection speed may decrease as you move
farther away from the Router.
In order to determine if wireless issues are related to range, we
suggest temporarily moving the computer within 10 feet from
the Router if possible.
Changing the wireless channel—Depending on local wireless traffic and
interference, switching the wireless channel of your network can
improve performance and reliability. See the section titled
“Changing the Wireless Channel” for instructions on how to
choose other channels.
Limiting the wireless transmit rate—Limiting the wireless transmit rate can
help improve range and connection stability. Most wireless
cards have the ability to limit the transmission rate. To change
this property in Windows, go to the Windows Control Panel,
open “Network Connections”, and double-click on your wireless
card’s connection. In the properties dialog, select the
“Configure” button on the “General” tab, then choose the
“Advanced” tab and select the rate property.

Wireless client cards are usually set to automatically adjust the
wireless transmit rate for you, but doing so can cause periodic
disconnects when the wireless signal is too weak; as a rule,
slower transmission rates are more stable. Experiment with
different connection rates until you find the best one for your
environment. Note that all available transmission rates should
be acceptable for browsing the Internet. For more assistance,
see your wireless card’s user manual.
I’veinstalledthisnewRouterandsomeofmynetworkclients(computers,
gameconsoles,etc.)arenowunabletoconnect.
YournewRoutercamepre‐configuredwithanetworknameand
password,foundprintedonanattachedcard.Allclientsmustuse
thisnetworknameandpasswordtoconnectwirelesslytoyour
Router.Youwillneedtofindthenetworksettingsonyourclient,
selectthenetworknameprintedonthecardfromthelistof
availablenetworks,andenterthepasswordwhenpromptedtojoin
thewirelessnetwork.
DoestheRoutersupportWirelessProtectedAccess(WPA)security?
TheRoutershipswithWPA/WPA2securityturnedon.WindowsXP
andsomeoldernetworkhardwaremayrequireasoftwareupdate
tosupportWPA/WPA2.
IamhavingdifficultysettingupWPAsecurityonmyRouter.
1) LogintoyourRouterbyvisitinghttp://router/withyour
webbrowser.Click on the “Login” button in the top right-
hand corner of the screen. You will be asked to enter your
password. If you have never set a password, leave the
“Password” field blank and click “Submit”.
2) Click“Wireless”intheleft‐handmenu.Thenclick“Security”
justbelowthat.
3) Selectthe“WPA/WPA2”option.

4) Enterapassword.Thiscanbefrom8–63charactersofyour
choice,includingspacesandpunctuation,ORa64‐digit
hexadecimalnumber(usingonlythenumbers0–9andletters
A–F).
5) Click“ApplyChanges”tofinish.Yourwirelessconnectionis
nowencrypted.Eachcomputerusingyourwirelessnetwork
willneedtousethenewkey.
Note:IfyouareconfiguringtheRouteroverawireless
connection,youwillhavetore‐connecttotheRouterafter
changinganysecuritysettings.
Note:SomeoldernetworkinghardwaresupportsonlyWEP
encryption.Ifyouroldercomputerscannotconnecttoyour
network,try128‐bitor64‐bitWEP,orseeksoftwareupdates
fromtheirmanufacturers.
IamhavingdifficultysettingupWiredEquivalentPrivacy(WEP)securityonmy
Router.
1) LogintoyourRouter.Visithttp://router/withyourweb
browser.Click on the “Login” button in the top right-hand
corner of the screen. You will be asked to enter your
password. If you have never set a password, leave the
“Password” field blank and click “Submit”.
2) Click“Wireless”intheleft‐handmenu.Thenclick“Security”
justbelowthat.
3) Selectthe“128‐bitWEP”option.
4) YoumaytypeinaWEPkeymanually,orgenerateonefroma
passphrase.Typeaphraseinthe“Passphrase”fieldandclick
the“Generate”button.AWEPkeyiscomposedof26
hexadecimaldigits(0–9,A–F).Forexample,C3030FAF4B
B2C3D44BC3D4EE74isavalid128‐bitWEPkey.
5) Click“ApplyChanges”tofinish.Yourwirelessactivityisnow
encrypted.Eachcomputerusingyourwirelessnetworkwill
needtousethenewkey.
Note:IfyouareconfiguringtheRouteroverawireless
connection,youwillhavetore‐connecttotheRouterafter
changinganysecuritysettings.
Note:Someoldernetworkinghardwaresupportsonly64‐bit
WEPencryption.Ifyouroldercomputerscannotconnectto
yournetwork,try64‐bitWEP.
AdiskIpluggedintotheUSBportisnotshowinguponmycomputerorin
MemorySafe.
1) IsthelightonovertheUSBportthatthediskispluggedinto?
Ifnot,tryunpluggingandre‐pluggingthedisk.Pleasecheck
thattheUSBconnectorisfirmlypluggedintotheRouter.
2) Ifyourdiskhasanoptionalpowersupply,pleaseuseitwhile
thediskisattachedtoyourRouter.
3) TheRoutersupportsFAT16,FAT32‐,orNTFS‐formatteddisks.
DisksinotherformatswillnotappearintheFinder(MacOS
X)orWindowsInternetExplorer®.
AdiskIpluggedintotheUSBportisnotcomingonorremainsononlyfora
shorttime.
SomedrivesrequiremorepowerthantheRouter’sUSBportprovides.If
yourdiskhasanoptionalpowersupply,pleaseuseitwhilethediskis
attachedtoyourRouter.
AprinterIpluggedintotheUSBportisnotshowinguponmycomputer.
1) IsthelightonovertheUSBportthattheprinterisplugged
into?Ifnot,tryunpluggingandre‐pluggingtheprinter.
PleasecheckthattheUSBconnectorisfirmlypluggedinto
theRouter.
2) ToprinttoaprinterattachedtotheRouter,yourcomputer
musthavethatprinter’sdriverinstalled.Pleasecheckthat
thedriverisinstalled.
3) Theprintermaynotbesettoauto‐connect.ViatheBelkin
RouterManager,opentheUSBPrintandStorageCenter.
Checkthattheprinterappearsinthelistofavailabledevices.
Viewthepropertiesoftheprinter,andcheckthat“auto‐
connect”isselected.
AdifferentsortofUSBdevicethatIpluggedintotheUSBportisnotshowingup
onmycomputer.
MostUSBdevicesotherthandisksandprintersmustbe
accessedviatheUSBPrintandStorageCenter.
1) IsthelightonovertheUSBportthatthedeviceisplugged
into?Ifnot,tryunpluggingandre‐pluggingthedevice.Please
checkthattheUSBconnectorisfirmlypluggedintothe
Router.
2) ViatheBelkinRouterManager,opentheUSBPrintand
StorageCenter.Checkthatthedeviceappearsinthelistof
availabledevices.
3) Selectthedeviceandclickthe“Use”button.Thedevicewill
bevirtuallyconnectedtoyourcomputeruntilyouchooseto
“StopUsing”thedevice,oranotherpersonrequestsuseofthe
device.
Technical Support
US
http://www.belkin.com/support
UK
http://www.belkin.com/uk/support
Australia
http://www.belkin.com/au/support

NewZealand
http://www.belkin.com/au/support
Singapore
1800 622 1130
Europe
http://www.belkin.com/uk/support
Belkin International, Inc., Limited 2-Year Product Warranty
What this warranty covers.
Belkin International, Inc. (“Belkin”) warrants to the original purchaser of this
Belkin product that the product shall be free of defects in design, assembly,
material, or workmanship.
What the period of coverage is.
Belkin warrants the Belkin product for two years.
What will we do to correct problems?
Product Warranty.
Belkin will repair or replace, at its option, any defective product free of charge
(except for shipping charges for the product). Belkin reserves the right to
discontinue any of its products without notice, and disclaims any limited warranty
to repair or replace any such discontinued products. In the event that Belkin is
unable to repair or replace the product (for example, because it has been
discontinued), Belkin will offer either a refund or a credit toward the purchase of
another product from Belkin.com in an amount equal to the purchase price of the
product as evidenced on the original purchase receipt as discounted by its
natural use.
What is not covered by this warranty?
All above warranties are null and void if the Belkin product is not provided to
Belkin for inspection upon Belkin’s request at the sole expense of the purchaser,
or if Belkin determines that the Belkin product has been improperly installed,
altered in any way, or tampered with. The Belkin Product Warranty does not
protect against acts of God such as flood, lightning, earthquake, war, vandalism,
theft, normal-use wear and tear, erosion, depletion, obsolescence, abuse,
damage due to low voltage disturbances (i.e. brownouts or sags), non-authorized
program, or system equipment modification or alteration.
How to get service.
To get service for your Belkin product you must take the following steps:
1. Contact Belkin International, Inc., at 12045 E. Waterfront Drive, Playa
Vista, CA 90094, Attn: Customer Service, or call (800)-223-5546, within 15 days
of the Occurrence. Be prepared to provide the following information:
a. The part number of the Belkin product.
b. Where you purchased the product.
c. When you purchased the product.
d. Copy of original receipt.
2. Your Belkin Customer Service Representative will then instruct you on
how to forward your receipt and Belkin product and how to proceed with your
claim.
Belkin reserves the right to review the damaged Belkin product. All costs of
shipping the Belkin product to Belkin for inspection shall be borne solely by the
purchaser. If Belkin determines, in its sole discretion, that it is impractical to ship
the damaged equipment to Belkin, Belkin may designate, in its sole discretion, an
equipment repair facility to inspect and estimate the cost to repair such
equipment. The cost, if any, of shipping the equipment to and from such repair
facility and of such estimate shall be borne solely by the purchaser. Damaged
equipment must remain available for inspection until the claim is finalized.
Whenever claims are settled, Belkin reserves the right to be subrogated under
any existing insurance policies the purchaser may have.
How state law relates to the warranty.
THIS WARRANTY CONTAINS THE SOLE WARRANTY OF BELKIN. THERE
ARE NO OTHER WARRANTIES, EXPRESSED OR, EXCEPT AS REQUIRED
BY LAW, IMPLIED, INCLUDING THE IMPLIED WARRANTY OR CONDITION
OF QUALITY, MERCHANTABILITY OR FITNESS FOR A PARTICULAR
PURPOSE, AND SUCH IMPLIED WARRANTIES, IF ANY, ARE LIMITED IN
DURATION TO THE TERM OF THIS WARRANTY.
Some states do not allow limitations on how long an implied warranty lasts, so
the above limitations may not apply to you.
IN NO EVENT SHALL BELKIN BE LIABLE FOR INCIDENTAL, SPECIAL,
DIRECT, INDIRECT, CONSEQUENTIAL OR MULTIPLE DAMAGES SUCH AS,
BUT NOT LIMITED TO, LOST BUSINESS OR PROFITS ARISING OUT OF THE
SALE OR USE OF ANY BELKIN PRODUCT, EVEN IF ADVISED OF THE
POSSIBILITY OF SUCH DAMAGES.

This warranty gives you specific legal rights, and you may also have
other rights, which may vary from state to state. Some states do not
allow the exclusion or limitation of incidental, consequential, or other
damages, so the above limitations may not apply to you.
*Regulatory Information
FCC Statement
DECLARATION OF CONFORMITY WITH FCC RULES FOR
ELECTROMAGNETIC COMPATIBILITY
We, Belkin International, Inc., of 12045 E. Waterfront Drive, Playa Vista, CA
90094, declare under our sole responsibility that the device, F9K1102 V21,
complies with Part 15 of the FCC Rules. Operation is subject to the following two
conditions: (1) this device may not cause harmful interference, and (2) this device
must accept any interference received, including interference that may cause
undesired operation.
Caution: Exposure to Radio Frequency Radiation.
The device shall be used in such a manner that the potential for human contact
normal operation is minimized.
This equipment complies with FCC radiation exposure limits set forth for an
uncontrolled environment. This equipment should be installed and operated with
a minimum distance of 20cm between the radiator and your body.
Federal Communications Commission Notice
This equipment has been tested and found to comply with the limits for a Class B
digital device, pursuant to Part 15 of the FCC Rules. These limits are designed to
provide reasonable protection against harmful interference in a residential
installation.
This equipment generates, uses, and can radiate radio frequency energy, and if
not installed and used in accordance with the instructions, may cause harmful
interference to radio communications. However, there is no guarantee that
interference will not occur in a particular installation. If this equipment does cause
harmful interference to radio or television reception, which can be determined by
turning the equipment off and on, the user is encouraged to try and correct the
interference by one or more of the following measures:
Reorient or relocate the receiving antenna.
Increase the distance between the equipment and the receiver.
Connect the equipment to an outlet on a circuit different from that to which the
receiver is connected.
Consult the dealer or an experienced radio/TV technician for help.
FCC Caution: Any changes or modifications not expressly approved by the party
responsible for compliance could void the user’s authority to operate this
equipment.
This device and its antenna(s) must not be co-located or operating in conjunction
with any other antenna or transmitter.
Canada-Industry Canada (IC)
The wireless radio of this device complies with RSS 139 & RSS 210 Industry
Canada. This Class B digital apparatus complies with Canadian ICES-003.
Operation is subject to the following two conditions: (1) this device may not cause
interference, and (2) this device must accept any interference, including
interference that may cause undesired operation of the device.
Cet appareil numérique de la classe B conforme á la norme NMB-003 du
Canada.

This device complies with Industry Canada licence-exempt RSS standard(s).
Operation is subject to the following two conditions: (1) this device may not cause
interference, and (2) this device must accept any interference, including
interference that may cause undesired operation of the device.
IC Radiation Exposure Statement:
This equipment complies with IC RSS-102 radiation exposure limits set forth for
an uncontrolled environment. This equipment should be installed and operated
with minimum distance 20cm between the radiator & your body.
This Class [B] digital apparatus complies with Canadian ICES-003.
Cet appareil numérique de la classe [B] est conforme à la norme NMB-003 du
Canada.
*Back cover
© 2011 Belkin International, Inc. All rights reserved. All trade names are
registered trademarks of respective manufacturers listed. iPad, iPhone, iPod
touch, Mac, and Mac OS are trademarks of Apple Inc., registered in the U.S. and
other countries. Windows, Windows Vista, Internet Explorer, and DirectX are
either registered trademarks or trademarks of Microsoft Corporation in the United
States and/or other countries.