Belkin F9K1115V2 AC1750 DB WI-FI DUAL-BAND AC+ GIGABIT ROUTER User Manual
Belkin International, Inc. AC1750 DB WI-FI DUAL-BAND AC+ GIGABIT ROUTER
UserManual.wiki
>
Belkin
>
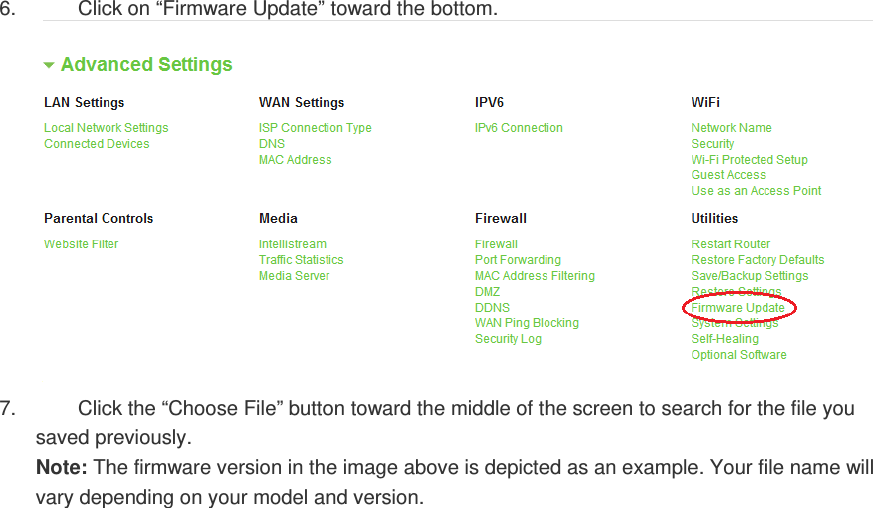
F9K1115V2 User Manual
User Manual
Navigation menu
Upload a User Manual
Namespaces
Wiki Guide
HTML
PDF
Info
Views
User Manual
Discussion / Help
Navigation
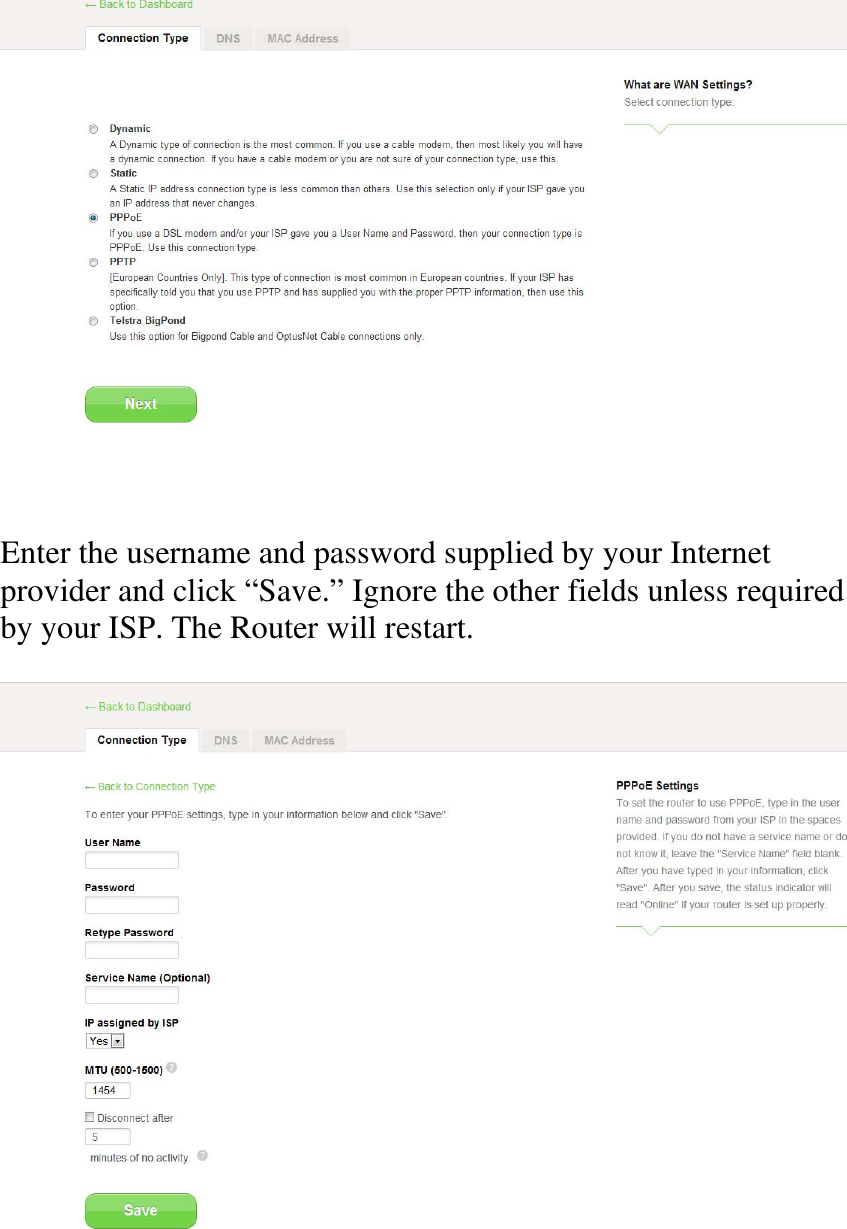
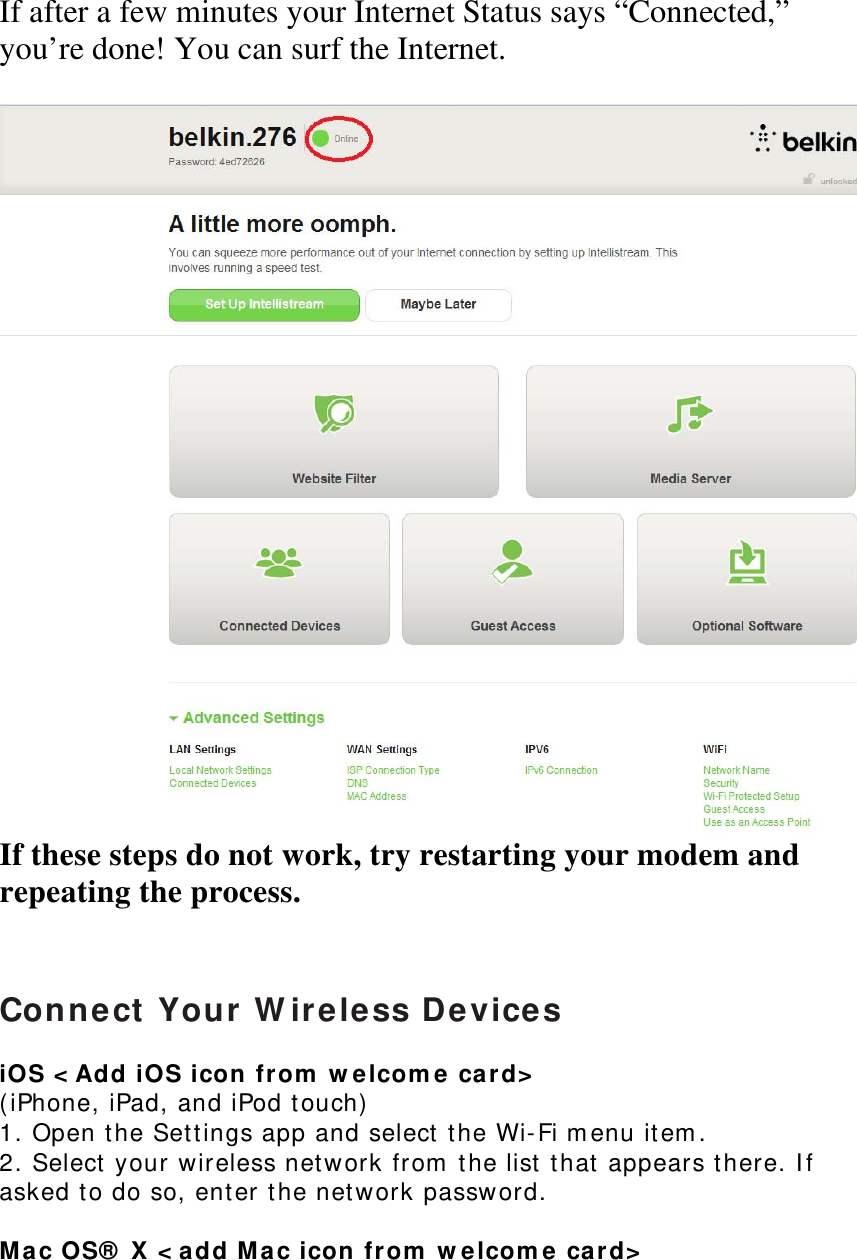
![Retrieve the network ID card from the foot of your new Belkin Router. [Diagram of bottom of the router showing service card – can be obtained from “Tested QIG 2011 07 14.pdf” provided] Can’t find the card? The default network name and password are also printed on the foot of the Router. Use your computer, tablet, or smartphone to connect to the wireless network shown on the network ID card. For information on how to connect your wireless devices, please see the “Connect Your Wireless Devices” section on page 20. When requested, please enter the password (security key) provided on the card.](https://usermanual.wiki/Belkin/F9K1115V2/User-Guide-2031924-Page-3.png)

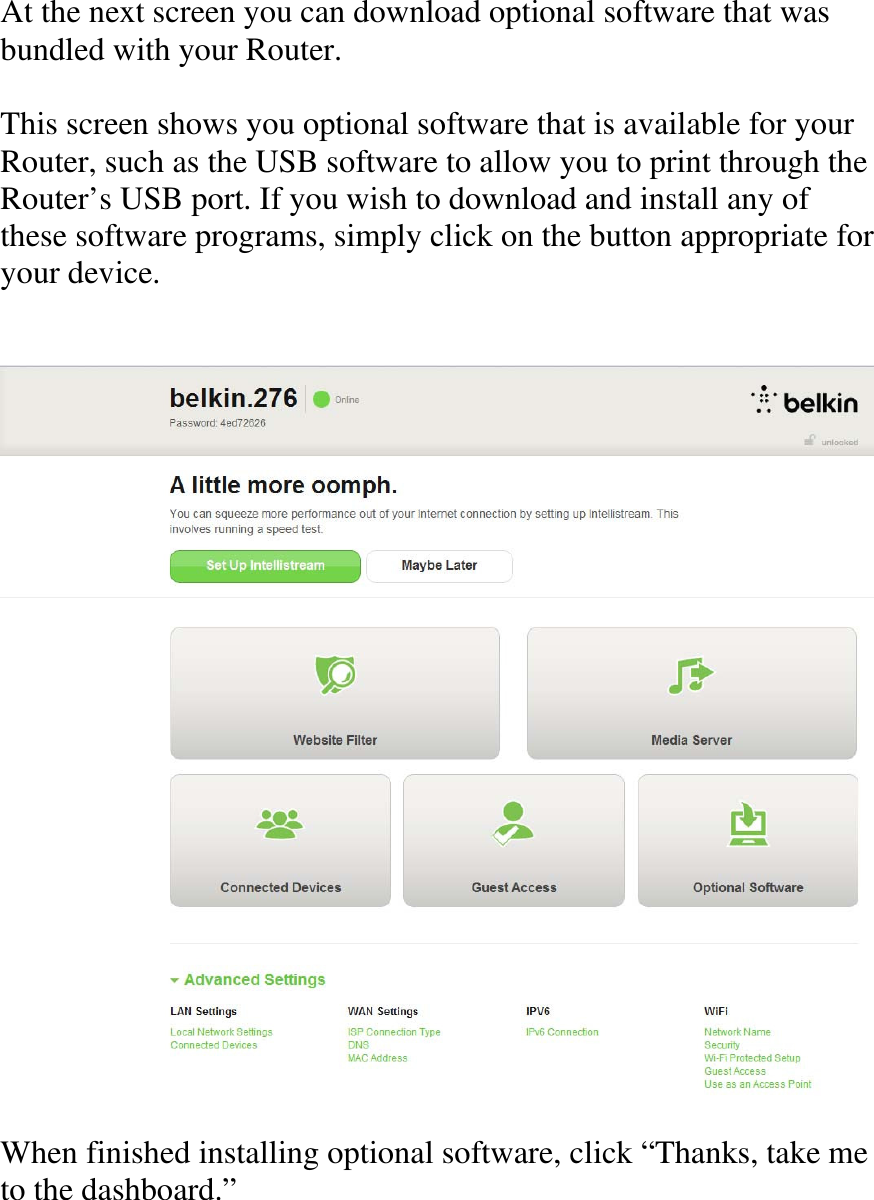


![Additional Capabilities Adding USB Devices [USBINVITATIONDIAGRAM(TBD)]AddingaDriveYoucanshareaUSBharddriveorflashdrivetoyournetworkviayourRouter’sUSBport.Onceconnected,youcansharefilesandmusicwithothercomputersanddeviceswithinyournetwork.PlugyourUSBharddriveintotheUSBportonthebackofyourRouter.YoucanmanuallycheckthestatusofyourshareddrivebyvisitingtheUSBPrintandStorageManager.Ifyouhavedifficultysharingadriveonyournetwork,pleaseseethe“Troubleshooting”sectionofthismanual. A few USB hard disks require more power than the Router’s USB port provides. In these cases, you may notice the drive failing to come on or remaining on for a short time. If your disk has an optional power supply, please use it while the disk is attached to your Router. AddingaPrinterYoucanaddaprintertoyournetworkviayourRouter’sUSBport.Onceconnected,youcanprintfromvariouscomputersandwirelessdeviceswithinyournetwork.Plugyourprinter’sUSBcableintotheUSBportlocatedonthebackofyourRouter.YoucanmanuallycheckthestatusofyourprinterbyvisitingtheUSBPrintandStorageManager,foundundertheBelkinicondisplayedinyoursystemtray(Windows)ormenubar(Mac).Ifyouhavedifficultysharingaprinteronyournetwork,pleaseseethe“Troubleshooting”sectionofthismanual.Note:EachcomputerthatwillusetheprintermusthaveboththeBelkinsoftwareandtheprinter’sdriverinstalled.Iftheprint](https://usermanual.wiki/Belkin/F9K1115V2/User-Guide-2031924-Page-24.png)

![Getting to Know Your Router Front Panel [DIAGRAMfront.ai]A)RouterStatusLightYourRouter’sstatusisshownbythelightonthefront.Off:TheRouterisnotpluggedintoapowersource.BlinkingBlue:TheRouterisstartingup.SolidBlue:TheRouterisconnectedtotheInternet.BlinkingAmber:TheRoutercan’tdetectthemodem.Eitherthemodemisoff,isnotpluggedintotheRouter,orisunresponsive.](https://usermanual.wiki/Belkin/F9K1115V2/User-Guide-2031924-Page-32.png)
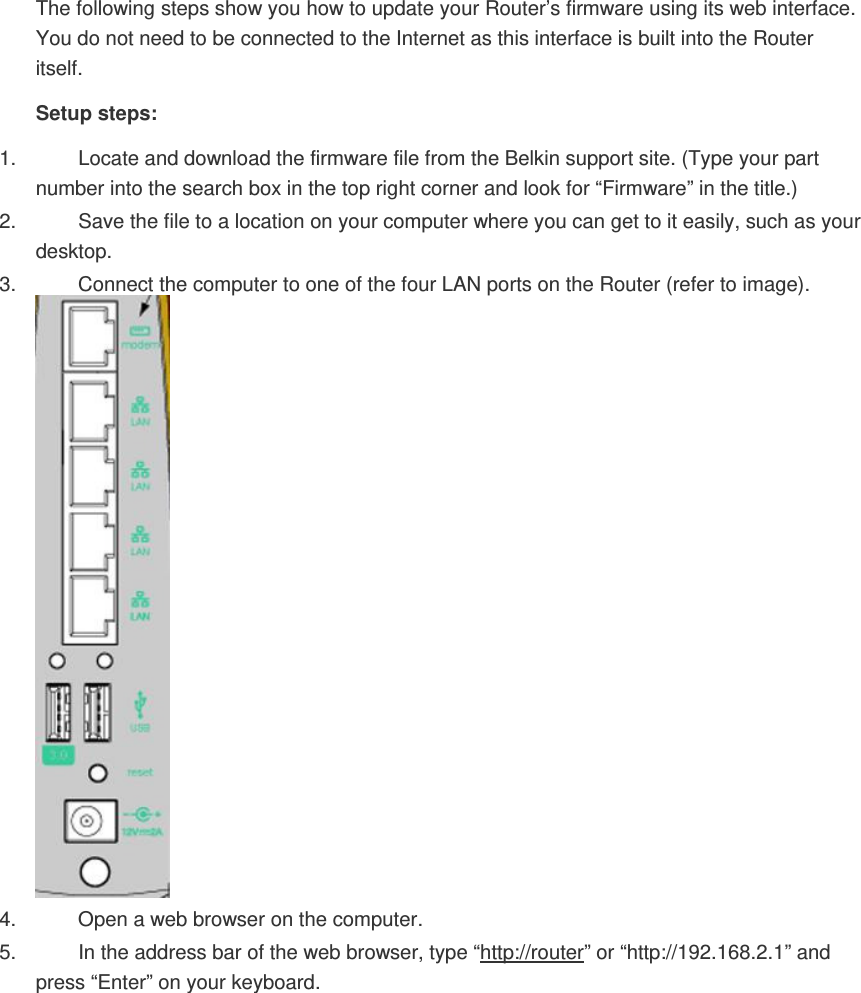
![B)Wi‐FiProtectedSetup(WPS)LightandButtonTheWPSbuttononthefrontofyourRoutercanbeusedtohelpestablishasecureconnectionbetweenyourRouterandotherWPS‐enabledWi‐Fidevicessuchascomputers.TouseWPS,refertopage9.ThesmalllightneartheWPSbuttonshowswhatishappeningwhileyouareusingWPStoestablishaconnection.Off:IdleBlinkingBlue:TheRouterislisteningforaWPS‐enabledcomputerorotherdevice.SolidBlue:TheRouterhasmadeasecureconnectionwiththecomputerorotherdevice.Amber:Aconnectionwasnotcreated.Back Panel [RDIAGRAMFORSHAREANDPLAYr_shareplay_back.ai]A)Modem(WAN)ConnectorConnectyourmodemtothisportusinganEthernetcable.B)Wired(LAN)ConnectorsConnectcomputersandotherwirednetworkdevicestotheseportsusingEthernetcables.C)USBPortUSBprinters,disks,andotherUSBdevicespluggedintothisportwillbesharedonyournetwork.EachUSBporthasalightthatindicatesitsstatus.Off:NoUSBdeviceisconnectedortheattachedUSBdeviceisnotinuse.Blinking:Pleasewaittounplugthedeviceuntilthelightturnsoff.On:TheUSBdeviceisconnectedandbeingsharedonyournetwork.](https://usermanual.wiki/Belkin/F9K1115V2/User-Guide-2031924-Page-33.png)