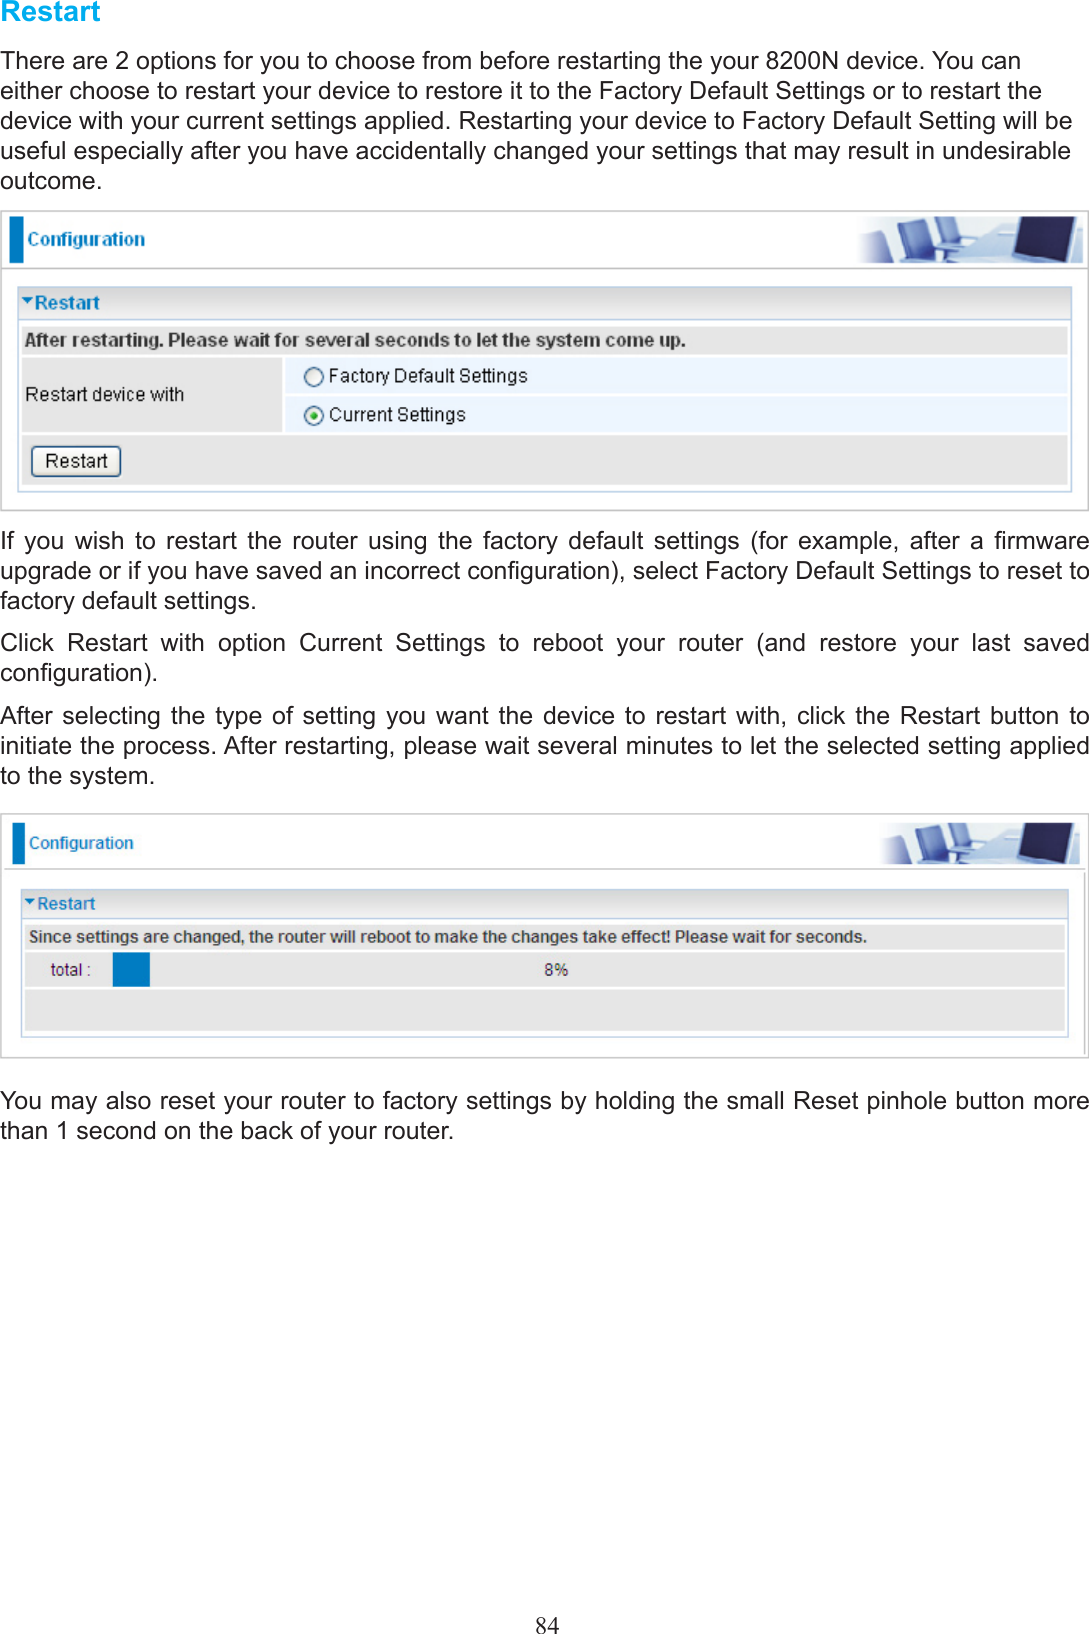
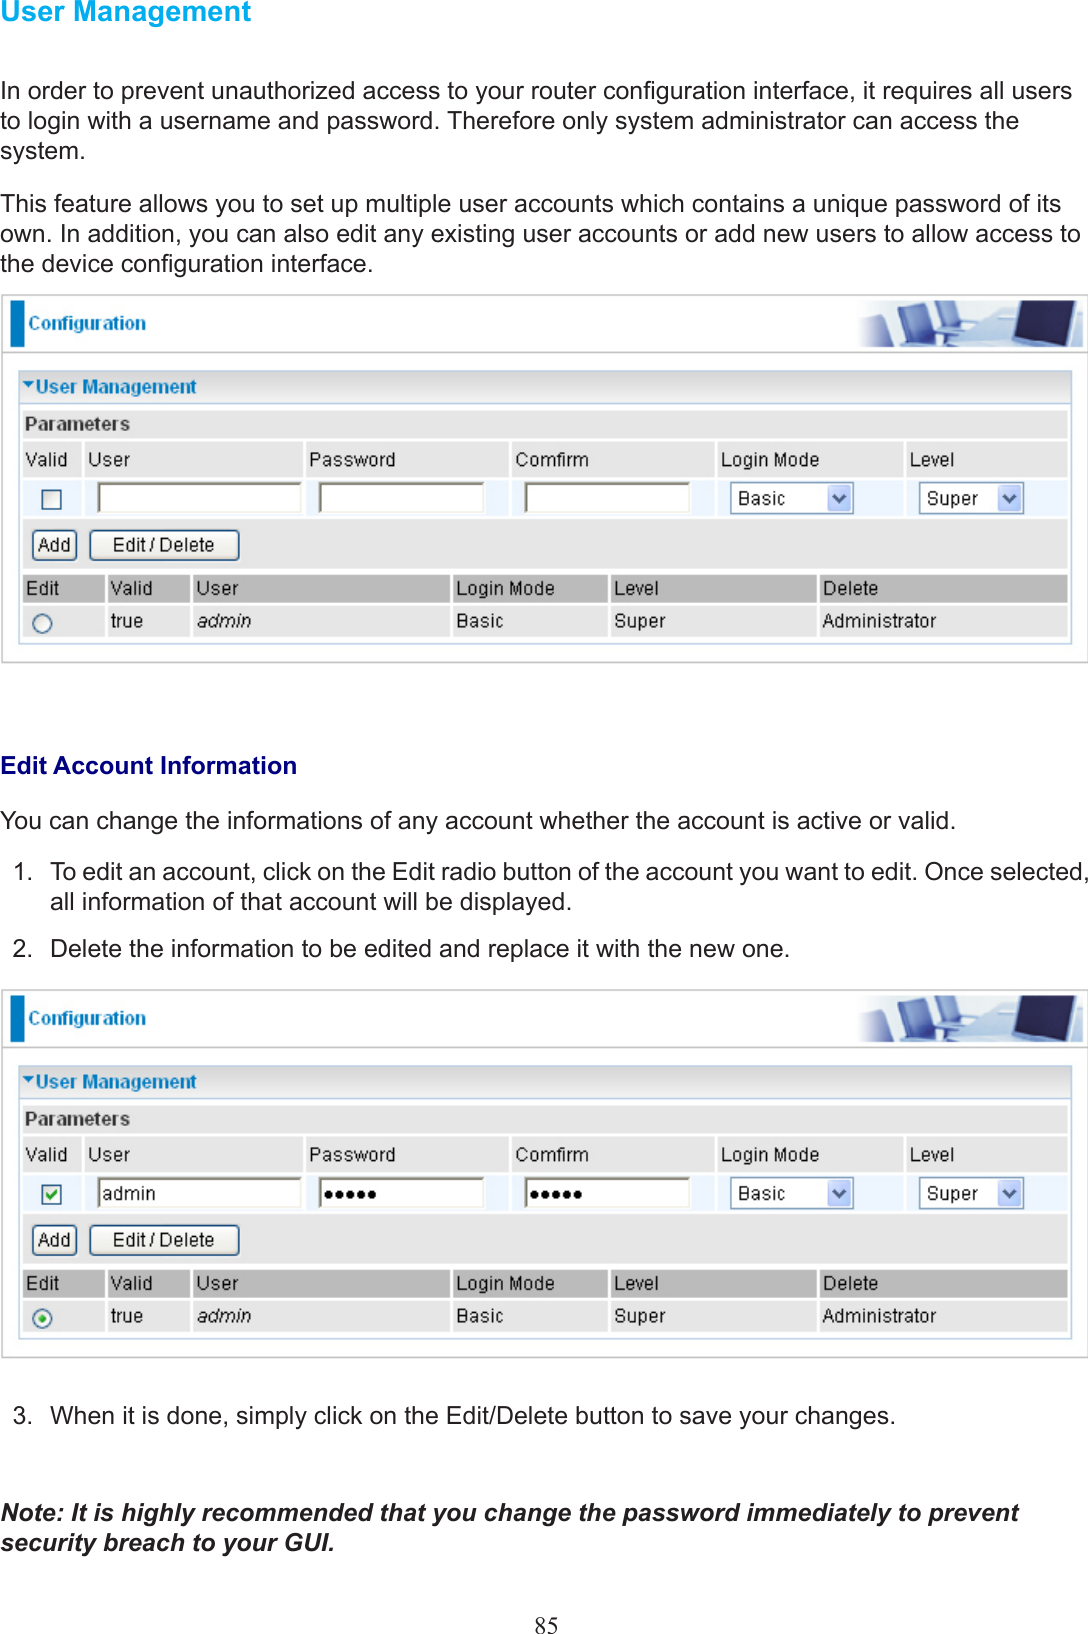
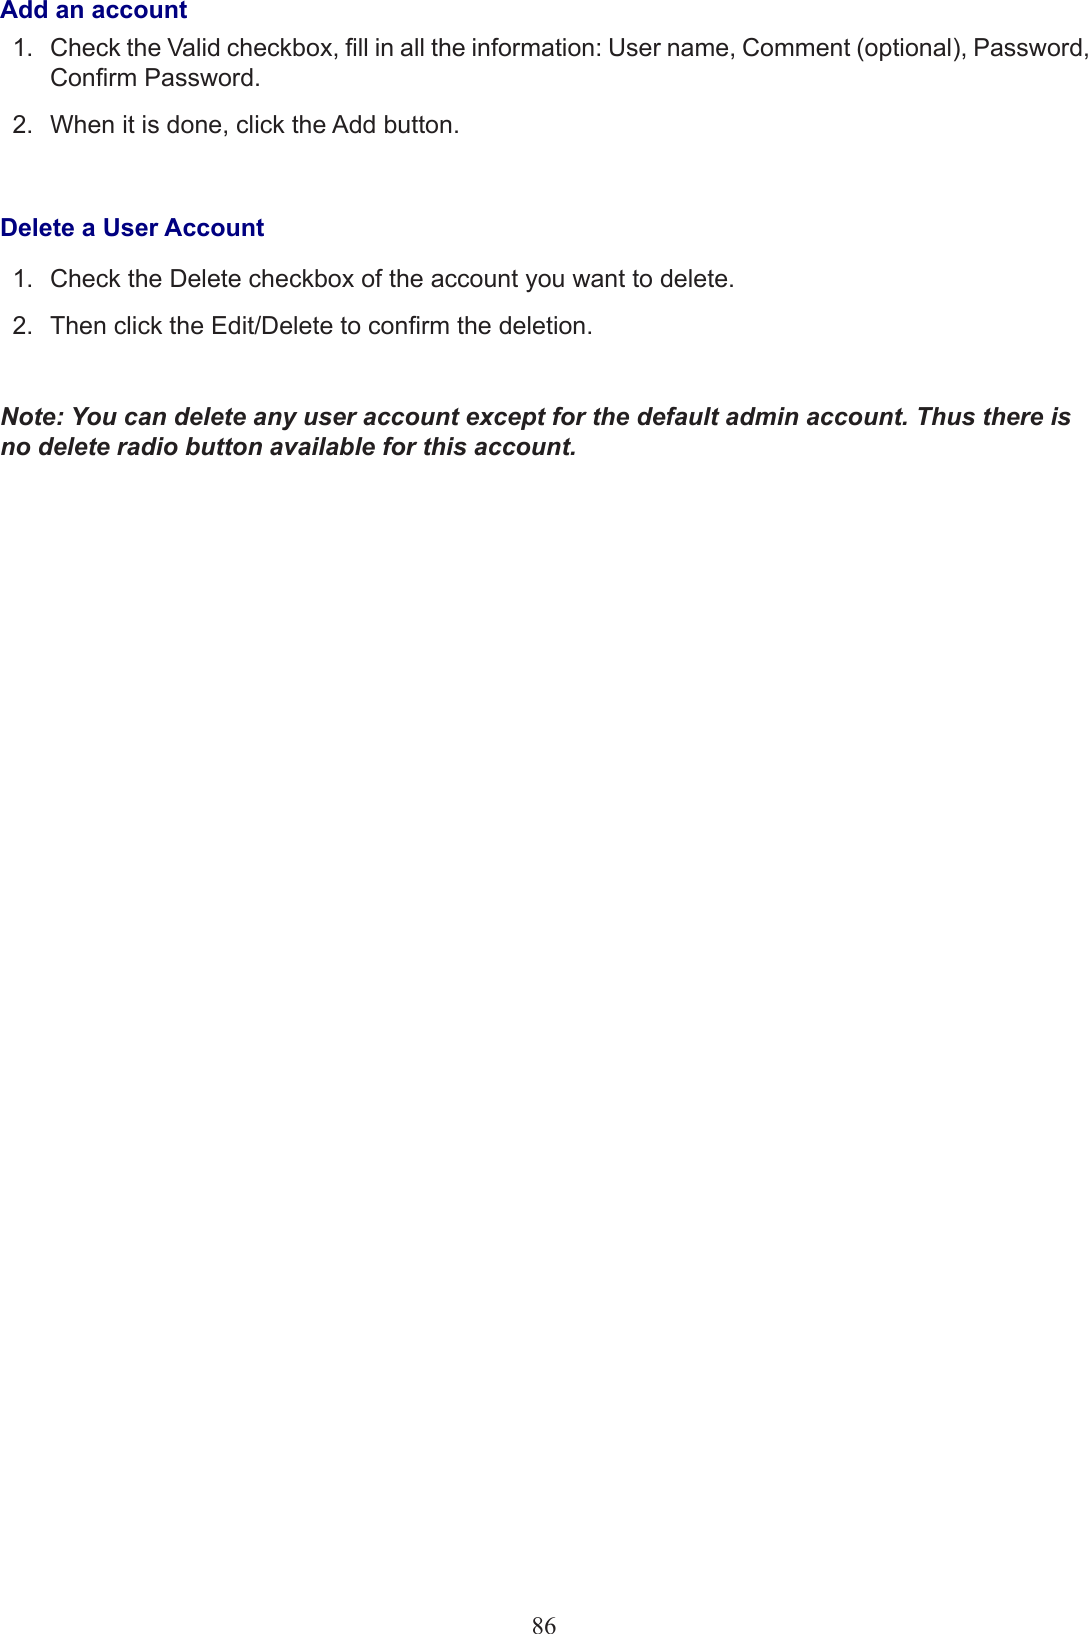
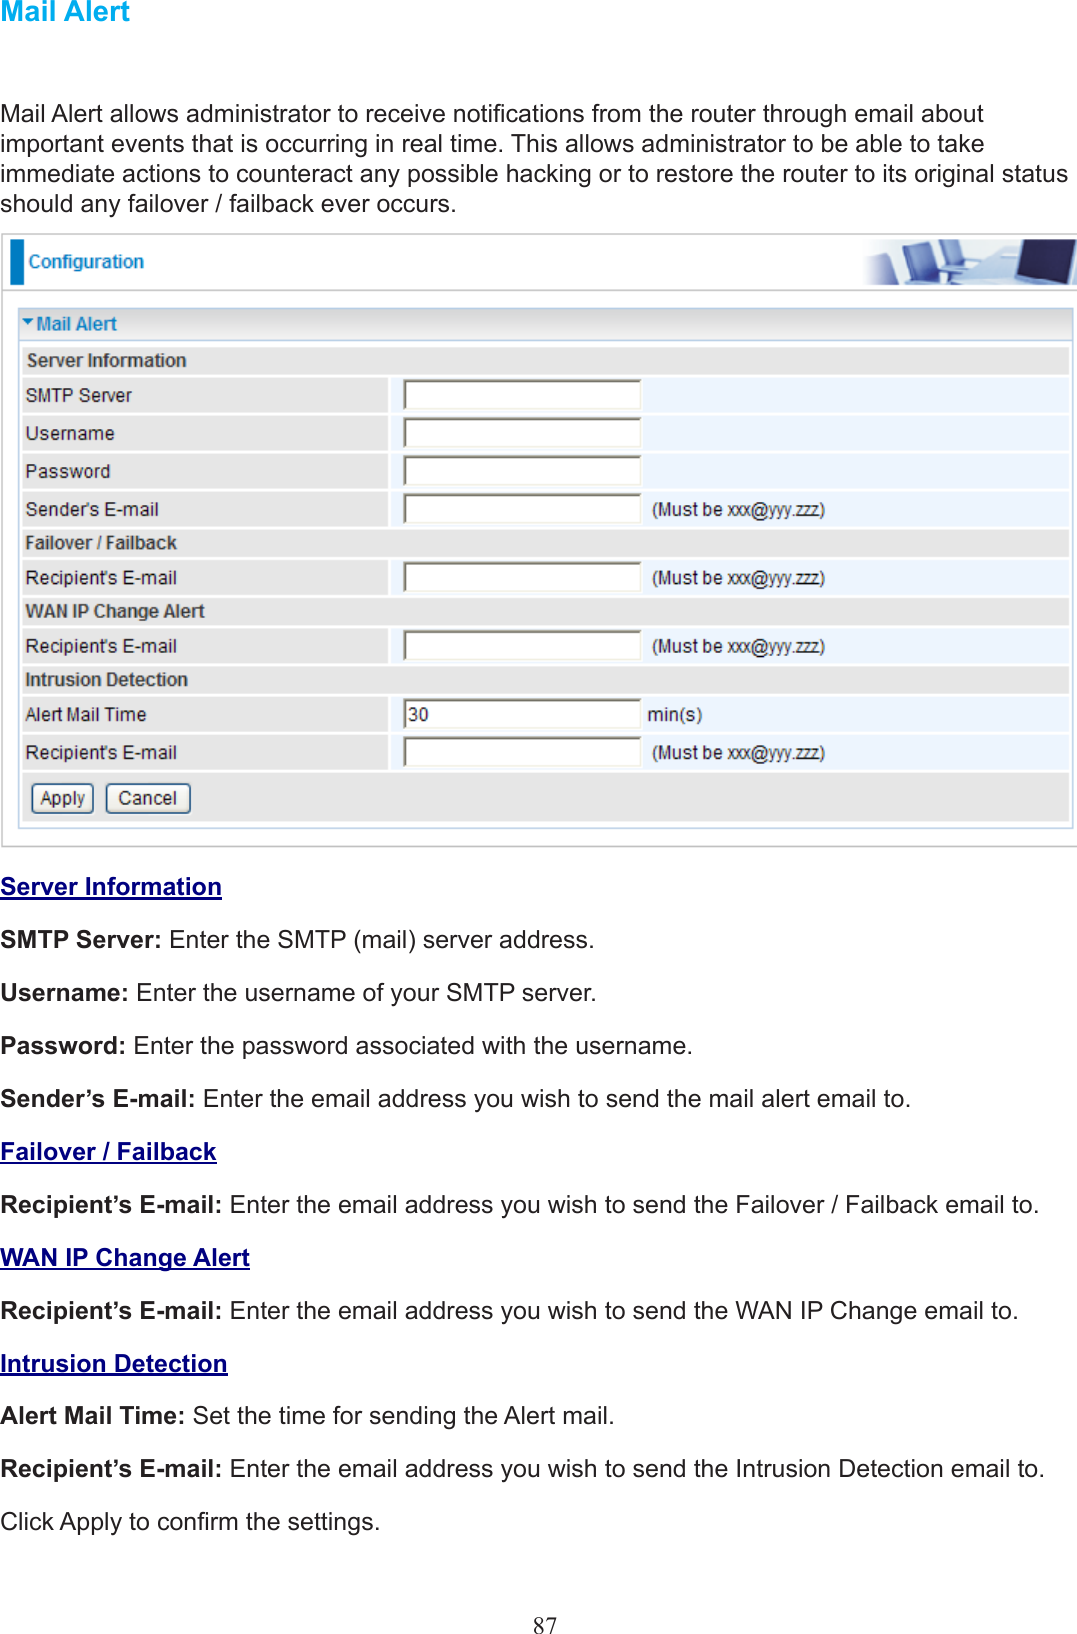
Billion Electric BIL-8200NX (3G) 802.11n VDSL (VPN) Firewall Router User Manual Users manual 02
Billion Electric Co., Ltd. (3G) 802.11n VDSL (VPN) Firewall Router Users manual 02
Contents
- 1. Users manual
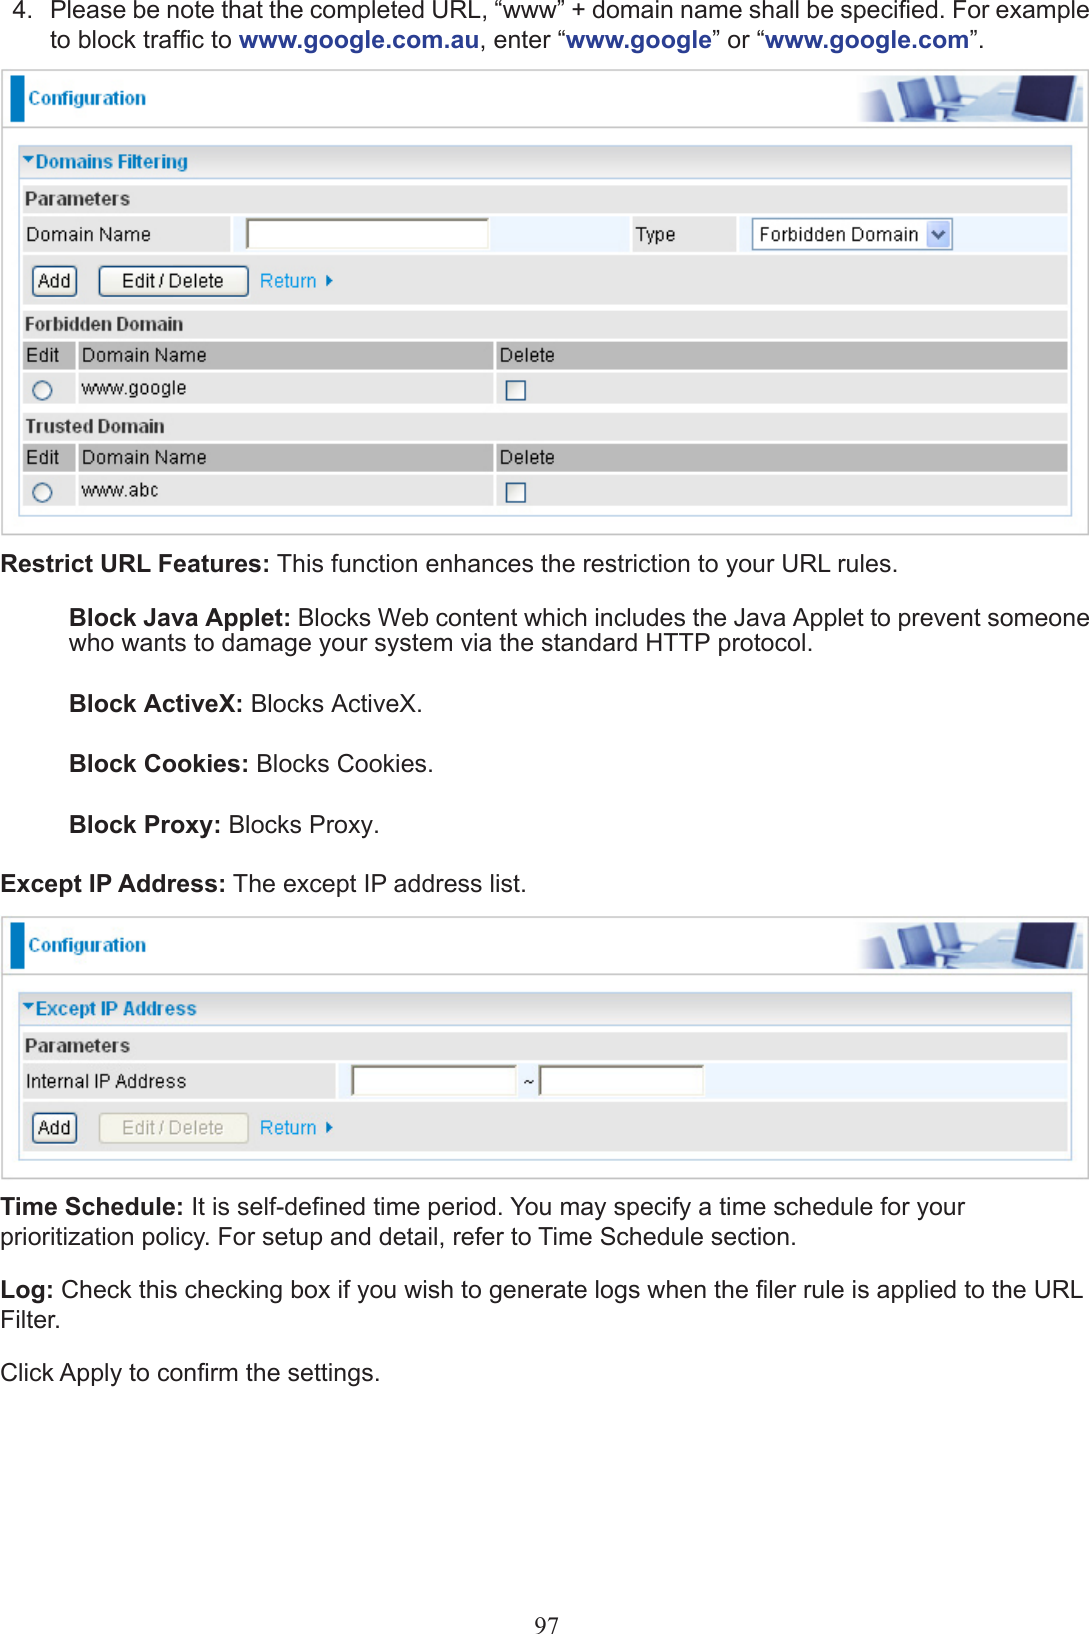
- 2. Users manual-02
- 3. Users manual-03
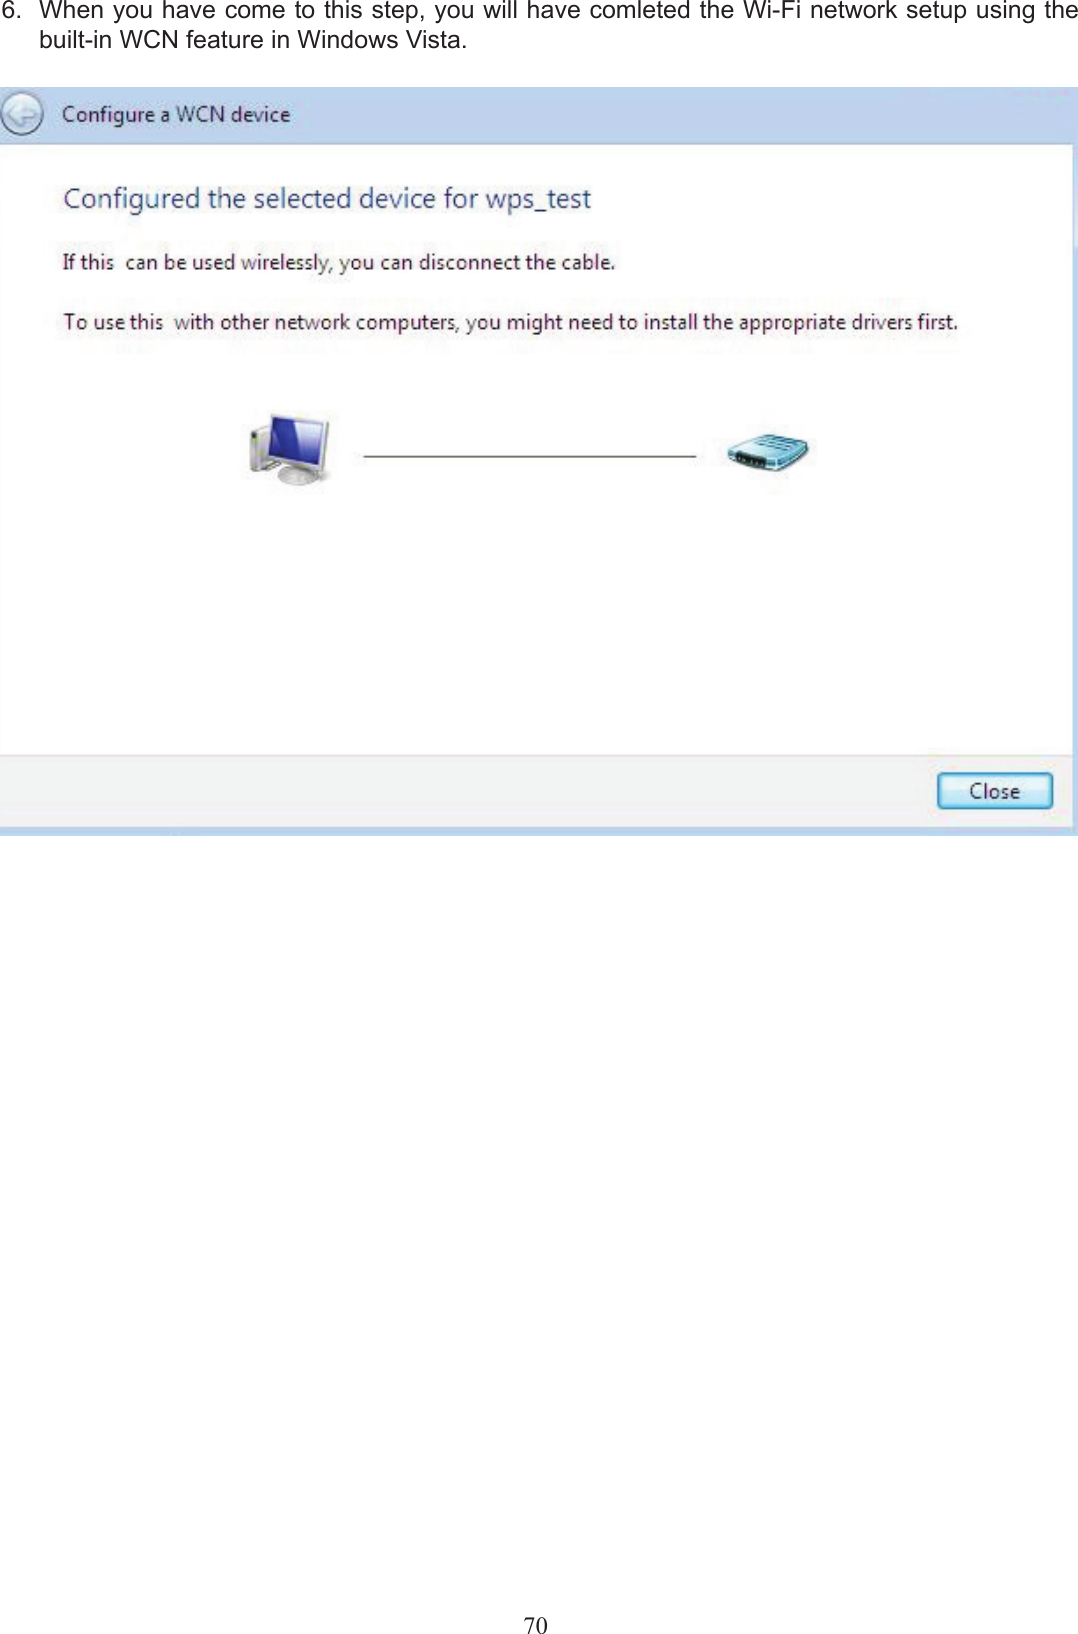
Users manual-02