Bitatek IT7000PDT PDT(Portable Data Terminal) User Manual IT7000 Users Guide 122704 for EMI
Bitatek Co., Ltd. PDT(Portable Data Terminal) IT7000 Users Guide 122704 for EMI
Bitatek >
Contents
User manual 3
Figure 3-4-5
3.2.5 Certificates
Certificates are used by some applications for establishing trust and for secure
communications.
Certificates are signed and issued by certificate authorities and are valid for a
prescribed period of time. Windows CE manages multiple certificate stores.
Table 3-4 Certificates(A)
ICON ITEM & FUNCTION
l “Store ” Tab ( Figure 3-5-1) :
Certificates
ü In the Stores tab, select the certificate store you wish to view or
modify from the drop-down list (Figure 3-5-2).
ü The “Trusted Authorities “store lists the top-level certificates
for authorities you trust.( Figure 3-5-2 , Figure 3-5-3)
ü The “My Certificates “store contains your personal certificates,
which you use to identify yourself.
ü Intermediate certificate authorities that help establish a chain of
trust are stored in the “Other Authorities” store.
P3-29
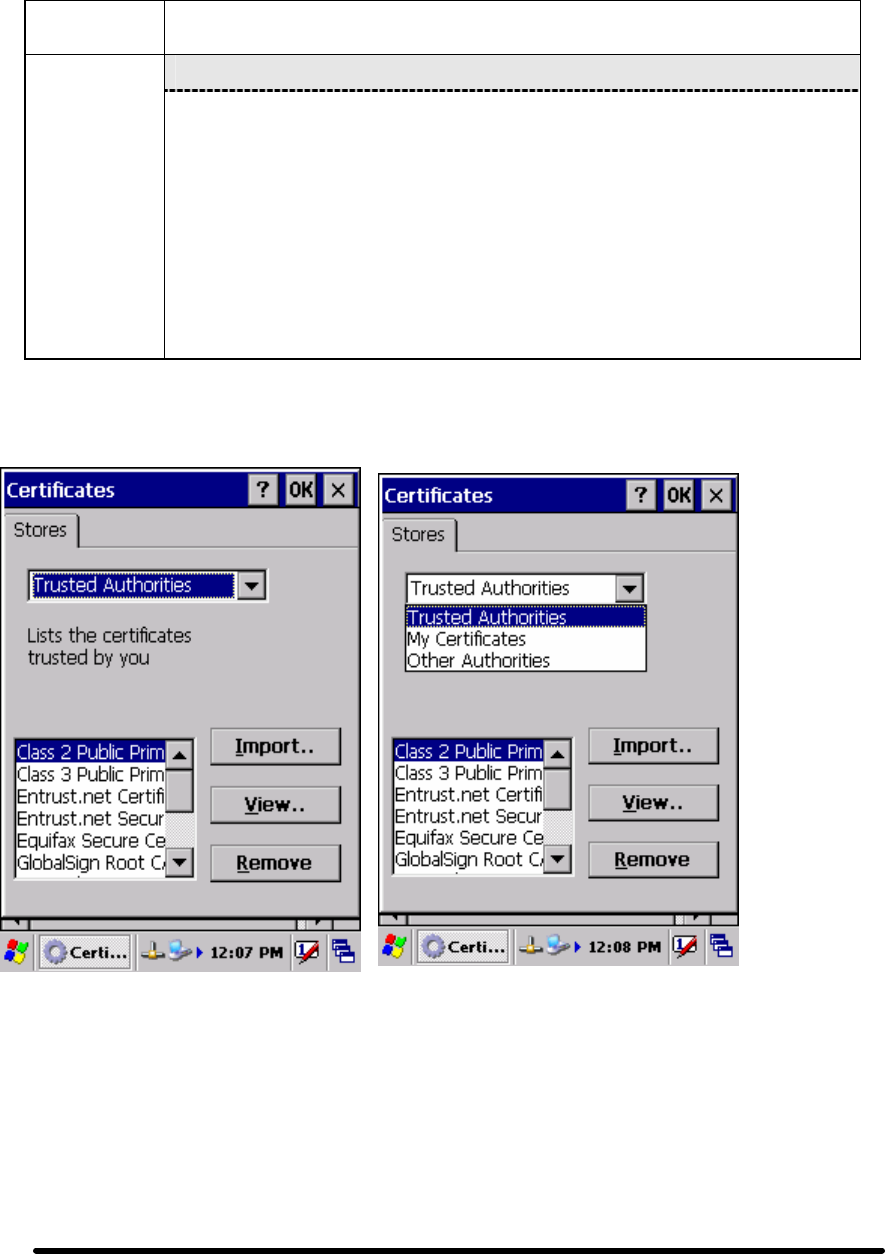
Table 3-4 Certificates(B)
ICON ITEM & FUNCTION
l “Store ” Tab :
Certificates
ü To add a certificate or associated private key to the selected
store, select “Import” (Figure 3-5-4).
ü To view more details of the selected certificate, such as the
expanded name or expiration date, choose “View”.
ü To delete the selected certificate from the store, choose
“Remove”.
Figure 3-5-1 Figure 3-5-2
P3-30
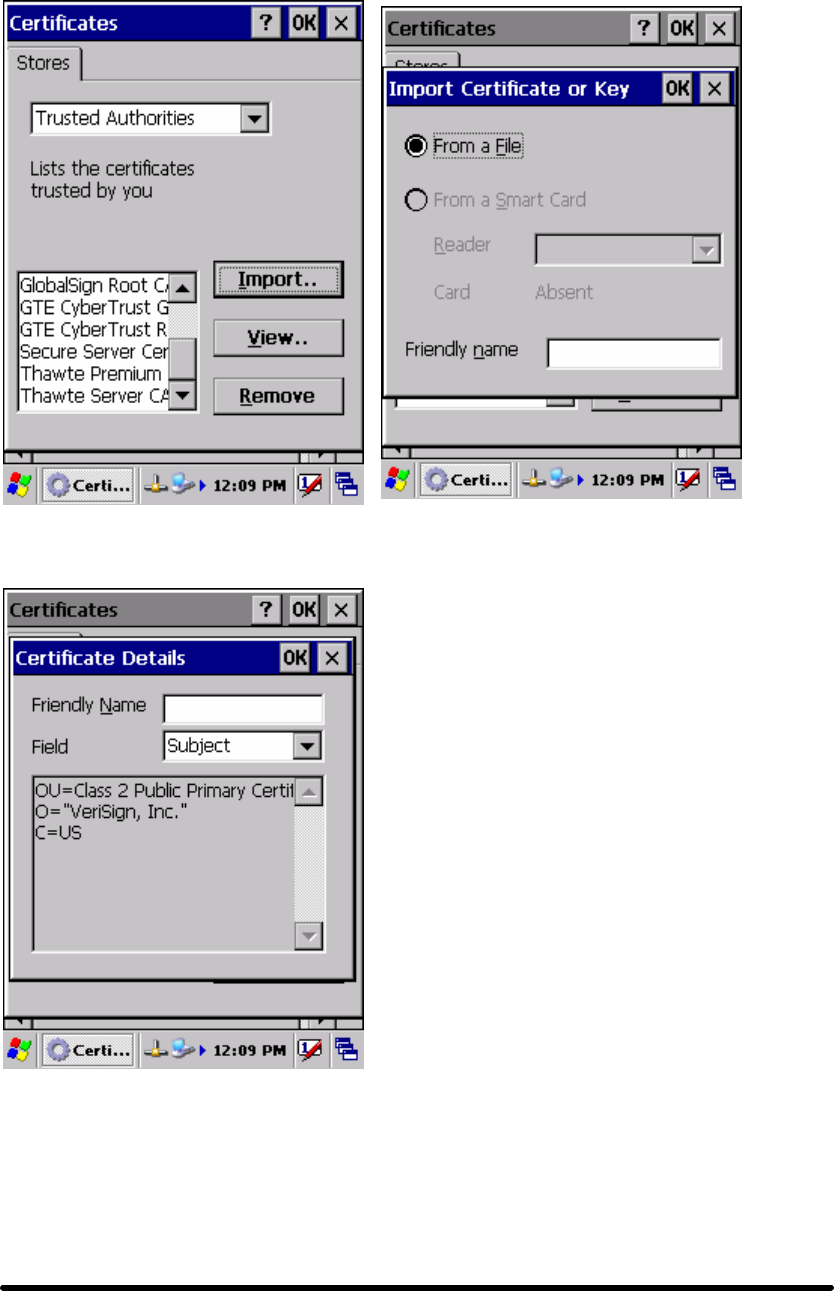
Figure 3-5-3 Figure 3-5-4
Figure 3-5-5
P3-31
3.2.6 CPU Speed
Table 3-5 CPU Speed
ICON ITEM & FUNCTION
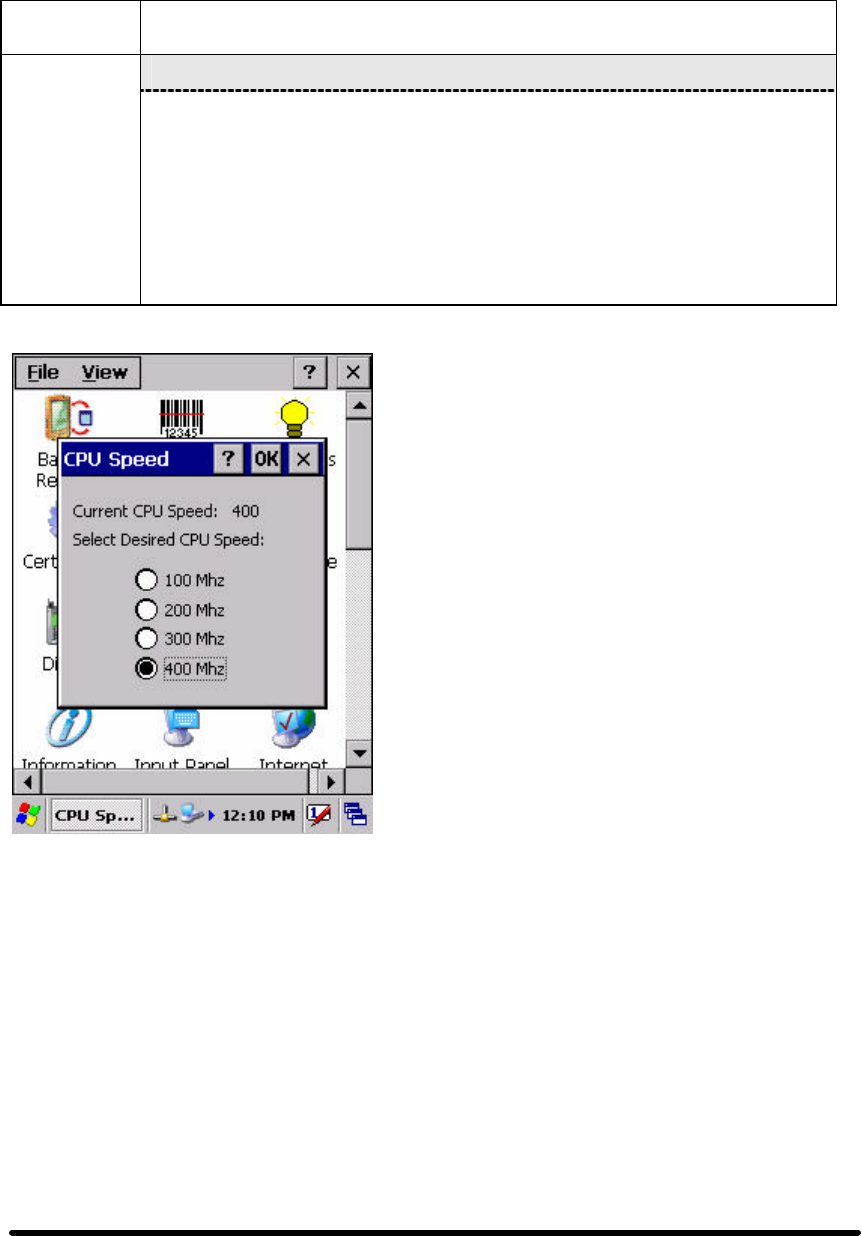
l “CPU Speed” Tab :( Figure 3-6)
CPU Speed
ü Provide the information of current CPU Speed.
ü To change the CPU Speed , select the desired CPU speed you
want.
< 100 MHz, 200MHz, 300MHz, 400MHz >
Figure 3-6
P3-32

3.2.7 Date/Time
Table 3-6 Date/Time
ICON ITEM & FUNCTION
l “Date/Time ” Tab :( Figure 3-6)
Date/Time ü Please see the detail information of 2.5.1 Setting Time and
Date on P2-22
3.2.8 Dialing Properties
Table 3-7 Dialing properties(A)
ICON ITEM & FUNCTION
l “Dialing Properties” Tab :( Figure 3-7-1)
ü In the When dialing from list, select the “Location” where you
want to change settings.(Figure 3-7-2)
ü To create a new location, select “New”. Enter the name of the
location, and then select “OK”.(Figure 3-7-3)
ü Enter or edit the area code and local country code as needed.
ü In Dial using, select “Tone dialing” or “Pulse dialing”. Most
phone lines are tone.
ü To automatically disable call waiting, select “□ Disable call
waiting by dialing”, select the appropriate number sequence in the
list, or enter a new sequence.
Dialing
Properties
l Editing dialing patterns (Figure 3-7-4)
ü Using the codes listed in the topic, revise the dialing patterns as
needed.
Notes:
n If you need to use character other than the ones listed here,
use manual dialing.
n Hyphens and spaces in dialing strings are ignored.
n Some modems may not respond to the following characters,
even though your device lets you add them to the dial
string.
P3-33
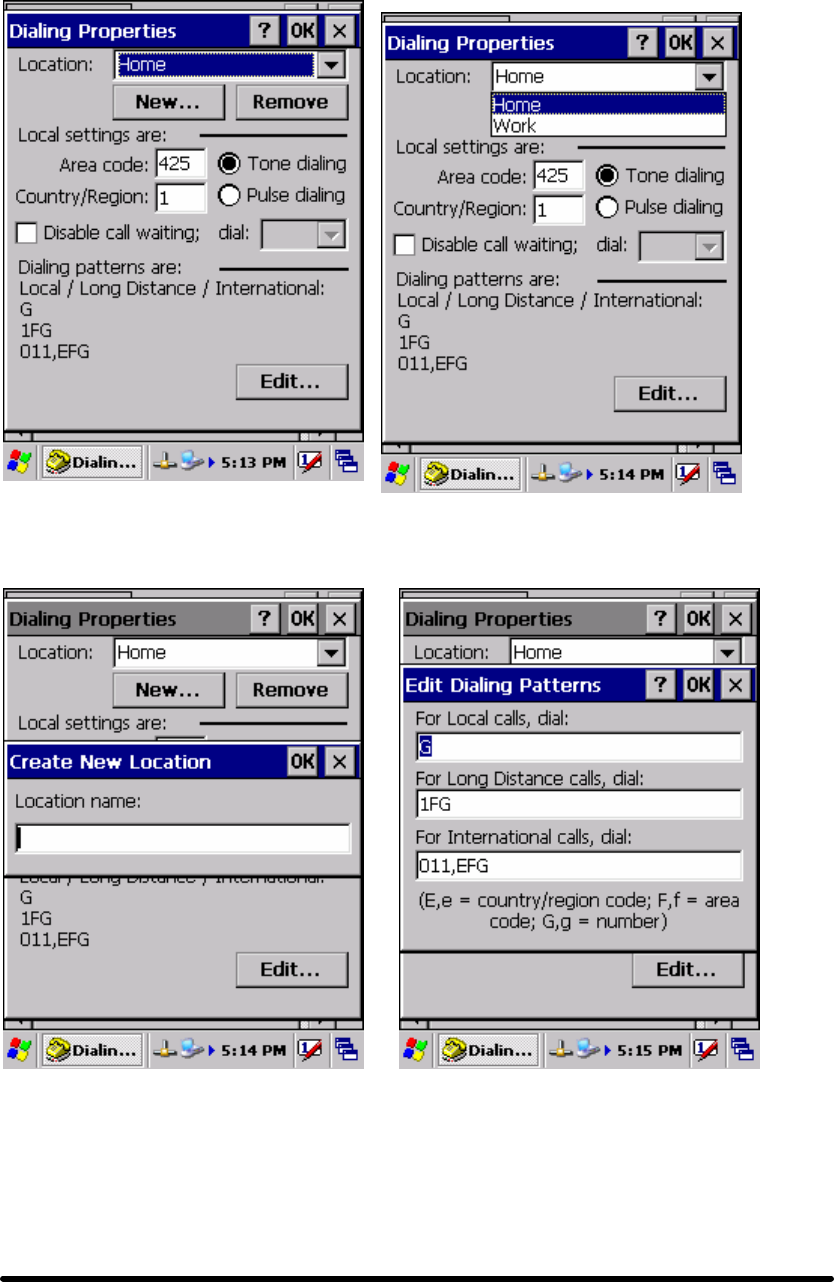
Figure 3-7-1 Figure 3-7-2
Figure 3-7-3 Figure 3-7-4
P3-34

3.2.9 Display Properties
Table 3-8 Display properties(A)
ICON ITEM & FUNCTION
l “Background” Tab :( Figure 3-8-1)
ü From the “Image” list, select an image you want as the
background of the desktop.(Figure 3-8-2)
ü To locate an image in another folder, select “Browse”.(Figure
3-8-3)
ü To have the image cover the entire background, select “ □Tile
image on background”
l “Appearance” Tab(Figure 3-8-4)
Display
ü Change the color scheme :( Figure 3-8-5)
Ø From the” Scheme” list, select a scheme.
Ø View your choice in the preview box. If you like the
scheme, select “Apply”.
ü Create a custom color scheme:
Ø From the “Item” list, select a display item.
Ø From the “Basic colors ” list, select a color, and select
“OK”.
Ø View your color selection(s) in the Preview box.
Ø To save the scheme, select “Save”.
Ø In the “Save this color scheme as” box, enter a name
for the scheme, and select “OK”.
Ø Select “Apply”.
P3-35
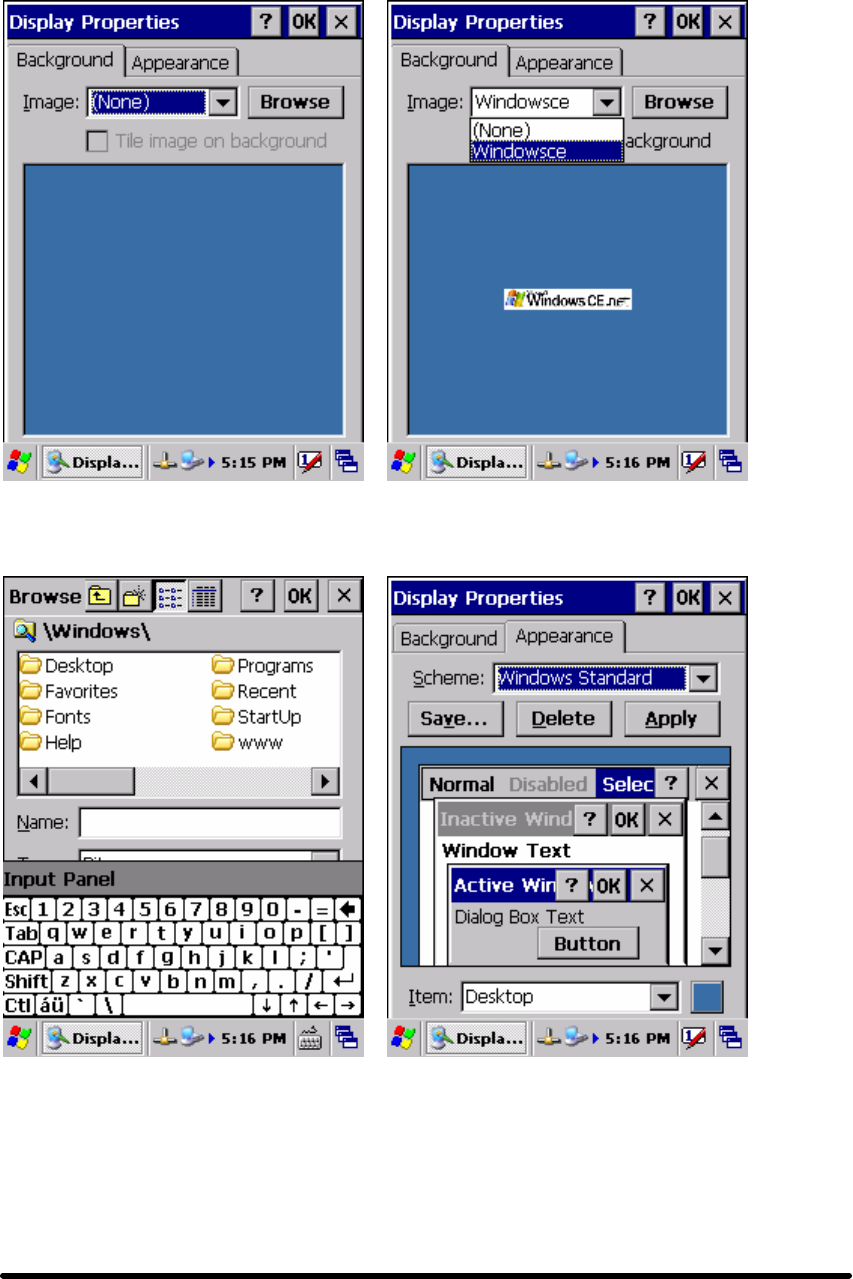
Figure 3-8-1 Figure 3-8-2
Figure 3-8-3 Figure 3-8-4
P3-36
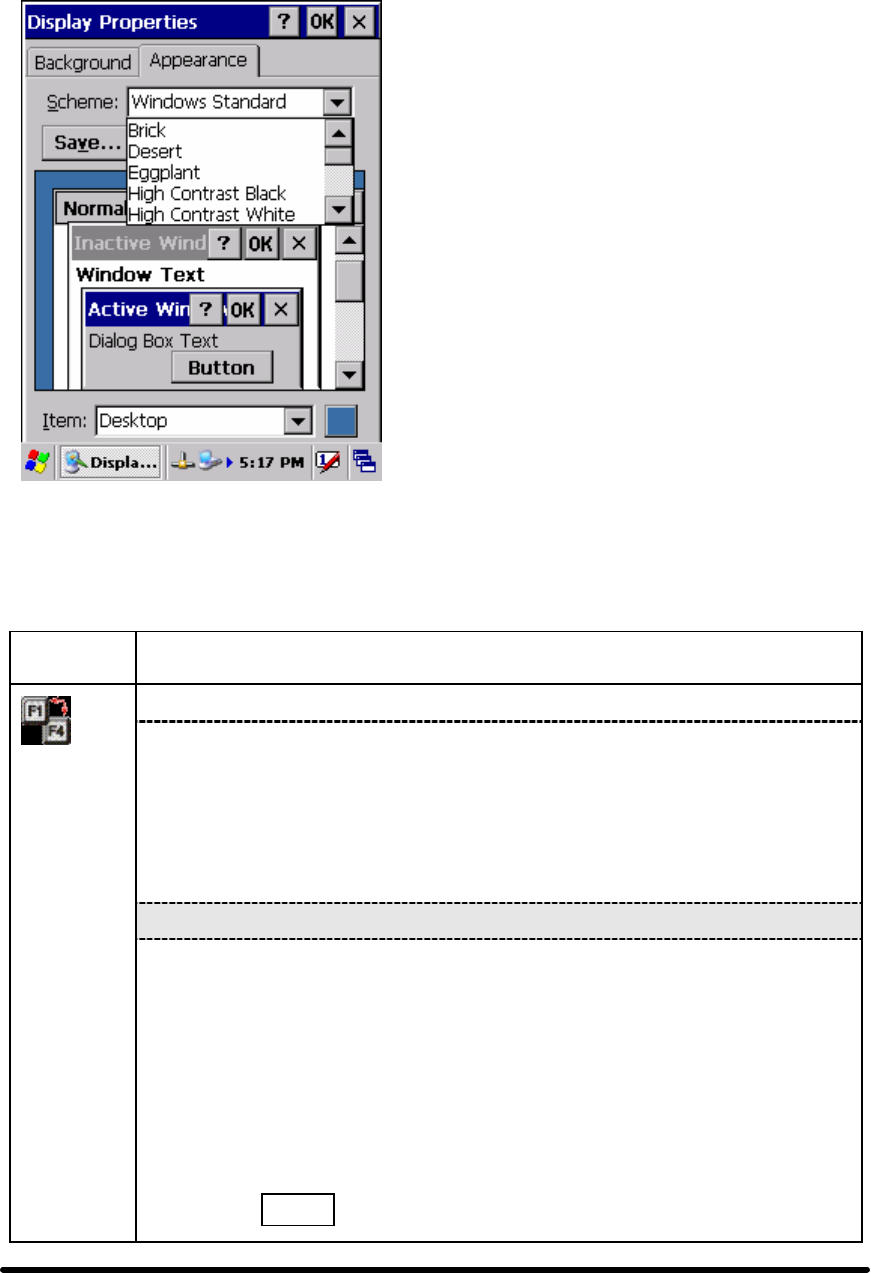
Figure 3-8-5
3.2.10 Fkey Settings
Table 3-9 FKey (A)
ICON ITEM & FUNCTION
l “Hot keys” Tab :( Figure 3-9-1)
ü Assign your hot keys to wakeup system after it goes into sleep
mode.
ü To select which key(s) that can wakeup system, then, tap “OK”.
< F1 key, F2 key, F3 key, F4 key and Scanner Buttons>
l “AP Settings” Tab(Figure 3-9-2)
FKey
Setting
ü To assign your favorite application program to F1,F2,F3 and F4 hot
keys.
ü Choose one of F1, F2, F3 and F4 from pull-down list.(Figure
3-9-3)
ü To tap “ Open” inside “Assign program” applet.
ü Select one application program you want from program list, Then,
choose “OK”. (Figure 3-9-4)
ü To tap Default tab to return back to default setting. (Figure 3-9-2)
P3-37
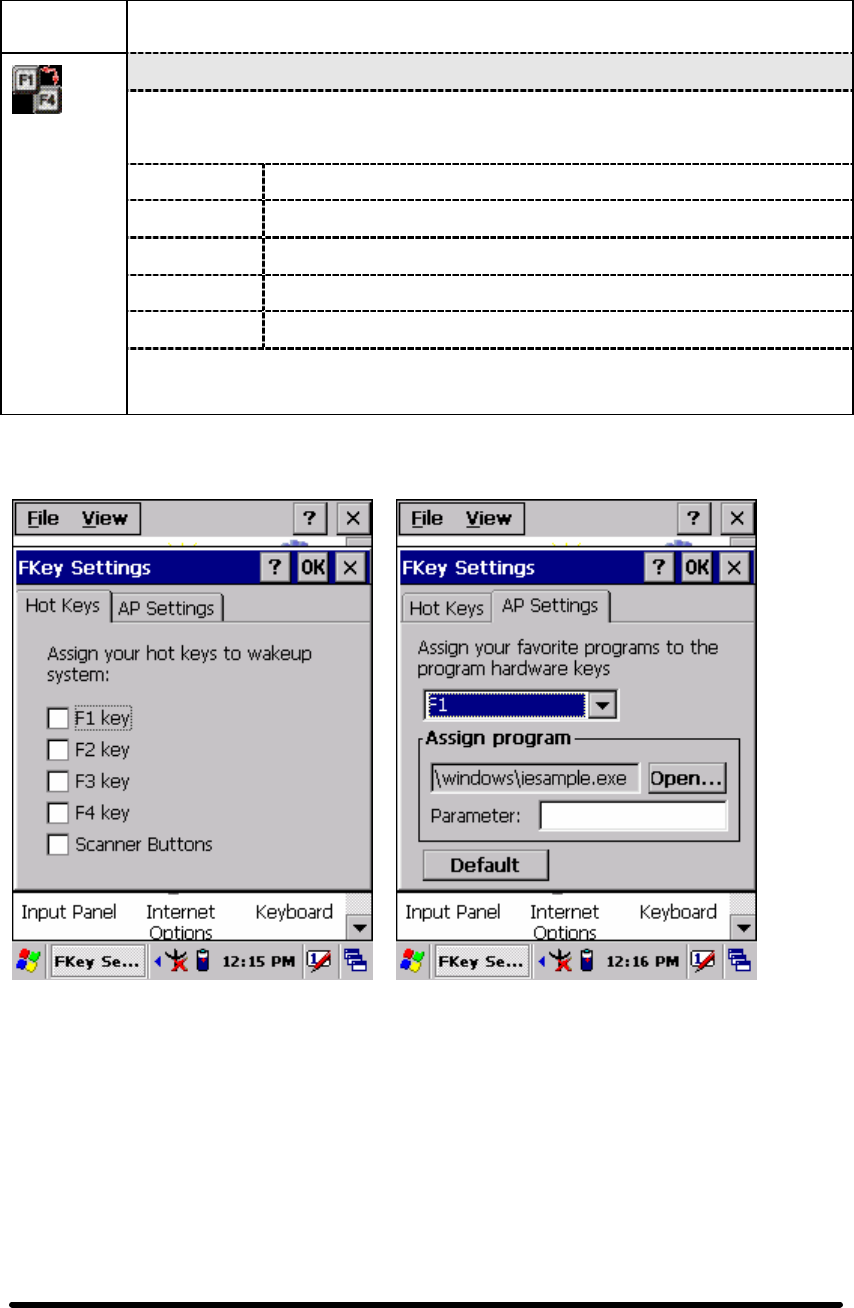
Table 3-9 FKey (B)
ICON ITEM & FUNCTION
l “AP Settings” Tab(Figure 3-9-2)
ü The default setting for F1~F4:
F Key Name of Application Program
F1 Internet Explorer
F2 WordPad
F3 Inbox
F4 My Computer
FKey
Setting
Figure 3-9-1 Figure 3-9-2
P3-38
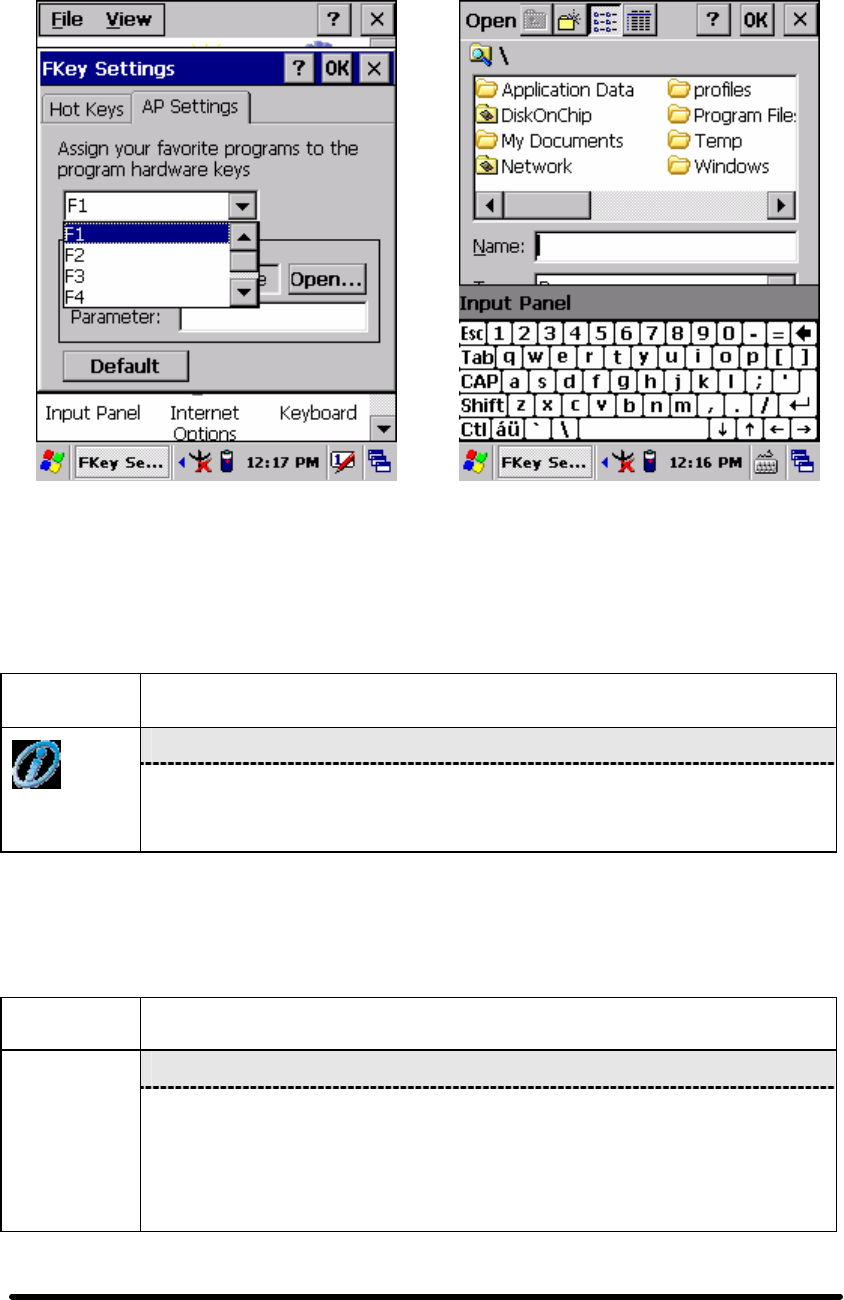
Figure 3-9-3 Figure 3-9-4
3.2.11 Information
Table 3-10 Information
ICON ITEM & FUNCTION
l “Information” Tab :
Information
ü Provide hardware version, Software version, ROM size, RAM
size, Serial No. and Configuration No.
3.2.12 Input Panel
Table 3-11 Display properties(A)
ICON ITEM & FUNCTION
l “Input panel” Tab :( Figure 3-10-1)
Input Panel ü Select the input method you want to change.
ü To change the Soft Keyboard Options , tap “Option” (Figure
3-10-2)
.
P3-39
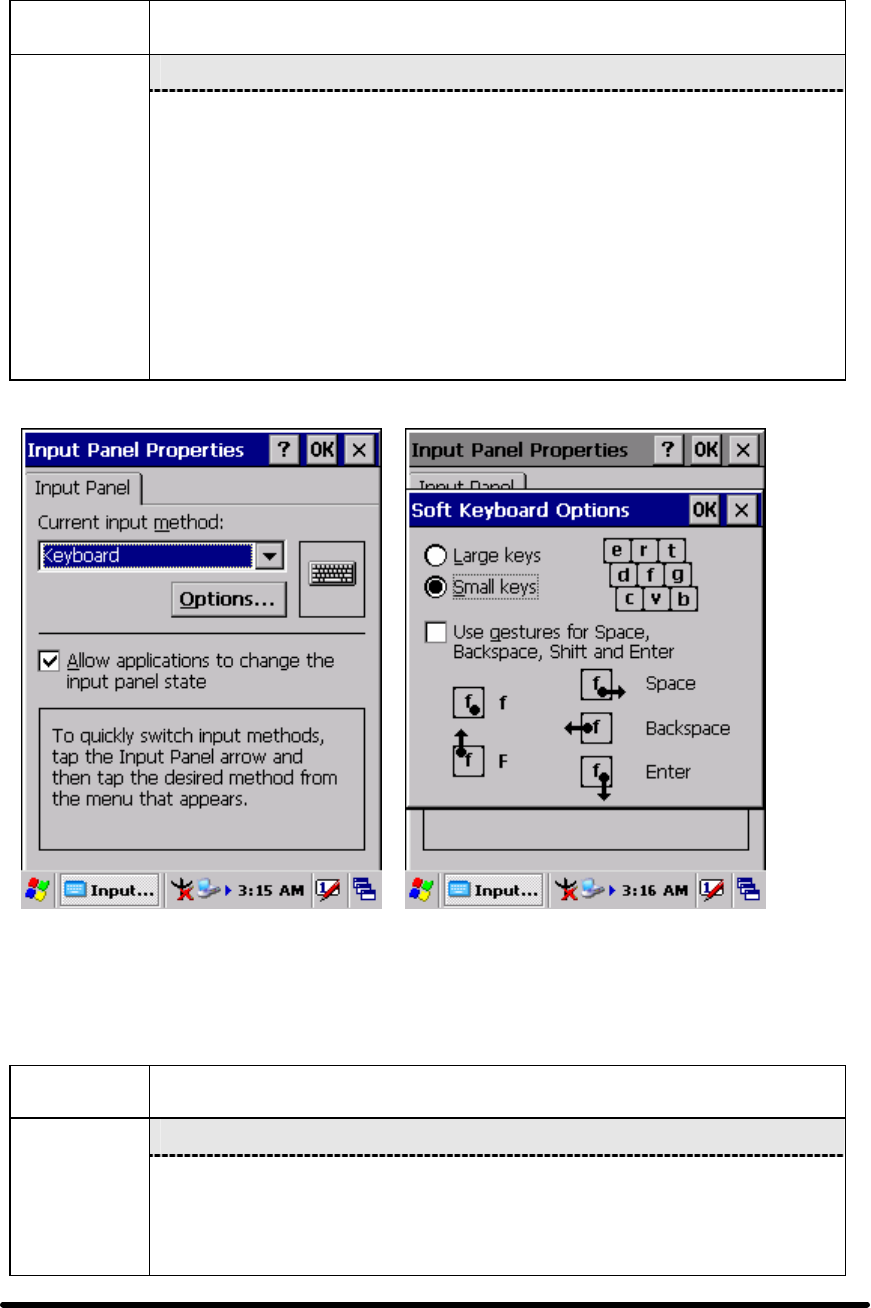
Table 3-11 Display properties(B)
ICON ITEM & FUNCTION
l “Input panel” Tab :
Input Panel ü Change the soft keyboard options as desired, selecting from:
Ø Large or small keys
Ø Using gestures for space, black-space shift, and enter.
ü To exit the soft keyboard Options, press “OK” on the control
bar, or press the <Enter> key on the keypad.
ü To exit the Input Panel, press “OK” on the control bar, or press
the <Enter> key on the keypad.
.
Figure 3-10-1 Figure 3-10-2
3.2.13 Internet Options
Table 3-12 Internet Options(A)
ICON ITEM & FUNCTION
l “General” Tab :( Figure 3-11-1)
Internet
Settings
ü Type in the URL of desired start page and the desired search
engine. You also change the Cache Size, clear the Cache and
Clear the History..
P3-40

Table 3-12 Internet Options(B)
ICON ITEM & FUNCTION
l “Connection” Tab :( Figure 3-11-2)
ü Modify the network access setting as desired.
l “Security” Tab (Figure 3-11-3)
ü Modify the security settings as desired. You can enable any of
the following by tapping the checkbox:
Ø Allow cookies
Ø Allow TLS 1.0 security
Ø Allow SSL 2.0 security
Ø Allow SSL 3.0 security
Ø Warm when switching across secure and insecure areas.
l “Advanced” Tab (Figure 3-11-4)
Internet
Settings
ü Modify the security settings as desired. You can enable any of
the following by tapping the checkbox:
Ø Display Image in pages
Ø Play sounds in pages
Ø Enable scripting
Ø Display a notification about every script error
Ø Underline links-
○ Never
○ Always
○ Hover
P3-41
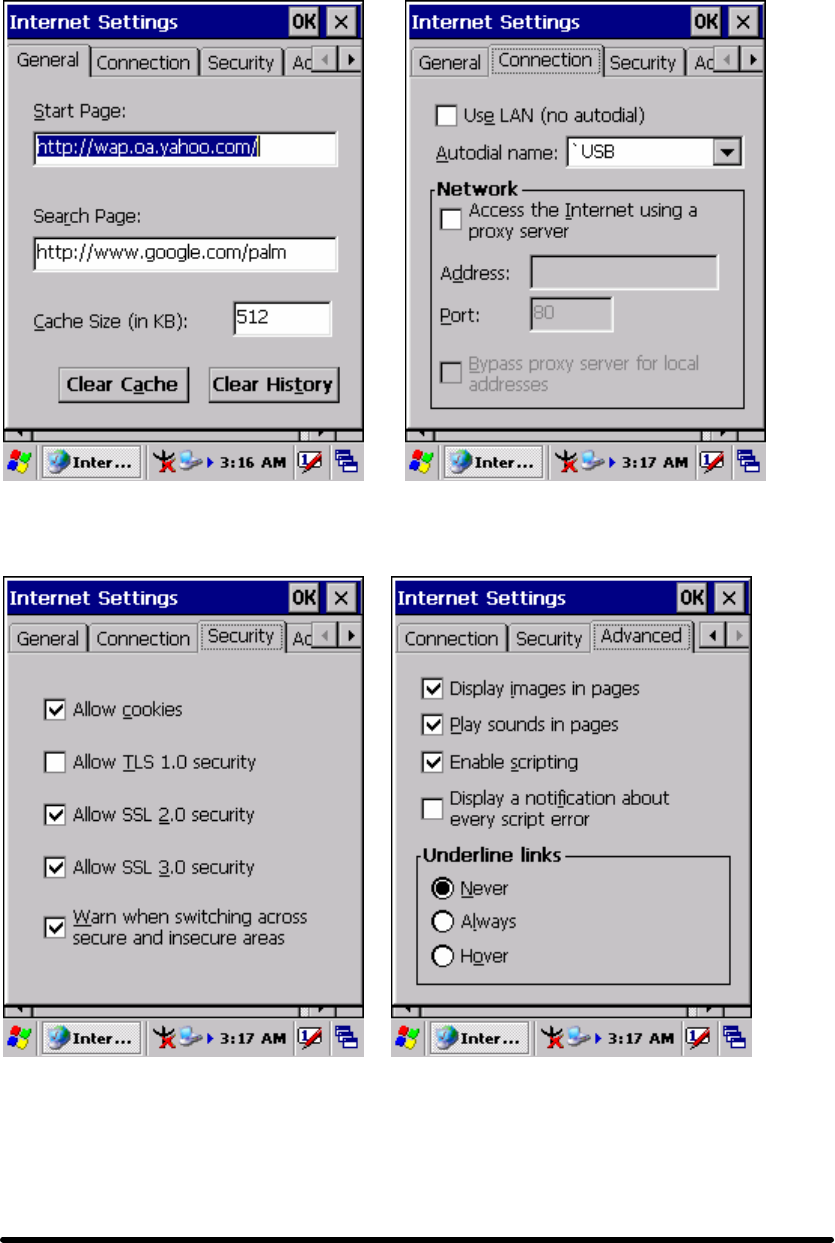
Figure 3-11-1 Figure 3-11-2
Figure 3-11-3 Figure 3-11-4
P3-42

3.2.14 Keyboard
Table 3-13 Keyboard(A)
ICON ITEM & FUNCTION
l “Repeat” Tab :( Figure 3-12)
Keyboard ü To change the amount of time between depressions before
repetition starts, adjust the Repeat delay slider
ü To change the repeat rate, adjust the Repeat rate slider.
ü Test your new setting.
ü Tap “ OK” to exit the “Keyboard” Tab.
Figure 3-12
P3-43

3.2.15 Mouse
Table 3-14 Mouse(A)
ICON ITEM & FUNCTION
l “Double-Click” Tab :( Figure 3-13-1,Figure 3-13-2)
Mouse ü Double-click the checkerboard grid at comfortable speed
ü Double-click the Test icon to test your setting.
ü The function is OK if the figures are changed from Figure
3-13-1 to Figure 3-13-2.
ü To tap “OK” to exit the Mouse tab.
Figure 3-13-1 Figure 3-13-2
P3-44

3.2.16 Network and Dial-up Connections
Table 3-15(A) Network and Dial-up Connections
ICON ITEM & FUNCTION
Network
and Dial-up
Connections
l “Connection” Tab :
ü To create a “Dial-up Connection”:
Ø Double-tap the “Make New connection”.
Ø In the “Make New Connection” dialog box, enter a name for
the connection.
Ø Select “Dial-Up Connection”.
Ø Select the “Next” button.
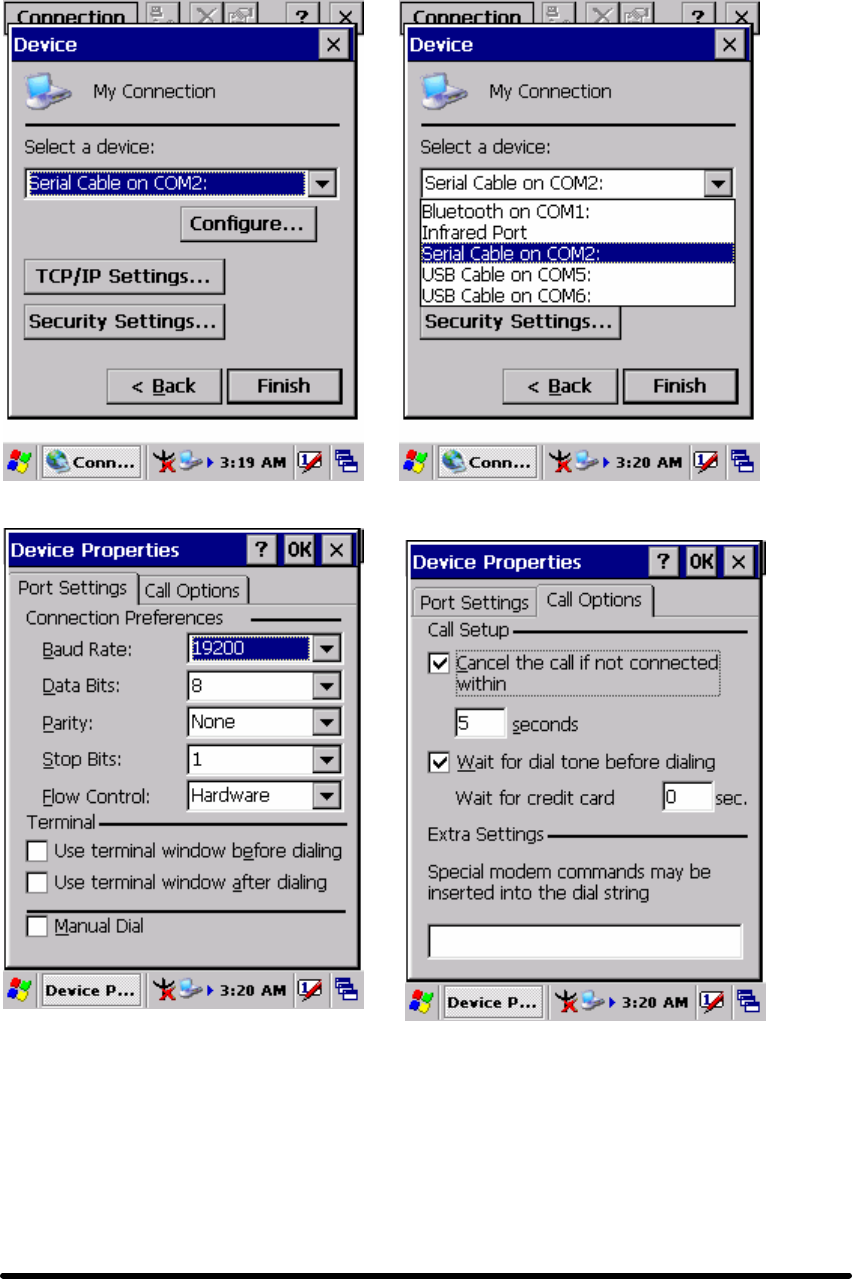
Ø Select the modem you want use.
Ø Select “Configure”
Ø Under “Connection Reference”, use the default settings
provided. If you can’t connect using these settings, see your
ISP or network administrator for specific information. If you
want to always enter a phone number before connecting,
Select “Manual Dial”. Select “OK”.
Ø Select “TCP/IP Settings”. In the “General” tab, ensure “Use
Server-assigned IP address” is selected. In the “Name
Servers” tab, ensure “Use Server-assigned addresses” is
selected, and select “OK”. If you are unable to connect with
these default settings, see your ISP or network administrator
for specific TCP/IP information.
Ø Select the “Next” button and type the telephone number.
Ø Select the “Finish” button.
The connection you just created appears as an icon in the “Network
and Dial-up Connections” folder.
ü Set up a point-to-Point Protocol(PPP) account with an ISP and
obtain the following information:
Ø Access telephone number
Ø User name
Ø Password
P3-45
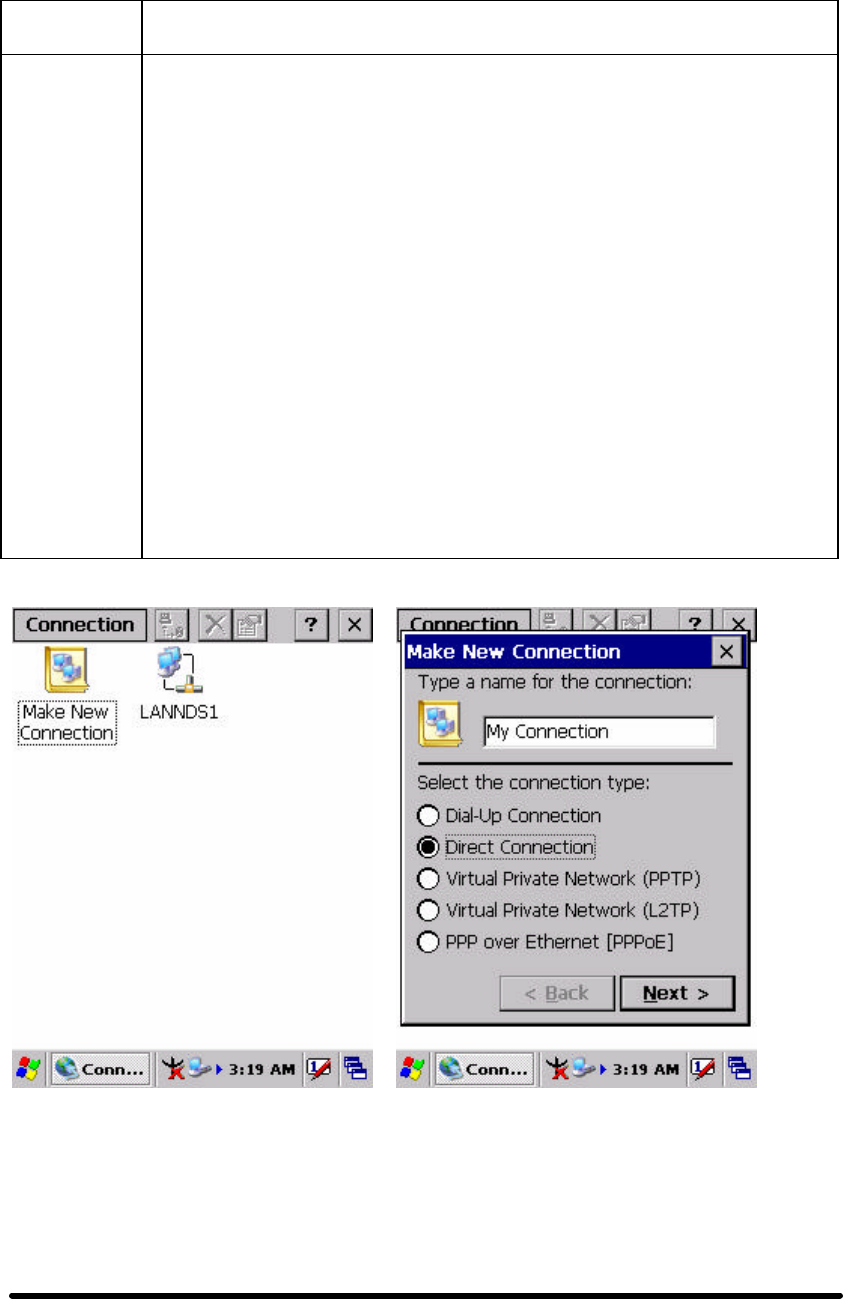
Table 3-15(A) Network and Dial-up Connections
ICON ITEM & FUNCTION
Network
and Dial-up
Connections
Once you have established an account, create a new connection on
your device. When creating this connection, you should be able to use
all of the default TCP/IP settings provided in the Make New
Connection Wizard. If you can’t connect using the default settings,
contact your ISP or access your ISP’s Web site for specific TCP/IP
information as well as primary and secondary DNS address.
ü Modify connection setting
Ø Select Start > Settings > Network and Dialup Connections
Ø Select the icon for connection settings you want to modify.
Ø Select File > Properties, or double- tap the appropriate icon.
Ø Select desired options. There may be additional settings that
depend on the connection. To modify, select the icon and
select the icon and select Advanced Settings… from the
menu.
P3-46
P3-47