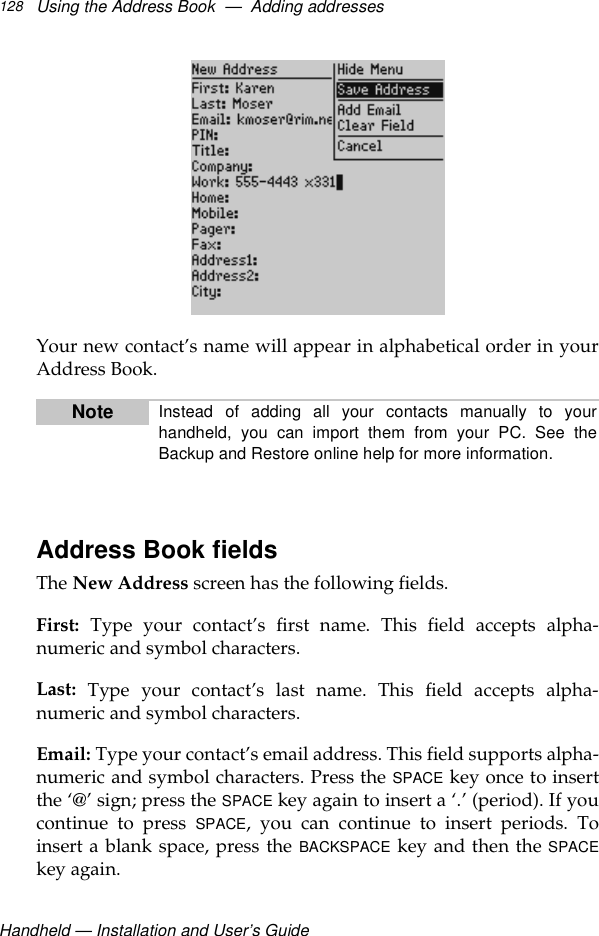
BlackBerry R857D-2-5 User Manual 857guide
BlackBerry Limited 857guide
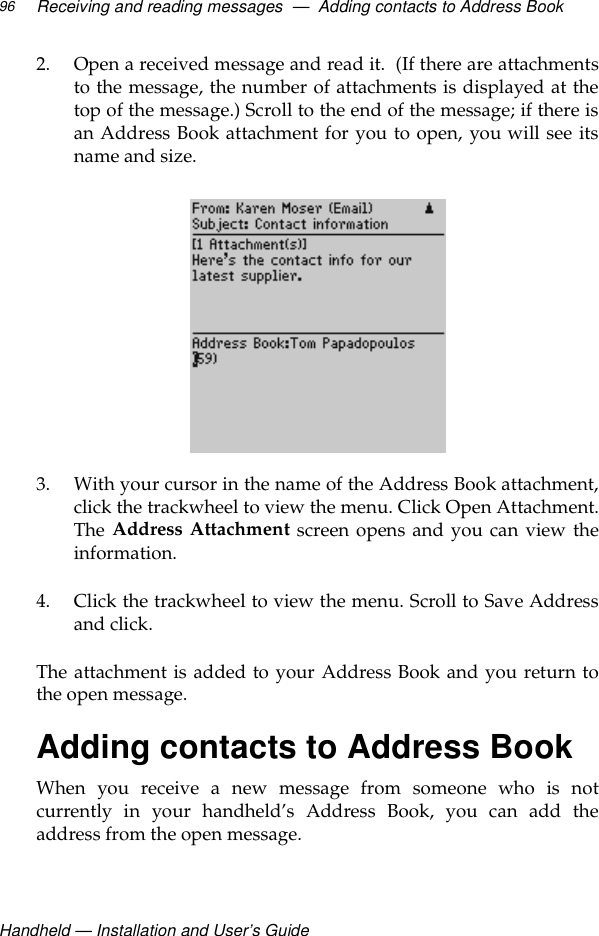
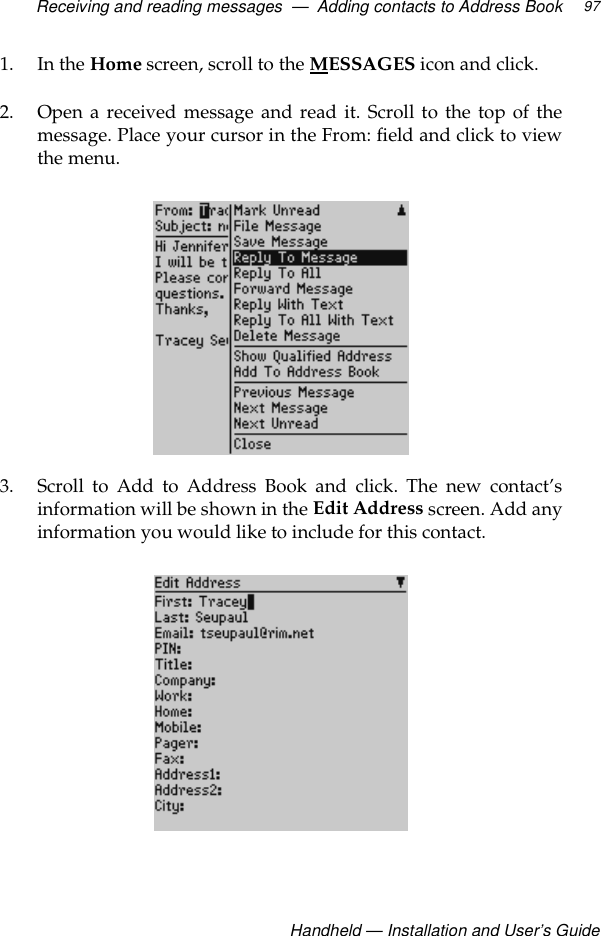
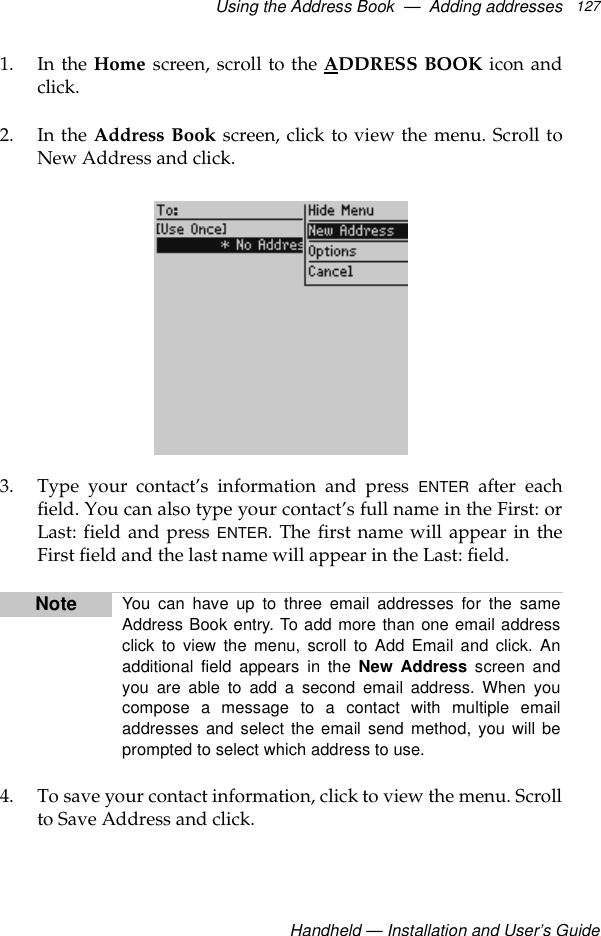
UserManual.wiki
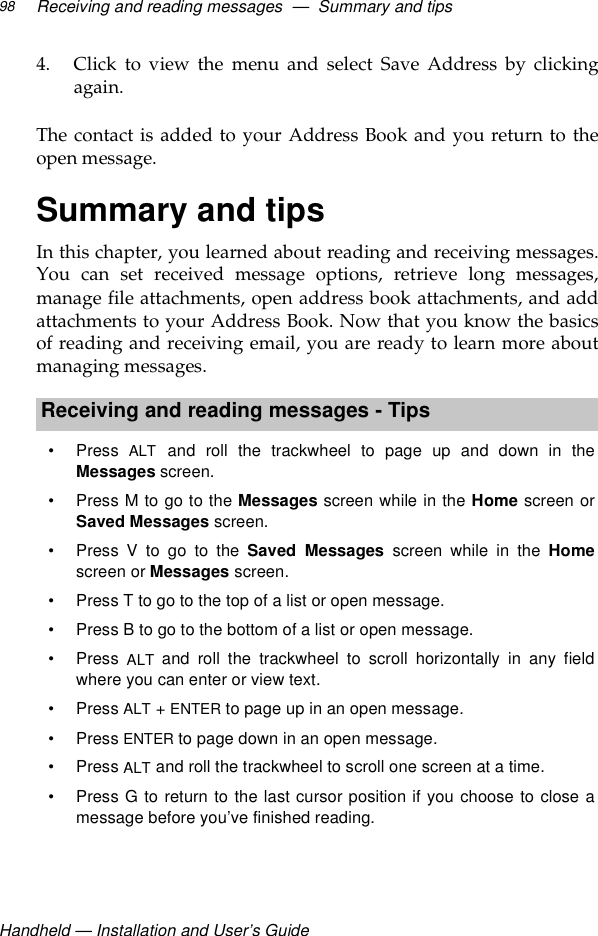
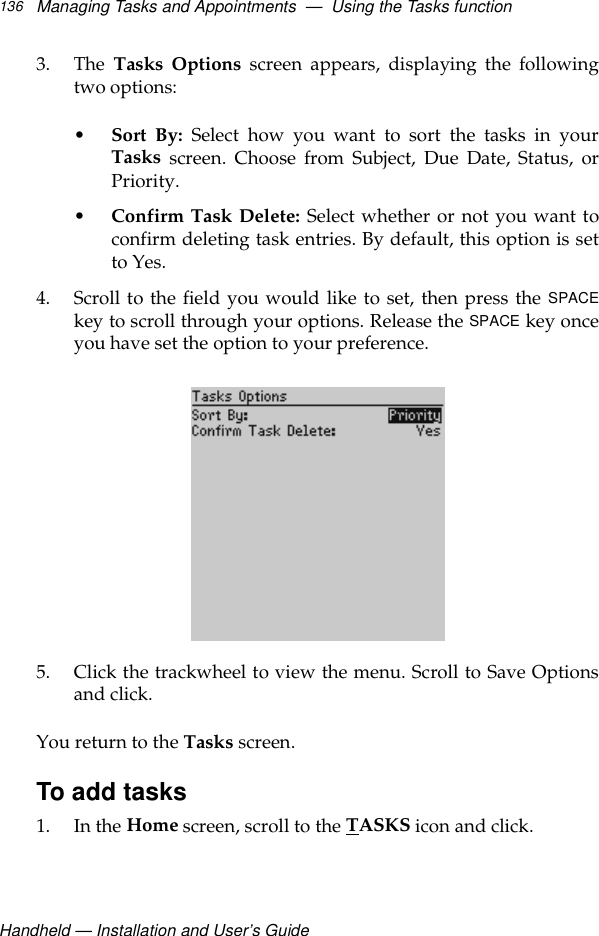
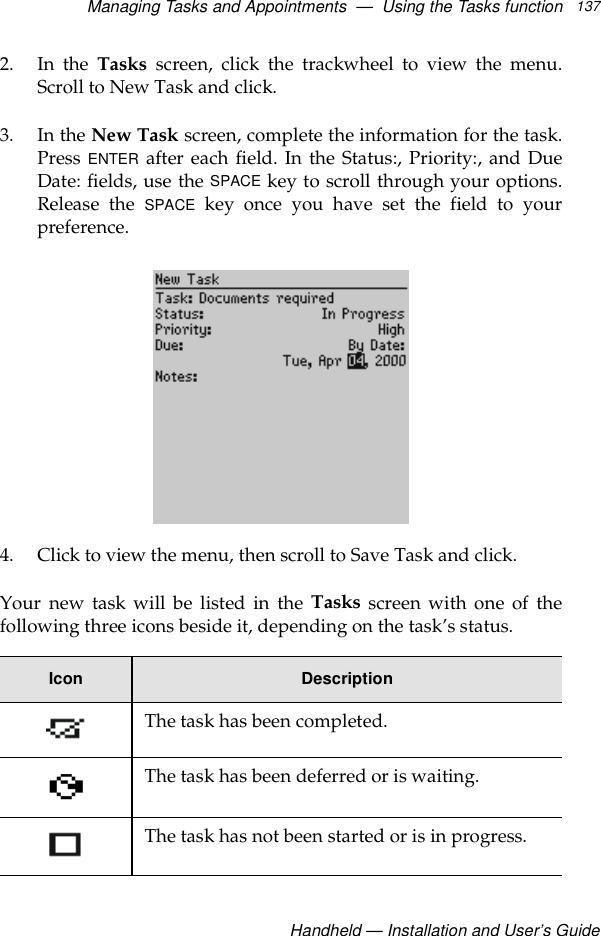
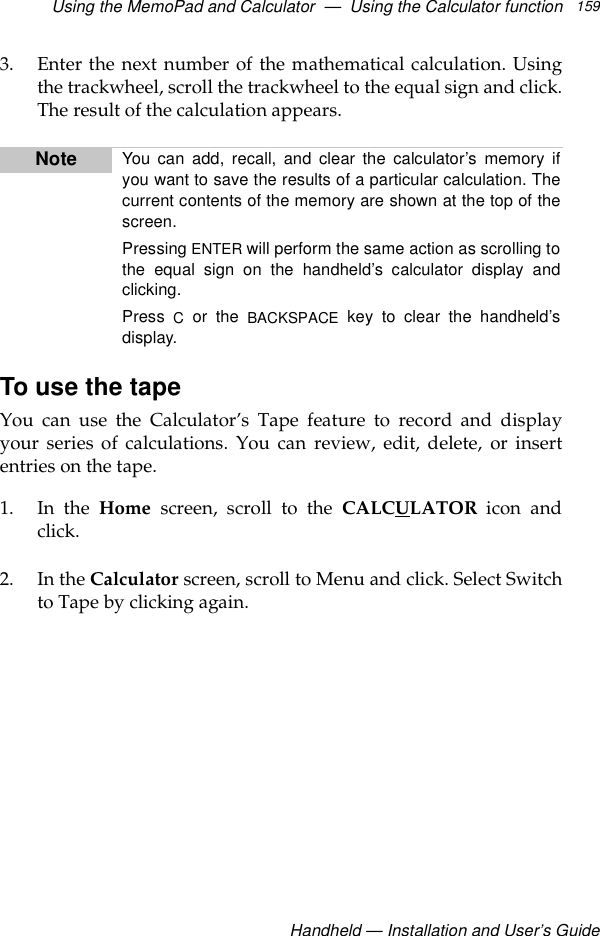
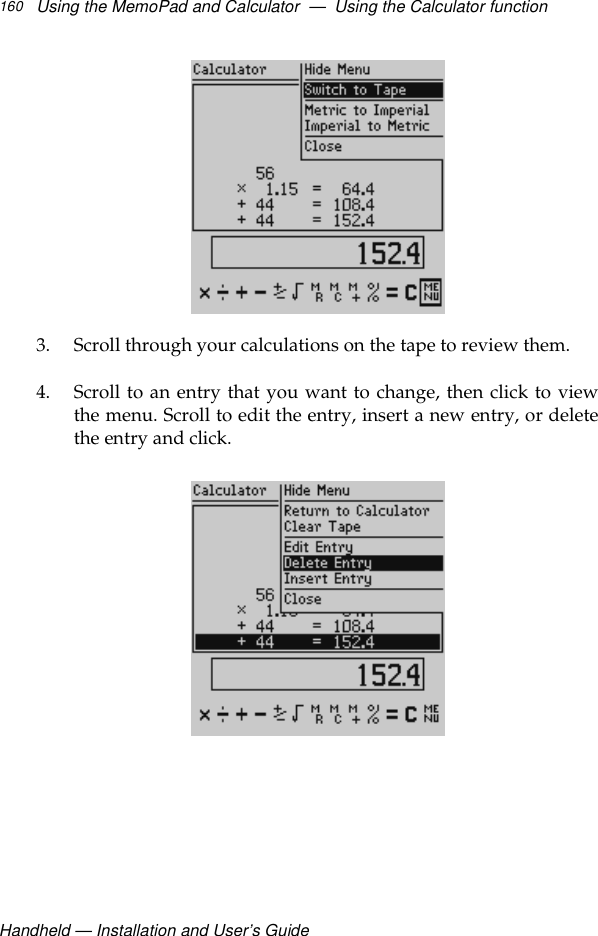
>
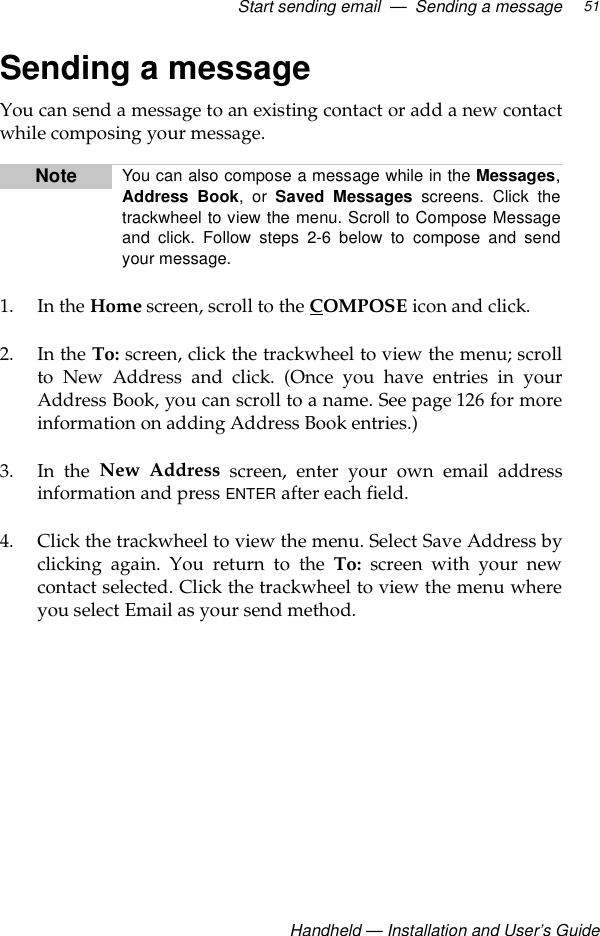
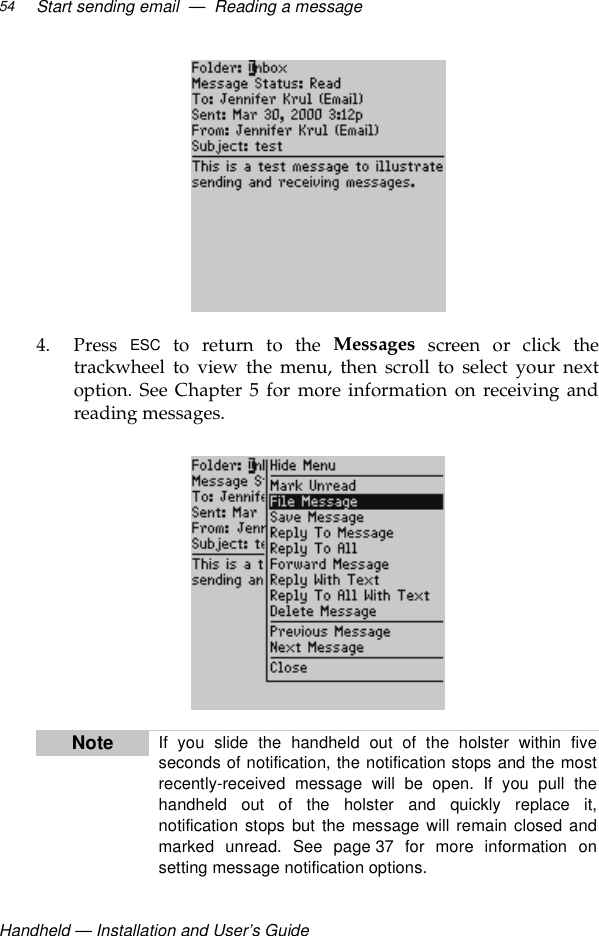
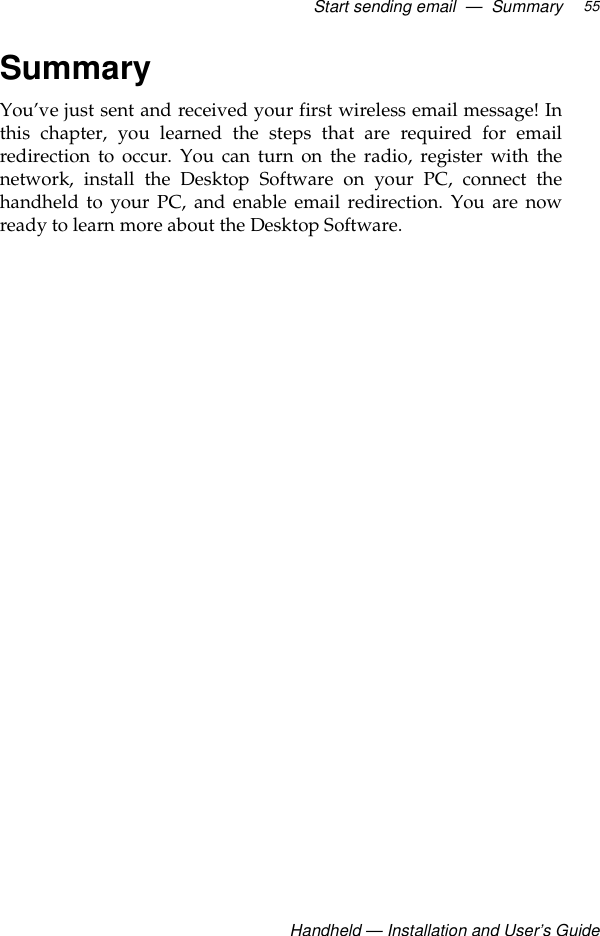
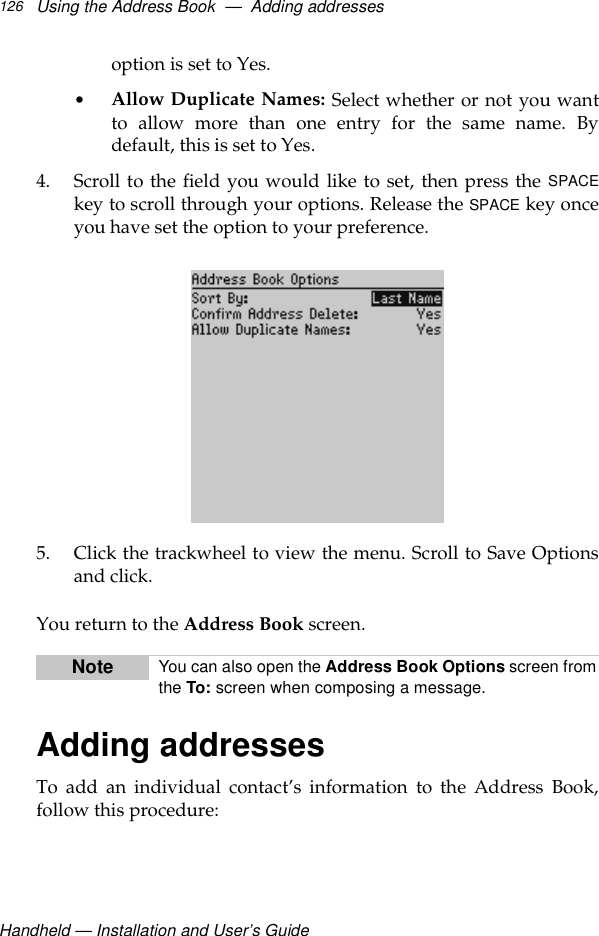
BlackBerry
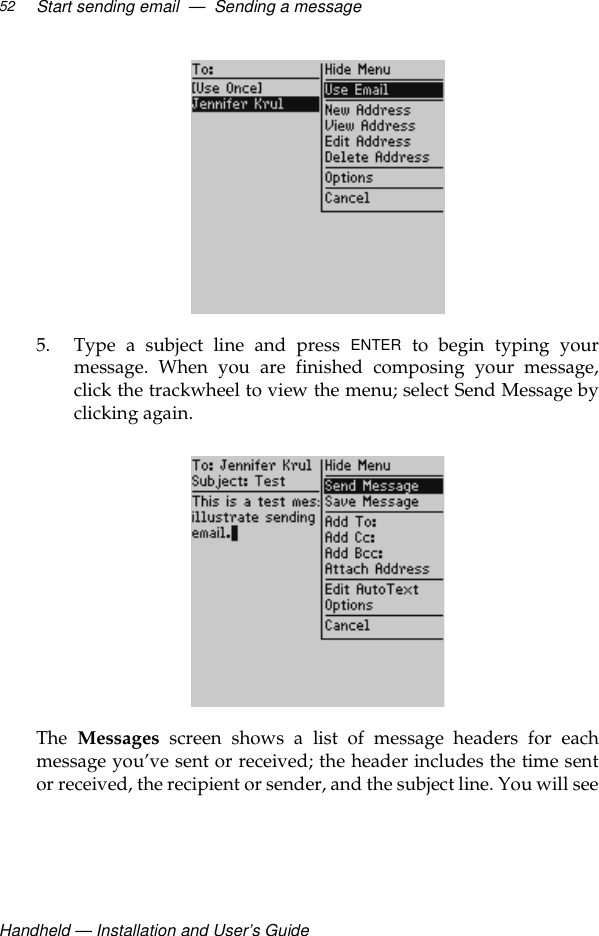
>
R857D 2 5 User Manual
user manual
Navigation menu
Upload a User Manual
Namespaces
Wiki Guide
HTML
PDF
Info
Views
User Manual
Discussion / Help
Navigation


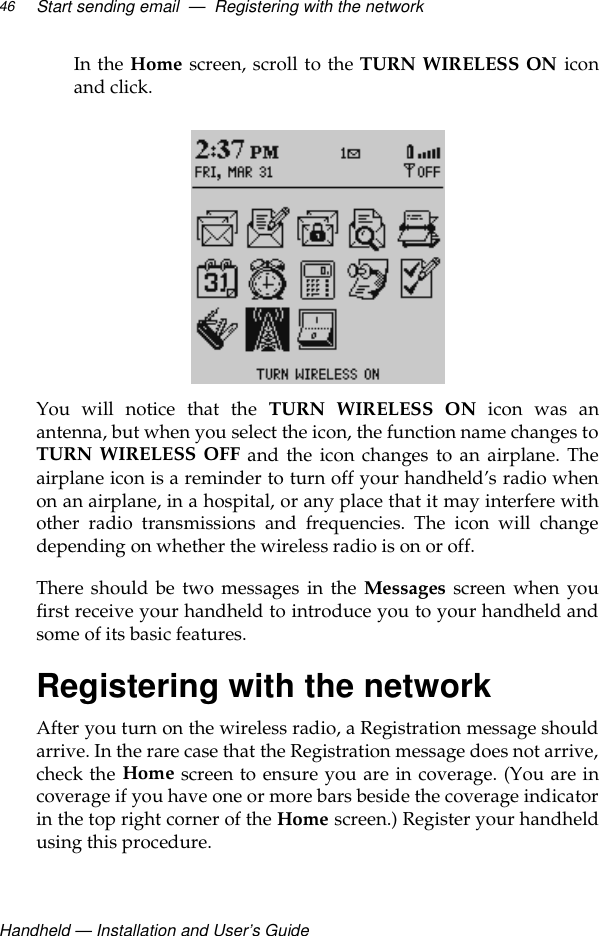
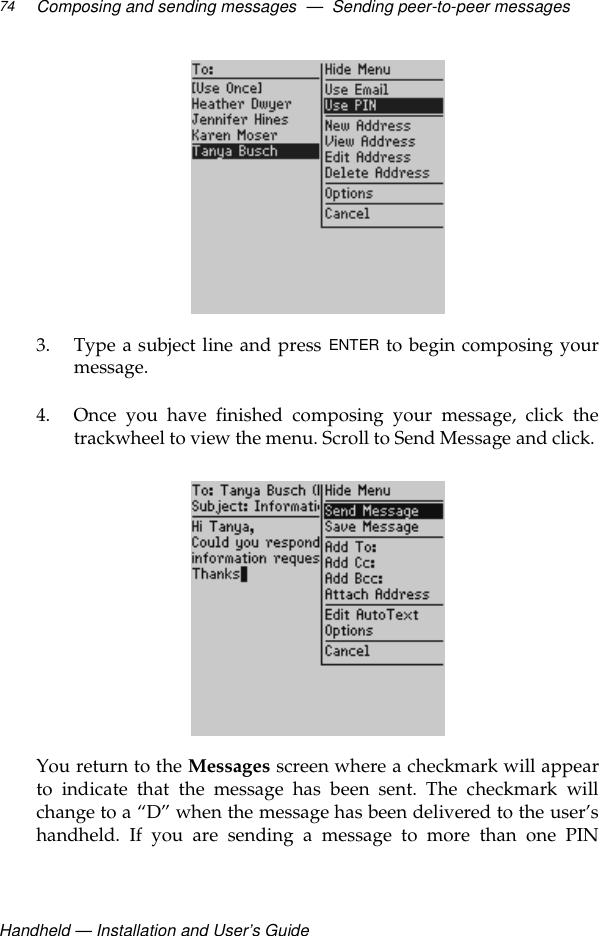
![Composing and sending messages — Sending one-time messagesHandheld — Installation and User’s Guide75number, the checkmark will change to a “D” when the message hasbeen delivered to all the recipients’ handhelds.Sending one-time messagesThis send option is a short-cut method and the recipient’s addresswill NOT be saved in your Address Book.1. In the Home screen, scroll to the COMPOSE icon and click.2. The To: screen appears. Scroll to [Use Once] and click to viewthe menu. Select a send method - either Email or PIN. (For thisexercise, select Use Email.)3. The One Time Email screen appears and you can type yourcontact’s email address. Click the trackwheel to view the menuand select Continue by clicking again.Note To find your PIN number, check the information in theStatus screen of the Options function. You can also findout your PIN number by placing your handheld in the cradleand running the Desktop Software.](https://usermanual.wiki/BlackBerry/R857D-2-5/User-Guide-97292-Page-75.png)


![Frequently asked questions — Home screenHandheld — Installation and User’s Guide181longer have the correct date and time or encryption key. To reset thedate and time, see “Customizing your handheld’s options” onpage 167, or to update it automatically, simply synchronize thehandheld with the Desktop Software’s Intellisync tool. You cangenerate a new encryption key in the Security tab of the DesktopSoftware’s Redirector Settings tool.Home screenHow can I return to the Home screen?The screen that displays the functions list and the date and time iscalled the Home screen. • Press the ESC key repeatedly until you return to the Homescreen. See page 23 for more information on othershortcuts.• Select Close from an application’s menu or, in the DeviceOptions screen, scroll to the [Return to Home Screen]option and click.LCD screenWhat can I do if my LCD screen seems faint?• Check the Screen/Keyboard option in the Device Optionsscreen. See page 167 for more information on how to setoptions.• While the handheld is on, press the silver key once to activatebacklighting. See page 29 for more information.The backlighting on my display screen keeps disappearing.• The LCD backlighting will turn off after 20 seconds if you havenot pressed a key or the trackwheel.](https://usermanual.wiki/BlackBerry/R857D-2-5/User-Guide-97292-Page-181.png)