BlackBerry RAN21CN BlackBerry Wireless Handheld User Manual user guide
BlackBerry Limited BlackBerry Wireless Handheld user guide
UserManual.wiki
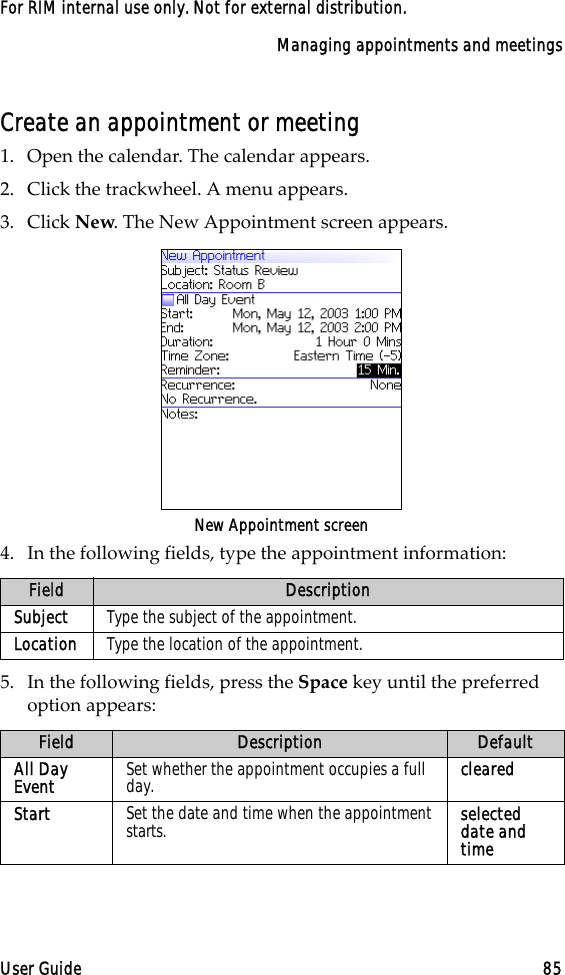
>
BlackBerry
>
RAN21CN User Manual
>
User Guide
Contents
1.
User Guide
2.
User Guide Safety Info
User Guide
Navigation menu
Upload a User Manual
Namespaces
Wiki Guide
HTML
PDF
Info
Views
User Manual
Discussion / Help
Navigation


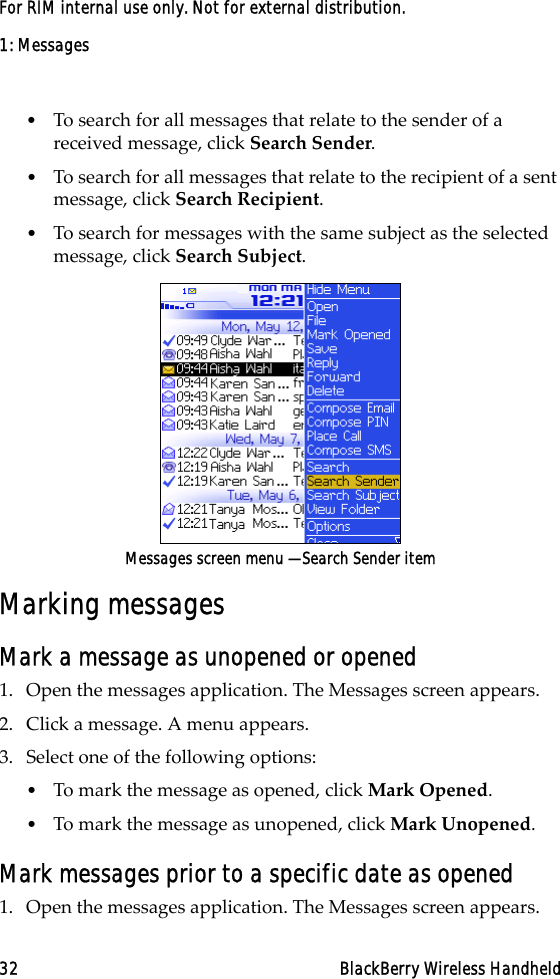
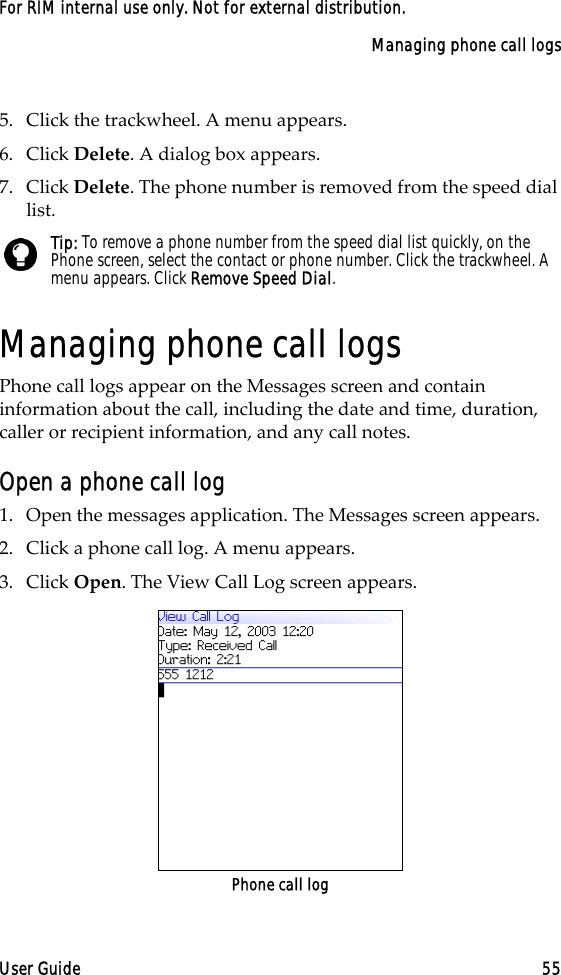
![Email and PIN messagesUser Guide 9For RIM internal use only. Not for external distribution.Sending email and PIN messagesSend a message1. Open the messages application. The Messages screen appears.2. Click the trackwheel. A menu appears.3. Select one of the following options:•To send an email message, click Compose Email. The Select Address screen appears.•To send a PIN message, click Compose PIN. The Select Address screen appears.4. Click [Use Once]. A menu appears.Select Address screen menu — Email item5. Select one of the following options:•To send an email message, click Email. The One Time Email screen appears.Prerequisite: To send messages, the following requirements must be met:•The wireless coverage indicator must show a level of wireless coverage.•1X must appear with the wireless coverage indicator on the Home screen.](https://usermanual.wiki/BlackBerry/RAN21CN.User-Guide/User-Guide-379374-Page-9.png)
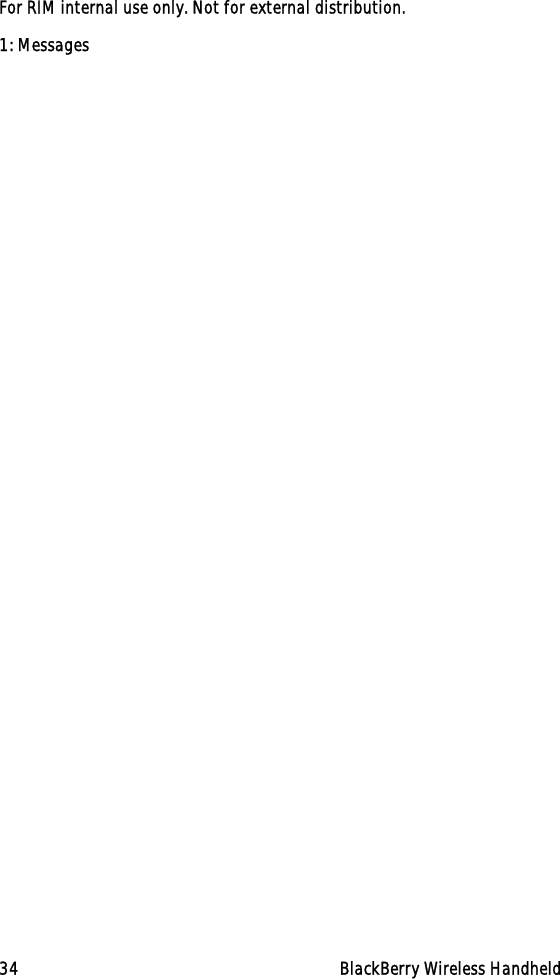
![1: Messages22 BlackBerry Wireless HandheldFor RIM internal use only. Not for external distribution.2. Click the trackwheel. A menu appears.3. Click Compose SMS. The SMS screen appears.4. Click [Use Once]. A menu appears.SMS screen menu — SMS item5. Click SMS. The One Time SMS screen appears.6. Type your contact’s SMS-compatible phone number.7. Click the trackwheel. A menu appears.8. Click Continue.9. Type a message. 10. Click the trackwheel. A menu appears.11. Click Send. The message is sent.Tip: Contact your service provider for more information on setting an SMS-compatible number for your contact. Your service provider might require that all SMS-compatible phone numbers include the area code and other prefixes.](https://usermanual.wiki/BlackBerry/RAN21CN.User-Guide/User-Guide-379374-Page-22.png)