Brady IPSERIES IP Printer User Manual IP Label Printer
Brady Corporation IP Printer IP Label Printer
UserManual.wiki
>
Brady
>
IPSERIES User Manual
>
Users Manual Part 1
Contents
1.
Quick Start Guide
2.
Users Manual Part 1
3.
Users Manual Part 2
Users Manual Part 1
Navigation menu
Upload a User Manual
Namespaces
Wiki Guide
HTML
PDF
Info
Views
User Manual
Discussion / Help
Navigation


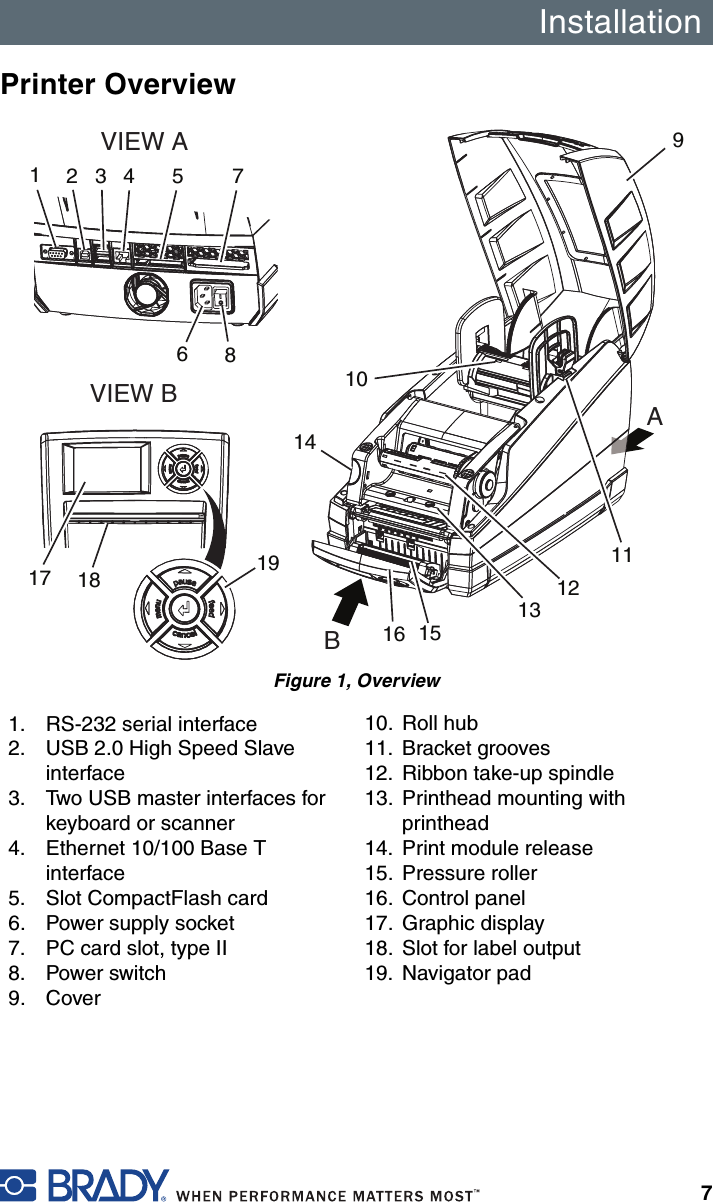
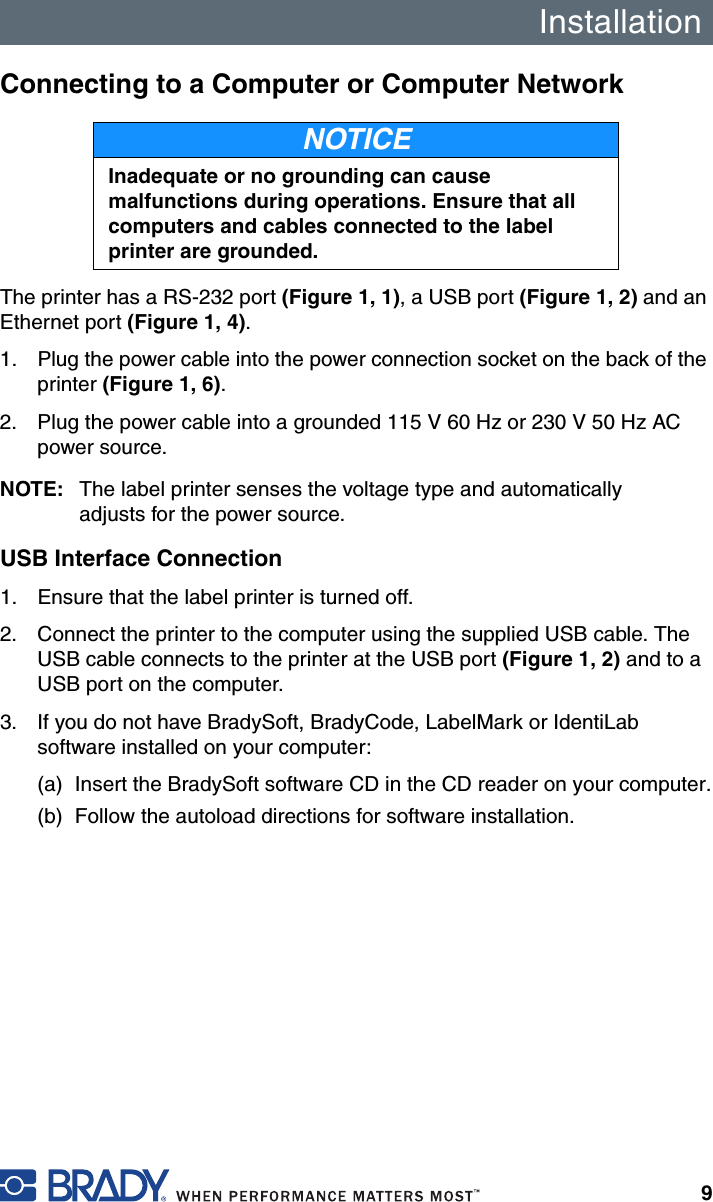
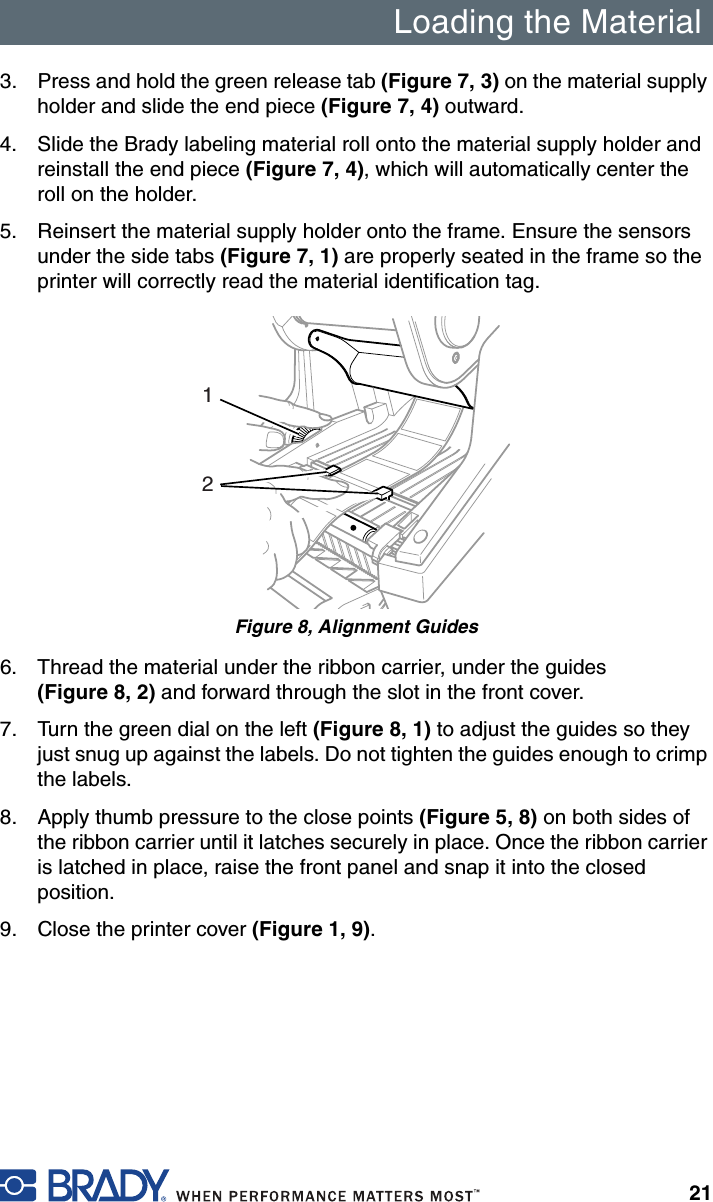
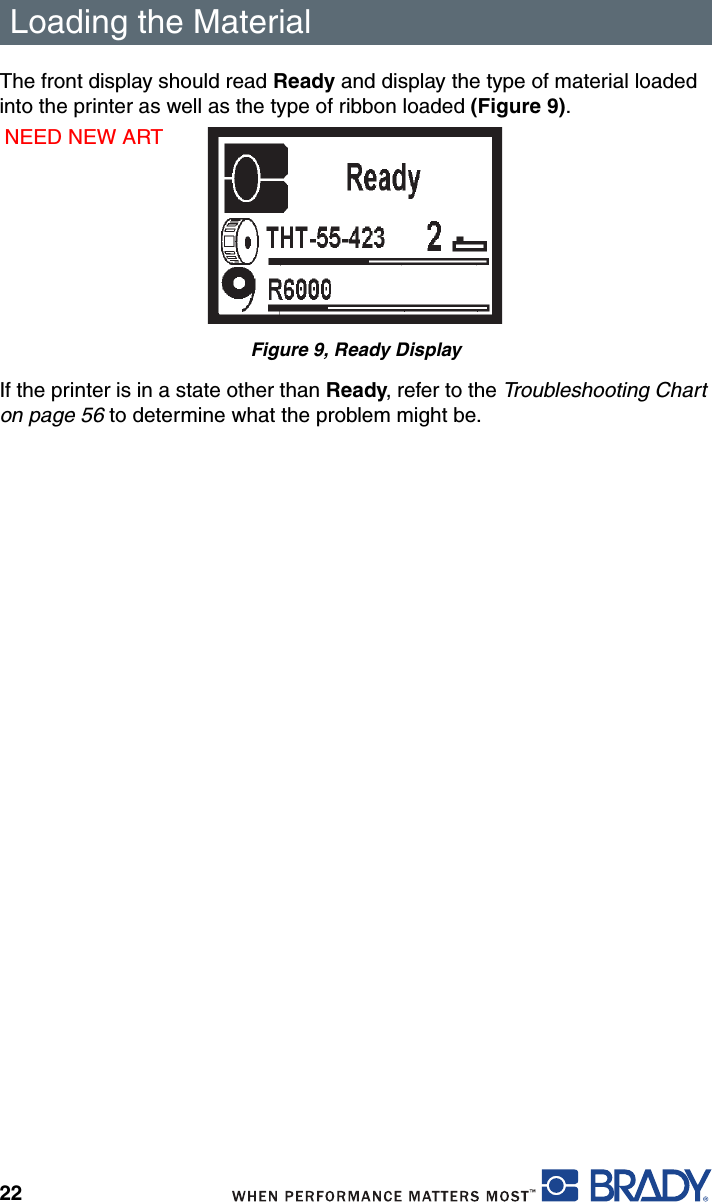
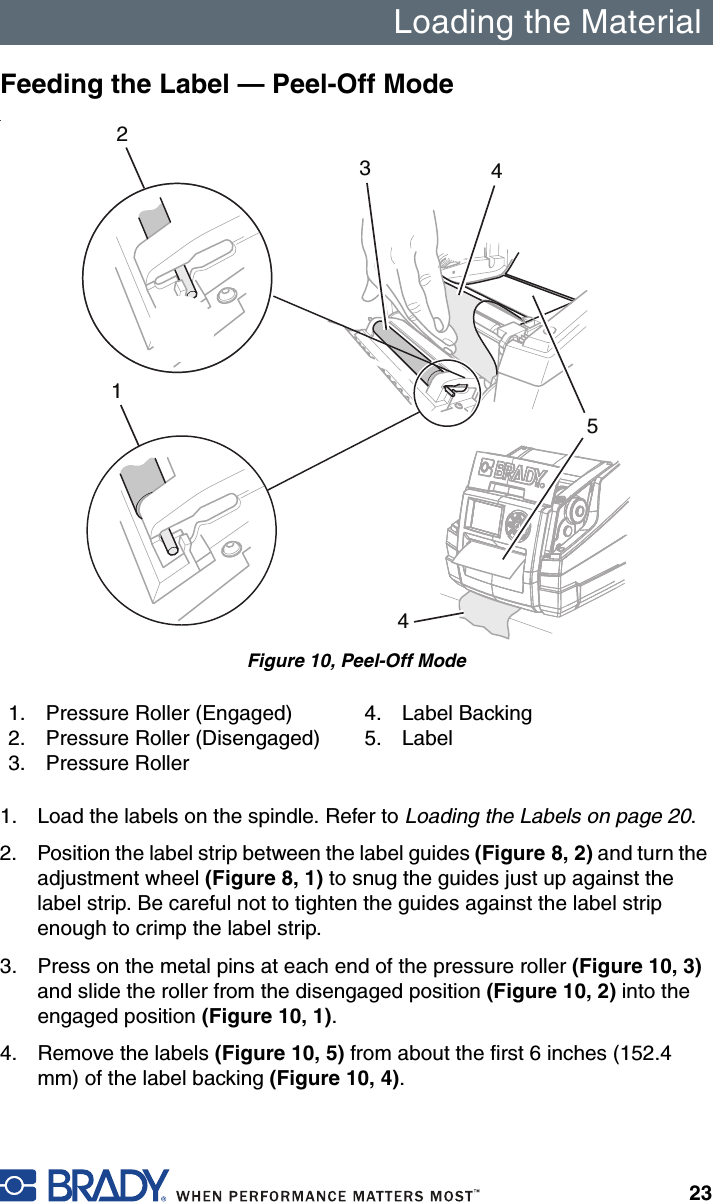
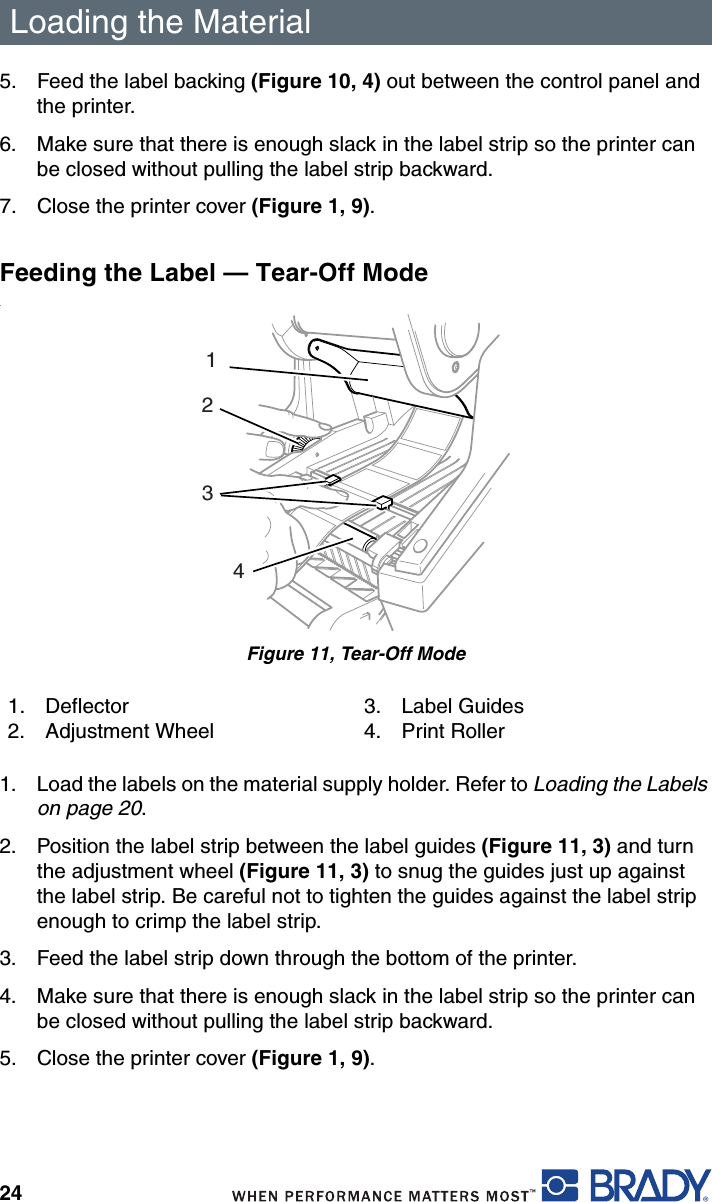
![Installation8Connecting the Printer■Place the printer on a level surface away from moisture.■Open the label printer cover (Figure 1, 9).■For operation in Peel-off mode, place the printer in such a position that the liner can run down without hindrance (refer to Feeding the Label — Tear-Off Mode on page 24).The standard available interfaces and connectors are shown in Figure 1, View A.Connecting to a Power SupplyThe printer is equipped with a wide area network unit. The device can be operated with a supply voltage of 115 V~/60 Hz or 230 V~/50 Hz without adjustment. [BRADY: is the previous supply voltage statement correct? If so, should we show voltage in this manner throughout?]1. Plug the power cable into the power connection socket on the back of the printer (Figure 1, 6).2. Plug the power cable into a grounded 115 V 60 Hz or 230 V 50 Hz AC power source.NOTICEThe device and printing materials will be damaged by moisture and wet conditions.Set up label printers only in dry locations protected from moisture.NOTICEEnsure that the foam transportation protection has been removed from around the printhead.A CAUTIONSwitch the printer power switch (Figure 1, 8) to the off position (O) before connecting the printer to the power supply.](https://usermanual.wiki/Brady/IPSERIES.Users-Manual-Part-1/User-Guide-773367-Page-14.png)