Brady IPSERIES IP Printer User Manual IP Label Printer
Brady Corporation IP Printer IP Label Printer
UserManual.wiki
>
Brady
>
IPSERIES User Manual
>
Users Manual Part 2
Contents
1.
Quick Start Guide
2.
Users Manual Part 1
3.
Users Manual Part 2
Users Manual Part 2
Navigation menu
Upload a User Manual
Namespaces
Wiki Guide
HTML
PDF
Info
Views
User Manual
Discussion / Help
Navigation

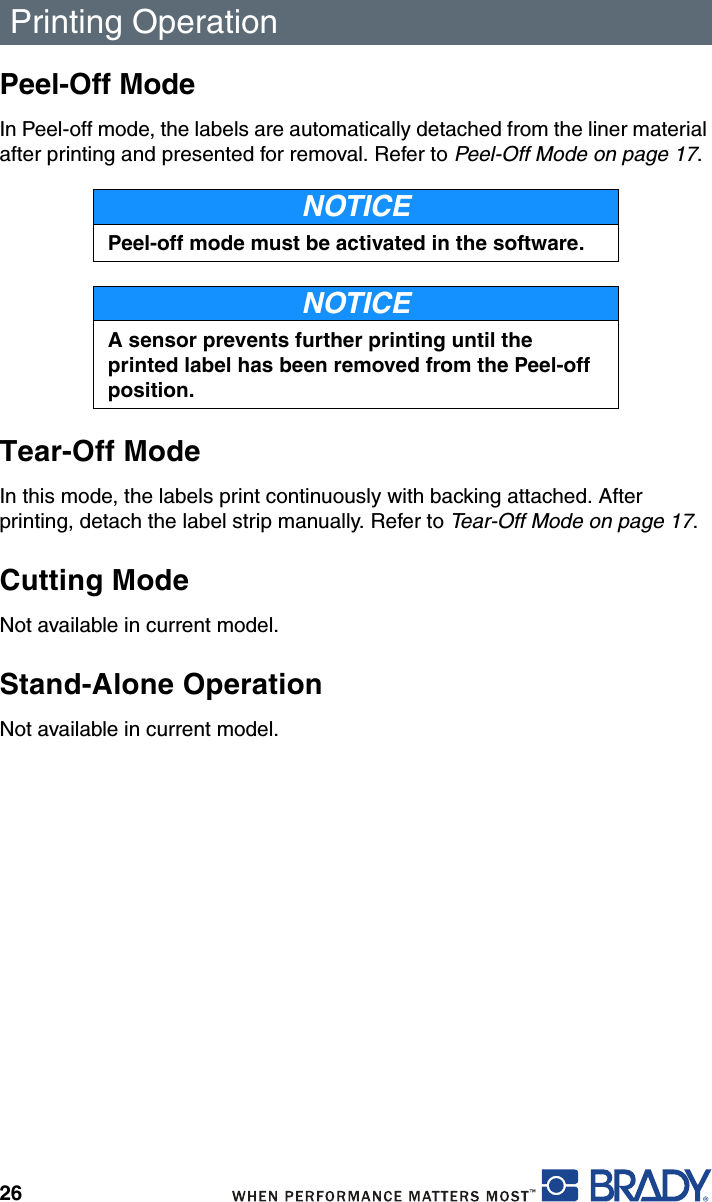

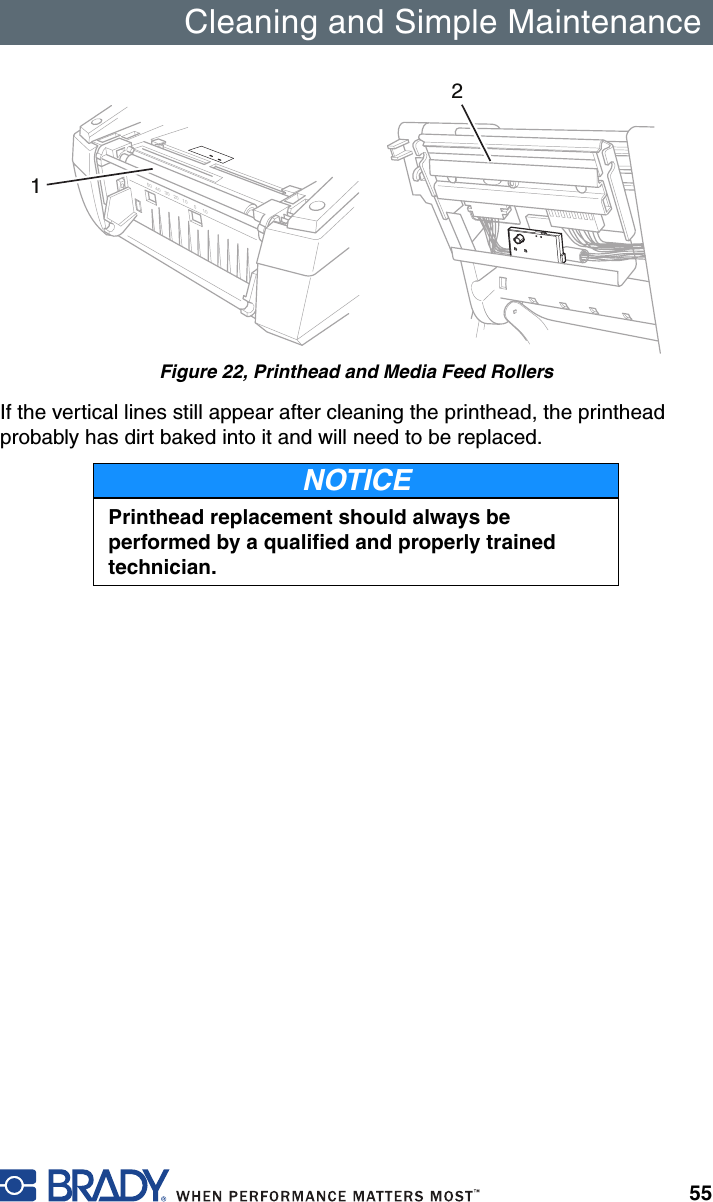
![Control Panel35Device List The Device list function prints out the most important information on hardware components of the printer and connected devices.NOTE: Continuous media is most suitable for this function.1. Press the menu key.2. Select Test > Device list menu.3. Press the key.You can cancel the printout with the cancel key.Figure 15, Device ListName InformationCPU Type and serial number of the CPU PCBRevision of CPU PCB and FPGATPH Resolution and heating point number of the installed thermal printhead.I/F [x] Type of interfaces installedx: Number of interface](https://usermanual.wiki/Brady/IPSERIES.Users-Manual-Part-2/User-Guide-773368-Page-11.png)

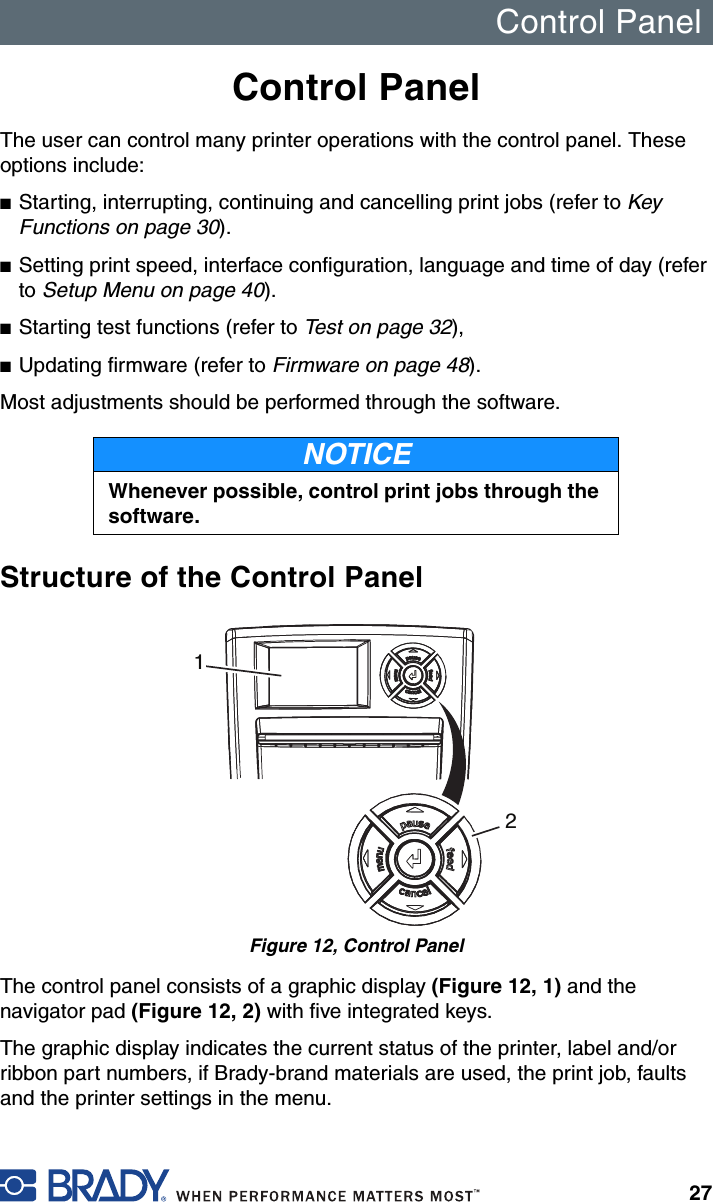
![Control Panel41Machine ParametersPress the menu key.Select Setup > Machine param.Parameter Meaning DefaultPrinthead pos. XShifting of the entire print image perpendicular to the direction of paper flow. The absolute shifting is limited by the margins of the print zone. Those are determined by the width of the printing line on the printhead.You can also set the Printhead pos. X via software. The offset values from the Machine param. menu and the software are added together. 0.0 mmPrinthead pos. YShifting of the entire print image in the direction of paper flow. With positive values, printing begins later in the direction of paper flow. Shifting of the print image in the direction of paper flow also influences the peel and tear positions.Correct the peel position and tear position parameters by the same value in the opposite direction.You can also set the Printhead pos. Y via software. The offset values from the Machine param. menu and the software are added together.0.0 mmDemand sensorConfiguration of the Peel-off parameters for devices with Peel-off function.> Peel position[BRADY: we need information about this function]>Backfeed delayDelay time between removing the label from the peel position and the backfeed of the label.250 ms](https://usermanual.wiki/Brady/IPSERIES.Users-Manual-Part-2/User-Guide-773368-Page-17.png)

![Control Panel48FirmwareThe printer firmware is saved in a Flash EPROM. You can update the firmware using the following functions:■Firmware upd.: Copy a firmware file from a computer connected to one of the interfaces of the label printer. Refer to Firmware Update via Interface on page 48.■Firmw. fr. card: Copy a firmware file from a memory card. Refer to Firmware Update from Memory Card on page 49.■FTP firmware update via printer management [BRADY: is this function available on the IP printer? If so, we need more information].Firmware Update via Interface1. Press the menu key.2. Select Service > Firmware upd. menu.3. Press the key.4. The Firmware-Upd message appears in the display.5. Press the key.6. If Firmware upd. is protected via a PIN, use the S, T, X and W keys to enter the code number and confirm with the key.7. Open the DOS input window on the PC.8. Configure the serial interface of the PC with the mode command. Enter the command mode com1: baud=115200 parity=n data=8 stop=1, for example9. Send the firmware file (e.g. 304_6811.x2) to the printer. Enter the command copy /b 304_6811.x2 com1:, for example.10. A progress indicator is displayed while the firmware is being copied. OK appears in the display once copying is successfully completed.11. Press the key.](https://usermanual.wiki/Brady/IPSERIES.Users-Manual-Part-2/User-Guide-773368-Page-24.png)
![Control Panel49Firmware Update from Memory Card1. Format CompactFlash memory card in printer [BRADY: is this function available on the IP printer? Is it the same as the CAB manual?].The directories "fonts," "images," "labels" and "misc" are created on the memory card.2. Copy the firmware file to the "misc" directory in a CompactFlash drive.3. Insert the prepared memory card into the printer.4. Press the menu button.5. Select Service > Firmw. fr. card menu.6. Press the key.7. If the function Firmw. fr. card is protected via a PIN, use the S, T, X and W keys to enter the code number and confirm with the key.The names of the firmware files found on the memory card are shown in the display.8. If several firmware files are found on the memory card, select the desired file with the S and T keys.9. Press the key.The selected firmware file is copied. A progress indicator is displayed while the firmware is being copied. OK appears in the display once copying is successfully completed.10. Press the key.](https://usermanual.wiki/Brady/IPSERIES.Users-Manual-Part-2/User-Guide-773368-Page-25.png)
![Control Panel51Adjust Screen BrightnessCalibration[NEED INFORMATION FROM BRADY.]Heat Settings for Print DarknessWith the use of none-standard Brady material, the heat settings in the setup print parameters menu may vary greatly. Setting the heat excessively high can result in not only melting the ribbon but also destroying the print head. If your material does not have a recommended heat setting, it is recommended that you set the heat at -20, which is the lowest possible value. At this point print a label and evaluate it for quality. If the label is too light, change the heat setting by one or two values in the positive direction and retry printing a label. Keep repeating this process until you get a quality label. Once you have determined the heat setting for this particular material, record it so that the next time you use this material you will know where to set the heat settings.Brightn. LCDAdjust the LCD display brightness (1 to 10). 10Contrast LCDAdjust the LCD display contrast (4 to 8). 6](https://usermanual.wiki/Brady/IPSERIES.Users-Manual-Part-2/User-Guide-773368-Page-27.png)
![Control Panel52Print Sample LabelA sample label is imbedded in the firmware and can be printed through the test menu.Figure 21, Sample LabelPrint Setting Label[NEED INFORMATION FROM BRADY.]](https://usermanual.wiki/Brady/IPSERIES.Users-Manual-Part-2/User-Guide-773368-Page-28.png)


![Additional Support62Brady Corporation’s maximum liability for warranty claims is limited to the invoice price of the product claimed defective. Brady Corporation does not assume responsibility for delays in replacement or repair of products. Brady Corporation shall not under any circumstances whatsoever be liable to you or any other party for loss or profits, lost data, diminution of goodwill, or any other special or consequential damages whatsoever with respect to any warranty claim made by you. Specifically for software, Brady Corporation is not liable for any incidental or consequential damages caused by abuse or misapplication of the software or by its use in violation of the U.S. copyright law or international treaty. No salesperson, representative, or agent of Brady Corporation is authorized to make any guaranty, warranty, or representation that contradicts the foregoing. Any waiver, alteration, addition, or modification to the foregoing warranties must be in writing and signed by an executive officer of Brady Corporation to be valid.Repair and Replacement Parts[NEED INFORMATION FROM BRADY.]Product RegistrationRegister your Brady IP Printer online at www.bradycorp.com/register and receive free product support and updates!](https://usermanual.wiki/Brady/IPSERIES.Users-Manual-Part-2/User-Guide-773368-Page-38.png)