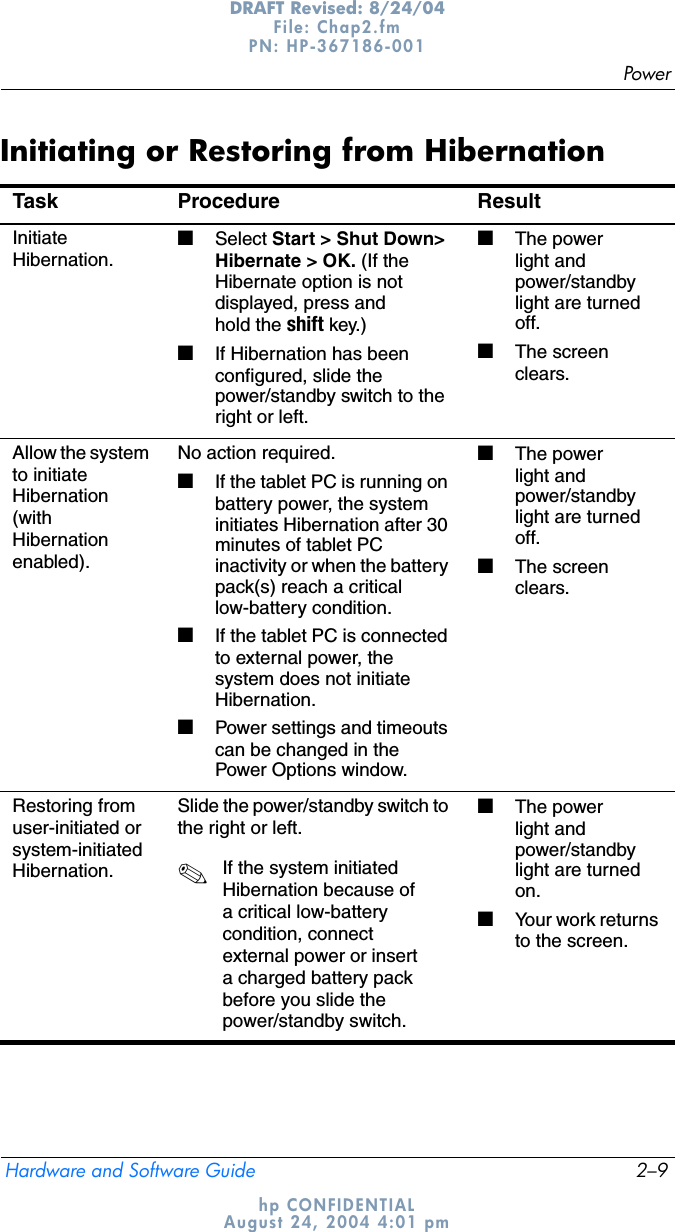
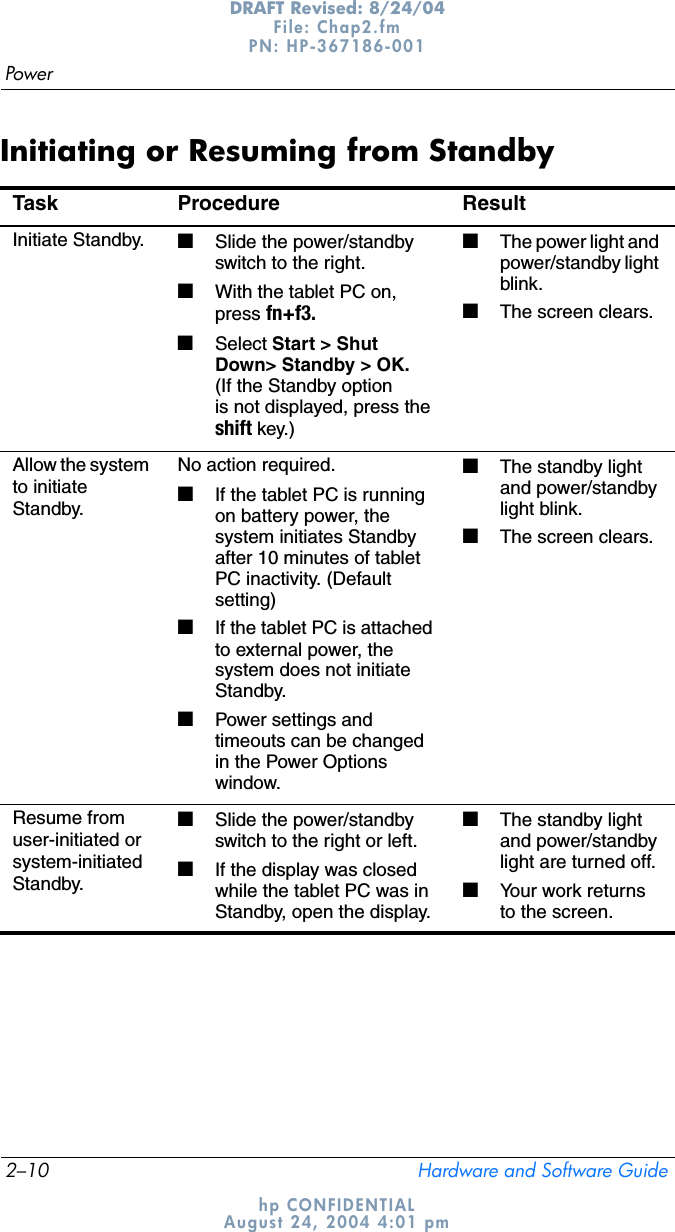
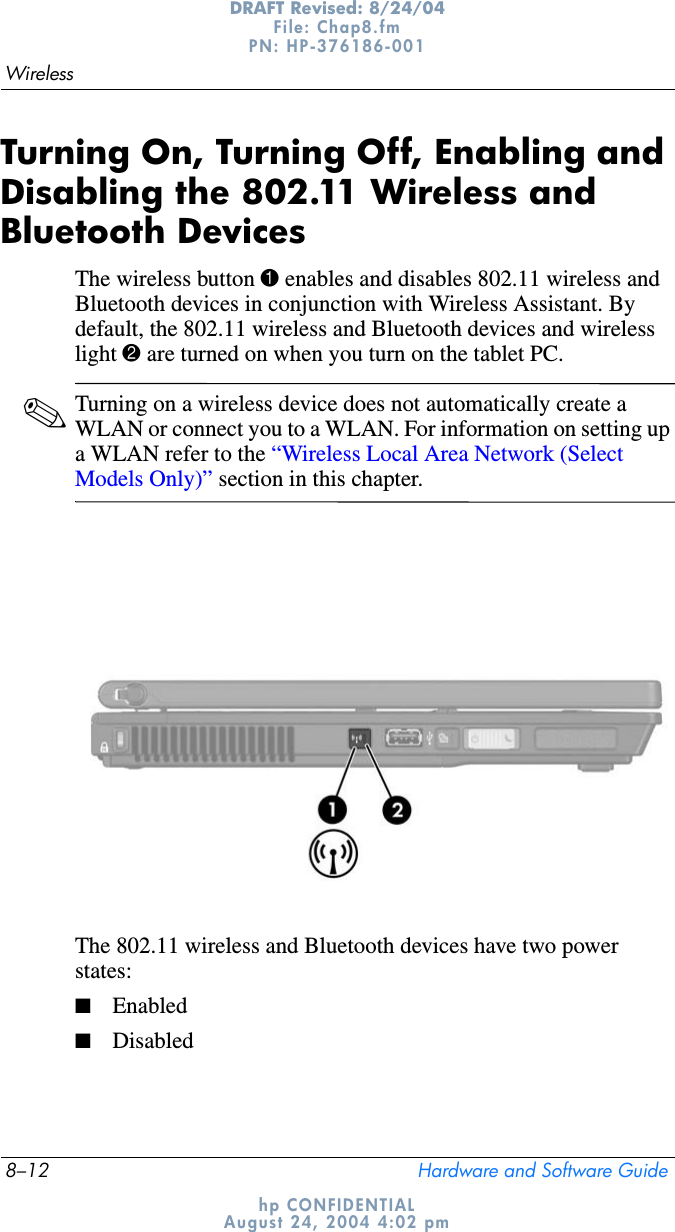
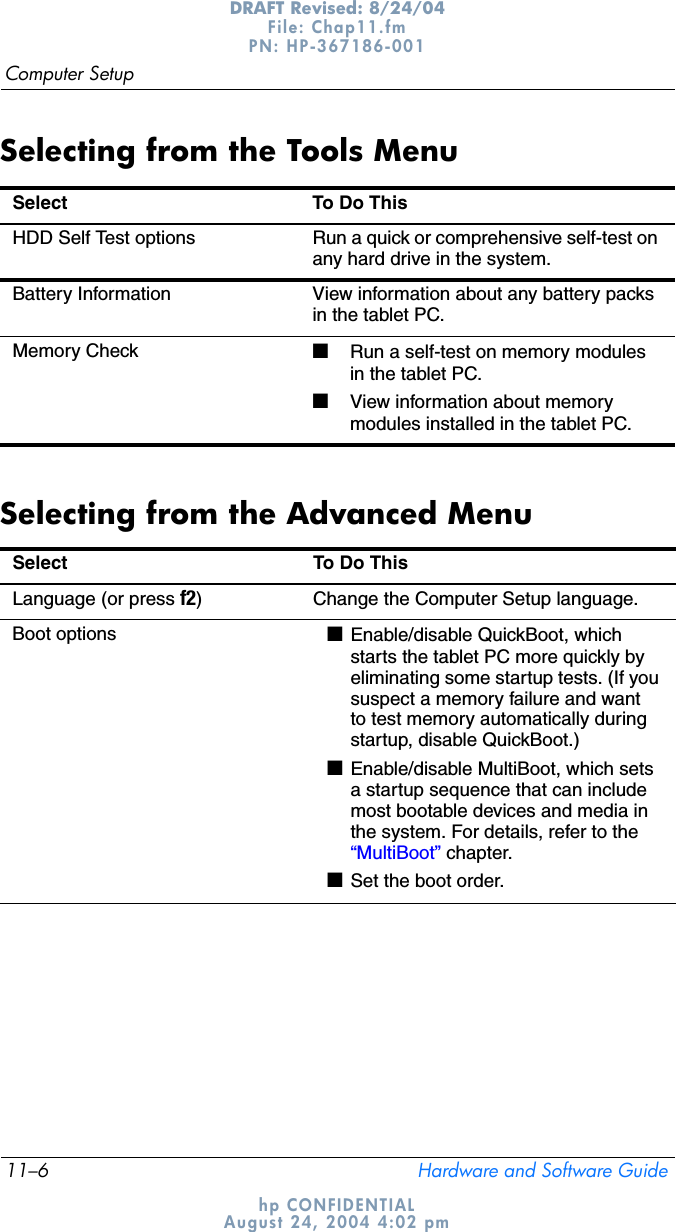
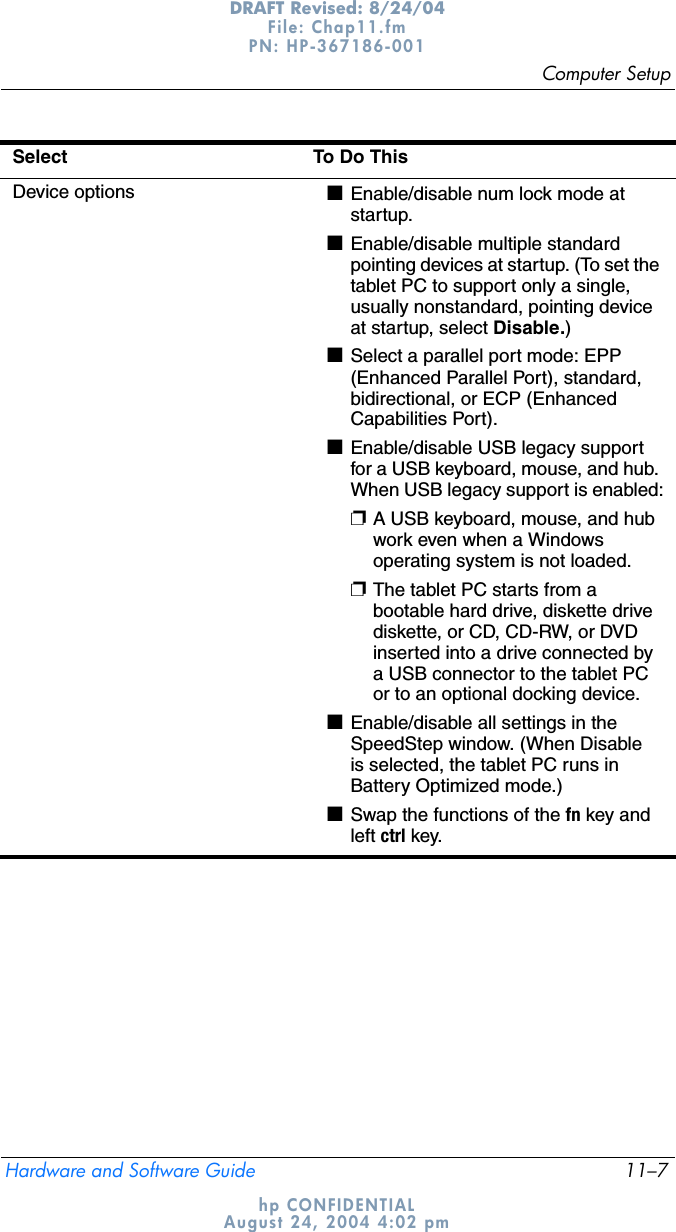
Broadcom BRCM1014 Broadcom 802.11a/g Mini PCI Card User Manual Notebook 367426 xx1
Broadcom Corporation Broadcom 802.11a/g Mini PCI Card Notebook 367426 xx1
UserManual.wiki
>
Broadcom
>
BRCM1014 User Manual
>
Notebook User Manual 367426 xx1
Contents
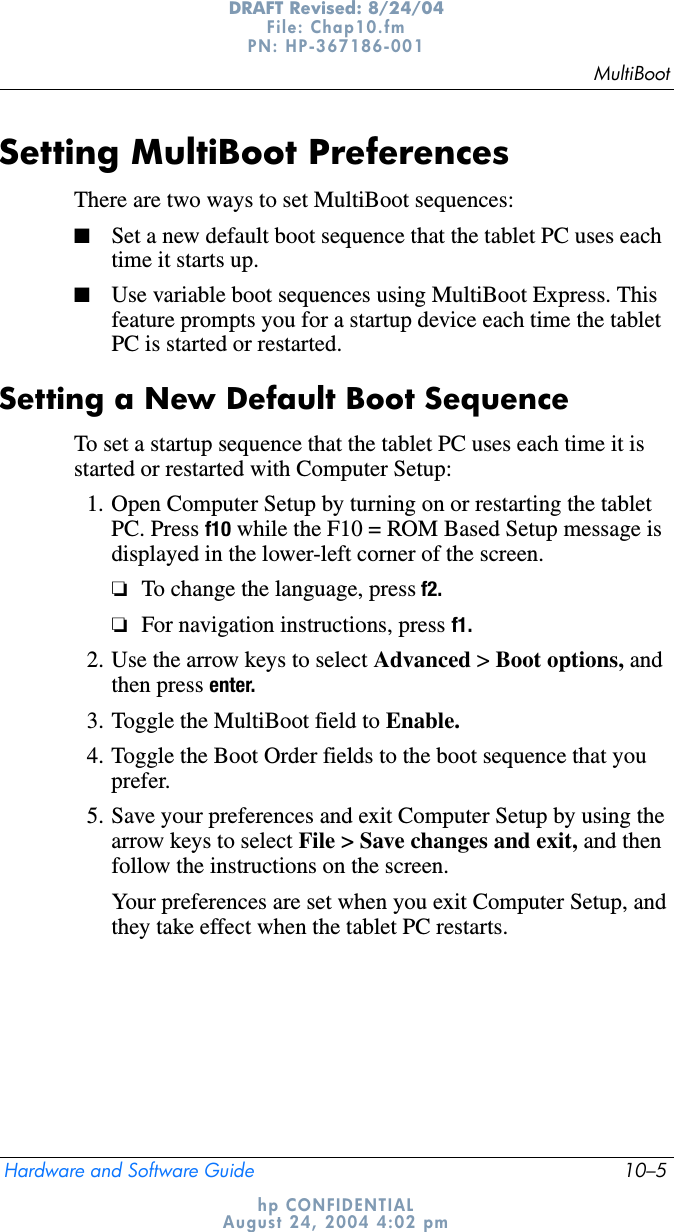
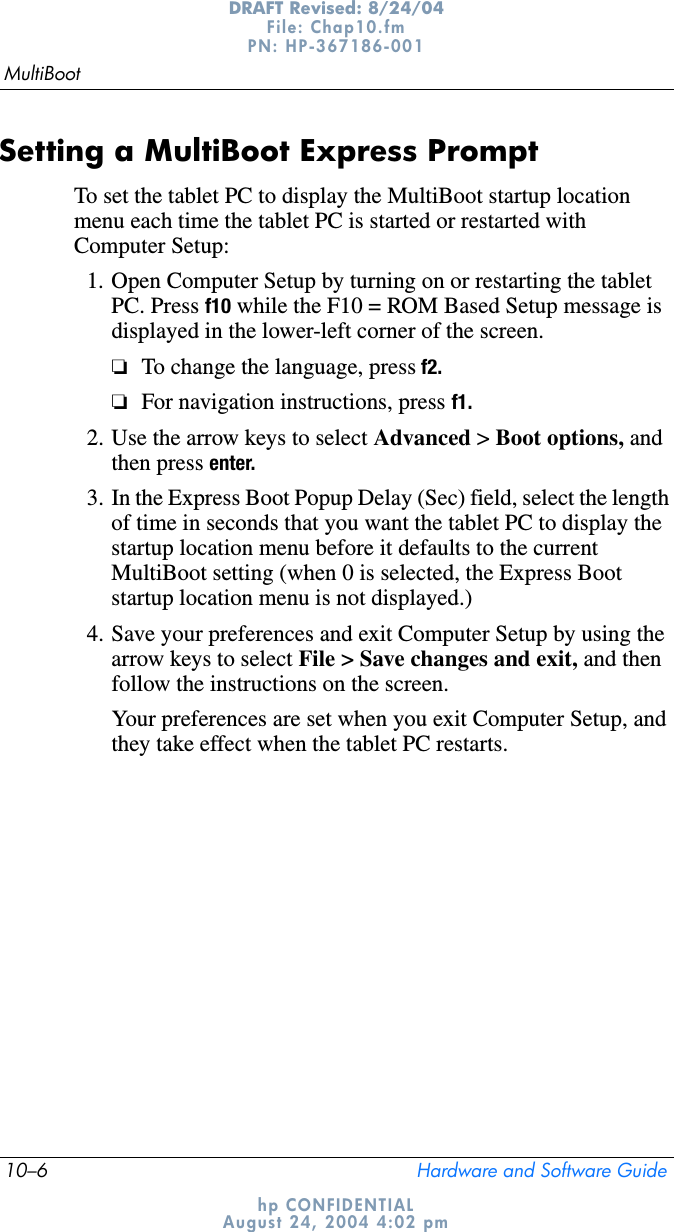
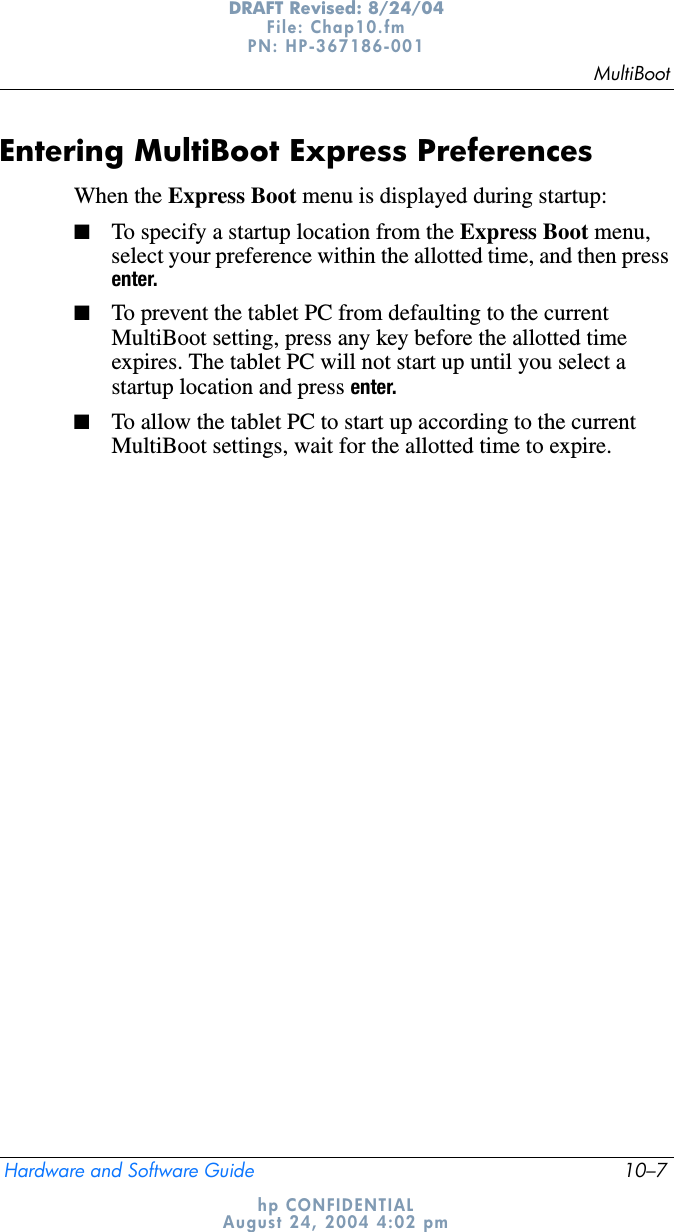
1.
User Manual
2.
CRN 27775 Tablet User Manual
3.
CRN 27775 User Installation Instruction
4.
CRN 27776 User Installation instruction
5.
CRN 27776 Tablet user manual
6.
Notebook User Manual 367426 xx1
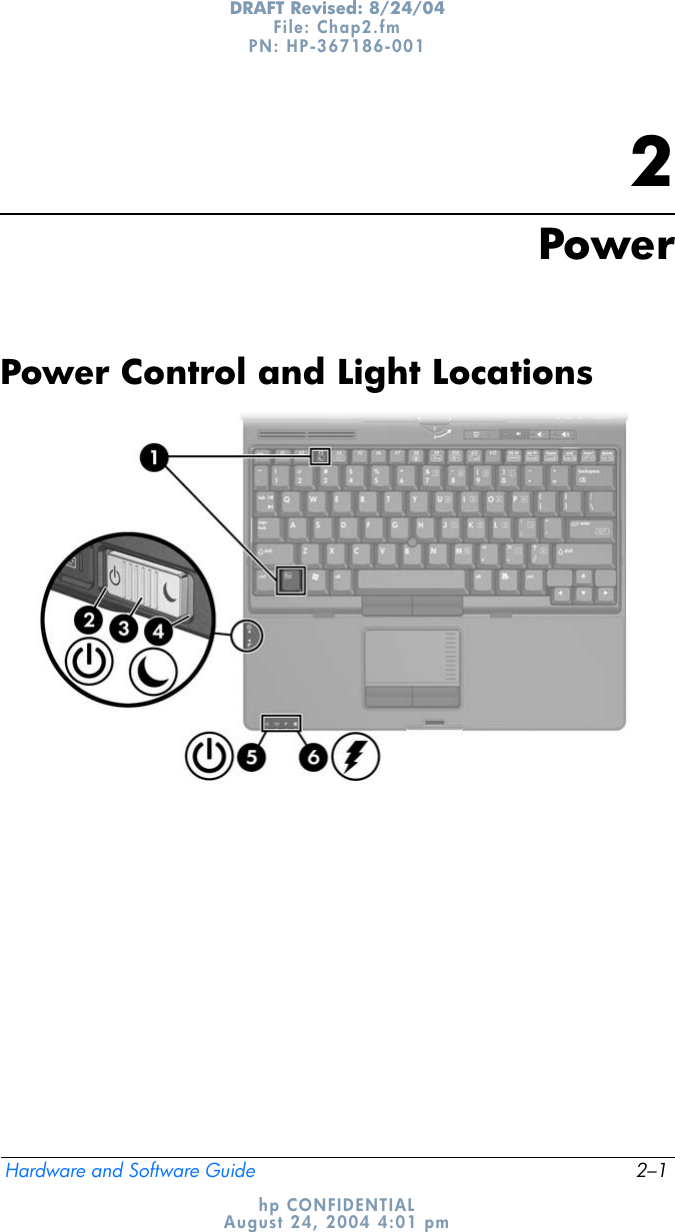
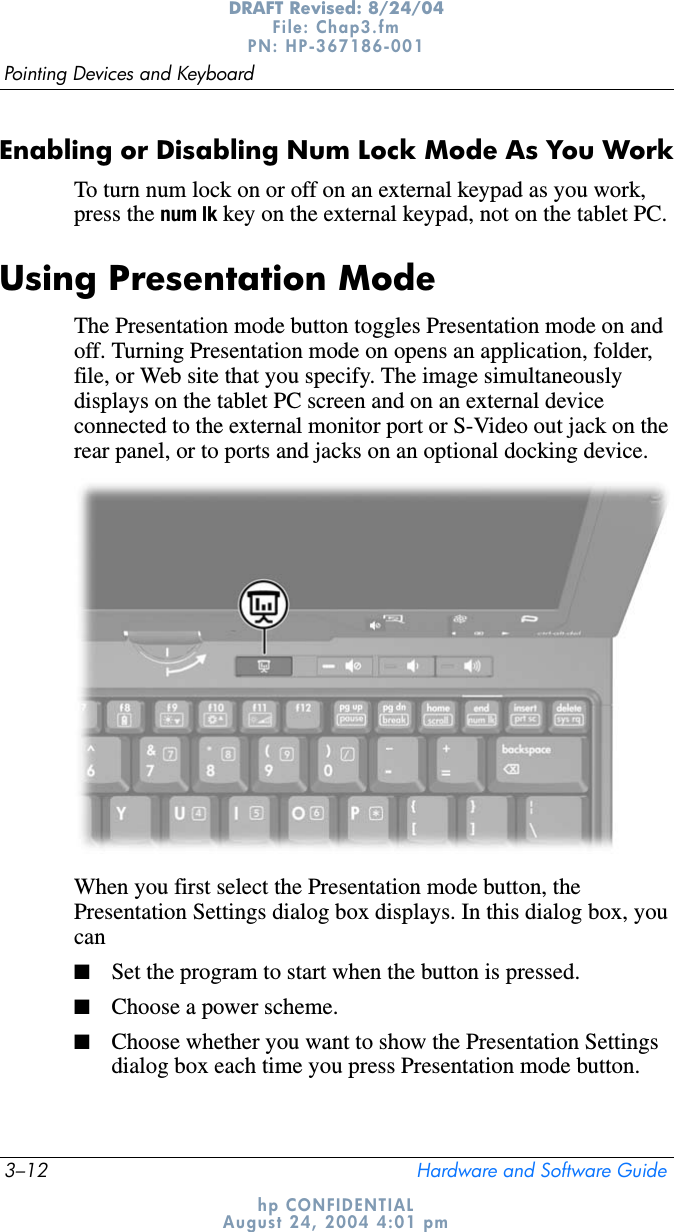
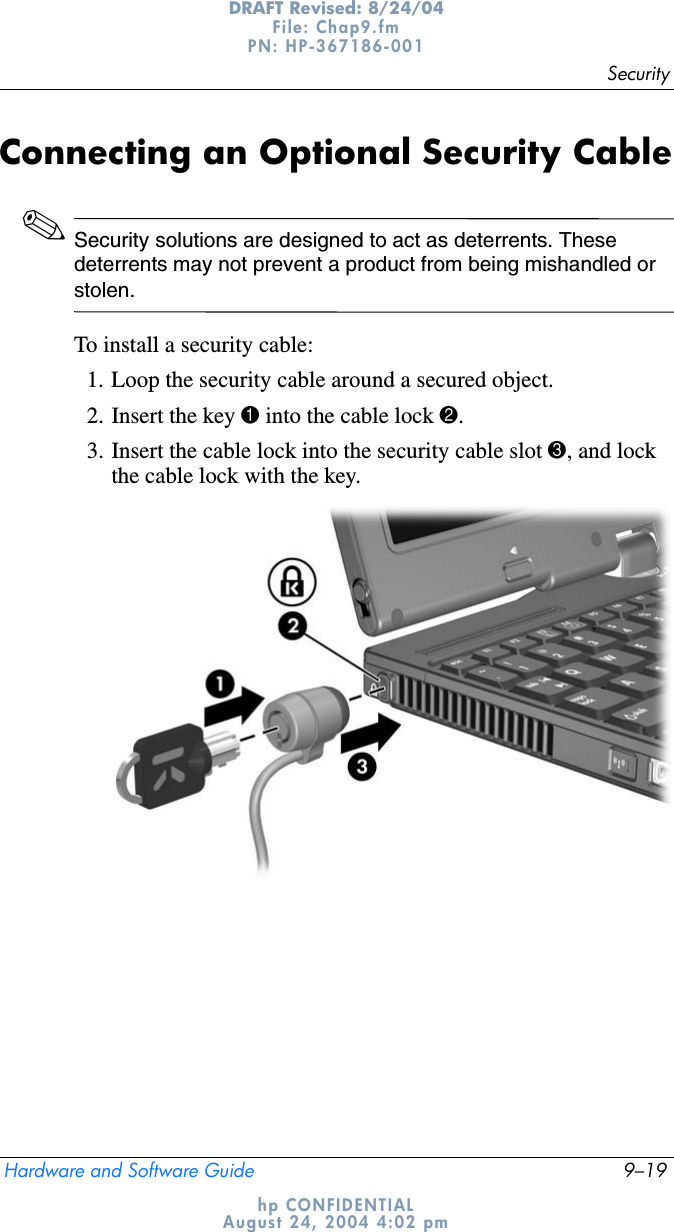
Notebook User Manual 367426 xx1
Navigation menu
Upload a User Manual
Namespaces
Wiki Guide
HTML
PDF
Info
Views
User Manual
Discussion / Help
Navigation