Broadcom BRCM1048 WLAN+Bluetooth PCI-E MiniCard User Manual net 3rd cycle eng 0807
Broadcom Corporation WLAN+Bluetooth PCI-E MiniCard net 3rd cycle eng 0807
UserManual.wiki
>
Broadcom
>
BRCM1048 User Manual
>
User manual 1 of 2
Contents
1.
User manual
2.
User manual 1 of 2
3.
User manual 2 of 2
4.
OEM installation guide
5.
Updated user manual
6.
Users Manual 1
7.
Users Manual 2
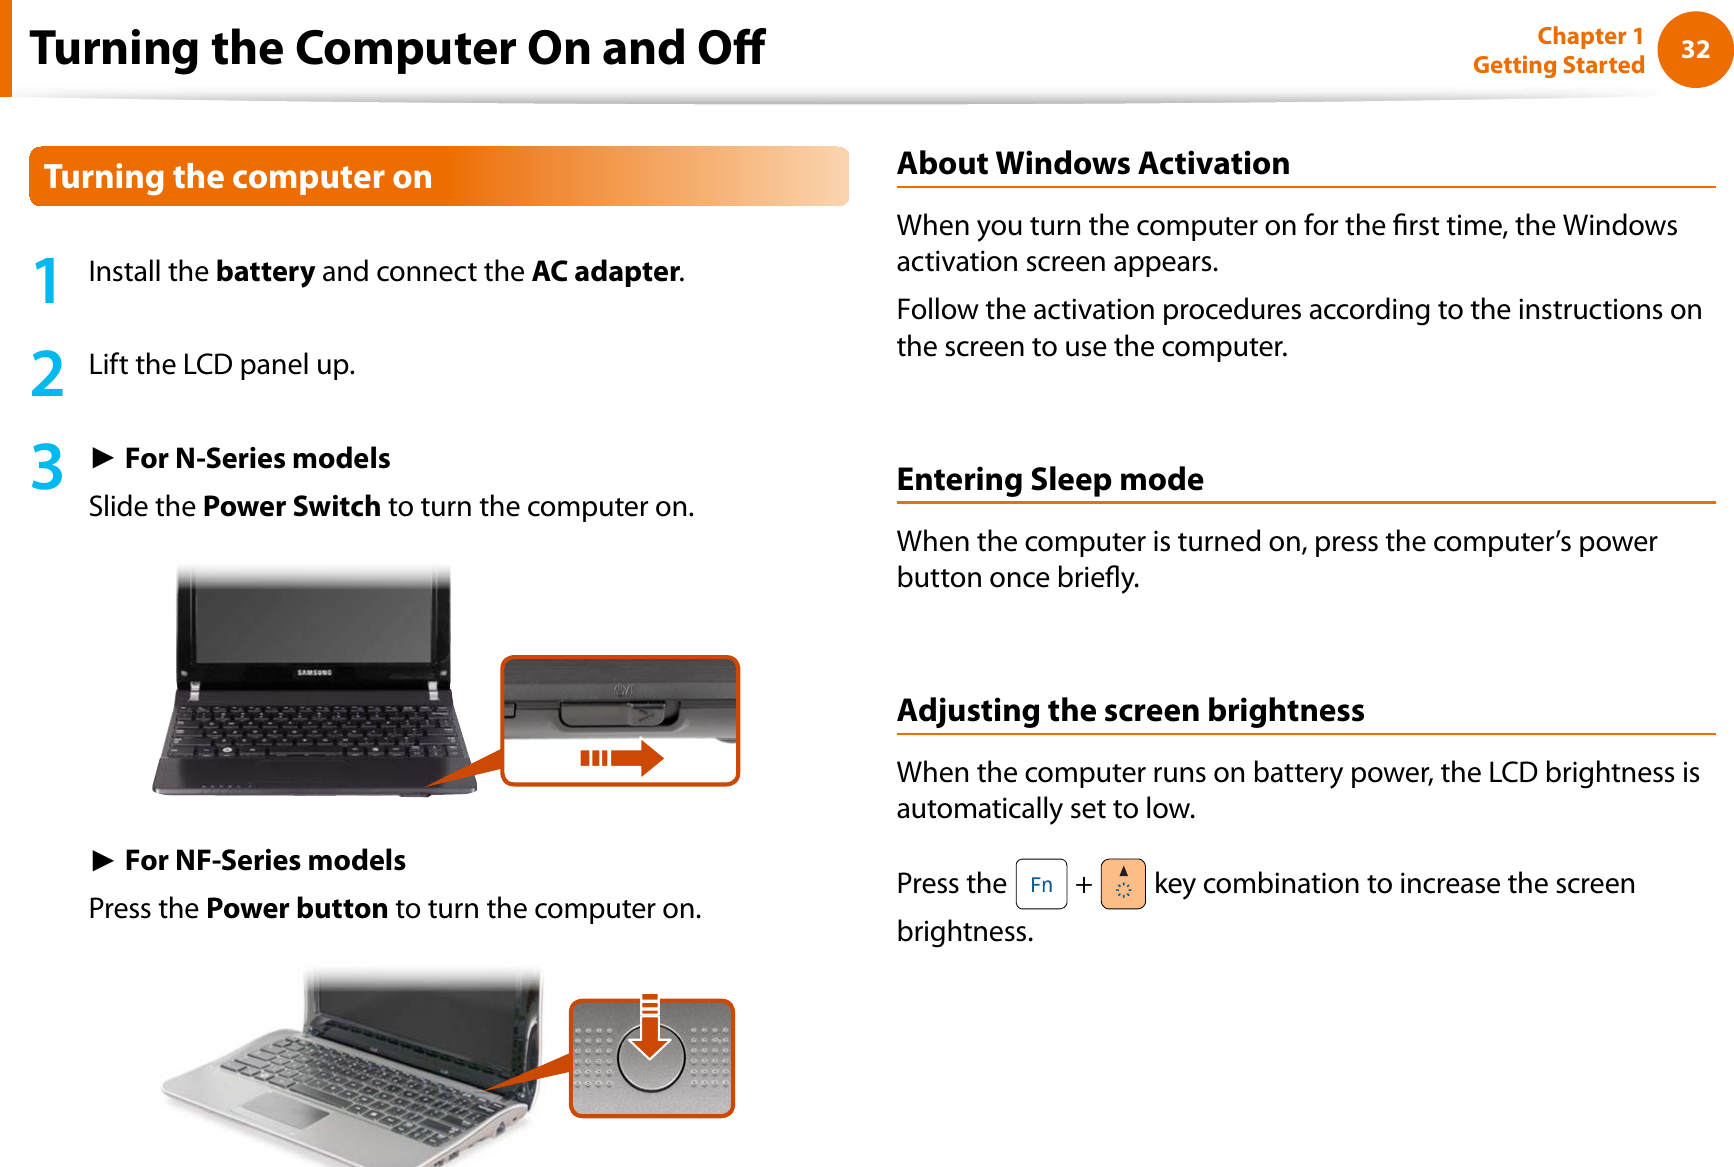
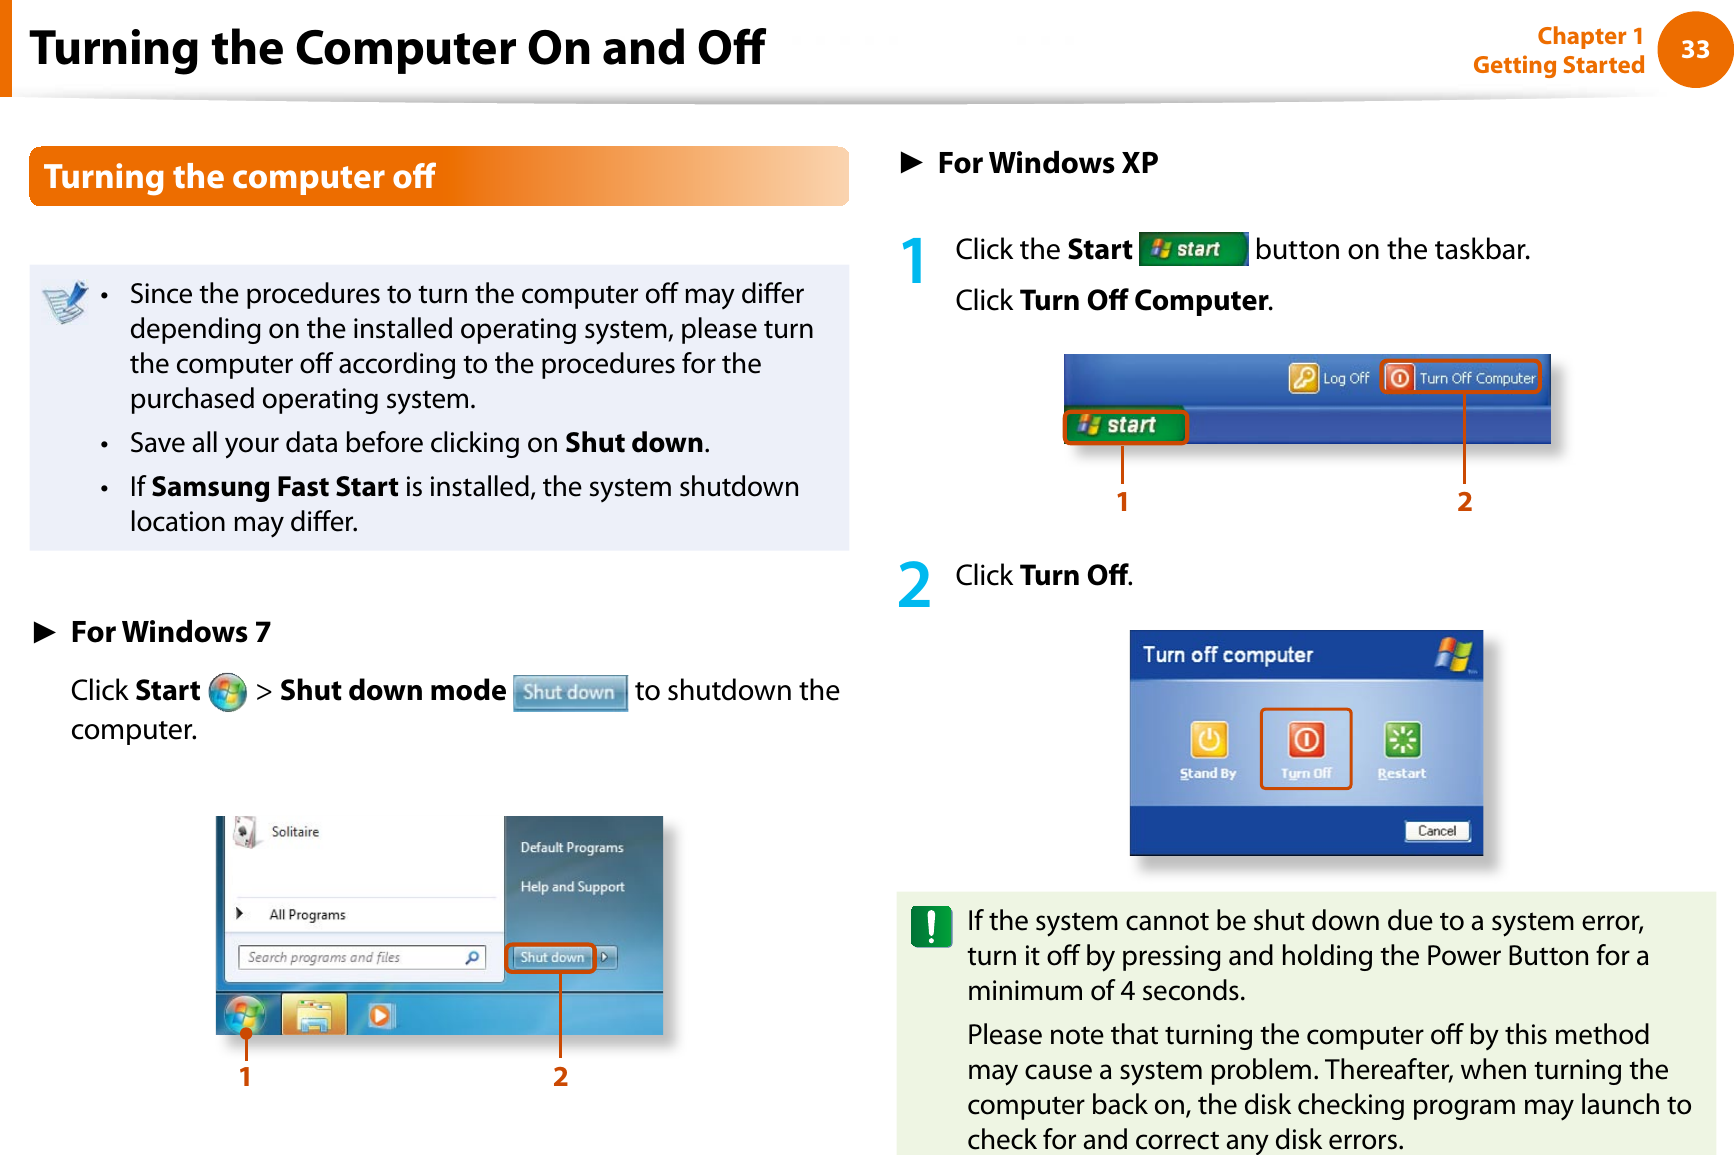
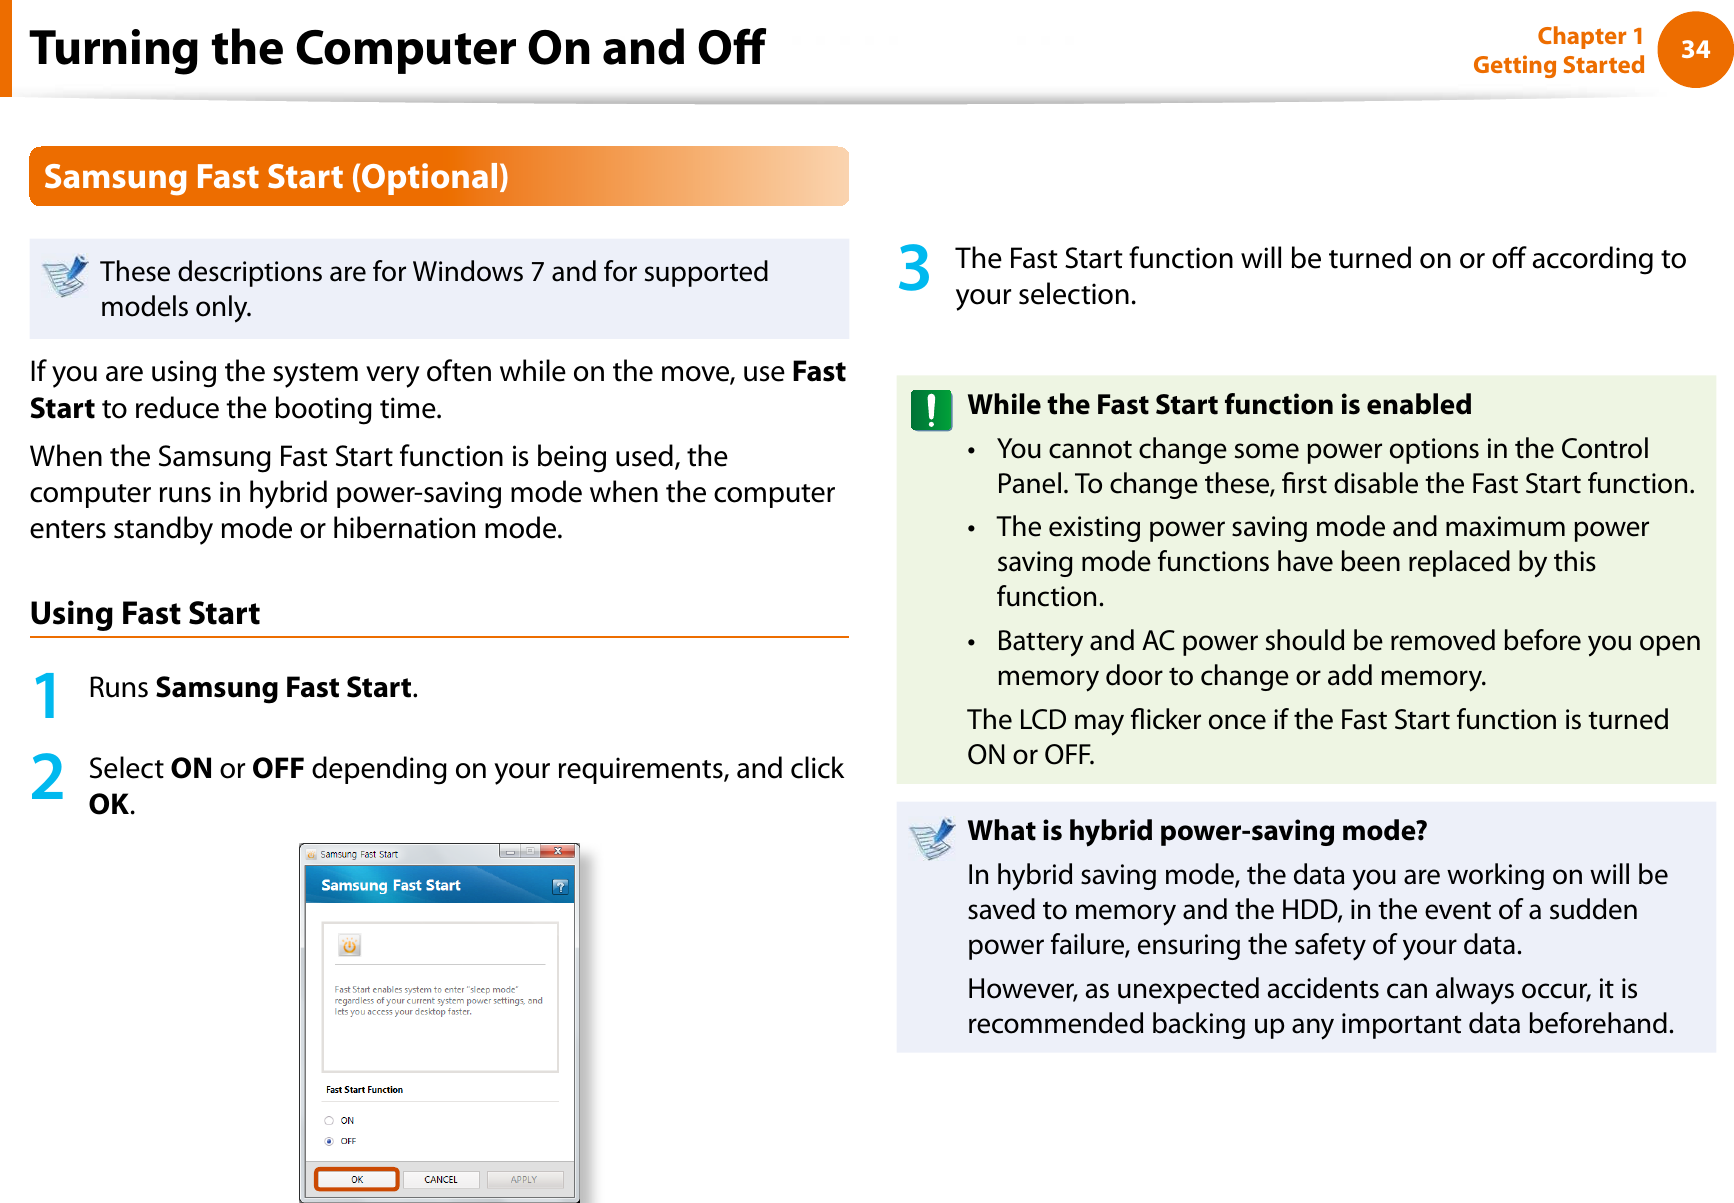
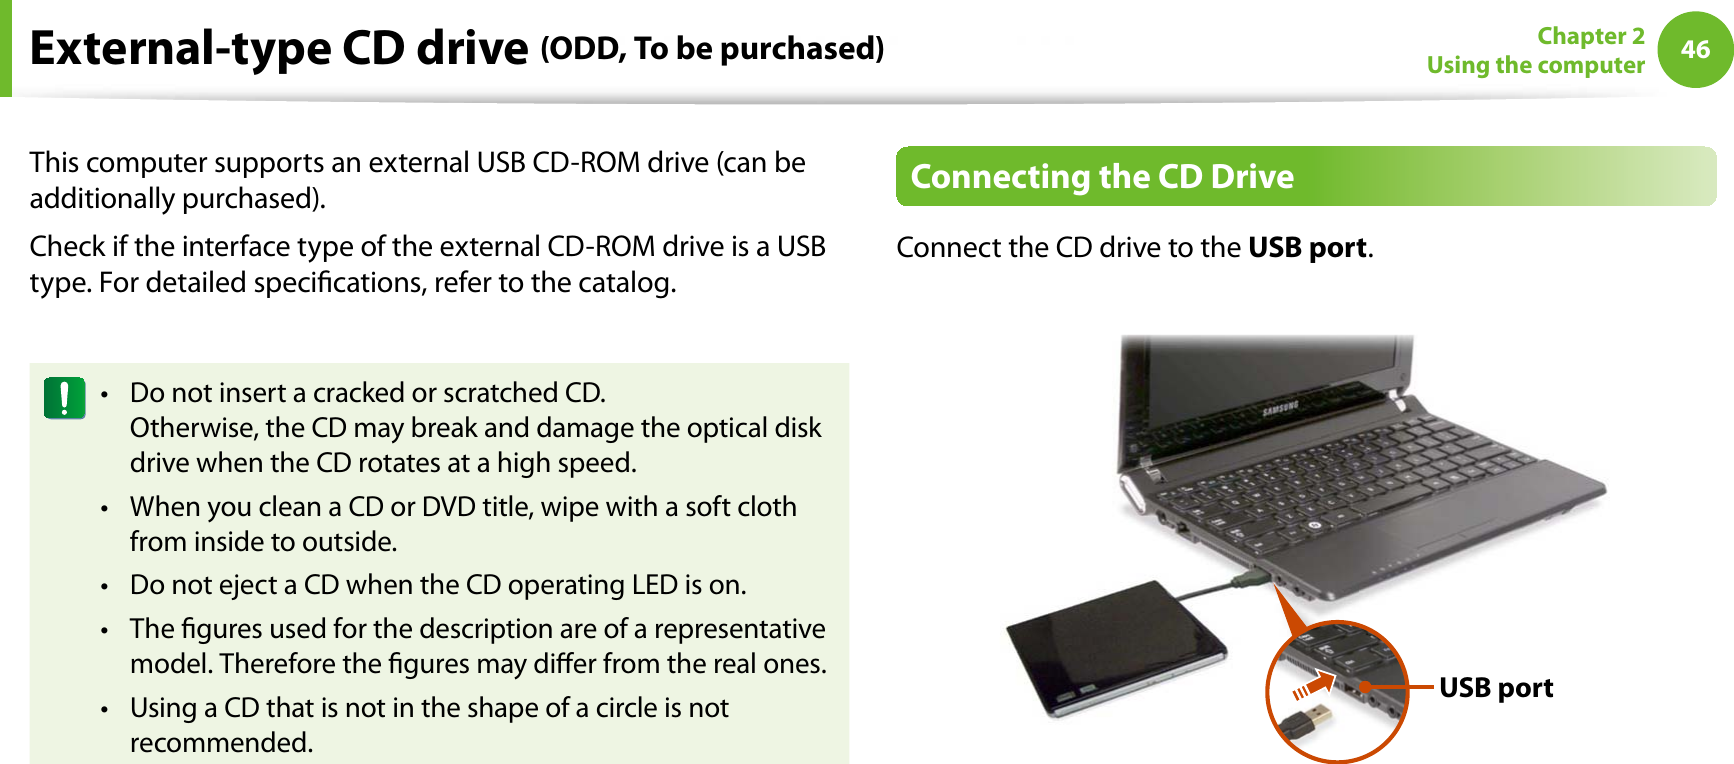
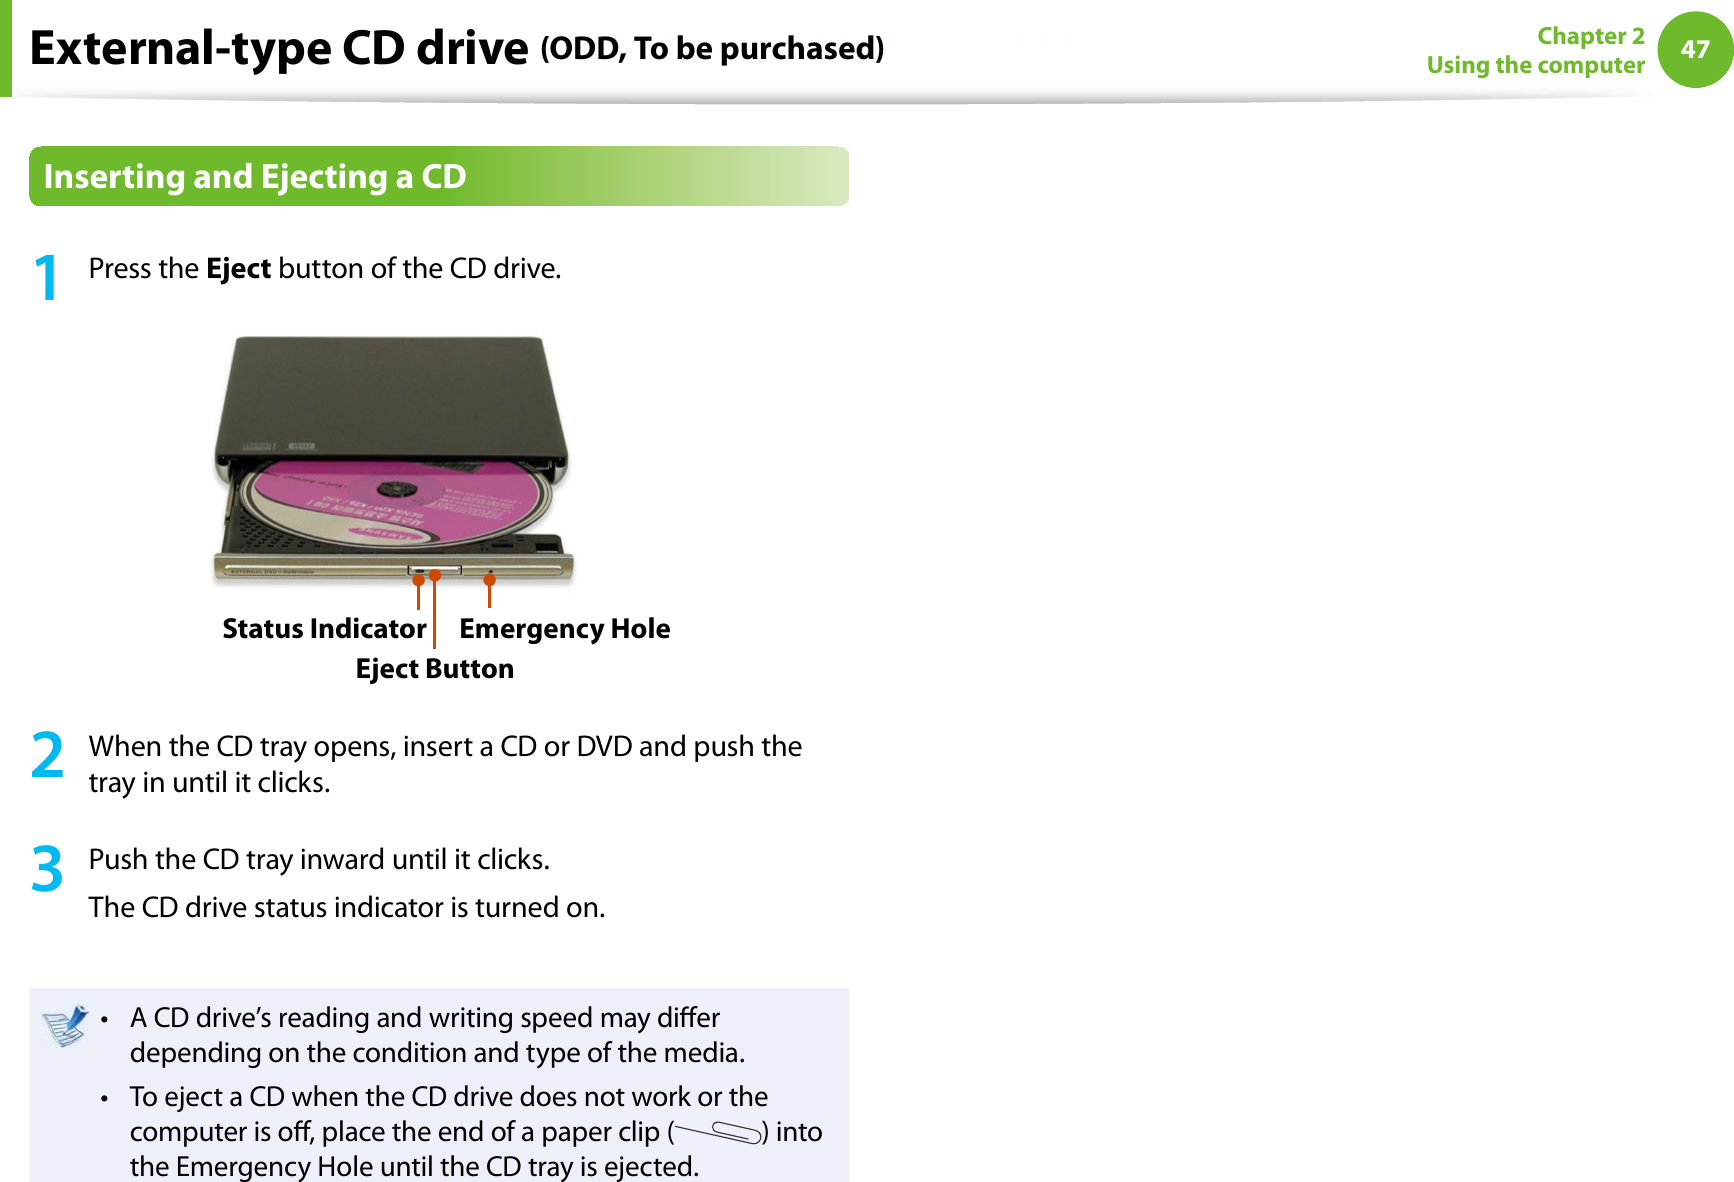
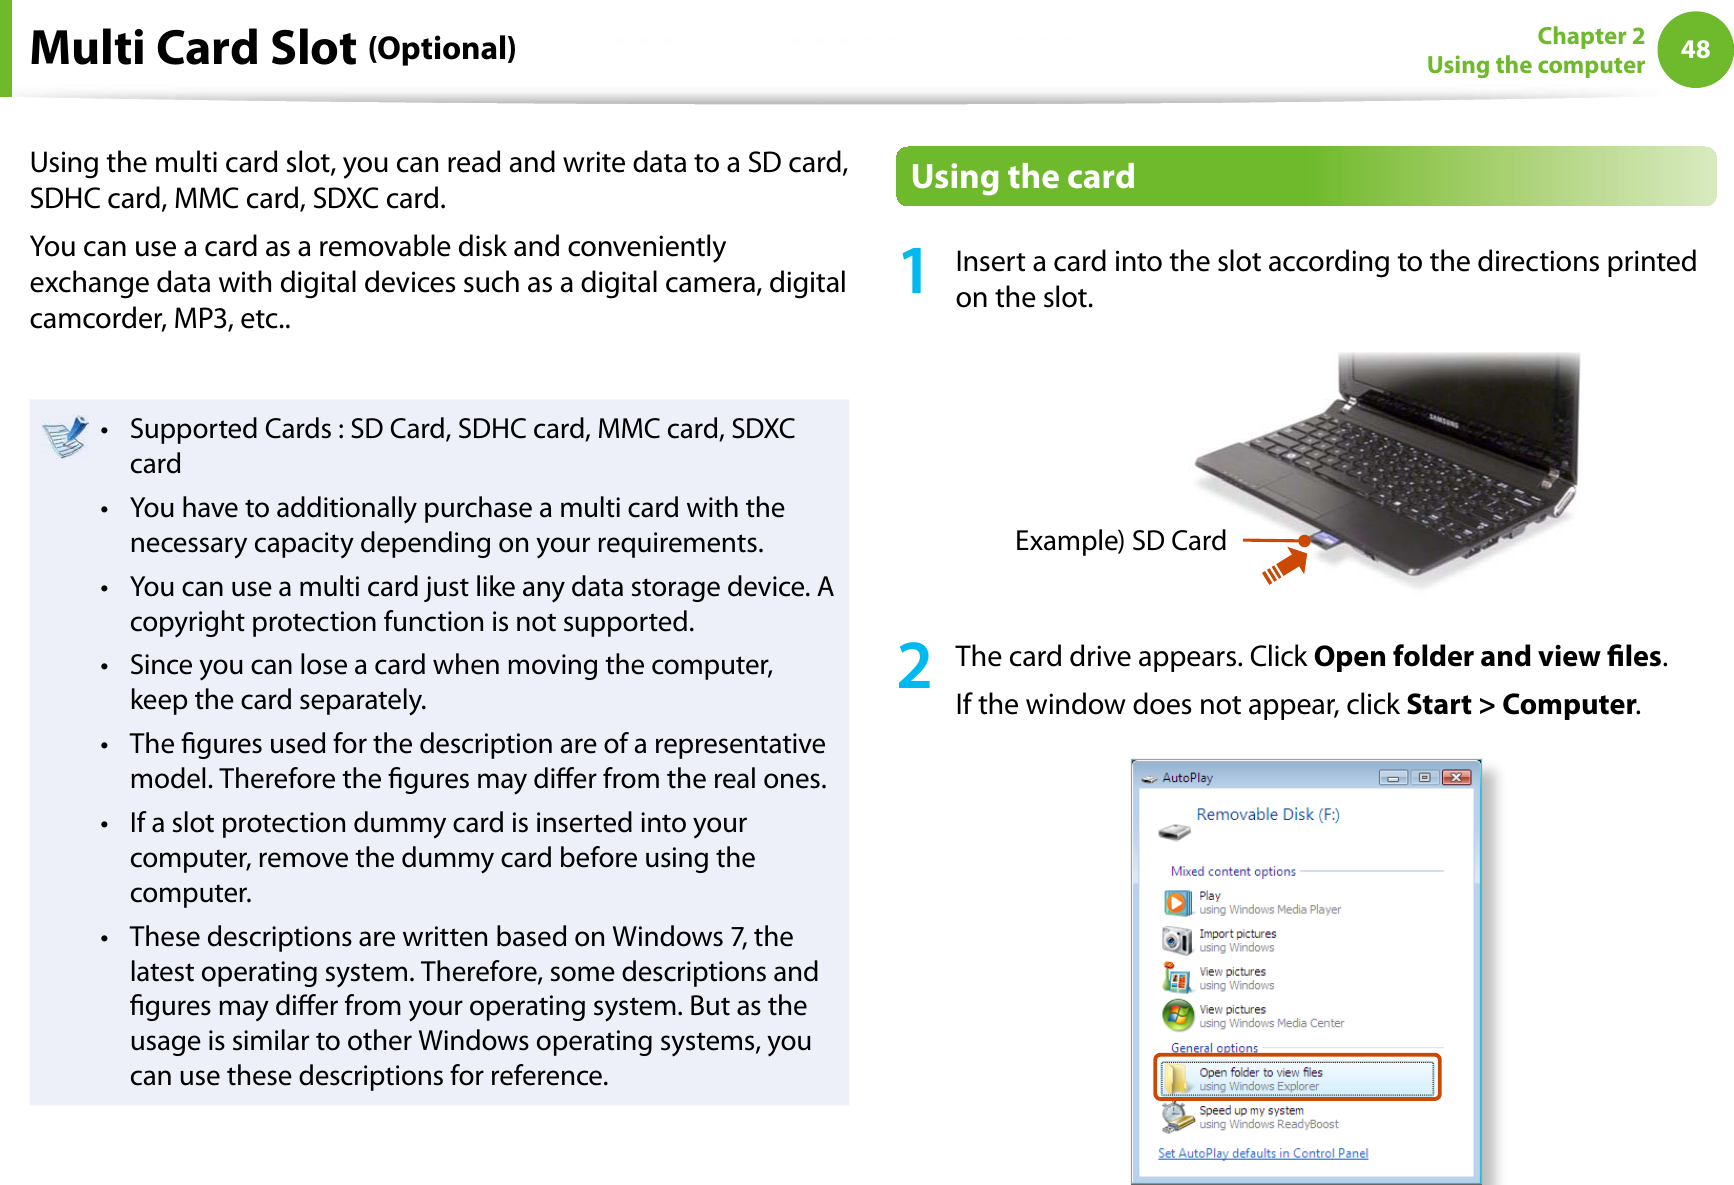
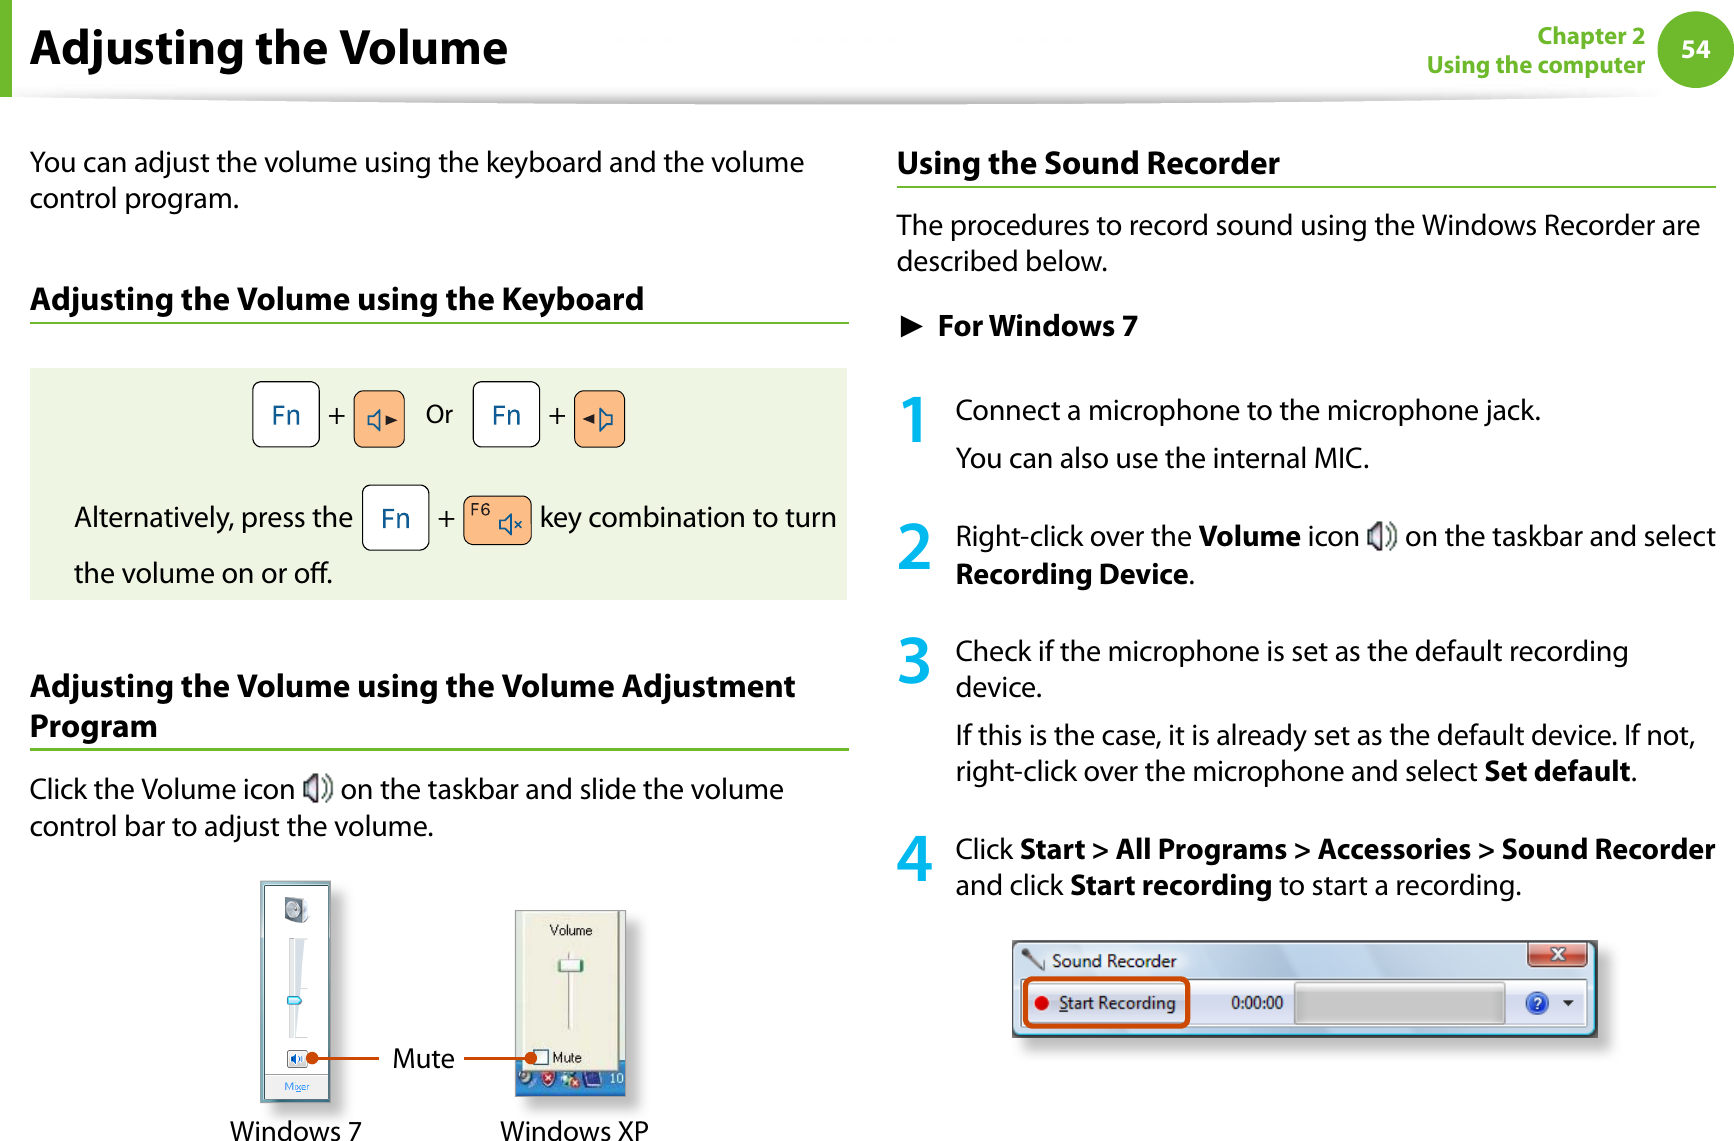
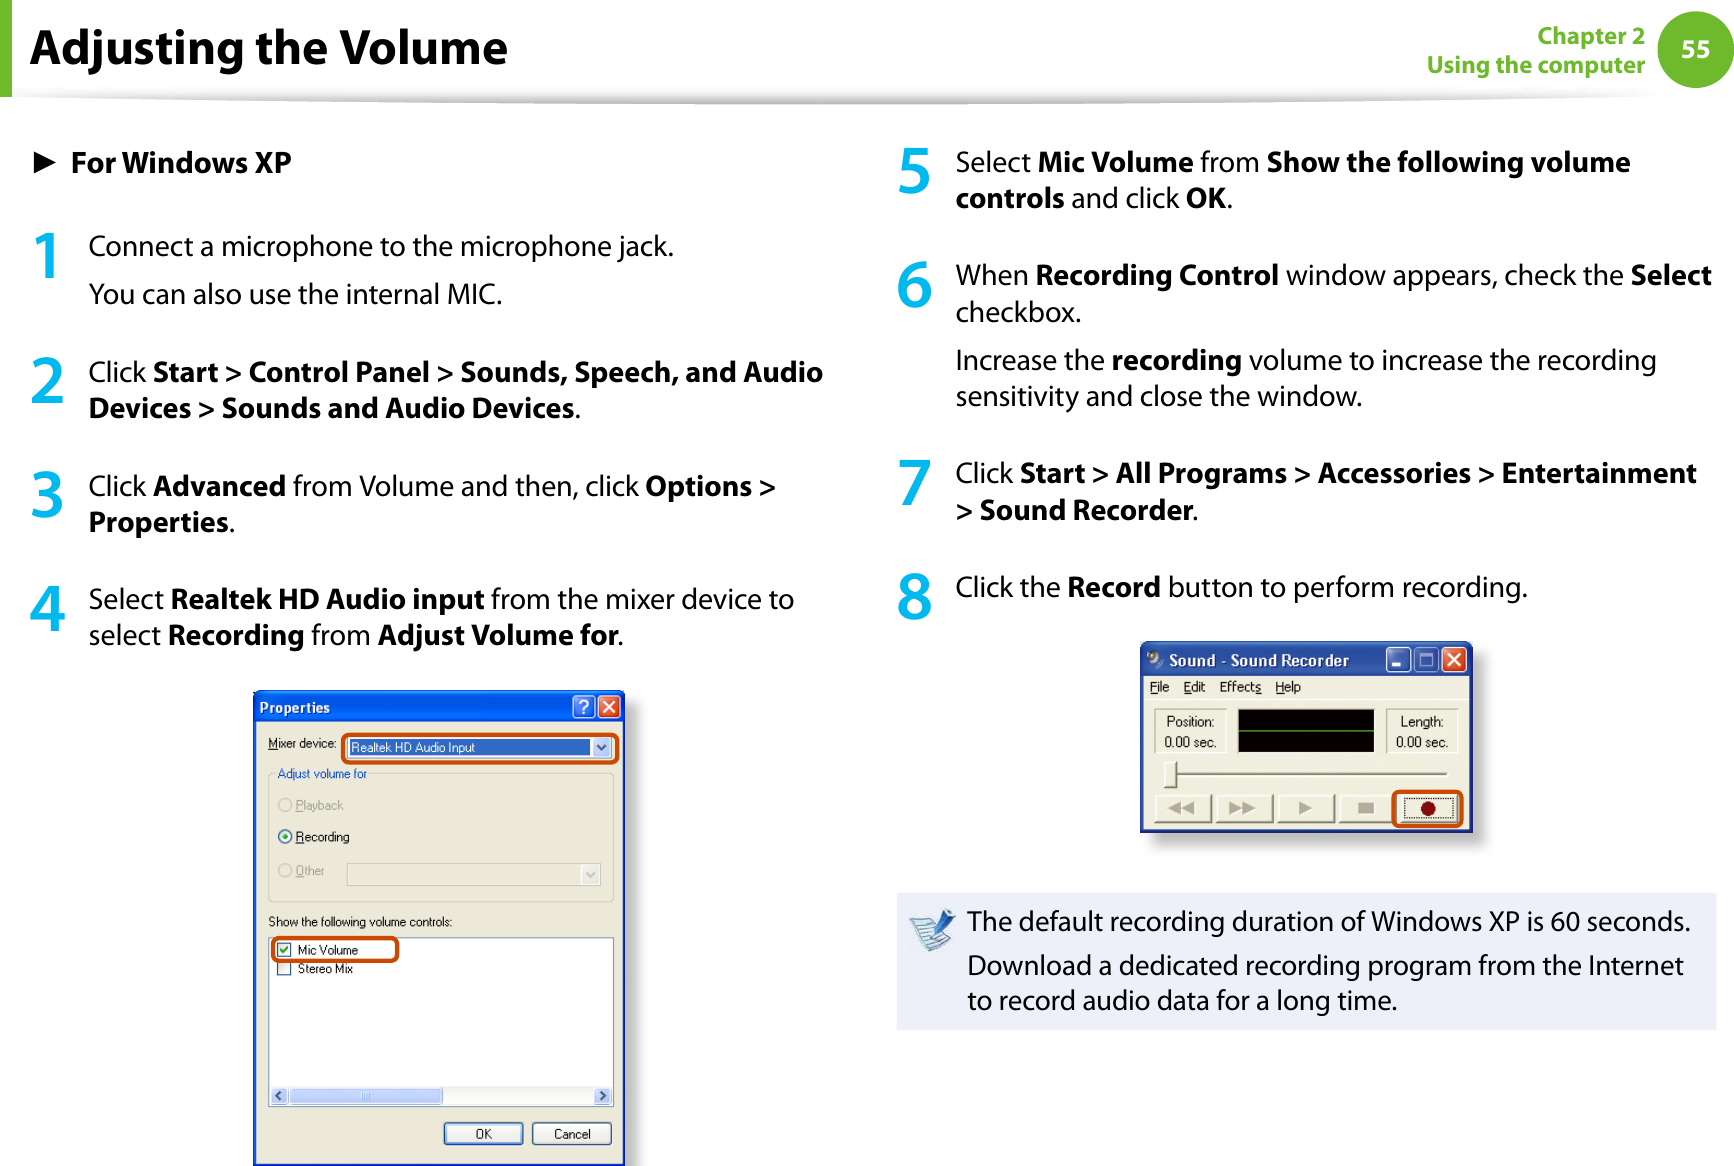
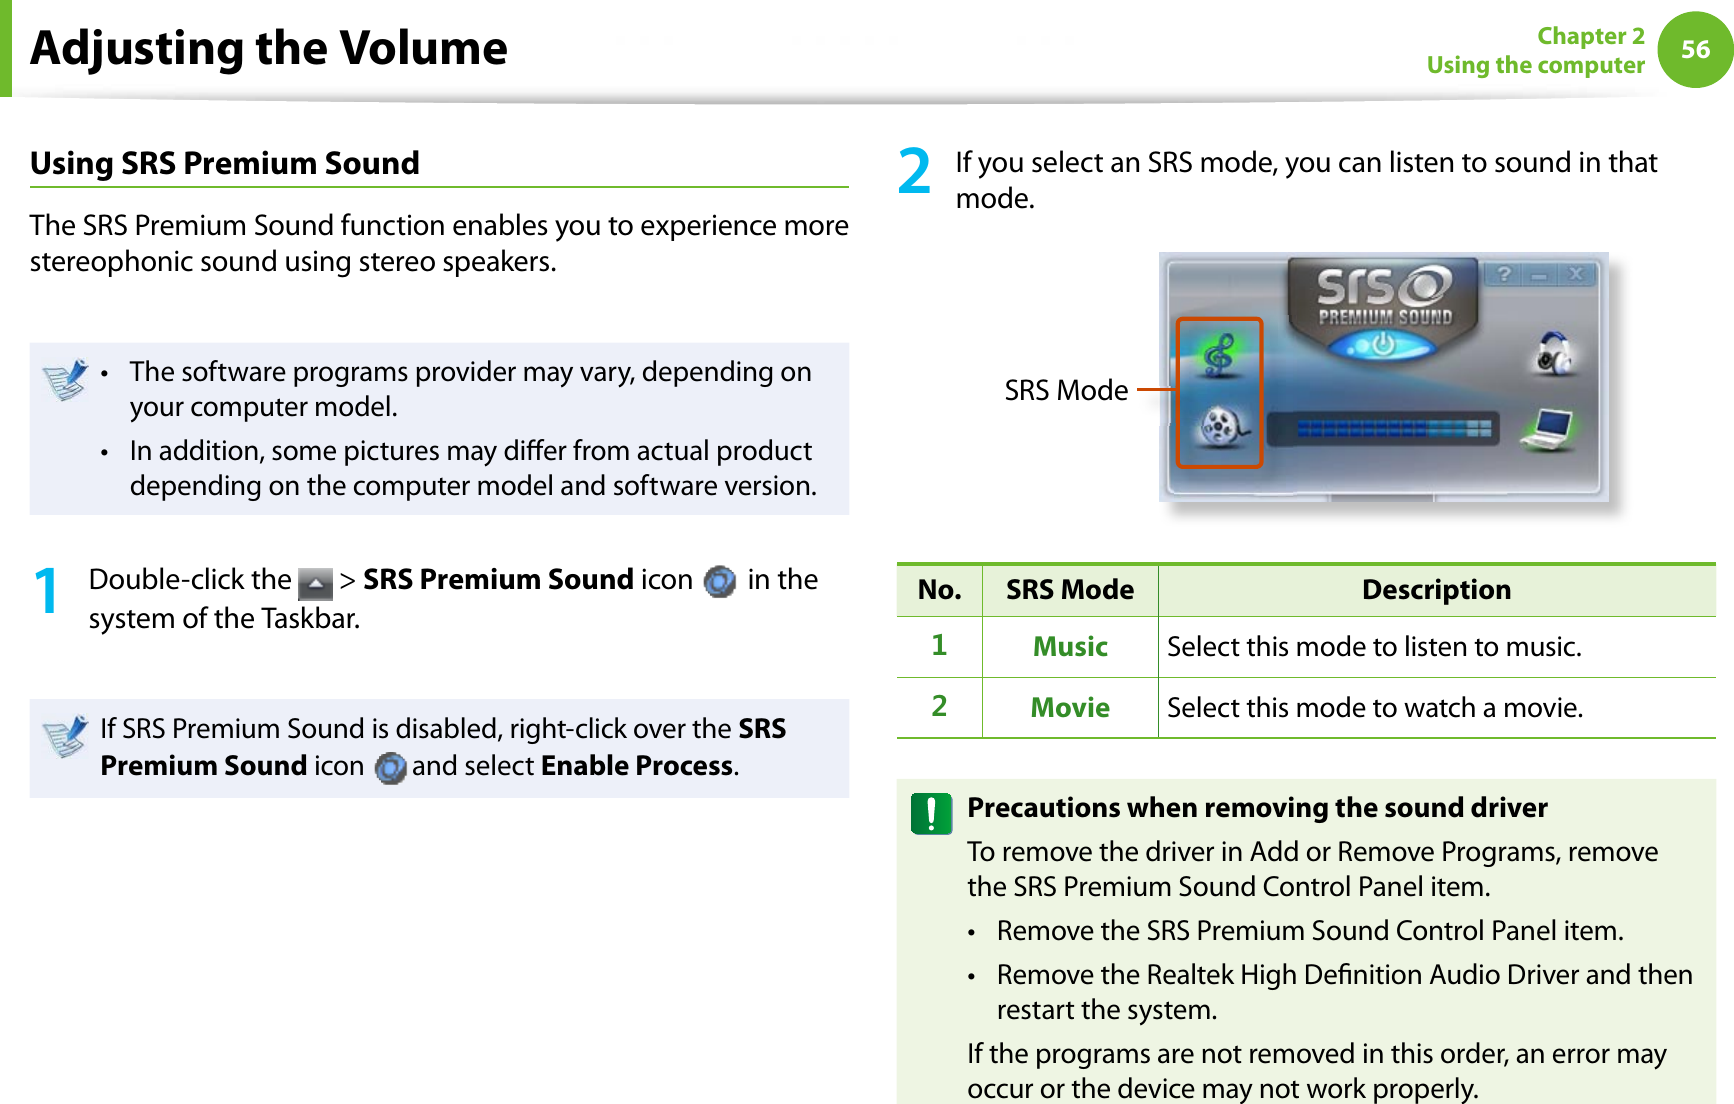
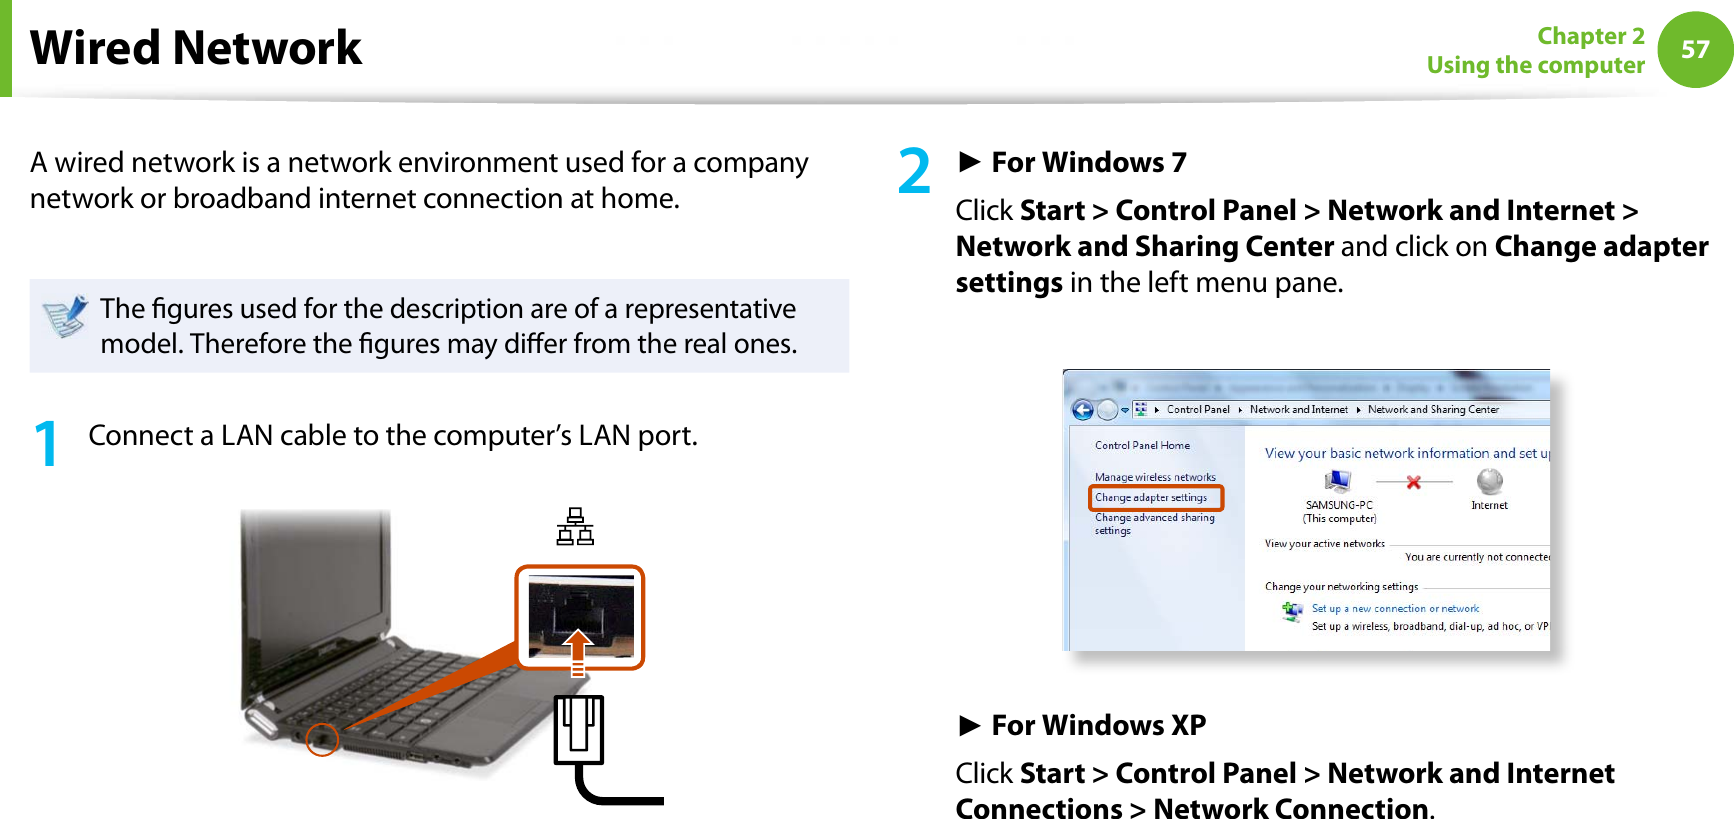
User manual 1 of 2
Navigation menu
Upload a User Manual
Namespaces
Wiki Guide
HTML
PDF
Info
Views
User Manual
Discussion / Help
Navigation