Business Machines U58H004 User Manual for LMA transmitter
International Business Machines Corporation Users Manual for LMA transmitter
Contents
- 1. Users Manual
- 2. RF Safety Info
- 3. Users Manual for Host PC X30
- 4. Users Manual for LMA transmitter
- 5. Users Manual T40
- 6. Users Manual X30
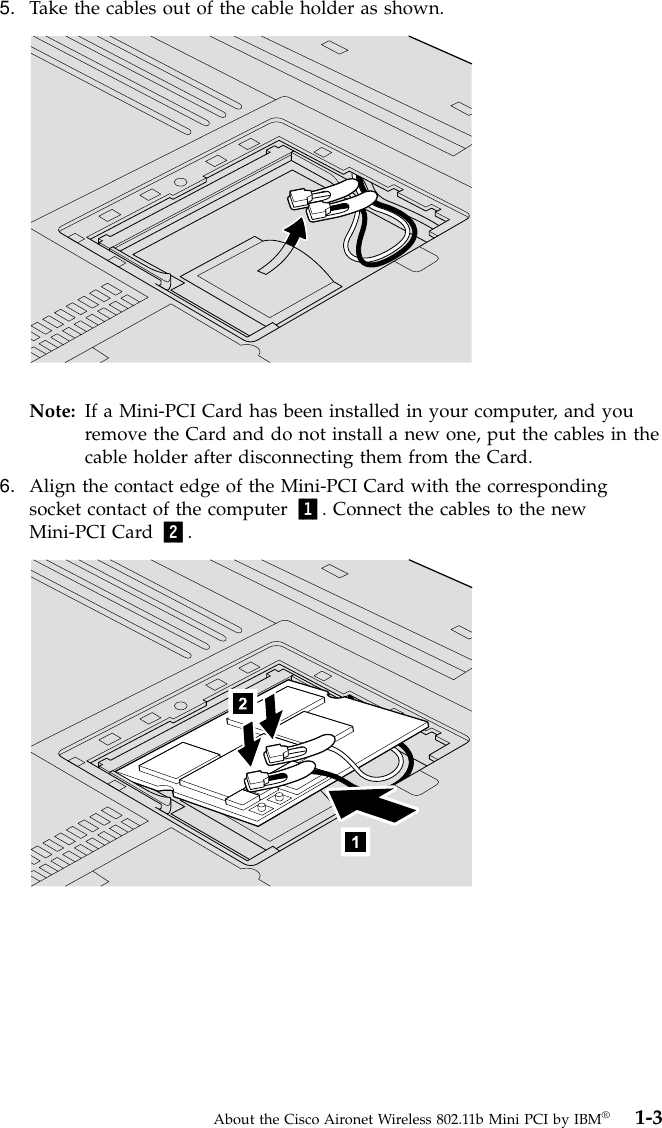
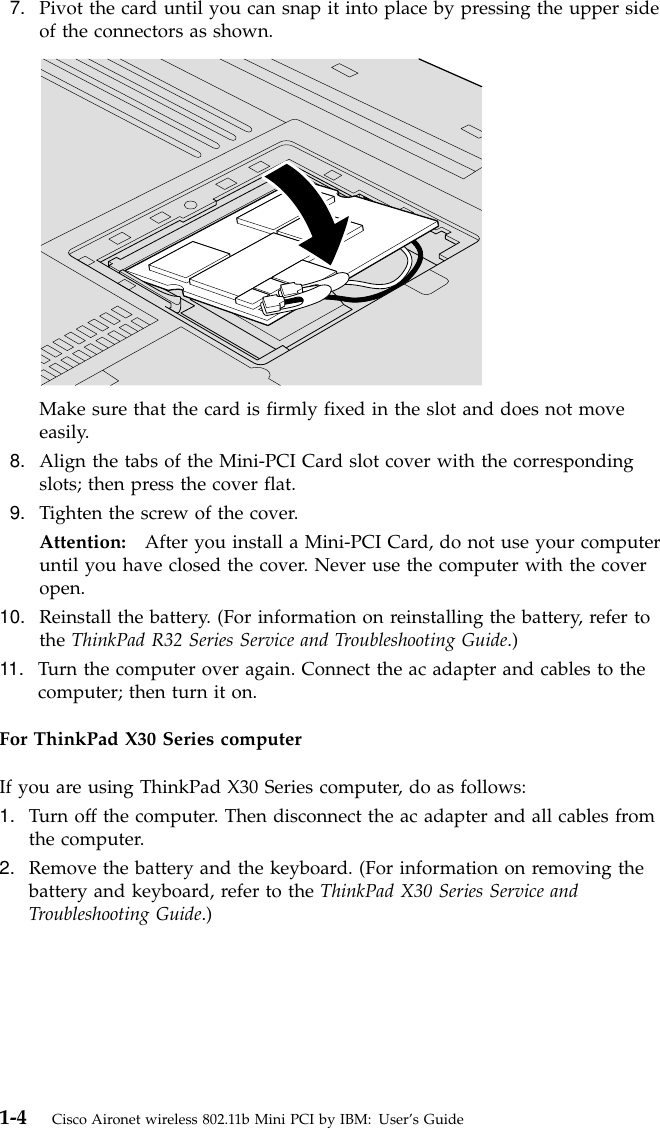
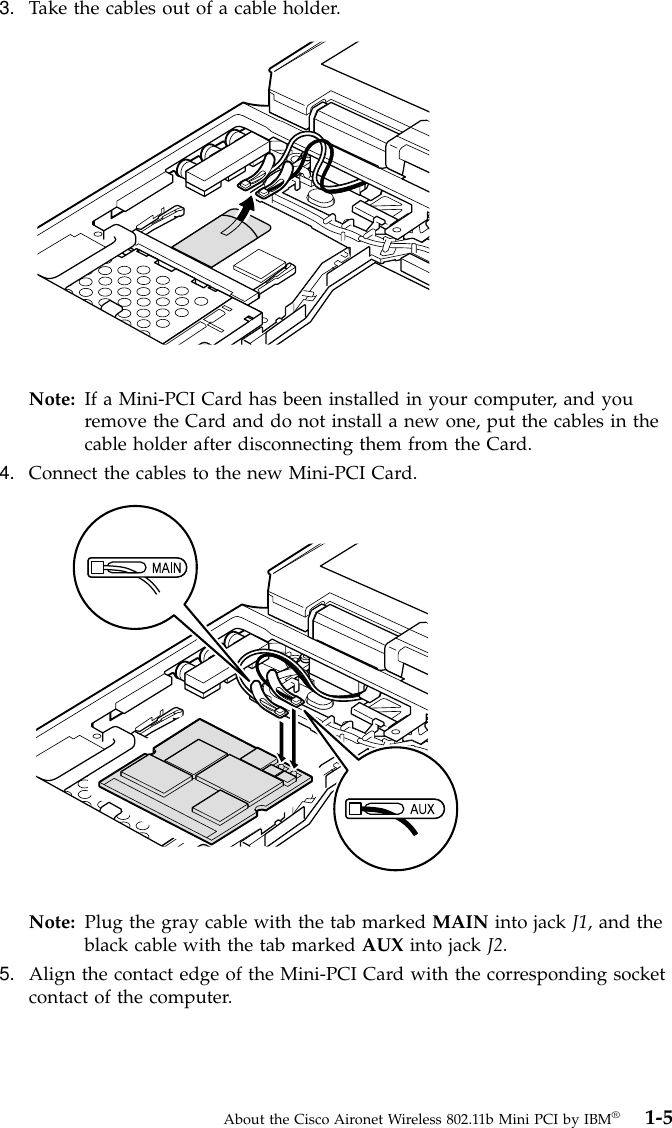
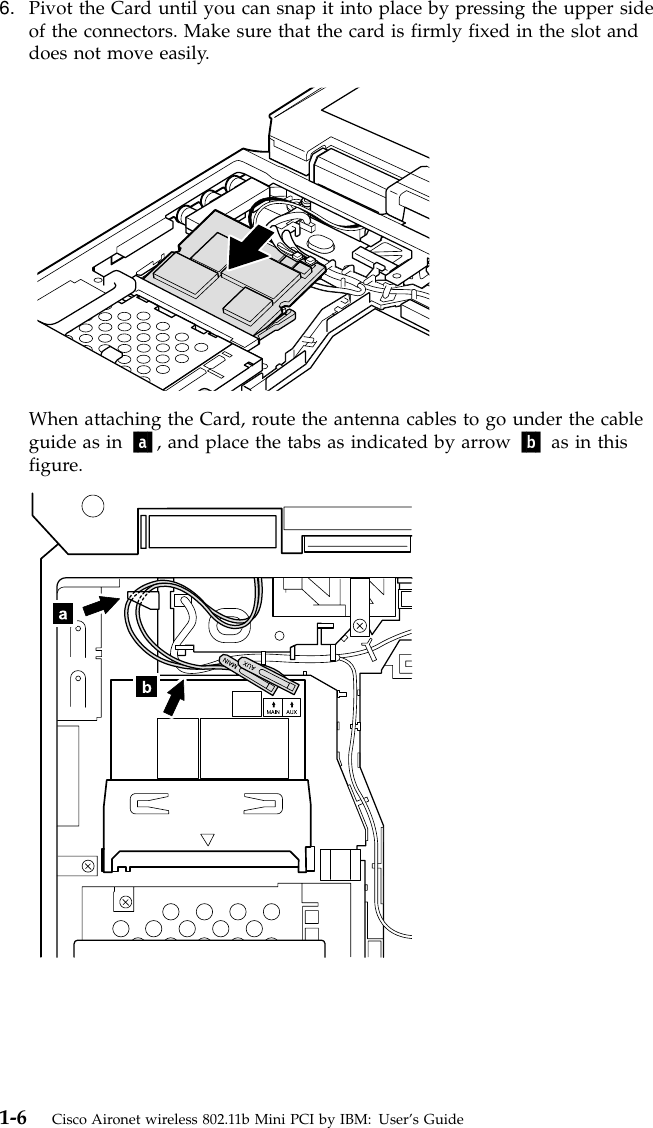
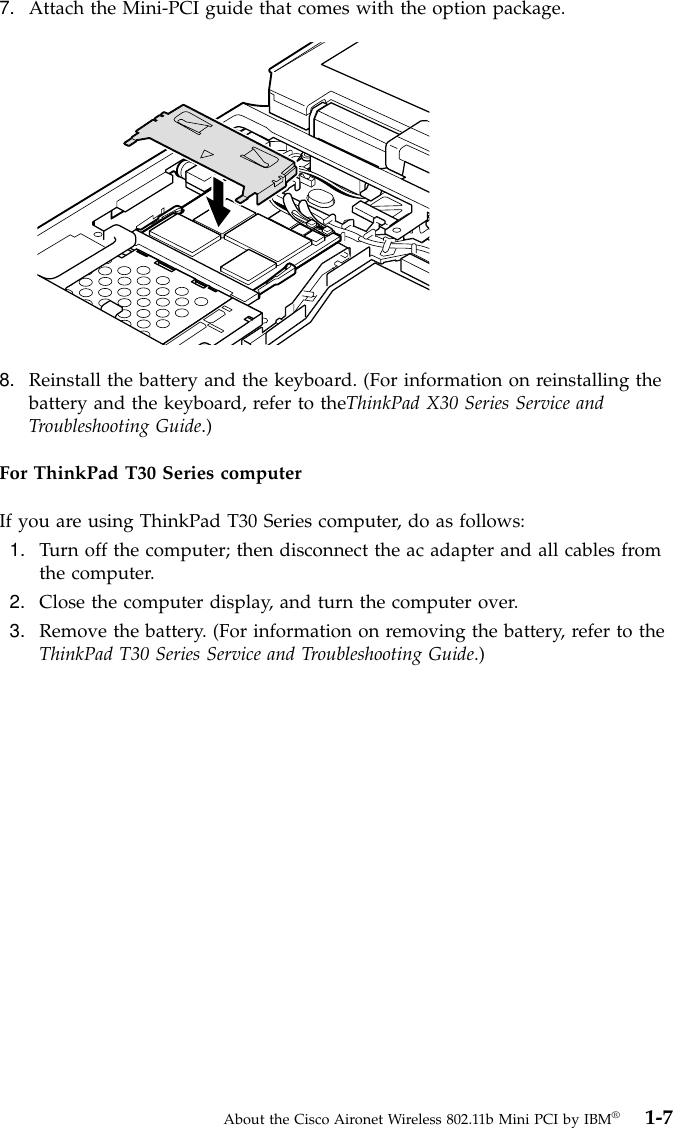
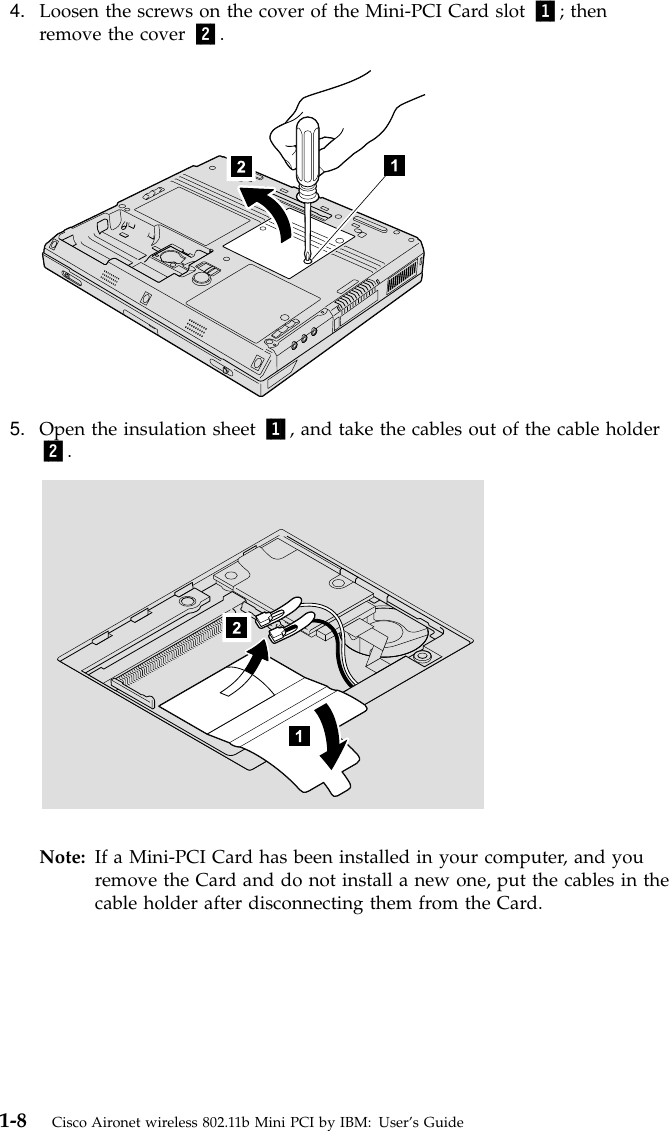
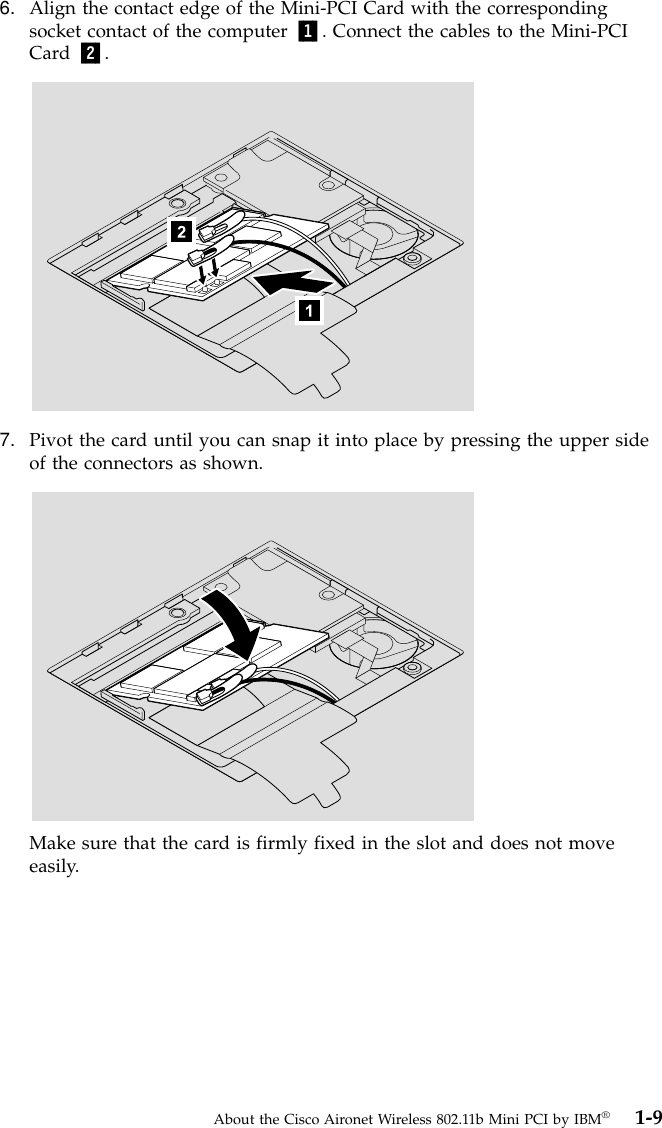
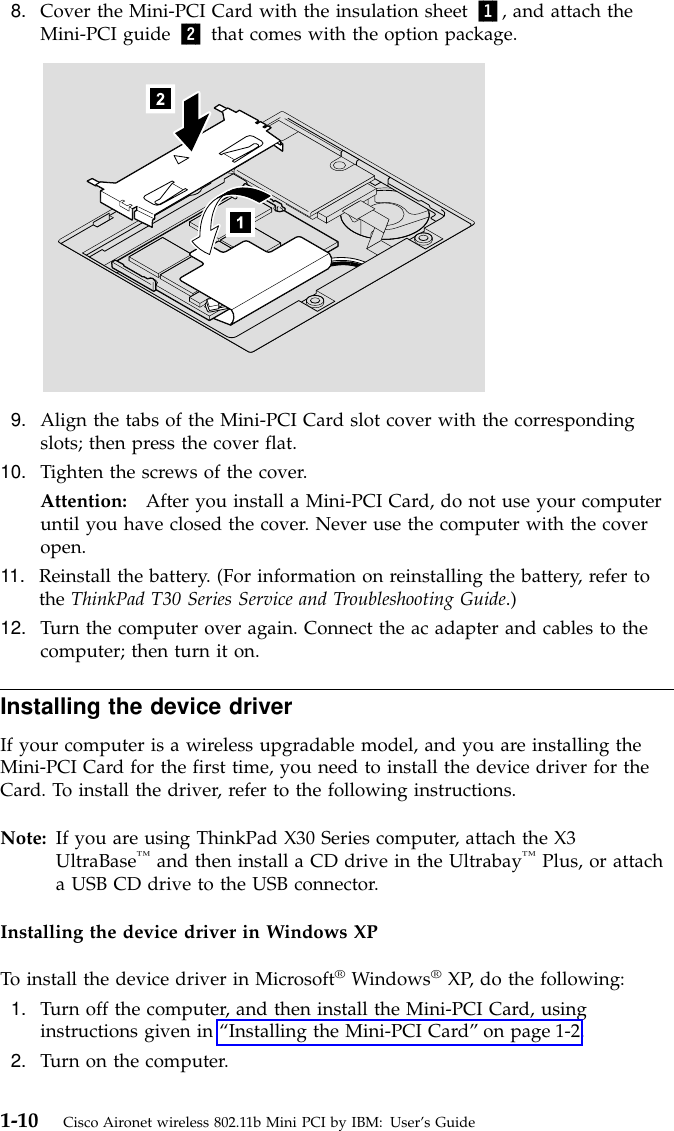
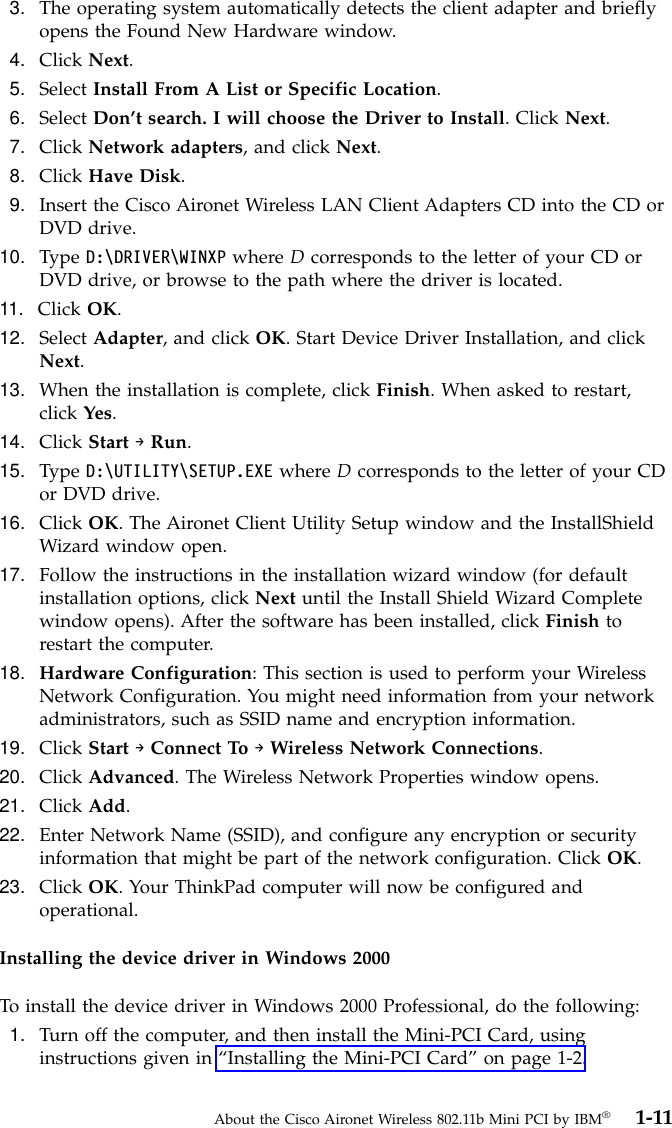
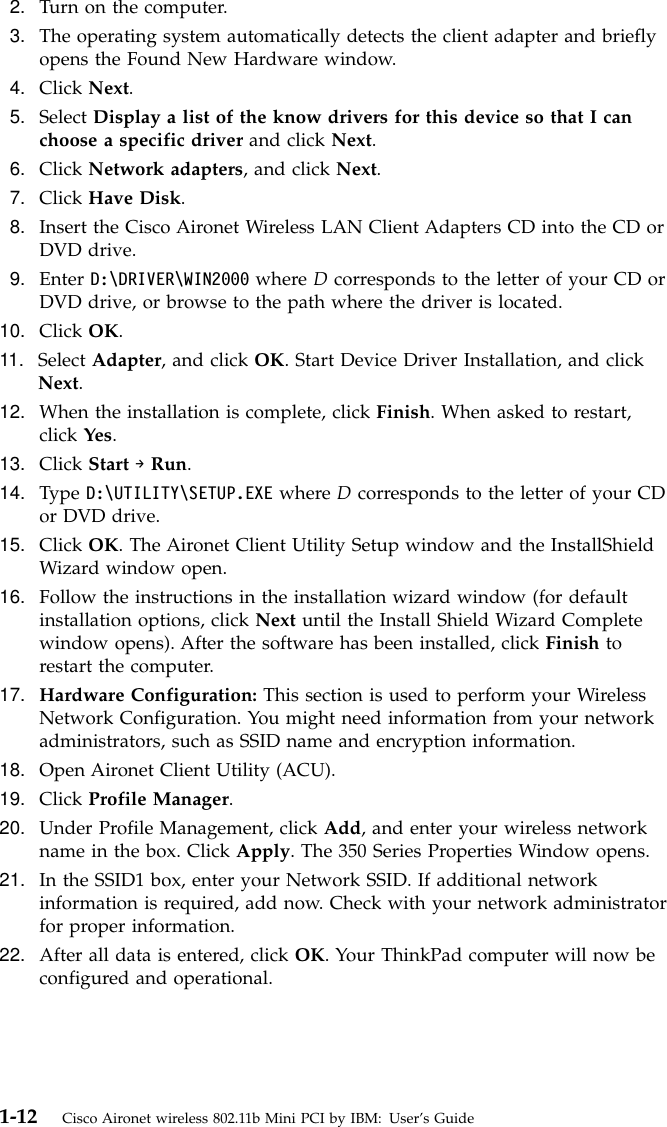
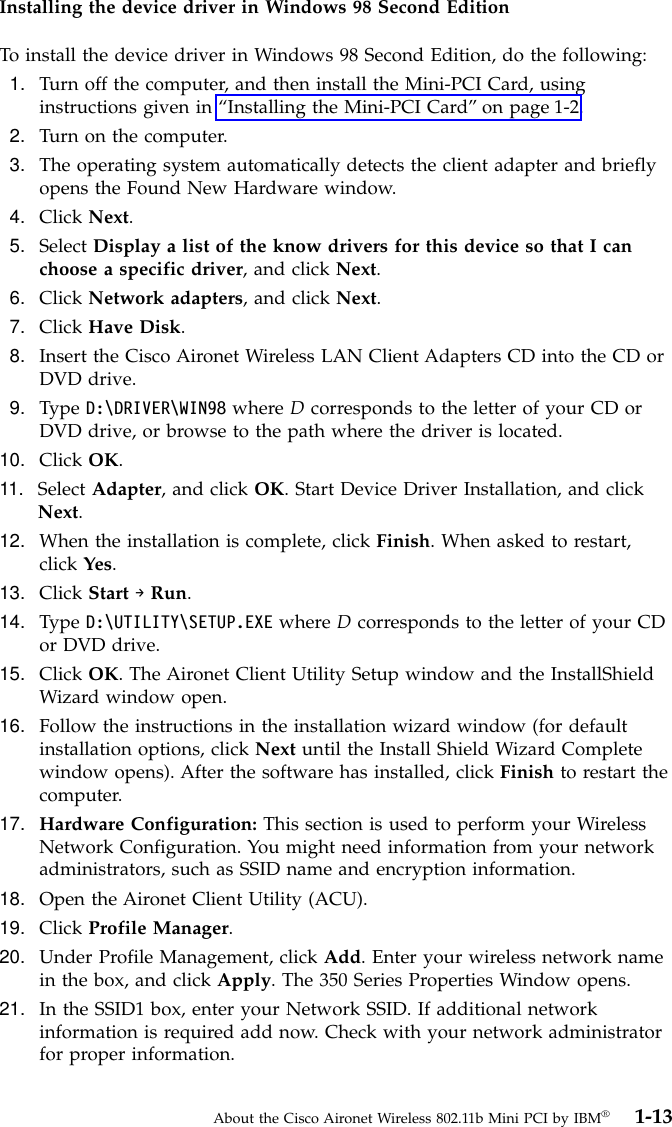
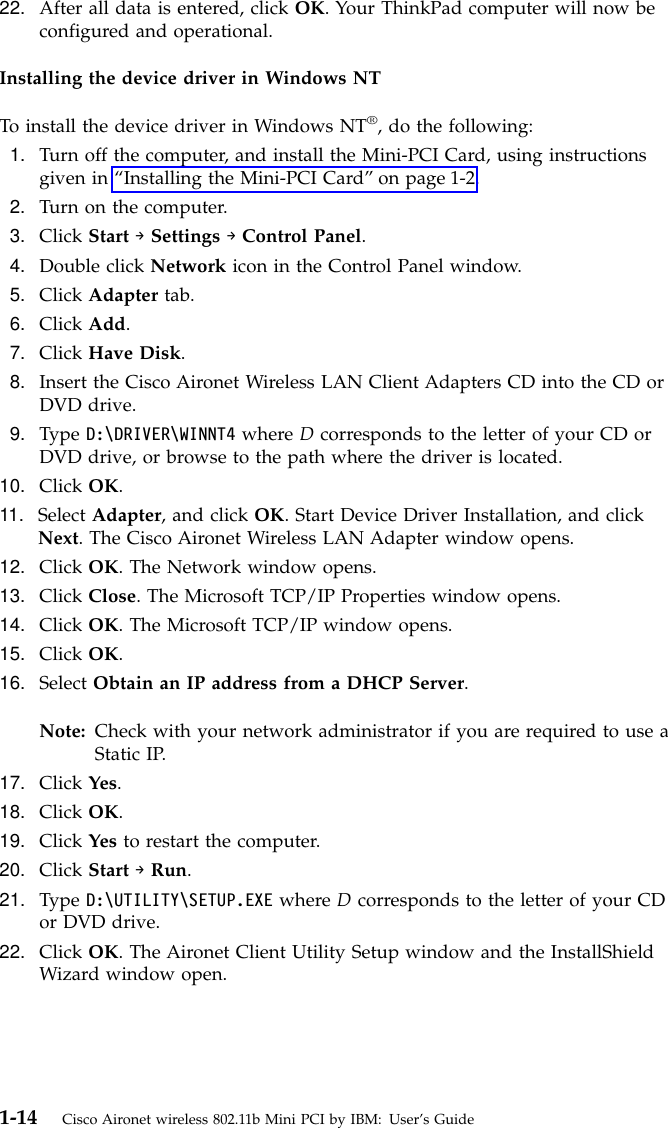
Users Manual for LMA transmitter