CETIS DCT1905 DECT Phone User Manual DCT1900 User Guide
CETIS,INC. DECT Phone DCT1900 User Guide
UserManual.wiki
>
CETIS
>
DCT1905 User Manual
>
Users manual
Contents
1.
Users manual
2.
Users Manual
Users manual
Navigation menu
Upload a User Manual
Namespaces
Wiki Guide
HTML
PDF
Info
Views
User Manual
Discussion / Help
Navigation
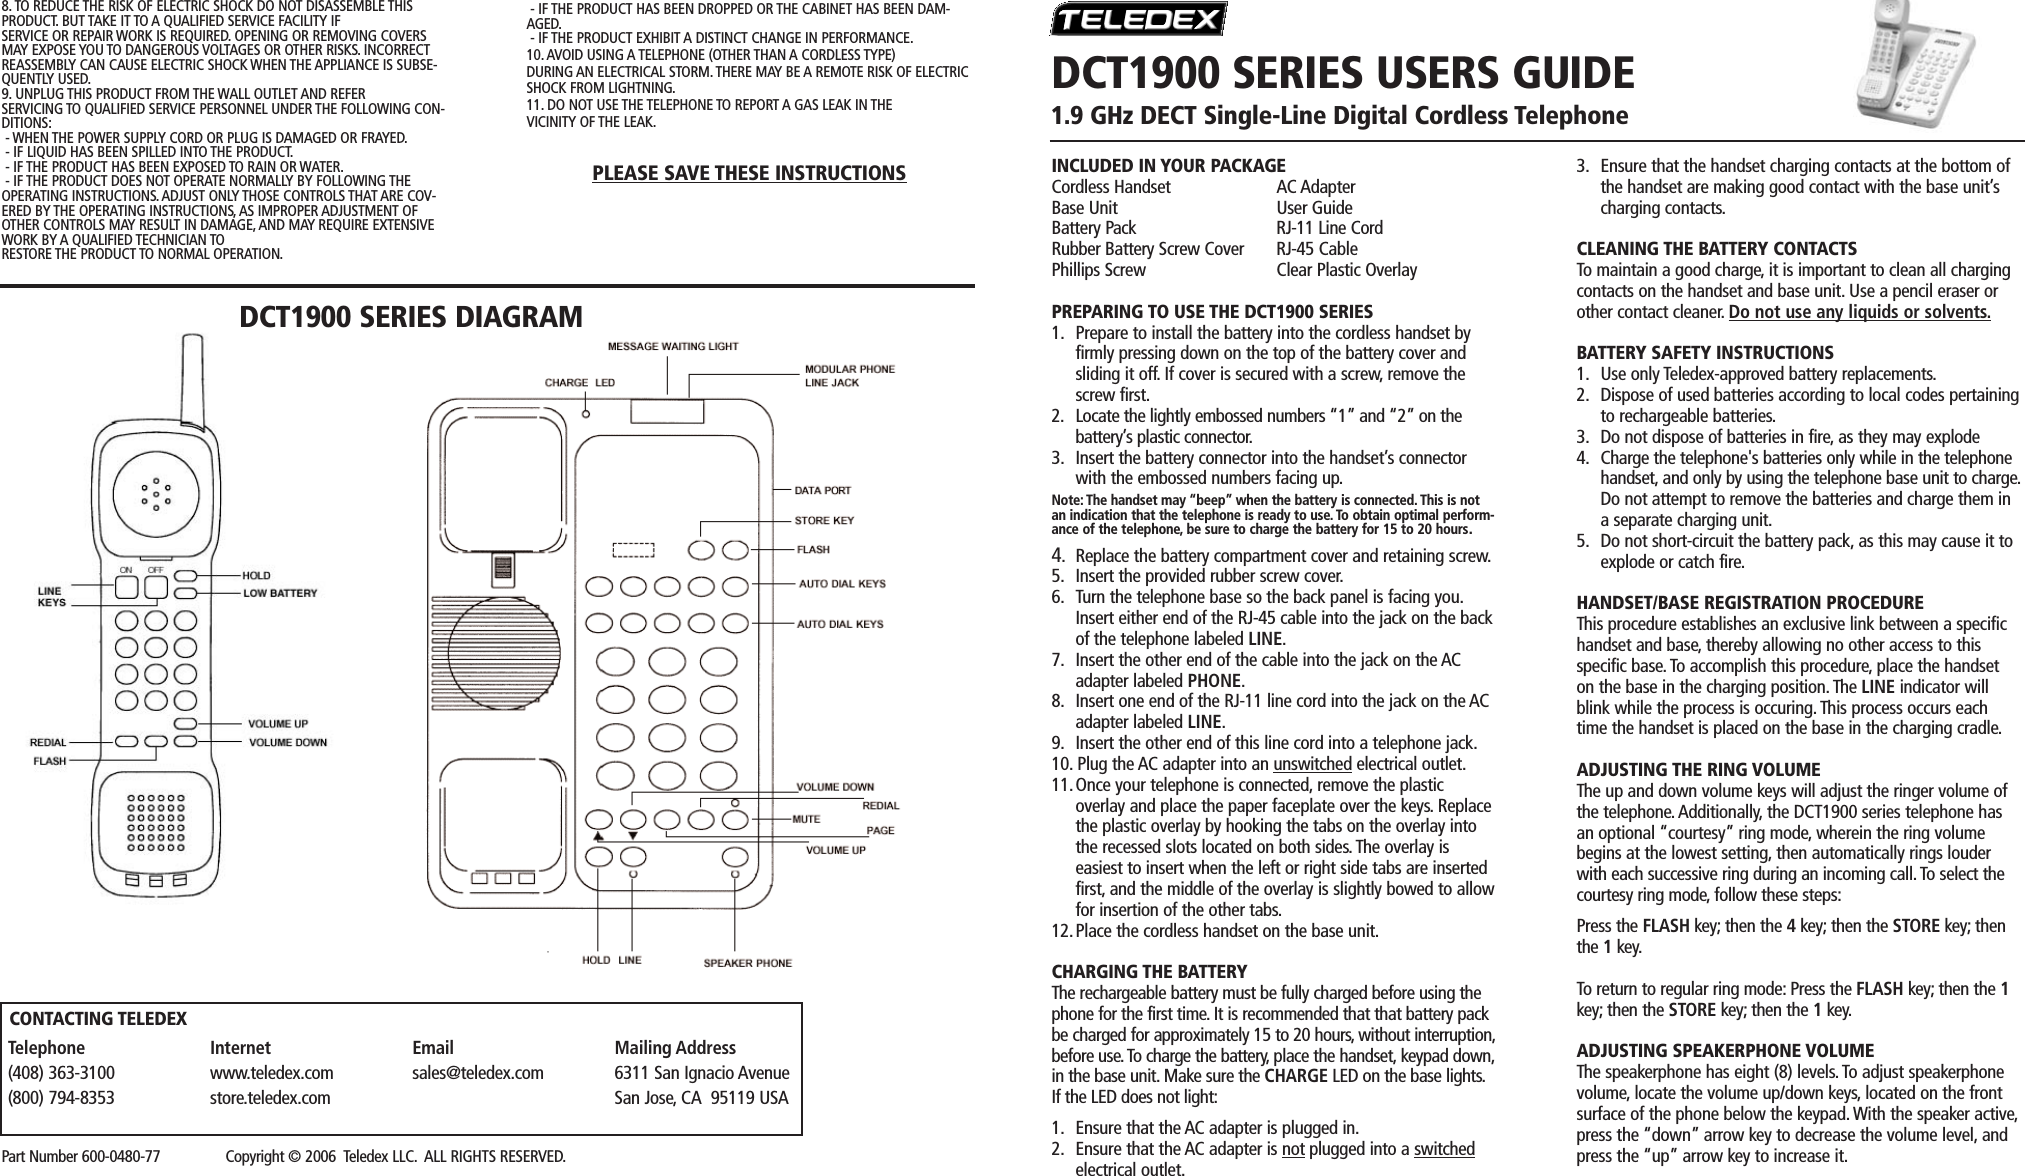
![ADJUSTING HANDSET RECEIVE VOLUMEThe handset has eight (8) volume levels. To adjust the handsetvolume, locate the volume up/down keys, located on thehandset, below the “#” key. Pressing the “minus” (-) key willdecrease the volume level, while pressing the “plus” (+) keywill increase it.AUTO DIAL KEYSThe DCT1900 series has either five (5) or ten (10) programmableguest service (auto dial) keys, depending on the model you own.These keys can be programmed to automatically dial telephonenumbers, or to activate telephone system features.To program theauto dial keys (programming can only be done from base unit):1. With the phone “on hook” (inactive) and the faceplate removed, press the recessed STORE key (see diagram).2. Enter the desired telephone number (up to 15 digits in length) to be stored. To enter a “pause” in the number string, press the REDIAL key as necessary.3. Press the STORE key again.4. Press the auto dial key where the number is to be stored.Programming is now completed for that auto dial key.To program additional keys, repeat this process.RECEIVING A CALLAn audible ring and flickering red LED indicate an incoming call.To answer the call using the handset while it is not on the base:1. Pick up the handset and press the ON key.2. The handset will go “off-hook” answering the call.3. To end the call, place the handset in the base unit cradle, or press the OFF key on the handset.To answer the call using the handset while it is resting on the base:1. Pick up the handset from the base. The phone willautomatically connect to the line.2. To end the call, replace the handset in the base unit cradle,or press the OFF key on the handset.To answer the call using the speakerphone:1. Press either the LINE key or the SPKR key. The speakerphonewill go “off-hook” answering the call.2. To end the call, press the SPKR key to hang up.PLACING A CALLUsing the handset:1. Pick up the handset and press the ON key. Listen for dial tone and dial the desired number.2. After the call is complete, press the OFF key to hang up.Using the speakerphone:1. Press either the LINE key or the SPKR key.2. Listen for dial tone, and dial the desired number, or press an auto dial key to dial a preprogrammed number.3. After the call is complete, press the SPKR key to hang up.REDIALThe DCT1900 series can automatically redial the last numberdialed. On the handset, press the REDIAL key to redial the lastnumber.USING THE HOLD KEYThe HOLD key places the call on hold locally at the cordlesstelephone.To place a call on hold:1. With a call active, press the red HOLD key on either the handset or base unit.2. The red line LED will flash, indicating the call is on hold.To remove a call from hold:1. Press the line key of the call on hold. This will remove the call from hold, making the call active again.2. The red line LED will return to steady illumination, indicating the line is active.To change phones after placing a call on hold:1. Place the call on hold as above.2. Pick up the call at another telephone that is on the same line. The telephone will activate the line and remove the holdat the original telephone.TO MUTE THE SPEAKERPHONE1. Press the MUTE key on the base unit. The red LED above the MUTE key will illuminate. The party on the other end will not be able to hear you when the MUTE LED is lit.2. Press the MUTE key again to turn off the mute feature.The MUTE LED will go out.CONVERTING FROM DESK TO WALL MOUNTThe DCT1900 series can be adapted for wall mounting applica-tions. The conversion is easiest to make when the handset andcords are not connected.1. Located on the handset cradle, above the speaker grill, is thewall/desk mount clip. Remove this clip by firmly pushing it upward towards the top of the phone.2. Flip the clip over (top to bottom) so that the protruding edge is towards the top of the phone and replace it in its slot.This edge will hold the handset when the phone is mounted on the wall.3. Turn the telephone over so the bottom is up, facing you.Place it on a non-abrasive surface to prevent scratching.4. Locate and remove the mounting bracket. Firmly push back and pull up to remove two of the four retaining tabs.5. Rotate the mounting bracket 180º degrees clockwise, so thatthe mounting eyelet on the bracket is facing in the same direction as the other mounting eyelet located on thebottom of the telephone.6. Insert the top two retaining tabs of the mounting brackets into the mounting bracket slots (located near the middle of the telephone). Then firmly push down to insert the retainingtabs on the opposite side of the mounting bracket.7. Connect a 15-foot RJ-45 cord into the LINE jack on the back of the phone.8. Turn the telephone over, and slide the telephone down onto the mounting posts of the wall bracket. Ensure that both eyelets line up with the mounting posts.REQUIREMENTS OF PART 68 - FCC RULESThis device has been granted a registration number by the FederalCommunications Commission, under Part 68 rules and regulations for direct con-nection to the telephone lines. In order to comply with these FCC rules, the fol-lowing instructions must be carefully read and applicable portions followed com-pletely:1. Direct connection to the telephone lines may be made only through the stan-dard modular cord furnished, to the utility installed jack. No connection may bemade to party or coin phone lines. On the bottom of the phone is a label thatcontains among other information, the FCC Registration Number and the RingerEquivalence number (REN) for this equipment. If requested this information mustbe provided to the telephone company. The USOC Jack for this equipment isRJ11C.2. The telephone company, under certain circumstances, may temporarily discon-tinue and make changes in facilities and services which may affect the operationof the users' equipment: however, the user shall be given adequate notice in writ-ing to allow the user to maintain uninterrupted service.3. In certain circumstances, it may be necessary for the telephone company torequest information from you concerning the equipment which you have connect-ed to your telephone line. Upon request of the telephonecompany, provide the FCC registration number and the ringer equivalence num-ber of the equipment which is connected to your line; this information will befound on the device.4. If any of your telephone equipment is not operating properly, you should imme-diately remove it from the telephone line. It may cause harm to the telephonenetwork.5. If the telephone company notes a problem, they may temporarilydiscontinue service. When practical, they will notify you in advancedisconnection. If advance notice is not feasible, the telephone company must;promptly notify you of such temporary discontinuance; afford the opportunity tocorrect the condition; inform you of your rights to bring a complaint to the FCCunder their rules.6. Repairs to the device may be made only by the manufacturer or an authorizedservice agency. This applies at any time during and afterwarranty. If unauthorized repair is performed, registration, connection to the tele-phone lines and remainder of warranty period all become null and void.7. This equipment is hearing aid compatible.8. This telephone must be connected behind a PBX.REQUIREMENTS OF PART 15 - FCC RULESStatement according to FCC part 15.105: NOTE:This equipment has been testedand found to comply with the limits for a Class B digital device, pursuant toPart 15 of the FCC Rules. These limits are designed to provide reasonableprotection against harmful interference in a residential installation. Thisequipment generates, uses and can radiate radio frequency energy and, if notinstalled and used in accordance with the instructions, may cause harmfulinterference to radio communications. However, there is no guarantee thatinterference will not occur in a particular installation. If this equipment doescause harmful interference to radio or television reception, which can bedetermined by turning the equipment off and on, the user is encouraged to tryto correct the interference by one or more of the following measures: Reorientor relocate the receiving antenna; Increase the separation between theequipment and receiver; Connect the equipment into an outlet on a circuitdifferent from that to which the receiver is connected. Consult the dealer oran experienced radio/TV technician for help.Statement according to FCC part 15.21: Modifications not expressly approvedby this company could void the user’s authority to operate the equipment.RF Exposure (Handset) (DECT): This device and its antenna must not beco-located or operating in conjunction with any other antenna or transmitter.RF Exposure mobile (Base) (DECT): The internal/external antennas used for thismobile transmitter must provide a separation distance of at least 20 cm fromall persons and must not be co-located or operating in conjunction with anyother antenna or transmitter.INDUSTRY OF CANADA REQUIREMENTSNOTICE: The Industry Canada label identifies certified equipment. This certifica-tion means that the equipment meets certain telecommunications network pro-tective operational and safety requirements as prescribed in the appropriateTerminal Equipment Technical Requirements documents. The department doesnot guarantee the equipment will operate to the users satisfaction. Beforeinstalling this equipment, users should ensure that it is permissible to be con-nected to the facilities of the local telecommunications company. The equip-ment must also be installed using an acceptable method of connection. Thecustomer should be aware that compliance with the above conditions may notprevent degradation of service in some situations. Repairs to certified equip-ment should be coordinated by a representative designated by the supplier. Anyrepairs or alterations made by the user to this equipment, or equipment mal-functions, may give the telecommunications company cause to request the userto disconnect the equipment. Users should ensure for their own protection thatthe electrical ground connections of the power utility, telephone lines, andinternal metallic water pipe systems, if present, are connected together. Thisprecaution may be particularly important in rural areas.Caution: Users should not attempt to make such connections themselves, but shouldcontact the appropriate electric inspection authority or electrician, as appropriate.The Ringer Equivalence Number (REN) of this device is 0.6A.Notice: The Ringer Equivalence Number (REN) assigned to each terminal deviceprovides an indication of the maximum number of terminals allowed to be con-nected to a telephone interface. The termination on an interface may consist ofany combination of devices subject only to the requirement that the sum of theRinger Equivalence Numbers of all the devices does not exceed 5.This tele-phone connects to the telephone network under the connecting arrangementcode CA11A. Statement according to fcc part 15.214:Privacy of communications may not be ensured when using this telephone!1.ˇThis equipment complies with Part 68 of the FCC rules and the requirements adopted by the ACTA. On the bottom of this equipment is a label that contains, among other information, a product identifier in the format US:AAAEQ# # TXXXX. If requested, this number must be provided to the telephone company.2.ˇA plug and jack used to connect this equipment to the premises wiring and telephone network must comply with the applicable FCC Part 68 rules and requirements adopted by the ACTA. A compliant telephone cord and modular plug is provided with this product. It is designed to be connected to a compatible modular jack that is also compliant. See installation instructions for details.3. If this equipment [US:2N3W410BDCT1905] causes harm to the telephone network, the telephone company will notify you in advance that temporary discontinuance of service may be required. But if advance notice isn't practical, the telephone company will notify the customer as soon as possible. Also, you will be advised of your right to file a complaint with the FCC if you believe it is necessary.4. The telephone company may make changes in itsfacilities, equipment, operations or procedures that couldaffect the operation of the equipment. If this happens thetelephone company will provide advance notice in order for youto make necessary modifications to maintain uninterruptedservice.5.If trouble is experienced with this equipment [US: 2N3W410BDCT1905], for repair or warranty information, Service can be facilitated through our office at:U.S. Agent Company name: Cetis, Inc.Address: 5025 Galley Road, Colorado Springs CO, 80915Tel: 719-638-88216.Please follow instructions for repairing if any (e.g. battery replacement section); otherwise do not alternate or repair any parts of device except specified. 7.Connection to party line service is subject to statetariffs. Contact the state public utility commission, publicservice commission or corporation commission for information.8.If your home has specially wired alarm equipment connected to the telephone line, ensure the installation of this [US: 2N3W410BDCT1905] does not disable your alarm equipment.If you have questions about what will disable alarm equipment, consult your telephone company or a qualified installer.9.If the telephone company requests information on what equipment is connected to their lines, inform them of:a) The ringer equivalence number [ 0.6A]b) The USOC jack required [ RJ11C]c) Facility Interface Codes (ìFICî) [ 02LS2]d) Service Order Codes (ì SOCî) [ 9.0y]e) The FCC Registration Number [ US: 2N3W410BDCT1905]10.The REN is used to determine the number of devices that may be connected to a telephone line. Excessive RENs on a telephone line may result in the devices not ringing in response to an incoming call. In most but not all areas, the sum of RENs should not exceed five (5.0). To be certain of the number of devices that may be connected to a line, as determined by the total RENs, contact the local telephone company. The REN for this product is part of the product identifier that has the format US:AAAEQ# # TXXXX. The digits represented by # # are the REN without a decimal point. For this product the FCC Registration number is [ US: 2N3W410BDCT1905] indicates the REN would be 0.6.11.If this product is equipped with a corded or cordless handset, it is hearing aid compatible.Customer Information](https://usermanual.wiki/CETIS/DCT1905.Users-manual/User-Guide-1759569-Page-2.png)