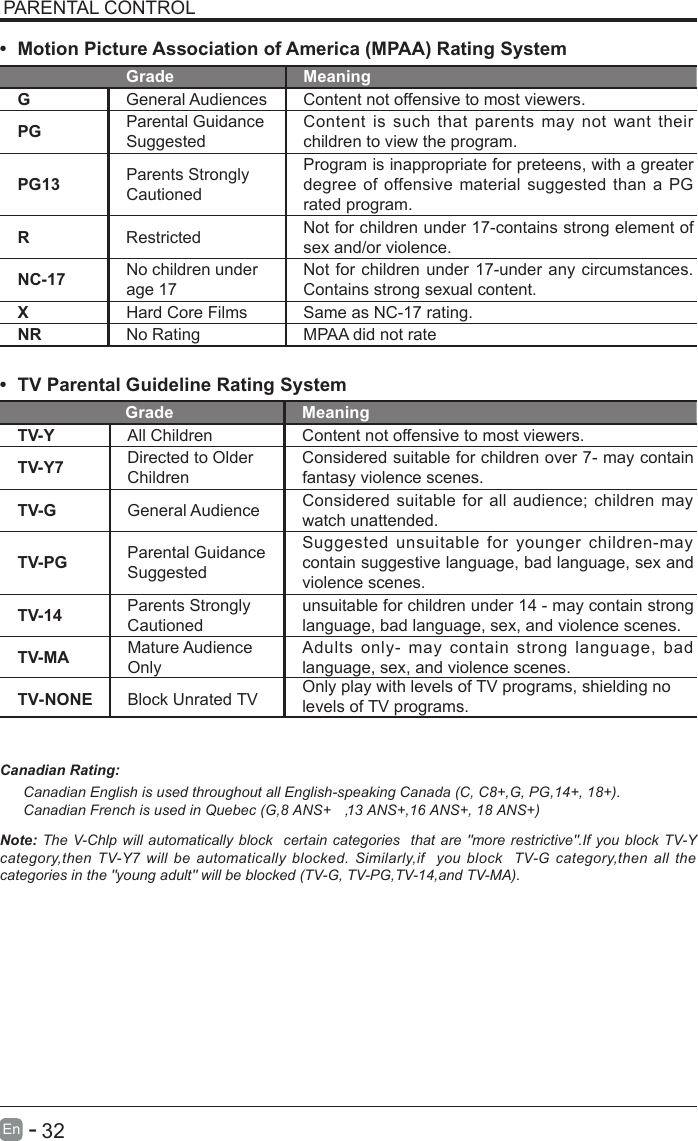
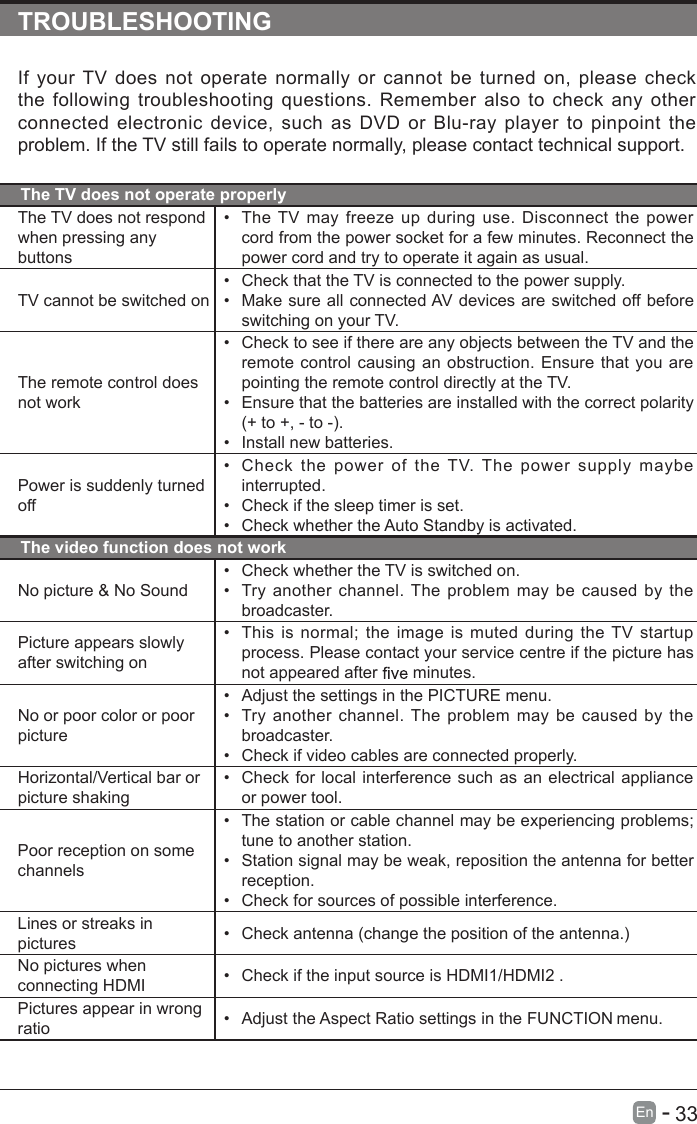
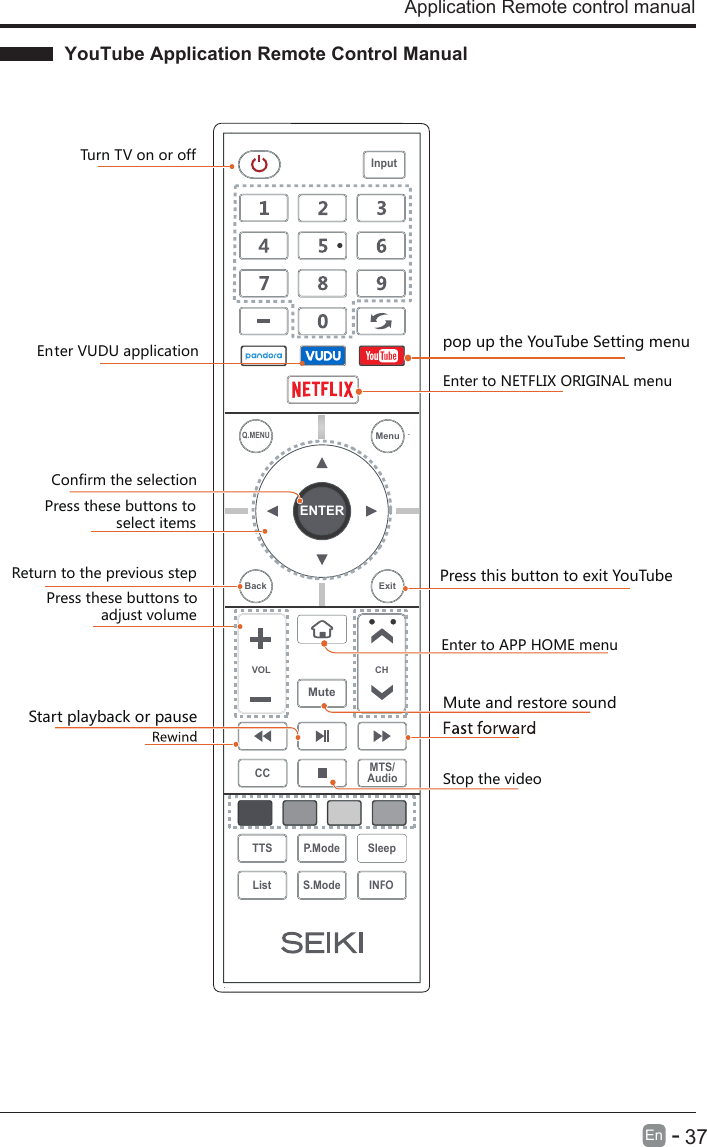
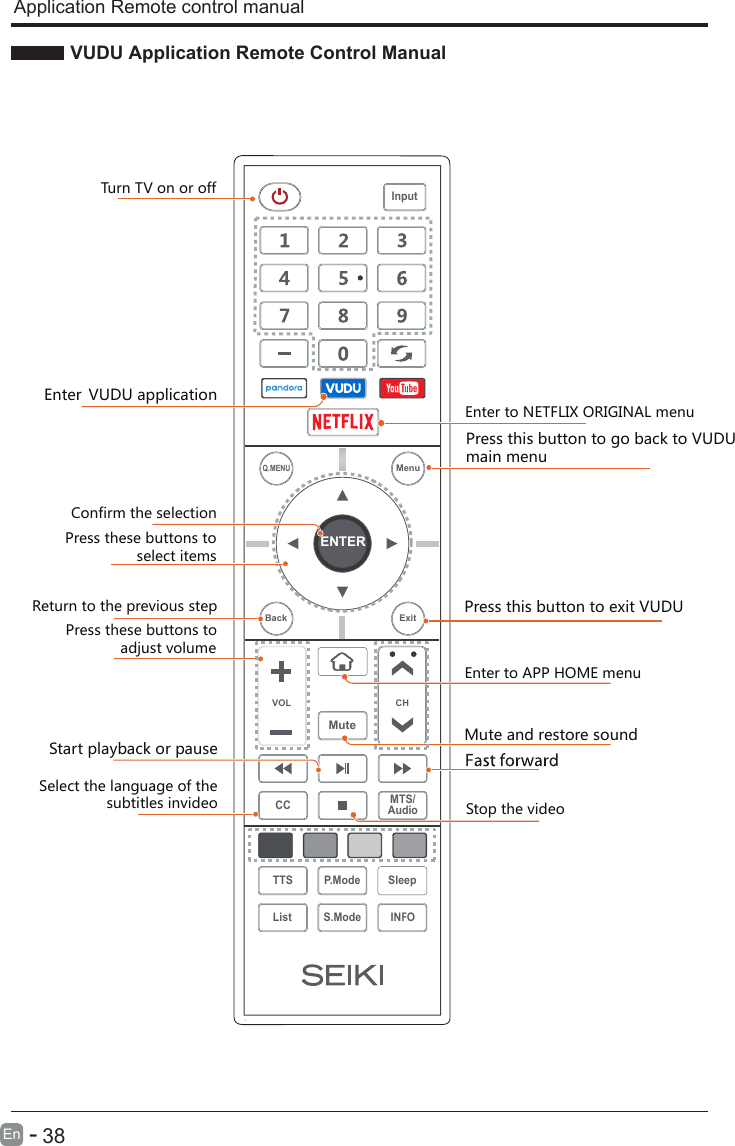
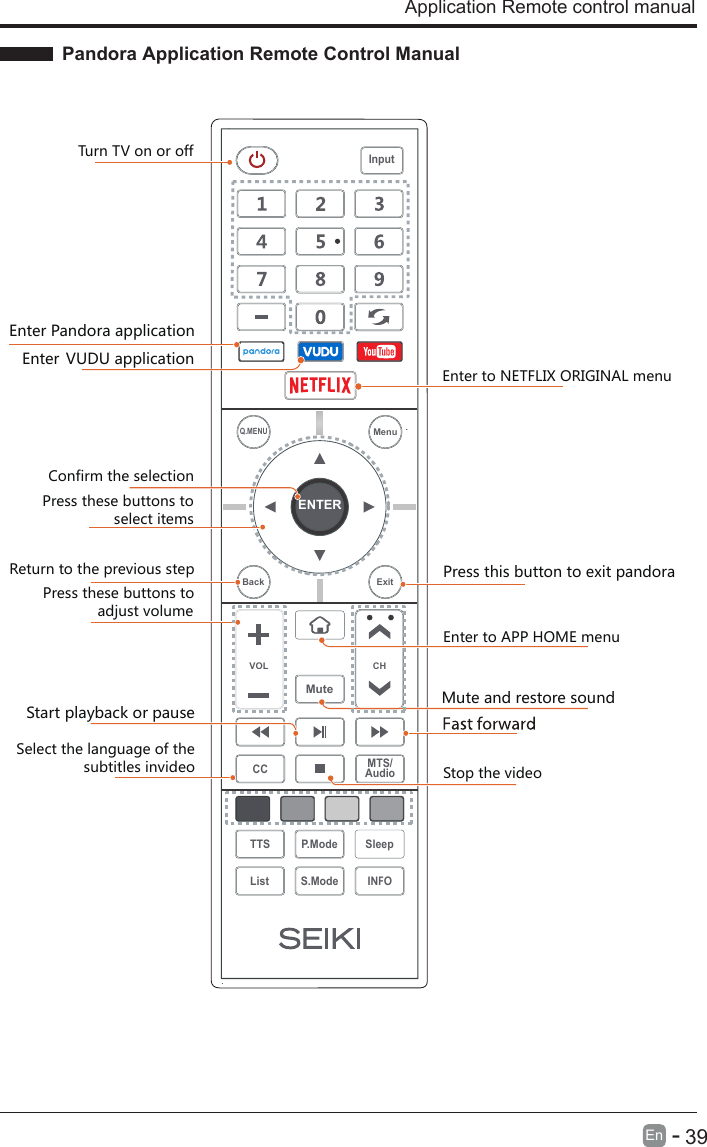
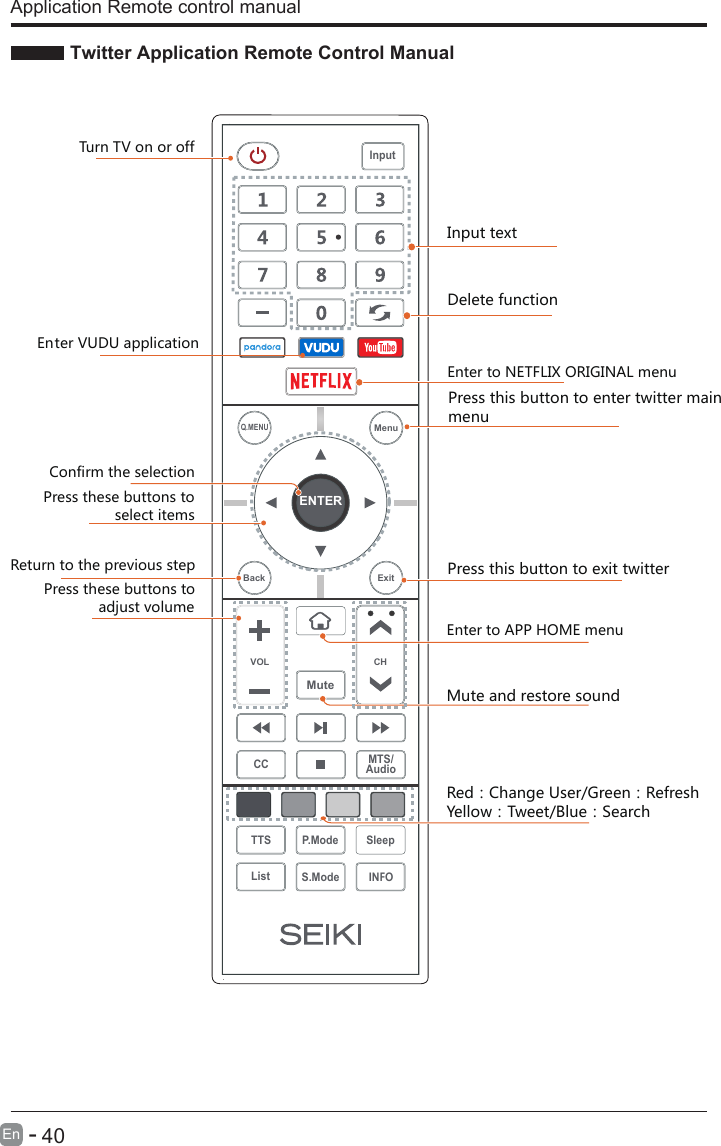
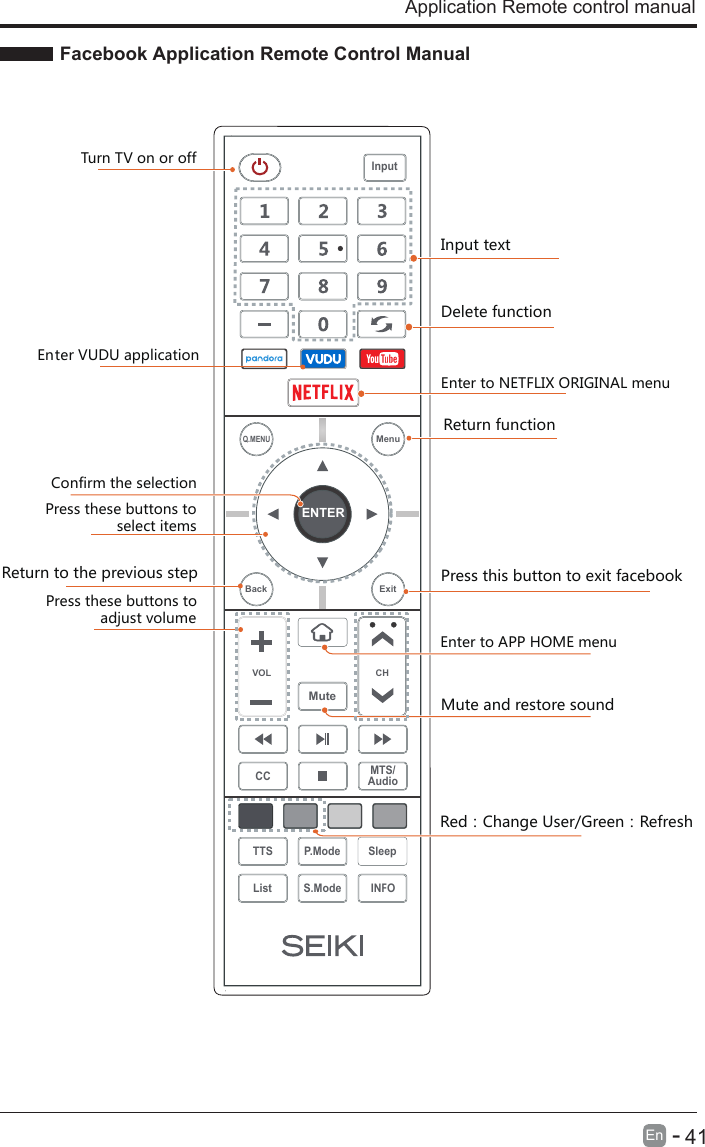
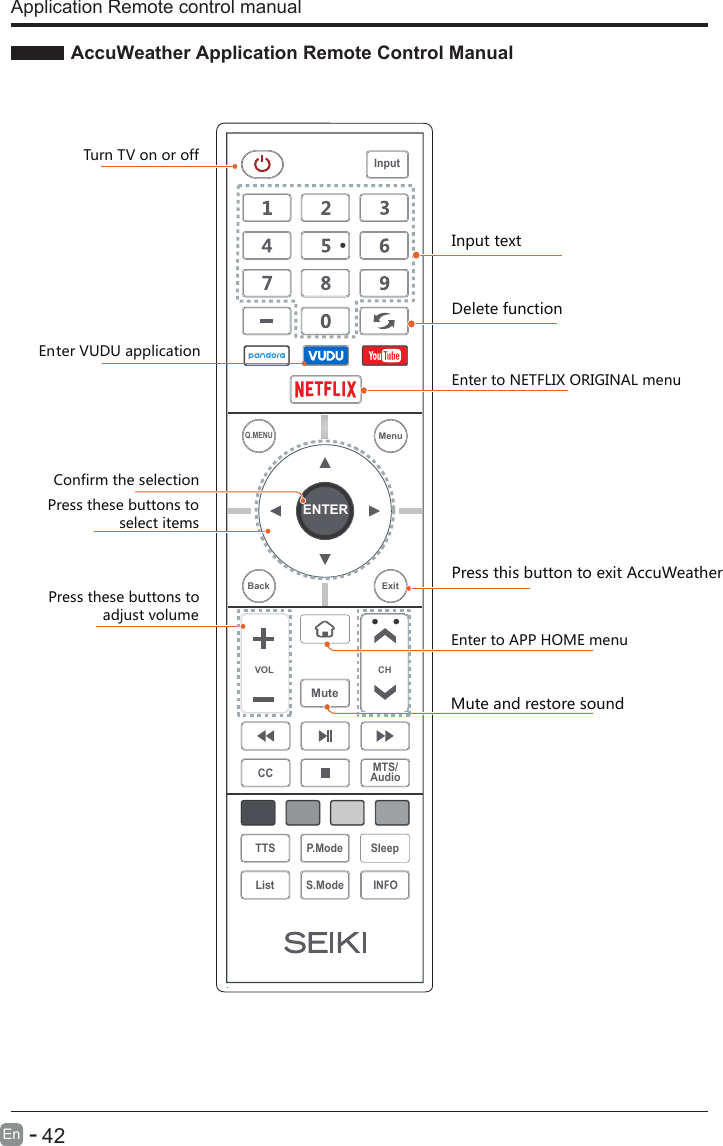
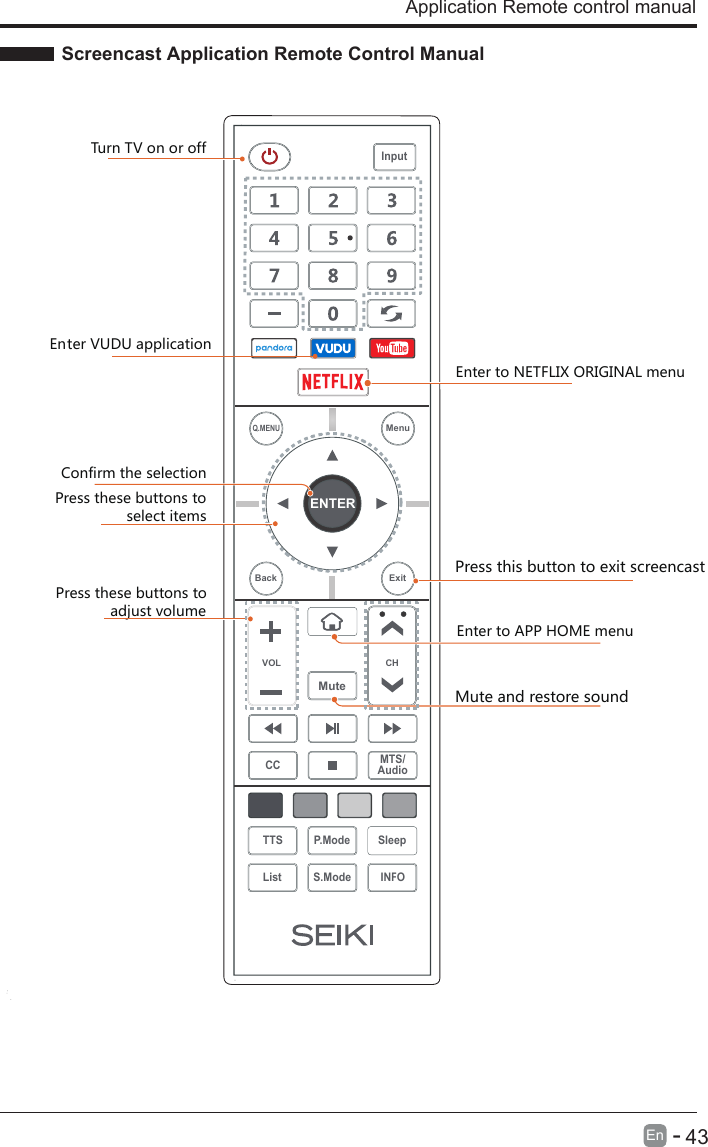
CHOICE FORTUNE SC-60UK850N LED TV User Manual
CHOICE FORTUNE HOLDINGS LIMITED LED TV
UserManual.wiki
>
CHOICE FORTUNE
>
SC 60UK850N User Manual
User Manual
Navigation menu
Upload a User Manual
Namespaces
Wiki Guide
HTML
PDF
Info
Views
User Manual
Discussion / Help
Navigation

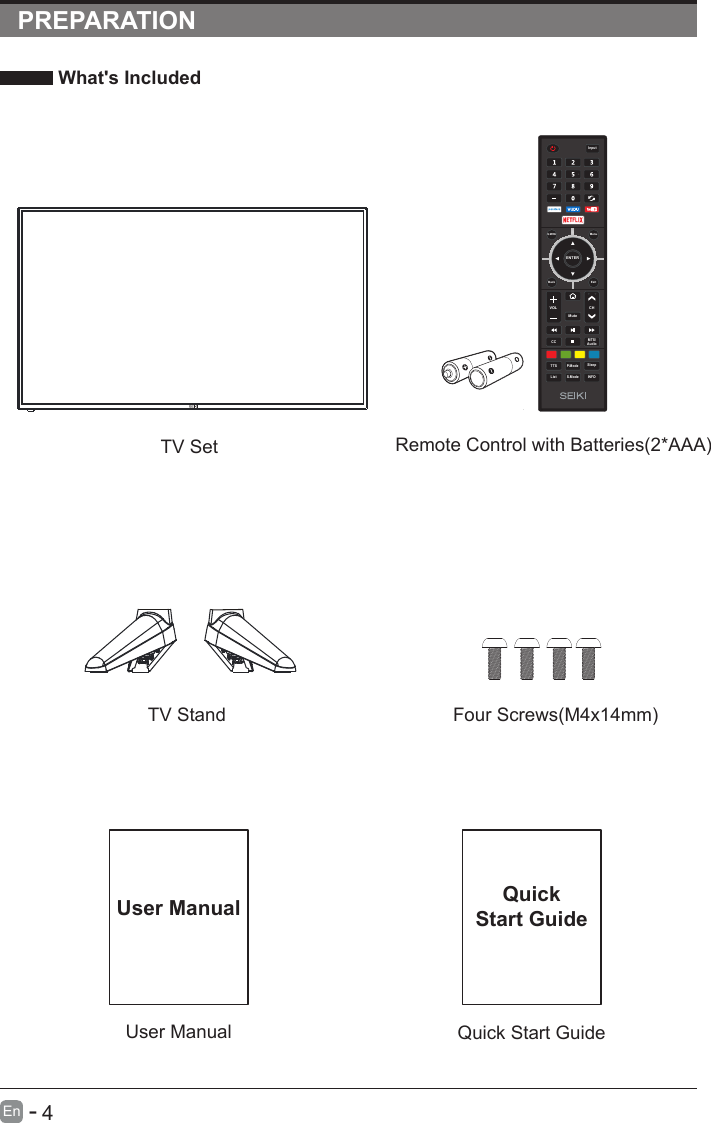
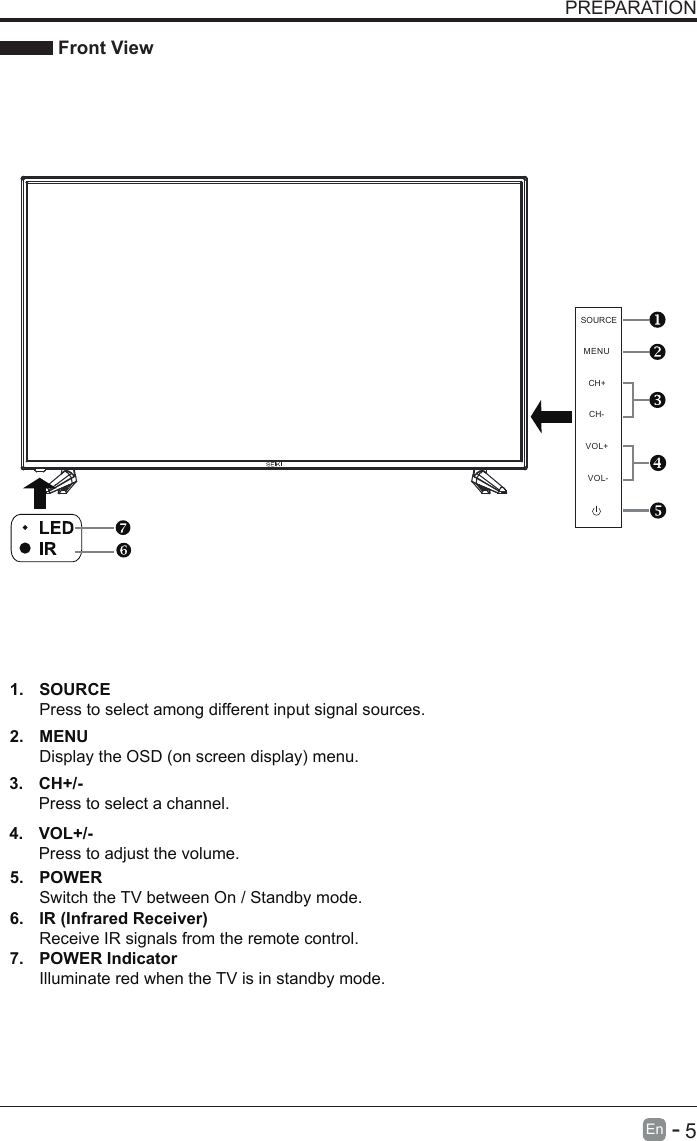
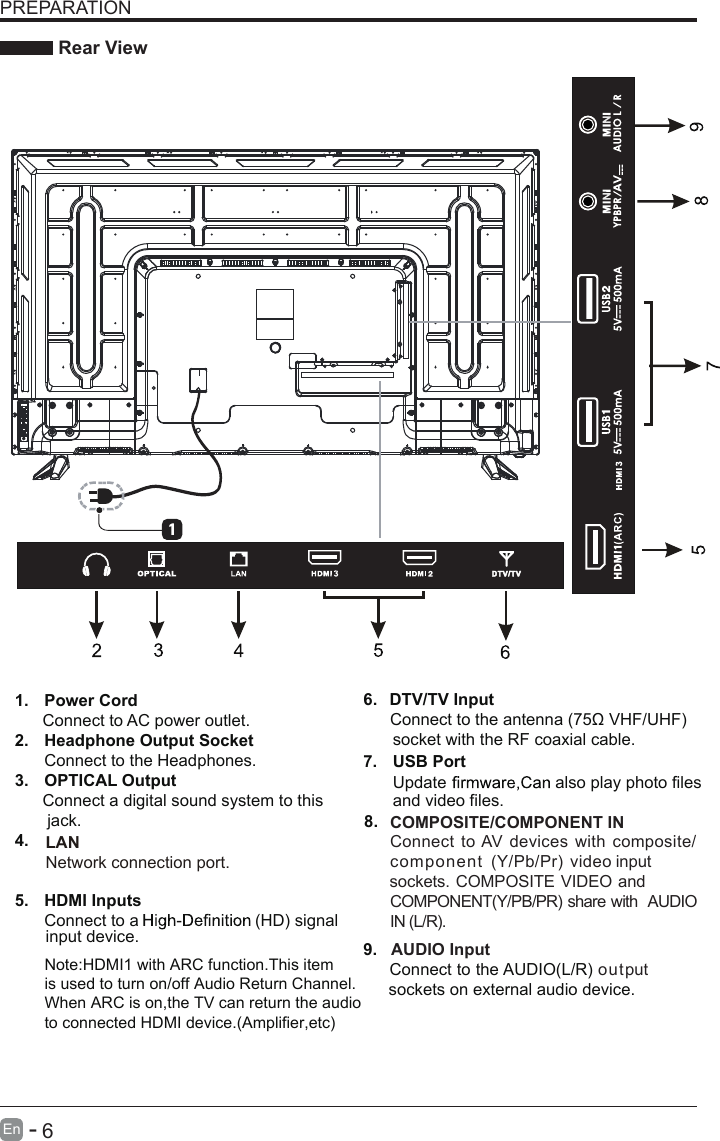
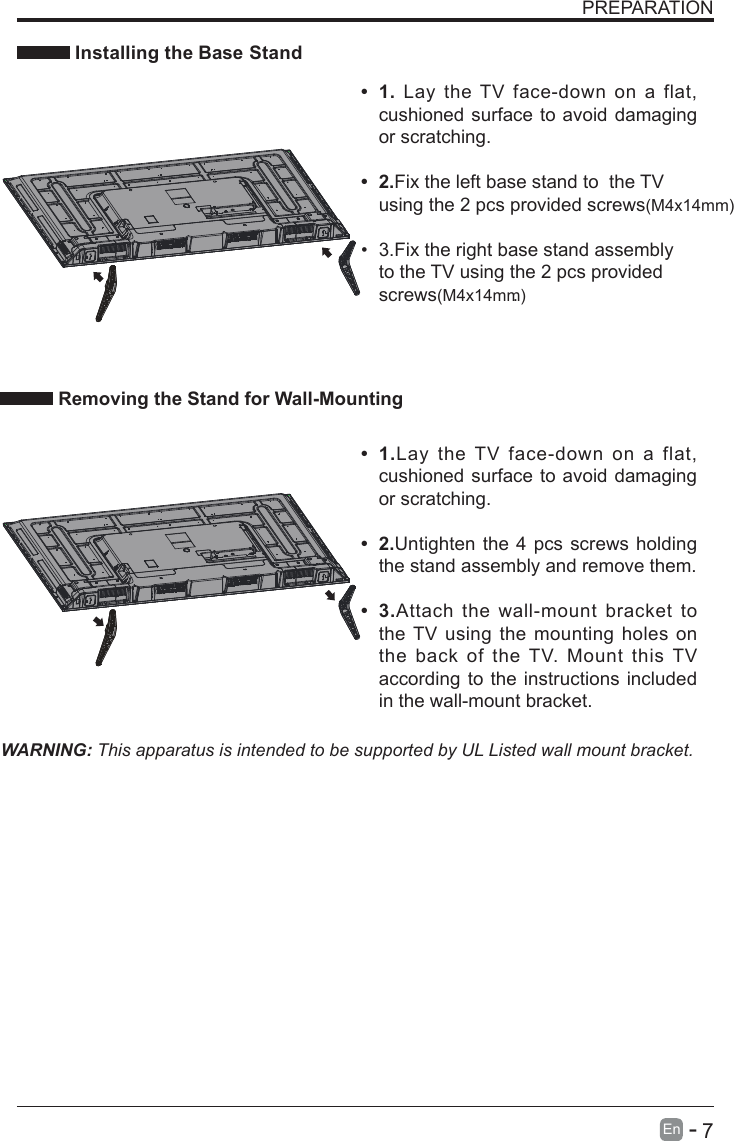
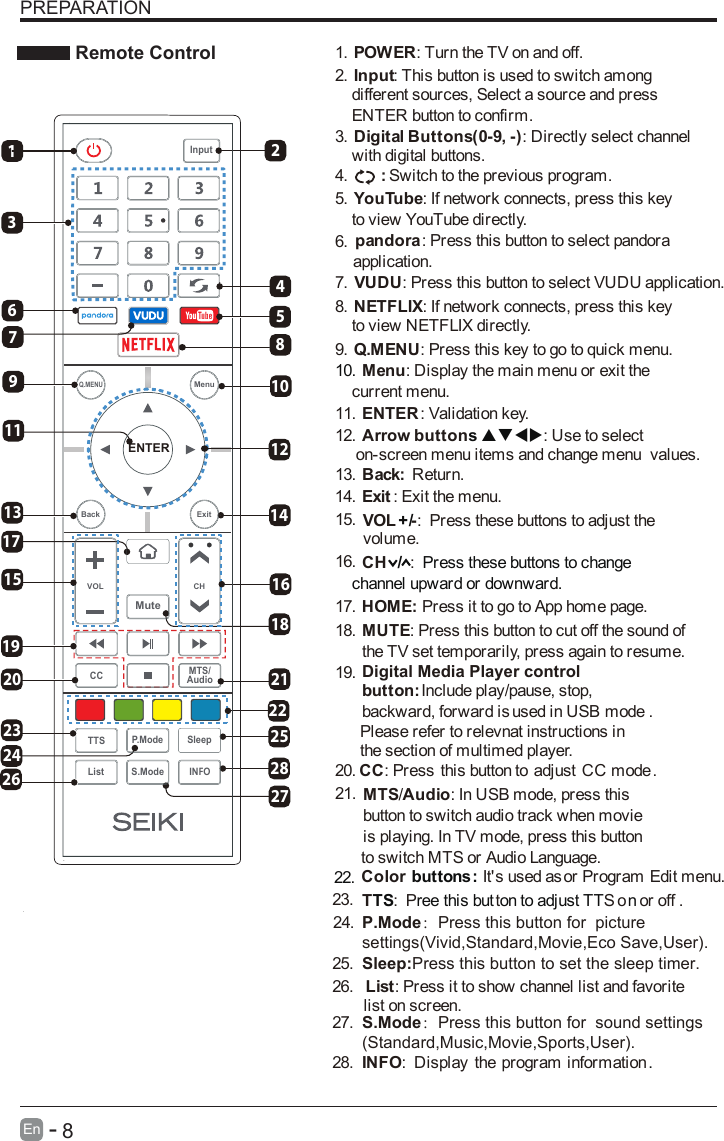
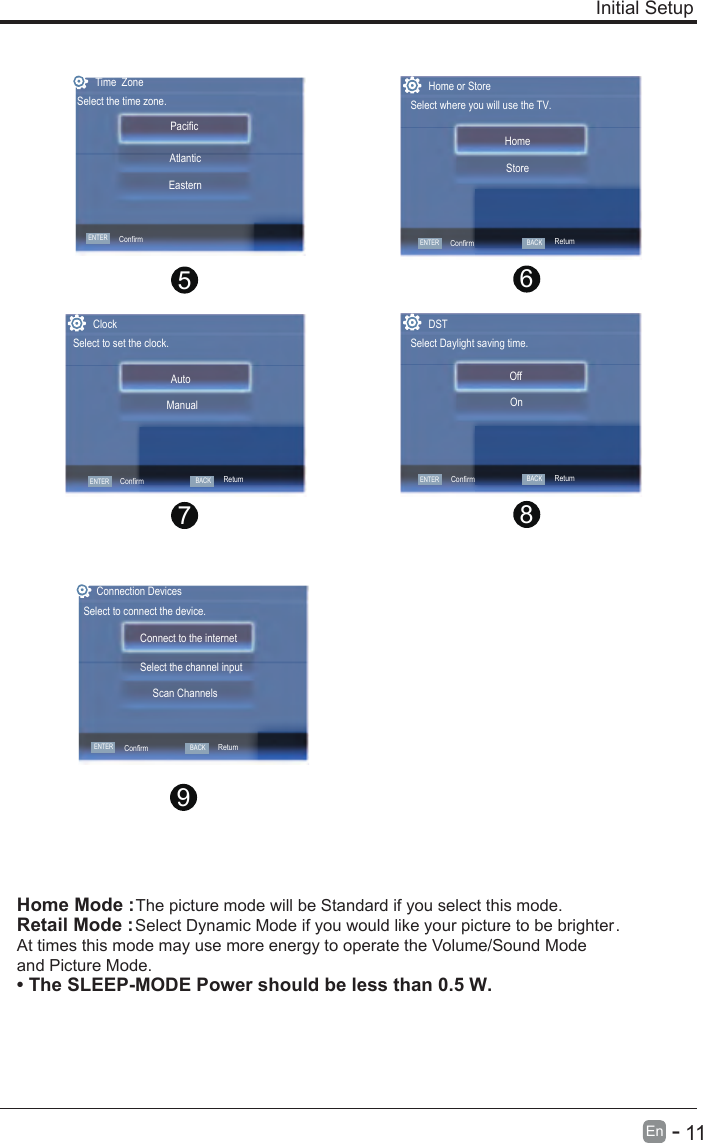
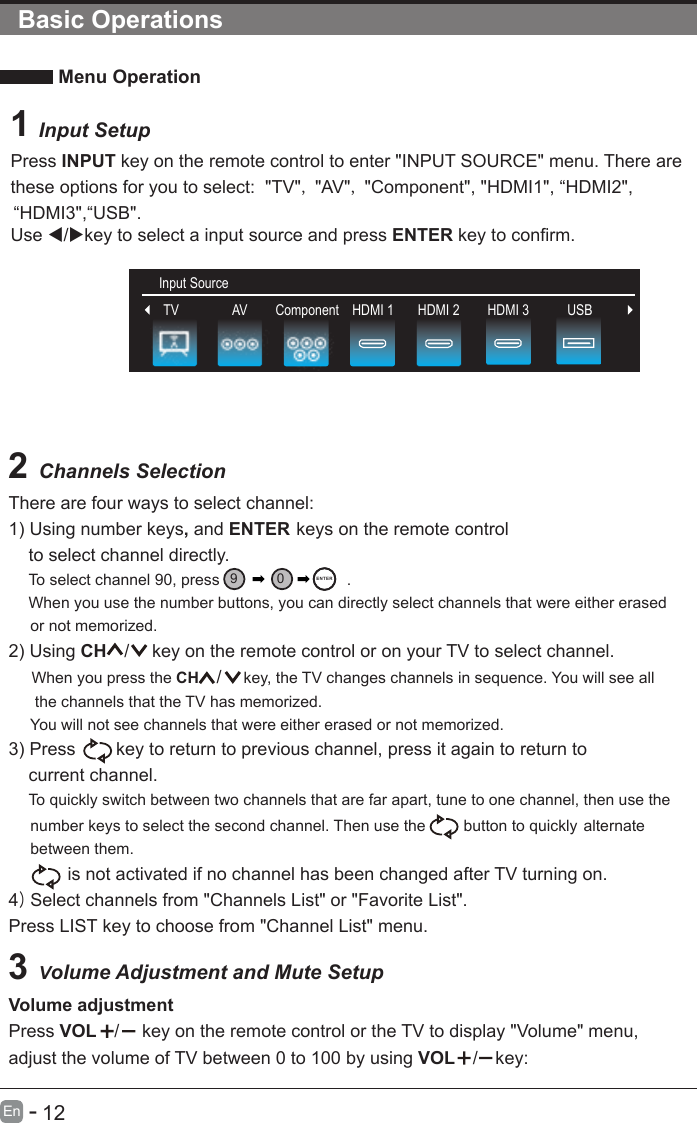
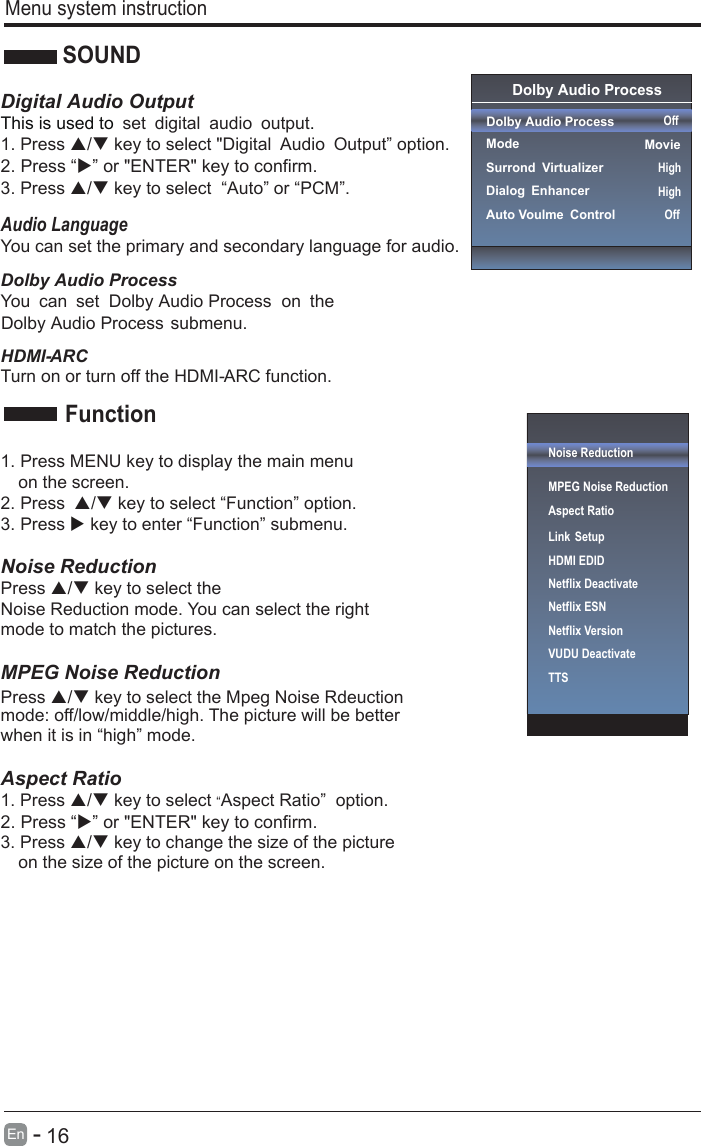
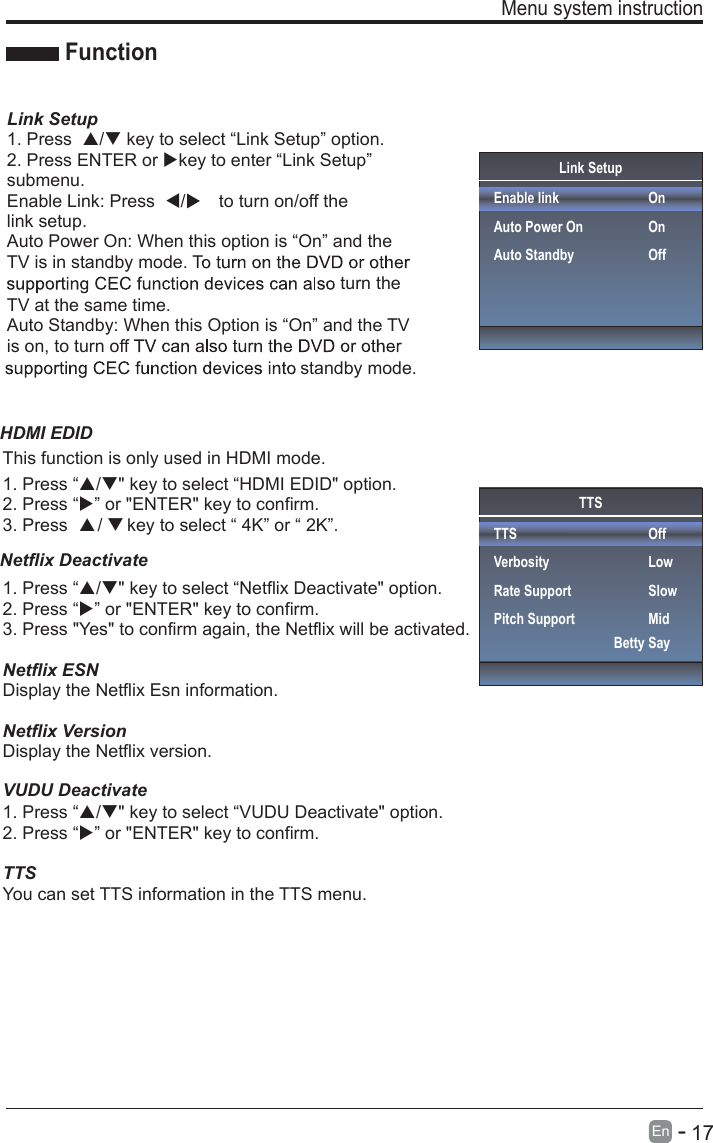
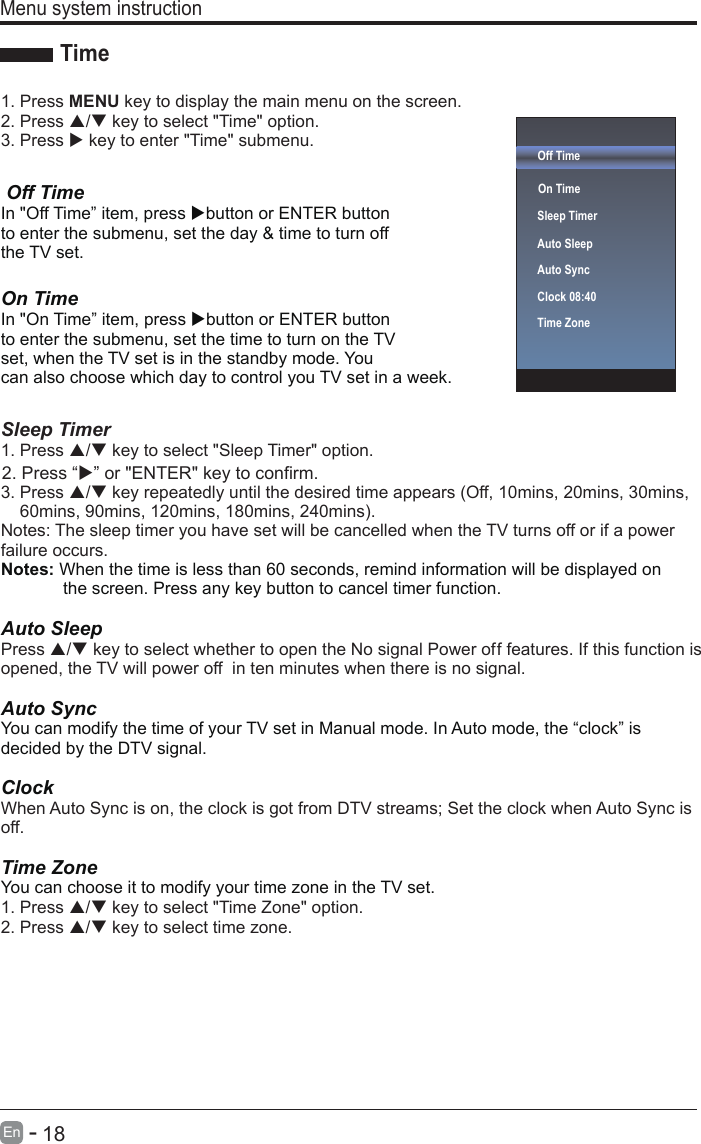
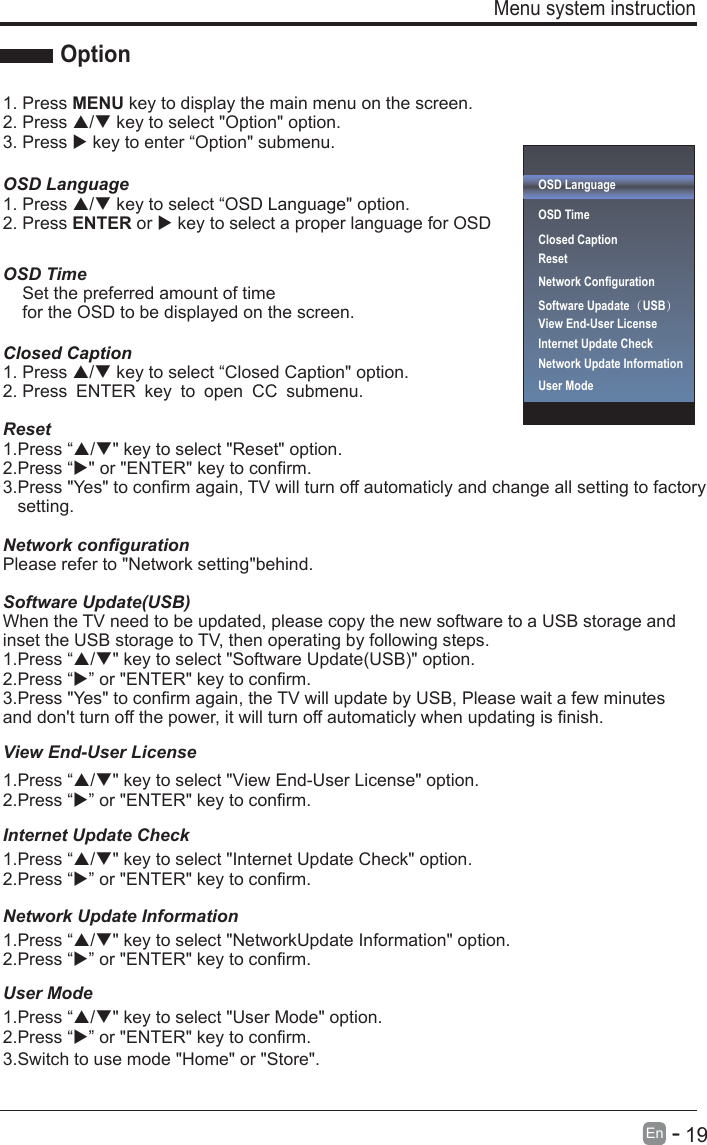
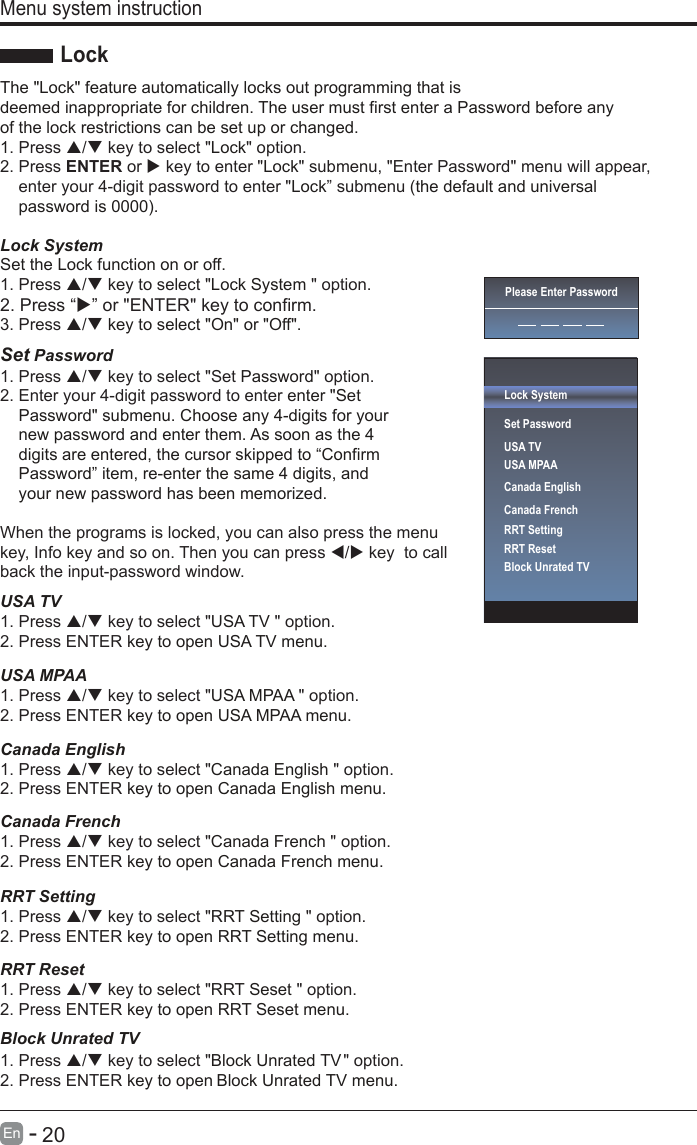
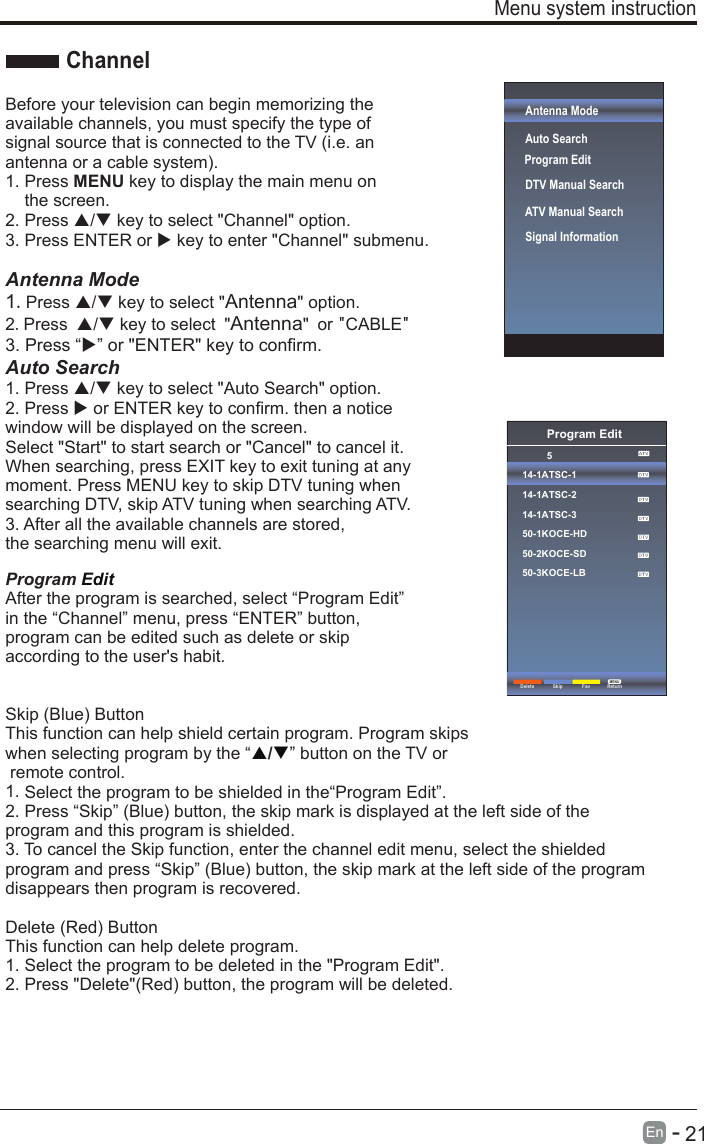
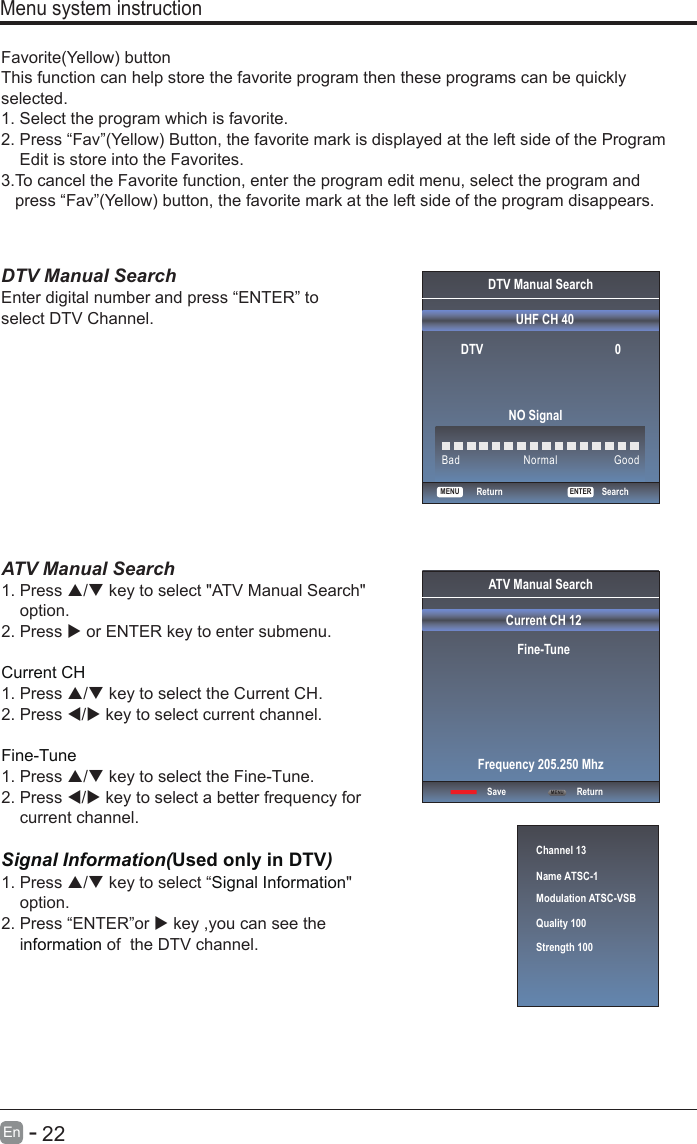
![10En - Initial Setup• Connect the power cord to the power socket after you have completed all the physical connections. At this stage, the TV will enter Standby Mode and the red LED indicator will illuminate. • In Standby Mode, press the button on the main unit or on the remote control to turn the TV on. The red LED indicator will turn off.• The first time you turn the TV on, it will go into the Setup Wizard. Press buttons to select your desired mode and press ENTERBasic OperationsCountrySelect the country.USCanadaMexicoConfirmOSD languageConfig Menu language.ENTER ENTERConfirmEnglish FranciasEspañolBACKRetum[ ] ACCEPT AUTOMATIC UPDATES [ ] DECLINE ALL](https://usermanual.wiki/CHOICE-FORTUNE/SC-60UK850N/User-Guide-4020518-Page-11.png)