CONTINENTAL AUTOMOTIVE RAMBOUILLET FRANCES NACEUR2 Multimedia System User Manual User guide
CONTINENTAL AUTOMOTIVE RAMBOUILLET FRANCE SAS Multimedia System User guide
UserManual.wiki
>
CONTINENTAL AUTOMOTIVE RAMBOUILLET FRANCES
>
NACEUR2 User Manual
User guide
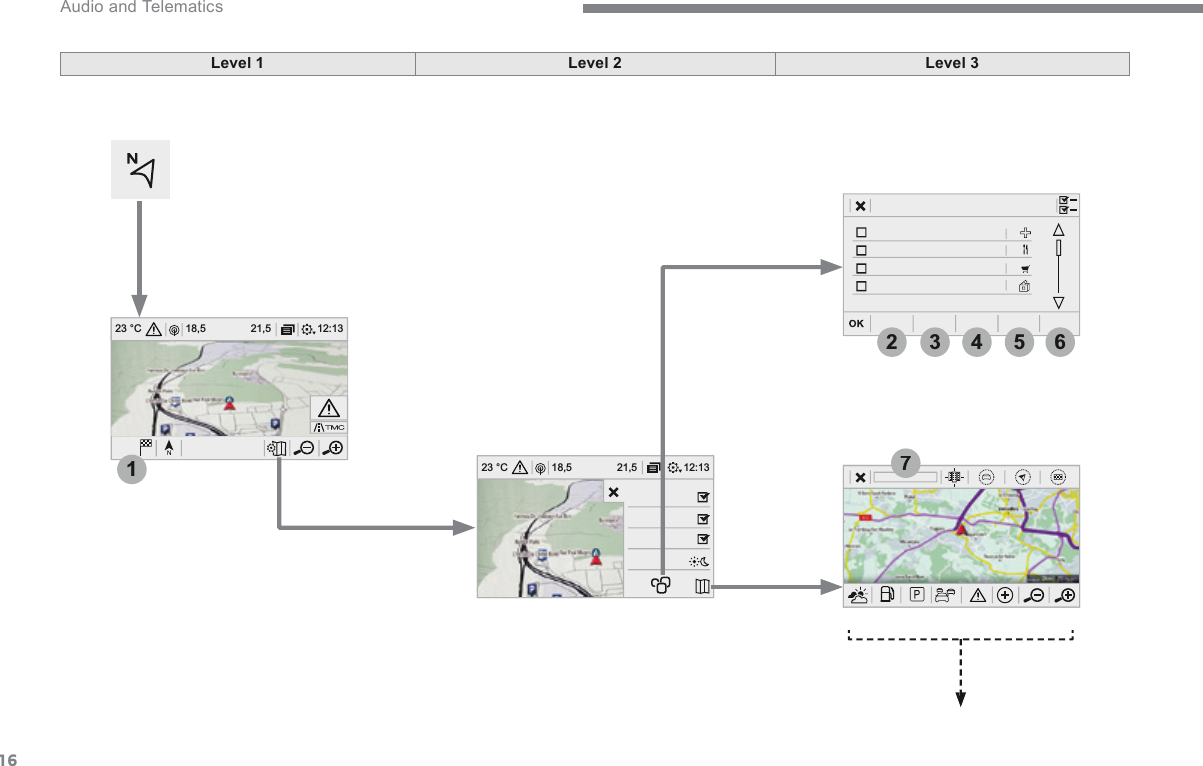
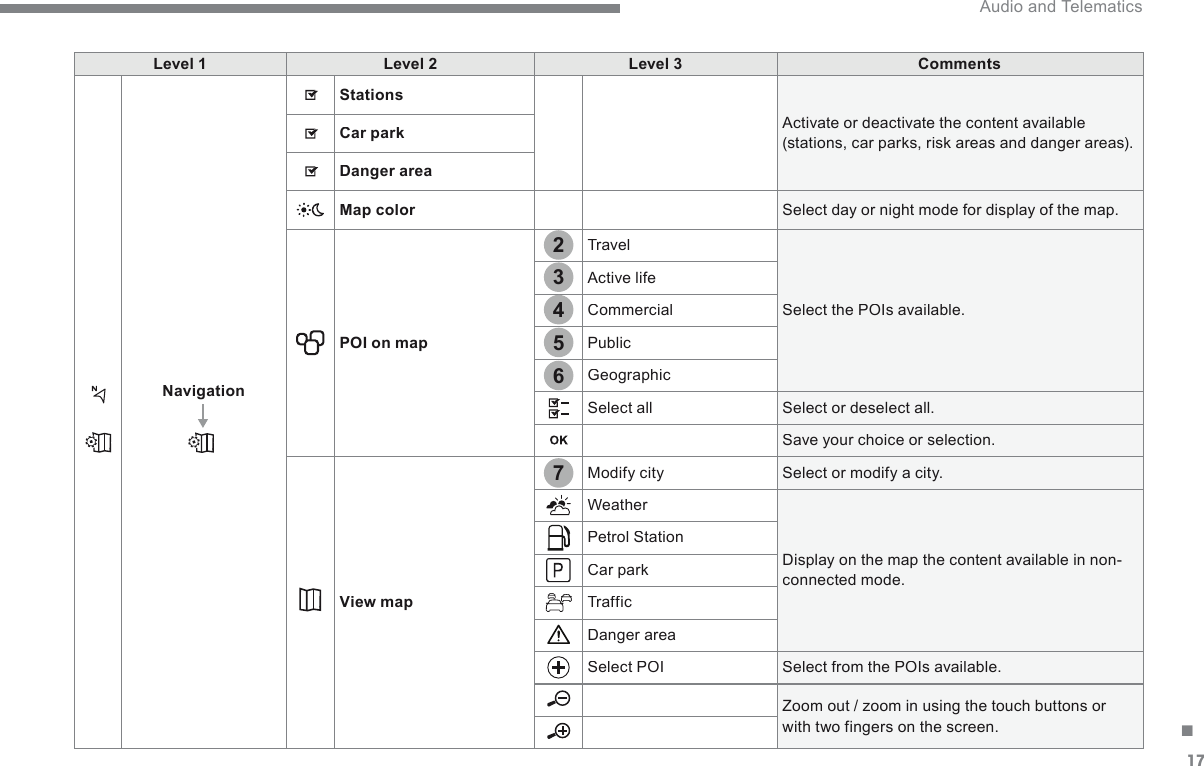
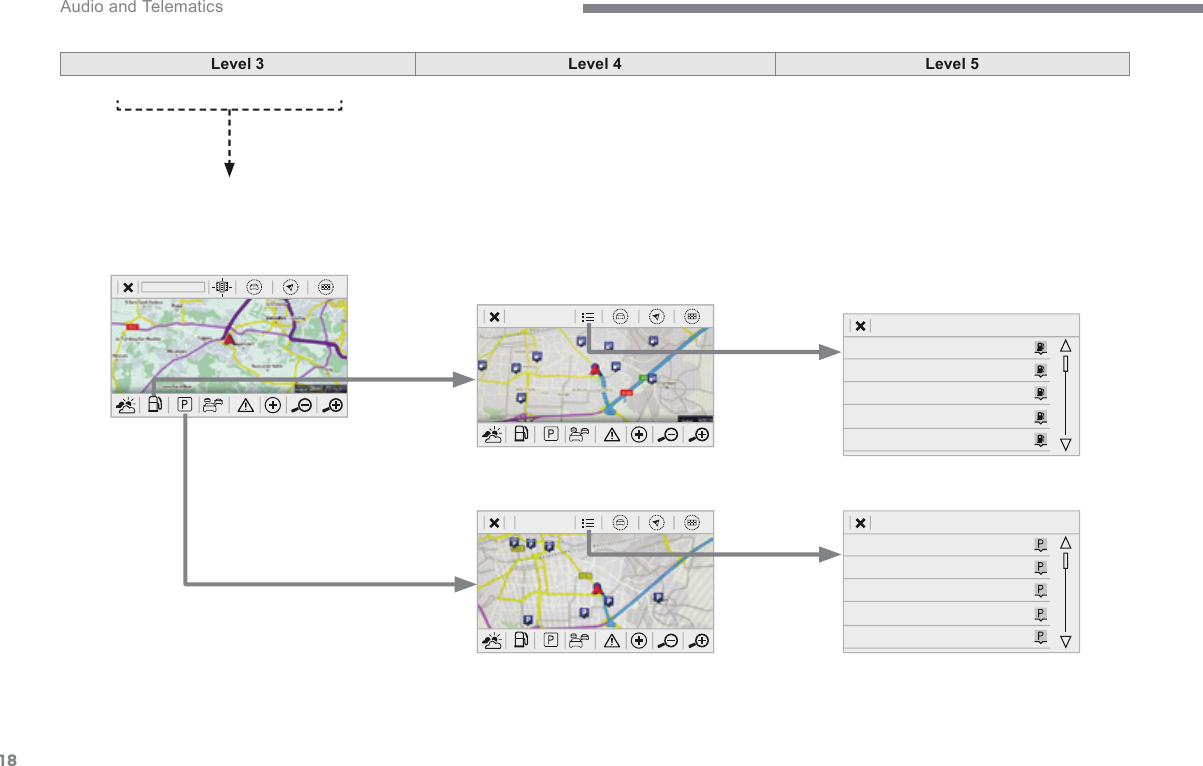
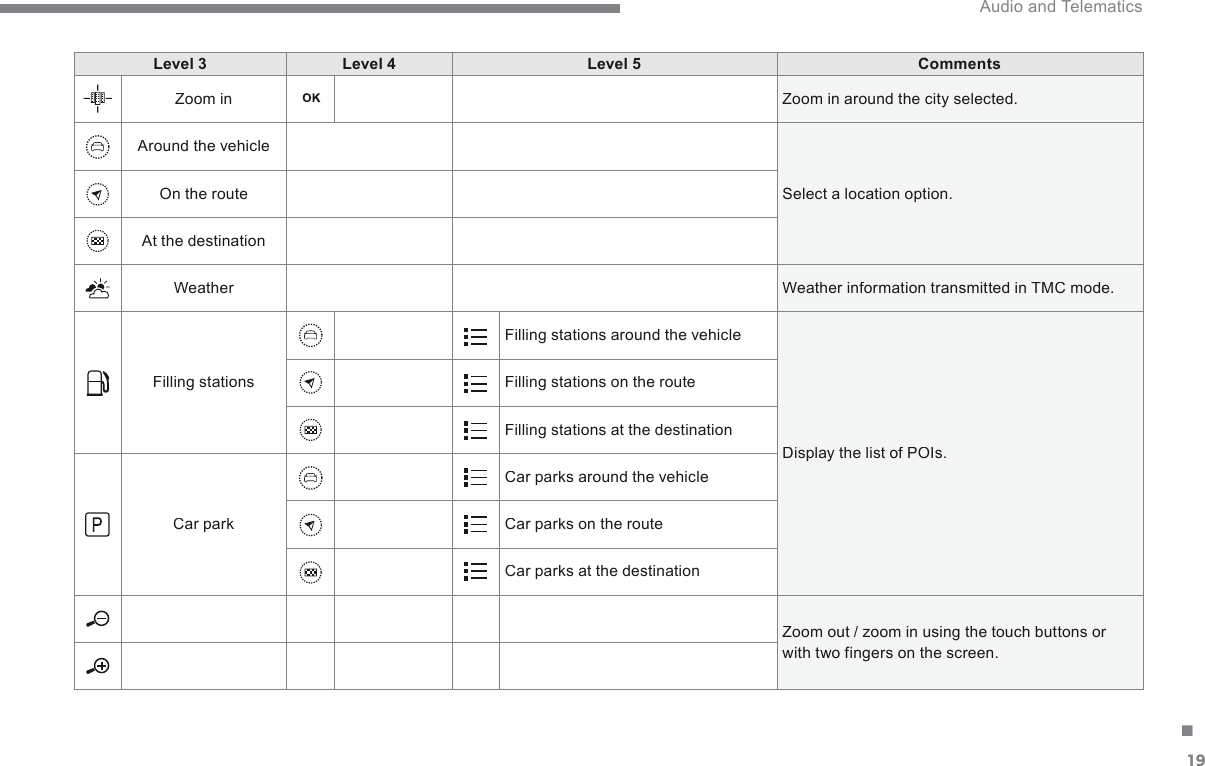
Navigation menu
Upload a User Manual
Namespaces
Wiki Guide
HTML
PDF
Info
Views
User Manual
Discussion / Help
Navigation