Cameo Communications SHS-2000 SMART HOME NETWORKING SERVICE User Manual user manual
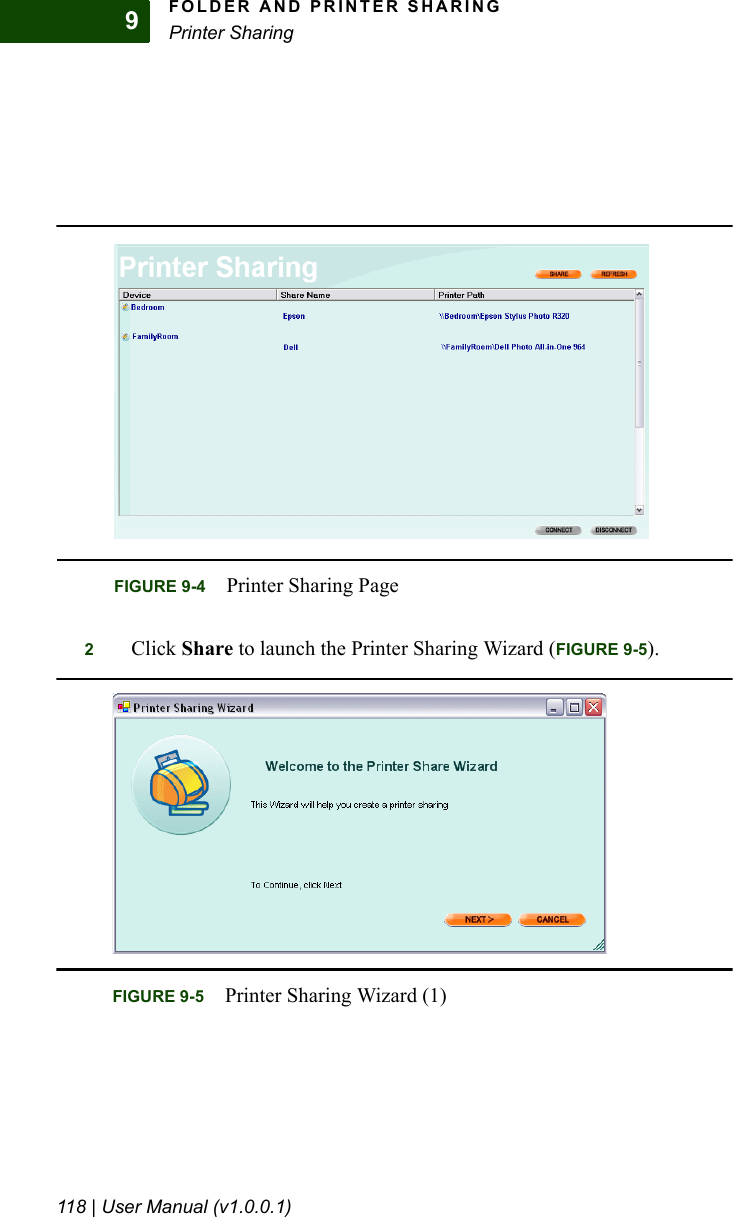
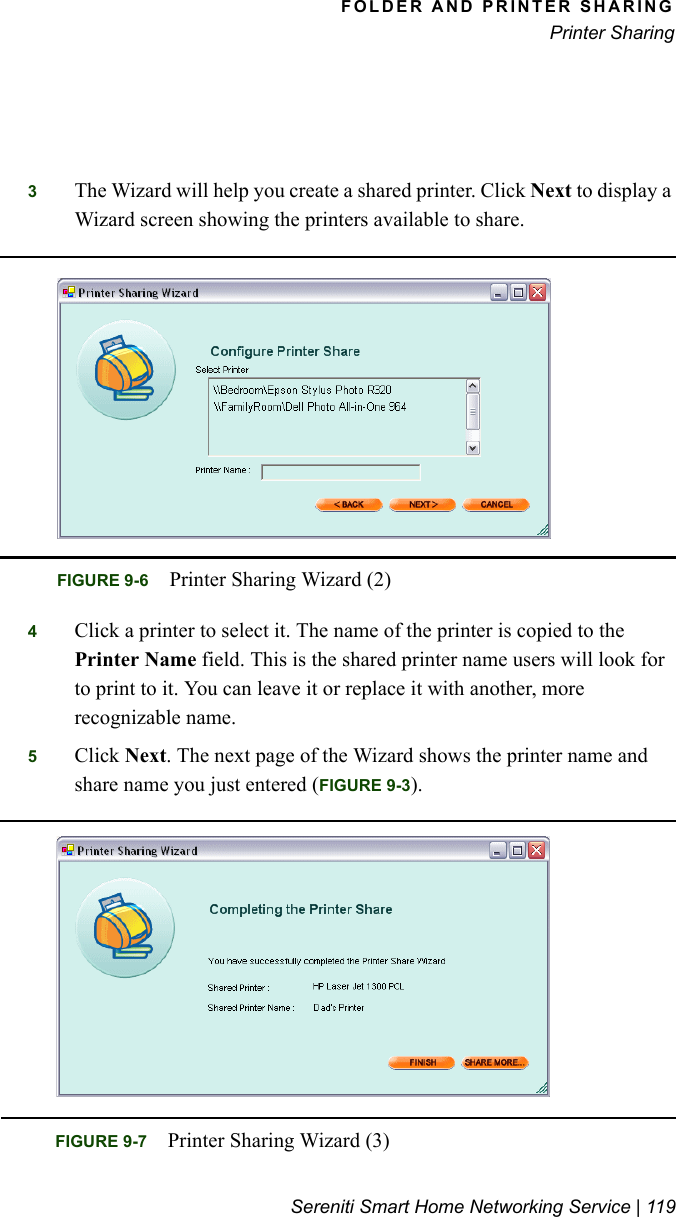
Cameo Communications Inc SMART HOME NETWORKING SERVICE user manual
UserManual.wiki
>
Cameo Communications
>
SHS 2000 User Manual
Manual
Navigation menu
Upload a User Manual
Namespaces
Wiki Guide
HTML
PDF
Info
Views
User Manual
Discussion / Help
Navigation


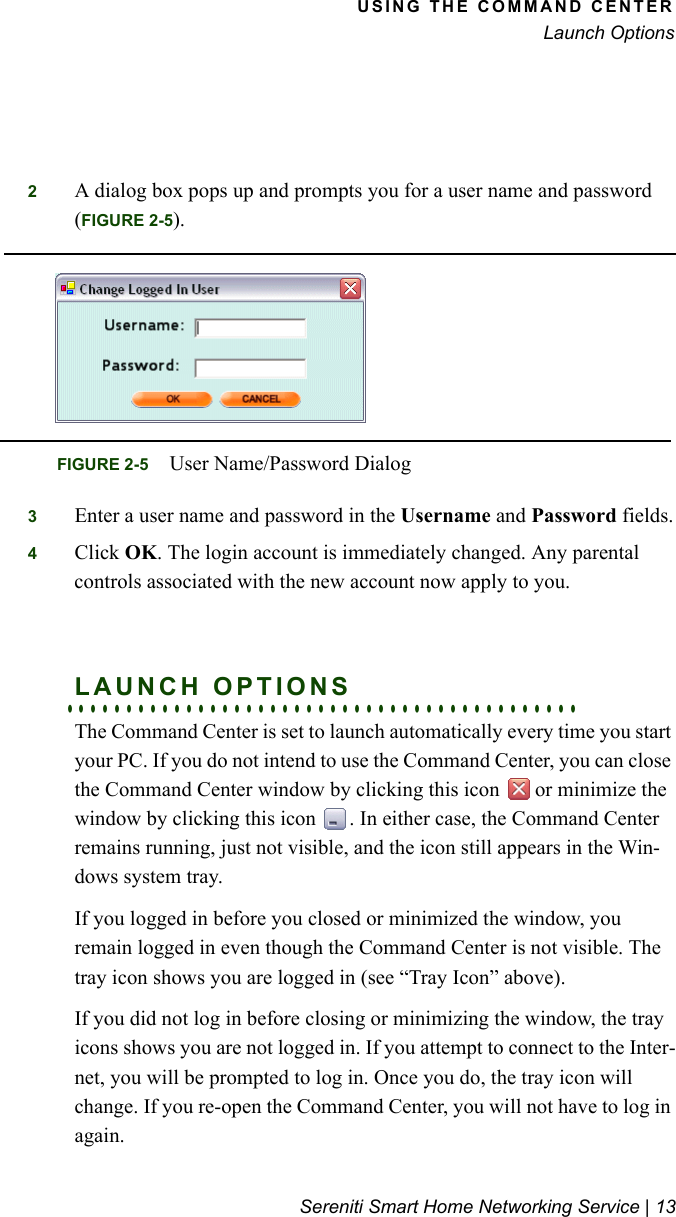
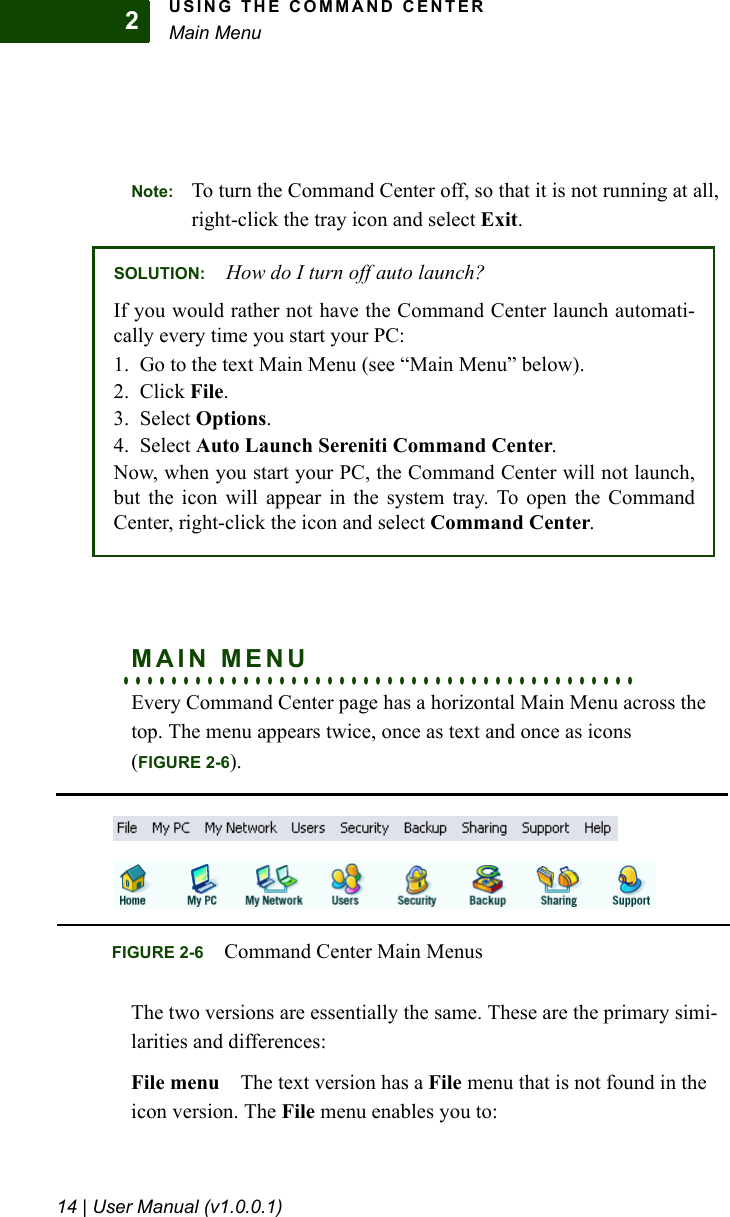
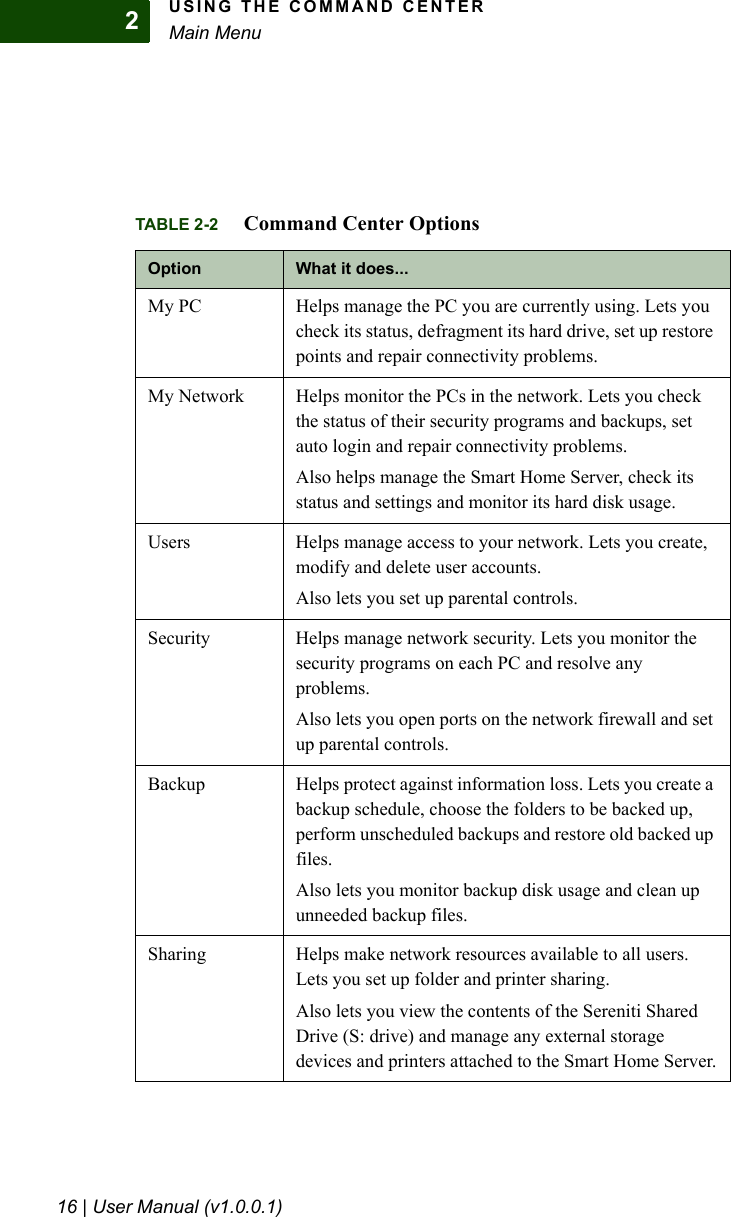
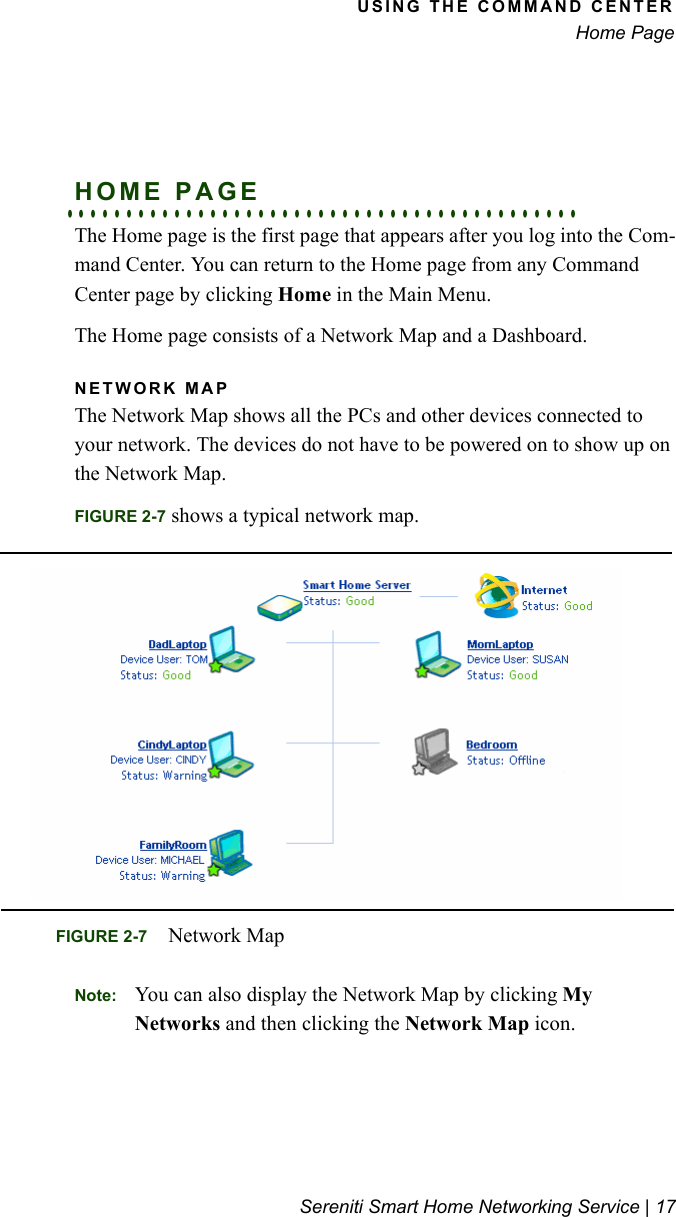
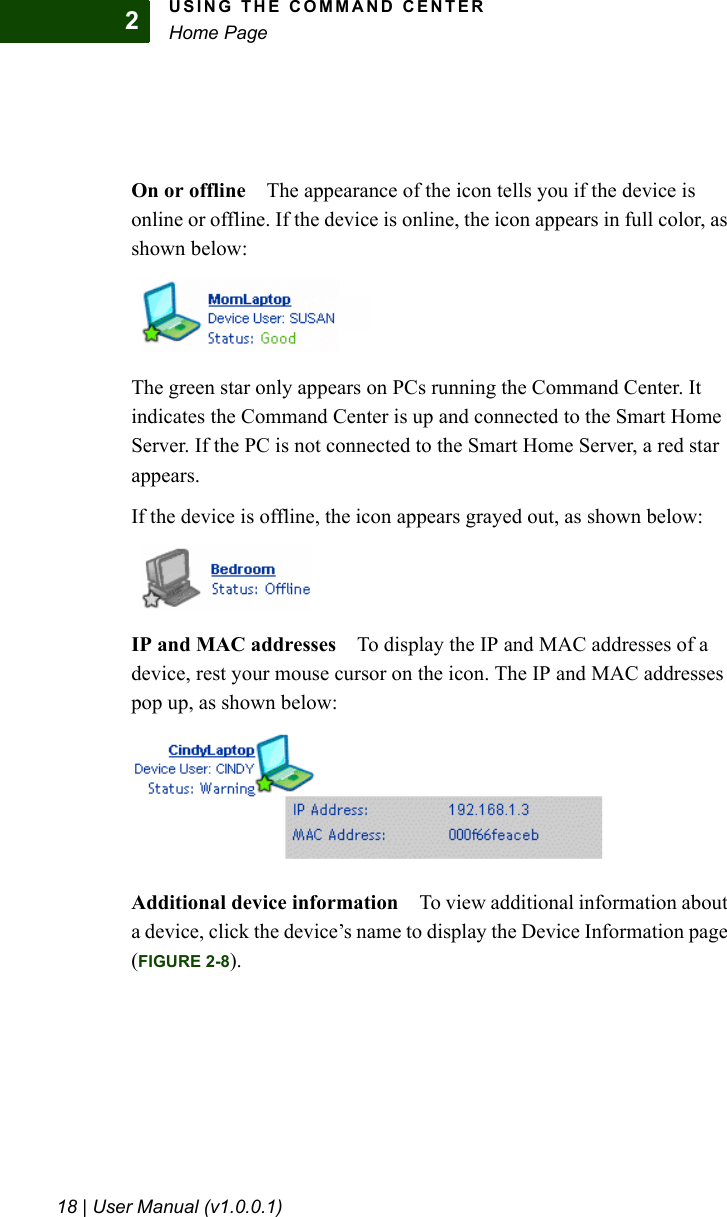
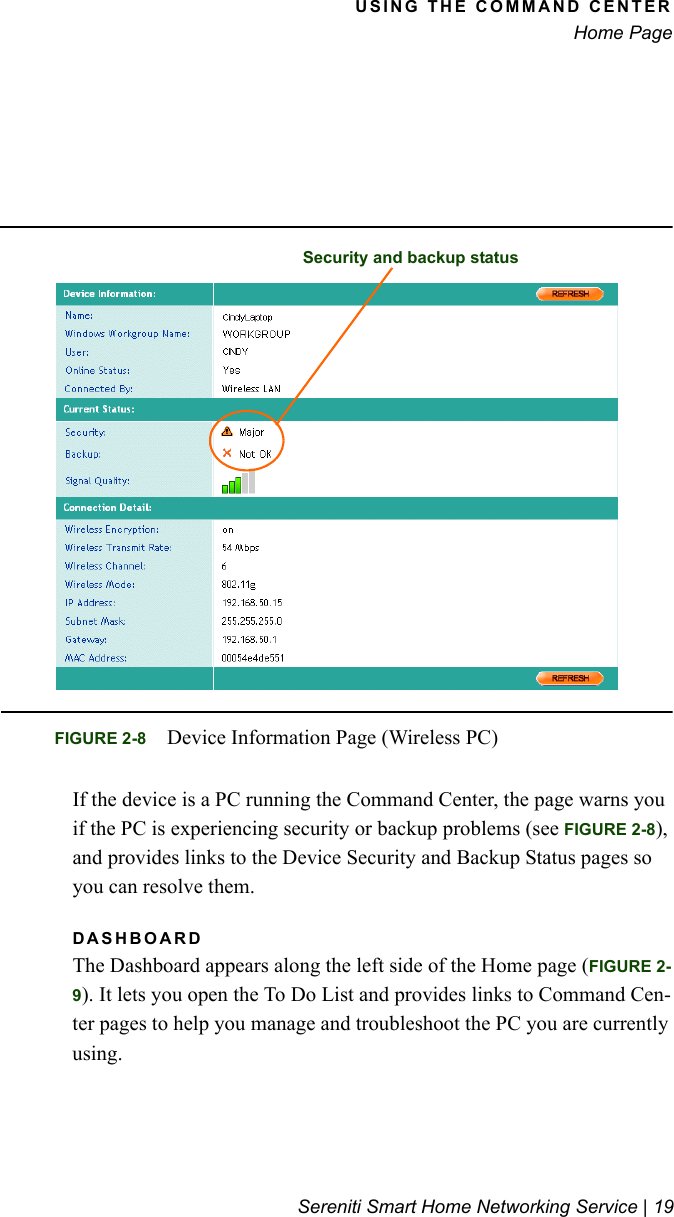
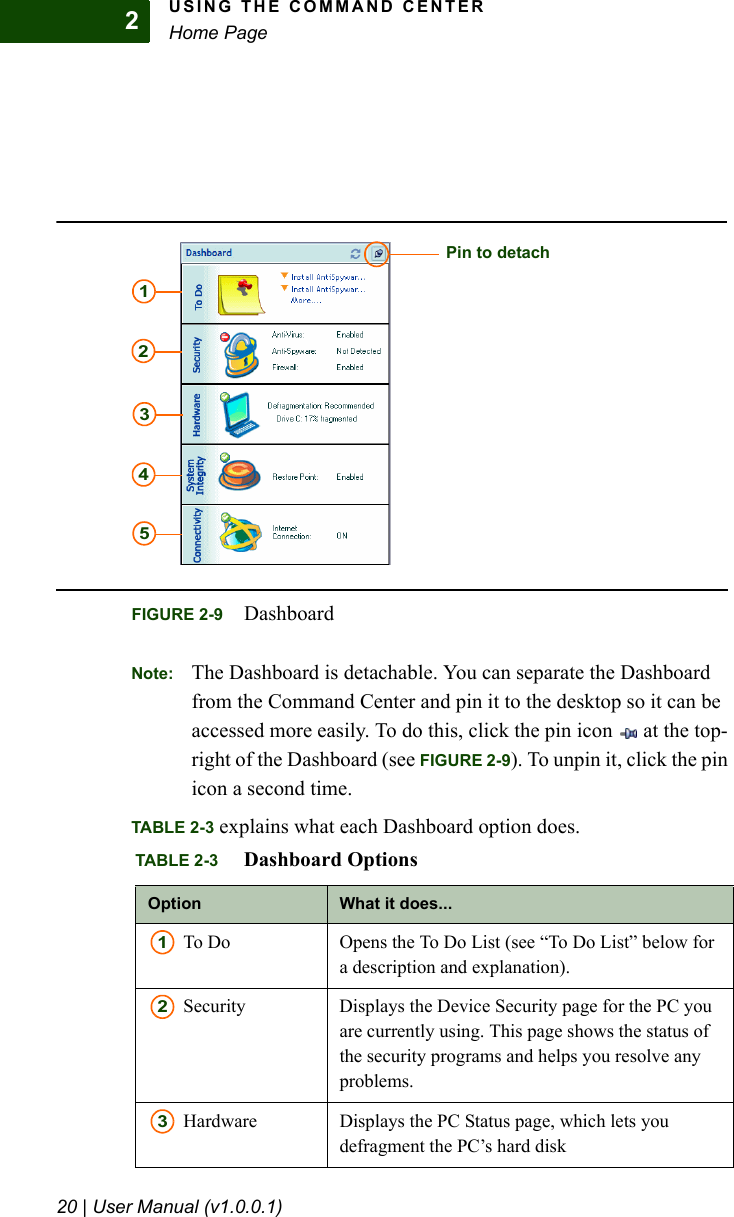
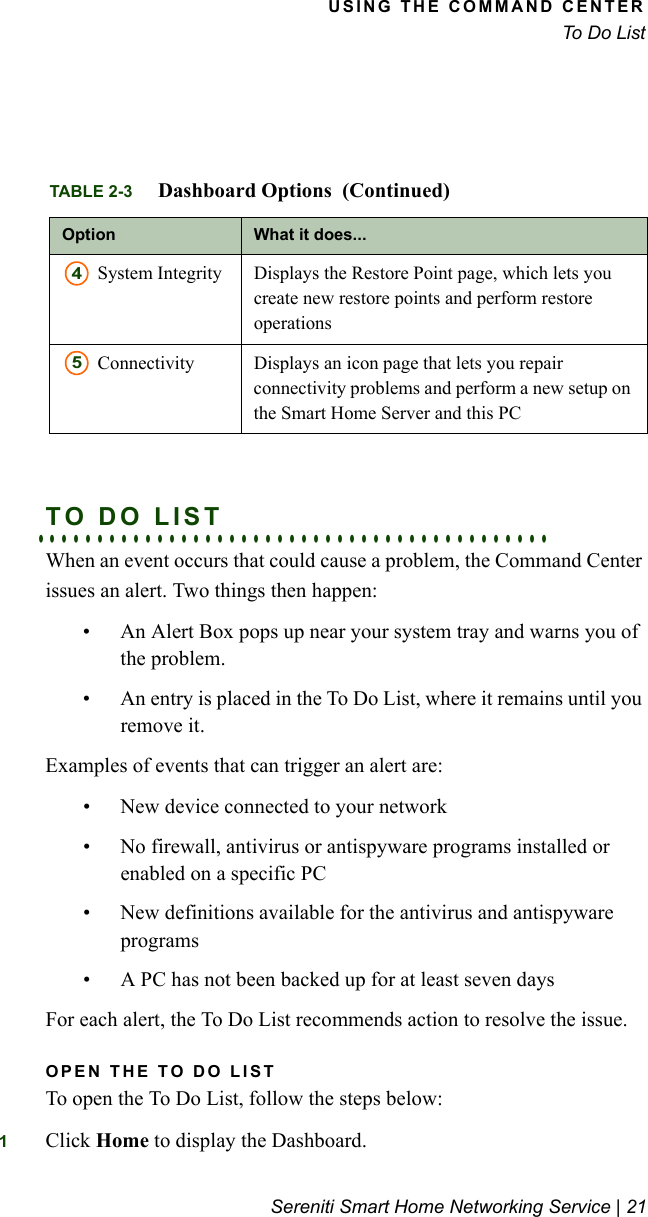
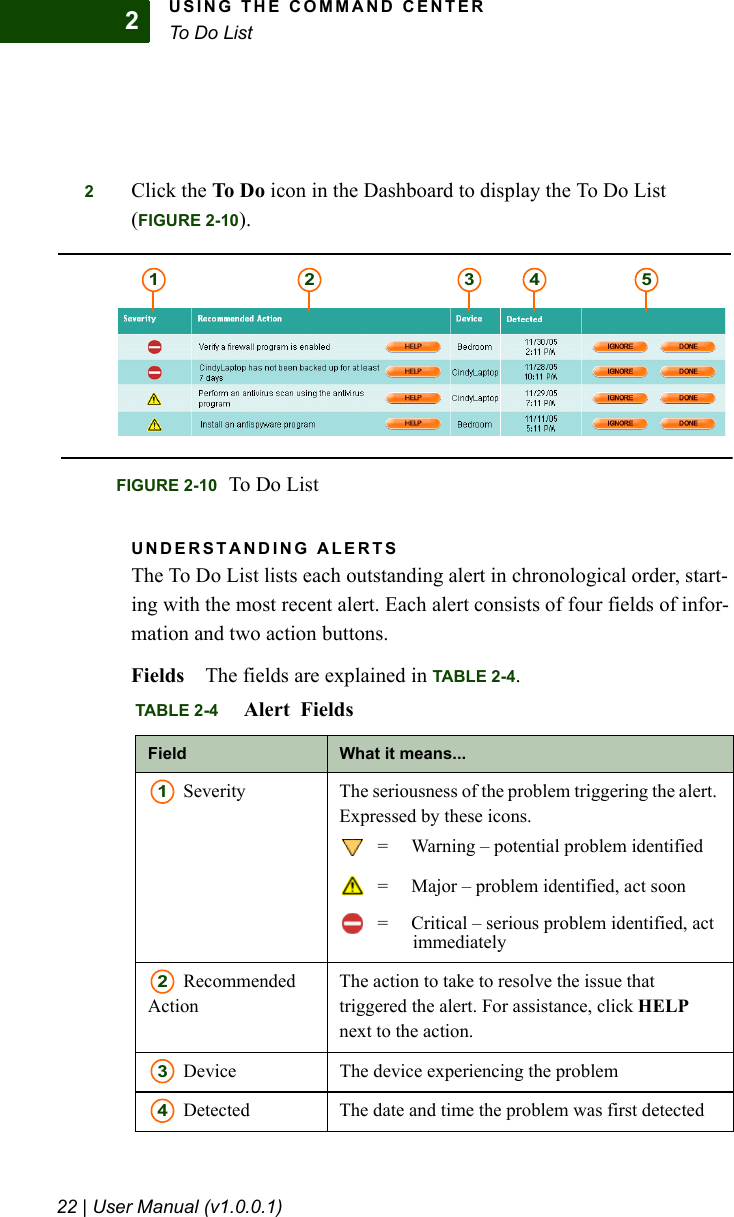
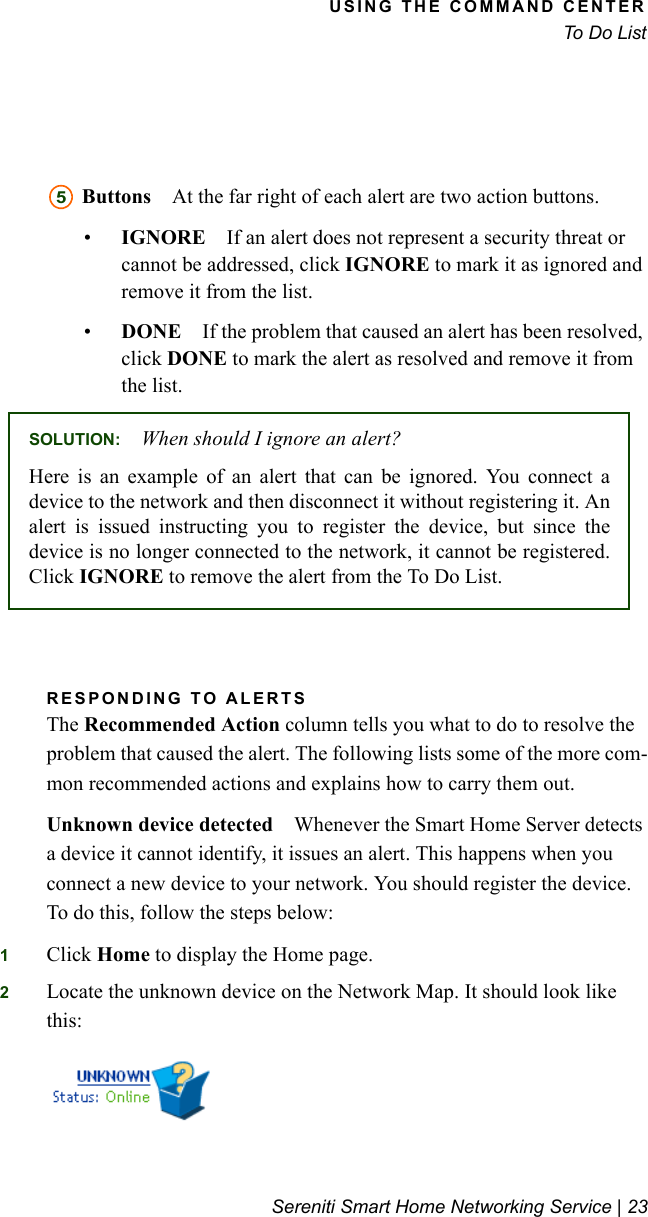


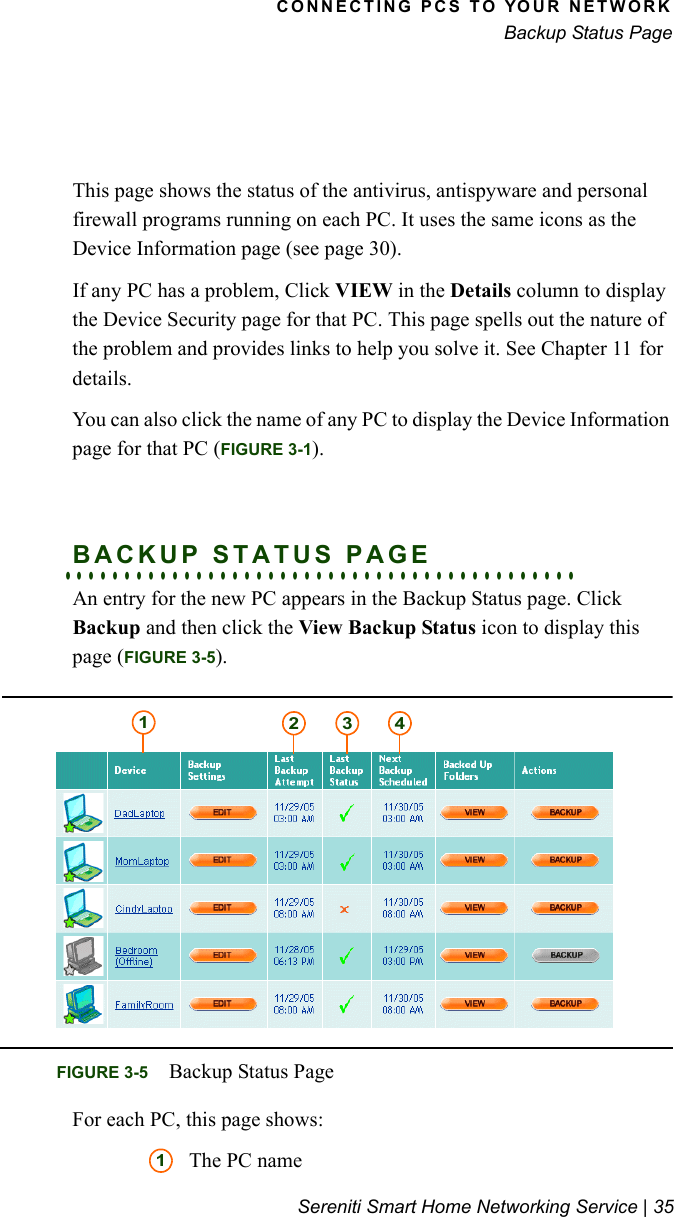

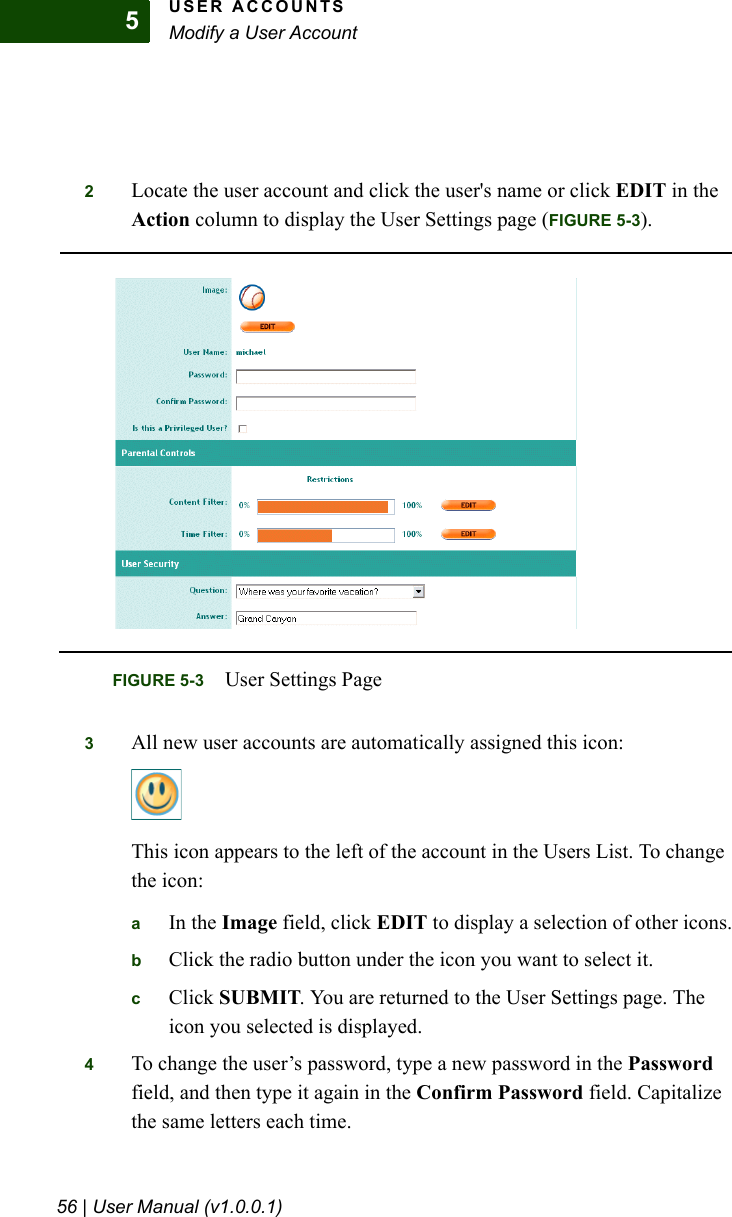


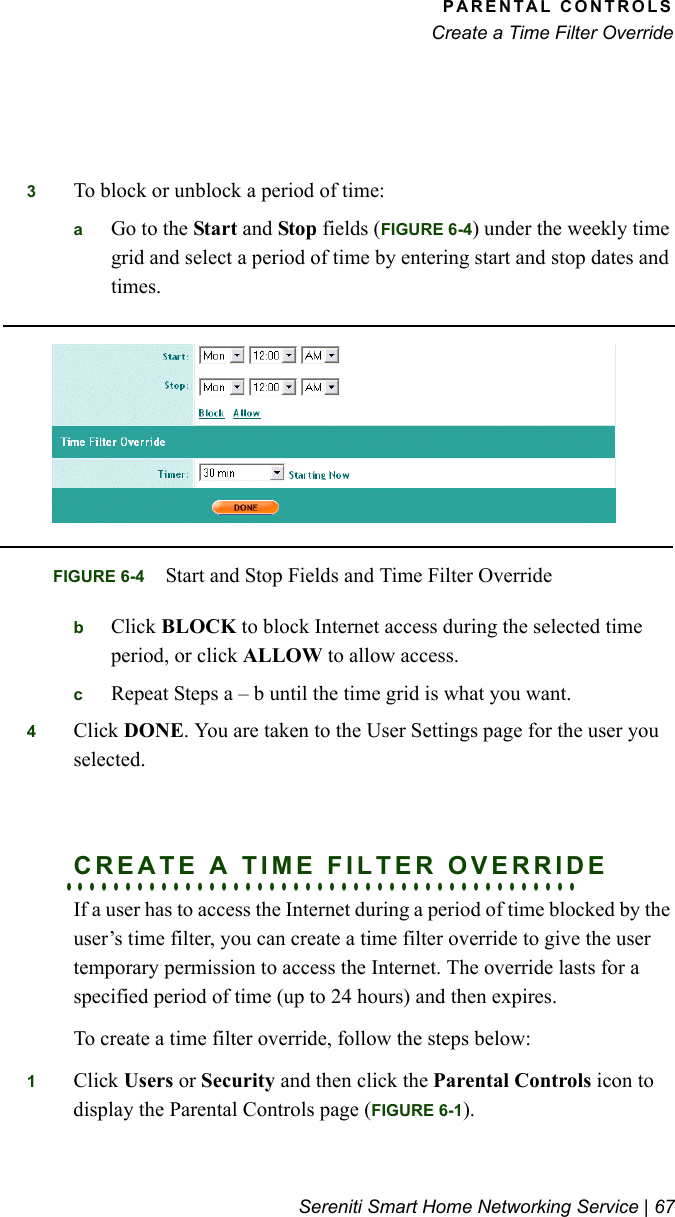
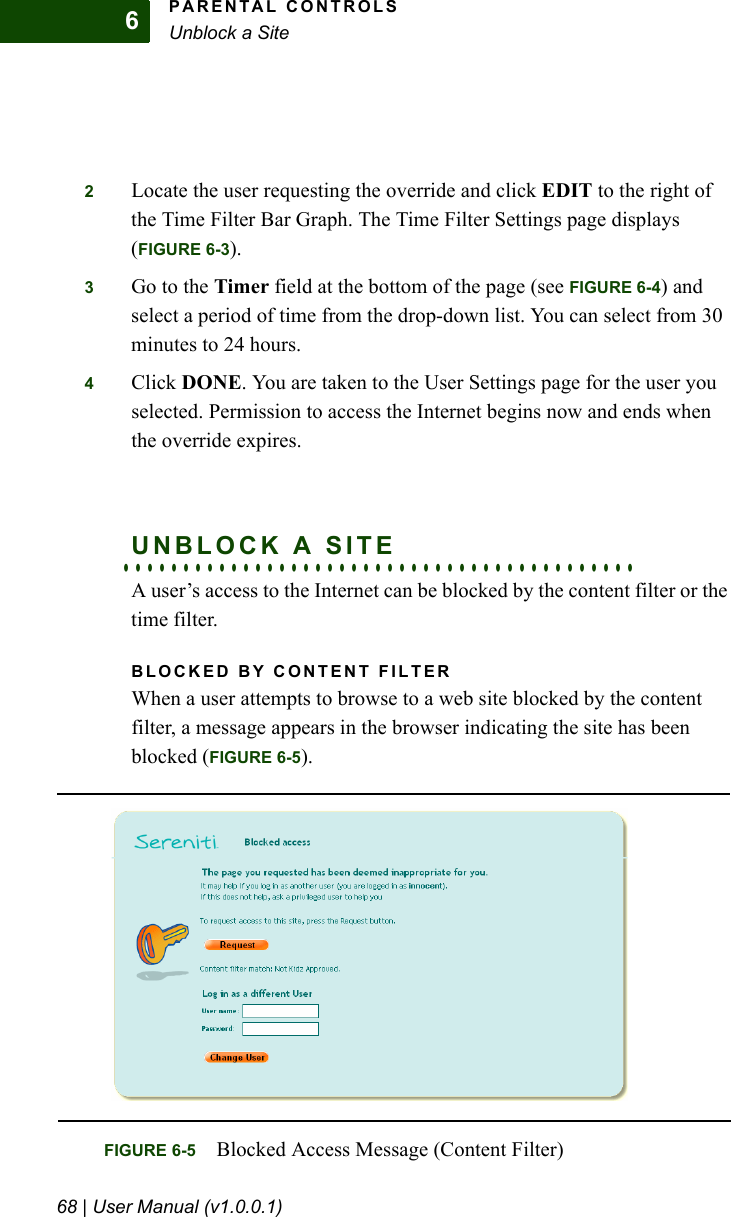
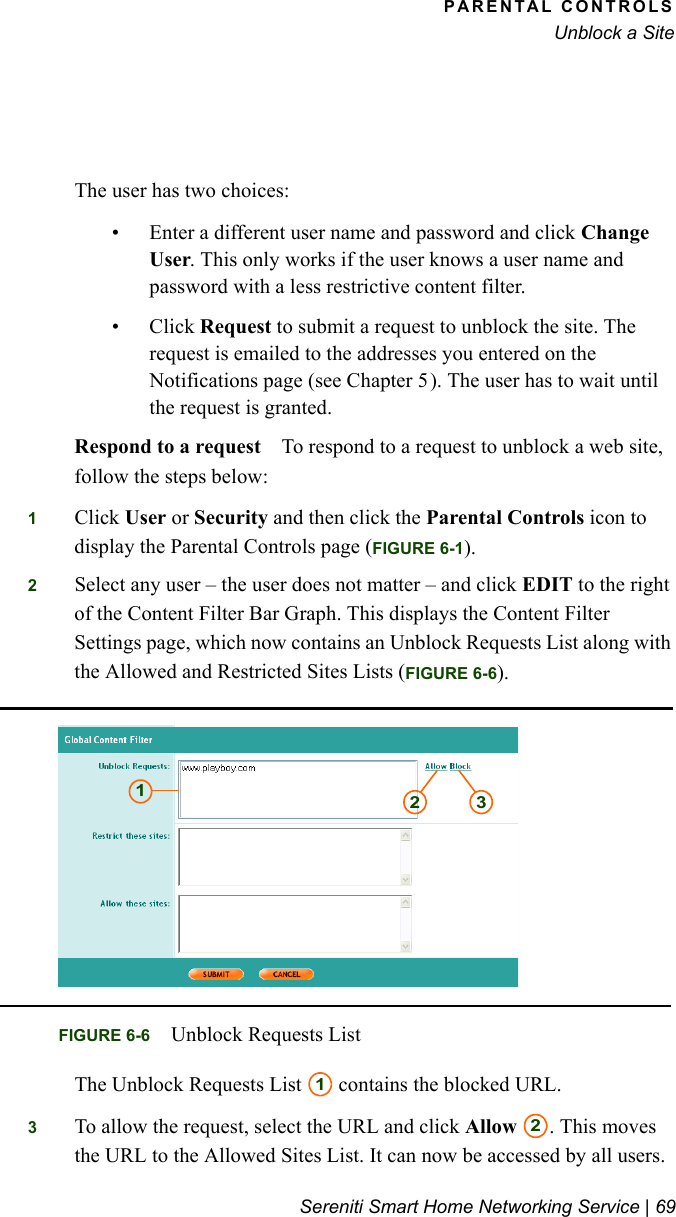
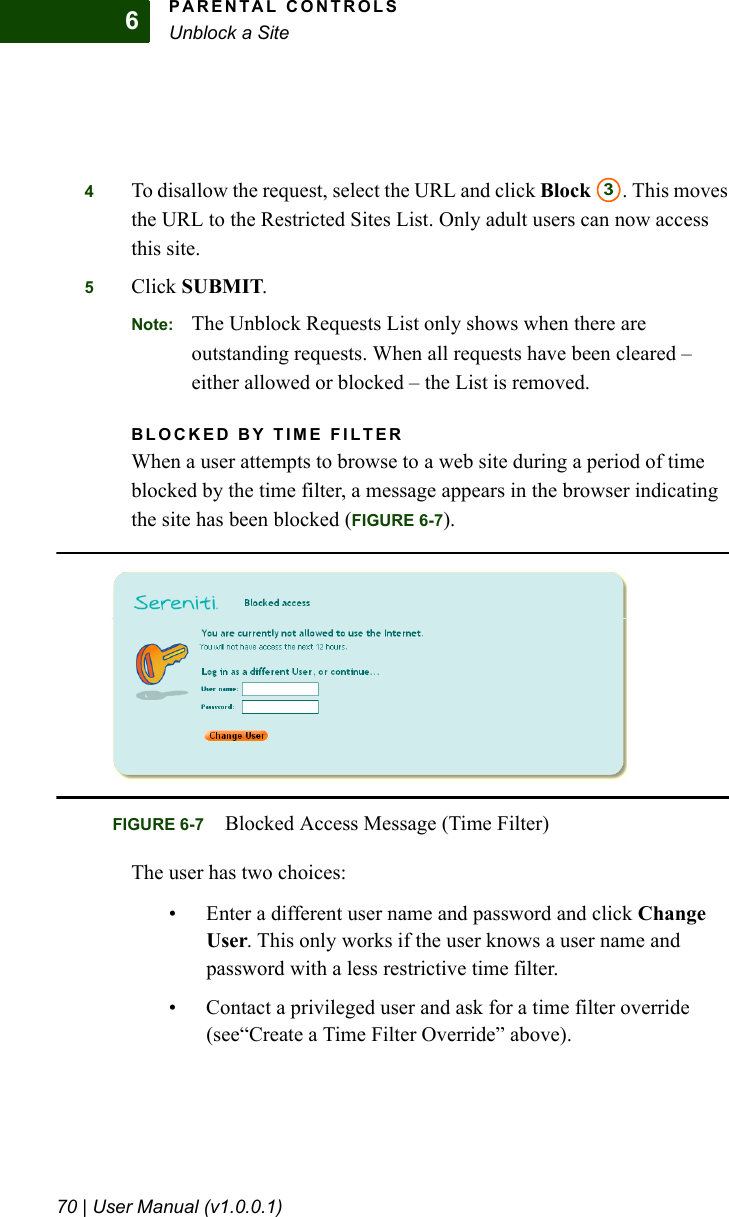
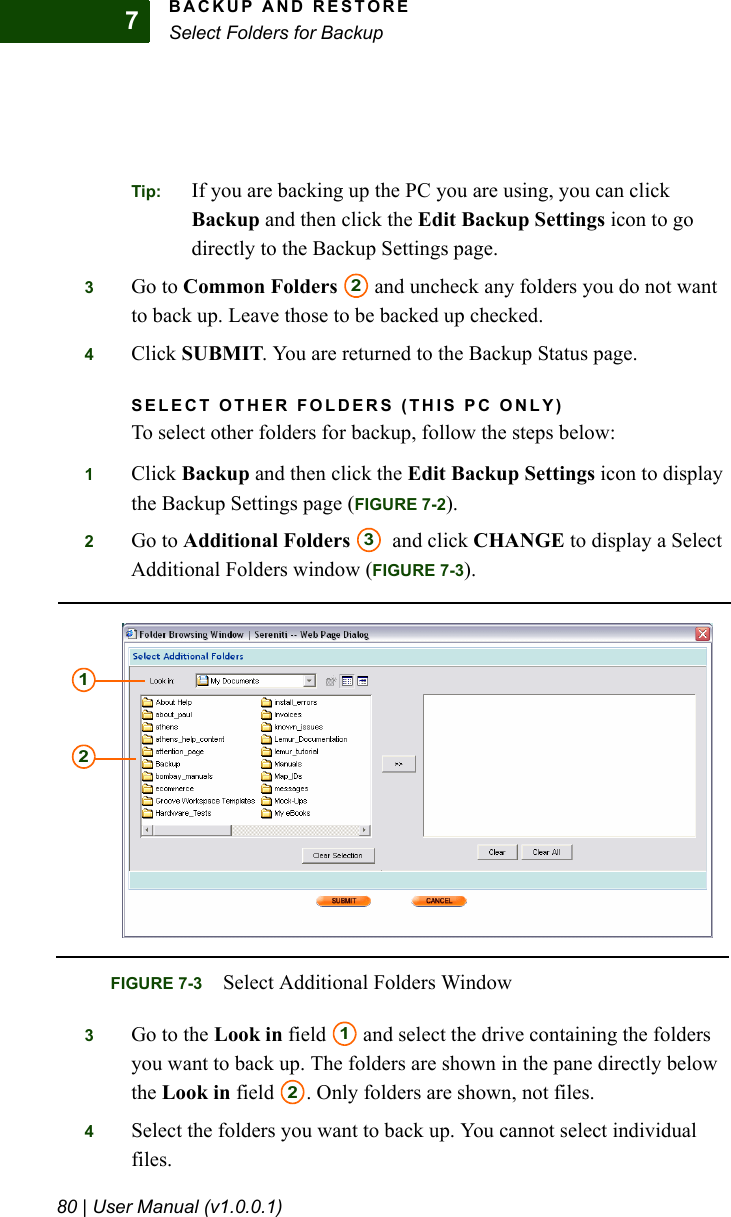
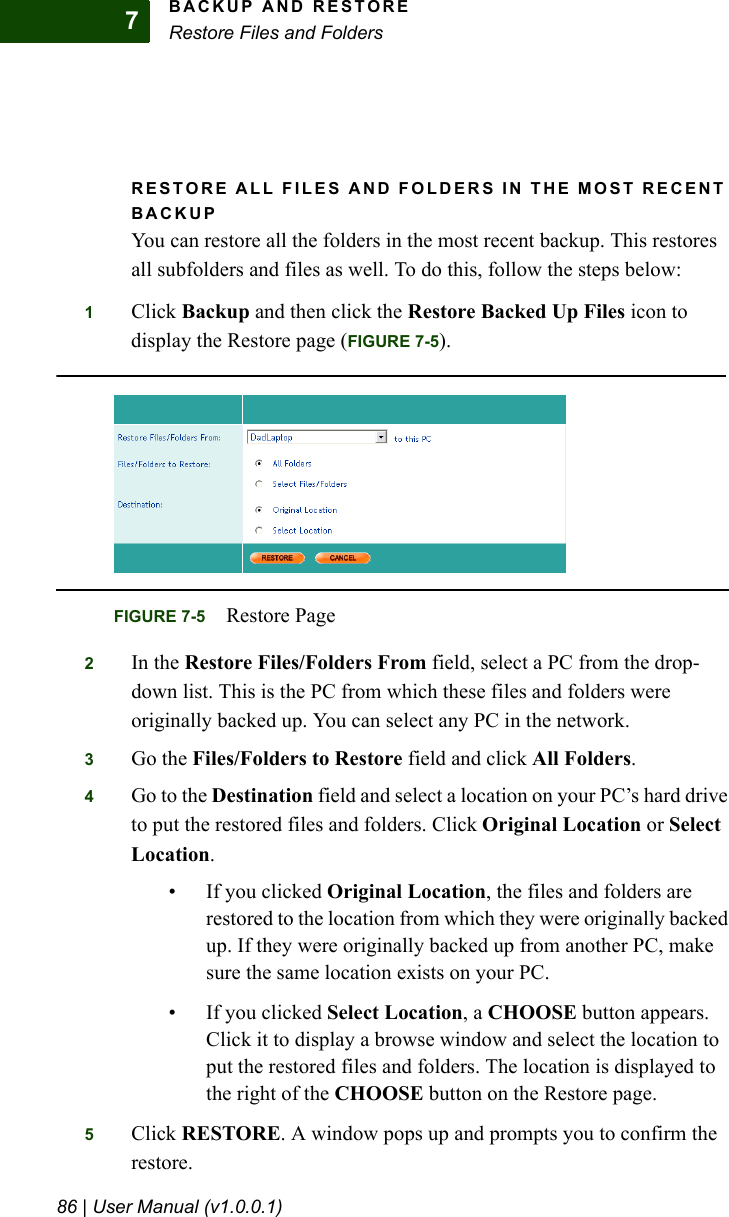
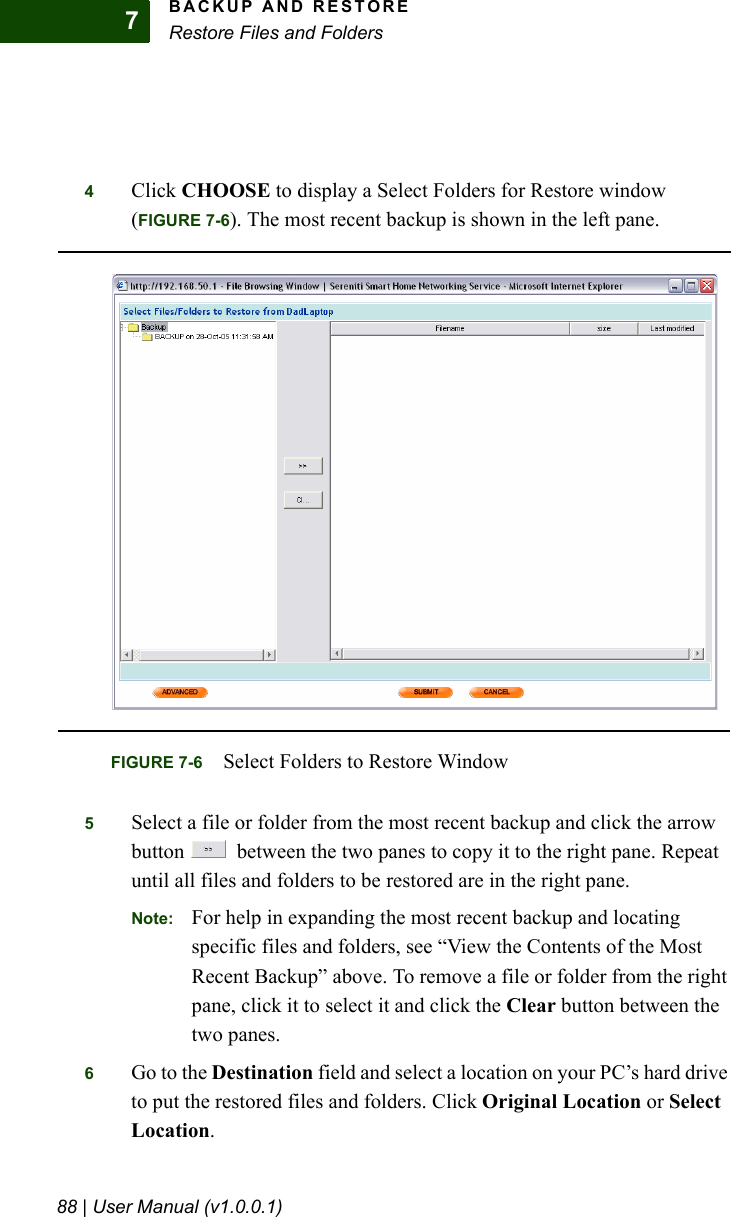
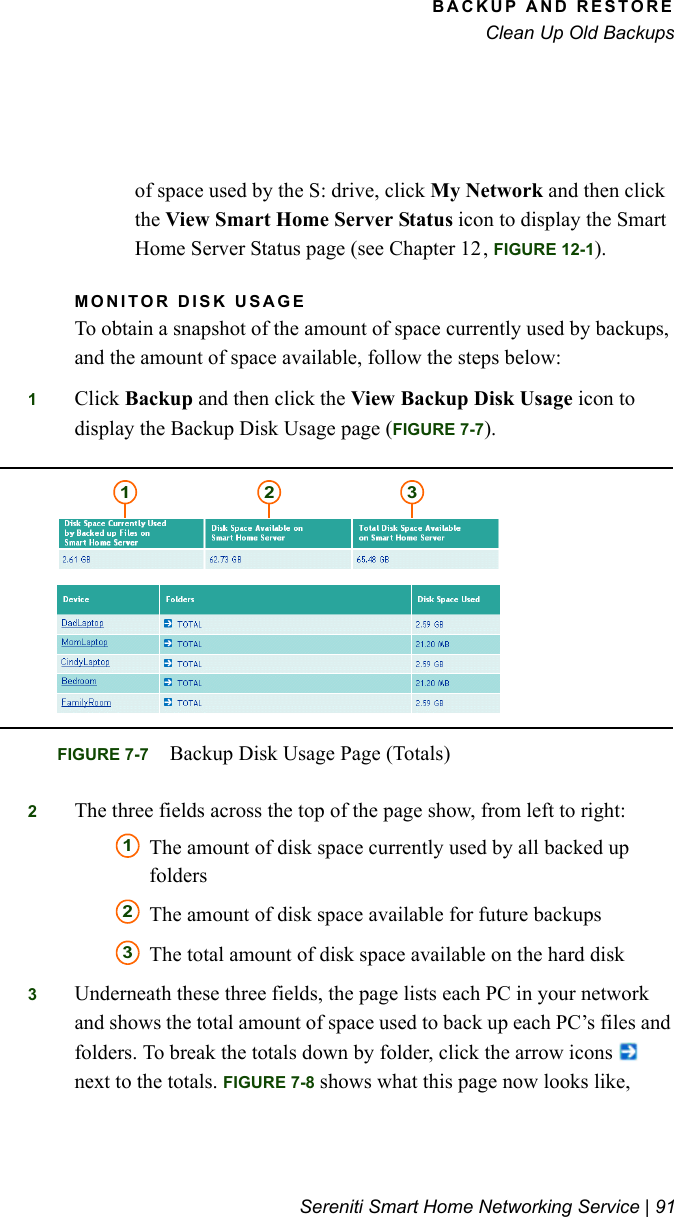
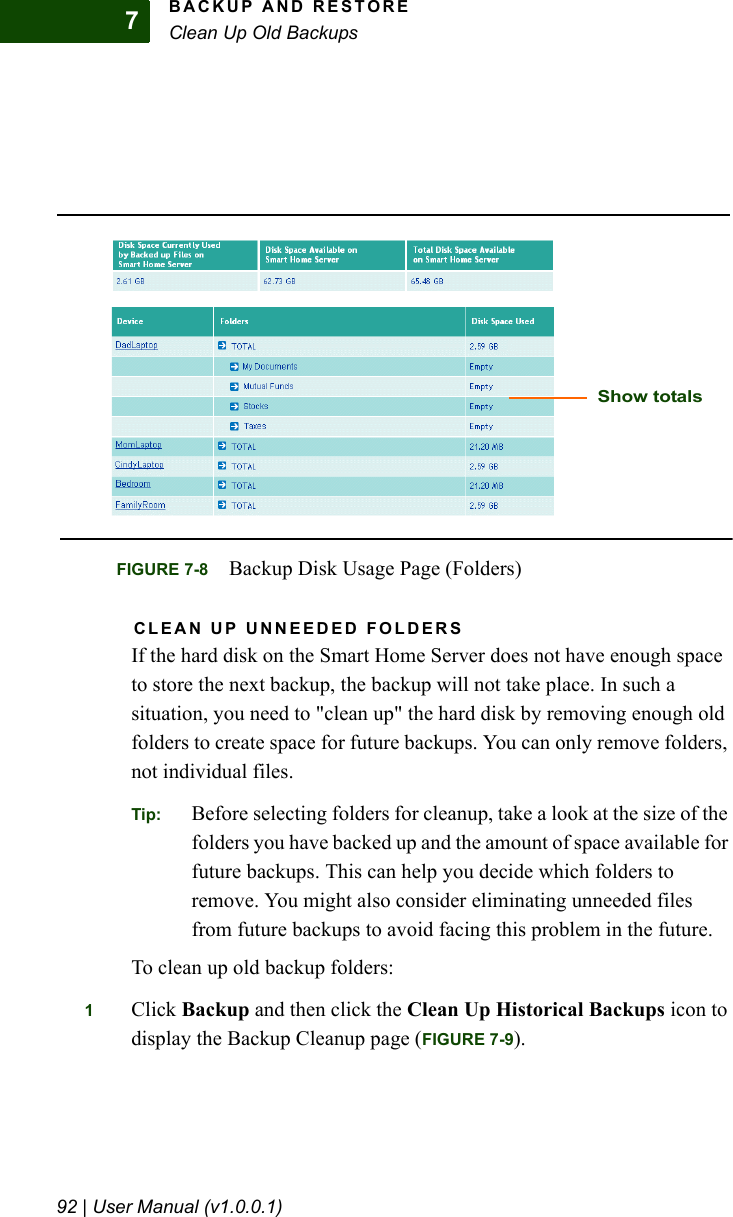
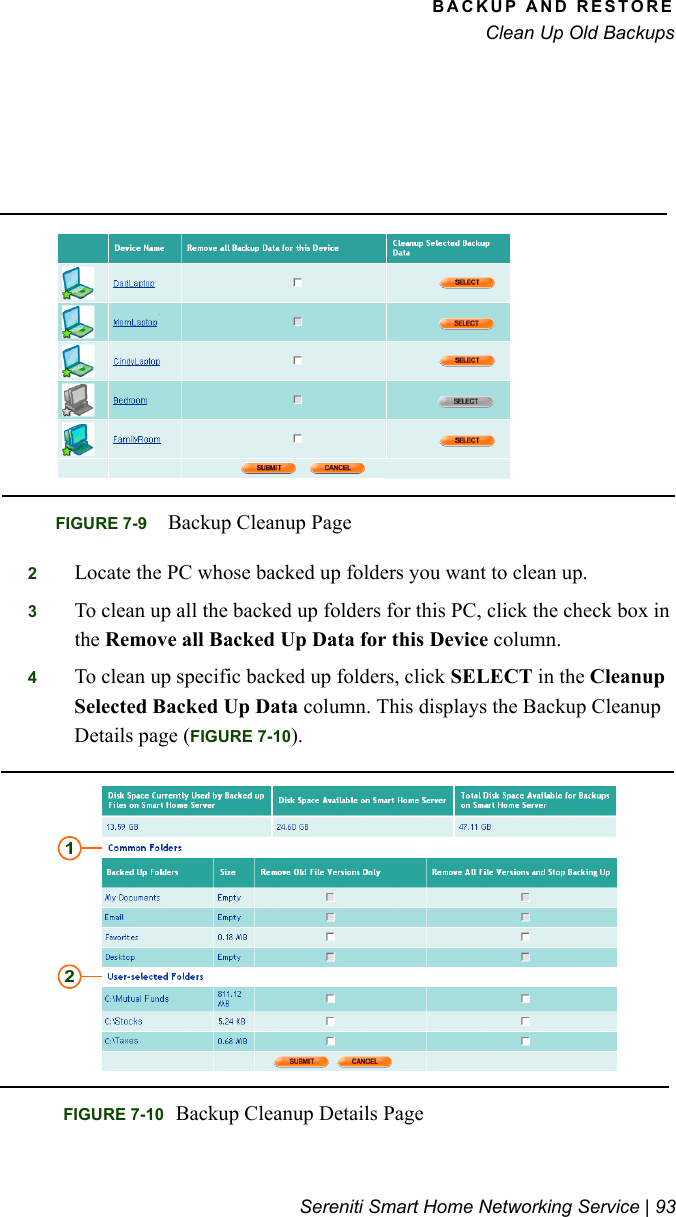
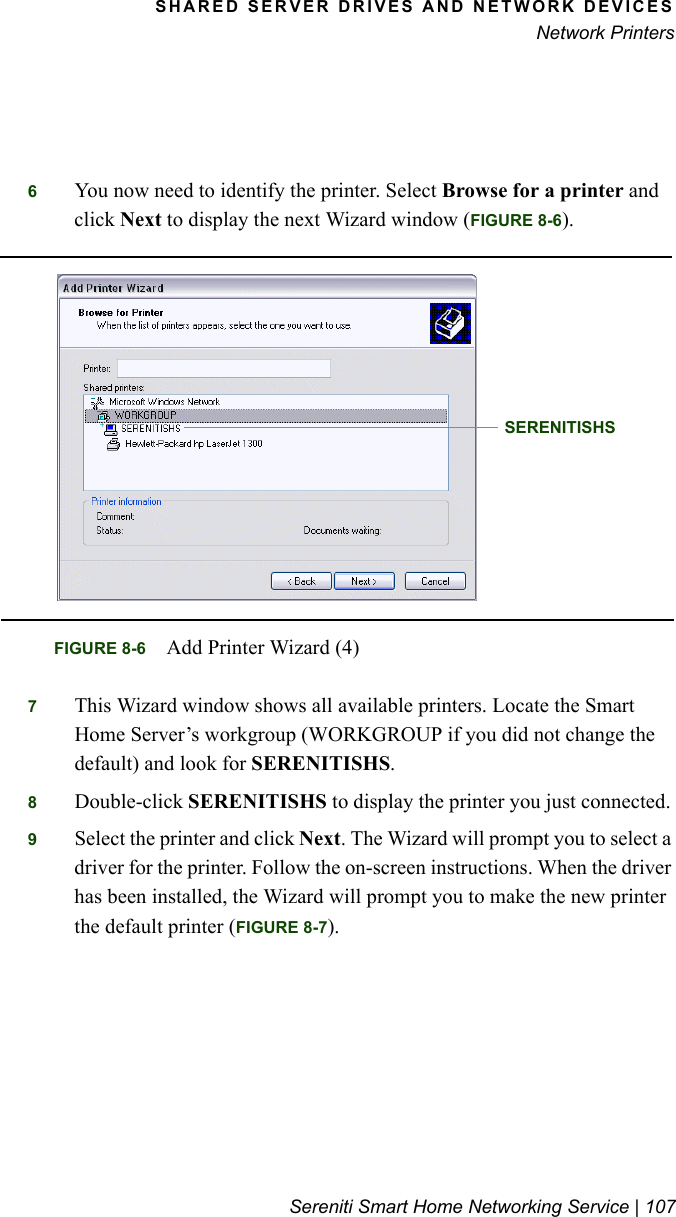
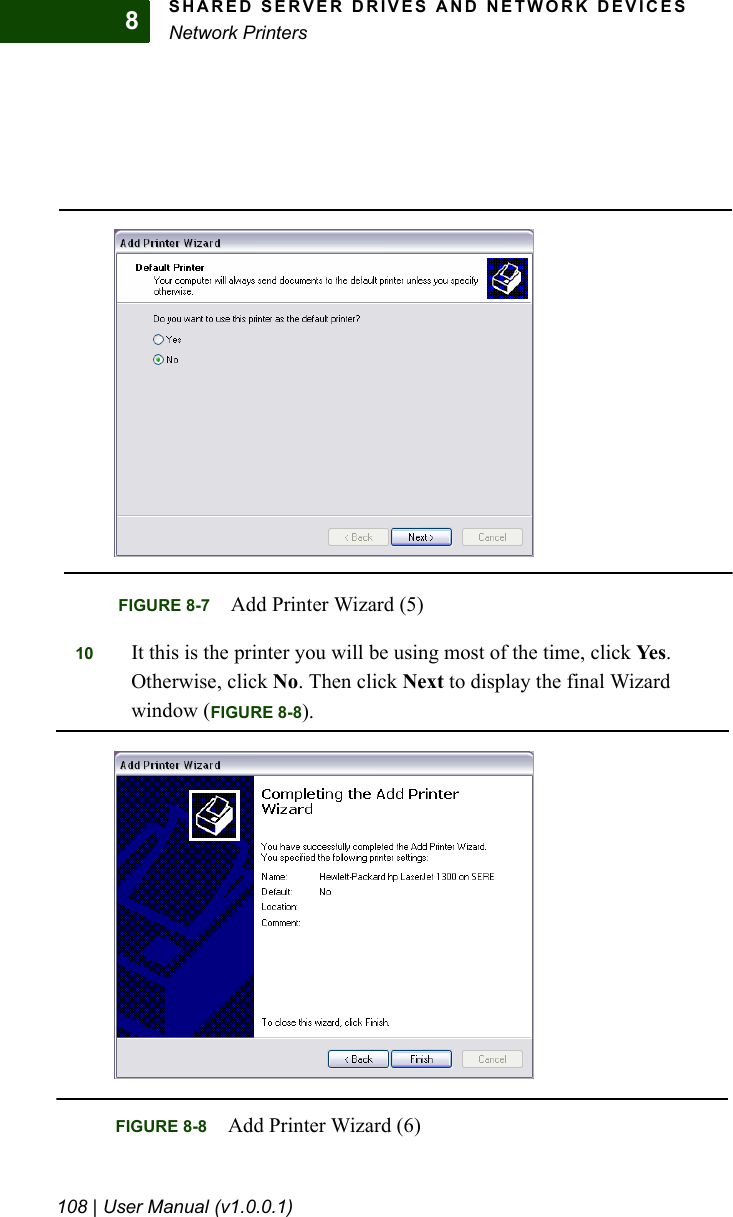
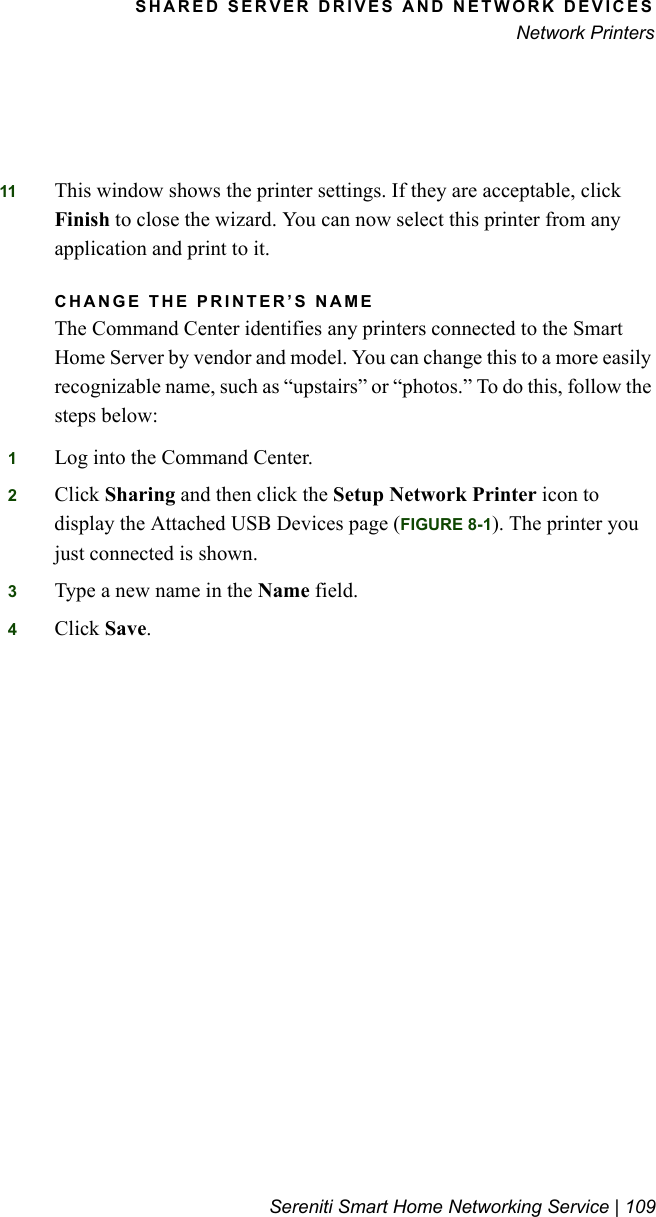
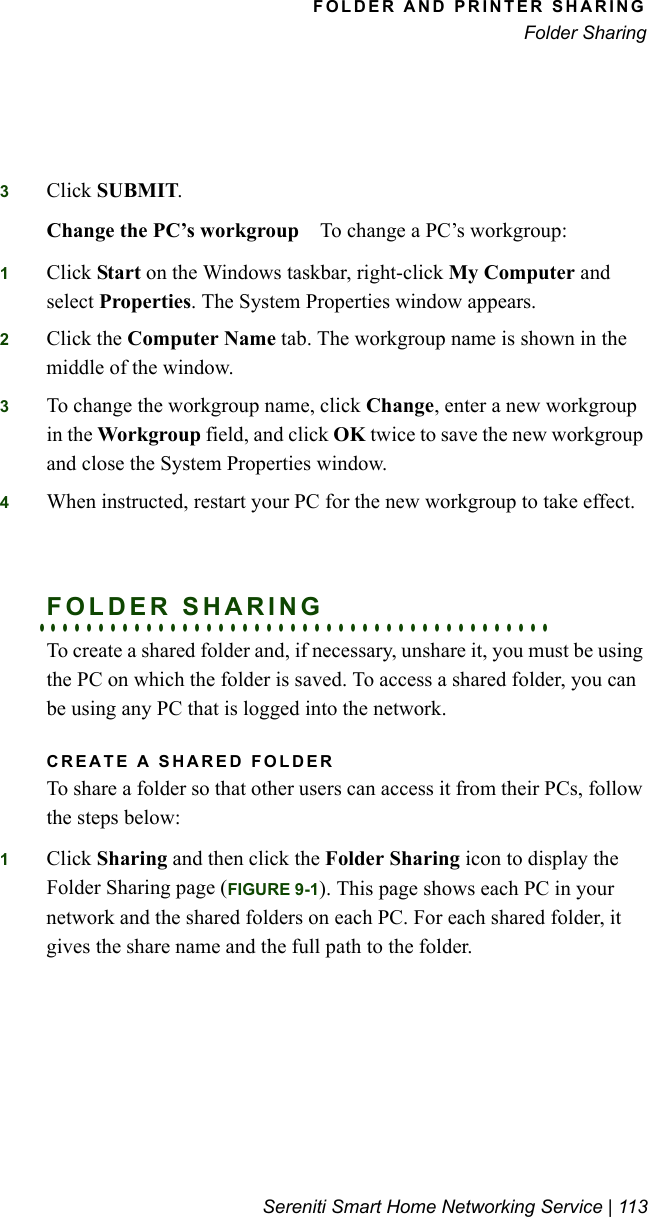
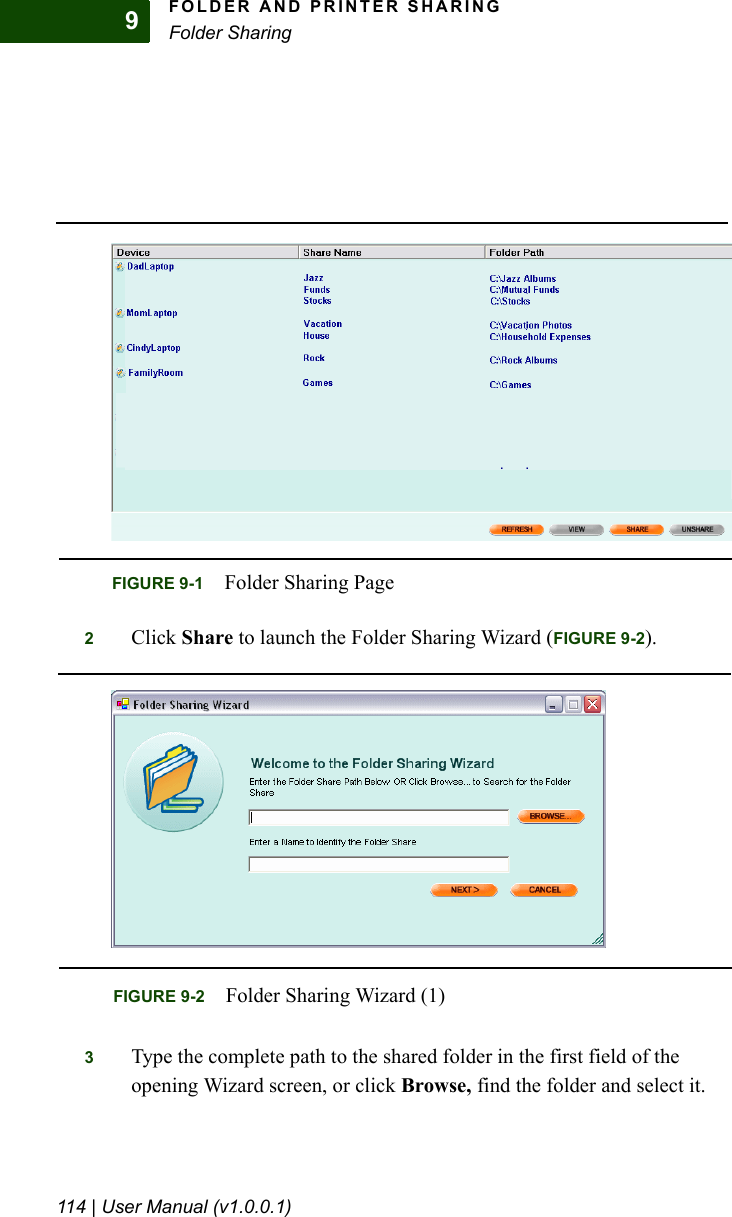
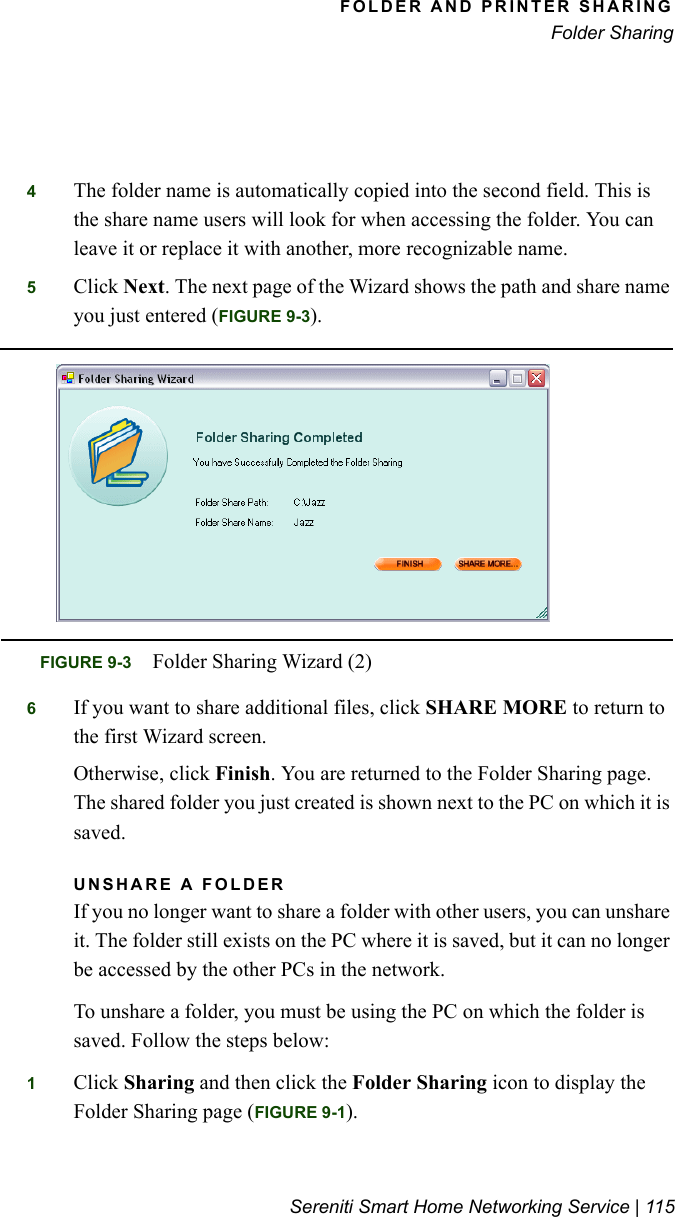
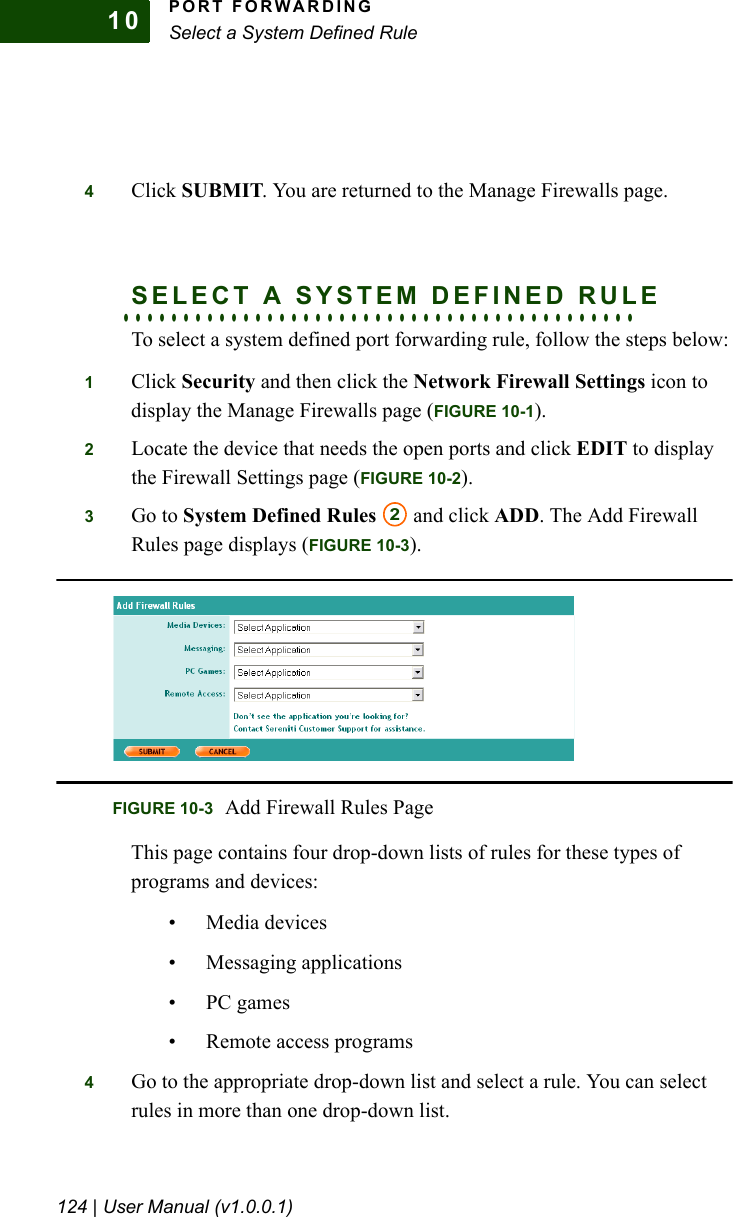
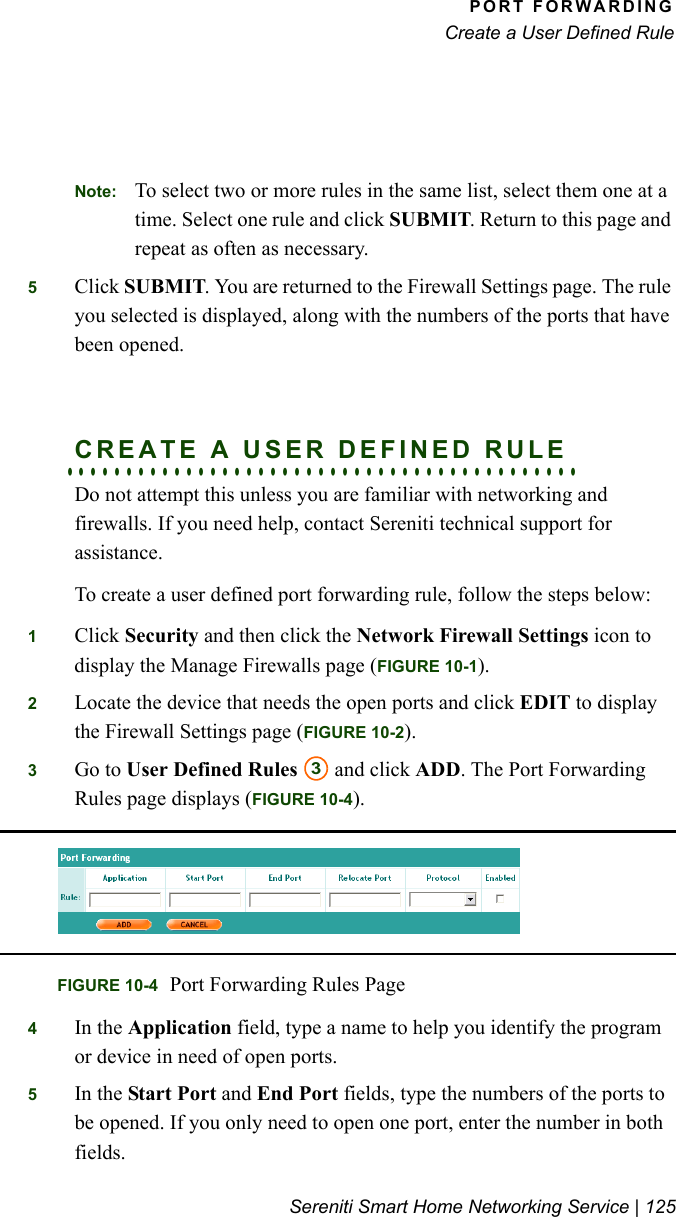
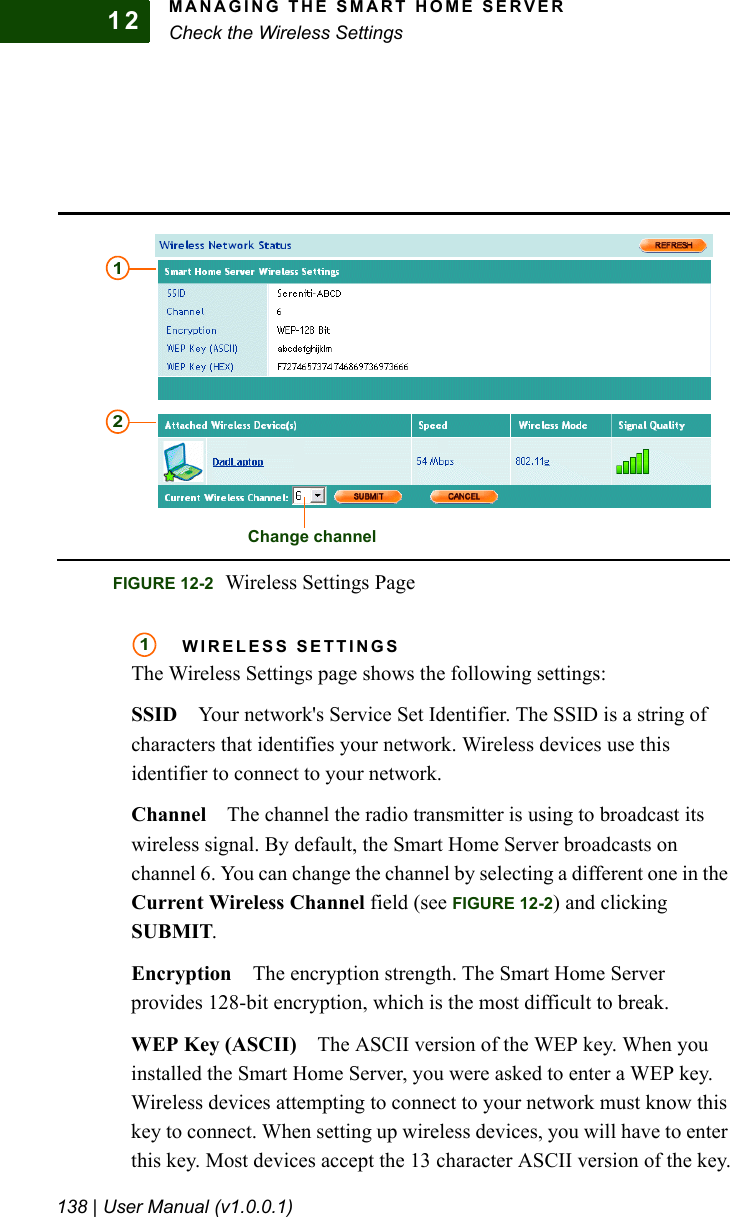
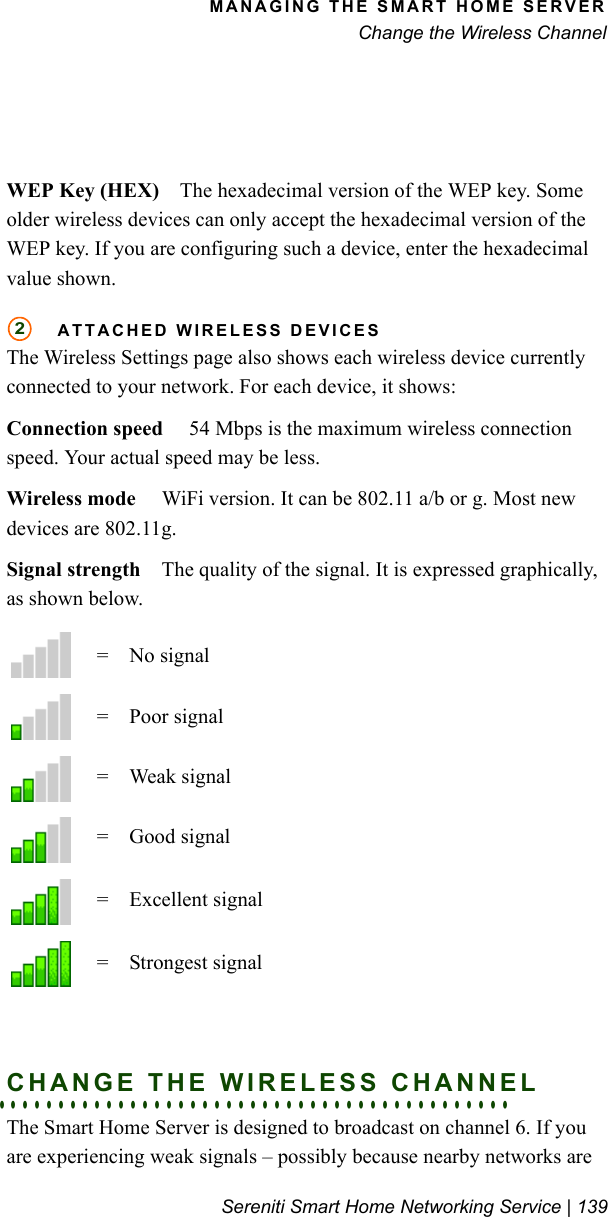
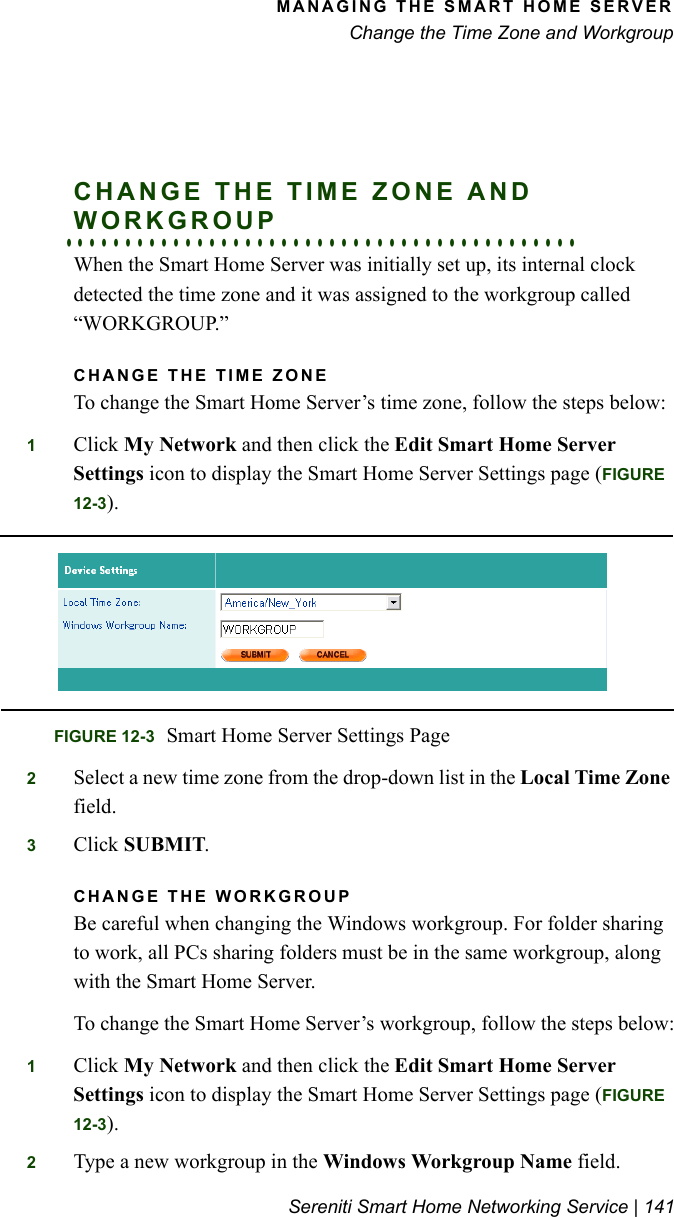
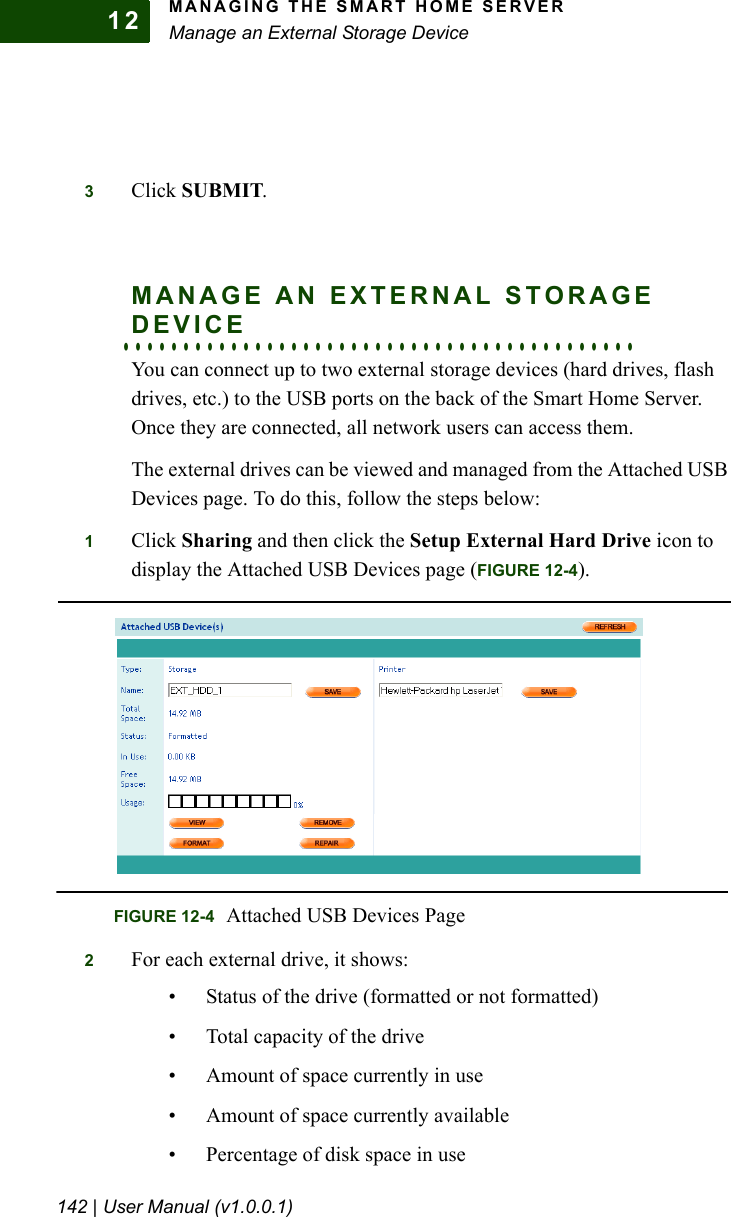
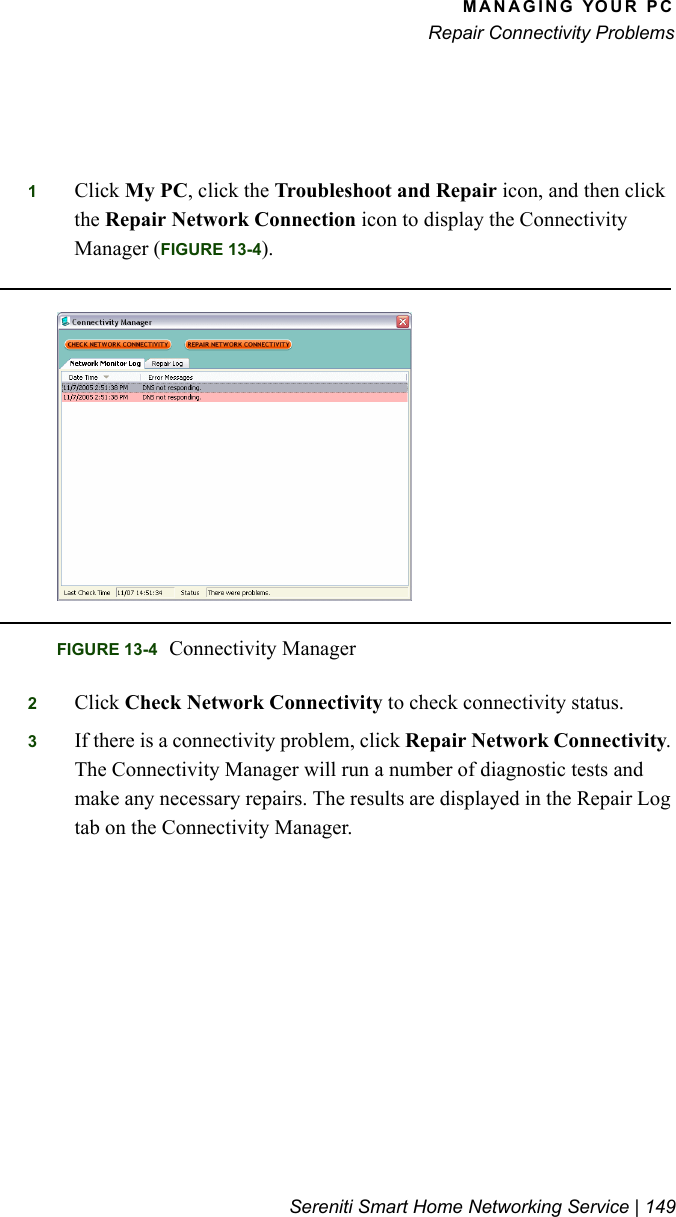
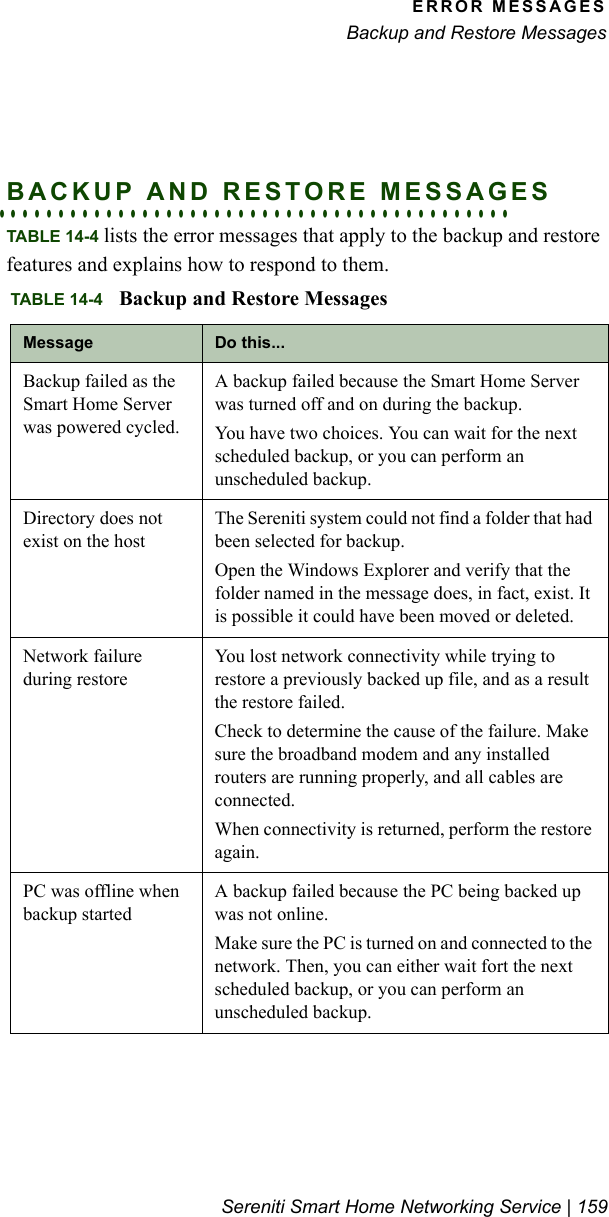
![BACKUP AND RESTORETrack the Status of Scheduled BackupsSereniti Smart Home Networking Service | 81• To open a folder so that you can select a subfolder, double-click the folder.• To select a single folder, click it once.• To select multiple folders, hold down the [CTRL] key and click each folder once, or hold down the [SHIFT] key and select two folders. Those two folders and all folders in between are selected.Note: To unselect all files selected in the left pane, click Clear Selection.5When you have made your selection, click the arrow button between the two panes to copy the folders to the right pane. These are the folders that will be backed up.Note: To remove a single file from the right pane, click the file to select it and click Clear. To remove all the files, click Clear All.6When you have selected all the folders to be backed up, click SUBMIT. You are returned to the Backup Settings page. The full path of each folder you selected appears in the Folder Name field.7Click SUBMIT again to save the selection. You are taken to the Backup Status page.TRACK THE STATUS OF SCHEDULED . . . . . . . . . . . . . . . . . . . . . . . . . . . . . . . . . . . . . . . . . . .BACKUPSScheduled backups can fail to take place. The two most common reasons are:• The PC was not turned on and connected to the Internet when the backup was scheduled.• The network was experiencing connectivity problems when the backup was scheduled, and the PC could not communicate with the Smart Home Server.](https://usermanual.wiki/Cameo-Communications/SHS-2000/User-Guide-627750-Page-99.png)