Cameo Communications WLG2210 108M 802.11g Wireless LAN Router User Manual M WLG 2210 A1 v100 0712
Cameo Communications Inc 108M 802.11g Wireless LAN Router M WLG 2210 A1 v100 0712
Contents
- 1. Manual 1
- 2. Manual 2
- 3. Manual 3
Manual 3
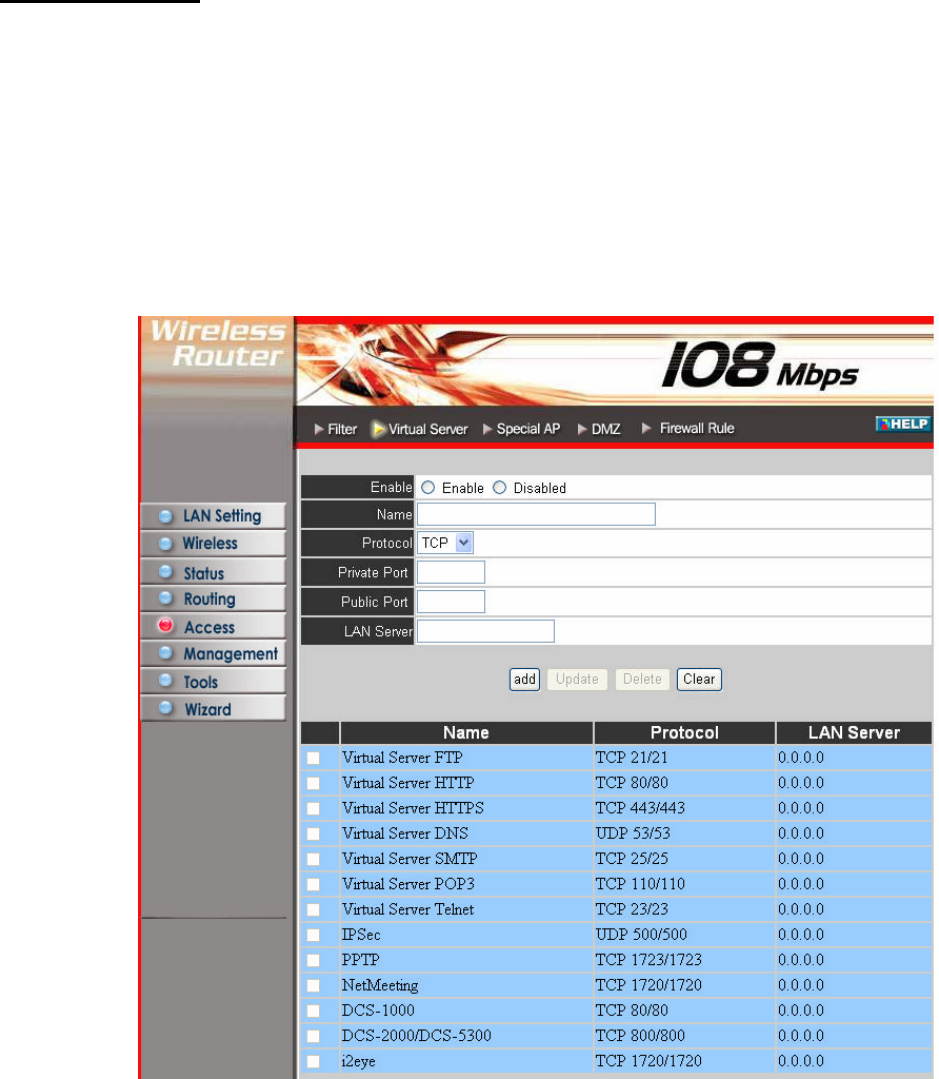
Virtual Server
This screen enables user to create a virtual server via the router. If the router is set
as a virtual server, remote users requesting Web or FTP services through the WAN
are directed to local servers in the LAN. The router redirects the request via the
protocol and port numbers to the correct LAN server. The Virtual Sever profiles are
listed in the table at the bottom of the page.
Note: When selecting items in the table at the bottom, click anywhere in the item.
The line is selected, and the fields automatically load the item's parameters, which
user can edit.
Enable: Click to enable or disable the virtual server.
Name: Type a descriptive name for the virtual server.
Protocol: Select a protocol (TCP or UDP) to use for the virtual server.
Private Port: Type the port number of the computer on the LAN that is being used
to act as a virtual server.
Public Port: Type the port number on the WAN that will be used to provide access
to the virtual server.
LAN Server: Type the LAN IP address that will be assigned to the virtual server.
Add: Click to add the virtual server to the table at the bottom of the screen.
Update: Click to update information for the virtual server if user have selected a
list item and have made changes.
Delete: Select a list item and click “Delete” to remove the item from the list.
New: Click “New” to erase all fields and enter new information.
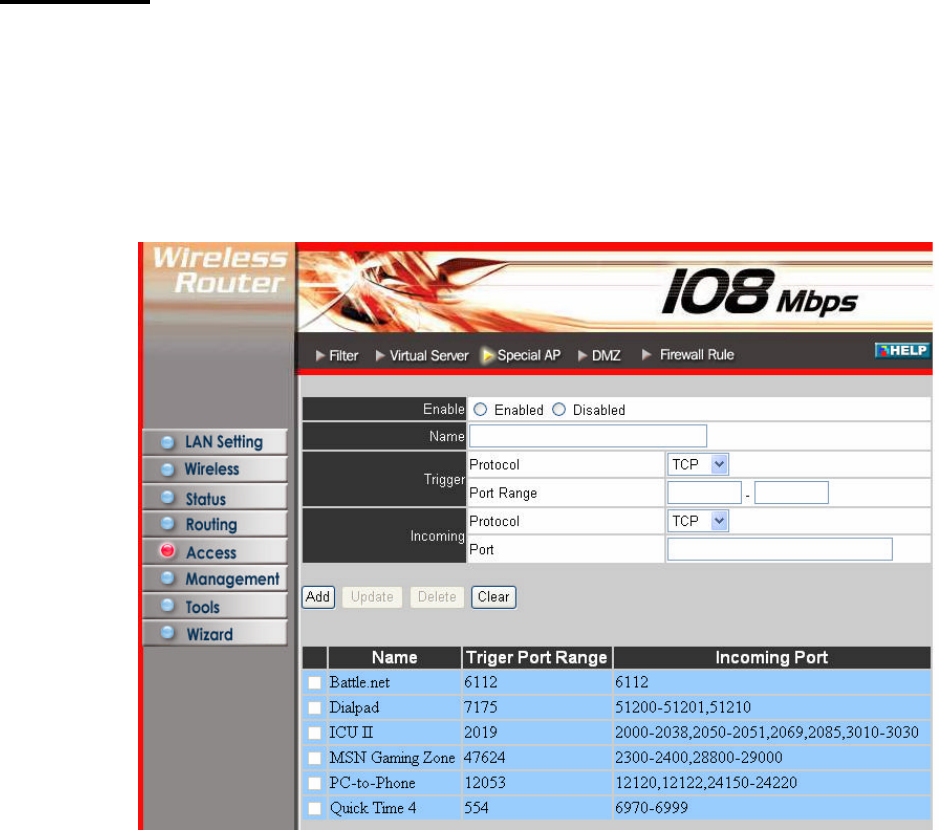
Special AP
This screen enables user to specify special applications, such as games, that require
multiple connections that are inhibited by NAT. The special applications profiles
are listed in the table at the bottom of the page.
Note: When selecting items in the table at the bottom, click anywhere in the item.
The line is selected, and the fields automatically load the item's parameters, which
user can edit.
Enable: Click to enable or disable the application profile. When enabled, users will
be able to connect to the application via the router WAN connection. Click
“Disabled” on a profile to prevent users from accessing the application on the
WAN.
Name: Type a descriptive name for the application.
Trigger: Defines the outgoing communication that determines whether the user has
legitimate access to the application.
? Protocol: Select the protocol (TCP, UDP, or ICMP) that can be used to
access the application.
? Port Range: Type the port range that can be used to access the application
in the text boxes.
? Incoming: Defines which incoming communications users are permitted
to connect with.
? Protocol: Select the protocol (TCP, UDP, or ICMP) that can be used by
the incoming communication.
? Port: Type the port number that can be used for the incoming communication.
Add: Click to add the special application profile to the table at the bottom of the
screen.
Update: Click to update information for the special application if user have
selected a list item and have made changes.
Delete: Select a list item and click Delete to remove the item from the list.
New: Click “New” to erase all fields and enter new information.
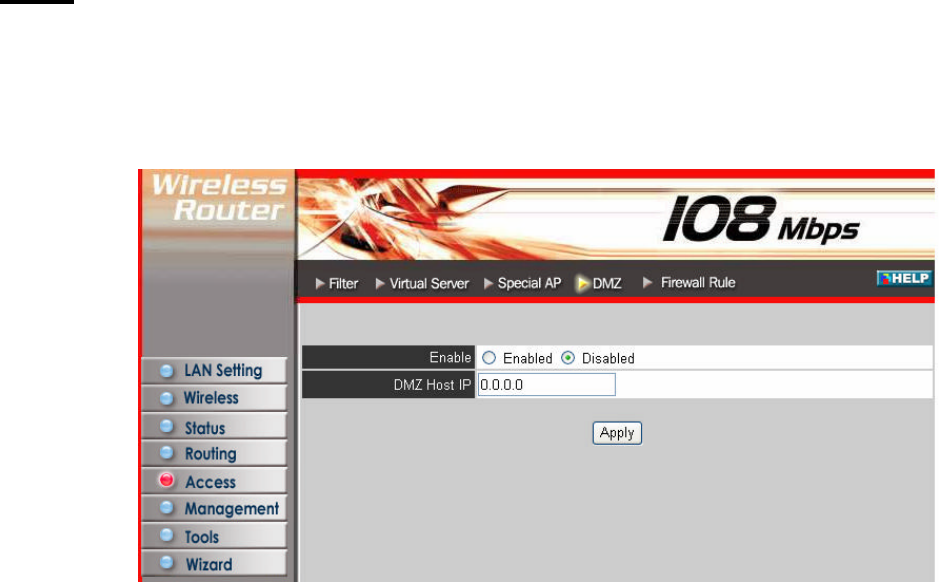
DMZ
This screen enables user to create a DMZ for those computers that cannot access
Internet applications properly through the router and associated security settings.
Note: Any clients added to the DMZ exposes the clients to security risks such as
viruses and unauthorized access.
Enable: Click to enable or disable the DMZ.
DMZ Host IP: Type a host IP address for the DMZ. The computer with this IP
address acts as a DMZ host with unlimited Internet access.
Apply: Click to save the settings.
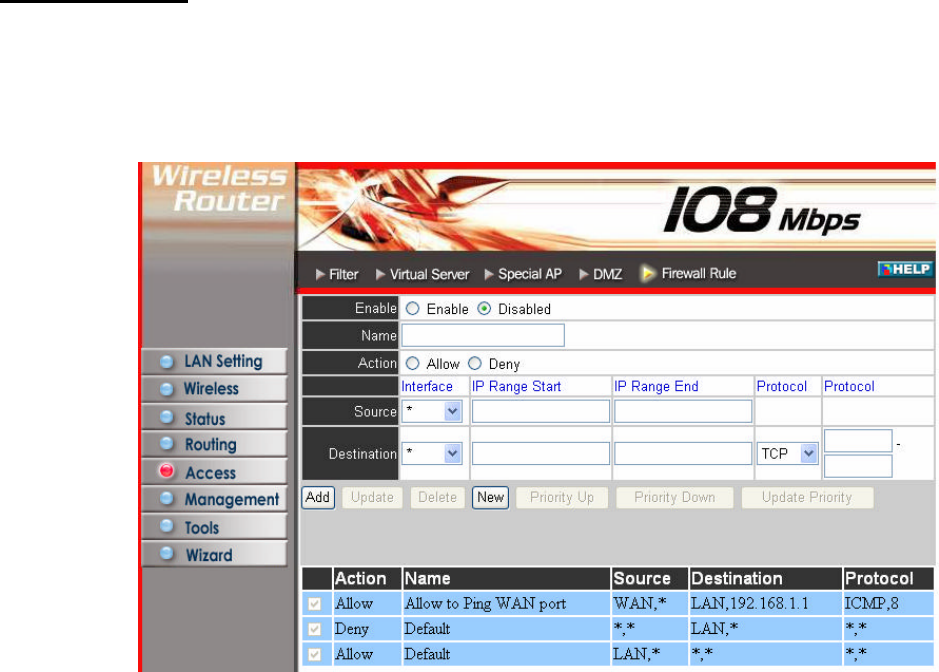
Firewall Rule
This screen enables user to set up the firewall. The router provides basic firewall
functions, by filtering all the packets that enter the router using a set of rules. The
rules are in an order sequence list--the lower the rule number, the higher the priority
the rule has.
Enable: Click to enable or disable the firewall rule profile.
Name: Type a descriptive name for the firewall rule profile.
Action: Select whether to allow or deny packets that conform to the rule.
Source: Defines the source of the incoming packet that the rule is applied to.
? Interface: Select which interface (WAN or LAN) the rule is applied to.
? IP Range Start: Type the start IP address that the rule is applied to.
? IP Range End: Type the end IP address that the rule is applied to.
Destination: Defines the destination of the incoming packet that the rule is applied
to.
? Interface: Select which interface (WAN or LAN) the rule is applied to.
? IP Range Start: Type the start IP address that the rule is applied to.
? IP Range End: Type the end IP address that the rule is applied to.
? Protocol: Select the protocol (TCP, UDP, or ICMP) of the destination.
? Port Range: Select the port range.
Add: Click to add the rule profile to the table at the bottom of the screen.
Update: Click to update information for the rule if user have selected a list item
and have made changes.

Delete: Select a list item and click “Delete” to remove the item from the list.
New: Click “New” to erase all fields and enter new information.
Priority Up: Select a rule from the list and click “Priority Up” to increase the
priority of the rule.
Priority Down: Select a rule from the list and click “Priority Down” to decrease
the priority of the rule.
Update Priority: After increasing or decreasing the priority of a rule, click
“Update Priority” to save the changes.
Management
Management enables user to set up SNMP and Remote Management feature.
SNMP
This screen enables you to configure the SNMP.
Enabled/Disabled: Click to enable or disable SNMP.
System Name: A name given to the router.
System Location: Description the location of the router (normally, the DNS name).
System Contact: Description the contact information for the person responsible for
the router.
Community: SNMP system name for exchanging SNMP community messages.
The name can be used to limit SNMP messages passing through the network. The
default name is 'public.'
Trap Receiver: Type the name of the destination PC that will receive trap
messages.
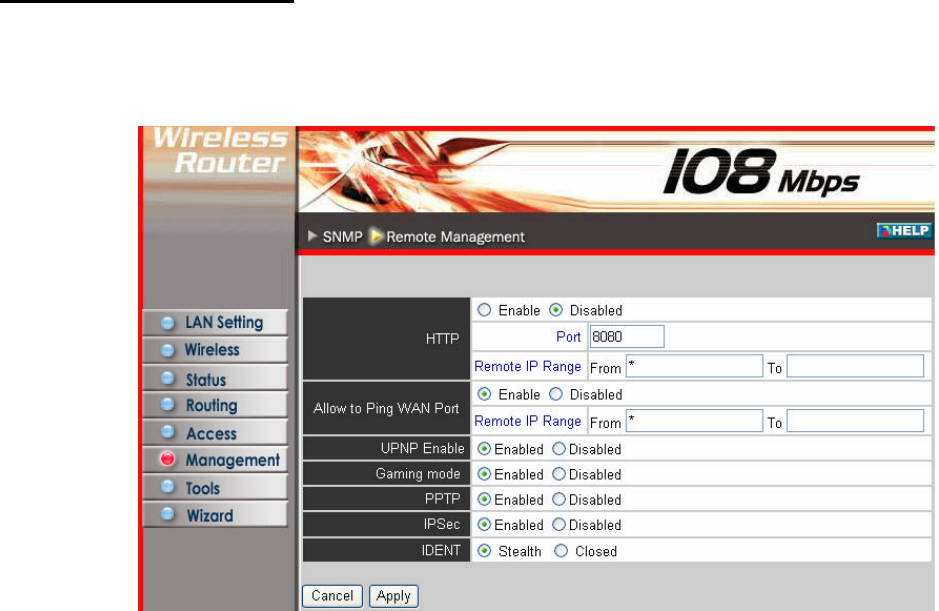
Remote Management
This screen enables user to set up remote management. Using remote management,
the router can be configured through the WAN via a Web browser. A user name
and password are required to perform remote management.
HTTP: Enables user to set up HTTP access for remote management.
Allow to Ping WAN Port: Type a range of router IP addresses that can be pinged
from remote locations
UPNP Enable: UPNP is short for Universal Plug and Play that is a networking
architecture that provides compatibility among networking equipment, software,
and peripherals. The Router is an UPnP enabled router and will only work with
other UPnP devices/software. If user does not want to use the UPnP functionality,
selecting “Disabled” can disable it.
Gaming mode: If user is experiencing difficulties when playing online games or
even certain applications that use voice data, user may need to enable Gaming
Mode for these applications to work correctly. When not playing games or using
these voice applications, it is recommended that Gaming Mode be disabled.
PPTP: Enables user to set up PPTP access for remote management.
IPSec: Enables user to set up IPSec access for remote management.
IDENT: Default is stealth. This enables user to set port 113 stealth.
Tools
This page enables user to restart the system, save and load different settings as
profiles, restore factory default settings, run a setup wizard to configure router
settings, upgrade the firmware, and ping remote IP addresses.
Reset
Click “Restart” to restart the system in the event the system is not performing
correctly.
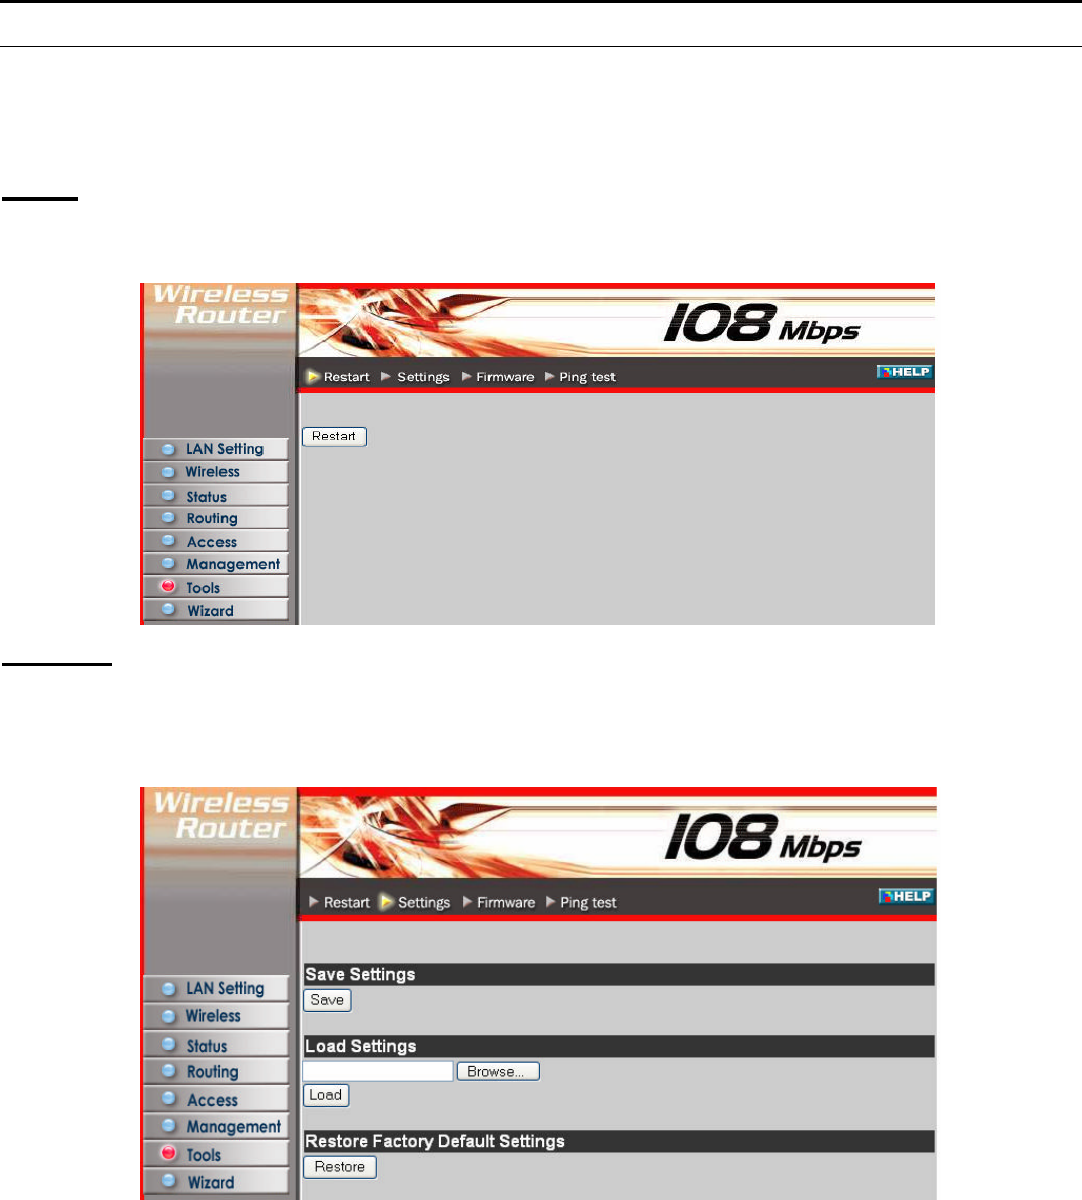
Settings
This screen enables user to save settings as a profile and load profiles for different
circumstances. User can also load the factory default settings, and run a setup
wizard to configure the router and router interface.
Save Settings: Click “Save” to save the current configuration as a profile that can
load when necessary.
Load Settings: Click “Browse” and go to the location of a stored profile. Click
“Load” to load the profile's settings.
Restore Factory Default Settings: Click “Restore” to restore the default settings.
All configuration changes will lose.
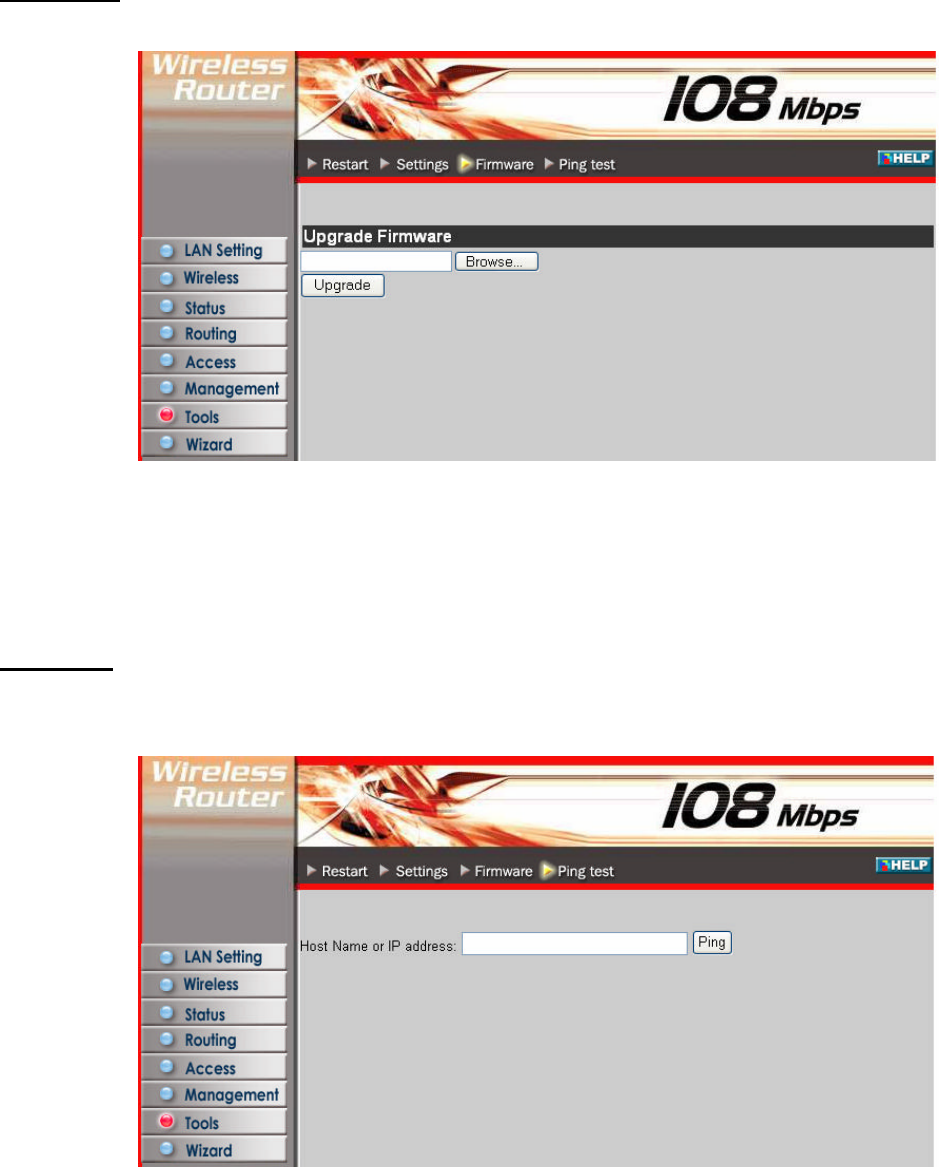
Firmware
This screen enables user to keep the router firmware up to date.
Please follow the below instructions:
Download the latest firmware from the manufacturer's Web site, and save it to disk.
Click “Browse” and go to the location of the downloaded firmware file.
Select the file and click “Upgrade” to update the firmware to the latest release.
Ping Test
The ping test enables user to determine whether an IP address or host is present on
the Internet. Type the host name or IP address in the text box and click Ping.

49
TECHNICAL SPECIFICATIONS
General
Standards IEEE 802.3u 100BASE-TX Fast Ethernet
IEEE 802.11g; IEEE 802.11b
Protocol CSMA/CD
Radio Technology IEEE 802.11g Orthogonal Frequency Division Modulation
Data Transfer Rate 802.11b: 1, 2, 5.5, 11Mbps (auto sense)
802.11g: 6, 9, 12, 18, 24, 36, 48, 54Mbps(auto sense)
Super-GTM: 108Mbps
Ethernet: 10Mbps (half duplex), 20Mbps (full-duplex)
Fast Ethernet: 100Mbps (half duplex), 200Mbps (full- duplex)
Topology Star
Receiver Sensitivity 54Mbps: Typical -70dBm @ 10% PER (Packet Error Rate)
11Mbps: Typical -85dBm @ 8% PER (Packet Error Rate)
TX Power 18dBm
Network Cables 10BASE-T: 2-pair UTP Cat. 3,4,5 (100 m), EIA/TIA- 568 100-ohm
STP (100 m)
100BASE-TX: 2-pair UTP Cat. 5 (100 m), EIA/TIA-568 100-ohm
STP (100 m)
Frequency Range 2400 ~ 2484 MHz ISM band (Japan)
2400 ~ 2483.5 MHz (USA, Europe, Canada, and Taiwan)
Modulation
Schemes DBPSK/DQPSK/CCK/OFDM
Security 64/128-bits WEP Encryption; WPA, WPA-PSK, WPA2, WPA2-PSK
Antenna Dipole, 2dBi
Channels 1 ~ 11 channels (FCC, Canada, Taiwan); 1 ~ 13 channels (ETSI);
1 ~ 14 channels (Japan)
Number of Ports LAN: 4 x 10/100Mbps Auto-MDIX Fast Ethernet port
WAN: 1 x 10/100Mbps Auto-MDIX Fast Ethernet port
Physical and Environmental
DC inputs 5VDC/2.5A
Power Consumption
5W (Max)
Temperature Operating: 0° ~ 40° C, Storage: -10° ~ 70° C
Humidity Operating: 10% ~ 90%, Storage: 5% ~ 90%
Dimensions 147 x 115 x 35 mm (W x H x D) without Antenna
EMI: FCC Class B, CE Mark B , LP0002 for Taiwan, RSS-210 for Canada