Canon DS508152 Wireless File Transmitter User Manual
Canon Inc Wireless File Transmitter Users Manual
UserManual.wiki
>
Canon
>
DS508152 User Manual
User Manual Updated
Navigation menu
Upload a User Manual
Namespaces
Wiki Guide
HTML
PDF
Info
Views
User Manual
Discussion / Help
Navigation

![4 ¡The instructions in this manual assume that the proper settings for the wireless LAN or wired LAN and FTP server have been completed. For details on how to set these settings, consult the manufacturer of the respective equipment. ¡The menu screens are based on the EOS-1Ds Mark II’s. ¡Terms in brackets [ ] indicate the button name, icon name, camera menu item, etc. ¡The number in parentheses indicate the number of the page where you can find more information. ¡This manual assumes that you have read the camera’s instruction manual and are familiar with camera operation procedures. ¡This manual uses the following alert symbols:: The Caution symbol indicates a warning to prevent mishaps.: The Note symbol gives supplemental information. ¡In this manual, “Windows XP” refers to Windows XP Home Edition/Professional, and “Windows 2000” refers to Windows 2000 Professional.Conventions Used in this Manual](https://usermanual.wiki/Canon/DS508152/User-Guide-474635-Page-4.png)
![10¡If you will not use a DHCP server, select [Use below IP address] and enter the [IPaddress], [Subnet mask], and [Gateway] text fields.¡If you will use a DNS server, checkmark the [¢Use DNS server] box and enter the DNS server address.¡If you use a DHCP server, the DNS server address acquired automatically from the DHCP server will override any other address.TCP/IP SettingsDHCP Server SettingDNS Server Setting](https://usermanual.wiki/Canon/DS508152/User-Guide-474635-Page-10.png)
![111Creating the Settings File¡Enter the target FTP server’s [Address] or [Server name] and [Port No.]. If you enter both the [Address] and [Server name], the [Address] will override the [Server name].¡Enter the name of the target FTP server’s [Target folder]. If this is left blank, the images will be saved in the root folder set by the FTP server. The same DCIM/100EOS1D folder hierarchy as in the memory card will be created automatically.If the camera has two memory card slots and the CF card is selected to save the images, the A/DCIM/100EOS1D folder hierarchy will be created automatically to save the images. If the SD card is selected to save the images, the B/DCIM/100EOS1D folder hierarchy will be created automatically to save the images. (CF card images will be in folder A, while SD card images will be in folder B.)¡If you want to use the passive mode, checkmark the [¢Use passive mode] box.¡To allow an image file in the target folder to be overwritten by a file having the same name, checkmark the [¢Overwrite same file] box.¡Enter the [Login name] and [Login password] required by the FTP server.¡If you will use a proxy, enter the proxy server’s [Address] or [Server name] and [Port No.]. If you enter both the [Address] and [Server name], the [Address] will override the [Server name].FTP SettingsTarget Server SettingsUser SettingsProxy Settings](https://usermanual.wiki/Canon/DS508152/User-Guide-474635-Page-11.png)
![12[SSID]¡Enter the SSID (or ESS-ID) that has been set for the wireless LAN access point or wireless LAN adapter. If the wireless LAN access point is set to ANY connection, set the SSID for the wireless LAN access point.[Conn. Method]¡Select either [Infrastructure] or [Ad hoc] for the connection.¡If you will use IEEE 802.11g, select [Infrastructure]. [Ad hoc] does not enable image transfers.[Channel]¡With [Infrastructure], the channel is set automatically.¡With [Ad hoc], the same channel as for the wireless LAN adapter will be set.Wireless LAN SettingsBasic Settings](https://usermanual.wiki/Canon/DS508152/User-Guide-474635-Page-12.png)
![131Creating the Settings FileWireless LAN SettingsSet the [Authentication], [Encryption], and [Key Format] to the same settings as for the wireless LAN access point or wireless LAN adapter.The possible settings will vary depending on the combination as shown below.To prevent the camera from changing the LAN settings, put a checkmark. You can also enable/disable the [Protect settings] with the camera’s menu screen (p.44).Authentication and EncryptionConn. Method Authentication EncryptionEncryption Method Key FormatInfrastructureOpen System WEP• Enter 10 hexadecimal char.• Enter 26 hexadecimal char.• Enter 5 ASCII characters• Enter 13 ASCII charactersNoneShared key WEP See WEP settings above.WPA-PSK TKIP • Enter 64 hexadecimal char.• Enter 8-63 ASCII charactersAd hocWEP See WEP settings above.TKIP See TKIP settings above.NoneSettings Protect](https://usermanual.wiki/Canon/DS508152/User-Guide-474635-Page-13.png)
![14You must now save the settings file to a memory card. Have a memory card on hand to save data.1Select the [TCP/IP] tab.2Click the [Save settings] button.aThe Save dialog box will appear.3Save without changing the file name.¡If you save the file with a different file name, the camera will not be able to read the file.¡Select the drive where the memory card is inserted, then open the memory card (in the root directory) and save the file to the memory card.¡To load the settings file into the camera, see page 23.Saving the Settings¡Save the settings file while the memory card is open. If you save the file by putting it inside the memory card folder, the camera will not be able to read the file from the memory card.¡Do not save more than one settings file in the memory card. If there are multiple settings files, the camera will not be able to read the file.By clicking the [Read settings] button, you can read the settings file saved in the memory card or hard disk.](https://usermanual.wiki/Canon/DS508152/User-Guide-474635-Page-14.png)
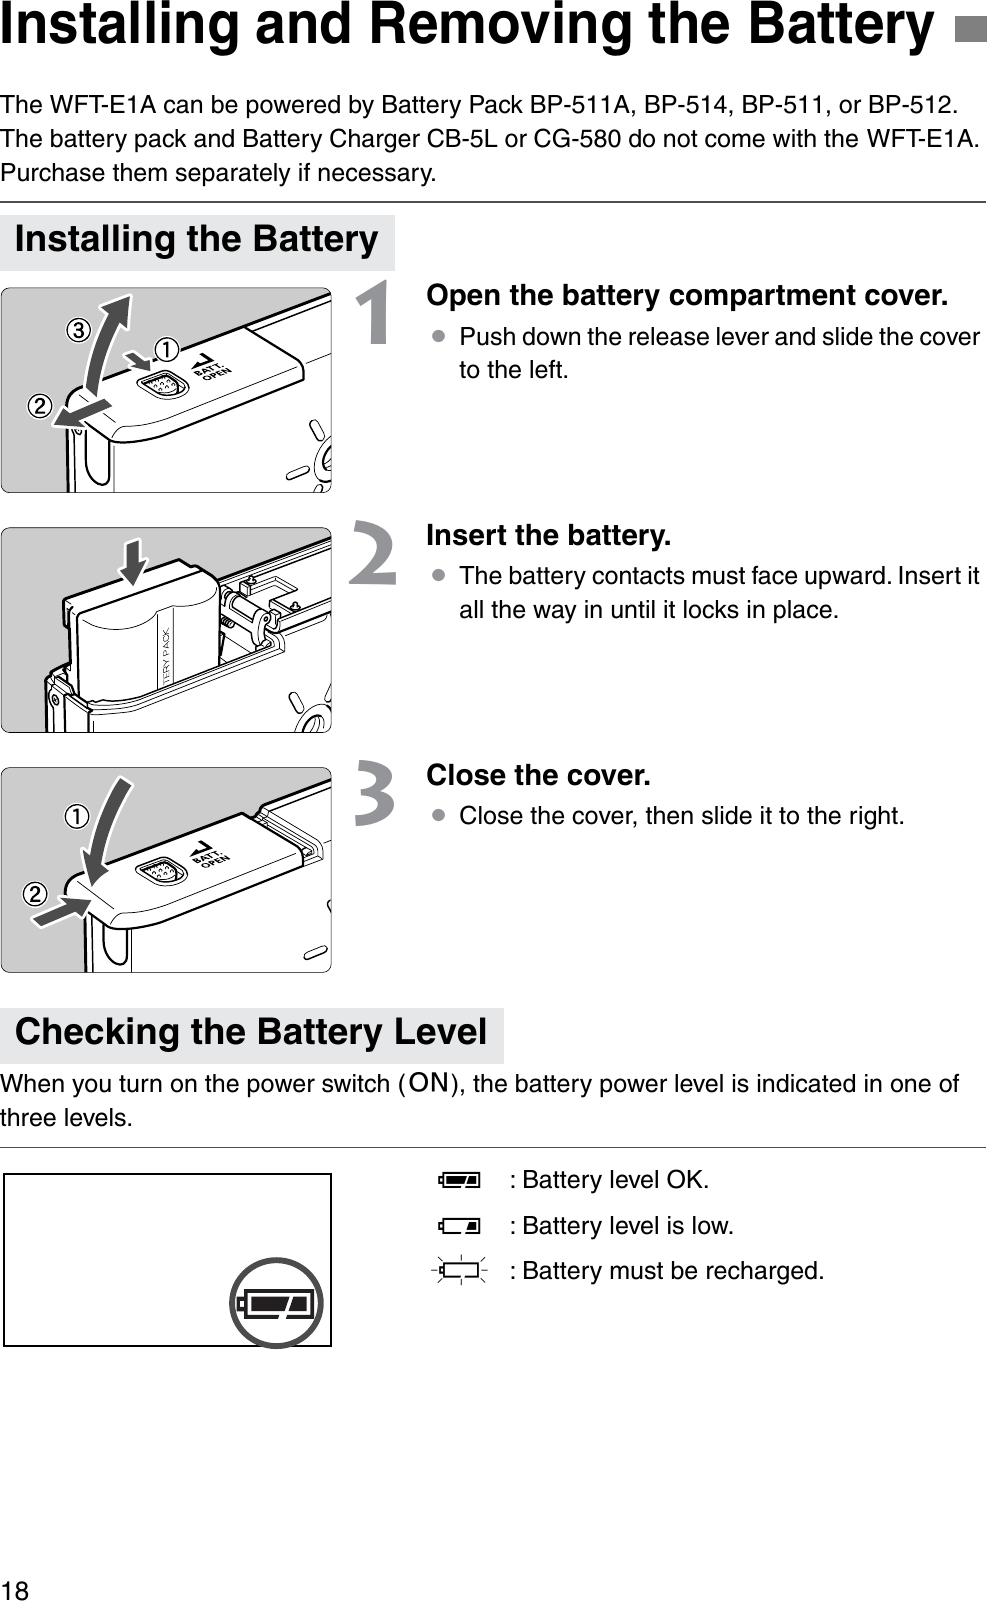
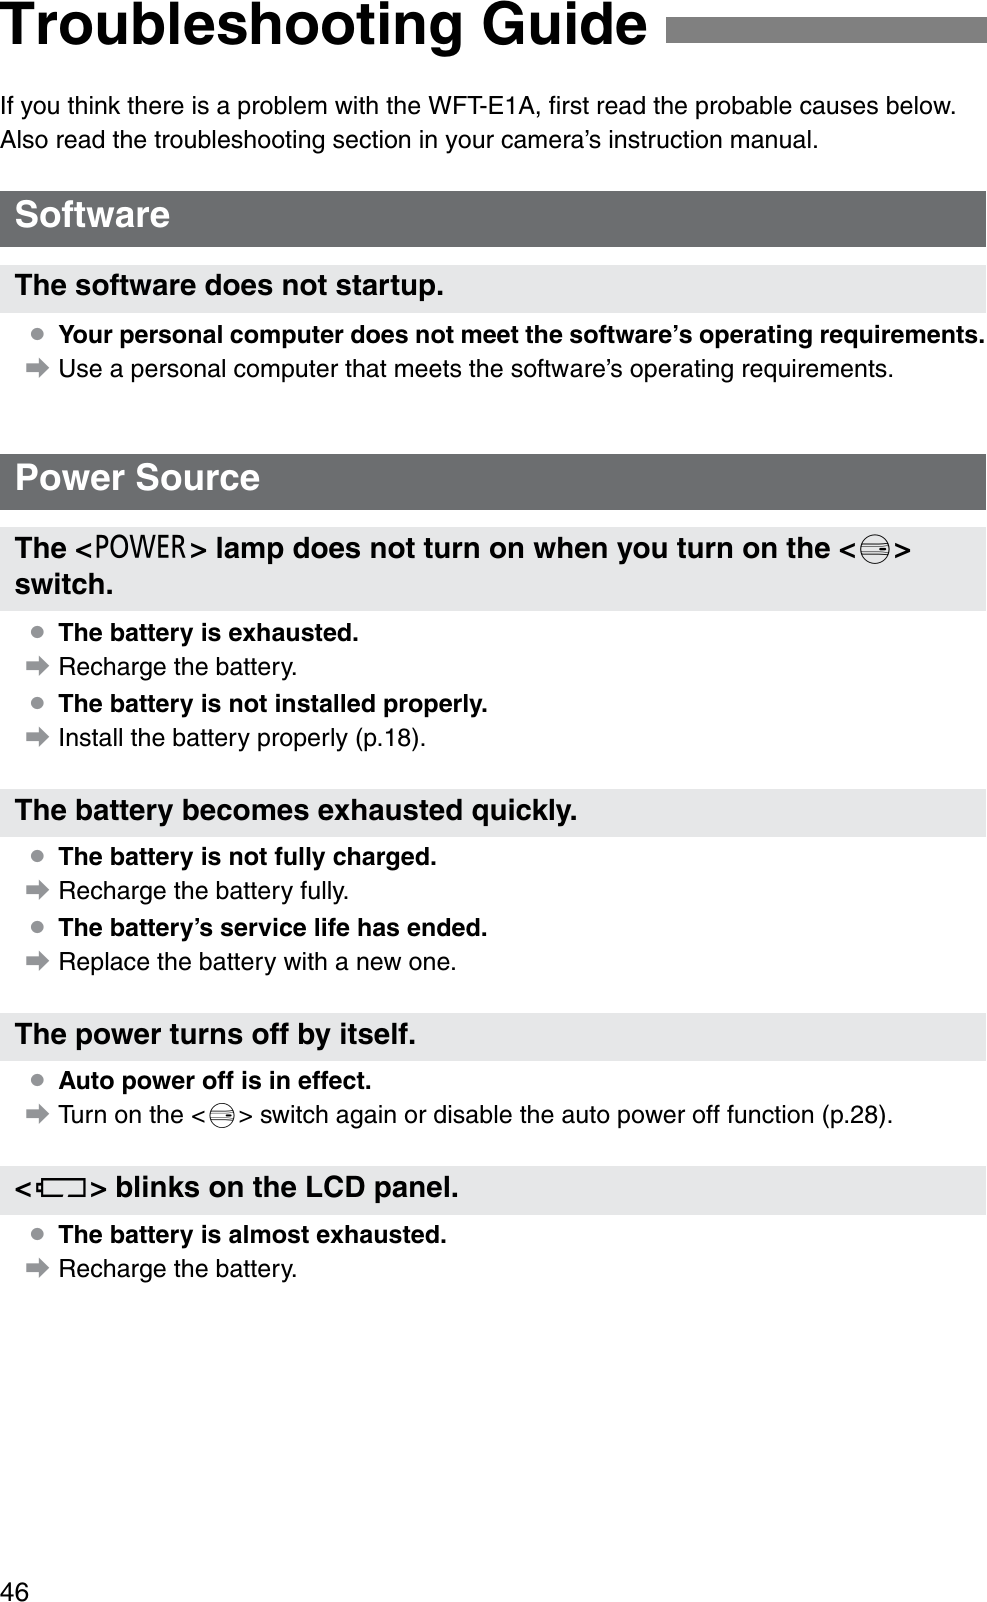
![192Setting Up the WFT-E1AInstalling and Removing the BatteryBattery Life ¡The battery life is based on Canon’s testing standards. The actual battery life may be shorter than the figures above depending on the operating conditions.1Open the battery compartment cover.¡Push down the release lever and slide the cover to the left.2Remove the battery.¡Push the battery lock lever as shown by the arrow to unlock it, then take out the battery.LAN type Temperature Continuous Image Transfer Time [minutes]Wireless LAN At 20°C / 68°F 180At 0°C / 32°F 120Ethernet At 20°C / 68°F 270At 0°C / 32°F 180Removing the Battery](https://usermanual.wiki/Canon/DS508152/User-Guide-474635-Page-19.png)
![232Setting Up the WFT-E1AWith the settings file you created in Chapter 2, you will enable the camera to be connected to the LAN.Although the sample menu screens shown are from the EOS-1Ds Mark II, other EOS digital cameras also use the same menu terminology.For the menu operation procedure, refer to your camera’s instruction manual.1Insert the memory card containing the settings file.2Connect the WFT-E1A and camera and turn on both.3Display the menu screen.¡Select the Setup menu category.4Select [Image transfer (LAN) settings].¡[Image transfer (LAN) settings] will not be displayed if the WFT-E1A and camera are not connected and turned on.5Select [LAN setting].¡English will be displayed for any language that the WFT-E1A is not compatible with.Setting the LANLoading the Settings File to the Camera](https://usermanual.wiki/Canon/DS508152/User-Guide-474635-Page-23.png)
![24Setting the LAN6Select [Set up].7Select the Set No. of the settings file you want to load.¡You can have up to five settings from [Set 1] to [Set 5].8Select [Load settings].9Select [OK].aThe settings file will be loaded into the selected Set No.Do steps 2 to 5 on page 23.In step 6, select the Set No. that suits the LAN environment you are using.Selecting the Settings (Set No.)](https://usermanual.wiki/Canon/DS508152/User-Guide-474635-Page-24.png)
![252Setting Up the WFT-E1ASet the image transfer for the wireless LAN or wired LAN.1Select [Image transfer (LAN) settings].¡[Image transfer (LAN) settings] will not be displayed if the WFT-E1A and camera are not connected and turned on.2Select [LAN type].¡English will be displayed for any language that the WFT-E1A is not compatible with.3Select the LAN type to be used.Selecting the LAN Type](https://usermanual.wiki/Canon/DS508152/User-Guide-474635-Page-25.png)
![272Setting Up the WFT-E1AChecking the Connection StatusIf an error occurs, follow the procedure below to identify the error (p.48) and take suitable steps to resolve the error. To resolve an error, you must be knowledgeable about the wireless LAN, wired LAN, and FTP server.1Select [Image transfer (LAN) settings].2Select [Error description].3Select the error No. displayed on the LCD panel.aThe respective error description will be displayed.Identifying an Error No. Displayed on the Display Panel¡Use a category 5 or higher LAN cable.¡If you are connecting directly to a personal computer without any router or hub, use a cross cable.](https://usermanual.wiki/Canon/DS508152/User-Guide-474635-Page-27.png)
![28Checking the Connection StatusThe WFT-E1A enters the power save mode if do not use the WFT-E1A for a set period of time. When you start shooting again, the power save mode will be canceled automatically and images will be transferred.During the power save mode, only the <D> and <P> icons will be displayed on the WFT-E1A’s display panel. The <4> lamp will be off.1Select [Image transfer (LAN) settings].2Select [Power saving].¡Select the desired time.Select this when you want to update the WFT-E1A’s firmware. For any new firmware and update procedures, check Canon’s Web site. Setting the Power Save ModeAbout [WFT-E1A firmware]](https://usermanual.wiki/Canon/DS508152/User-Guide-474635-Page-28.png)
![30You can transfer the image automatically to an FTP server right after it is taken. You can continue shooting even while an image is being transferred.Be sure to insert the memory card in the camera when shooting.1Select [Image transfer (LAN) settings].2Select [Automatic transfer].¡Select [Enable].3Take the picture.aThe captured image will be transferred to the FTP server.¡During the image transfer, the <4> lamp will blink.Automatic Image Transfer After Each Shot¡Images cannot be transferred if the memory card is not inserted.¡During the image transfer, do not turn off the camera’s power switch. Doing so will interrupt the image transfer. If there is any image whose transfer failed or was interrupted, you can transfer it later in a batch.¡During continuous shooting, the images will be transferred in the order they were captured.¡The captured images will also be stored in the memory card.](https://usermanual.wiki/Canon/DS508152/User-Guide-474635-Page-30.png)
![313Transferring ImagesAutomatic Image Transfer After Each ShotDuring continuous shooting, you can check how many images are remaining to be transferred. Select [Image transfer (LAN) settings] on the menu and the number remaining will be displayed.If you select [Cancel], the transferring and transfer standby images will be cancelled.If you select [Select] with [Image sel./transfer], you can check its image transfer history (p.32).Image not selected for transfer (No icon)Images to transferImage selected for transferImages failing transferImage failed to transfer (error)Images transferredImage transferred successfullyChecking the Remaining Images to be Transferred and Canceling the Image TransferChecking the Image Transfer History](https://usermanual.wiki/Canon/DS508152/User-Guide-474635-Page-31.png)
![32After you finish shooting, you can select the best images and transfer them in a batch. Or you can send images which have not been transferred or which failed transfer.You can continue shooting even while an image is being transferred.1Select [Image transfer (LAN) settings].2Select [Image sel./transfer].¡Select [Select].aThe image will be displayed.3Select the image to be transferred.¡Select the image in the same way as for image playback.¡When using a camera with <b> button, turn the <c> while holding down the <b> button to display <j> on the upper left of the image to be transferred. When using a camera with <g> button, press the <g> button to display <j> on the upper left of the image to be transferred.You can select up to 9999 images.¡After selecting the images to be transferred, press the <e> button.Image Batch Transfer After ShootingSelecting Images to be Transferred](https://usermanual.wiki/Canon/DS508152/User-Guide-474635-Page-32.png)
![333Transferring ImagesImage Batch Transfer After Shooting4Transfer the images.¡Select [Transfer].¡During the image transfer, the <4> lamp will blink.With the left screen displayed in step 2, you can check the number of images to be transferred as well as the image transfer history like the number of images in the selected folder or card that failed to transfer or that completed the transfer.Checking the Image Transfer History for a Folder or Memory CardDuring the image transfer, do not turn off the camera’s power switch. Doing so will interrupt the image transfer.¡In step 3, if you set it to the index display, three thumbnail images will be displayed. To return to the normal view, magnify the image view.¡See page 31 for “Checking the Remaining Images to be Transferred and Canceling the Image Transfer.”](https://usermanual.wiki/Canon/DS508152/User-Guide-474635-Page-33.png)
![34Image Batch Transfer After Shooting1Select [Image transfer (LAN) settings].2Select [Image sel./transfer].¡Select [All].3Select the desired option.¡You can select the images in a folder or memory card which have not been transferred or which failed the transfer.¡If your camera cannot select folders, the folder options will not appear.About [Folder…]¡You can select “images not transferred” or “images failed transfer” in the selected folder.About [Card…]¡You can select “images not transferred” or “images failed transfer” in the selected memory card.¡After selecting the desired option, press the <e> button.Transferring Images in a Batch](https://usermanual.wiki/Canon/DS508152/User-Guide-474635-Page-34.png)
![353Transferring ImagesImage Batch Transfer After Shooting4Transfer the images.¡Select [Transfer].¡During the image transfer, the <4> lamp will blink.You can use the menu even during image transfers. However, the following menu operations cannot be done during image transfers since it may interfere with the image transfer (your camera might not have all these operations):• Protect images • Rotate • Erase • Print Order • Format• Firmware • Sensor cleaning• Save camera settings • Loading camera settingMenu Operation During Image TransferDuring the image transfer, do not turn off the camera’s power switch. Doing so will interrupt the image transfer.¡See page 31 for “Checking the Remaining Images to be Transferred and Canceling the Image Transfer.”¡If you select [Clear transfer history], the status of all the images in the folder or memory card will be set to “not transferred.” Then you can resend all the images in the folder or memory card by selecting [Images not transferred].](https://usermanual.wiki/Canon/DS508152/User-Guide-474635-Page-35.png)
![36For RAW+JPEG images, you can select which image format to transfer. This option is convenient when you want to first send only the JPEG images that have a smaller file size.1Select [Image transfer (LAN) settings].2Select [RAW+JPEG transfer].3Select the desired option.Transferring RAW+JPEG Images](https://usermanual.wiki/Canon/DS508152/User-Guide-474635-Page-36.png)
![38[Image transfer (LAN) settings]/ [LAN setting]/ [Set up]/ [TCP/IP]/ [DHCPserver]: Select Use or No use.[Image transfer (LAN) settings]/ [LAN setting]/ [Set up]/ [TCP/IP]/ [IPaddress]: Enter number¡Enter the number in the same way as for the [Date/Time].[Image transfer (LAN) settings]/ [LAN setting]/ [Set up]/ [TCP/IP]/ [Subnetmask]: Enter the number.¡Enter the number in the same way as for the [Date/Time].[Image transfer (LAN) settings]/ [LAN setting]/ [Set up]/ [TCP/IP]/ [Gateway]: Enter the number.¡Enter the number in the same way as for the [Date/Time].Setting TCP/IPDHCP ServerIP AddressSubnet MaskGateway](https://usermanual.wiki/Canon/DS508152/User-Guide-474635-Page-38.png)
![394Changing the LAN Settings with the Camera[Image transfer (LAN) settings]/ [LAN setting]/ [Set up]/ [DNS server]/ [DNSserver]: Select Use or No use.[Image transfer (LAN) settings]/ [LAN setting]/ [Set up]/ [DNS server]/[Address]: Enter the number.¡Enter the number if you use a DNS server.¡Enter the number in the same way as for the [Date/Time].Setting the DNS ServerDNS ServerAddress](https://usermanual.wiki/Canon/DS508152/User-Guide-474635-Page-39.png)
![40[Server name][Image transfer (LAN) settings]/ [LAN setting]/ [Set up]/ [FTP server]/ [Targetserver]/ [Server name]: Enter server name or address.[Port No.][Image transfer (LAN) settings]/ [LAN setting]/ [Set up]/ [FTP server]/ [Targetserver]/ [Port No.]: Enter a number less than 65535.You can enter the server name using the following method.Moving the cursor:Hold down the <k> button and turn the <c> dial.Deleting a character in the entry field:Press the <d> button and the cursor will delete the character on its left.Selecting a keyboard character and entering it:Hold down the <b> button and turn the <c> dial to select a character. When you let go of the button, the character will be entered at the cursor’s position.Exiting the entry screen:Press the <e> button. The entries will be registered and the previous screen will reappear.Canceling the entry:Press the <f> button and no changes will be made to the entry. The previous screen will reappear.Setting the FTP ServerTarget ServerVirtual Keyboard OperationWith EOS-1D-Series Cameras](https://usermanual.wiki/Canon/DS508152/User-Guide-474635-Page-40.png)
![414Changing the LAN Settings with the CameraSetting the FTP ServerSwitching between the entry field and keyboard:Press the <h> button to switch between the entry field and keyboard.Moving the cursor in the entry field:Turn the <c> dial.Deleting a character in the entry field:Press the <d> button and the cursor will delete the character on its left.Selecting a keyboard character and entering it:Turn the <c> dial to select a character. Press the <g> button to enter the character at the cursor’s position.Exiting the entry screen:Press the <e> button. The entries will be registered and the previous screen will reappear.Canceling the entry:Press the <i> button and no changes will be made to the entry. The previous screen will reappear.[Image transfer (LAN) settings]/ [LAN setting]/ [Set up]/ [FTP server]/ [Loginname]: Enter your login name.[Image transfer (LAN) settings]/ [LAN setting]/ [Set up]/ [FTP server]/ [Loginpassword]: Enter your login password.[Image transfer (LAN) settings]/ [LAN setting]/ [Set up]/ [FTP server]/ [Targetfolder]: Enter the save folder.With Cameras Other than EOS-1D-SeriesLogin nameLogin passwordTarget folder](https://usermanual.wiki/Canon/DS508152/User-Guide-474635-Page-41.png)
![42Setting the FTP Server[Image transfer (LAN) settings]/ [LAN setting]/ [Set up]/ [FTP server]/[Passive mode]: Select Use or No use.[Proxy][Image transfer (LAN) settings]/ [LAN setting]/ [Set up]/ [FTP server]/ [Proxy]/ [Proxy]: Select Use or No use.[Address][Image transfer (LAN) settings]/ [LAN setting]/ [Set up]/ [FTP server]/ [Proxy]/ [Address]: Enter number¡Enter the number in the same way as for the [Date/Time].[Port No.][Image transfer (LAN) settings]/ [LAN setting]/ [Set up]/ [FTP server]/ [Proxy]/ [Port No.]: Enter a number less than 65535.[Image transfer (LAN) settings]/ [LAN setting]/ [Set up]/ [FTP server]/[Overwrite same file]: Select Yes or No.Passive ModeProxyOverwrite Same File](https://usermanual.wiki/Canon/DS508152/User-Guide-474635-Page-42.png)
![434Changing the LAN Settings with the Camera[Image transfer (LAN) settings]/ [LAN setting]/ [Set up]/ [Wireless LAN]/[SSID]: Enter the SSID.You can set the connection method, authentication method, encryption, etc.[Image transfer (LAN) settings]/ [LAN setting]/ [Set up]/ [Wireless LAN]/[Advanced settings]: If you enter the settings for the wireless LAN access point (or wireless LAN adapter), the following screens will be displayed automatically.The settings which can be set will vary automatically depending on the configuration.[Image transfer (LAN) settings]/ [LAN setting]/ [Set up]/ [Wireless LAN]/[MAC address]: The MAC address will be displayedSetting Wireless LANSSIDAdvanced settingsMAC Address](https://usermanual.wiki/Canon/DS508152/User-Guide-474635-Page-43.png)
![44[Image transfer (LAN) settings]/ [LAN setting]/ [Set up]/ [Protect settings]: Select On or Off.¡Select [On] to prevent the LAN settings from being modified inadvertantly.¡Select [Off] if you want to change the LAN settings with the camera.[Image transfer (LAN) settings]/ [LAN setting]/ [Set up]/ [Save settings]/[OK]: The settings will be saved in the memory card.Protecting and Saving the SettingsProtect SettingsSave Settings](https://usermanual.wiki/Canon/DS508152/User-Guide-474635-Page-44.png)
![475ReferenceTroubleshooting Guide¡The WFT-E1A is not connected to the camera and both are not turned on.aThe LAN menu options will appear only if the WFT-E1A is connected to the camera and both are turned on (p.23).¡You selected an interface language not compatible with LAN menus.aEnglish will be displayed for languages not compatible with the LAN menus (p.25).¡The WFT-E1A is not securely connected to the camera.aCheck whether the cable is securely connected to the WFT-E1A and camera (p.22).¡The WFT-E1A is connected to the EOS-1D-series camera with a USB cable.aTo connect an EOS-1D-series to the WFT-E1A (p.22), use an IEEE 1394 cable.¡The correct [LAN type] setting (wireless LAN/wired LAN) in the menu has not been selected.aSet the correct LAN type (p.25).¡You are trying to connect to the IEEE 802.11g wireless LAN access point via ad hoc.aFor the wireless LAN setting, set it to infrastructure instead (p.12).Menu FunctionsLAN menu options do not appear.LAN menu options are in English.LAN FunctionsThe <3> lamp blinks and images cannot be transferred.Although there is no <E> displayed, images cannot be transferred.](https://usermanual.wiki/Canon/DS508152/User-Guide-474635-Page-47.png)