Capital Prospect SA001 WIRELESS SIREN User Manual SA 103 manual
Capital Prospect Ltd WIRELESS SIREN SA 103 manual
UserManual.wiki
>
Capital Prospect
>
SA001 User Manual
User manual
Navigation menu
Upload a User Manual
Namespaces
Wiki Guide
HTML
PDF
Info
Views
User Manual
Discussion / Help
Navigation

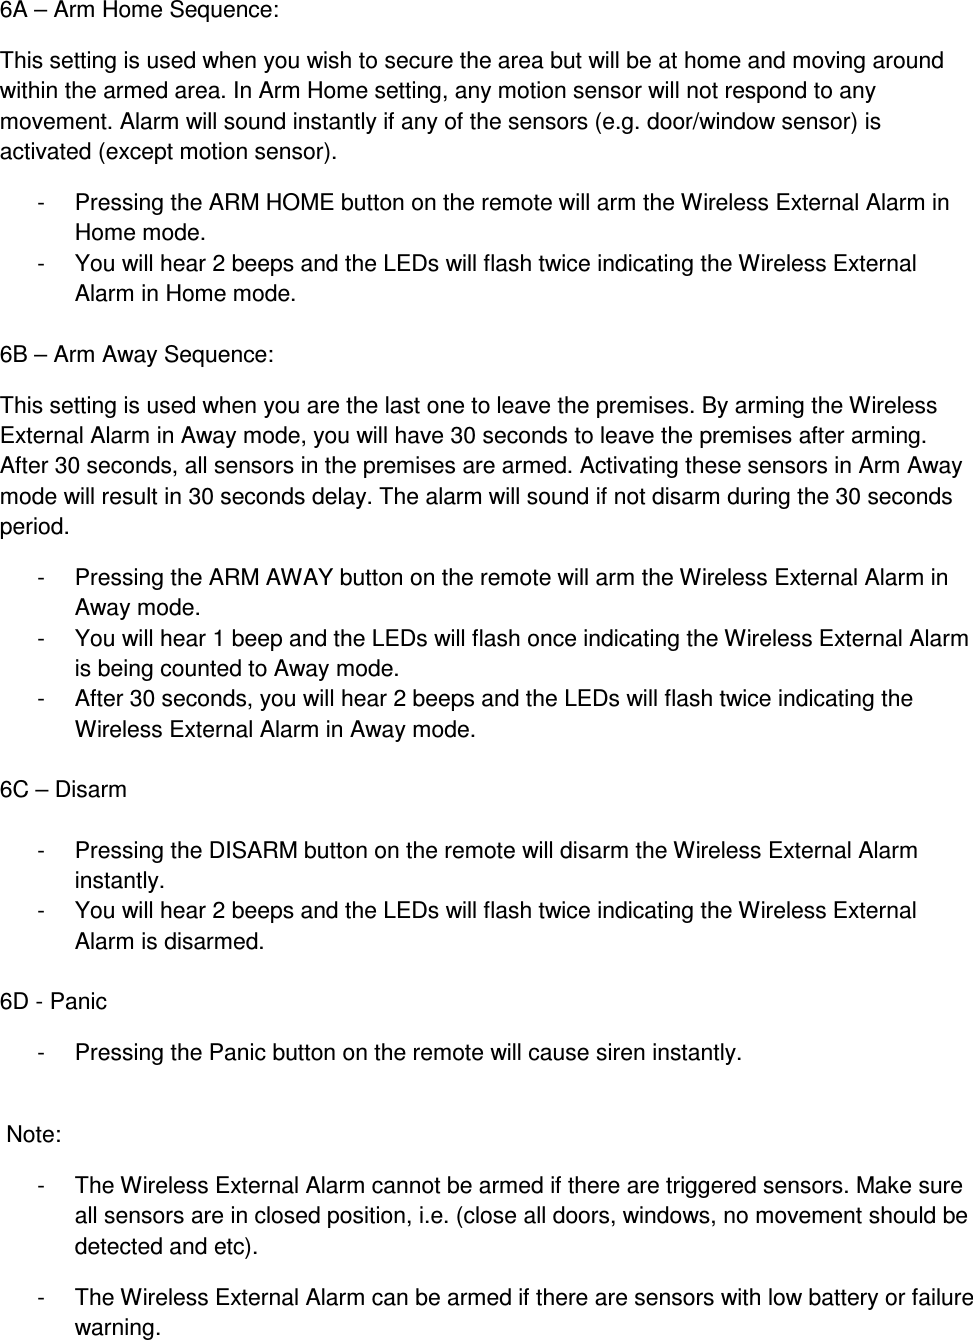
![- During the Arm Away mode, you will have 30 seconds to leave the premises, this is called the exit delay. When the exit delay expires, the Wireless External Alarm is armed. - If a sensor is triggered while the Wireless External Alarm is armed, such as entering the premises, an entry delay will be triggered. User is allowed to disarm the Wireless External Alarm during the 30 seconds entry delay. You will hear beeping every 5 seconds during the entry delay interval. The beeping rate will change from slow to fast in last few seconds. If the Wireless External Alarm is not disarmed within 30 seconds, alarm will sound immediately. 7. Operating the Skylink Security Control Panel The Wireless External Alarm is designed to work with the Skylink security control panel such as AM-001, ML-001 and SC-001. Put the control panel that you plan to program into programming mode. Refer to the User’s Instructions of that control panel. 7A – Learn control panel AM-001 or ML-001 to the Wireless External Alarm: - Press and hold the Learn button on the Wireless External Alarm for 2 seconds and then release. The Learn/Set LED will flash. - Activate the control panel AM-001 or ML-001 by pressing [ARM] and then enter your current Master PIN (MPIN) [factory default 1 2 3 4]. - You will hear 2 beeps and the LEDs will flash twice indicating the control panel is now programmed to the Wireless External Alarm. 7B – Learn control panel SC-001 to the Wireless External Alarm: - Press and hold the Learn button on the Wireless External Alarm for 2 seconds and then release. The Learn/Set LED will flash. - Activate the control panel SC-001 by entering your current Master PIN (MPIN) [factory default 0 0 0], then enter [B], [B]. - You will hear 2 beeps and the LEDs will flash twice indicating the control panel is now programmed to the Wireless External Alarm.](https://usermanual.wiki/Capital-Prospect/SA001/User-Guide-1799434-Page-6.png)