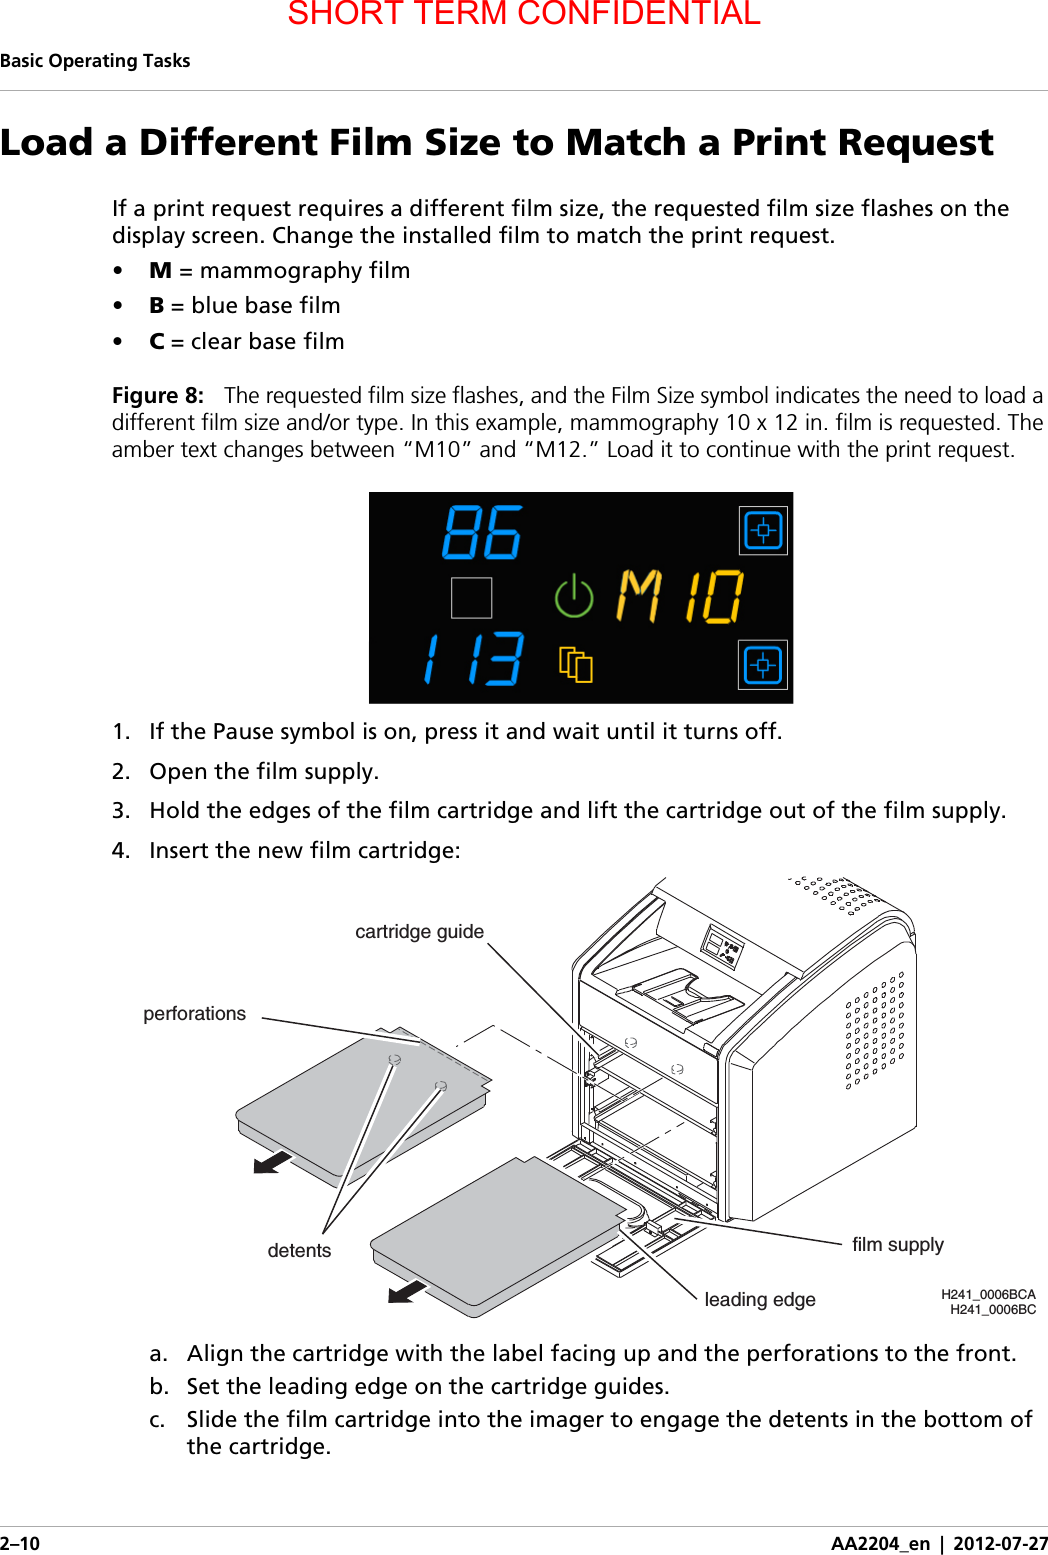
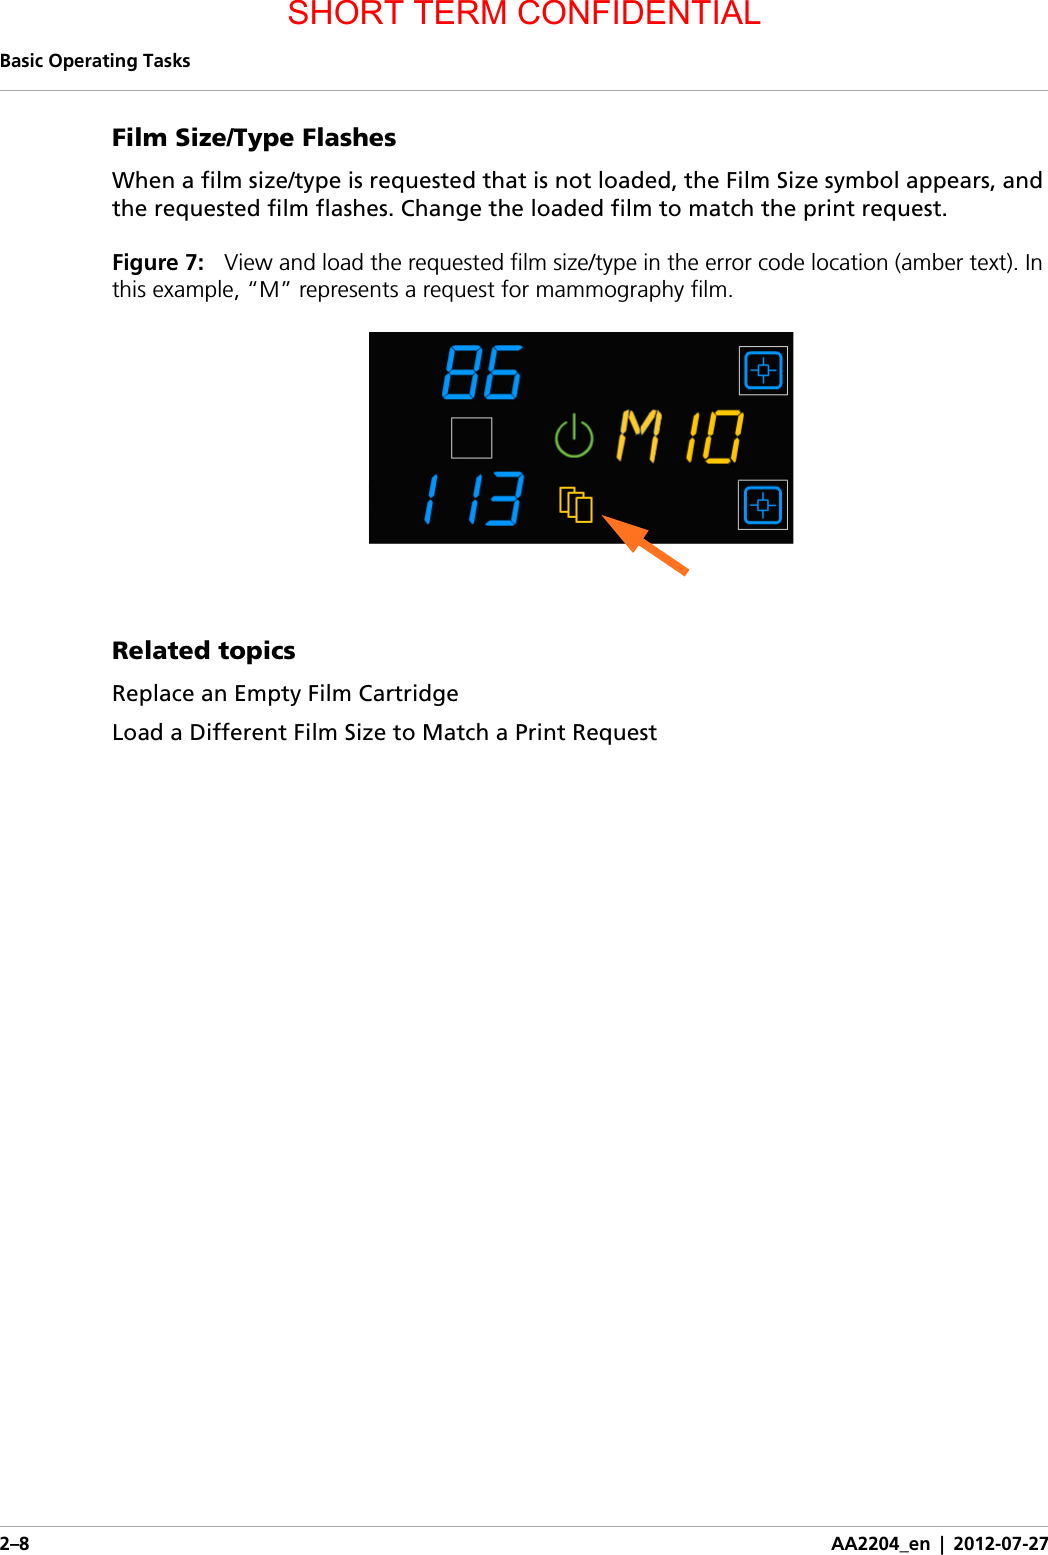
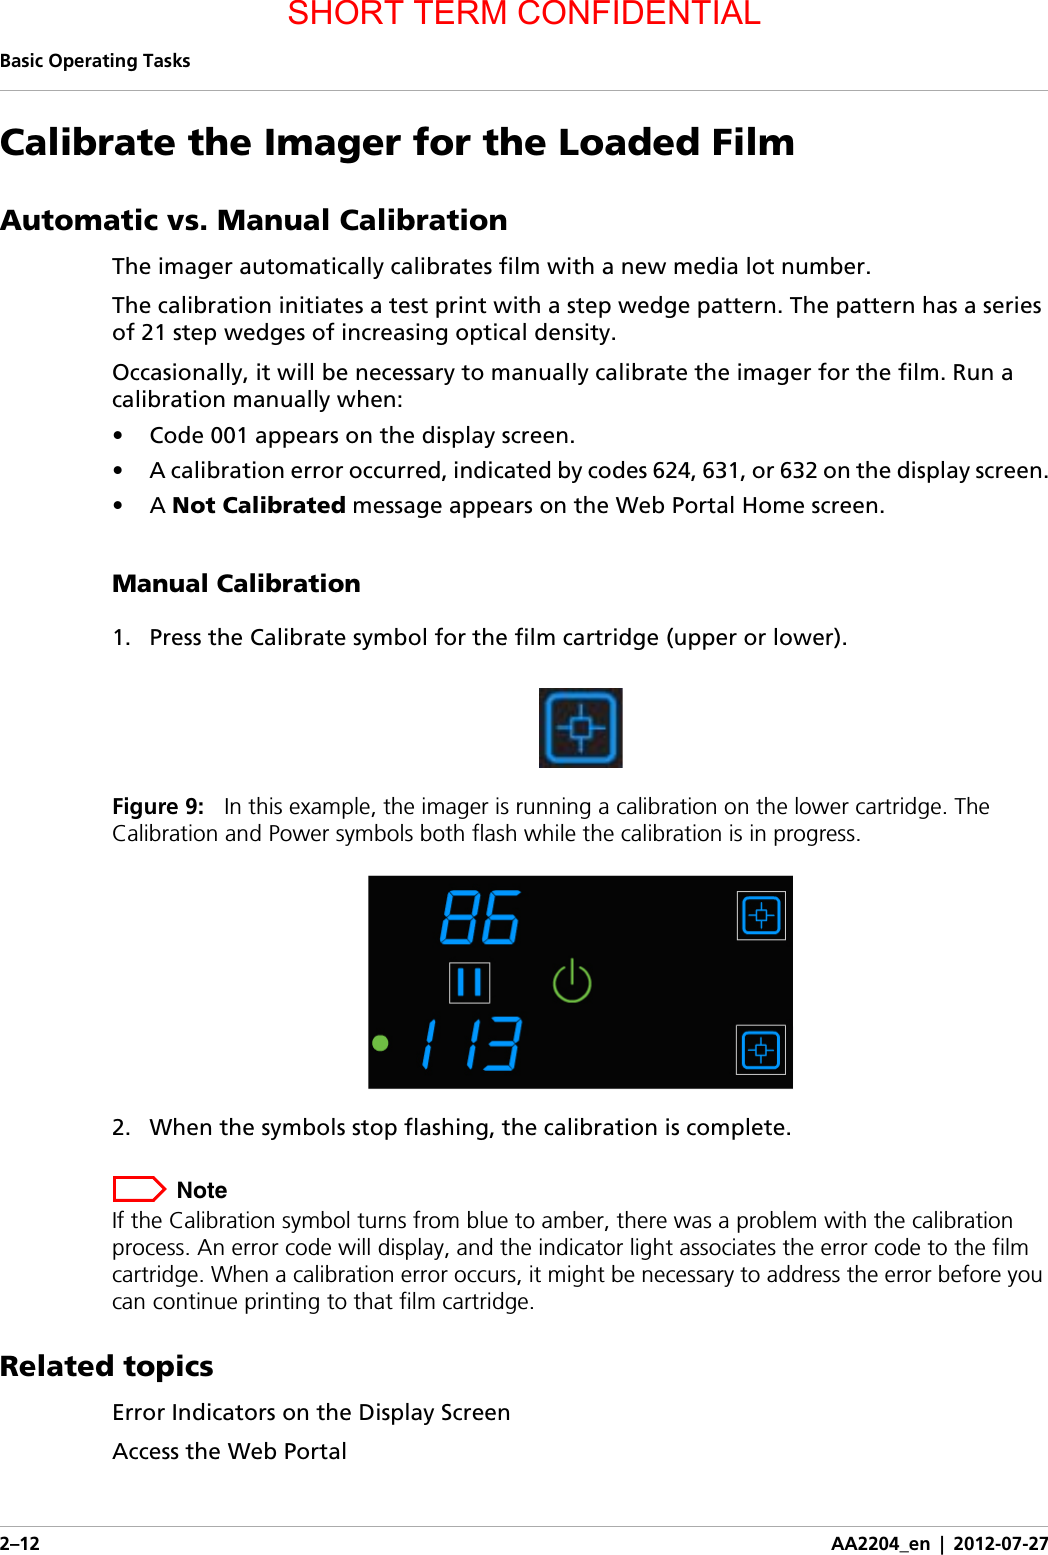
Carestream Health 5950 Film Printer for Medical Images using 13.56 MHz Transmitter RFID User Manual 5950 user
Carestream Health, Inc. Film Printer for Medical Images using 13.56 MHz Transmitter RFID 5950 user
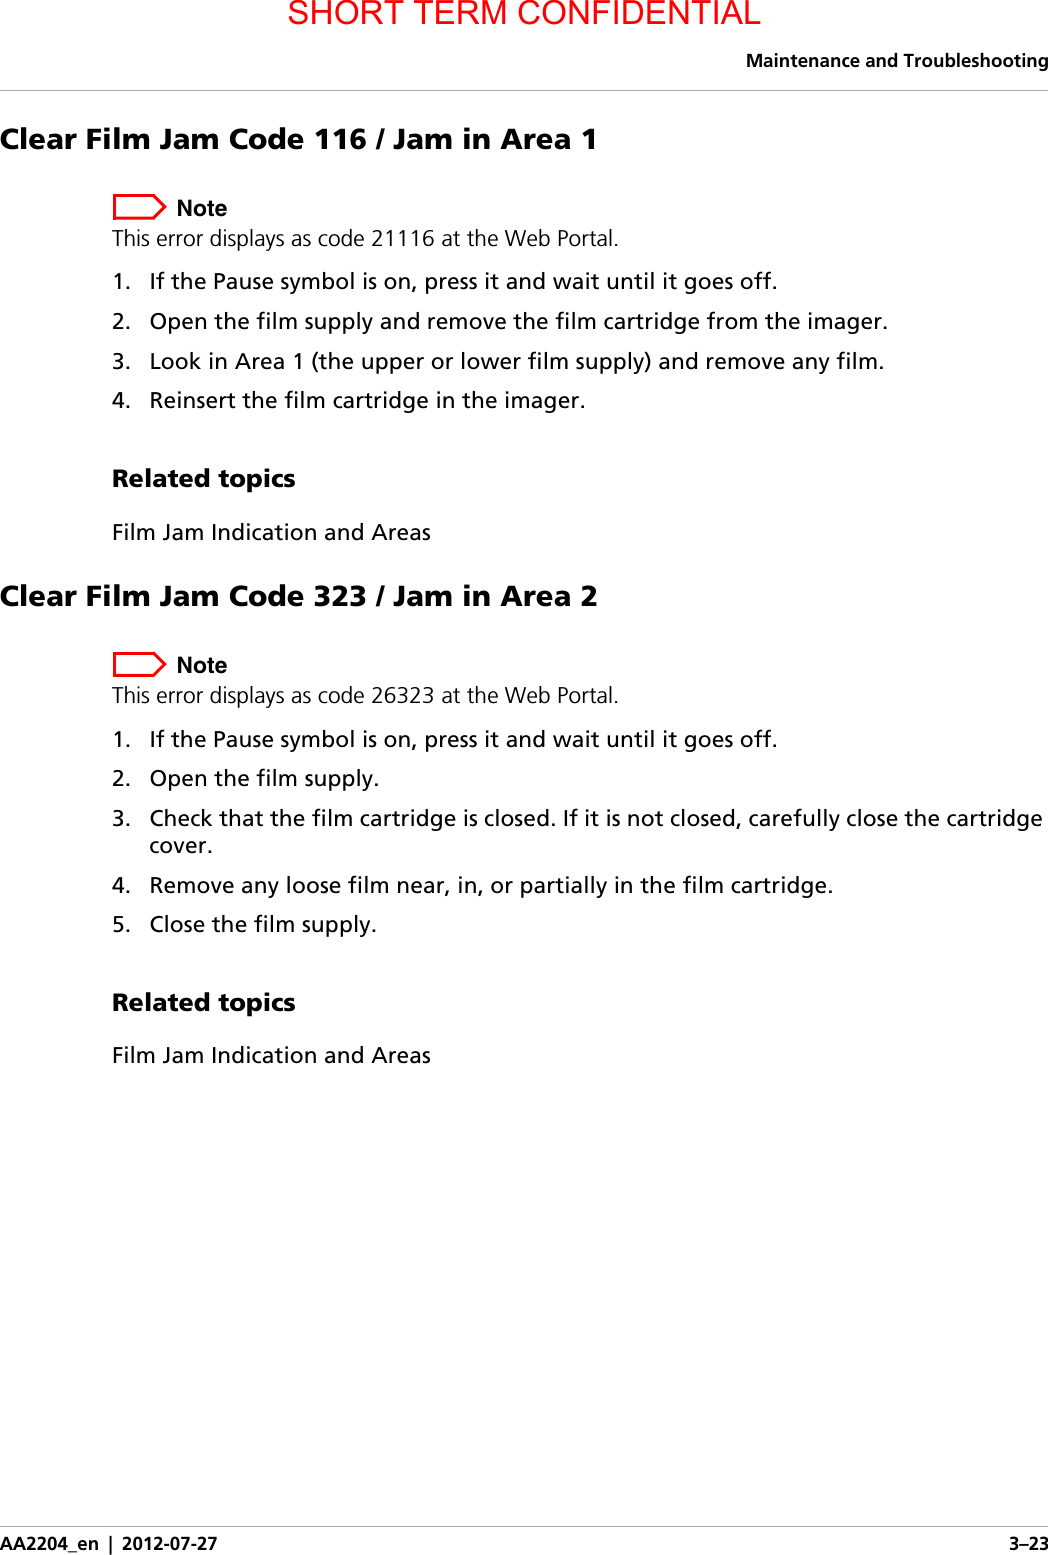
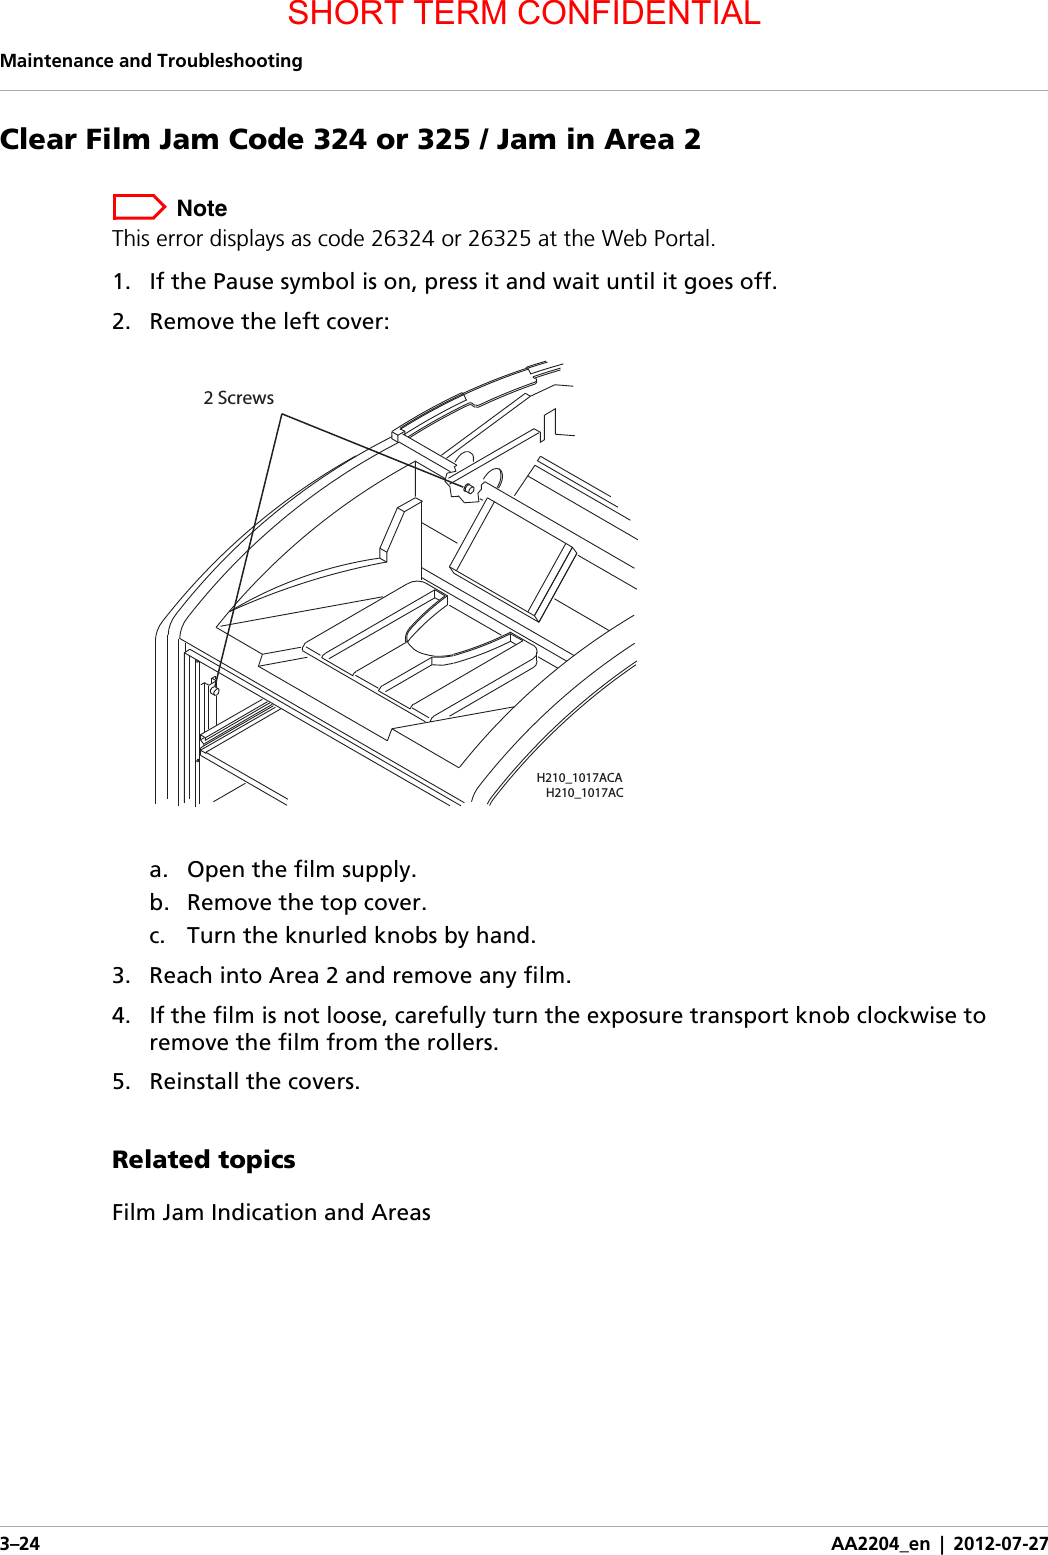
Contents
- 1. User Manual
- 2. User Manual II
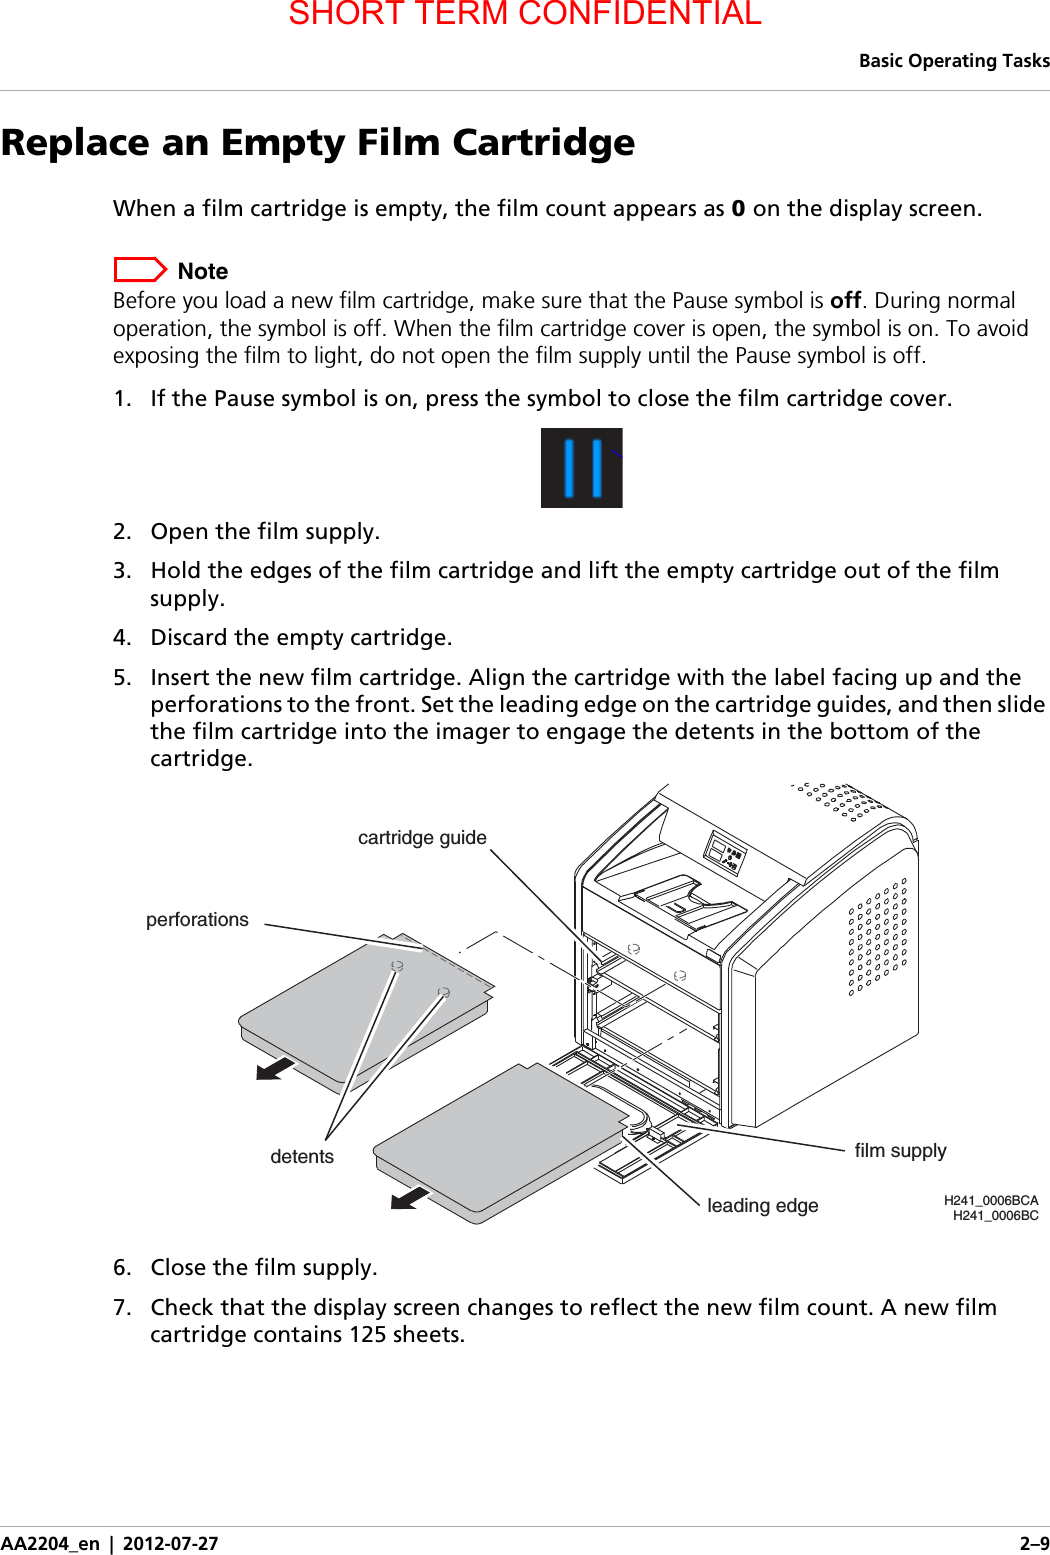
User Manual