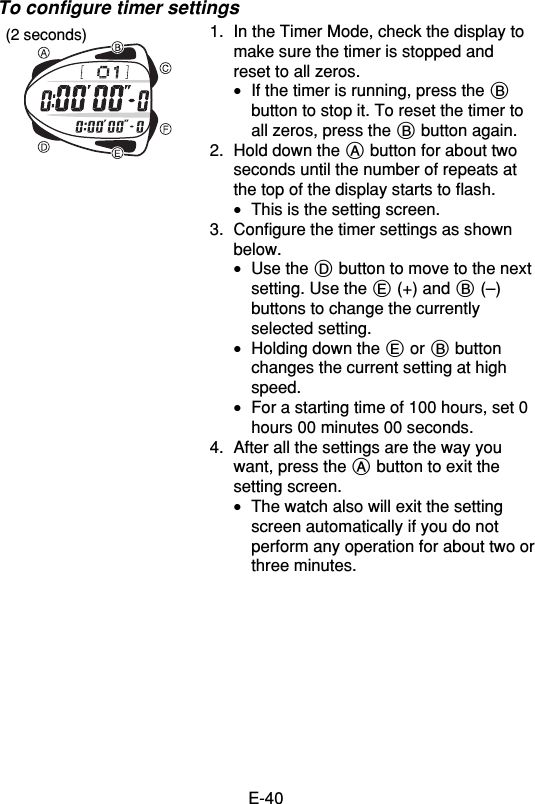
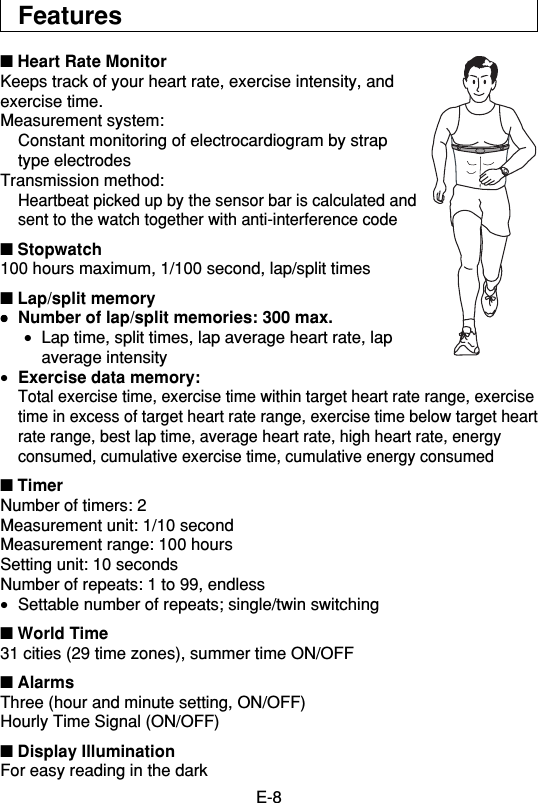
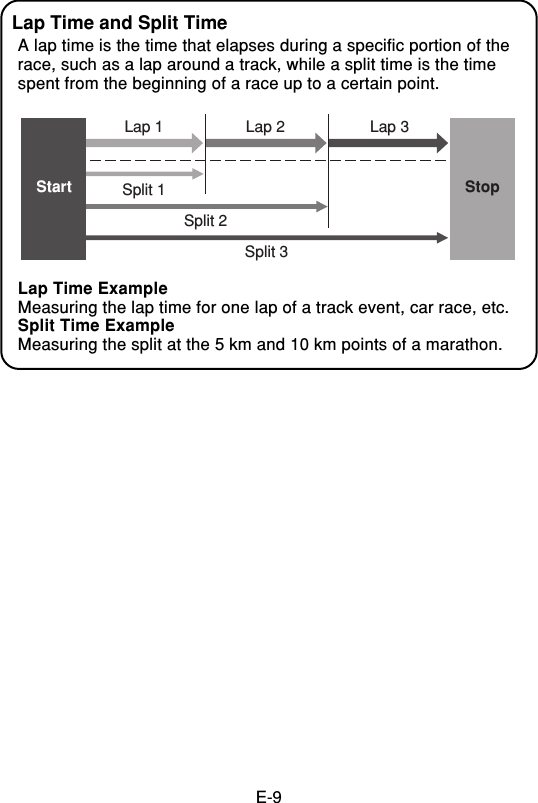
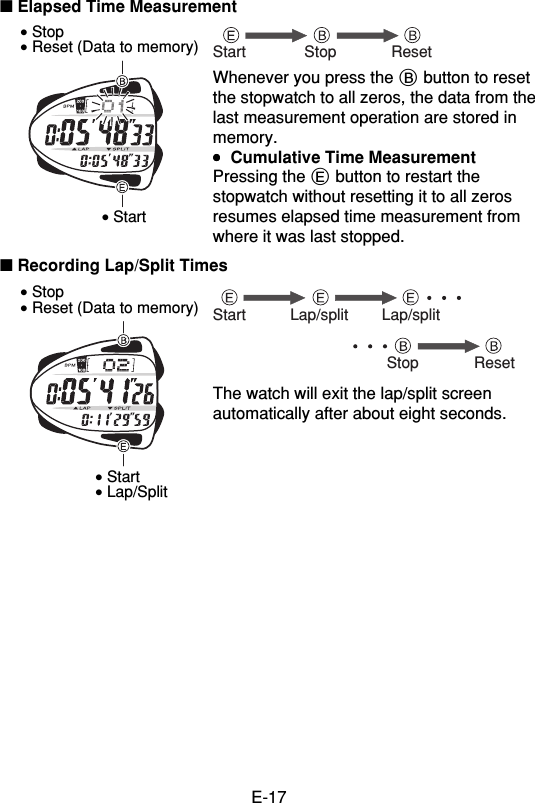
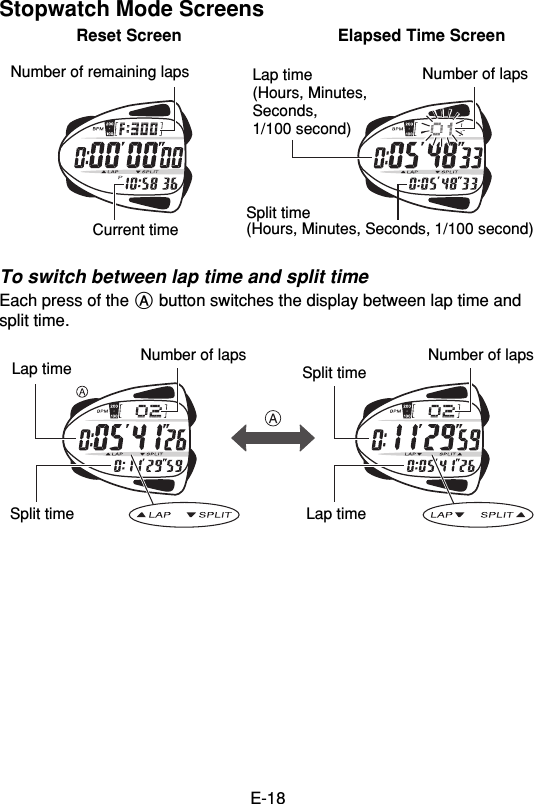
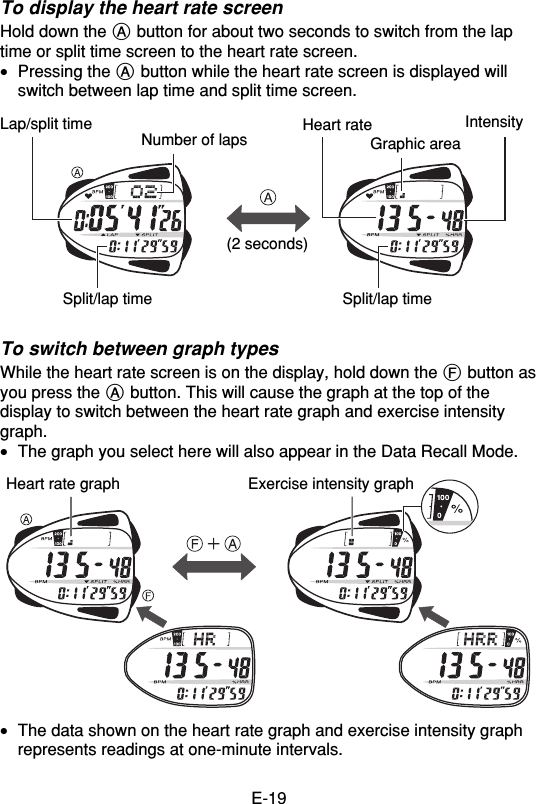
Casio Computer HRM-1 Heart Rate Transmitter User Manual 2981 E 002
Casio Computer Co Ltd Heart Rate Transmitter 2981 E 002
UserManual.wiki
>
Casio Computer
>
HRM 1 User Manual
Users Manual
Navigation menu
Upload a User Manual
Namespaces
Wiki Guide
HTML
PDF
Info
Views
User Manual
Discussion / Help
Navigation
![EUHiermit erklärt [CASIO Europe GmbH, Bornbarch 10,22848 Norderstedt, Germany], dass sich das Gerät [Heartrate monitor Model CHR-200 and CHR-200WC with theexclusive accessories, Chest strap CBD-2C] inÜbereinstimmung mit den grundlegenden Anforderungenund den übrigen einschlägigen Bestimmungen derRichtlinie 1999/5/EG befindet.Hereby, CASIO Europe GmbH, Bornbarch 10, 22848Norderstedt, Germany, declares that this Heart ratemonitor Model CHR-200 and CHR-200WC with theexclusive accessories, Chest strap CBD-2C] is incompliance with the essential requirements and otherrelevant provisions of Directive 1999/5/EC.Por medio de la presente [CASIO Europe GmbH,Bornbarch 10, 22848 Norderstedt, Germany] declara queel [Heart rate monitor Model CHR-200 and CHR-200WCwith the exclusive accessories, Chest strap CBD-2C]cumple con los requisitos esenciales y cualesquiera otrasdisposiciones aplicables o exigibles de la Directiva 1999/5/CE.Par la présente [CASIO Europe GmbH, Bornbarch 10,22848 Norderstedt, Germany] déclare que l’appareil[Heart rate monitor Model CHR-200 and CHR-200WCwith the exclusive accessories, Chest strap CBD-2C] estconforme aux exigences essentielles et aux autresdispositions pertinentes de la directive 1999/5/CE.Con la presente [CASIO Europe GmbH, Bornbarch 10,22848 Norderstedt, Germany] dichiara che questo [Heartrate monitor Model CHR-200 and CHR-200WC with theexclusive accessories, Chest strap CBD-2C] è conformeai requisiti essenziali ed alle altre disposizioni pertinentistabilite dalla direttiva 1999/5/CE.[CASIO Europe GmbH, Bornbarch 10, 22848Norderstedt, Germany] declara que este [Heart ratemonitor Model CHR-200 and CHR-200WC with theexclusive accessories, Chest strap CBD-2C] estáconforme com os requisitos essenciais e outrasdisposições da Directiva 1999/5/CE.Deutsch[German]EnglishEspañol[Spanish]Français[French]Italiano[Italian]Português[Portuguese] de en esfritpt他言語翻訳はまだ入っていません。伊訳者よりthis Heart rate monitor,exclusive accessories,Chest strapが主語なら、isではなく、are?](https://usermanual.wiki/Casio-Computer/HRM-1/User-Guide-571624-Page-2.png)


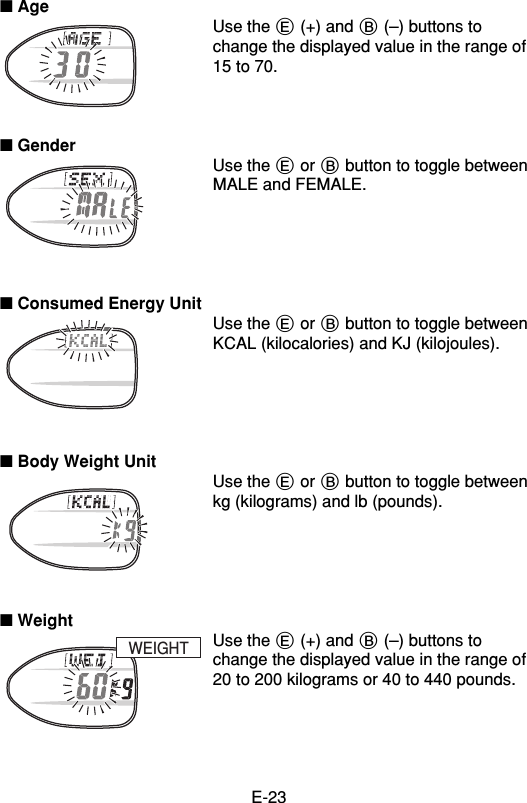
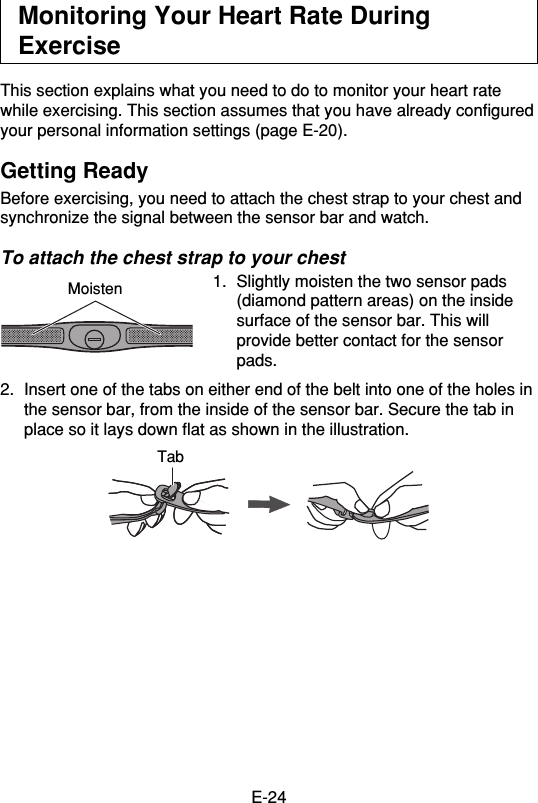
![E-22Personal Information Settings■ Target Alarm On/OffPress the E button to toggle the targetalarm on and off.•When turned on, the target alarm willsound whenever your heart rate goesoutside of the target range you set. Thetarget alarm will also sound every minuteif your heart rate remains outside of thetarget range.■ Target Range Upper LimitUse the E (+) and B (–) buttons tochange the displayed value in the range of1 to 220.■ Target Range Lower LimitUse the E (+) and B (–) buttons tochange the displayed value in the range of[resting heart rate setting plus 1] to [targetrange upper limit minus 1].■ Resting Heart RateUse the E (+) and B (–) buttons tochange the displayed value in the range of30 to [target range lower limit minus 1] (145maximum).•Measure your heart rate before gettingup when you awake in the morning. Thisis your resting heart rate.REST-HRLIMIT LOWLIMIT HIGHTARGET](https://usermanual.wiki/Casio-Computer/HRM-1/User-Guide-571624-Page-26.png)