CastleNet Technology WM1260 Wireless 802.11g MiniPCI Card User Manual WM1260 Installation Manual
CastleNet Technology Inc. Wireless 802.11g MiniPCI Card WM1260 Installation Manual
Manual
Wireless 802.11g MiniPCI Card
WM1260
OEM Installation Manual
(The module is sold only to the OEM integrators & the
manual is valid only for the OEM manufactures)
Version: 1.0
December, 2004
Federal Communication Commission Interference Statement
This equipment has been tested and found to comply with the limits for a Class B digital
device, pursuant to Part 15 of the FCC Rules. These limits are designed to provide
reasonable protection against harmful interference in a residential installation. This
equipment generates, uses and can radiate radio frequency energy and, if not installed and
used in accordance with the instructions, may cause harmful interference to radio
communications. However, there is no guarantee that interference will not occur in a
particular installation. If this equipment does cause harmful interference to radio or
television reception, which can be determined by turning the equipment off and on, the
user is encouraged to try to correct the interference by one of the following measures:
- Reorient or relocate the receiving antenna.
- Increase the separation between the equipment and receiver.
- Connect the equipment into an outlet on a circuit different from that to which the receiver
is connected.
- Consult the dealer or an experienced radio/TV technician for help.
FCC Caution: To assure continued compliance, (example - use only shielded interface
cables when connecting to computer or peripheral devices) any changes or modifications
not expressly approved by the party responsible for compliance could void the user's
authority to operate this equipment.
This device complies with Part 15 of the FCC Rules. Operation is subject to the following
two conditions:
(1) This device may not cause harmful interference, and
(2) This device must accept any interference received, including interference that may
cause undesired operation.
IMPORTANT NOTE:
This module is restricted to mobile configuration. To comply with FCC RF exposure
compliance requirements, the antenna used for this transmitter must be installed to provide
a separation distance of at least 20 cm from all persons and must not be co-located or
operating in conjunction with any other antenna or transmitter. This transmitter module
must not be co-located or operating in conjunction with any other antenna or transmitter
*Caution !!
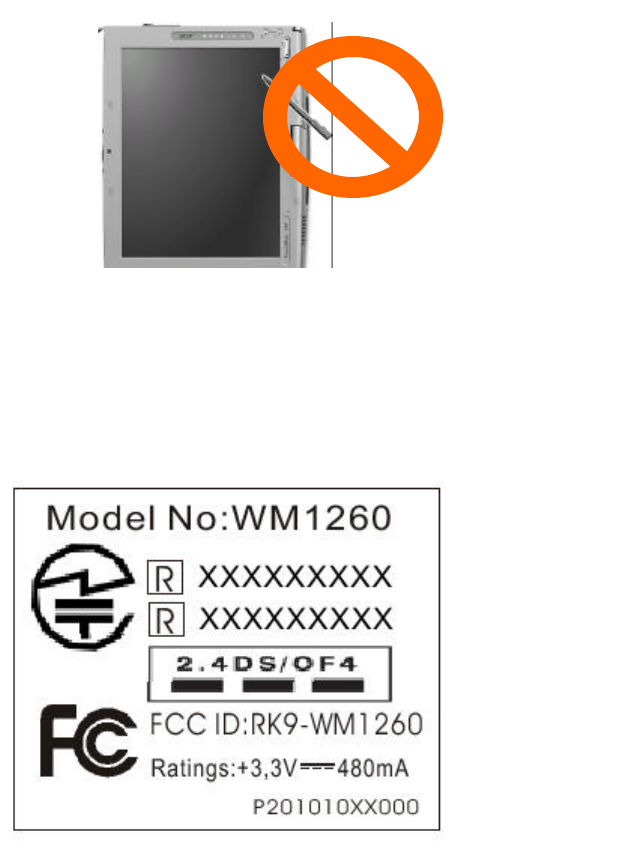
(1). This module cannot be bound in a tablet
computer for RF exposure issues. (See Label 1)
(2). This module must be labeled with FCC ID. (See
Label 2)
Label 2
Label 1

(3). If the FCC ID is not visible when the module is
installed inside another device, then the
outside of device must also display a label
referring to the enclosed module. The exterior
label can be “ Contains Transmitter Module
FCC ID:RK9-WM1260 ” or similar wording. (See
label 3)
Contains Transmitter WM1260
FCC ID: RK9-WM1260
Label 3
Please put Label 3 to the enclosure of end product to note
the end user.
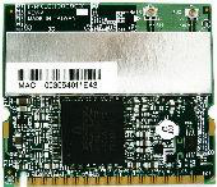
Wireless 802.11g MiniPCI Card
WM1260
Installation Manual
System Requirements
Software (supports the following operating systems):
o Windows XP
o Windows XP SP1
o Windows 2000
o Windows ME
o Windows 98SE
Hardware:
o Minimum configuration: Pentium 300 MHz, 128 MB RAM
Hardware Installation
For Window XP and Window 2000
Follow the steps below to install the WM1260 in your computer first.
1. Turn off the notebook PC.
2. Find the MiniPCI slot and open the cover.
3. Insert the WM1260 into the MiniPCI slot. Make sure the WM1260 contacts are fully seated in
the MiniPCI slot.
4. Attach the antenna to the WM1260.
5. Cap the cover and power on the notebook PC.
For Window ME and Window 98
WARNING : Setup must be run before the hardware is inserted into the system.
Software and Driver Installation
Follow the steps for the appropriate version of Windows to install the Wireless 802.11g MiniPCI
Card driver.
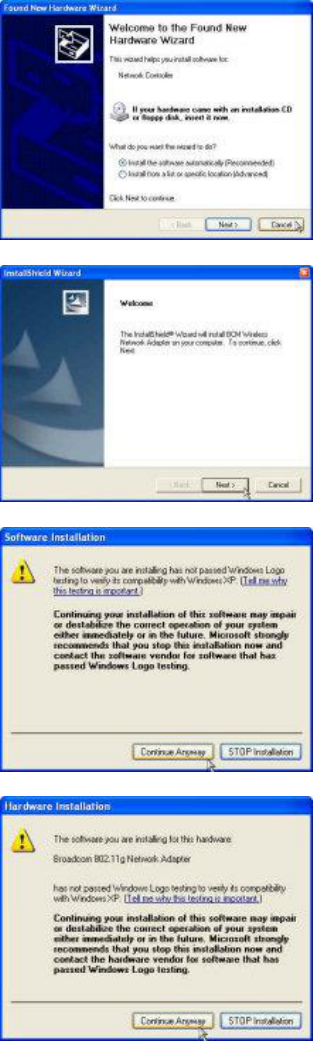
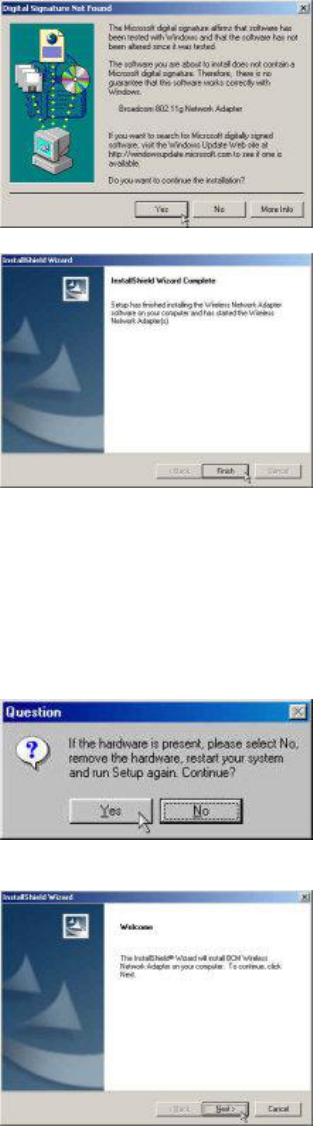
Windows XP
1. When Windows automatically detects the
Network Controller, click Cancel.
2. Insert the Driver CD into your CD-ROM
drive.
3. Execute the setup.exe and then click
Next.
4. When system appear the warning message,
click Continue Anyway.
5. When system find the Broadcom 802.11g
Network Adaptor, Click Continue
Anyway.
6. Click Finish and reboot the system.
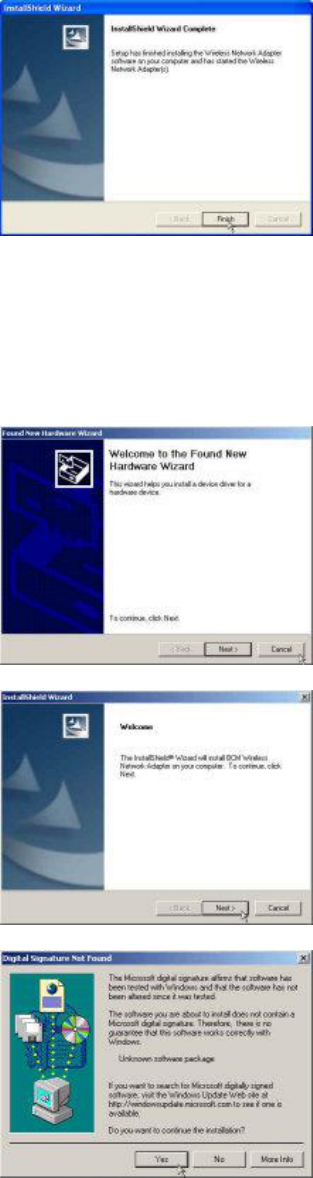
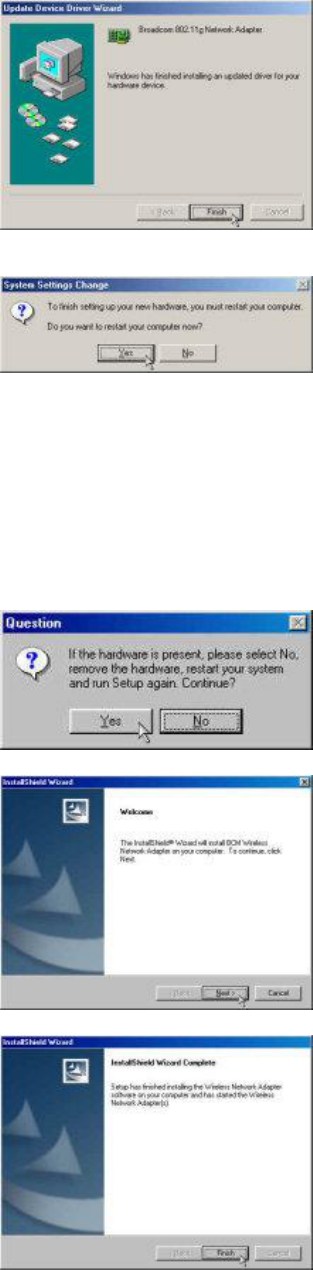
Windows 2000
1. When Windows automatically detects the
New Hardware, click Cancel.
2. Insert the Driver CD into your CD-ROM
drive.
3. Execute the setup.exe and then click Next
4. When system appear the warning message,
click Yes.
5. When system find the Broadcom 802.11g
Network Adaptor, Click Yes
6. Click Finish and reboot the system.
Windows ME
WARNING : Setup must be run before the hardware is inserted into the system.
1. Insert the Driver CD into your CD-ROM
drive.
2. Execute the setup.exe and then click Yes.
3. Click Next to continue the setup.
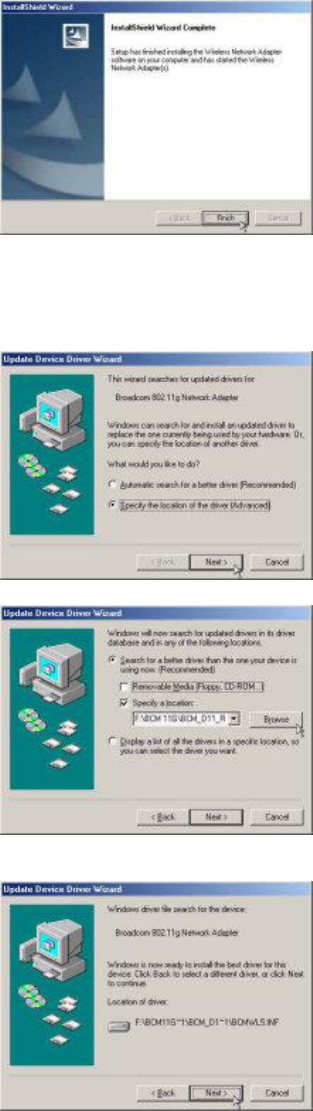
4. Click Finish and shutdown the computer
when prompted.
Notice : Insert the WM1260 when System is shutdown. After the hardware installed, power
on the notebook.
5. When system find the Broadcom 802.11g
Network Adaptor, Choose the Specify the
location of the driver (Advance) and
then Click Next.
6. Click Browse and find the driver
BCMWL5.inf location then click Next
7. Click Next to continue the setup.
8. Click Finish.
9. Click Yes and reboot the system
Windows 98
WARNING : Setup must be run before the hardware is inserted into the system.
1. Insert the Driver CD into your CD-ROM
drive.
2. Execute the setup.exe and then click Yes.
3. Click Next to continue the setup.
4. Click Finish and shutdown the computer
when prompted.
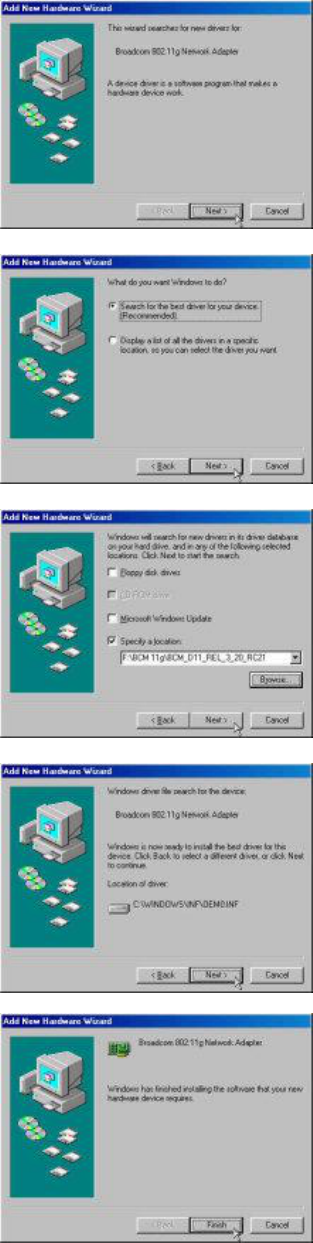
Notice : Insert the WM1260 when System is shutdown. After the hardware installed, power
on the notebook.
5. Click Next to continue the setup.
6. Click Next to continue the setup.
7. Click Specify a location
8. Click Browse and find the driver
BCMWL5.inf location then click Next
9. Click Next to continue the setup.
10. Click Yes and reboot the system
Configuration
Follow the steps for the appropriate version of Windows to configure the Wireless 802.11g
MiniPCI Card.
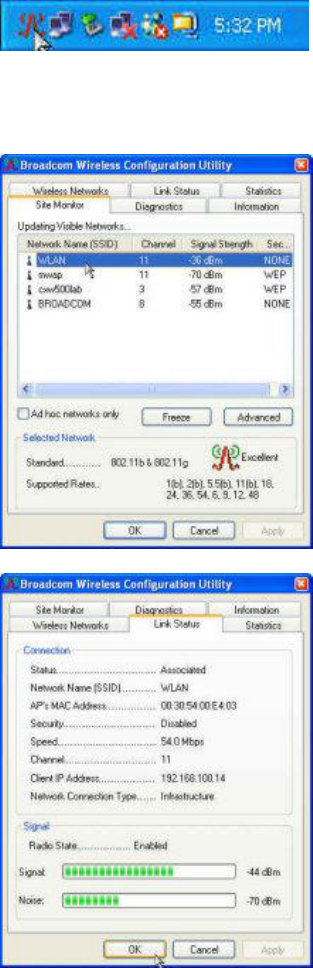
Windows XP
1. Right-click on the Broadcom Wireless
Configuration Utility icon in the
Windows XP system tray and select Open
Utility to open the utility options.
2. Select the Site Monitor tab and select the
Network you want to use.
3. Select the Advanced tab if need configure
more.
4. Double Click the Network name and then
connect the Network.
5. Select the Link Status tab and you can
check the link status.
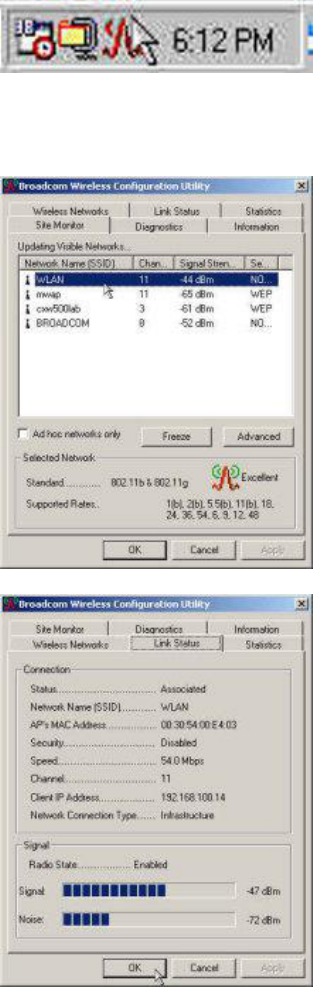
Windows 2000/ME/98
1. Right-click on the Broadcom Wireless
Configuration Utility icon in the
Windows XP system tray and select Open
Utility to open the utility options.
2. Select the Site Monitor tab and select the
Network you want to use.
3. Select the Advanced tab if need configure
more.
4. Double Click the Network name and then
connect the Network.
5. Select the Link Status tab and you can
check the link status.