Cernium AF3001000 Outdoor Low-Light Wireless Camera & Recording System User Manual CERTIFICATE OF COMPLIANCE
Cernium Corporation Outdoor Low-Light Wireless Camera & Recording System CERTIFICATE OF COMPLIANCE
UserManual.wiki
>
Cernium
>
AF3001000 User Manual
User Manual
Navigation menu
Upload a User Manual
Namespaces
Wiki Guide
HTML
PDF
Info
Views
User Manual
Discussion / Help
Navigation


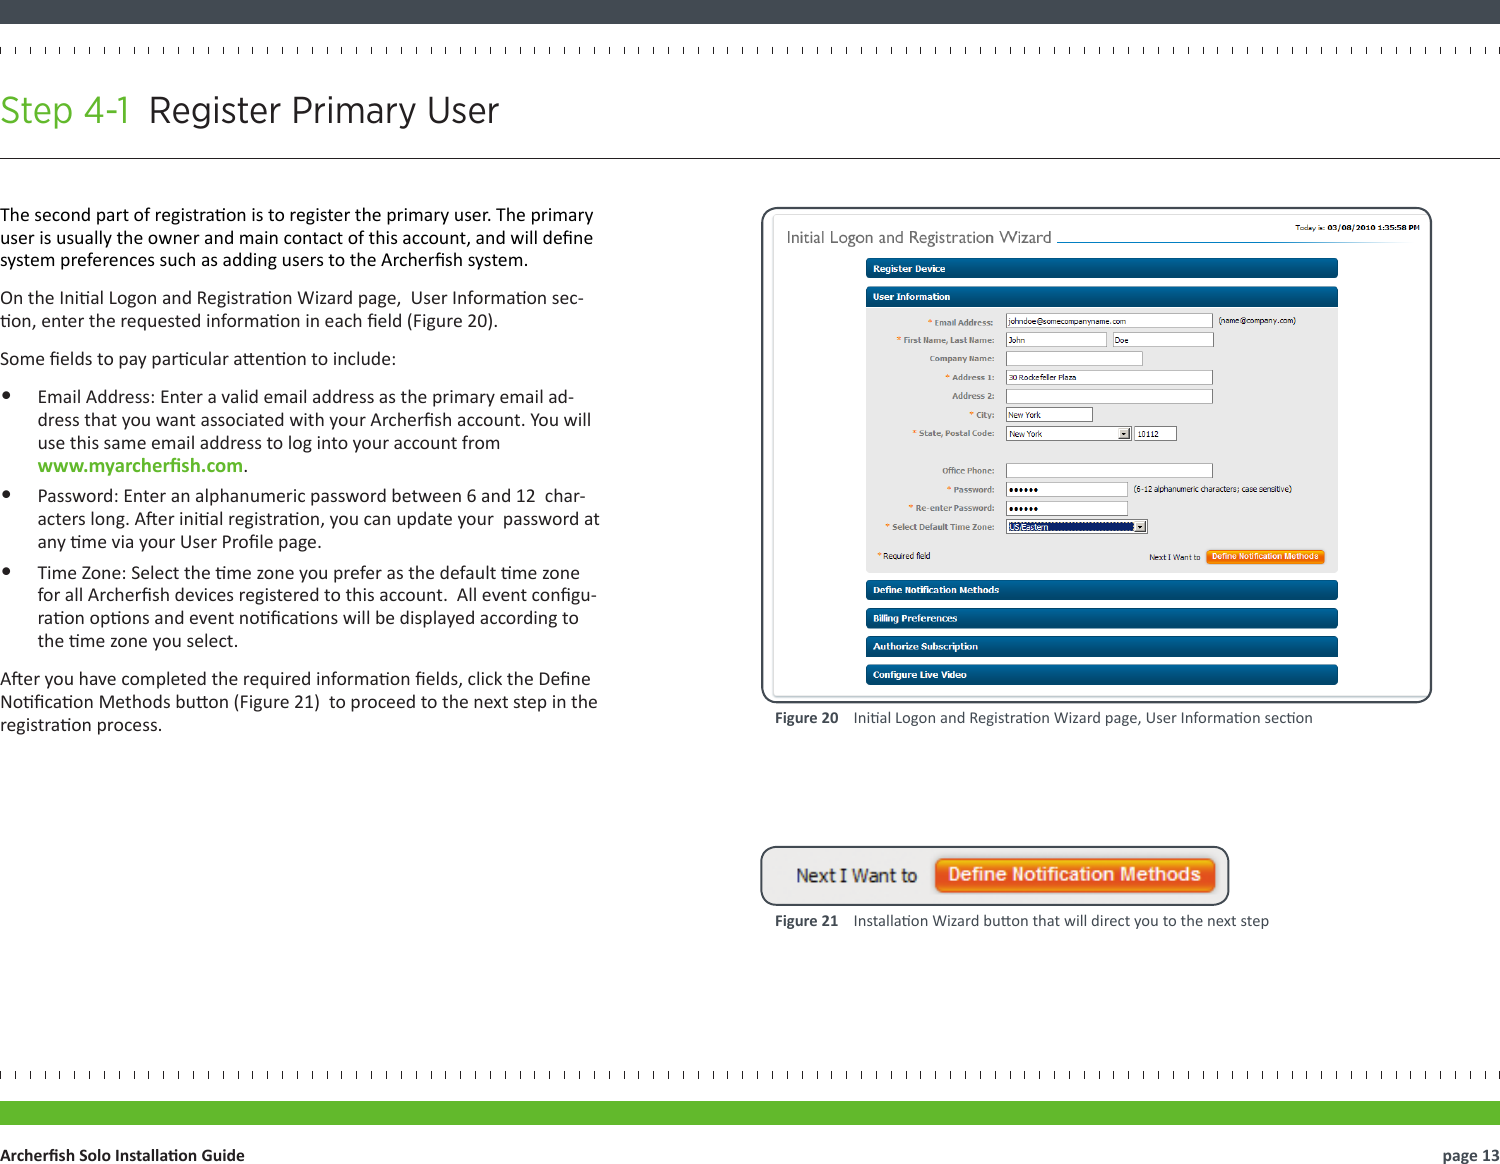
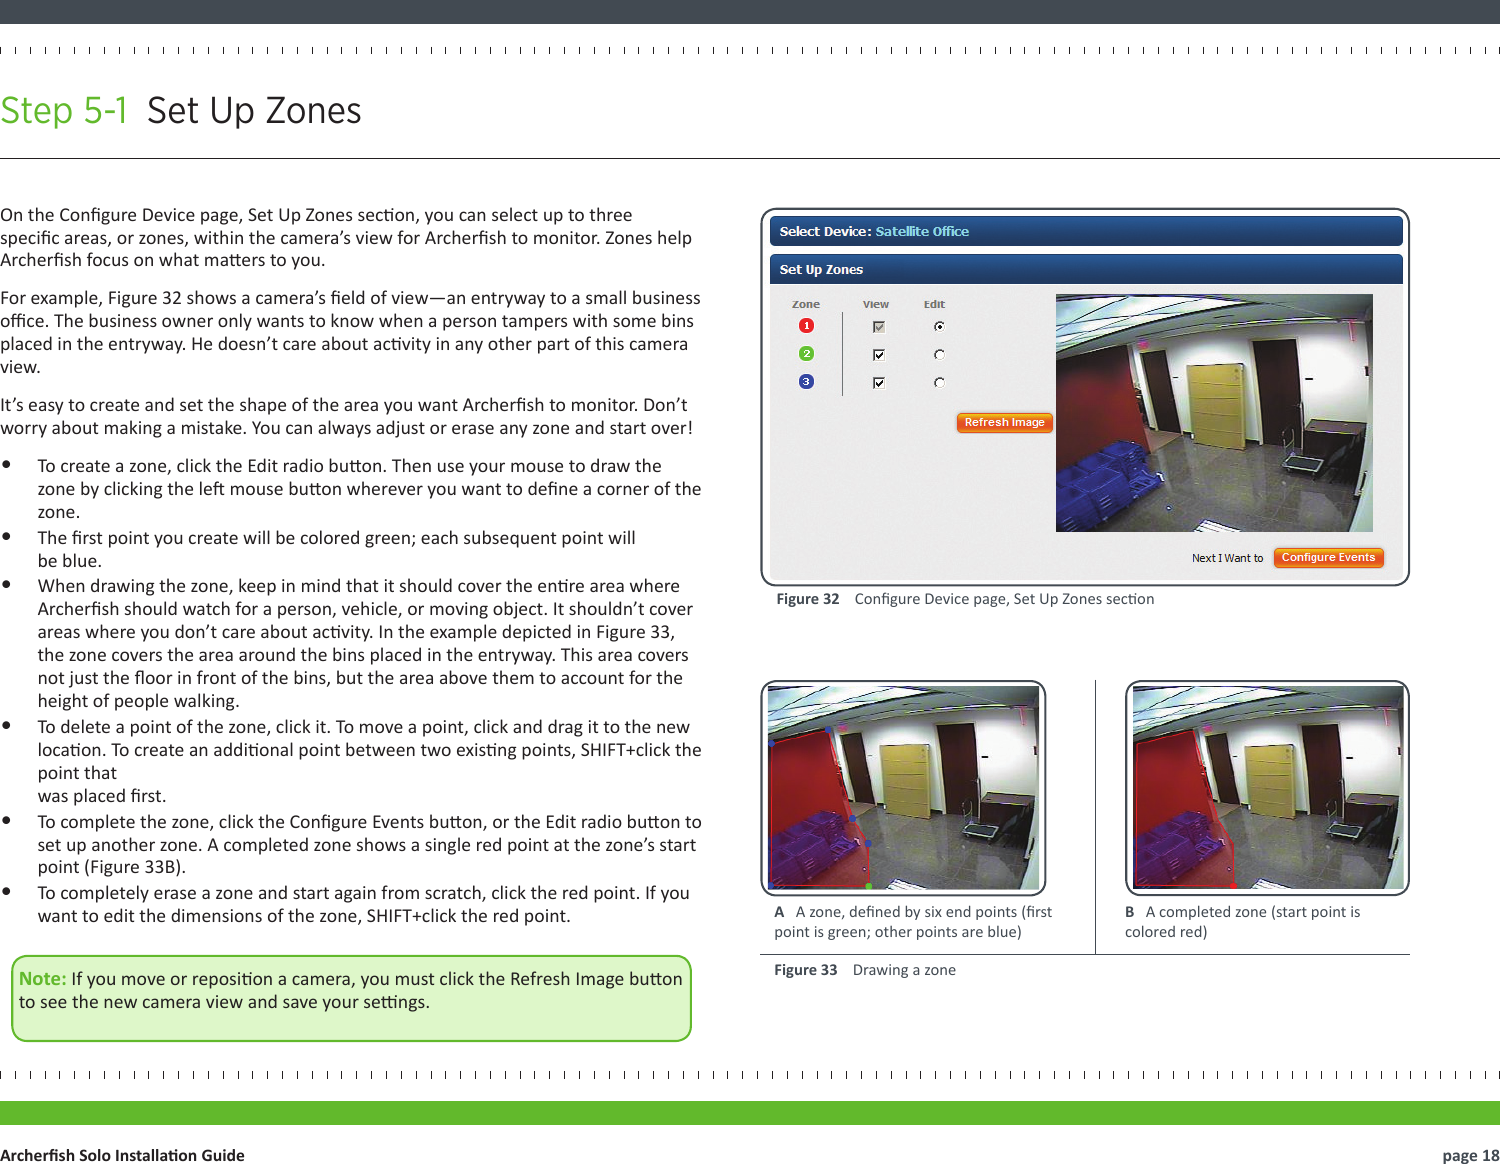
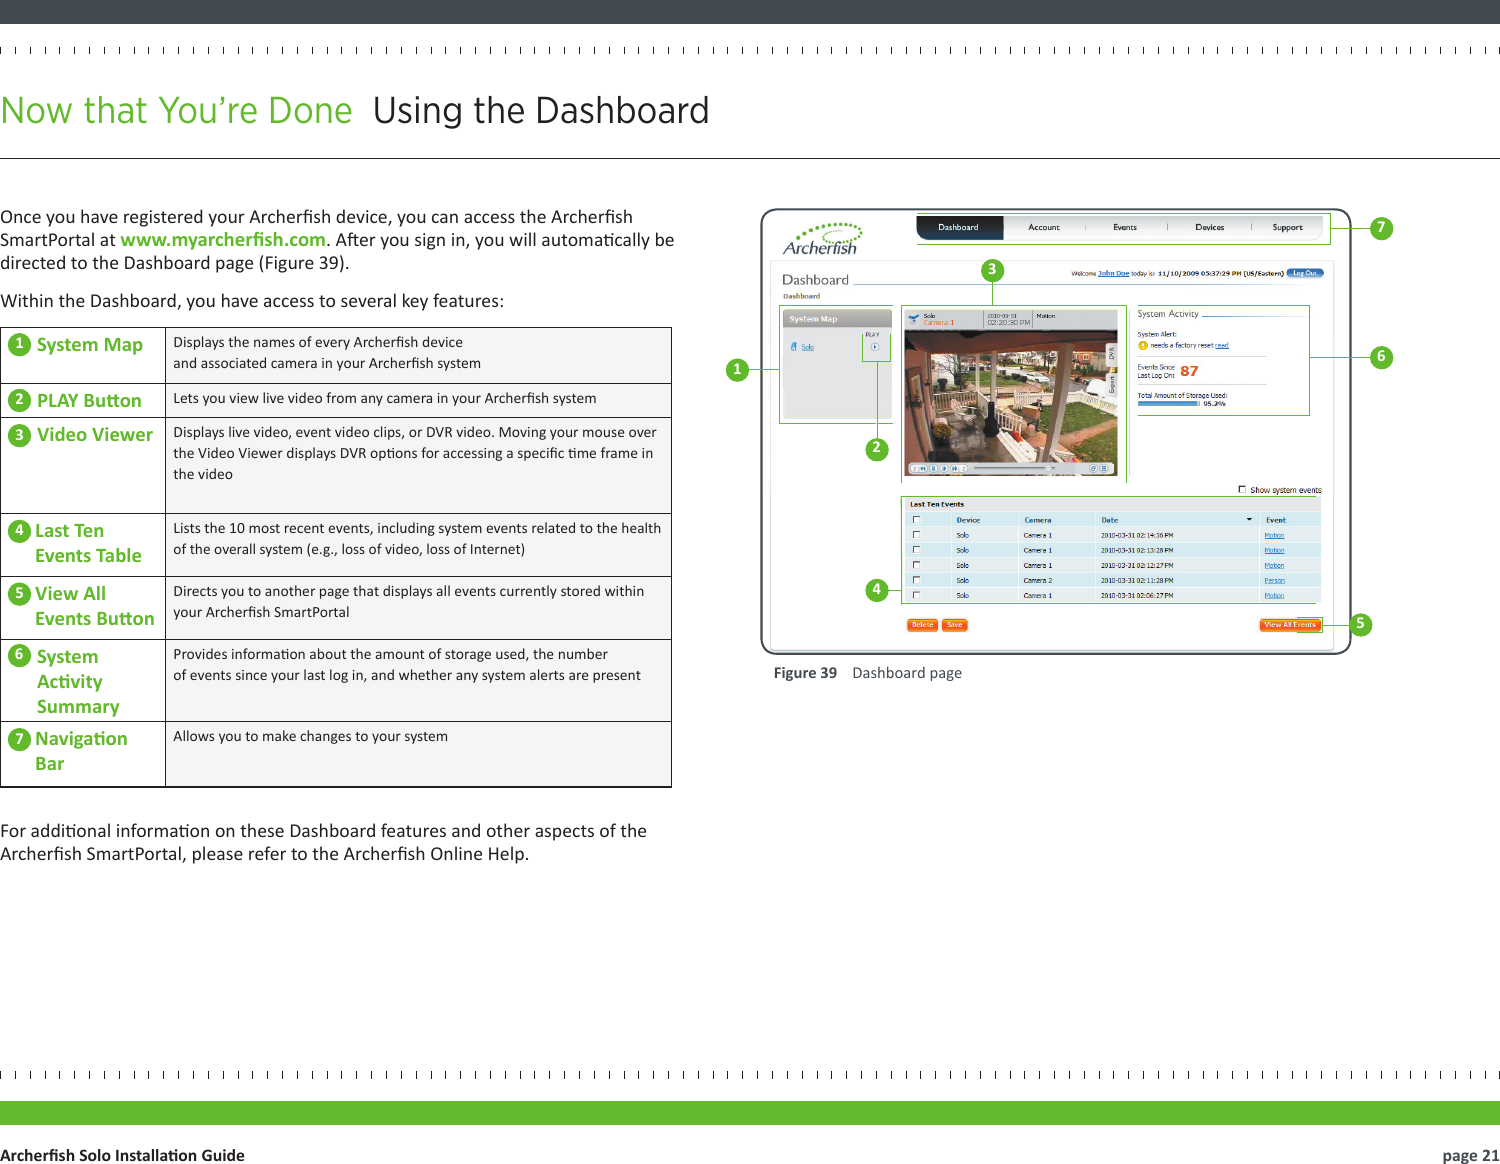
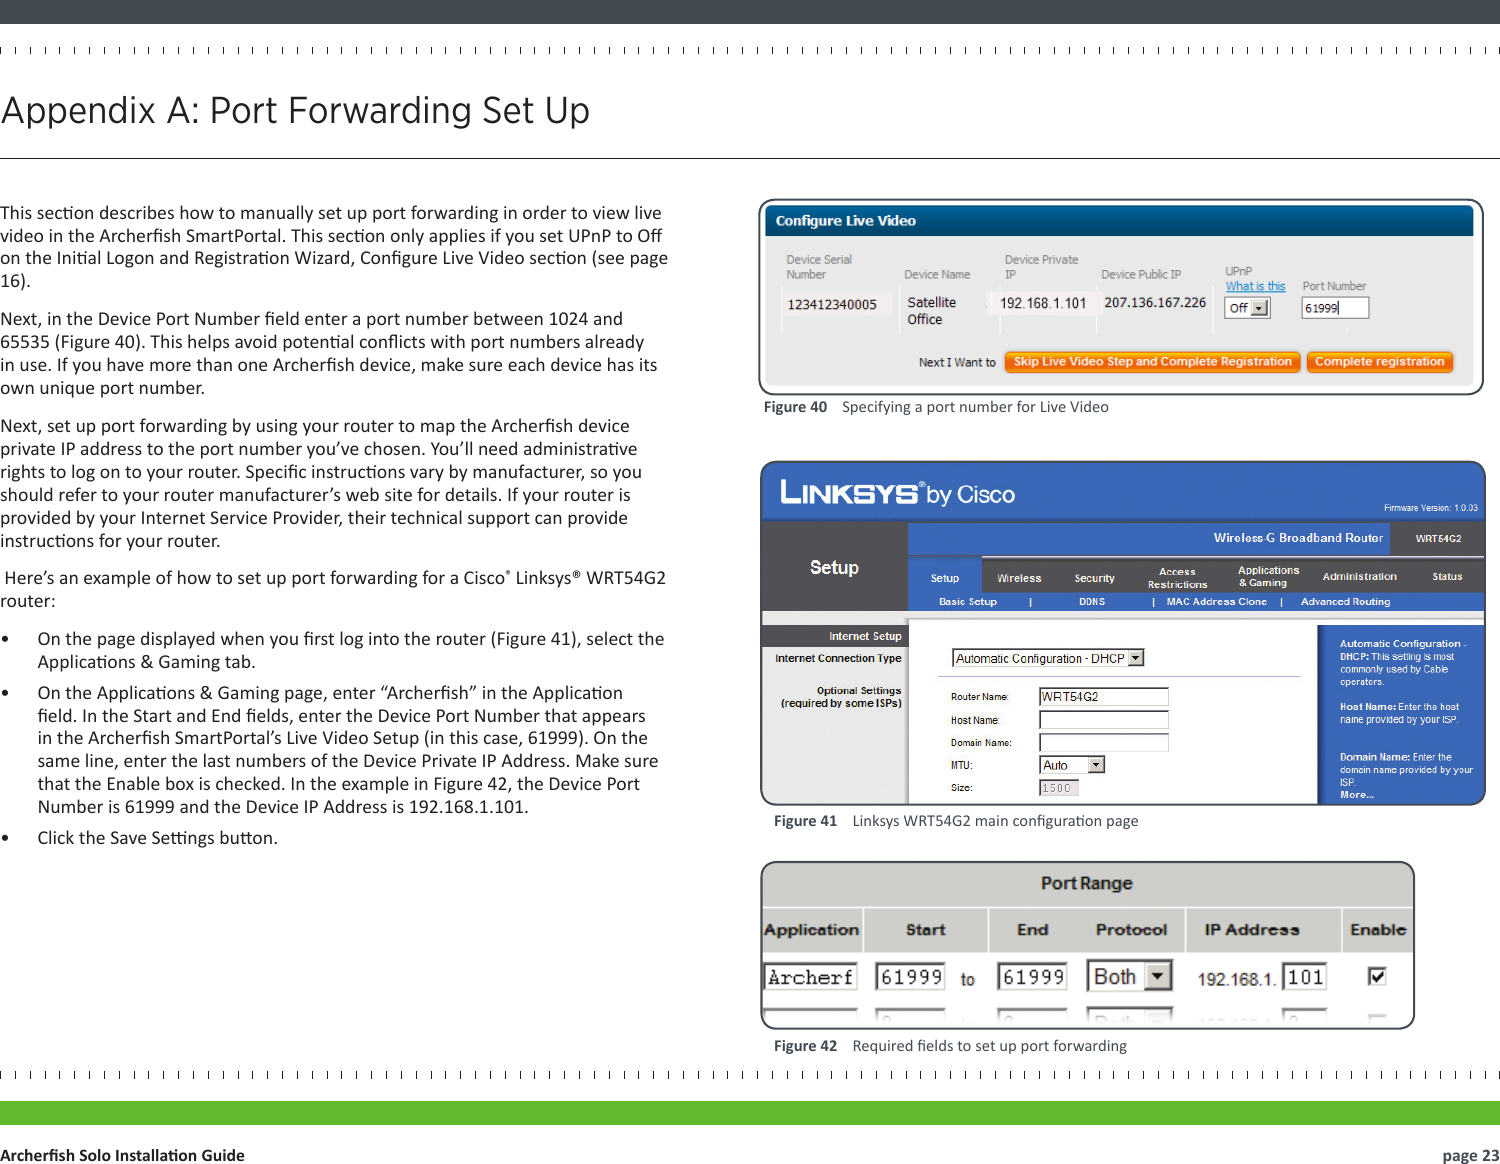
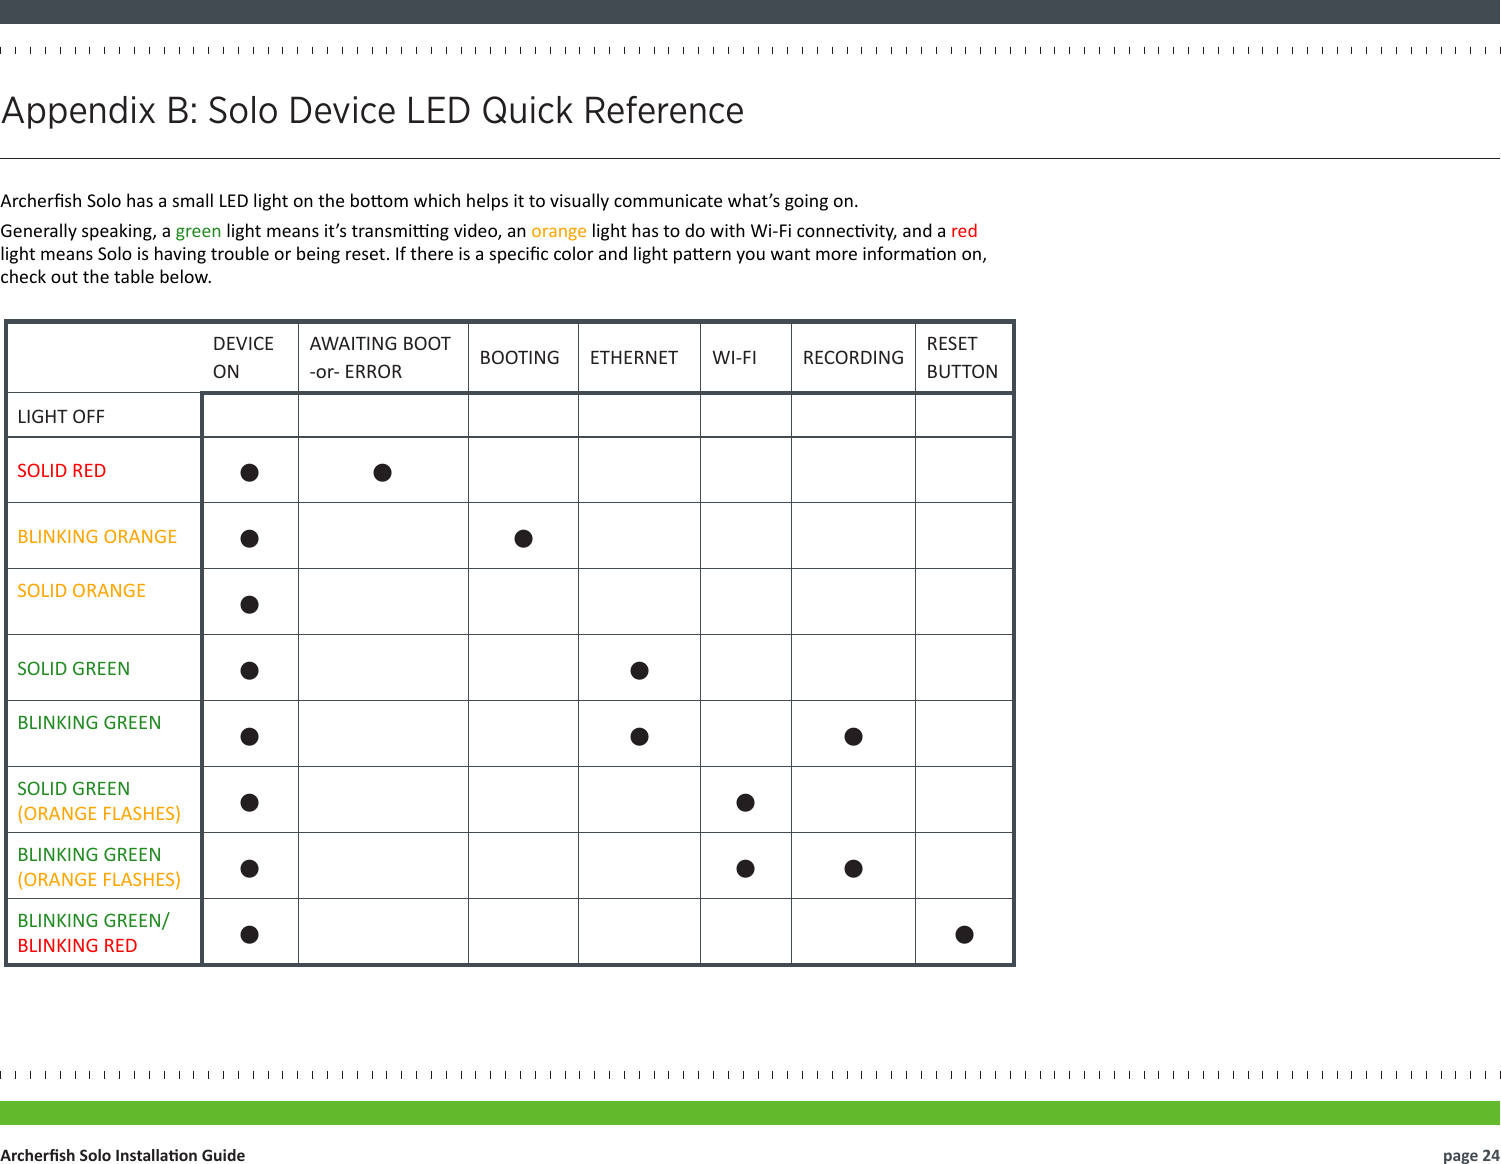
![On the Congure Device page, Congure Events secon (Figure 34), you can dene the events you want Archersh to look for by using the following opons:• Time Span: Use the drop down menus to select the Day of Week [day], Start [me] and End [me] that you want Archersh to look for an event.• Events: Select the type(s) of event you want Archersh to look for. You can tell Archersh to look for a person, vehicle, or moon. You can also select a combinaon of these. For instance, if Archersh is monitoring your driveway, you might choose to have Archersh nofy you when a car or person comes up the driveway. Note that if you choose Moon, you’ll be noed of any object moving in the camera view.• Zones: Select the zones where Archersh should look for the event. You will only be able to select zones that you have already dened.• Duraon: Select the amount of me the event (e.g., person, vehicle, or object) stays within the zone before Archersh noes you. Seng a duraon is helpful in focusing Archersh on the things that maer (a person loitering) versus things that don’t (a person passing through).Using the same example from Step 5-1, if you wanted to detect people who might be tampering with some bins on Monday morning, you might set the Time Span to Monday between 5:00 AM and 11:59 AM and the Events as Person. Once you have dened your event, click the Add Event buon. You will see your event in the table (Figure 35) and can edit or delete the event at any me. Click the Select User Nocaon Method buon to proceed (Figure 36). Step 5-2 Configure Eventspage 19Archersh Solo Installaon GuideFigure 35 Event tableFigure 34 Congure Device page, Congure Events seconFigure 36 Installaon Wizard buon that will direct you to the next step](https://usermanual.wiki/Cernium/AF3001000/User-Guide-1286136-Page-21.png)