Chamberlain Group The 1341 Remote control transmitter User Manual Instructions of 1A5235
Chamberlain Group Inc, The Remote control transmitter Instructions of 1A5235
Instructions of 1A5235
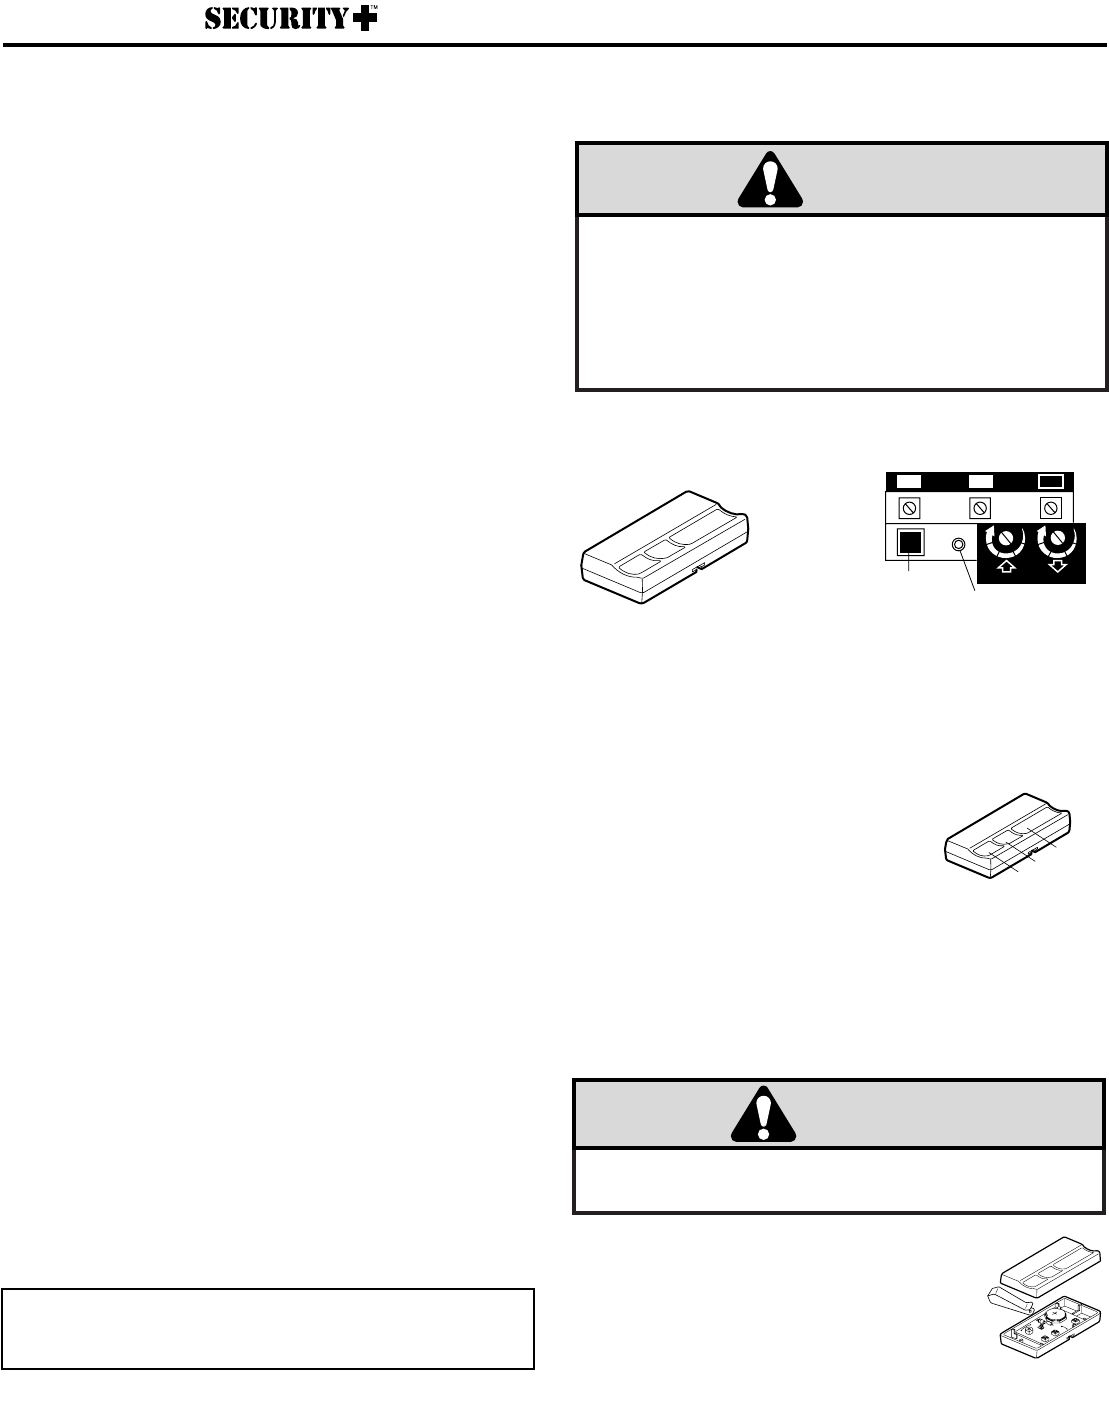
"Smart" (learn)
Button Indicator Light
KG KG
1
3
9
7
5
1
3
9
7
5
123
© 1998, Chamberlain Group Inc.
114A2335 All Rights Reserved Printed in Mexico
Children operating or playing with a garage door opener can injure
themselves or others. The garage door could close and cause serious
injury or death. Do not allow children to operate the wall push buttons or
remote controls.
A moving garage door could injure or kill someone under it. Activate
the opener only when you can see the door clearly, it is free of
obstructions, and is properly adjusted.
WARNING
Figure 2
The Security✚remote control works only with door
openers and light controls having an orange "Smart"
button and a yellow indicator light.
Programming instructions are described and illustrated
below. The additional push buttons can also activate
other garage door openers and/or light controls.
(Instructions for programming light products are included
with those accessories.)
SECURITY✚GARAGE DOOR OPENERS
To Program the Opener to Accept
the Remote Control Code
Select a remote control push button to operate the opener.
The
large
button is recommended for use with a garage door
opener.
1. Press and
hold
the selected remote control push button. See
Figure 1.
2. Press and release the “Smart” (learn) button on the opener
panel. See Figure 2. The indicator light on the panel will
begin to blink and the opener lights will
flash once.
3.
Release the remote push button.
Now the opener will operate when that remote control button
is pressed. Test it by pressing the remote button to see that
the door goes up and down.
Adding a remote can also be done from the door control, as
follows:
1.
With the door closed,
press and hold a remote push button.
2. Press and hold the Light button on the door control.
3. Press and hold the door control push bar.
4. After the opener lights flash, release all buttons.
Test by pressing the remote push button.
To Erase All Remote Control Codes
Press and hold the “Smart” button on the opener panel until
the indicator light turns off (about 6 seconds). All transmitter
codes are now erased. Then follow the steps above to re-
program each remote control.
To Control the Opener Lights
With Security✚transmitters, a remote push button can be
programmed to operate the opener lights without opening the
door.
1.
With the door closed,
press and hold the remote button that
you want to control the light.
2. Press and hold the Light button on the door control.
3. Press and hold the Lock button on the door control.
4. After the opener lights flash, release all buttons.
Test by pressing the remote push button. The opener lights
should turn on or off but the door should not move.
Open/Close/Stop Operation
Your Security✚remote control can be programmed to operate
one door using all 3 buttons: the large button will only open
the door, the middle button will only close the door, and the
third button will stop the door’s movement. You may set up
this feature as follows:
1.
With the door closed,
press and hold the
large remote push button.
2. Press and hold the Lock button on the
door control.
3. Press and hold the door control push bar.
When the opener lights flash, release all buttons. Test by
pressing the large
(Open)
button on the remote. The door
should open. Press it again while the door is open and nothing
should happen. Press the middle
(Close)
button and the door
should close. Press the third
(Stop)
button while the door is
moving and it should stop immediately.
Open
Close
Stop
NOTICE: To comply with FCC rules, adjustment or modifications of this receiver
and/or transmitter are prohibited, except for changing the code setting or replacing the
battery. THERE ARE NO OTHER USER SERVICEABLE PARTS.
Figure 1
SECURITY✚
Remote Control
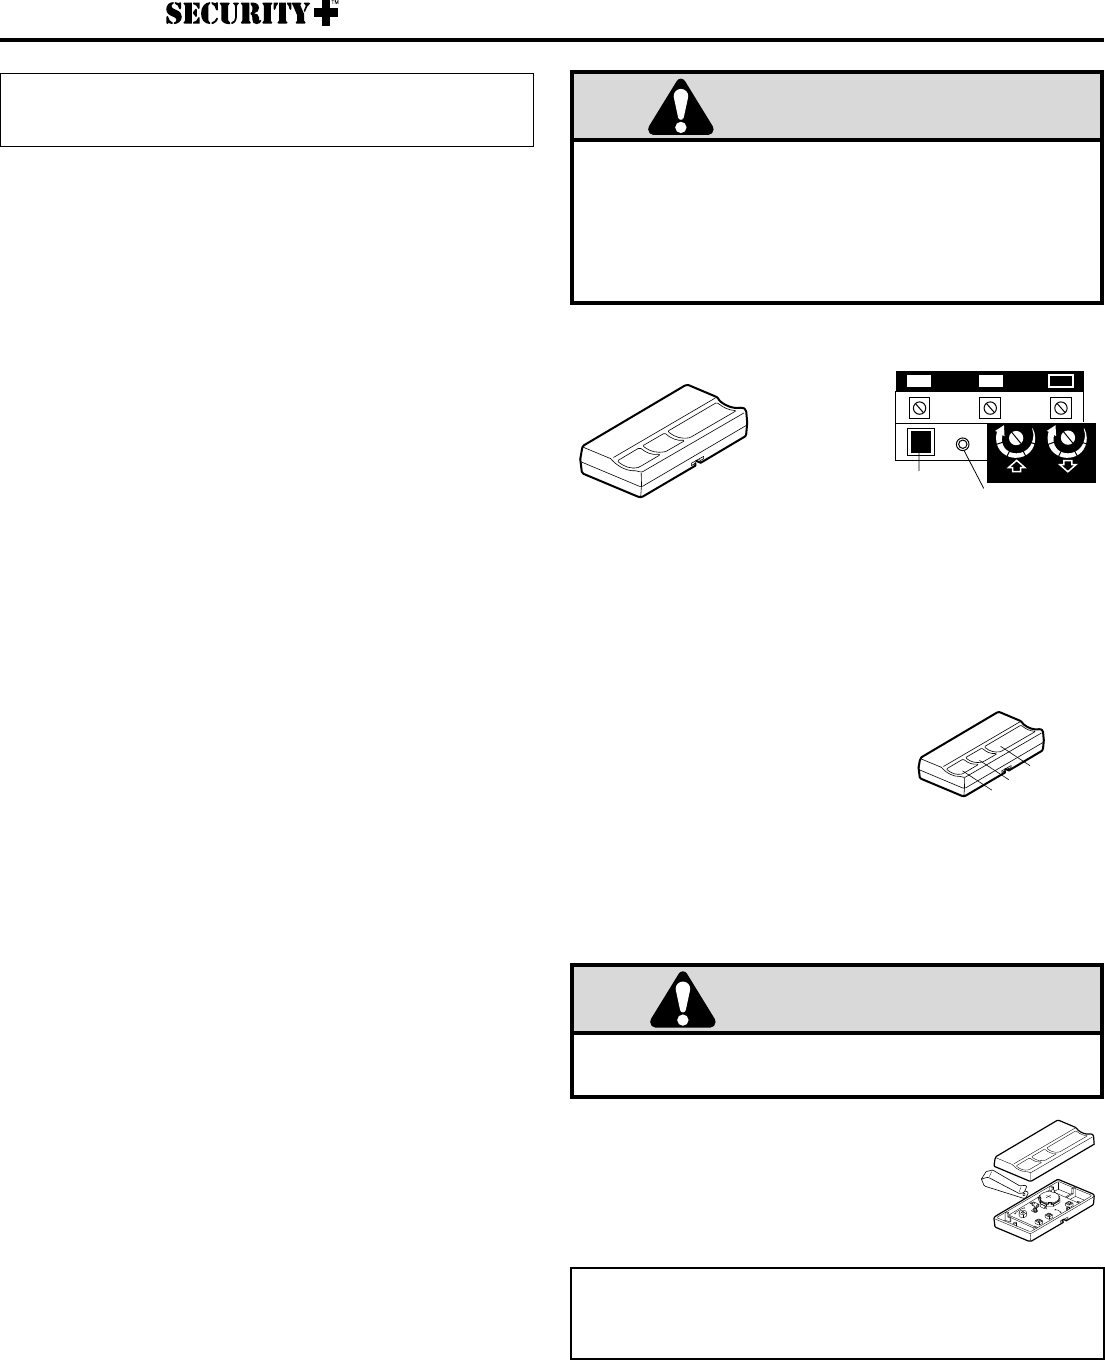
The Remote Control Battery
The lithium battery should produce power for up
to 5 years. To replace battery, pry open case
vith visor clip or screwdriver, as shown. Insert
battery
positive side up (+).
Dispose of old battery properly.
Keep batteries away from small children. If swallowed, promptly notify
doctor.
WARNING
Replacement Parts
433MHz SECURITY✚remote case (circuit board not included) –
41A5056-3; 3V2032 Lithium battery – 10A20; Visor clip – 29B137
FOR SERVICE DIAL OUR TOLL FREE NUMBER: 1-800-528-2817
SECURITY✚
Garage Door Opener
433MHz 3 Channel Remote Control
Les enfants qui utilisent ou qui jouent avec un ouvre-porte de garage
risquent de se blesser et de blesser les autres. La porte risque de se fermer
et de causer de graves blessures, voire la mort. Ne pas permettre aux
enfants d’utiliser les télécommandes ou les boutons-poussoirs au mur.
Une porte de garage en mouvement peut blesser ou tuer la personne qui se
trouve dessous. N’actionner l’ouvre-porte de garage que si l’on peut bien
voir la porte, s’il n’y a pas d’obstruction et si elle est bien réglée.
AVERTISSEMENTAVERTISSEMENT
AVIS: Conformément aux règles de la FCC/IC, il est interdit de régler ou de modifier ce
récepteur et/ou émetteur, sauf pour modifier le code ou pour remplacer la pile. IL N’EXISTE
AUCUNE AUTRE PIÈCE SUSCEPTIBLE D’ÊTRE ENTRETENUE PAR L’UTILISATEUR.
© 1998, The Chamberlain Group, Inc
114A2335 Tous droits réservés. Imprimé au Mexique
Pièces de rechange
433MHz Télécommande SECURITY✚(sans fil) – 41A5056-3;
Pile au lithium 3V2032 – 10A20; Pince de pare-soleil – 29B137
POUR LE SERVICE, PRIÈRE DE COMPOSER NOTRE NUMÉRO SANS FRAIS 1-800-654-4736
La télécommande SECURITY✚ fonctionne uniquement avec les
ouvre-portes et commandes d’éclairage possédant un bouton
“Smart” orange et un témoin lumineux jaune.
Des instructions de programmation sont décrites et illustrées ci-
après. Les boutons-poussoirs supplémentaires peuvent
également actionner d’autres ouvre-portes de garage et/ou
commandes d’éclairage. (Les instructions pour la programmation
de l’éclairage sont fournies avec ces accessoires.)
OUVRE-PORTES DE GARAGE SECURITY✚
Pour programmer l’ouvre-porte pour accepter
le code de télécommande
Sélectionner un bouton-poussoir de télécommande pour actionner
l’ouvre-porte. Le
gros
bouton est recommandé pour usage avec un
ouvre-porte de garage.
1. Appuyer sur le bouton-poussoir sélectionné de la télécommande et
le
tenir
. Voir Figure 1.
2. Appuyer sur le bouton "Smart" (apprentissage) du tableau de
l’ouvre-porte et le relâcher. Voir Figure 2. Le témoin lumineux du
tableau commencera à clignoter et l’éclairage de l’ouvre-
porte
clignotera
une fois.
3. Relâcher le bouton-poussoir de la télécommande.
L’ouvre-porte fonctionnera désormais lorsqu’on appuiera sur ce bouton
de la télécommande. Faire un essai en appuyant sur le bouton de la
télécommande pour vérifier si la porte remonte et descend.
L’addition d’une télécommande peut également se faire depuis la
commande de la porte, comme suit:
1.
La porte étant fermée
, appuyer sur un bouton-poussoir de la
télécommande et le tenir.
2. Appuyer sur le bouton d’éclairage de la commande de la porte et le
tenir.
3. Appuyer sur la barre-poussoir de la commande de la porte et la tenir.
4. Lorsque l’éclairage de l’ouvre-porte clignote, relâcher tous les
boutons.
Faire un essai en appuyant sur le bouton-poussoir de la
télécommande.
Pour effacer tous les codes de la télécommande
Appuyer sur le bouton "Smart" du tableau de l’ouvre-porte et le tenir
jusqu’à ce que le témoin lumineux s’éteigne (environ 6 secondes).
Tous les codes de l’émetteur sont maintenant effacés. Suivre ensuite
les étapes susmentionnées pour reprogrammer chaque
télécommande.
Commande de l’éclairage de l’ouvre-porte
Avec les émetteurs SECURITY✚, on peut programmer un bouton-
poussoir de la télécommande de manière à actionner l’éclairage de
l’ouvre-porte sans devoir ouvrir la porte.
1.
La porte étant fermée
, enfoncer et tenir le bouton-poussoir de la
télécommande qui contrôlera l’éclairage.
2. Appuyer sur le bouton d’éclairage de la commande de la porte et
le tenir.
3. Appuyer sur le bouton de blocage de la commande de la porte et
le tenir.
4. Lorsque l’éclairage de l’ouvre-porte clignote, relâcher tous les
boutons.
Faire un essai en appuyant sur le bouton-poussoir de la
télécommande. L’éclairage de l’ouvre-porte doit s’allumer ou
s’éteindre sans que la porte ne bouge.
Fonctionnement ouverture/fermeture/arrêt
La télécommande SECURITY✚peut être programmée de manière à
faire fonctionner une porte à l’aide des trois boutons: le gros bouton
servira uniquement à ouvrir la porte, le bouton moyen servira
uniquement à fermer la porte, et le troisième bouton arrêtera le
mouvement de la porte. Cette fonction peut être réglée comme suit:
1.
La porte étant fermée
, appuyer sur le gros bouton-poussoir de la
télécommande et le tenir.
2. Appuyer sur le bouton de blocage de la
commande de la porte et le tenir.
3. Appuyer sur la barre-poussoir de la
commande de la porte et la tenir.
Lorsque l’éclairage de l’ouvre-porte clignote, relâcher tous les
boutons. Faire un essai en appuyant sur le gros bouton (
Ouverture
)
de la télécommande. La porte devrait s’ouvrir. Appuyer à nouveau
tandis que la porte est ouverte et rien ne devrait se produire. Appuyer
sur le bouton moyen (
Fermeture
) et la porte devrait se fermer.
Appuyer sur le troisième bouton (
Arrêt
) tandis que la porte bouge, et
elle devrait s’arrêter immédiatement.
La pile de la télécommande
La pile au lithium devrait durer pendant une période
allant jusqu'à 5 ans. Pour changer la pile, ouvrir le
boîtier comme illustré. Insérer la pile côté positif
vers le haut
(+)
.
Se débarrasser de la pile usagée convenablement.
Garder les piles hors de la portée des jeunes enfants. Si avalées, aviser
immédiatement votre médecin.
AVERTISSEMENTAVERTISSEMENT
Bouton "Smart"
(apprentissage) Témoin lumineux
KG KG
1
3
9
7
5
1
3
9
7
5
123
Figure 2
Figure 1
Télécommande
SECURITY✚
SECURITY✚
Ouvre-porte de garage
Ouverture
Fermeture
Arrêt
433MHz Télécommande à trois canaux