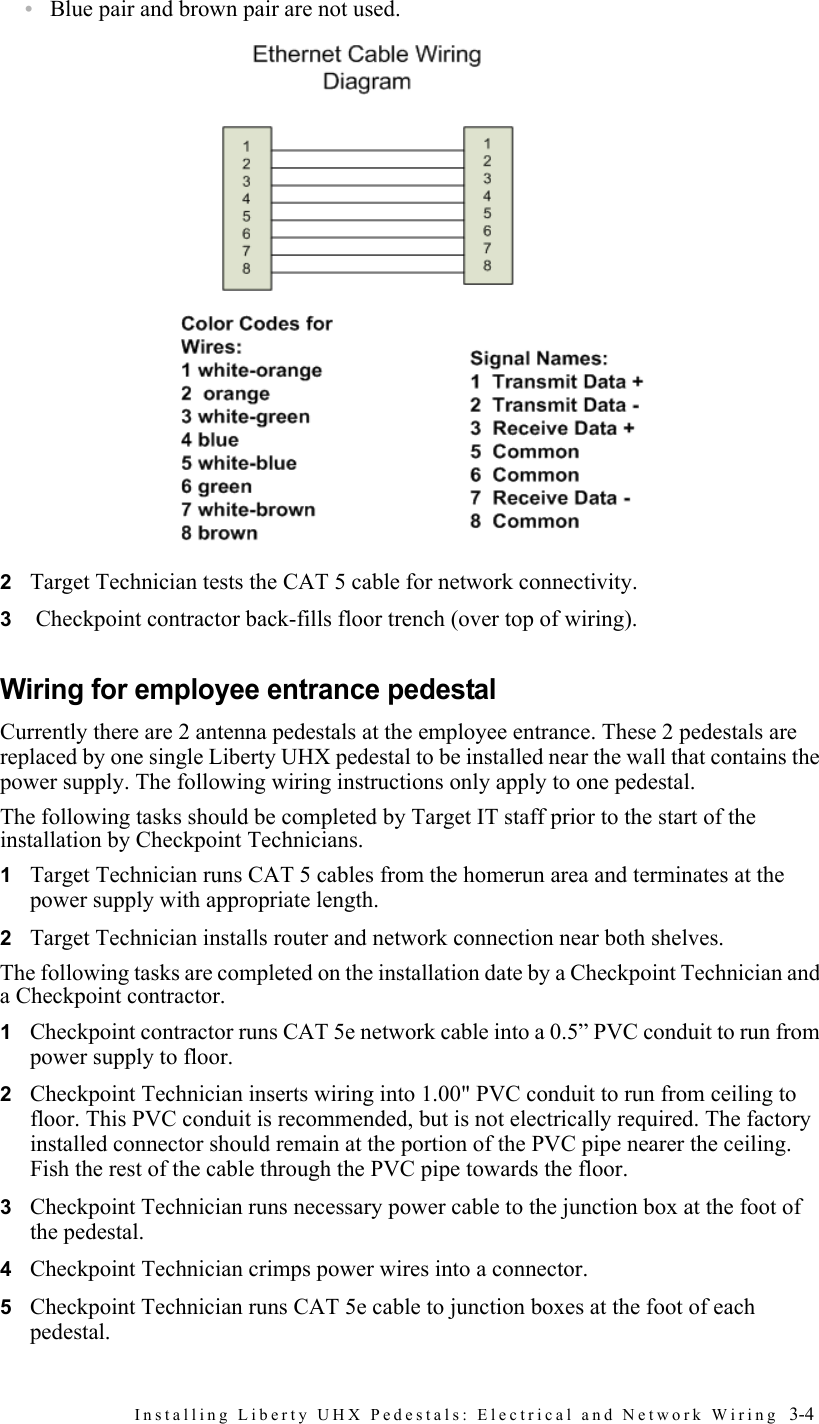
Checkpoint Systems LIBUHX Liberty UHX Pedestals User Manual Liberty UHX On site Upgrade Guide
Checkpoint Systems Inc Liberty UHX Pedestals Liberty UHX On site Upgrade Guide
UserManual.wiki
>
Checkpoint Systems
>
LIBUHX User Manual
rev users manual
Navigation menu
Upload a User Manual
Namespaces
Wiki Guide
HTML
PDF
Info
Views
User Manual
Discussion / Help
Navigation


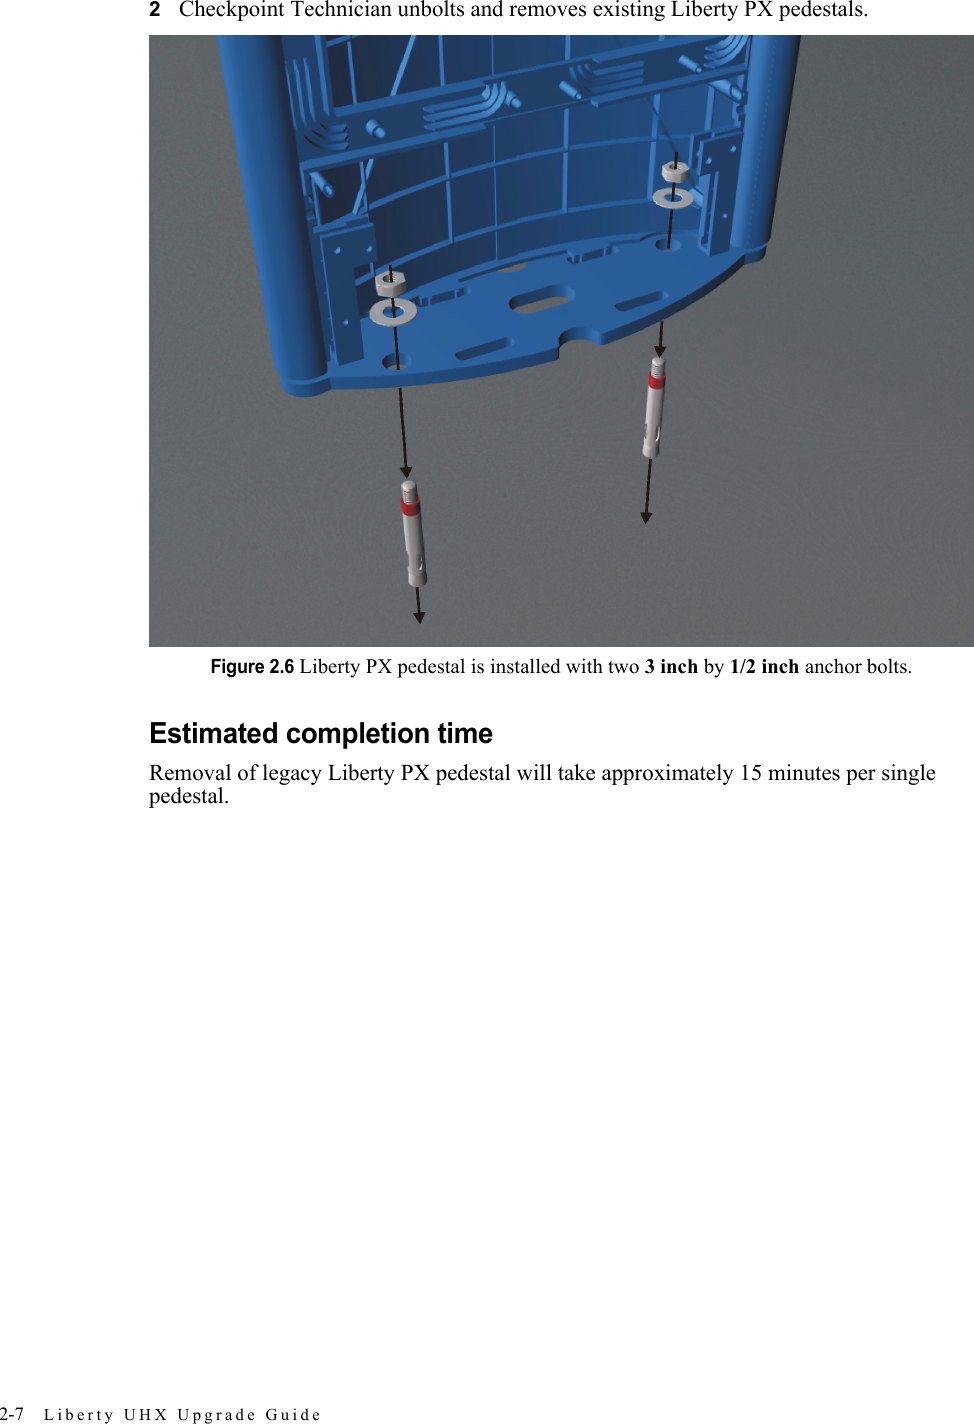


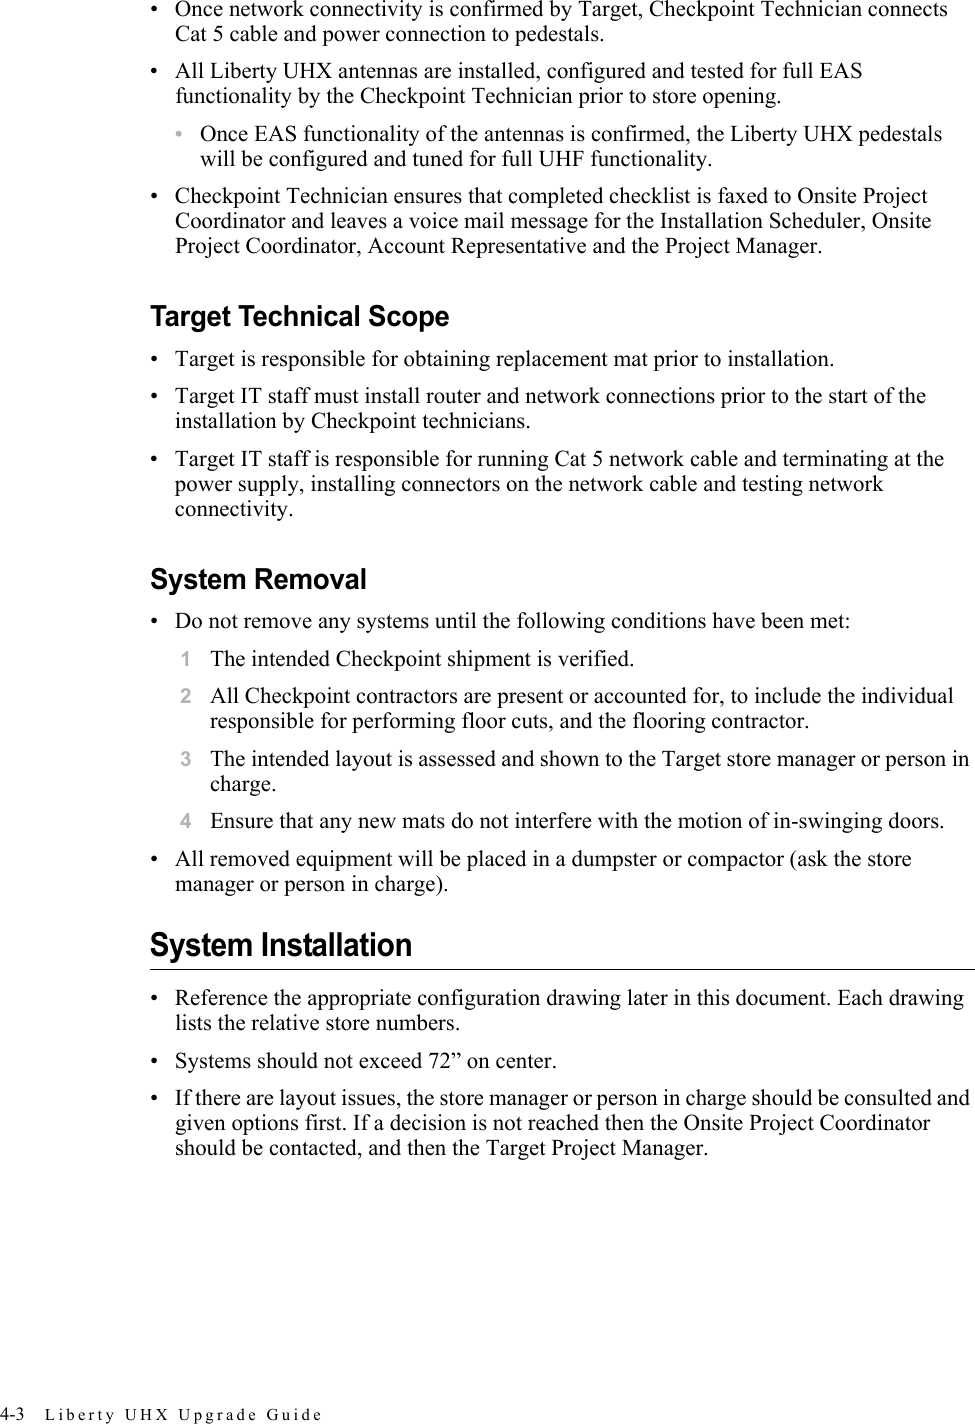
![Liberty UHX Installation Checklist: Installation Checklist 4-4Follow up Procedures• Ensure that the installation checklist is filled out and initialed by Checkpoint, the Checkpoint contractor, and the onsite Target representative. The checklist should be faxed to the Onsite Project Coordinator.• At the completion of the installation, a voice mail message must be left for the Installation Scheduler, Onsite Project Coordinator, Account Representative, and the Project Manager. Table 4.1Project contact informationTitle Name Office Ext. Cell PagerAccount SchedulerOnsite Project Coordinator[Customer Name] Project Manager[Checkpoint Contractor Name] Point of ContactAccount ManagerProject ManagerTable 4.2Door installation checklistItem #Door Designation (i.e., North Door)No? Explain BelowCustomer InitialsCheckpoint InitialsCheckpoint Contractor InitialsA New layout agreed upon?B Replacement mat acquired? (if necessary)C Existing pedestals removed and disposed of?D Old drill holes repaired? (if necessary)E Floor mats removed?F Alvarado posts removed and disposed of?G Alvarado bumper post holes filled in? (if necessary)H New floor channel cut?I Walker duct and power supply boxes installed?J Power run from ceiling to floor?K Power run through walker duct to pedestal riser?L Power wires crimped and connectors installed?M CAT 5 cable run and terminated at pedestal riser?N CAT 5 cable crimped and connectors installed?O Floor cut filled in?P Floor covering repaired/installed/replaced?Q Work area is clean and ready for store opening?R Pedestals tested and properly functioning for EAS?S Pedestals tested and properly functioning for UHF?](https://usermanual.wiki/Checkpoint-Systems/LIBUHX/User-Guide-540866-Page-28.png)
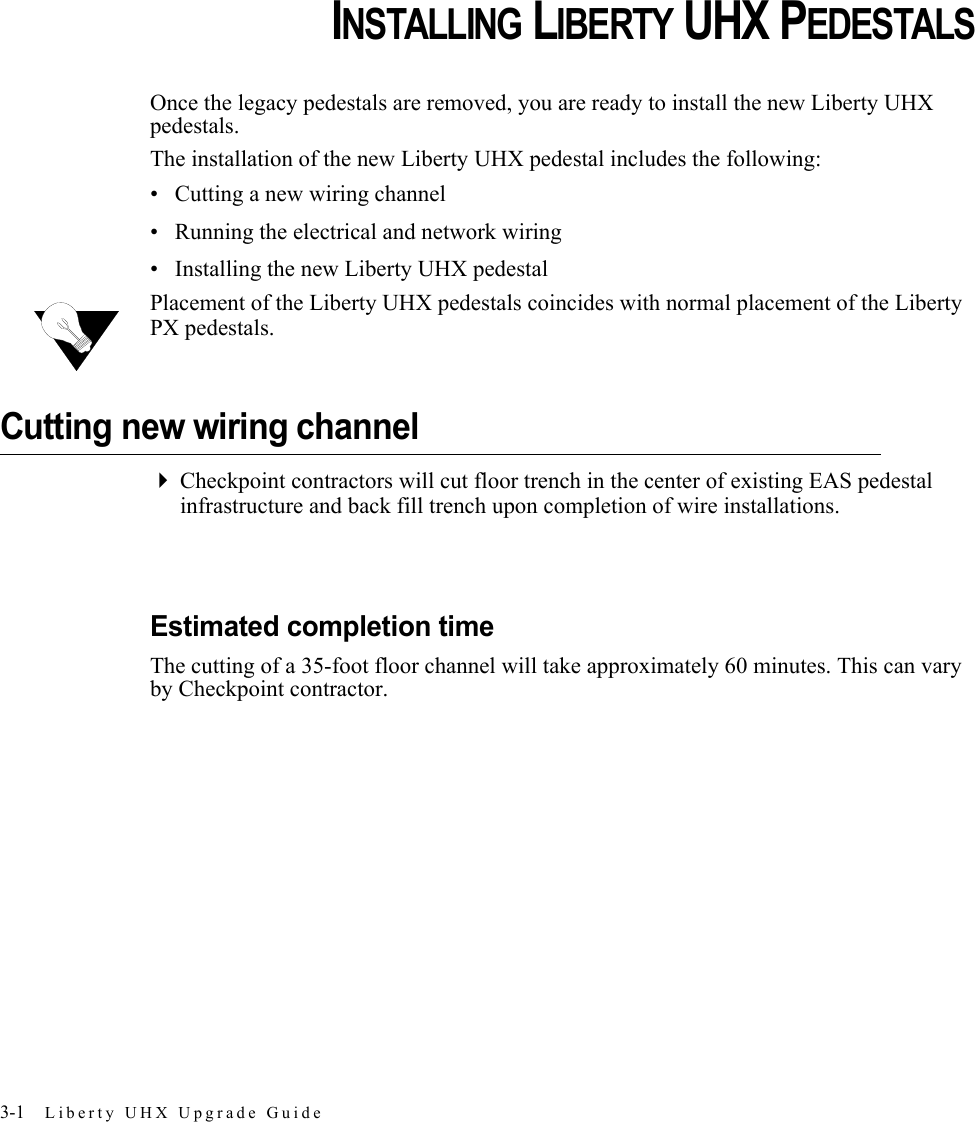
![4-7 Liberty UHX Upgrade GuideSample Door Layouts56"72" 72"72"72"#28256"14' to Registers72" 72"72"72" 4'-0"5'-9"#175,72"56"72" 72"#11, #26 [Mirrored Config: #12]](https://usermanual.wiki/Checkpoint-Systems/LIBUHX/User-Guide-540866-Page-31.png)
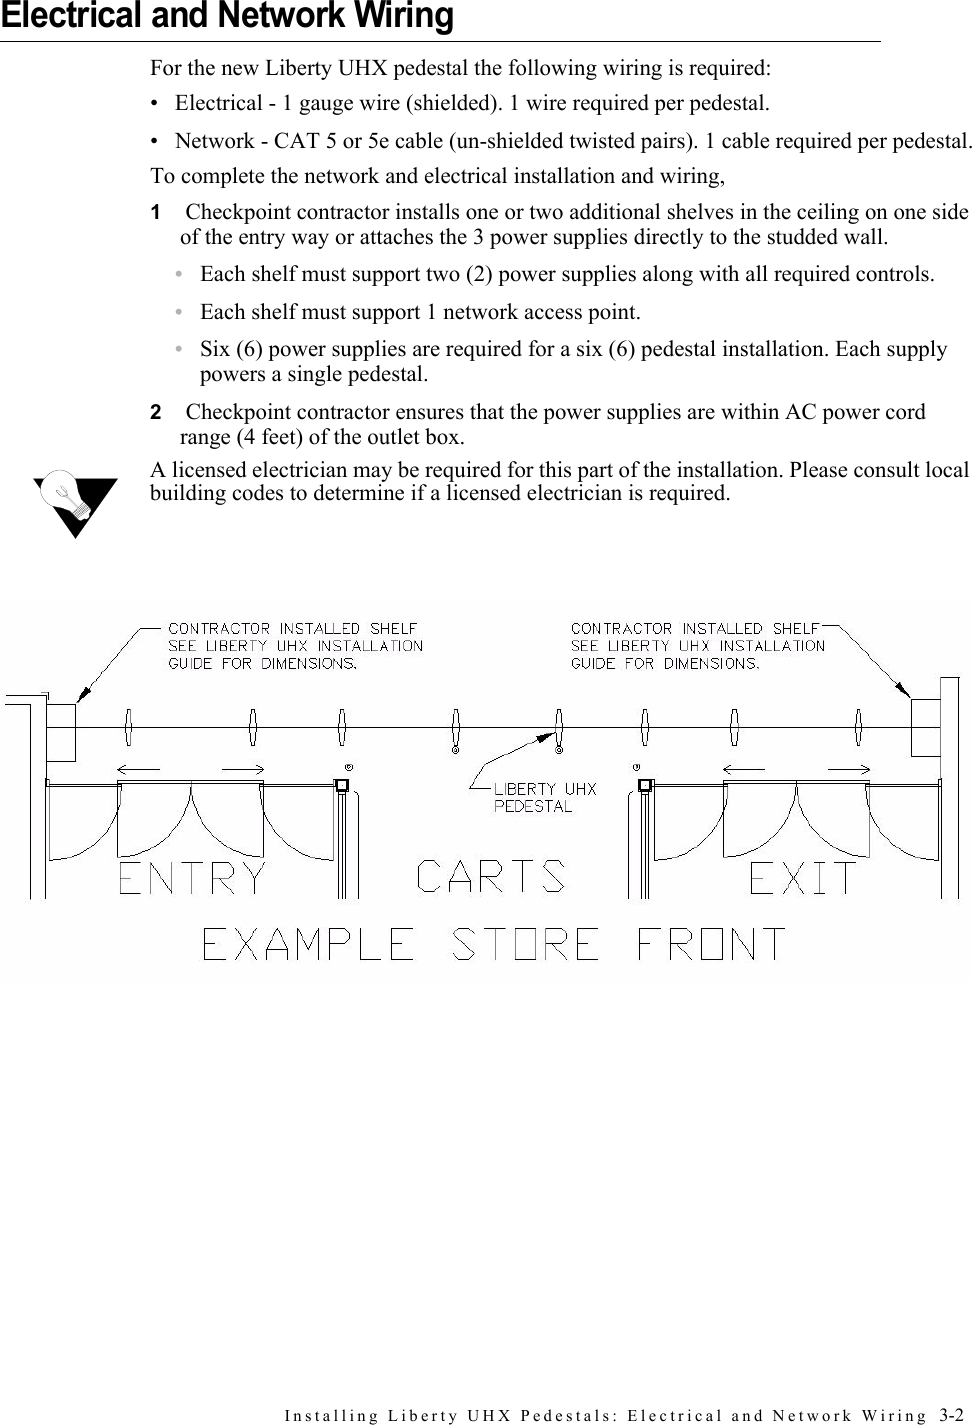
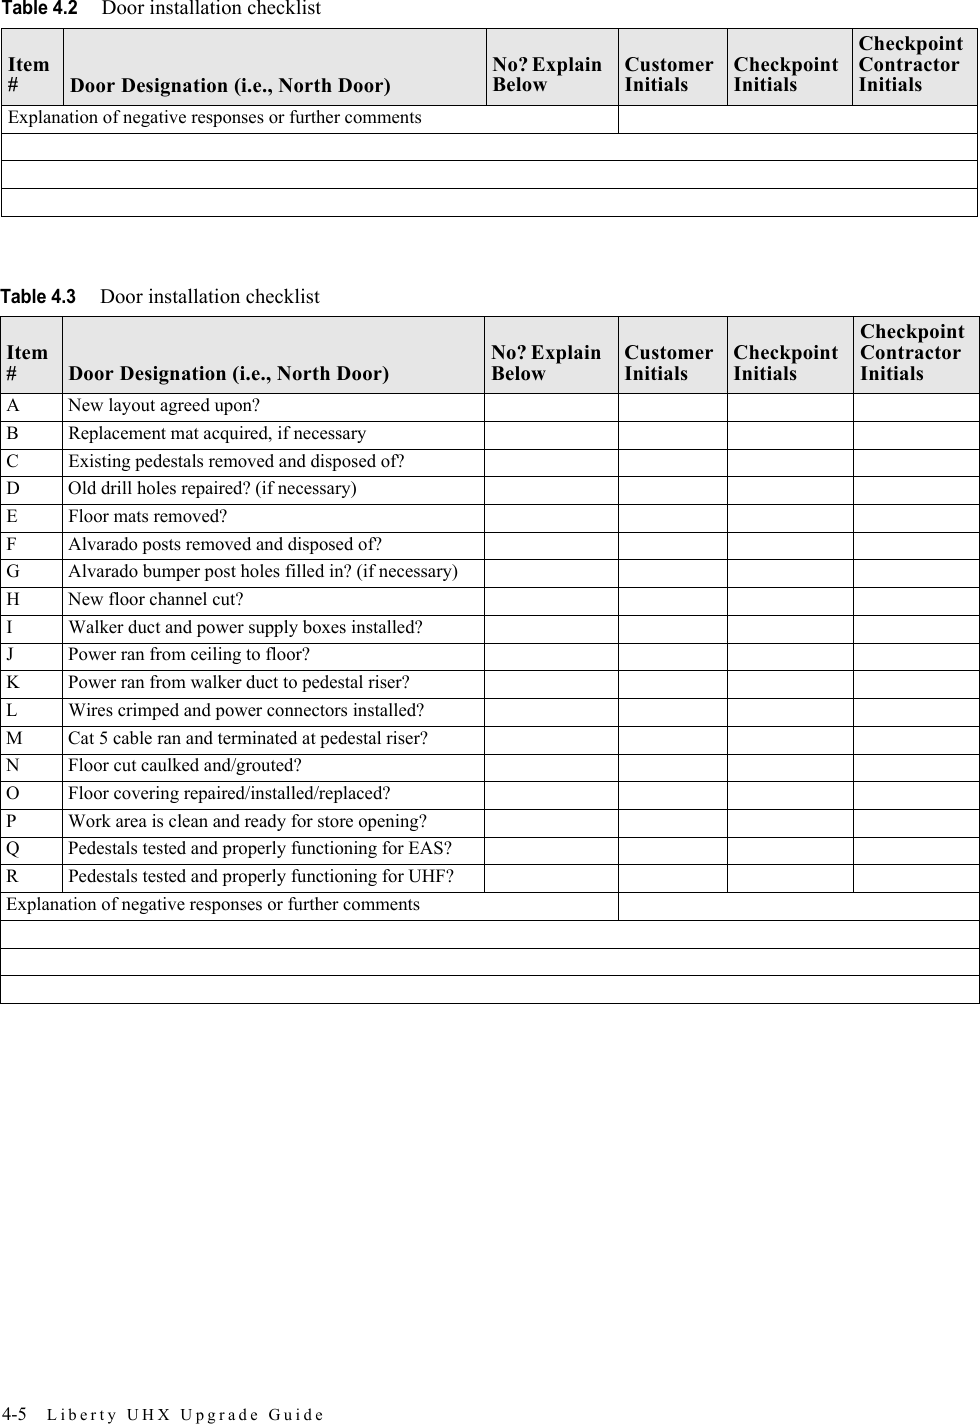
![Liberty UHX Installation Checklist: Installation Checklist 4-8#5156"72"56"72" 72"72"72"#346, #696, #748 - [Mirrored Config: #764, #826]56"72" 72"72"72" #339](https://usermanual.wiki/Checkpoint-Systems/LIBUHX/User-Guide-540866-Page-32.png)