Cheng Uei Precision Industry 58905350 TXTR User Manual BMK UG EN
Cheng Uei Precision Industry Co., Ltd. TXTR BMK UG EN
UserManual.wiki
>
Cheng Uei Precision Industry
>
58905350 User Manual
Users Manual
Navigation menu
Upload a User Manual
Namespaces
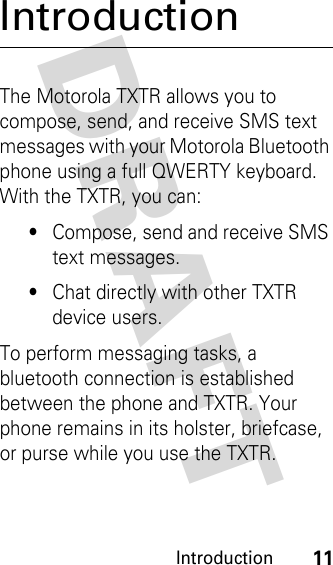
Wiki Guide
HTML
PDF
Info
Views
User Manual
Discussion / Help
Navigation


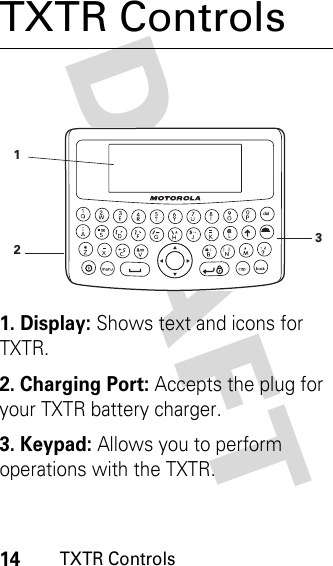
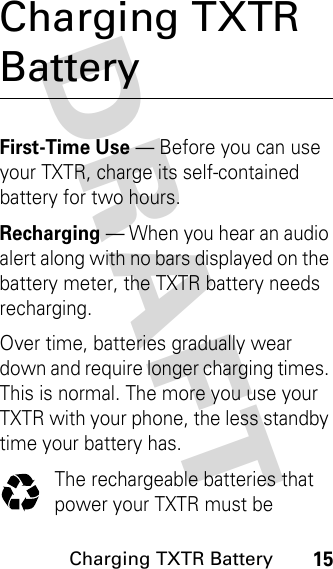
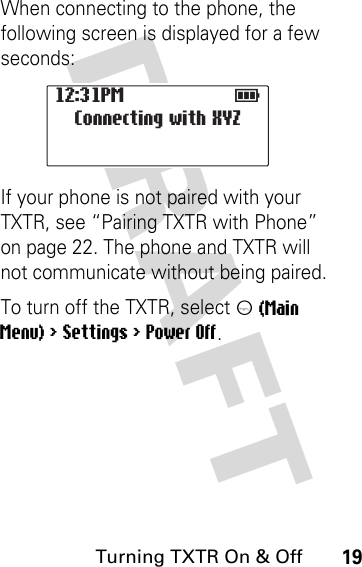
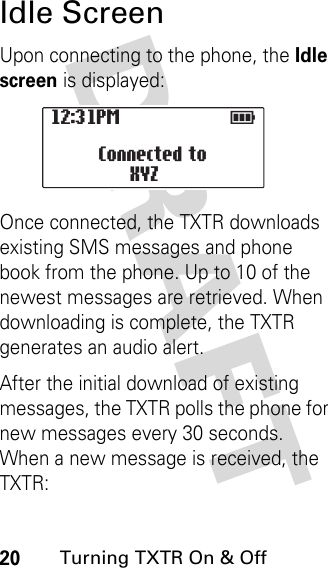
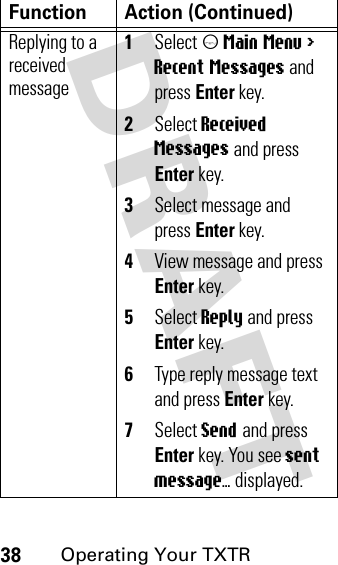
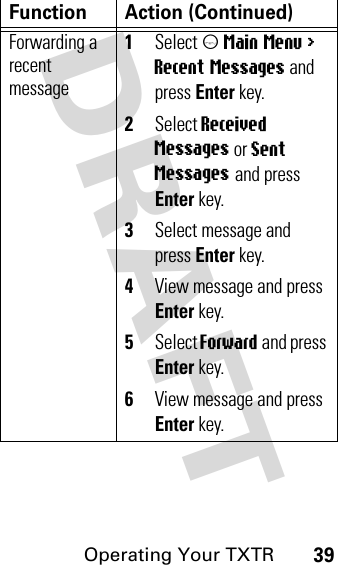
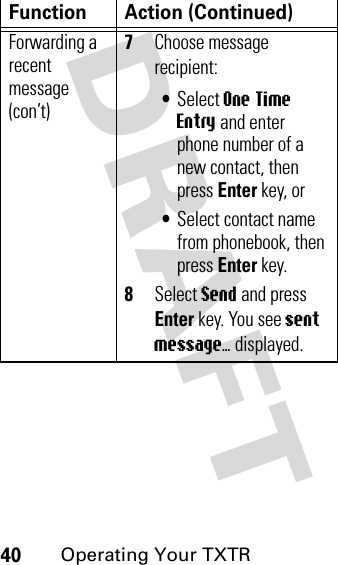
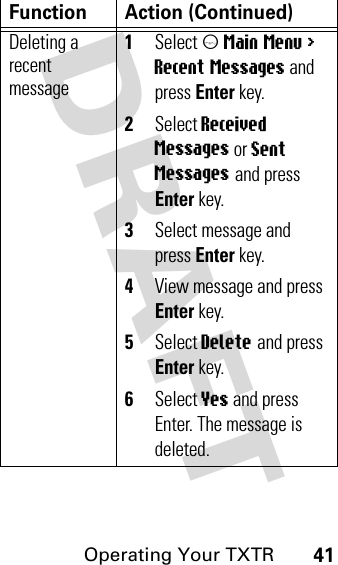
![DRAFT 24Pairing TXTR with Phonefeature remains on until you turn it off.Setting TXTR to Look for PhoneTo place the TXTR into Bluetooth search mode, select m (Main Menu) > Settings > Bluetooth > Search phone.The TXTR is placed in search mode for [xx] seconds.Pairing Phone with TXTRWhile the TXTR is in search mode, place your phone in Bluetooth discovery mode to pair (link) it with your TXTR.](https://usermanual.wiki/Cheng-Uei-Precision-Industry/58905350/User-Guide-629396-Page-26.png)