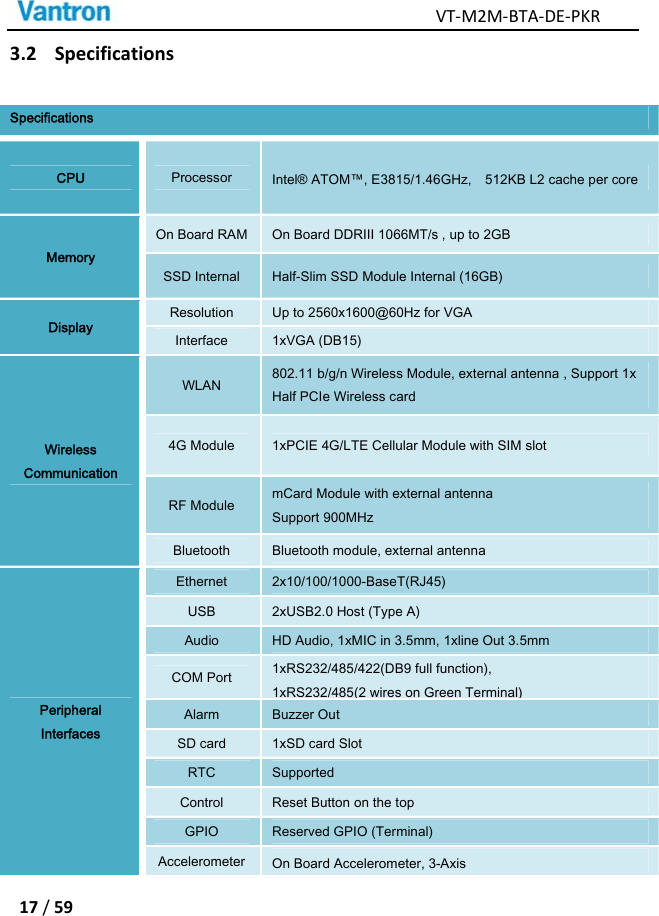
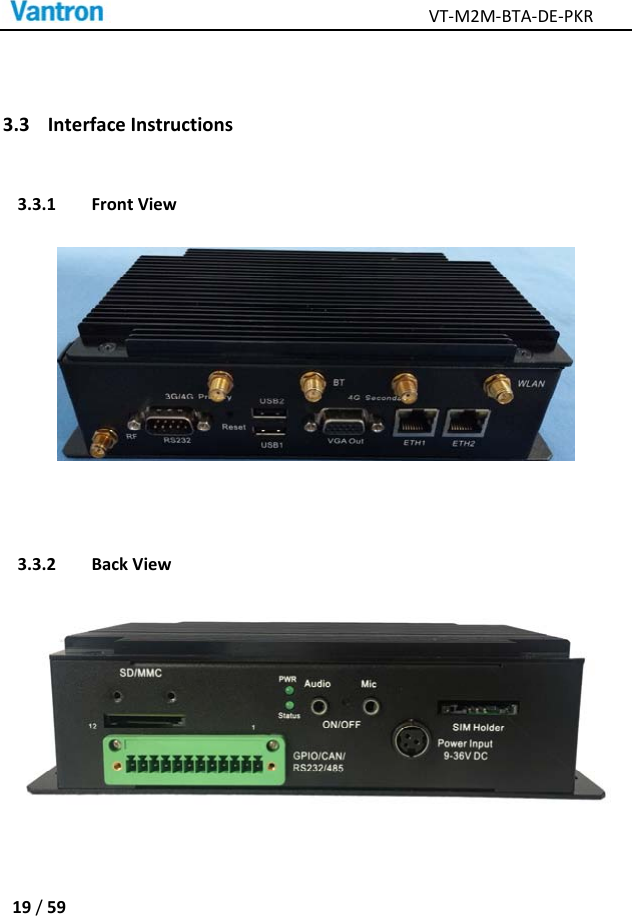
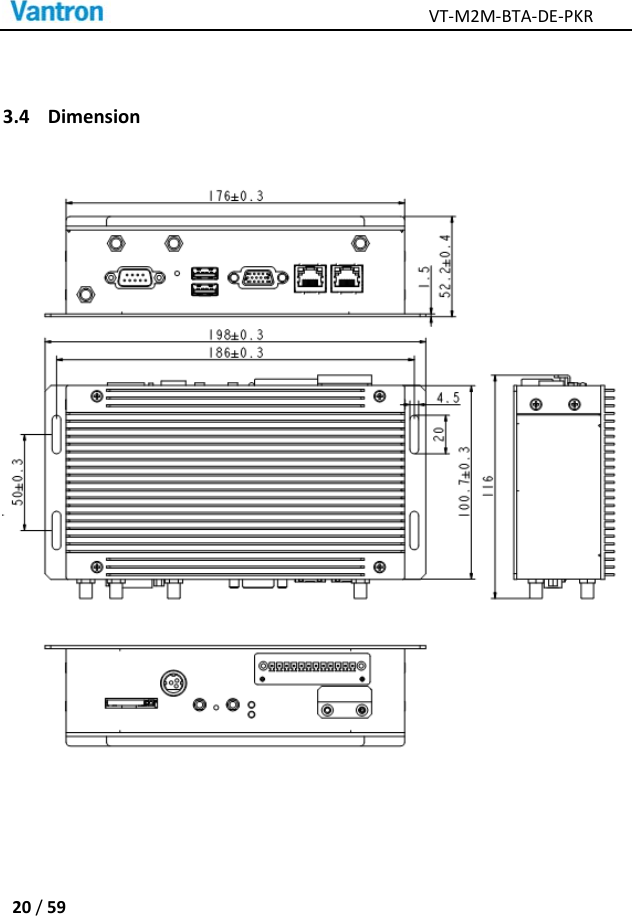
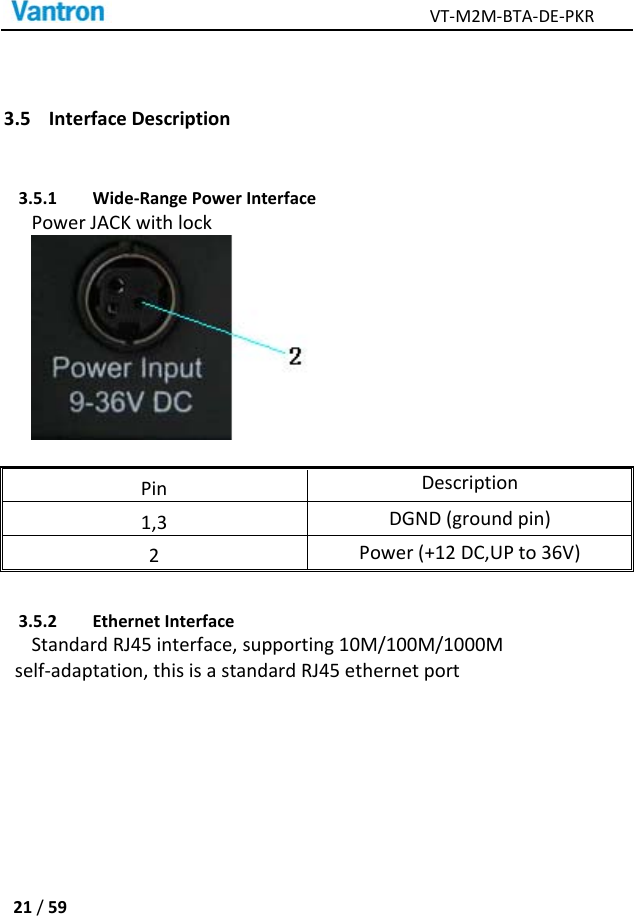
Chengdu Vantron Technology BTADE-PKR M2M Gateway User Manual 0810
Chengdu Vantron Technology, Ltd. M2M Gateway 0810
UserManual.wiki
>
Chengdu Vantron Technology
>
BTADE PKR User Manual
User Manual
Navigation menu
Upload a User Manual
Namespaces
Wiki Guide
HTML
PDF
Info
Views
User Manual
Discussion / Help
Navigation

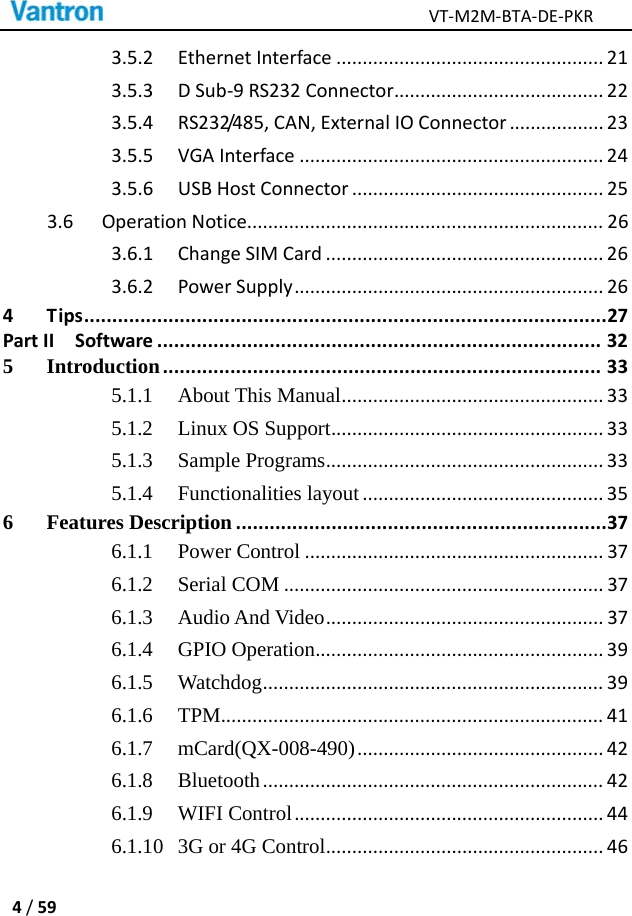


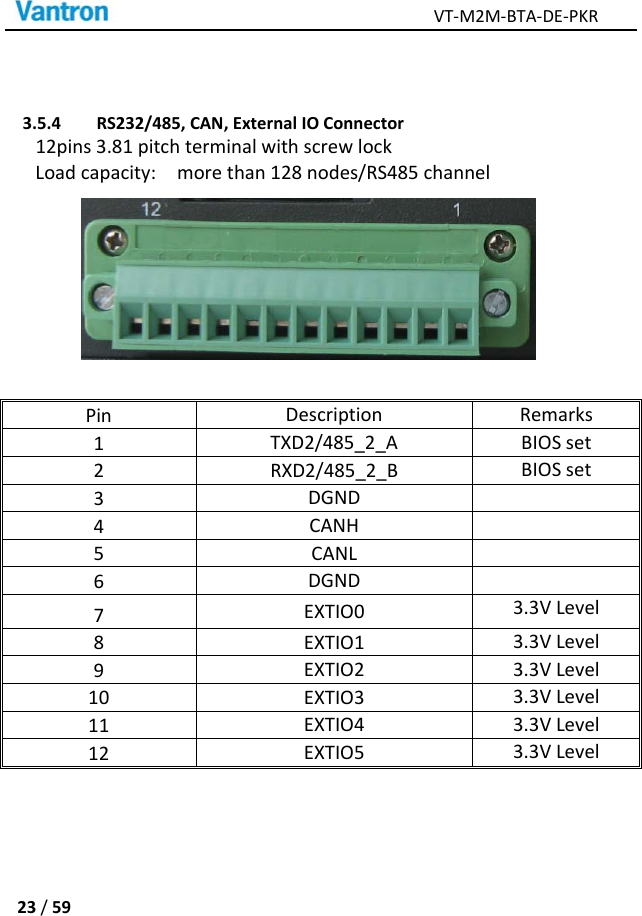


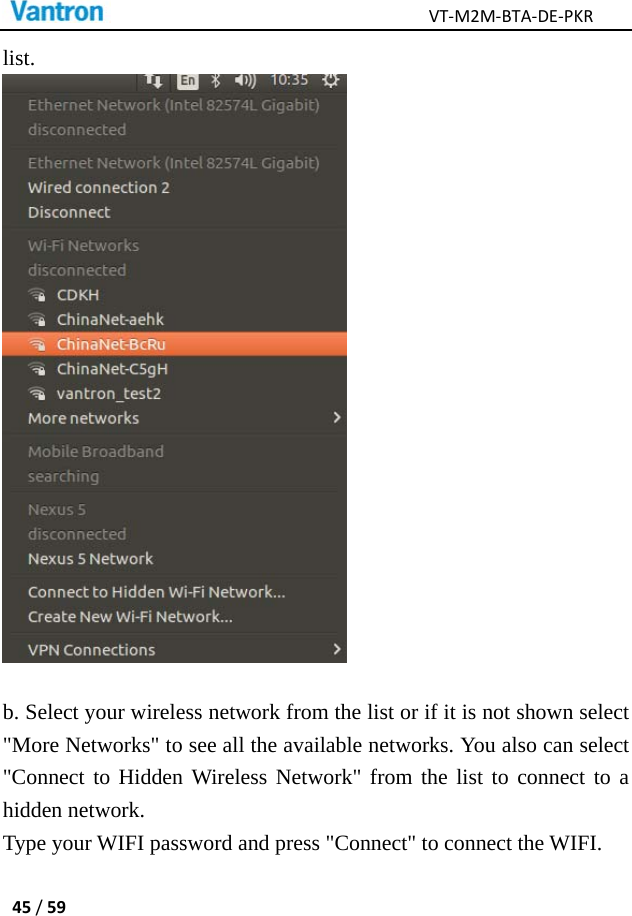
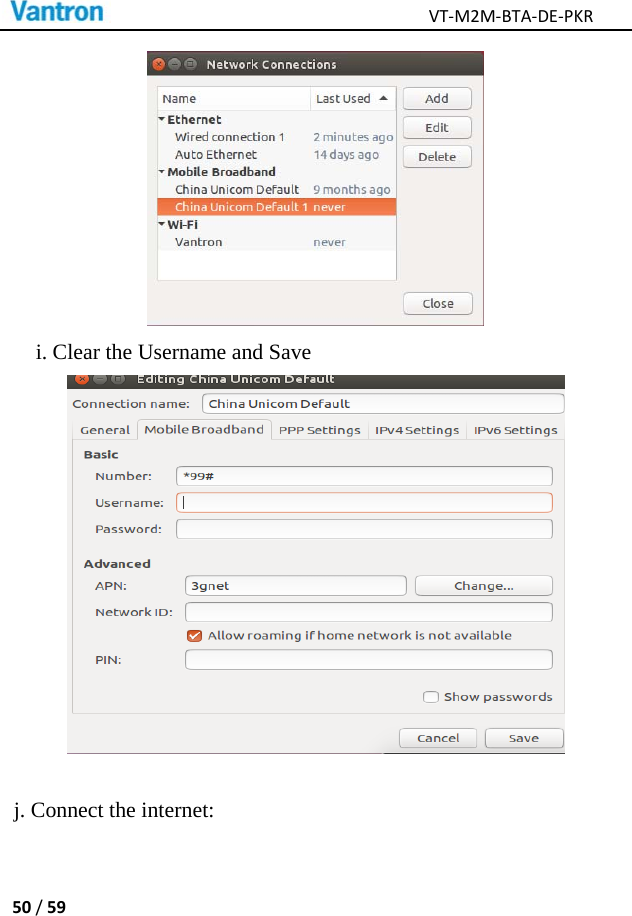
![VT‐M2M‐BTA‐DE‐PKR37/596 Features Description This chapter describes some of the features of the software operation. Open the terminal (CTRL+ALT+T), use the testing command. 6.1.1 Power Control power [3g ] [on|off] 3g: Power control of 3G Module 6.1.2 Serial COM 115200,38400 and 9600 bps are valid. Test the RS232/485, we need two devices. Select the serial protocol thought the BIOS. a. One side send data: $sudo minicom -D /dev/ttyS1 -b 115200 Then input “hello” will print “hello”s on your output device b. The other side accept data: $sudo minicom -D /dev/ttyS2 -b 115200 6.1.3 Audio And Video a. Audio record:](https://usermanual.wiki/Chengdu-Vantron-Technology/BTADE-PKR/User-Guide-3963089-Page-37.png)

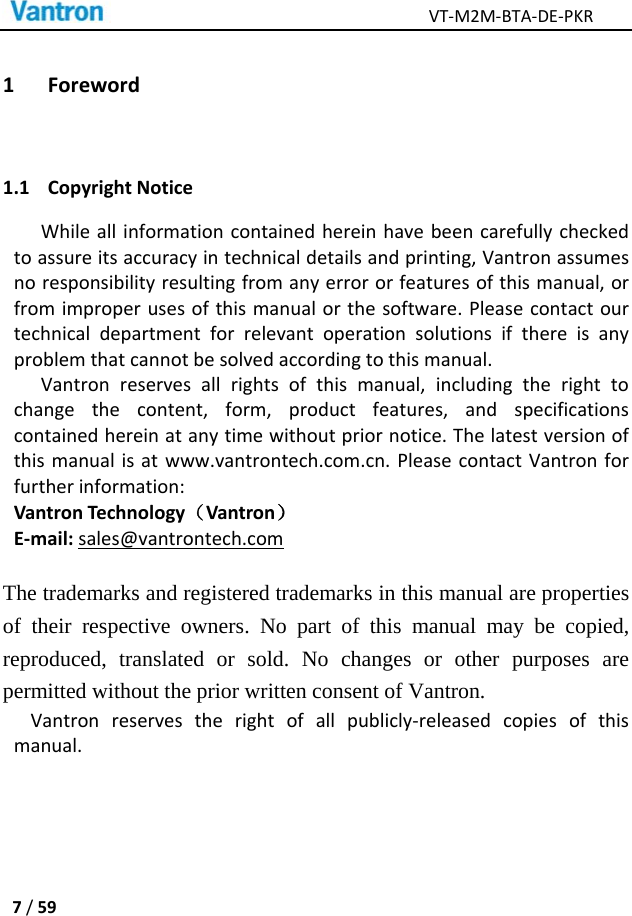
![VT‐M2M‐BTA‐DE‐PKR39/59 6.1.4 GPIO Operation There are 6 extern GPIO on VT-M2M-BTA-DE-PKR,you can use this command: gpio [ set | clear | read | dirout | dirin ] [ 1-6 | all ] ex 1: Set gpio 1 low $sudo gpio clear 1 ex2: Set gpio 1 high $sudo gpio set 1 ex3: Get gpio 1 value $sudo gpio read 1 ex4: Set gpio 1 input $sudo gpio dirin 1 6.1.5 Watchdog a. Configure watchdog driver: $sudo vim /etc/default/watchdog #Start watchdog at boot time? 0 or 1 run_watchdog=1 #Load module before starting watchdog watchdog_module=”sch311x_wdt” #Specify additional watchdog options here (see manpage). b. Configure watchdog:](https://usermanual.wiki/Chengdu-Vantron-Technology/BTADE-PKR/User-Guide-3963089-Page-39.png)