Chengdu Vantron Technology VTM2M-TCVM M2M Gateway User Manual
Chengdu Vantron Technology, Ltd. M2M Gateway Users Manual
UserManual.wiki
>
Chengdu Vantron Technology
>
VTM2M-TCVM User Manual
>
Users Manual
Contents
1.
User Manual
2.
Users Manual
Users Manual
Navigation menu
Upload a User Manual
Namespaces
Wiki Guide
HTML
PDF
Info
Views
User Manual
Discussion / Help
Navigation


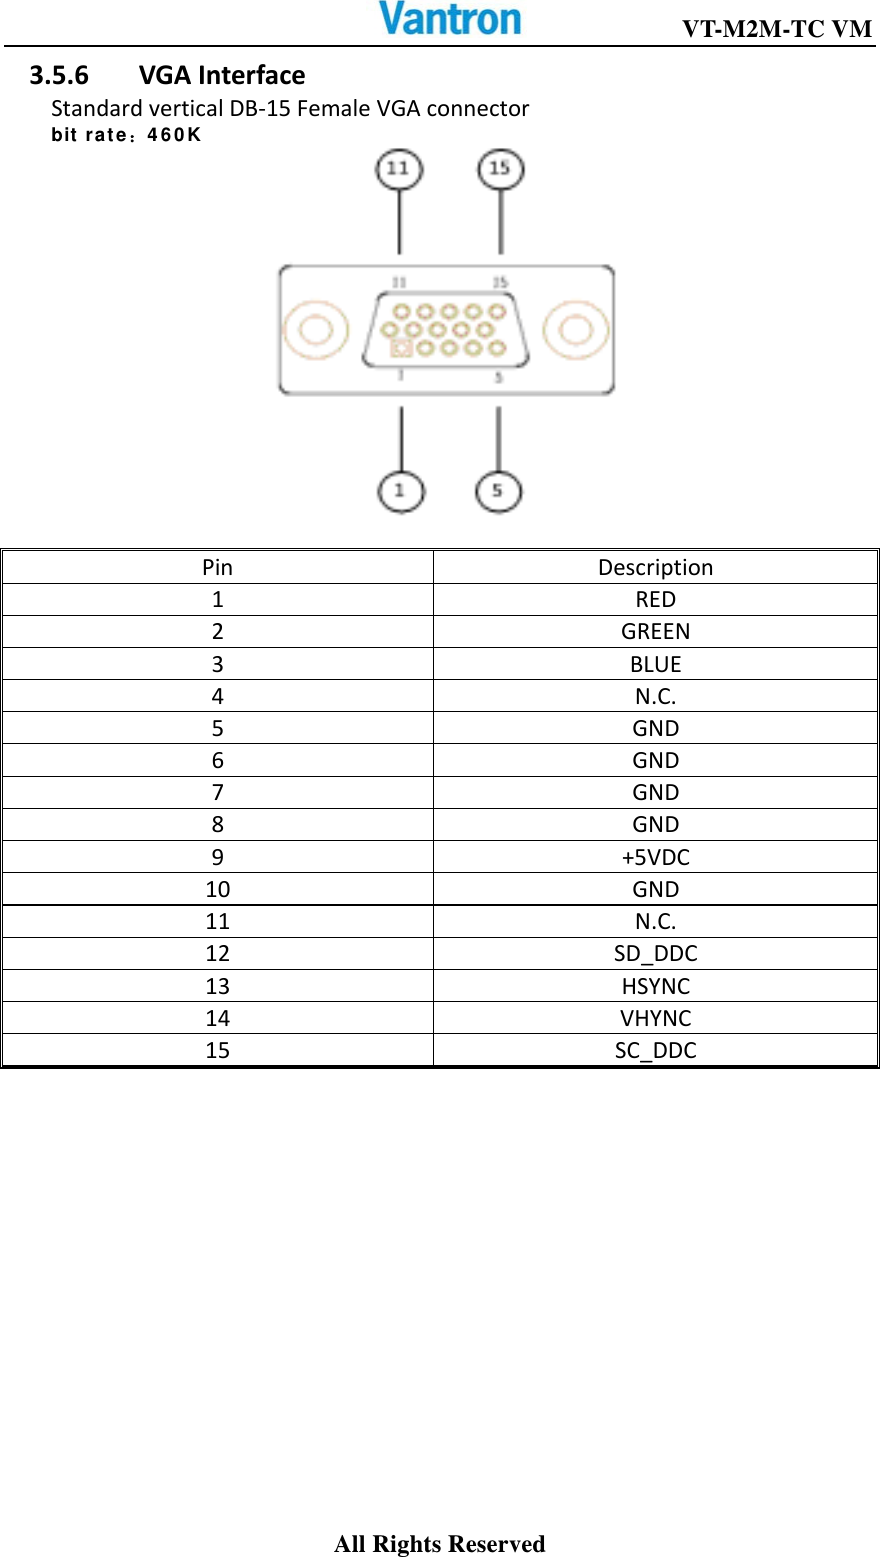
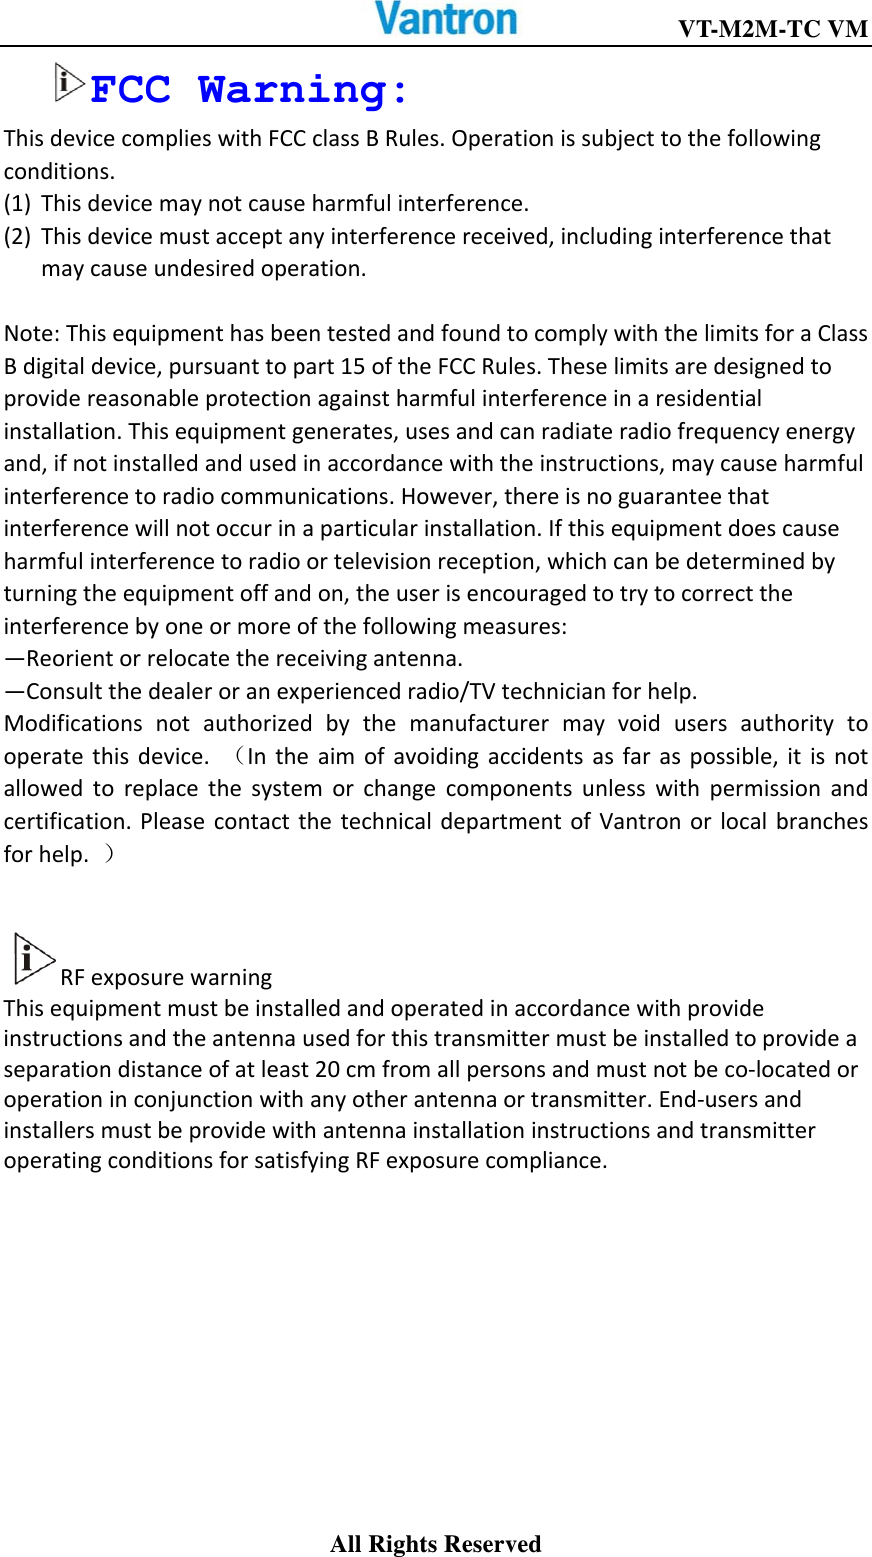
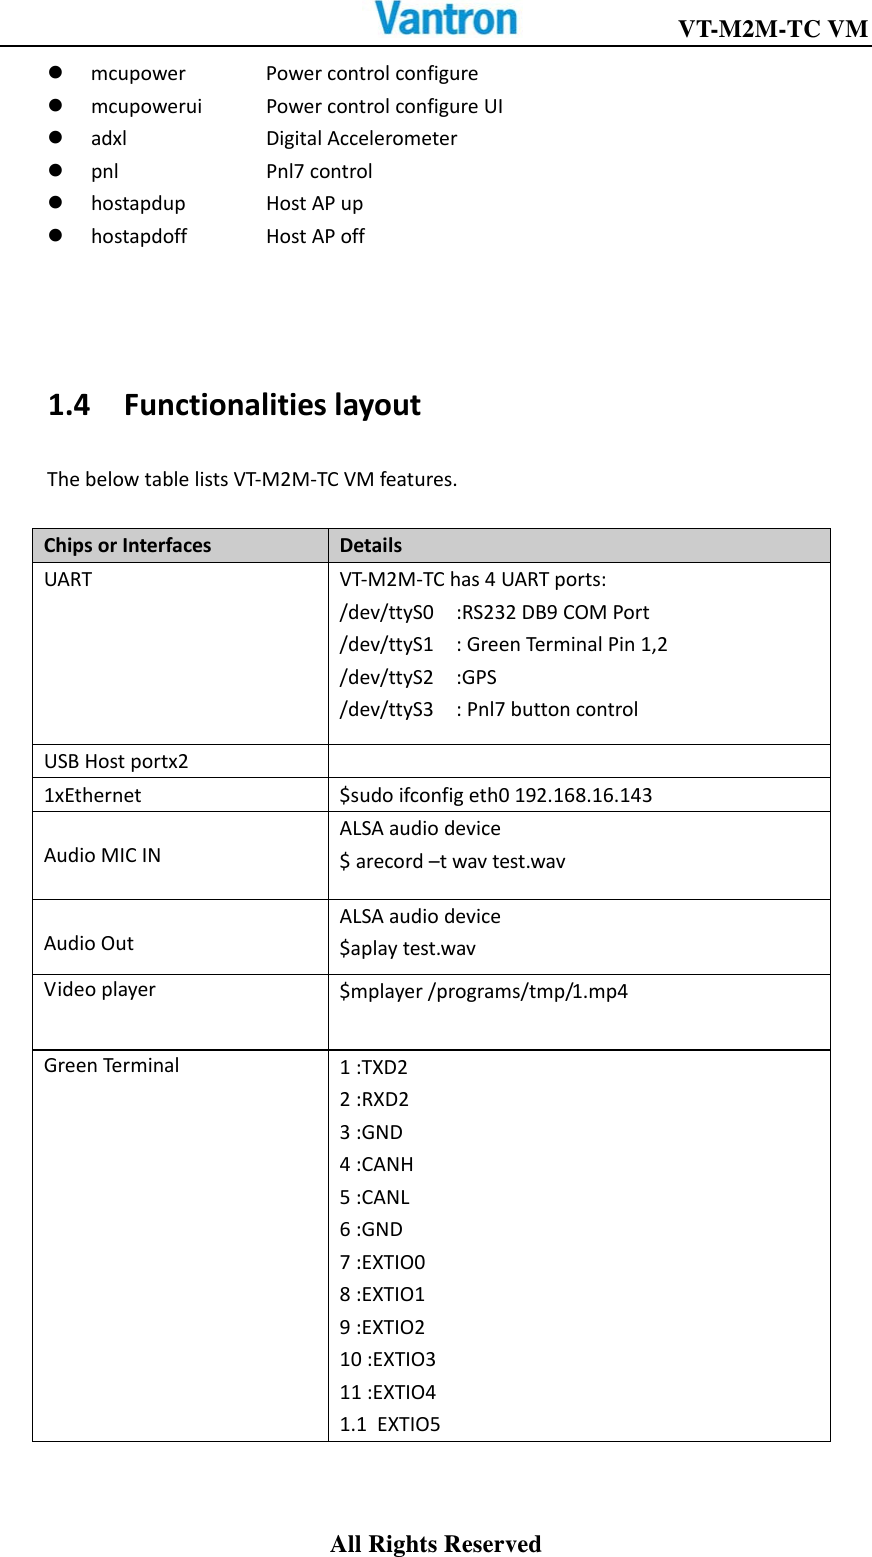
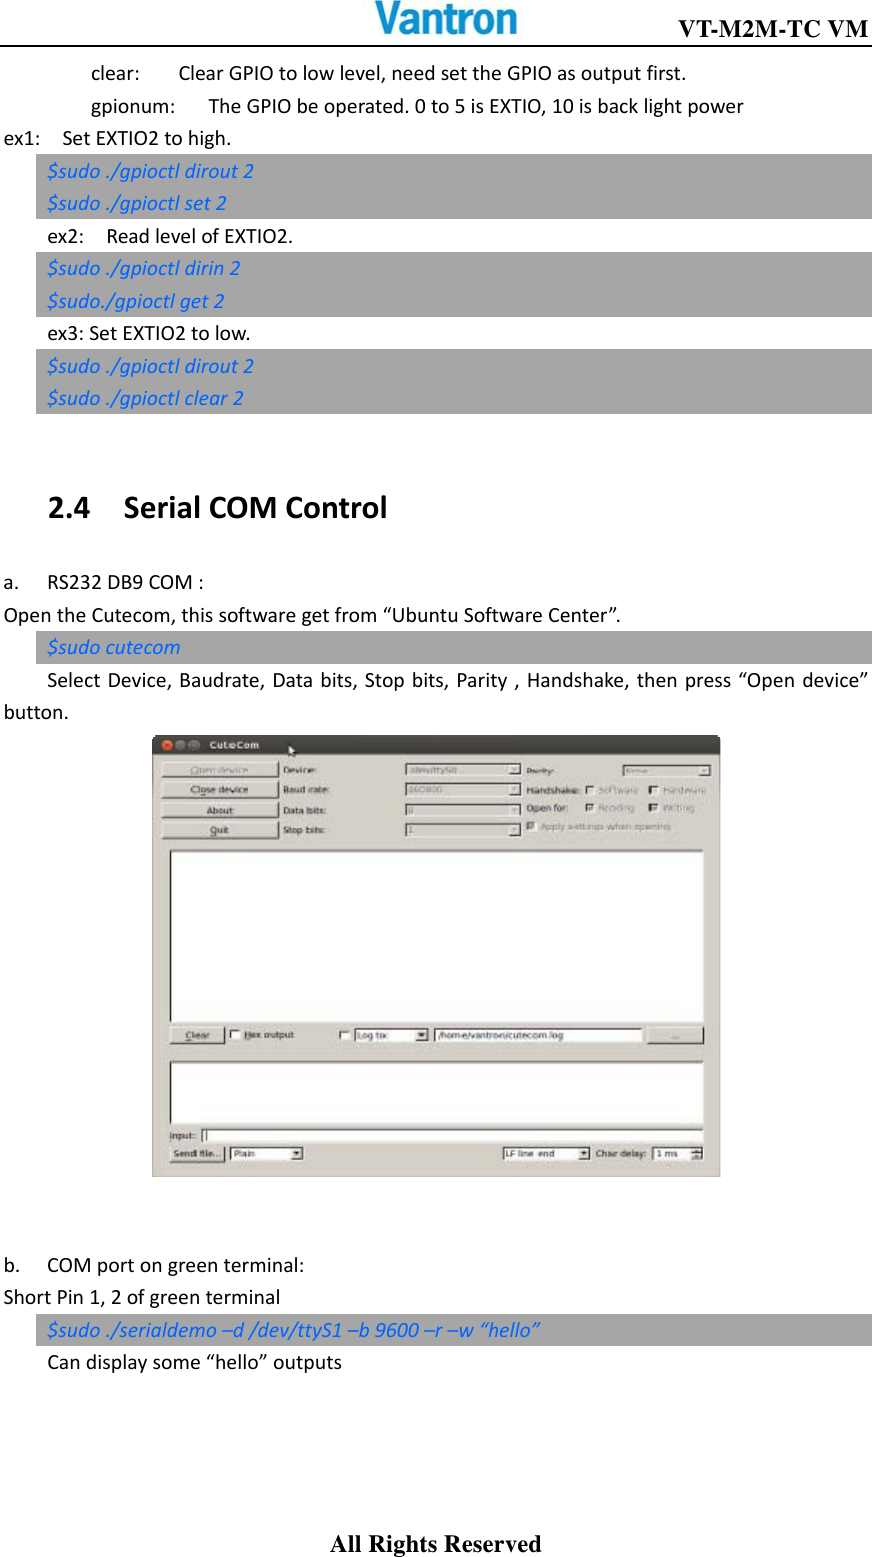
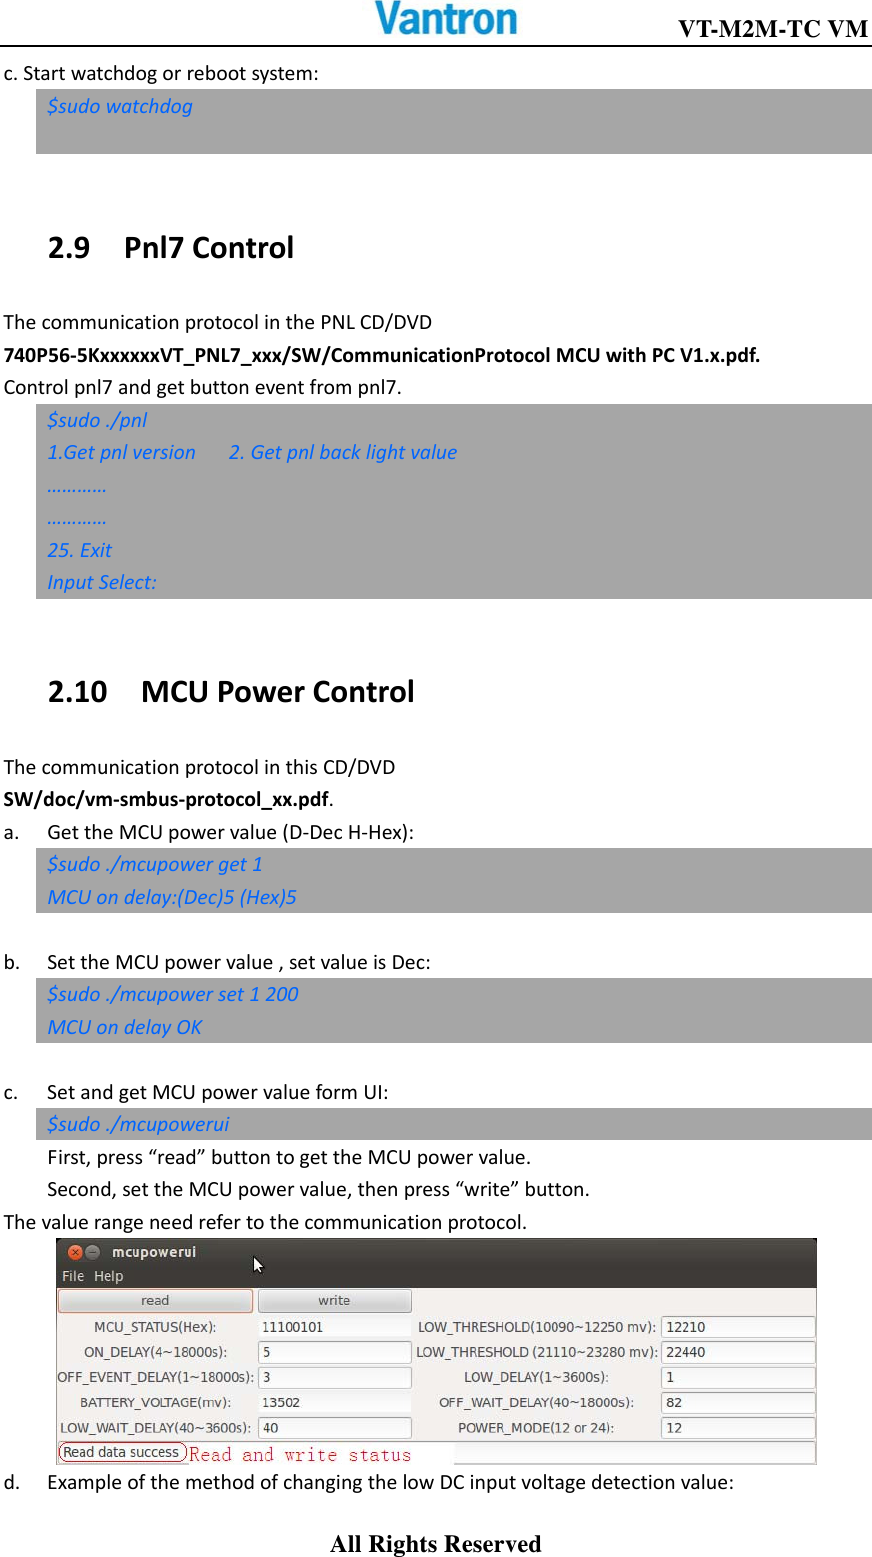
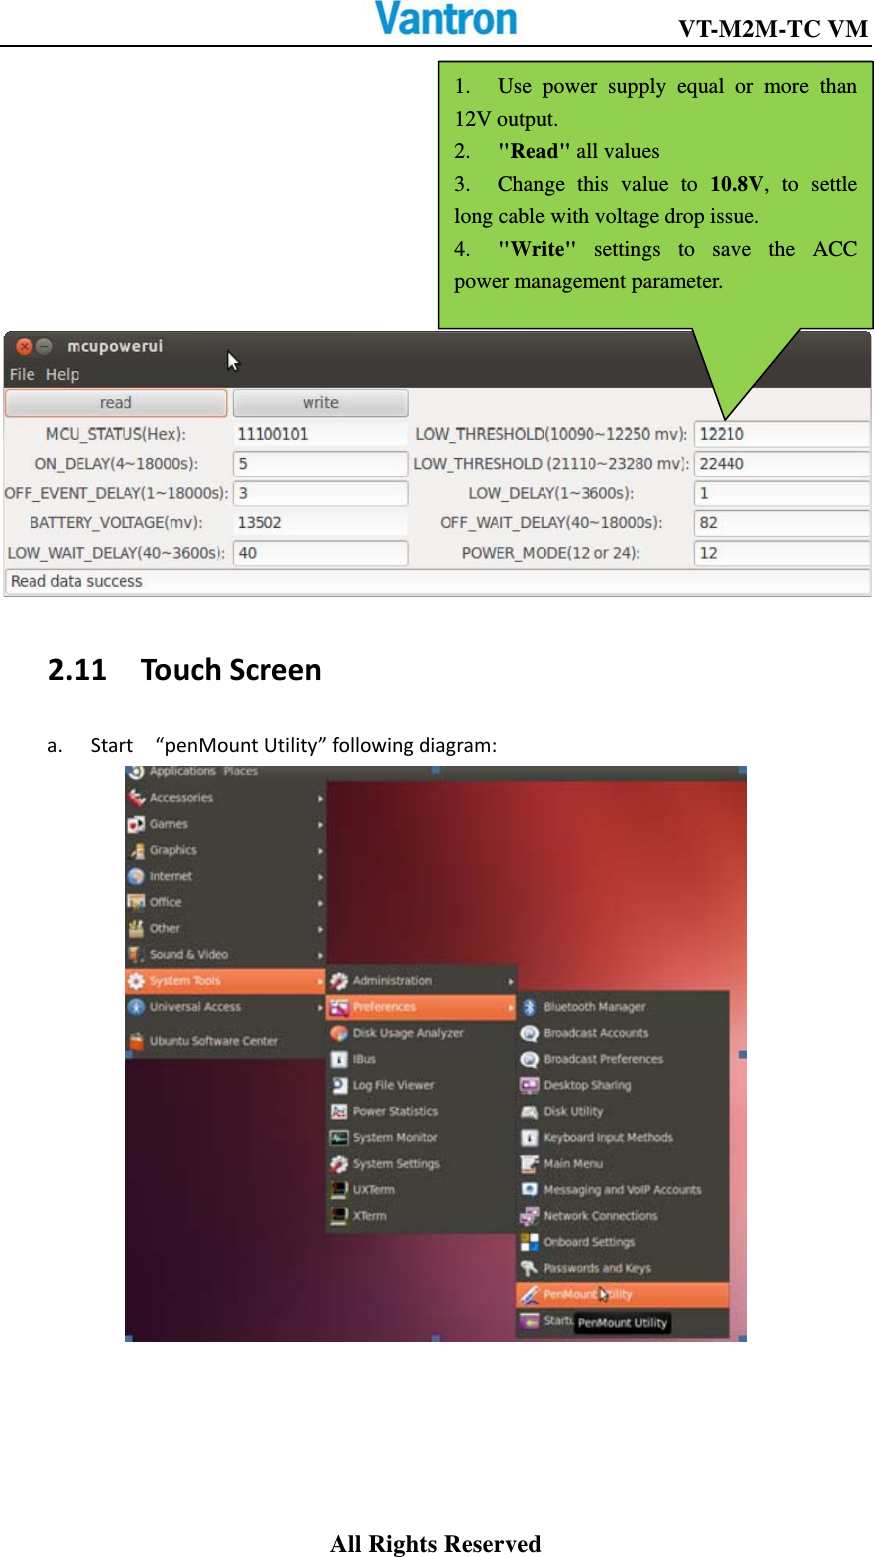
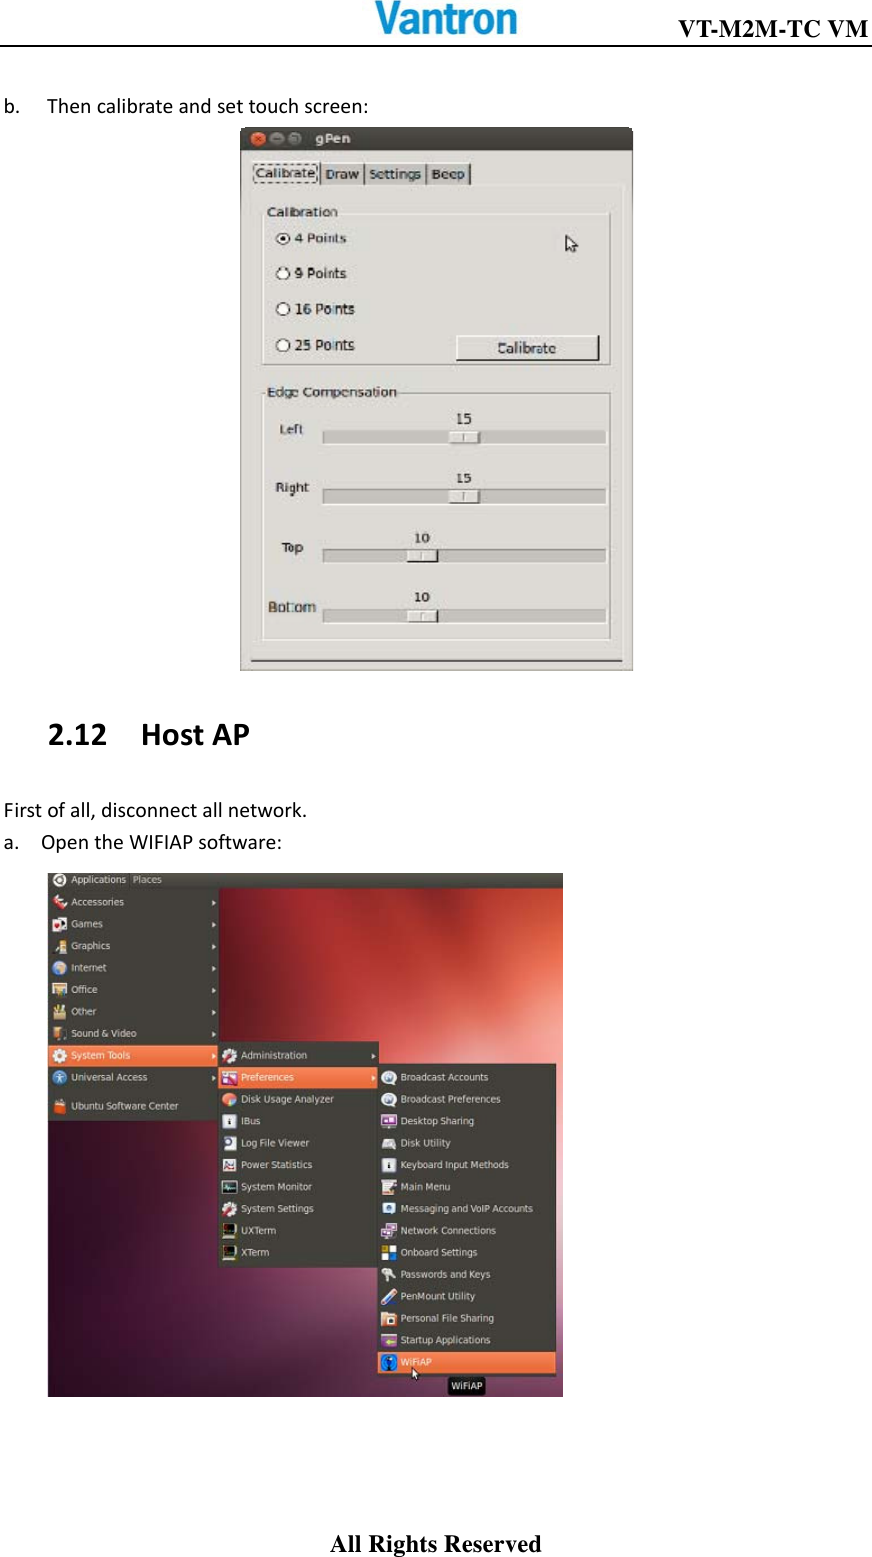
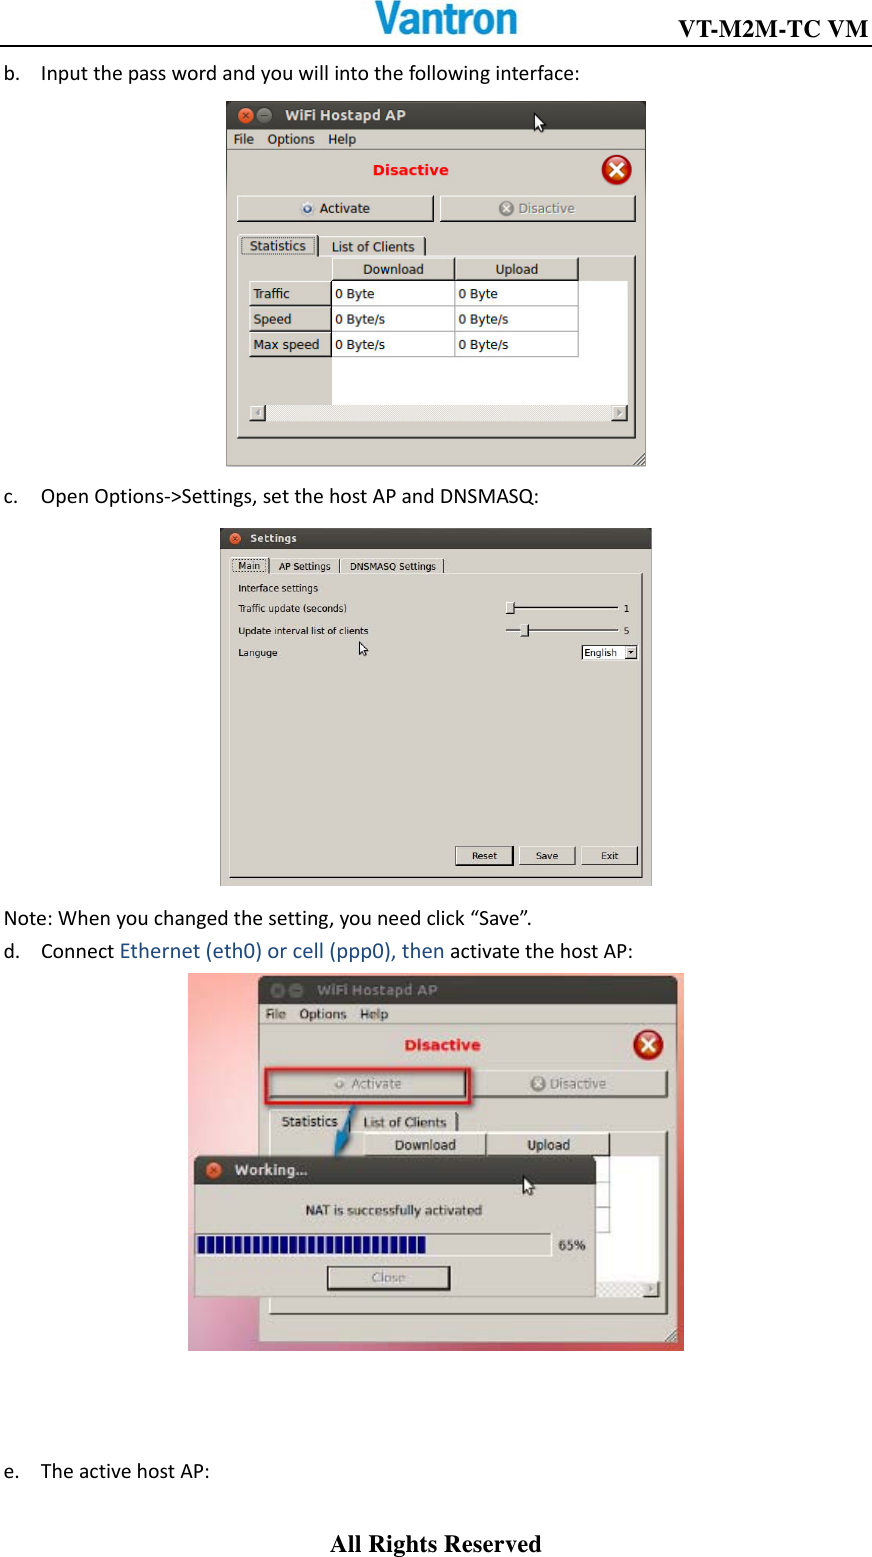
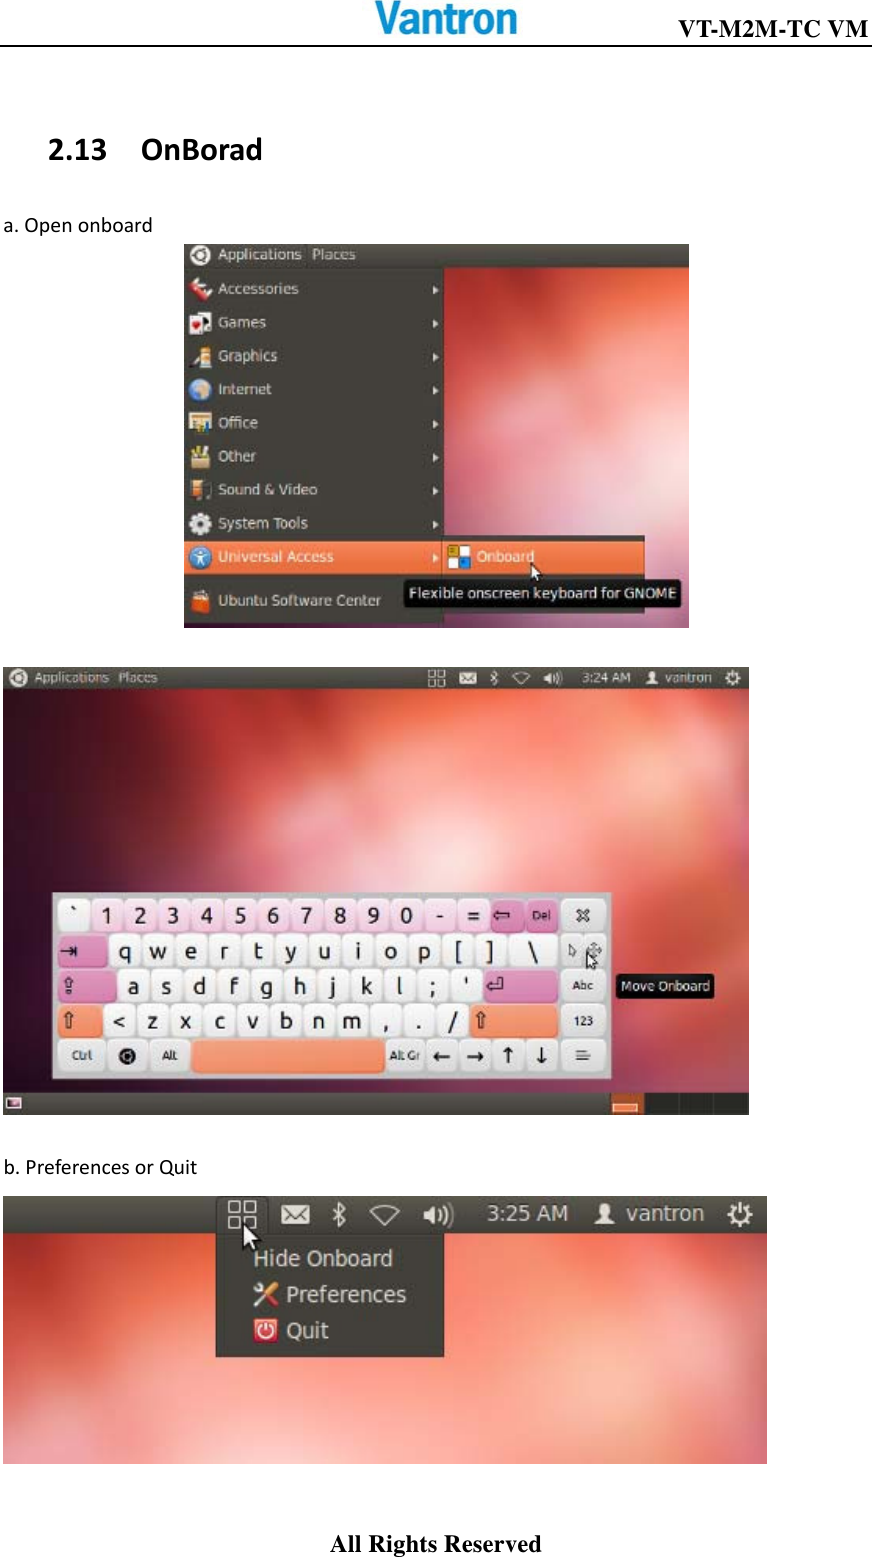
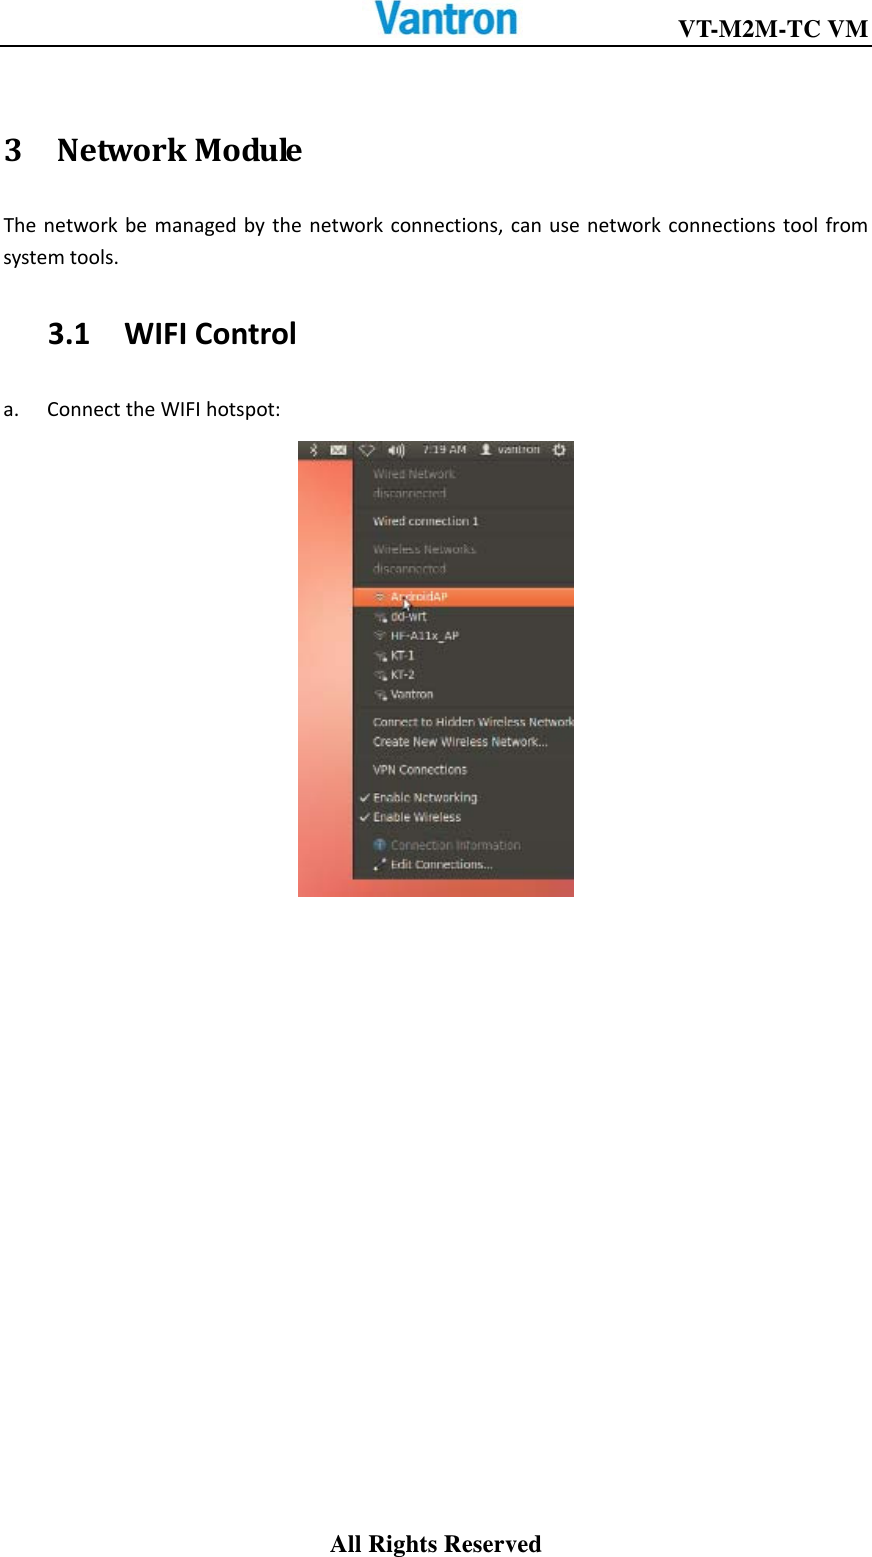
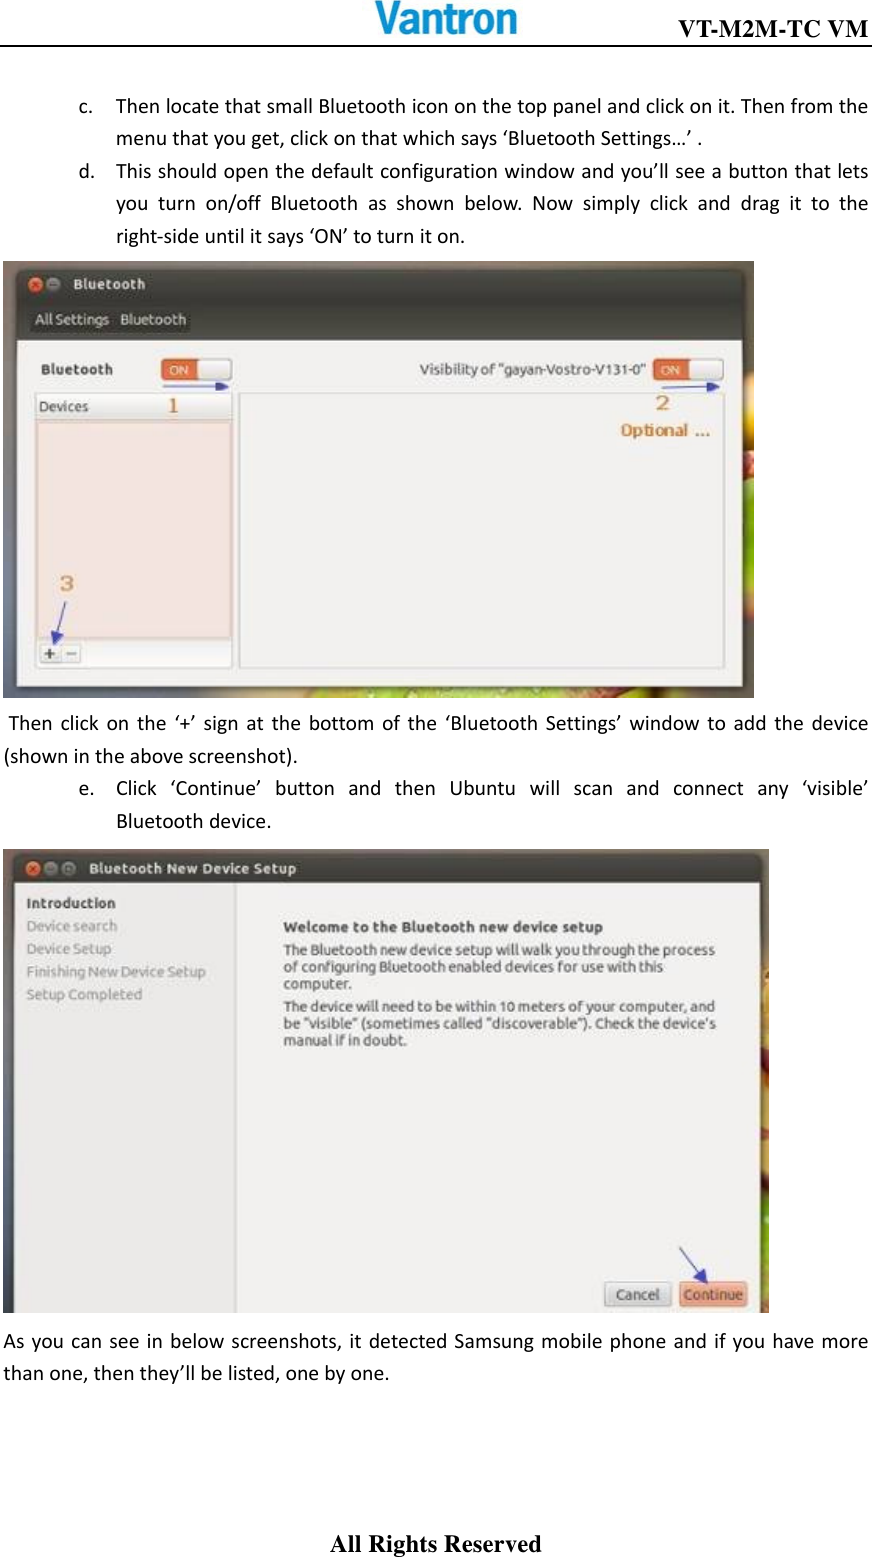
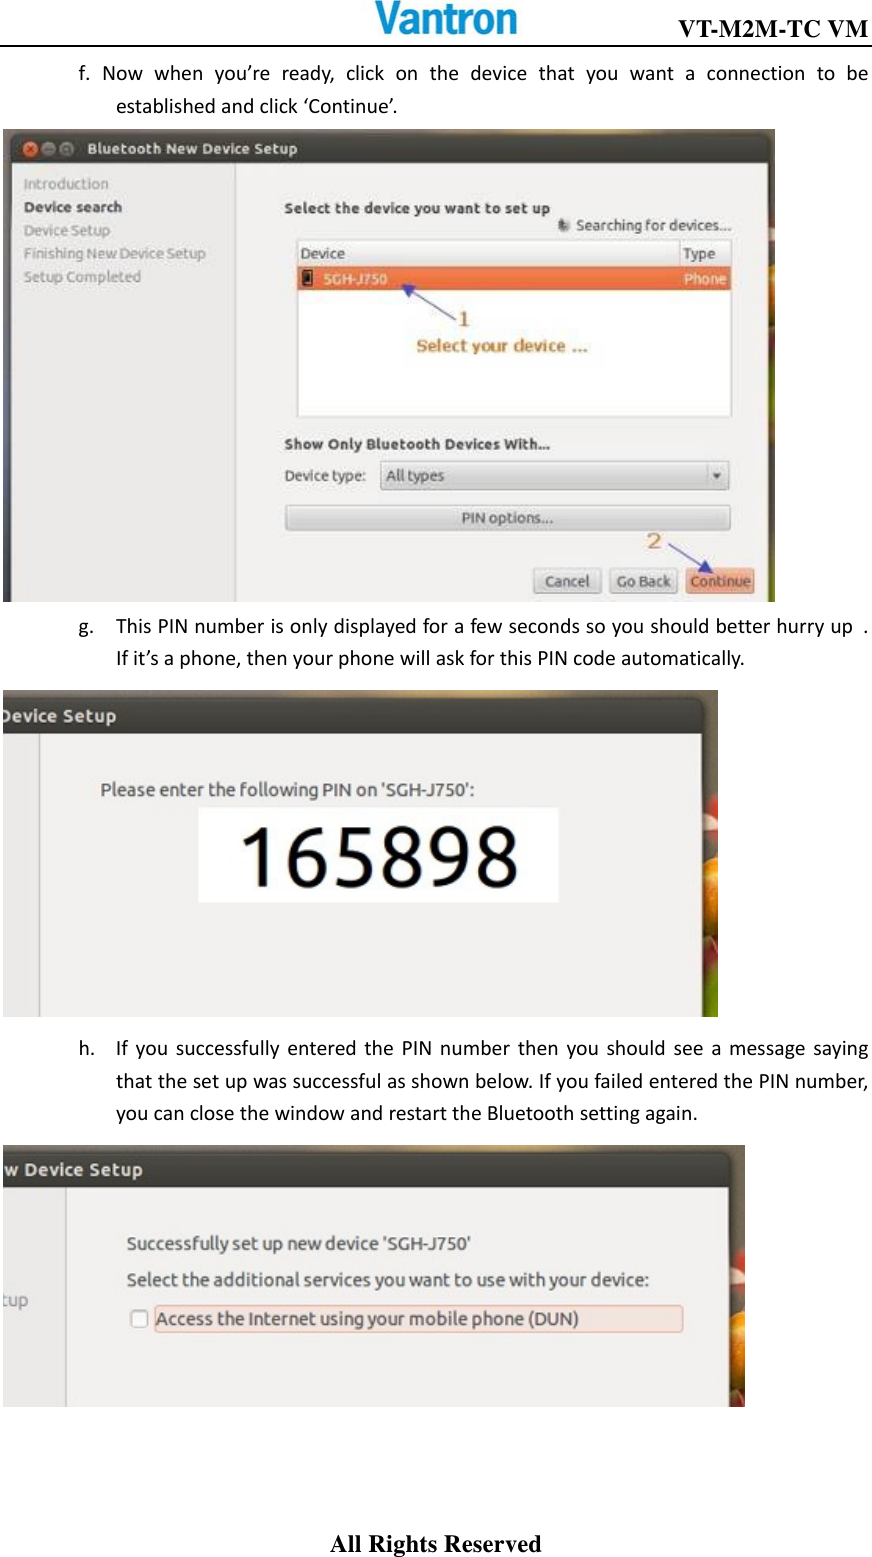
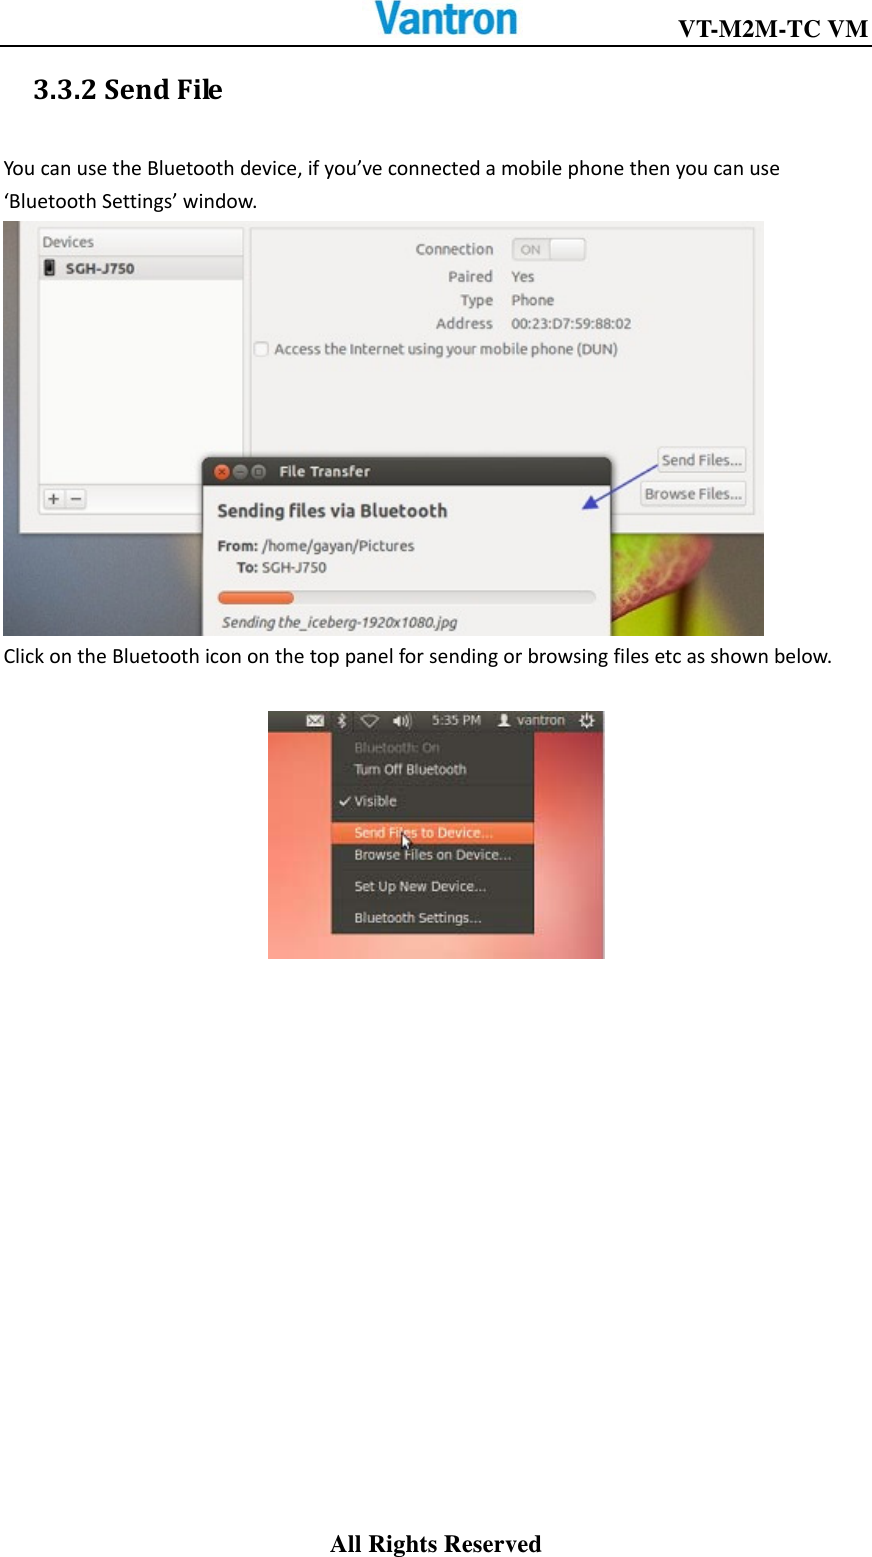
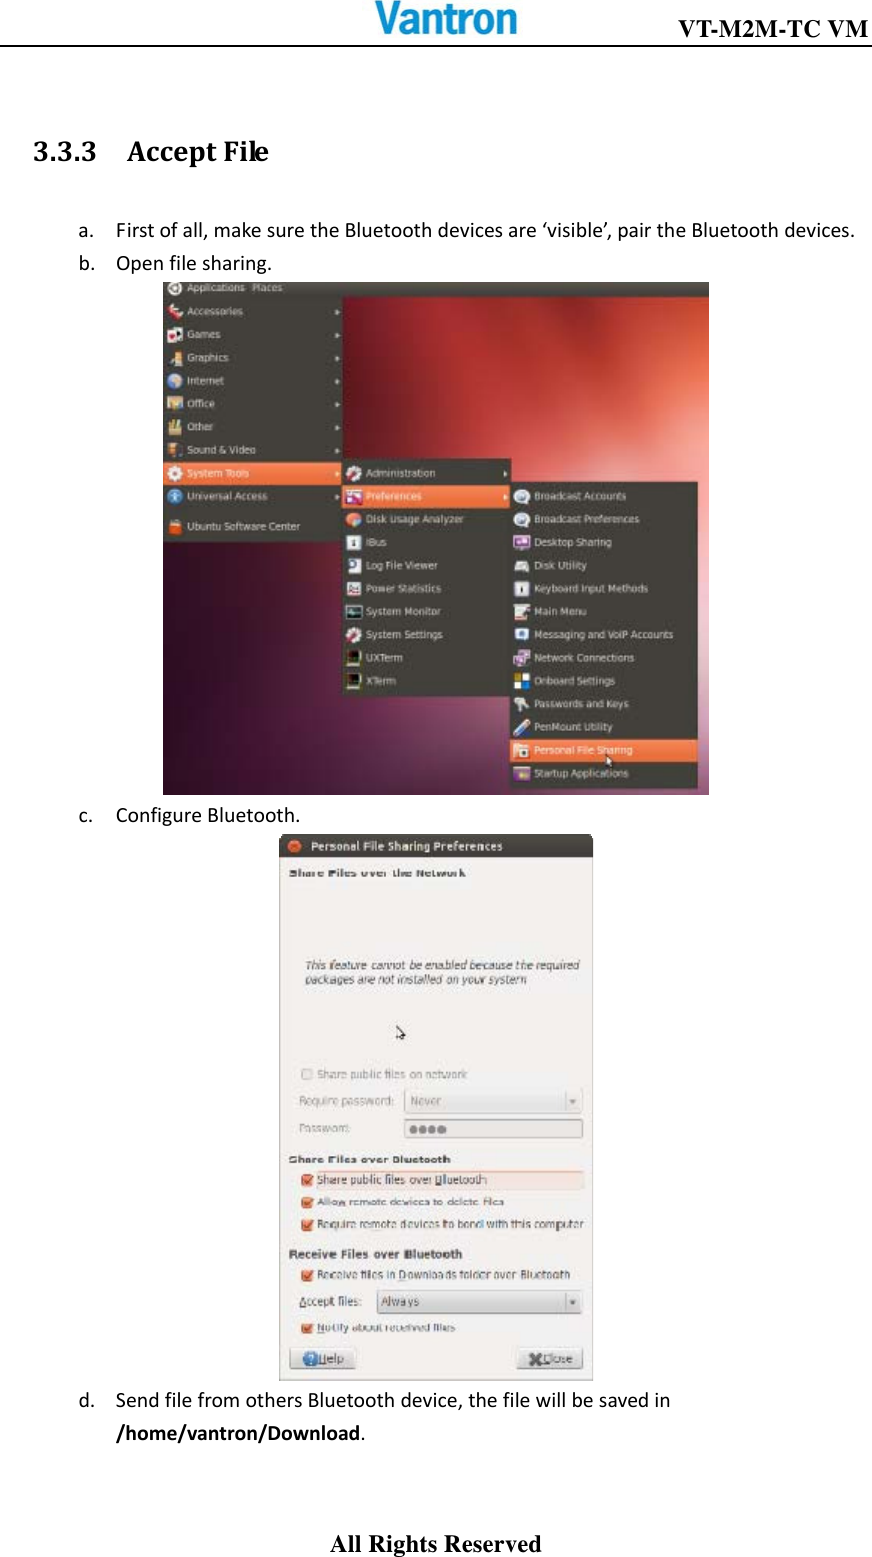
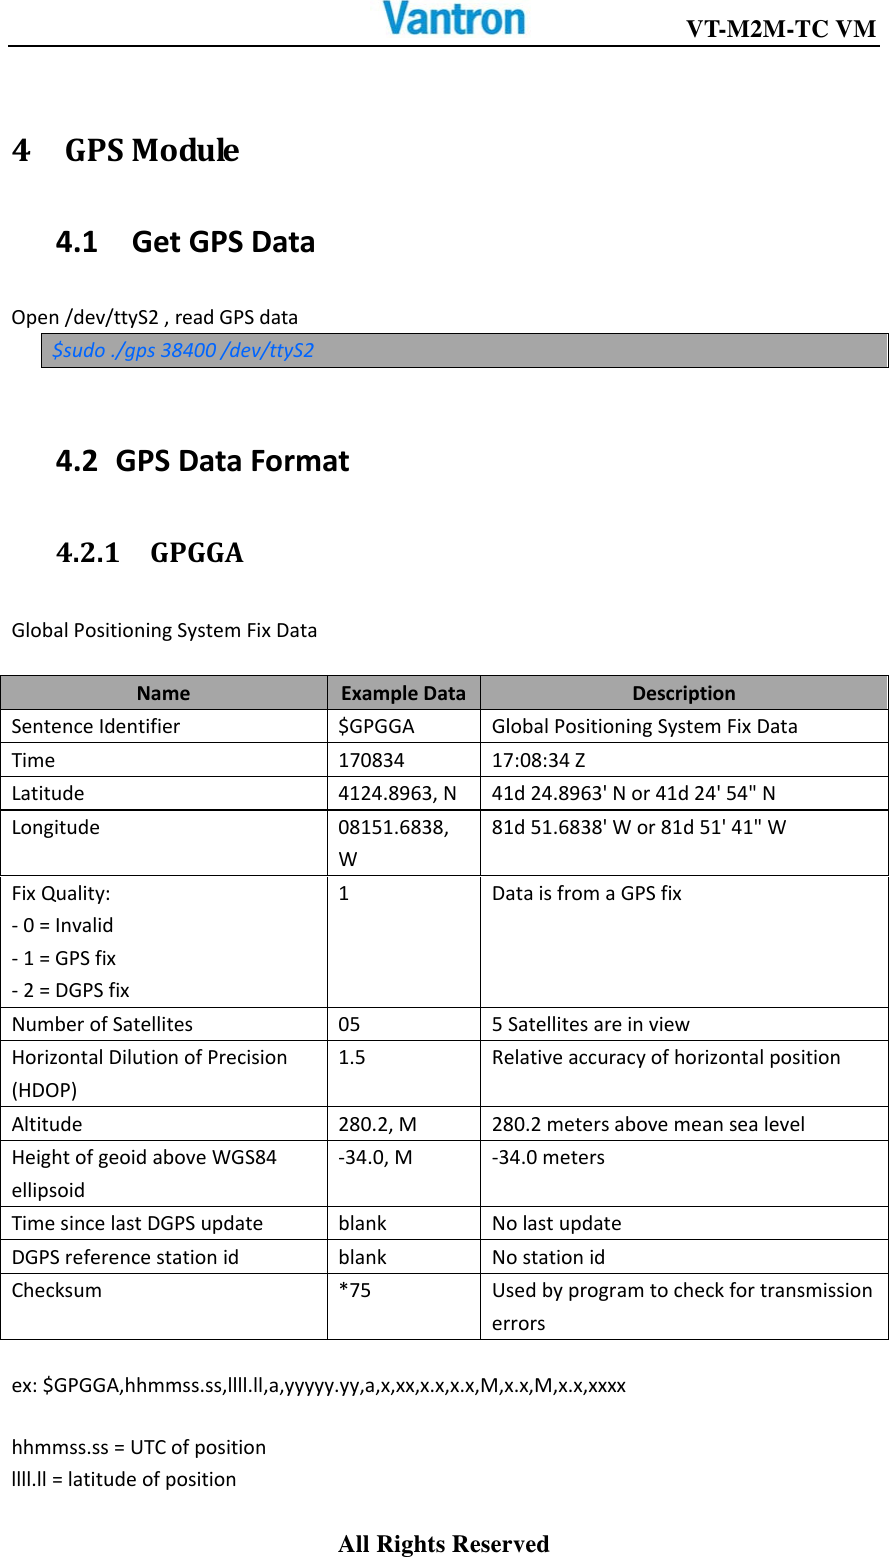
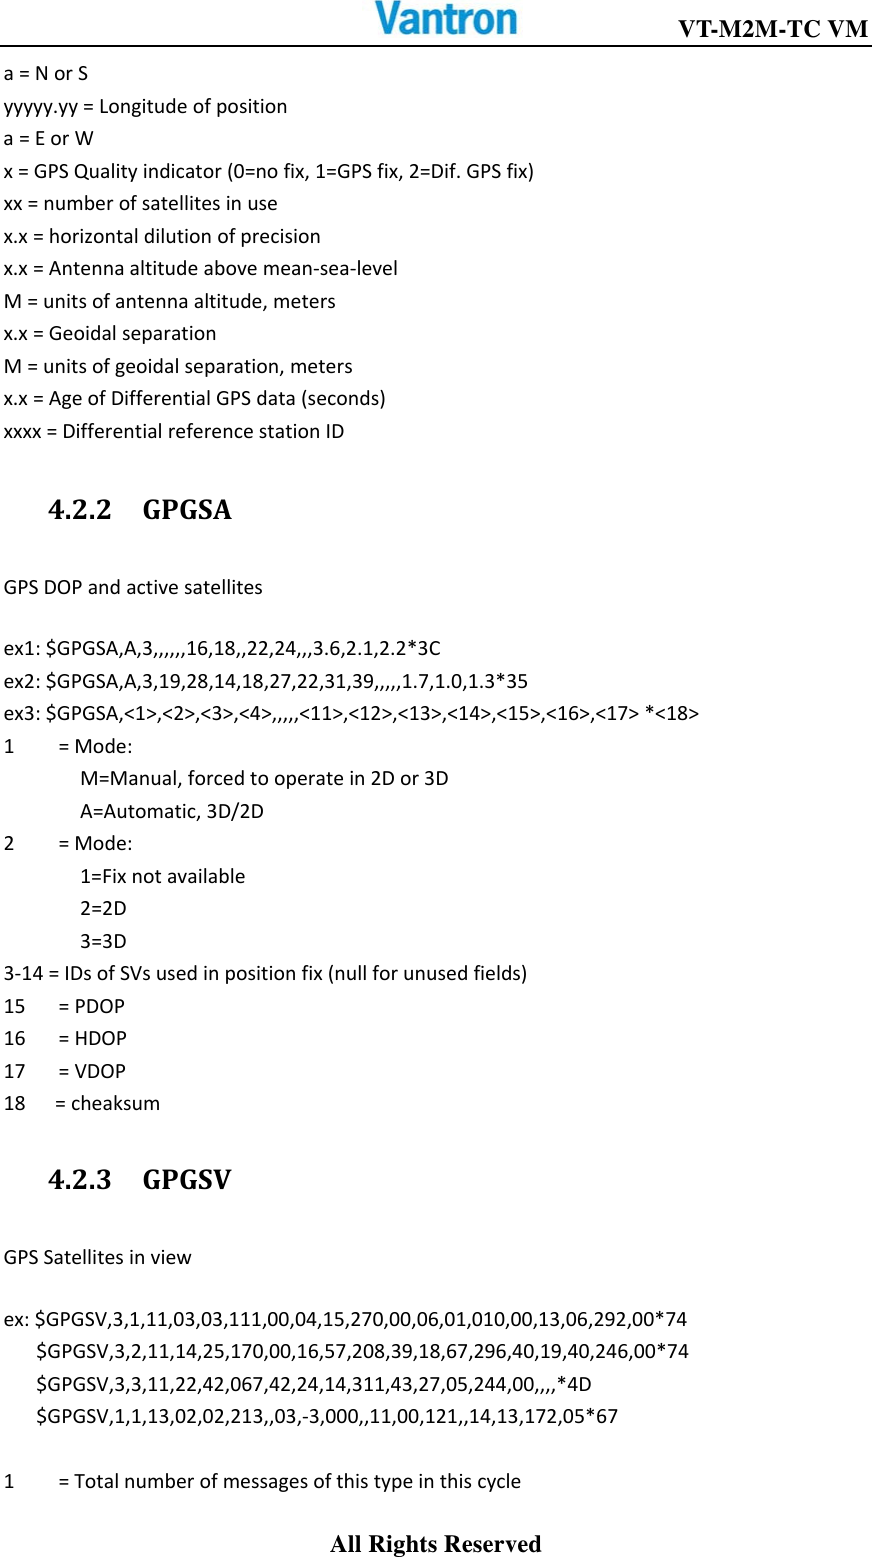
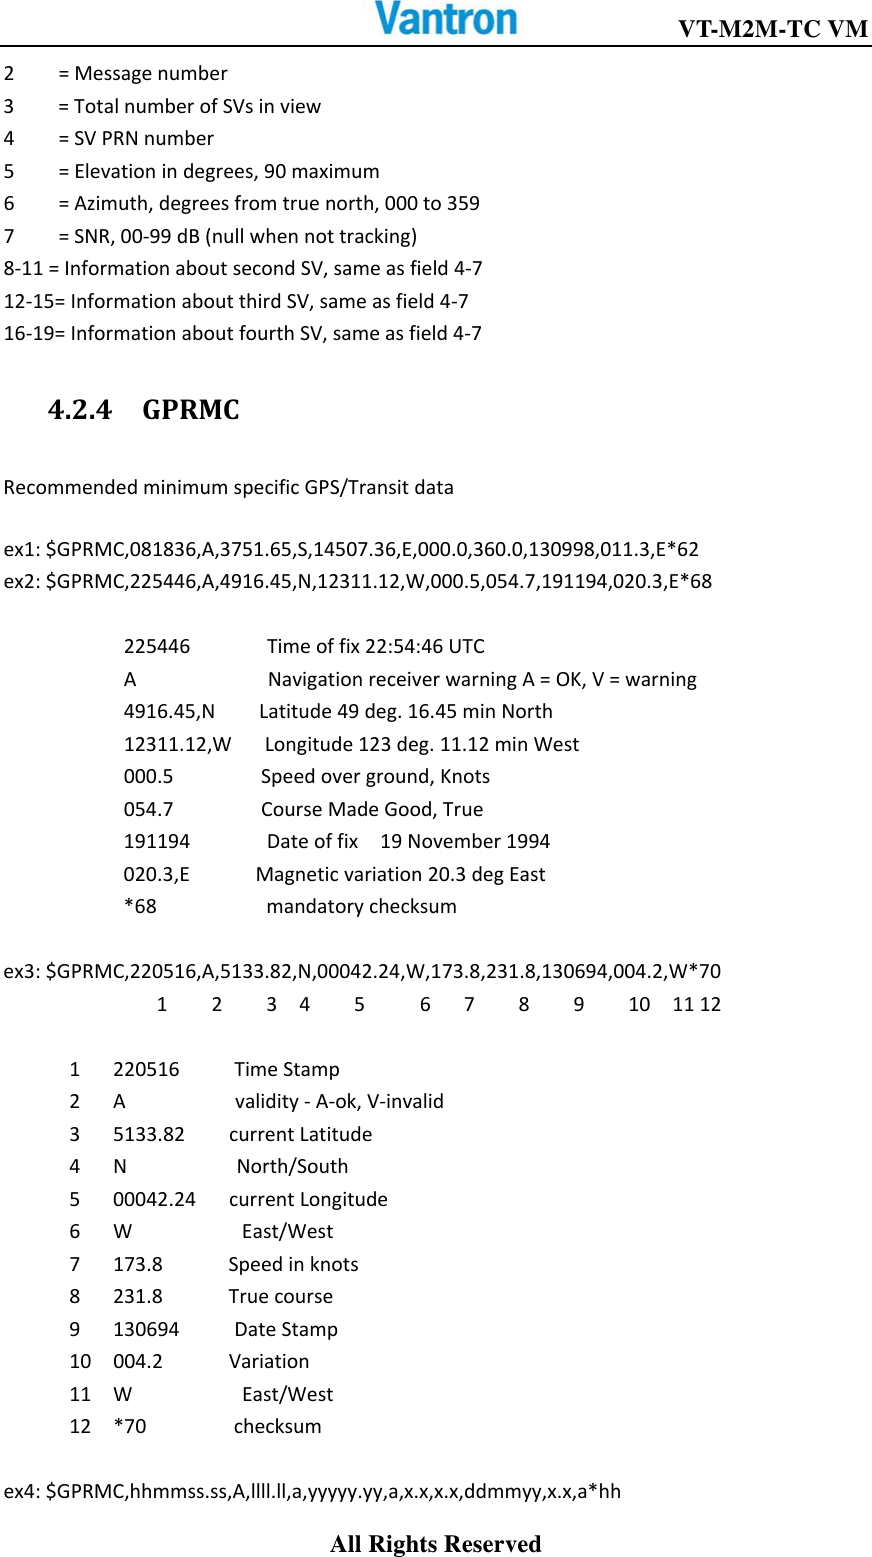
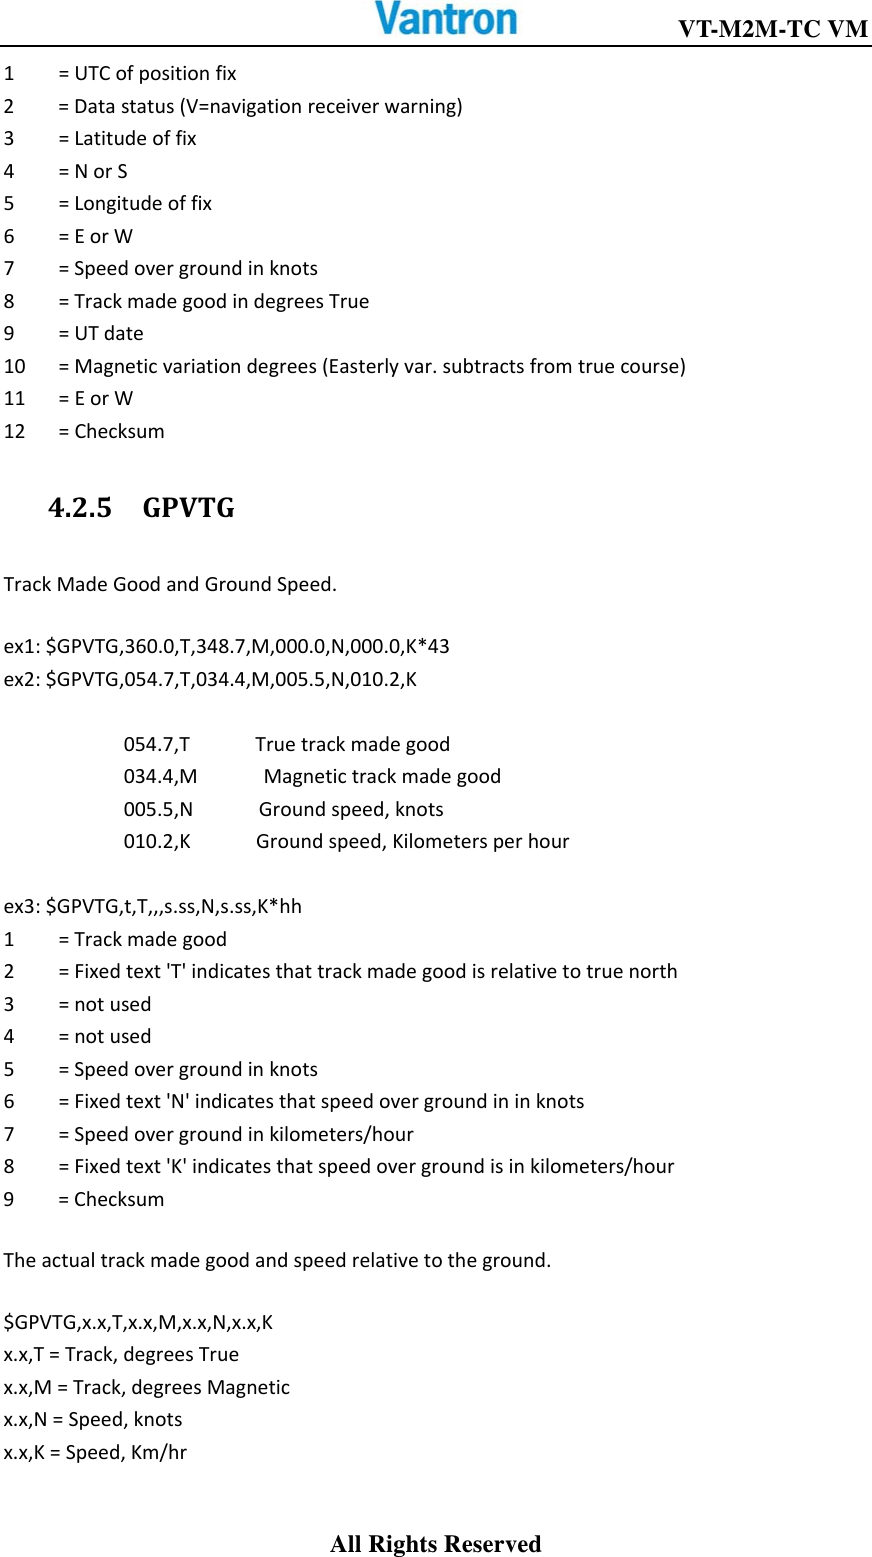
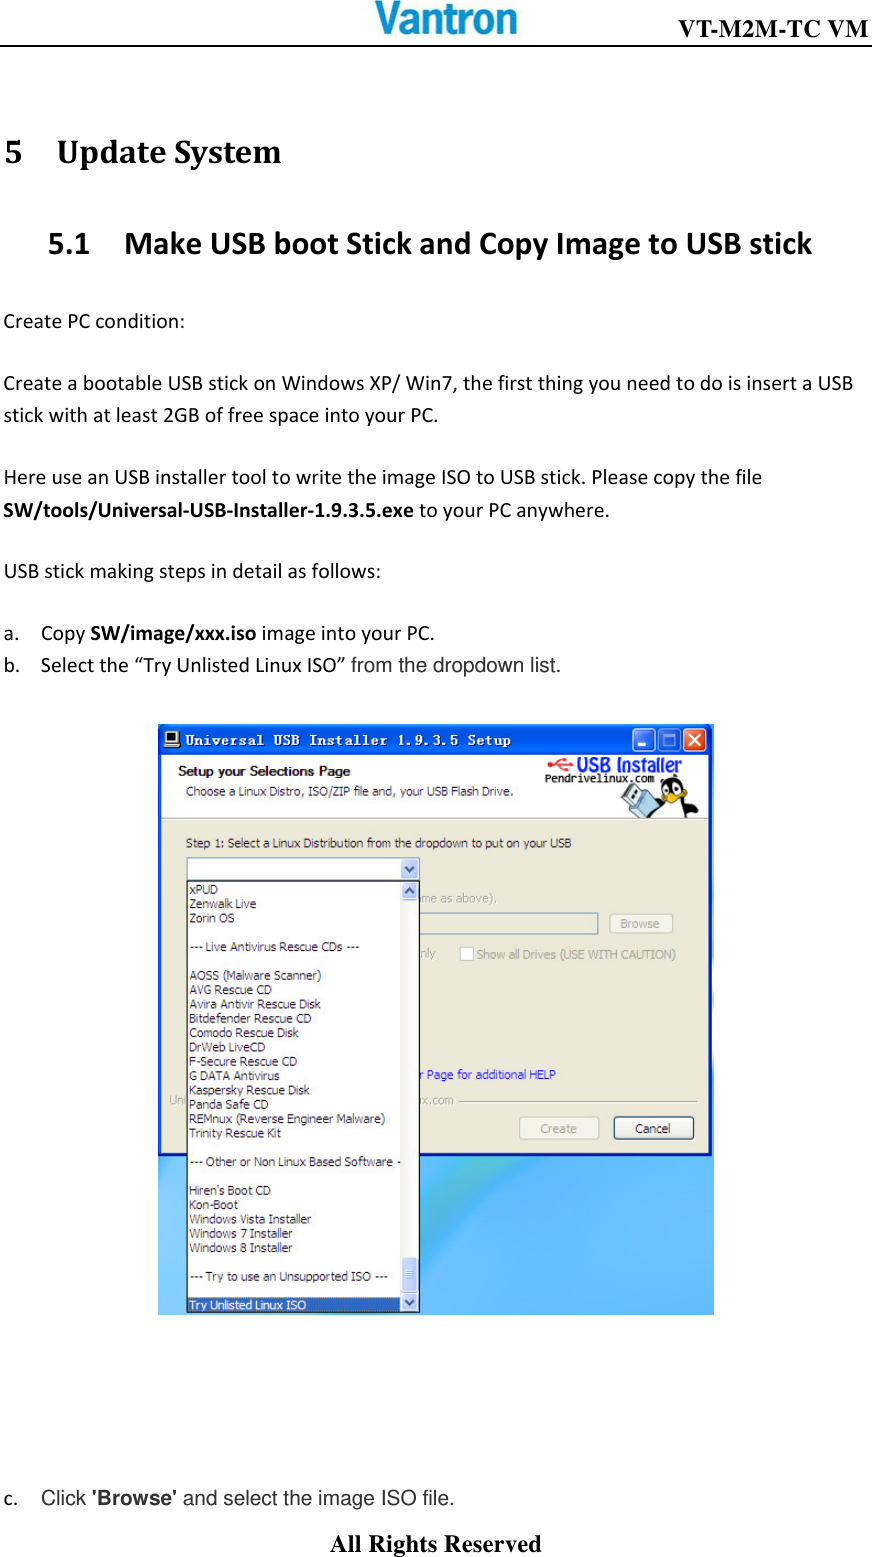
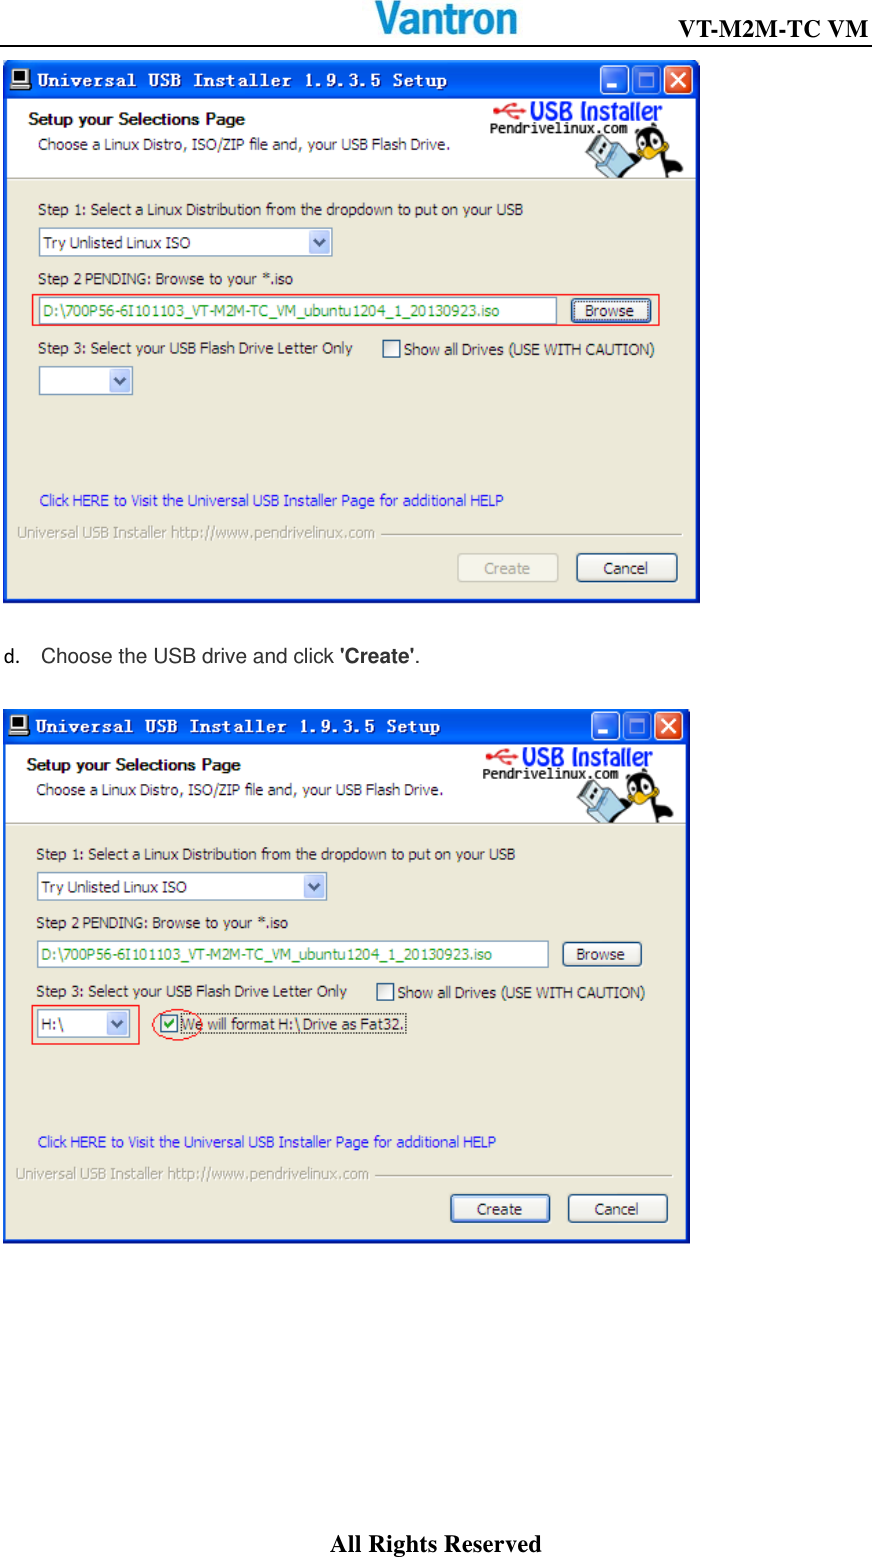
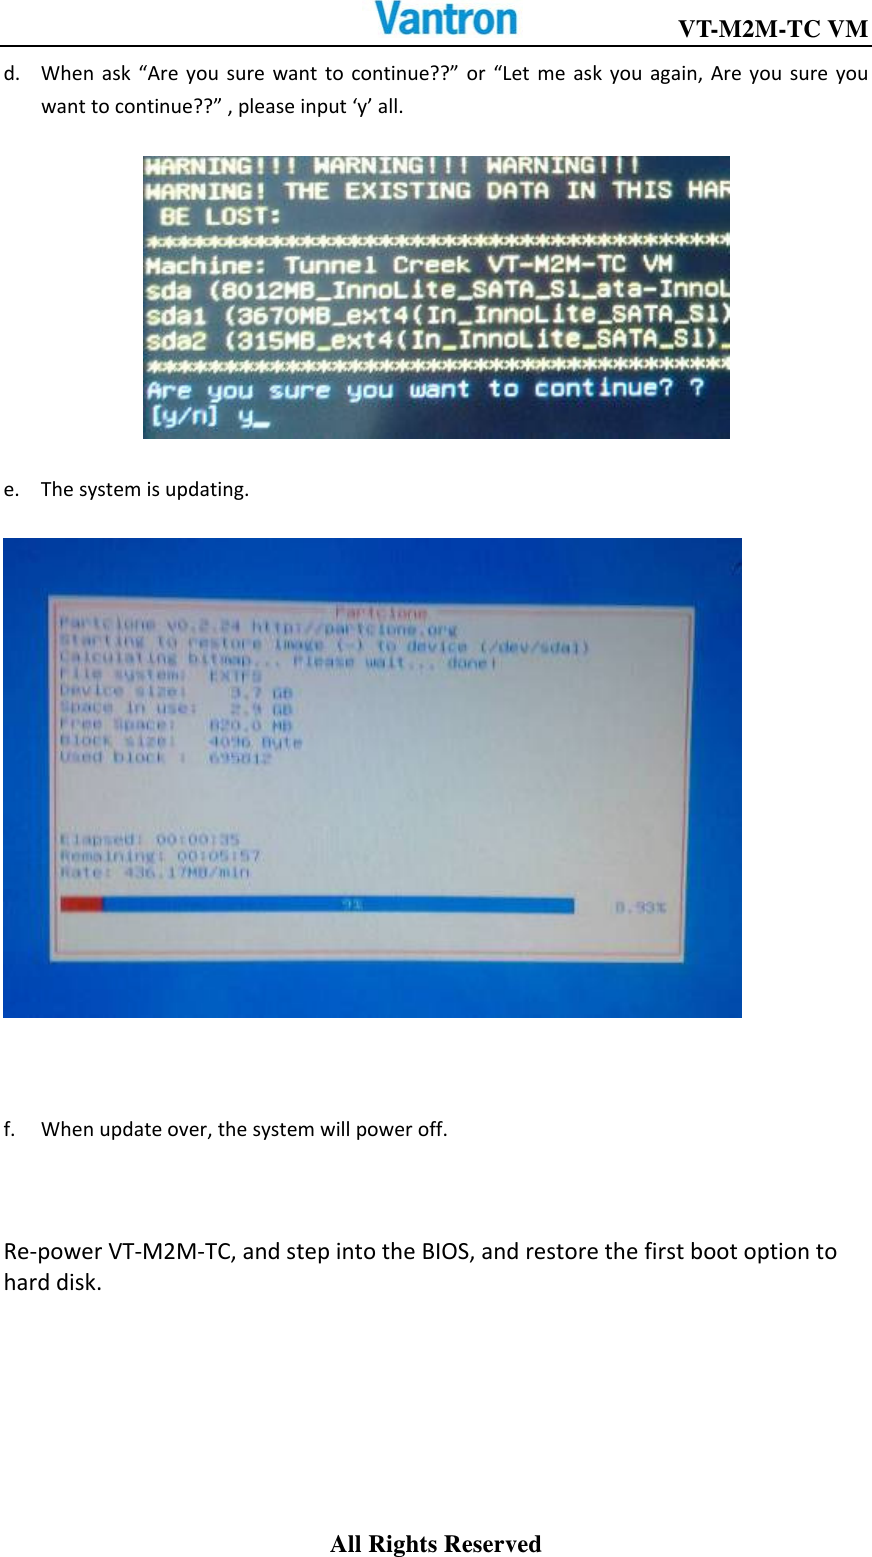
![VT-M2M-TC VM All Rights Reserved 2BaseControlOpentheterminal(CTRL+ALT+T),thengetintothedemodirectory. Thedirectorypatchis/programs/demo.ex:$cd/programs/demo2.1PowerControlpowercan|gps|3g][on|off]can:PowercontrolofCANModulegps:PowercontrolofGPSModule3g:Powercontrolof3GModuleex1:Turnonpowerofcanmodule$sudo./powercanonex2:Turnoffpowerofcanmodule$sudo./powercanoff2.2CanControla.Closecandevice$sudoifconfigcan0downb.Configurecan,setcan’sbaudrateto1Mbps,or100000(100kbps)$sudoiplinksetcan0typecanbitrate100000$sudoifconfigcan0upc.Receivecandata,itwillreceivecandatawhichfromotherside$sudo./loopbackd.Sendcandata,itwillsendcanpackagewithIDof0x02$sudo./client2.3GPIOControlgpioctl<dirin|dirout|get|set|clear><gpionum> dirin: SetspecifiedGPIOasinputtype dirout: SetspecifiedGPIOasoutput get:ReadGPIOinputlevel.NeedsettheGPIOasinputfirst. set:SetGPIOashighlevel.NeesettheGPIOasoutputfirst.](https://usermanual.wiki/Chengdu-Vantron-Technology/VTM2M-TCVM.Users-Manual/User-Guide-2200716-Page-30.png)