Chic Technology CKM50XXX Wireless Keyboard User Manual PMU CKM00014 NEW
Chic Technology Corporation Wireless Keyboard PMU CKM00014 NEW
users manual
Intelligent Wireless Keyboard
User's Guide
Notice:
Federal Communications Commission (FCC) requirements, Part 15
This equipment has been tested and found to comply with the limits for a class B digital device, pursuant to part 15 of the FCC Rules.
These limits are designed to provide reasonable protection against harmful interference in a residential installation.
This equipment generates, uses and can radiate radio frequency energy and, if not installed and used in accordance with the
instructions, may cause harmful interference to radio communications. However, there is no guarantee that interference will not
occur in a particular installation. If this equipment does cause harmful interference to radio or television reception, which can be
determined by turning the equipment off and on, the user is encouraged to try to correct the interference by one or more of the
following measures:
--Reorient or relocate the receiving antenna.
--Increase the separation between the equipment and receiver.
--Connect the equipment into an outlet on a circuit different from that to which the receiver is connected.
--Consult the dealer or an experienced radio/TV technician for help.
CAUTION: Any changes of modifications not expressly approved by the grantee of this device could void the user's authority to
operate the equipment.
Congratulations on your purchase of the Intelligent Wireless Keyboard. Please
carefully read the User's Guide to learn about the installation and the convenient
Internet and multimedia functions of your new Intelligent Wireless Keyboard.
1. Contents of Package
1) Intelligent Wireless Keyboard
2) Receiver (PS/2)
3) Three AA Batteries
4) Driver CD-ROM
5) User's Guide
2. Install Hardware
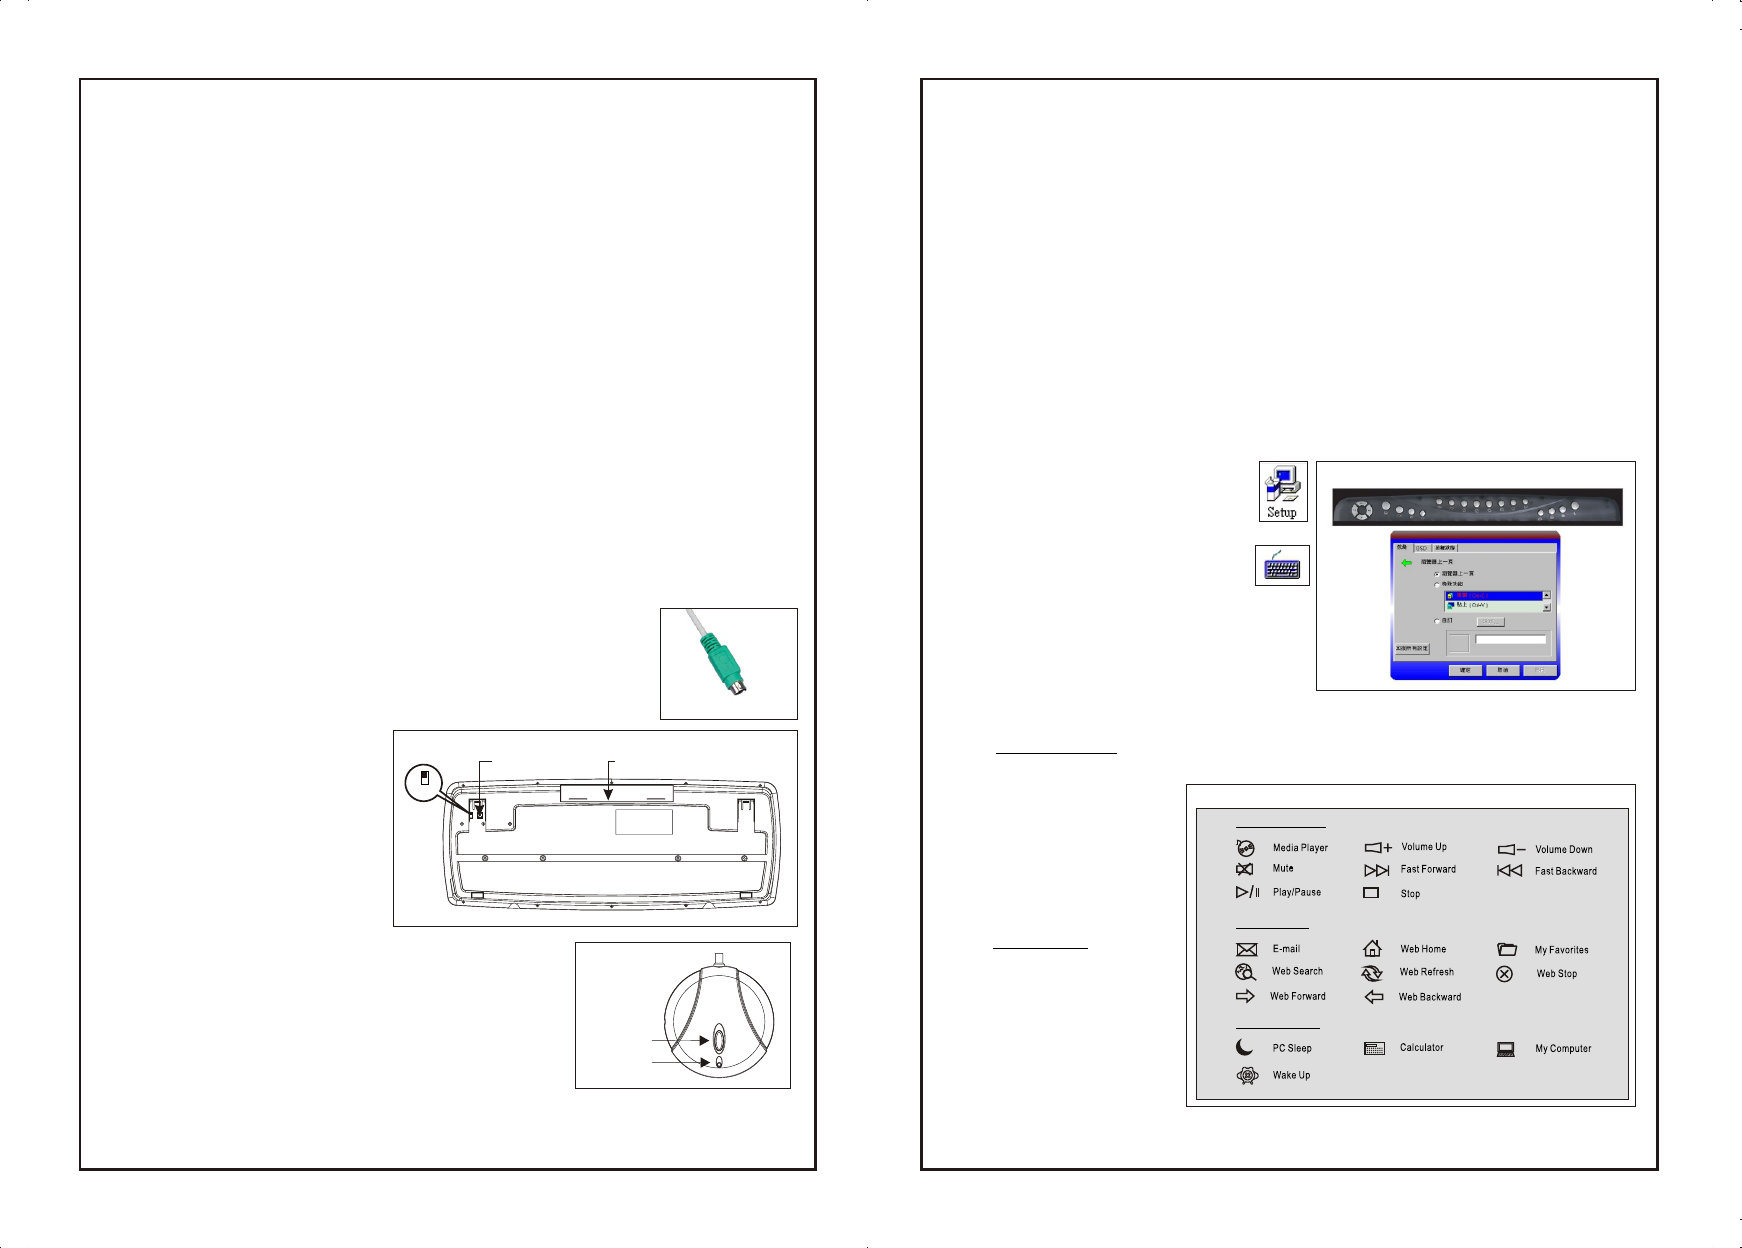
2-1. Install the Receiver with a PS/2 Connector
1) Please turn off your PC.
2) Plug the PS/2 connector of the receiver into the PS/2 keyboard port of
the PC.
2-2. Select the Keyboard Channel
1) The two-channel switch is
located on the back, right-hand
side of the keyboard, which is
next to the link button. Select
channel "1" or "2".
2) Put the batteries into the battery
case
2-3. Link the Intelligent Wireless
Keyboard with the Receiver
Notice: The locations of the channel link button and the
LED indicator may be different due to various receiver
shapes.
1) Please turn on your PC. The LED indicator on the
receiver will light.
2) Press the ID Link Button on the receiver and the LED
indicator will blink. The receiver is ready to
automatically link with the keyboard.
3) Press the ID Link Button on the back of the keyboard and the LED light on the receiver
will blink quickly while you successfully finish the keyboard linkage.
This device complies with Part 15 of the FCC Rules.
Operation is subject to the following two conditions: (1) this device may not cause harmful interference, and
(2) this device must accept any interference received, including interference that may cause undesired operation.
4) The LED indicator on the receiver will light steadily while you complete the linkage.
5) The LED indicator of the receiver will blink while you use the keyboard.
6) If you need to re-link the keyboard or after changing the batteries, please repeat the
above linkage instructions.
7) If the selected channel is interfered by other wireless keyboard users nearby, please
change the Link ID by re-linkage or select the other channel immediately.
8) There are 256 changeable IDs for each channel.
3. Install Driver
3-1. Notice
1) The driver supports Windows 95, Windows 98, Windows NT, Windows 2000, Windows
ME and Windows XP.
2) The driver CD-ROM may content the drivers of keyboards and mice. Please select to
install the keyboard driver at the pop-up window.
3) The PC system may automatically install the driver.
3-2. Install the Keyboard Driver
1) Insert the driver CD-ROM to your PC.
2) If the driver CD-ROM does not be
automatically installed, please
double click the file "Setup.exe"
in the folder of the keyboard and
follow the setup instructions to
complete the driver installation.
3) A Keyboard Setting icon will
appear on the tool bar of Windows
after you successfully finish the
installation.
4)You can double click the Keyboard
Setting icon and follow the
selection instructions to set the
keyboard functions.
5) 20 Smart Hot Keys locate in three zones-
-Multimedia, Internet and Computer.
Multimedia Zone
Provides you the total media control.
(1) Media Player
(2) Volume Up
(3) Volume Down
(4) Mute
(5) Fast Forward
(6) Fast Backward
(7) Play/Pause
(8) Stop
Internet Zone
Freely surfing Internet
through the 8 easy hot
keys.
(1) E-mail
(2) Web Home
(3) My Favorites
(4) Web Search
(5) Web Refresh
(6) Web Stop
(7) Web Page Forward
Computer Zone
Internet Zone
3Figure 3-2-5
Multimedia Zone
3Figure 2-1
Link Button
Receiver
3Figure 2-3
LED Indicator
3Figure 3-2-4
Link Button
1
2
CH
Keyboard
3Figure 2-2
Battery Case
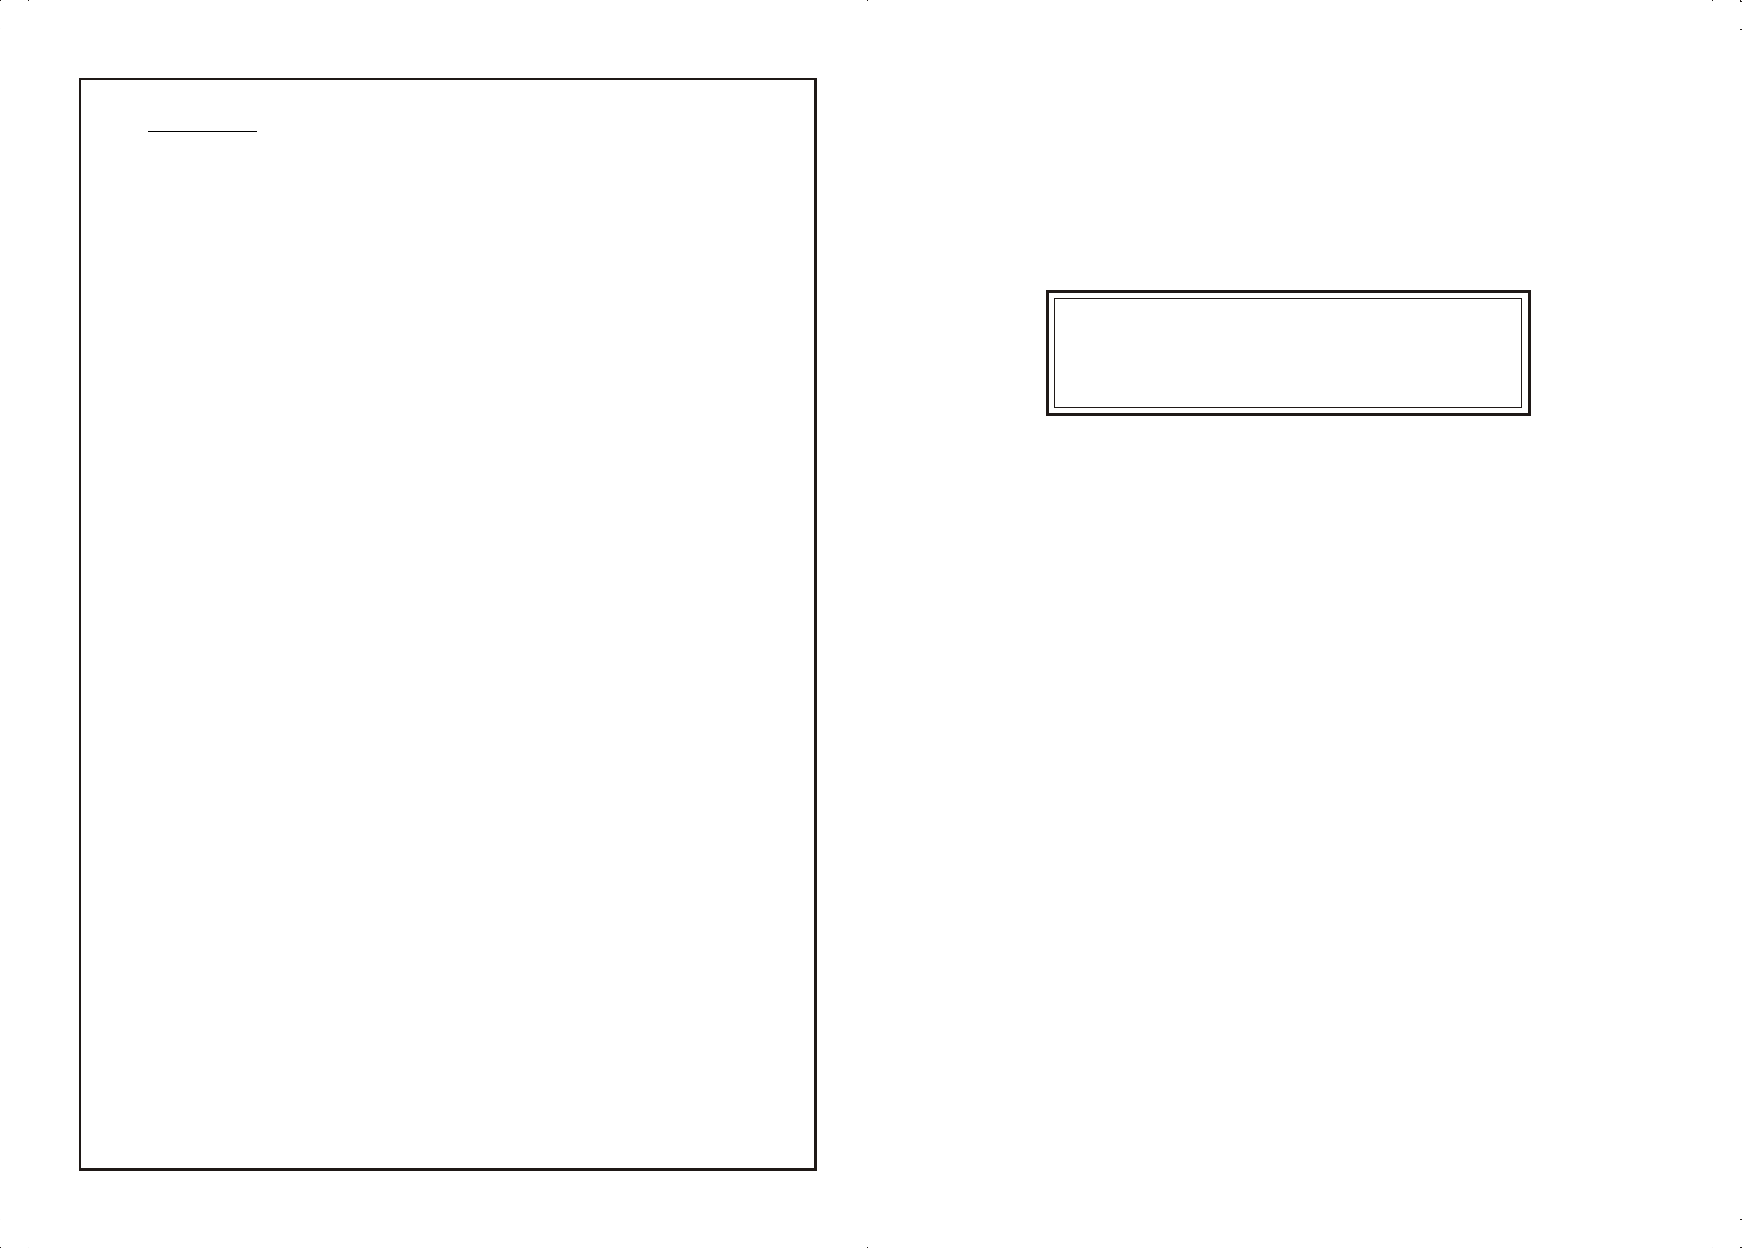
Computer Zone
Use your computer in the smarter way.
(1) PC Sleep
(2) Calculator
(3) My Computer
(4) Wake Up
4. Battery Notice
1) The LED indicator of the keyboard will turn to red light while the keyboard is in the status of
low battery and a low-battery icon will appear on the taskbar of Windows. Please change the
batteries immediately.
2) Press any button to wake up the keyboard while the keyboard is in the sleeping mode. Intelligent Wireless Keyboard
User's Guide
PMU-CKM00014
Made in China