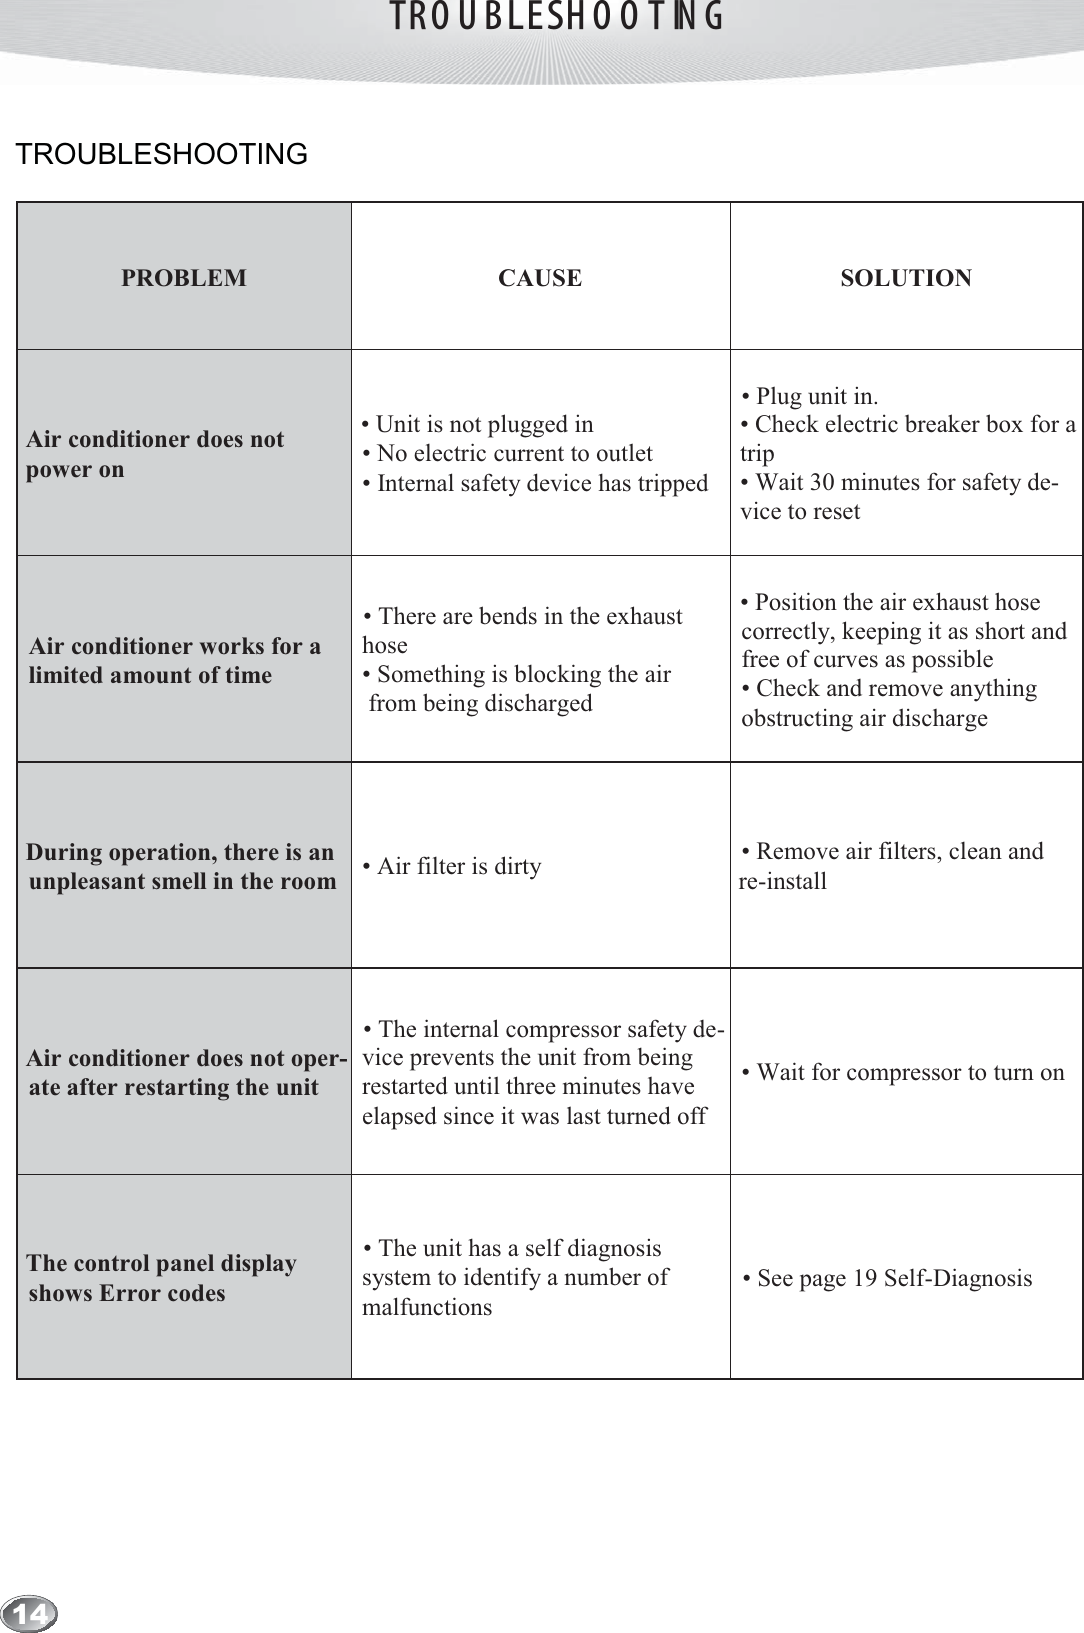
Chigo Air Conditioning CP-WF-DL-01 Portable Air-Conditioner User Manual
Guangdong Chigo Air Conditioning Co.,Ltd Portable Air-Conditioner Users Manual
UserManual.wiki
>
Chigo Air Conditioning
>
CP WF DL 01 User Manual
User manual
Navigation menu
Upload a User Manual
Namespaces
Wiki Guide
HTML
PDF
Info
Views
User Manual
Discussion / Help
Navigation


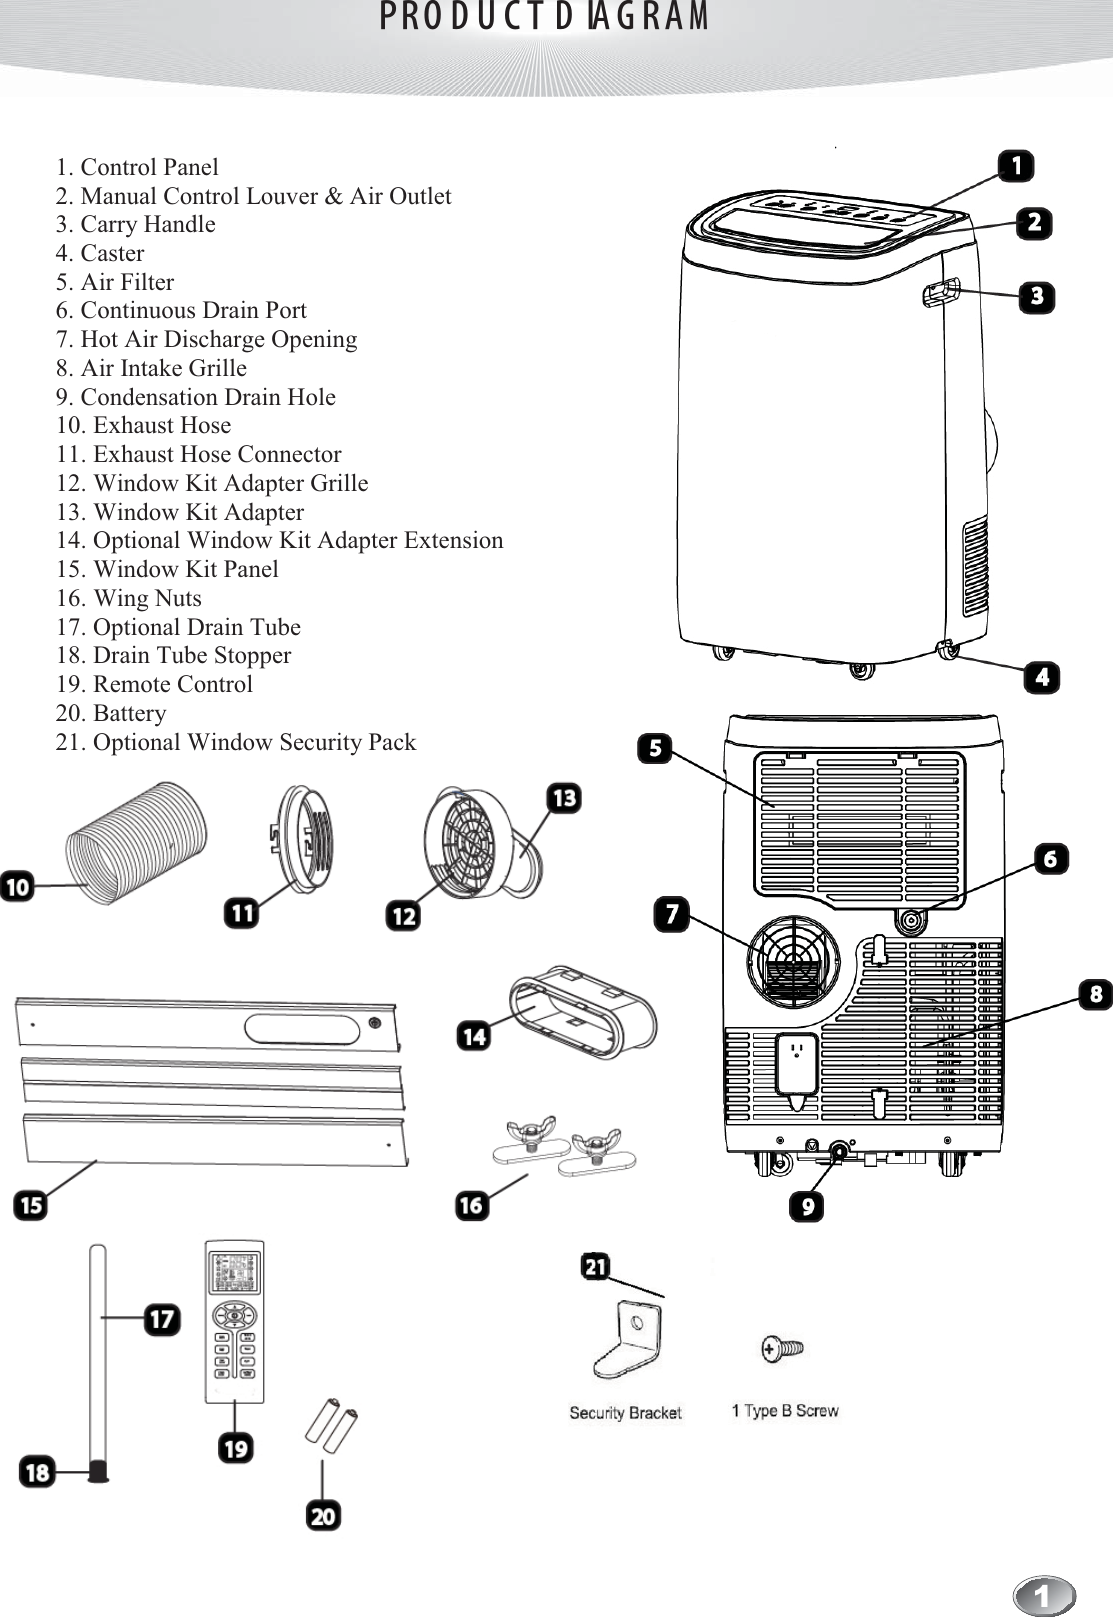
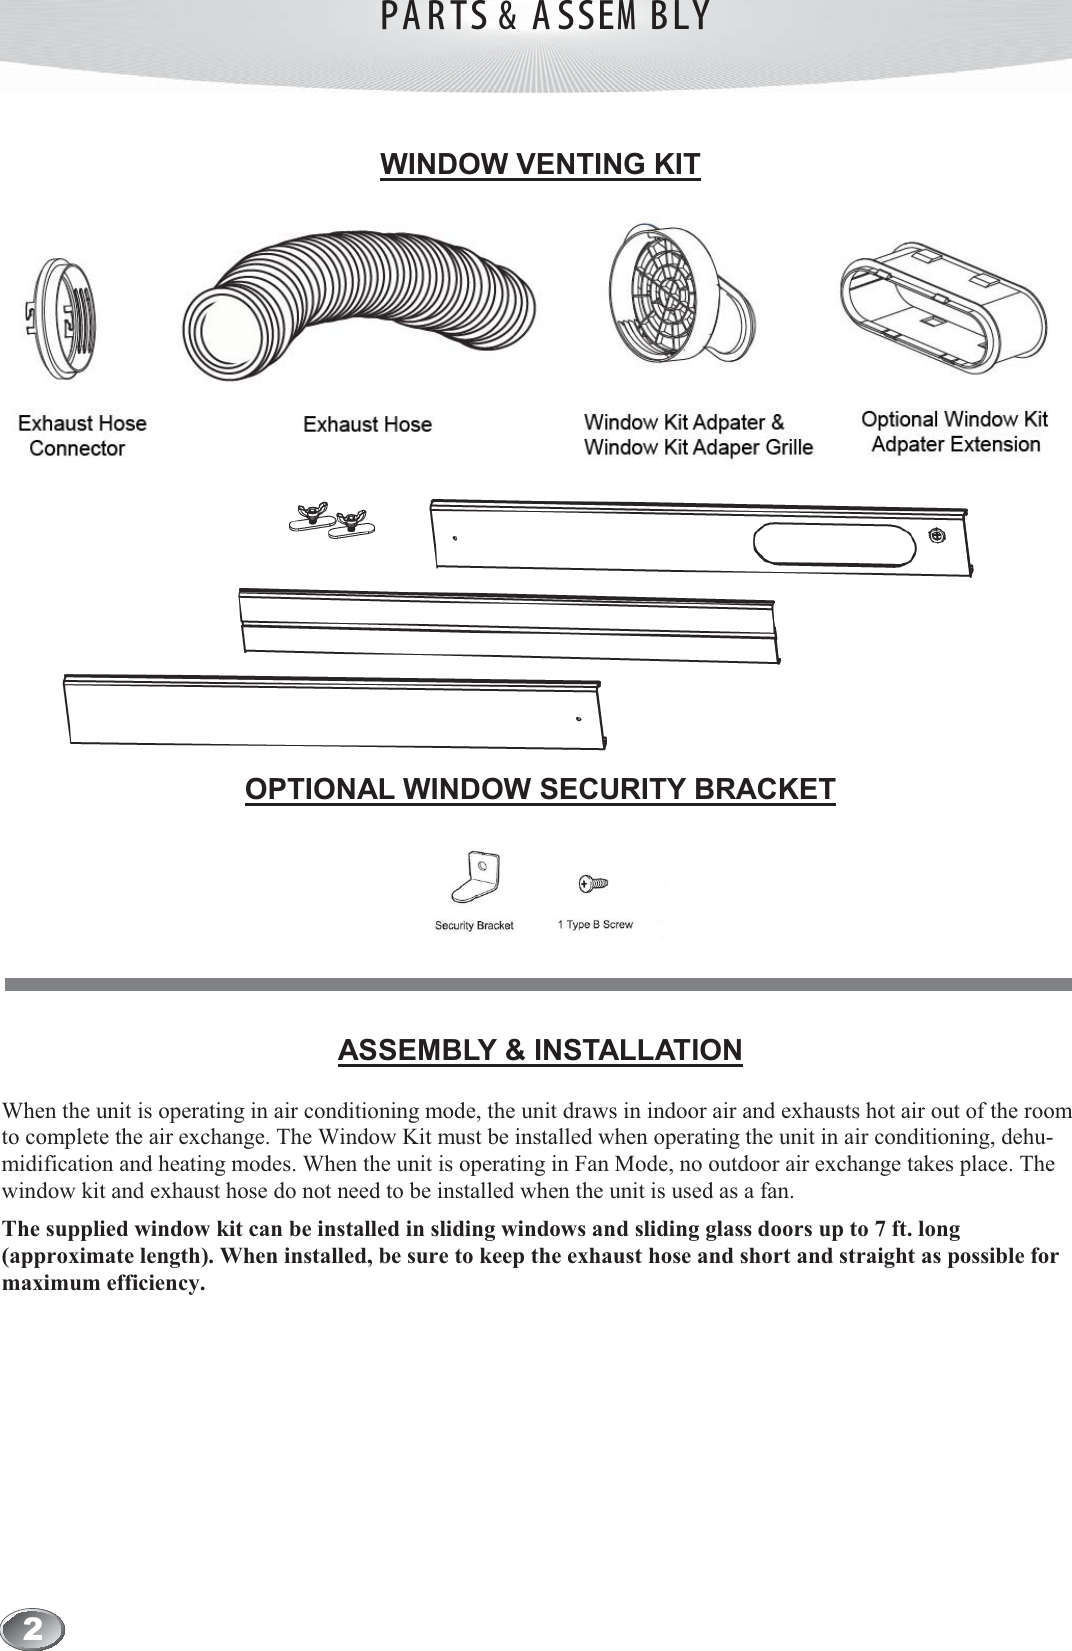
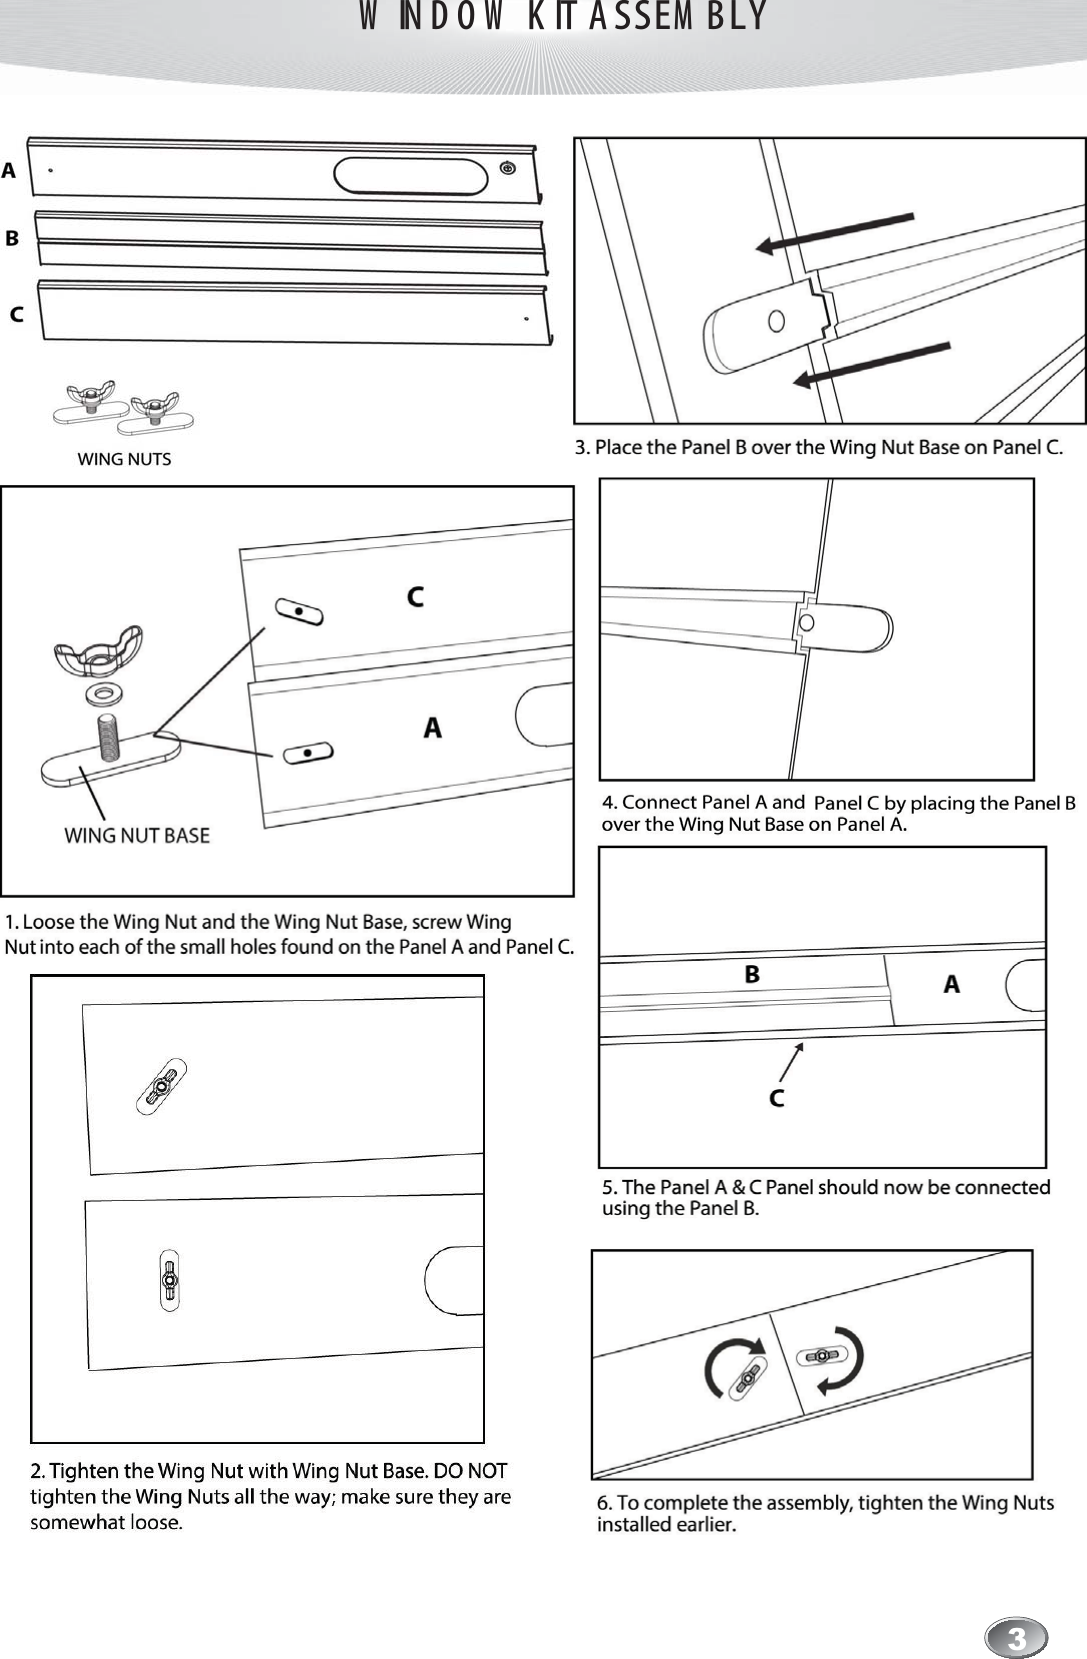
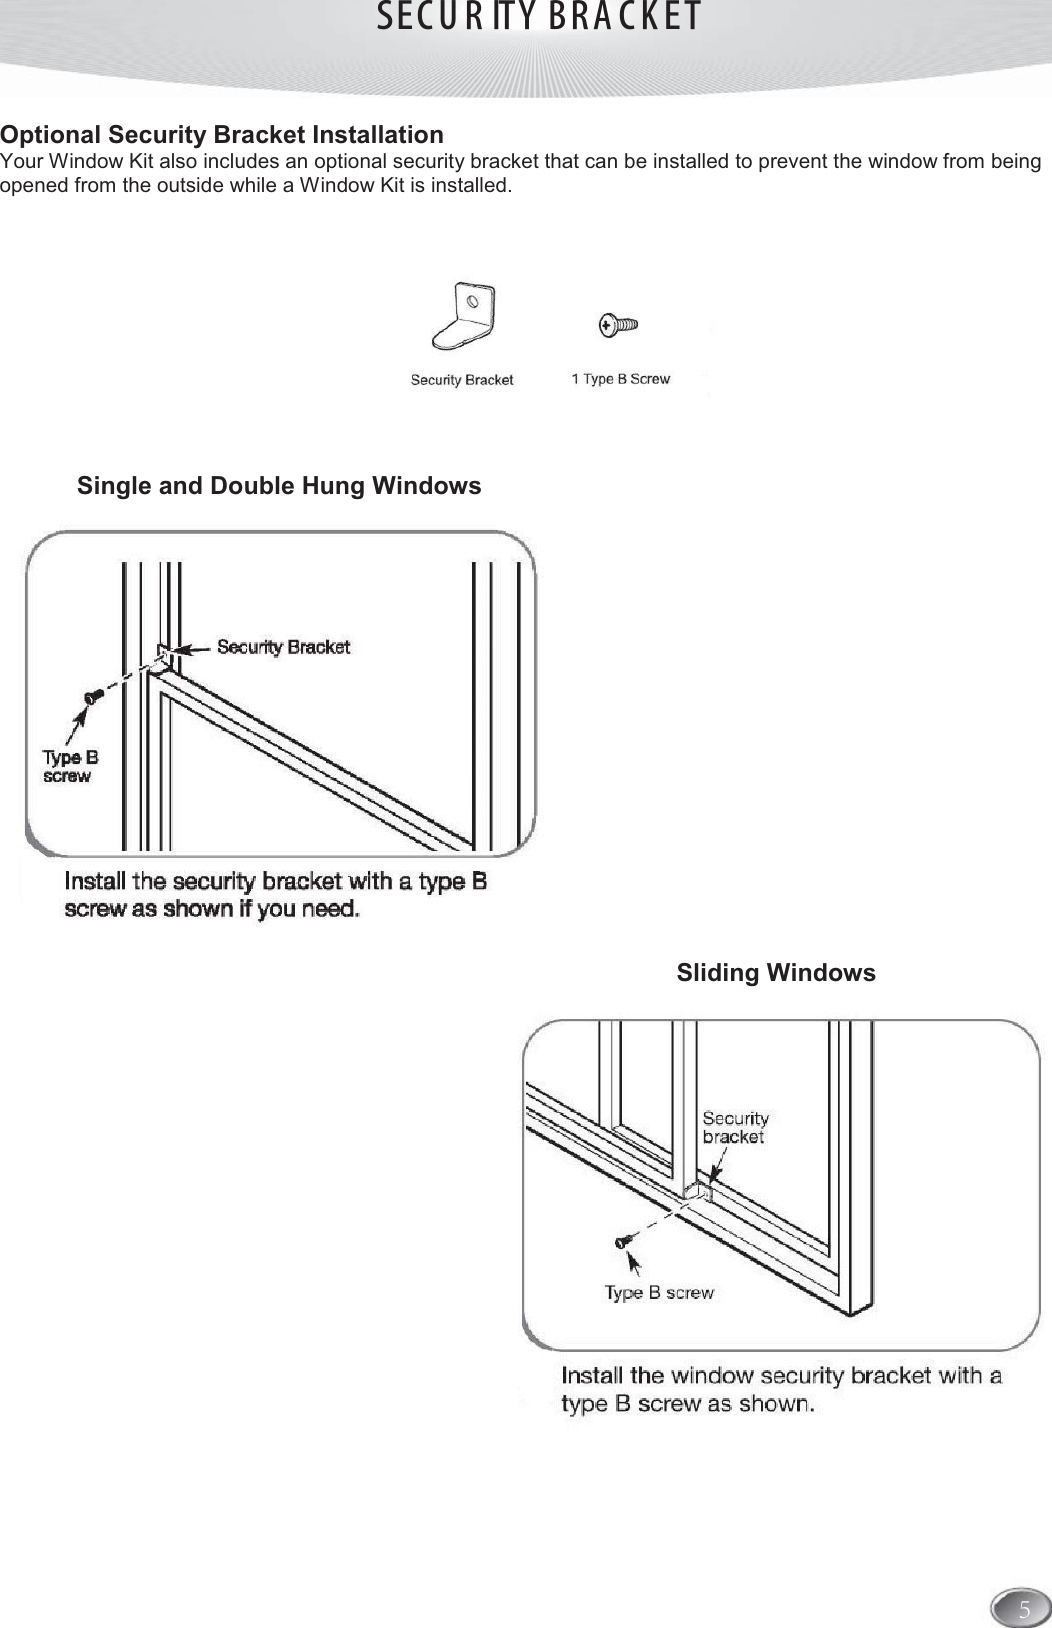
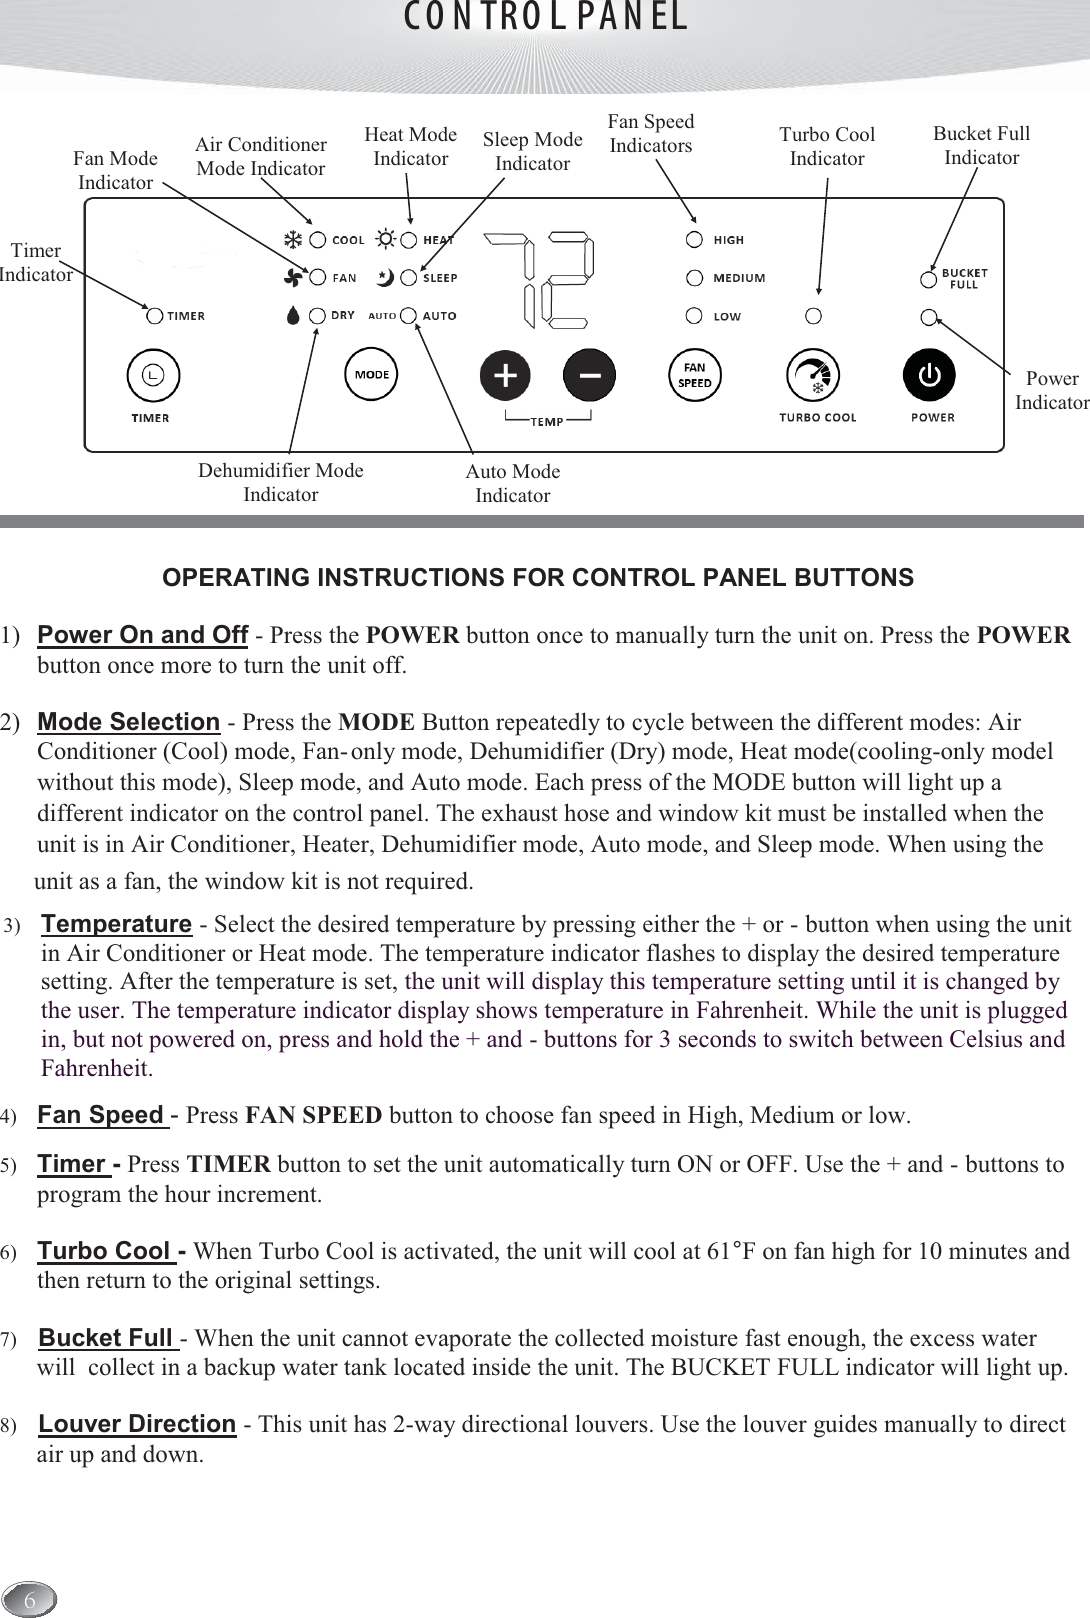
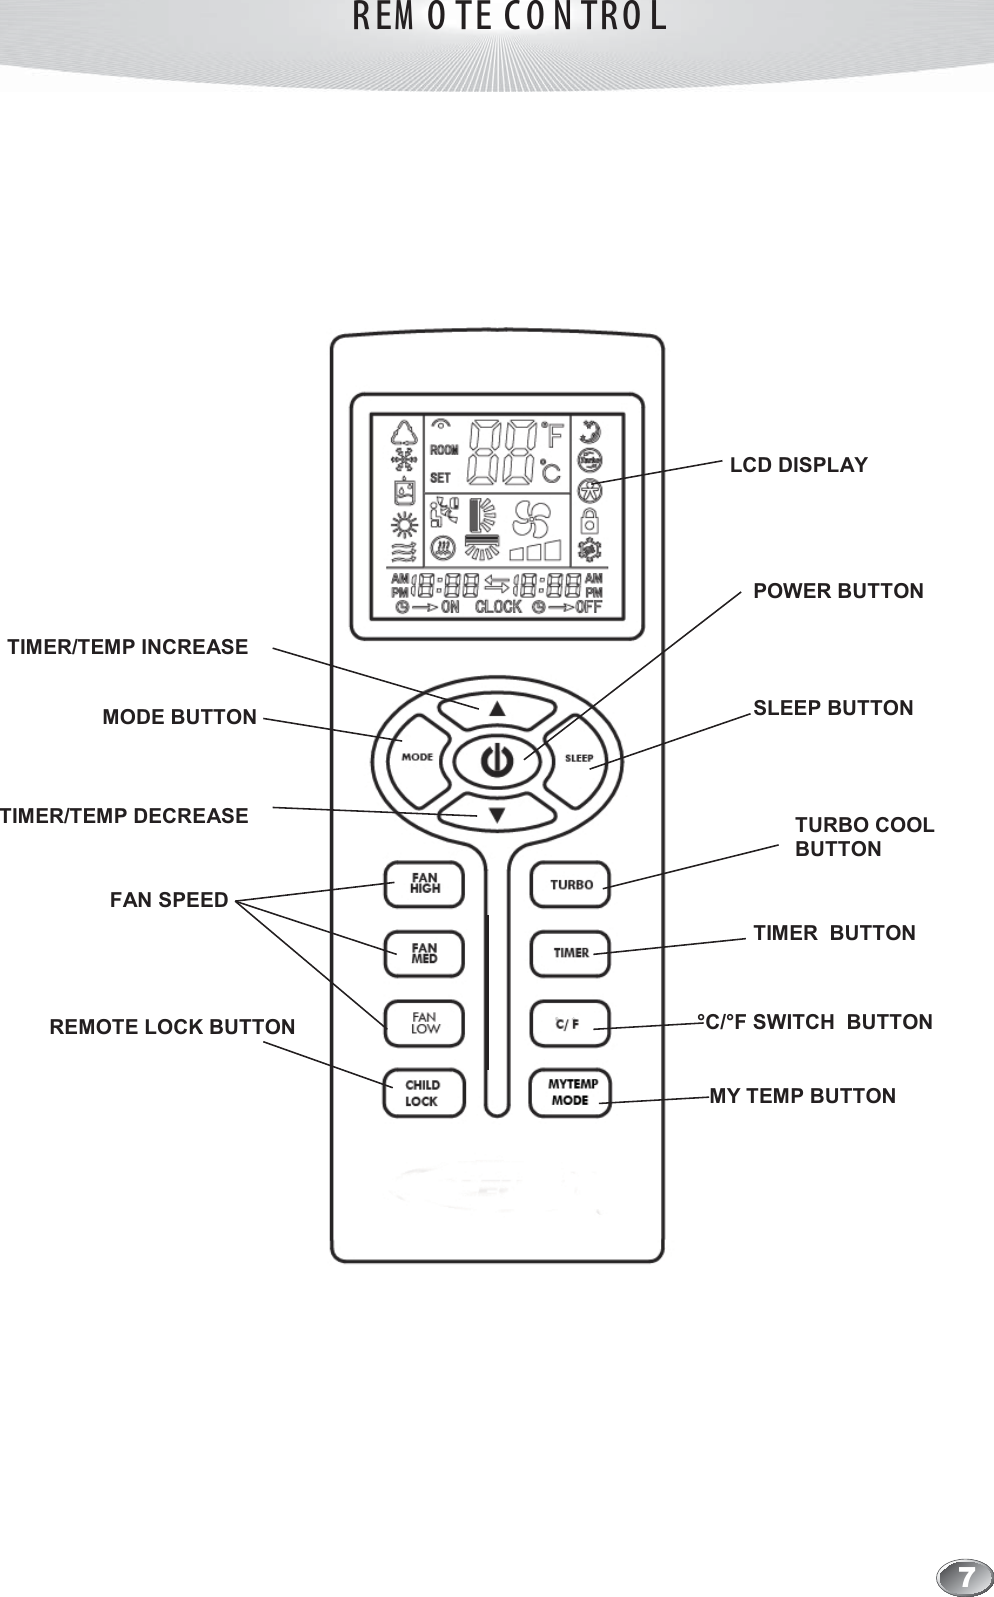
![. PORTABLE AIR CONDITIONER 7KHZLQGRZYHQWLQJNLWPXVWEHLQVWDOOHGLQRUGHUIRUWKHXQLWWRZRUNFRUUHFWO\7KHZLQGRZYHQWLQJNLWKDVEHHQGHVLJQHGWRILWLQWRPRVWYHUWLFDODQGKRUL]RQWDOZLQGRZRSHQLQJVDQGVOLGLQJJODVVGRRUVXSWRIHHW2. 7ZLVWWKH([KDXVW+RVH&RQQHFWRURQWR([KDXVW+RVH1. 2SHQWKHZLQGRZRUGRRUWRDGMXVWWKHOHQJWKRIWKH:LQGRZ.LW3DQHOVWRILWWKHRSHQLQJ,IQHFHVVDU\PDUNWKHNLWDQGFXWRQHHQGGRZQWRSURSHUO\ILWWKHRSHQLQJ3. 7ZLVWWKH([KDXVW+RVH&RQQHFWRURYHUWKHGLVFKDUJHRSHQLQJRQWKHEDFNRIWKHXQLWDQGH[WHQGWKH([KDXVW+RVH(Keep the exhaust hose as short and straight as possible) 4. $WWDFKWKH([KDXVW+RVHWRWKH:LQGRZ.LW$GDSWHU1RZFRQQHFWWKH2SWLRQDO:LQGRZ.LW$GDSWHU([WHQVLRQWRWKH:LQGRZ.LW$GDSWHU7KHQDWWDFKWKH2SWLRQDO:LQGRZ.LW$GDSWHU([WHQVLRQWR.HHSWKHH[KDXVWKRVHDVVKRUWDQGVWUDLJKWDVSRVVLEOHIRUPD[LPXPHIILFLHQF\44WINDOW KIT IN STA LLA TIO N](https://usermanual.wiki/Chigo-Air-Conditioning/CP-WF-DL-01/User-Guide-3857657-Page-6.png)