Christie Digital Systems Canada UHD751P TV set for digital signage with WiFi and bluetooth User Manual UHD751P v2
Christie Digital Systems Canada, Inc. TV set for digital signage with WiFi and bluetooth UHD751P v2
Contents
- 1. User manual
- 2. User manual - UHD751P - v2
- 3. User Manual
User manual - UHD751P - v2

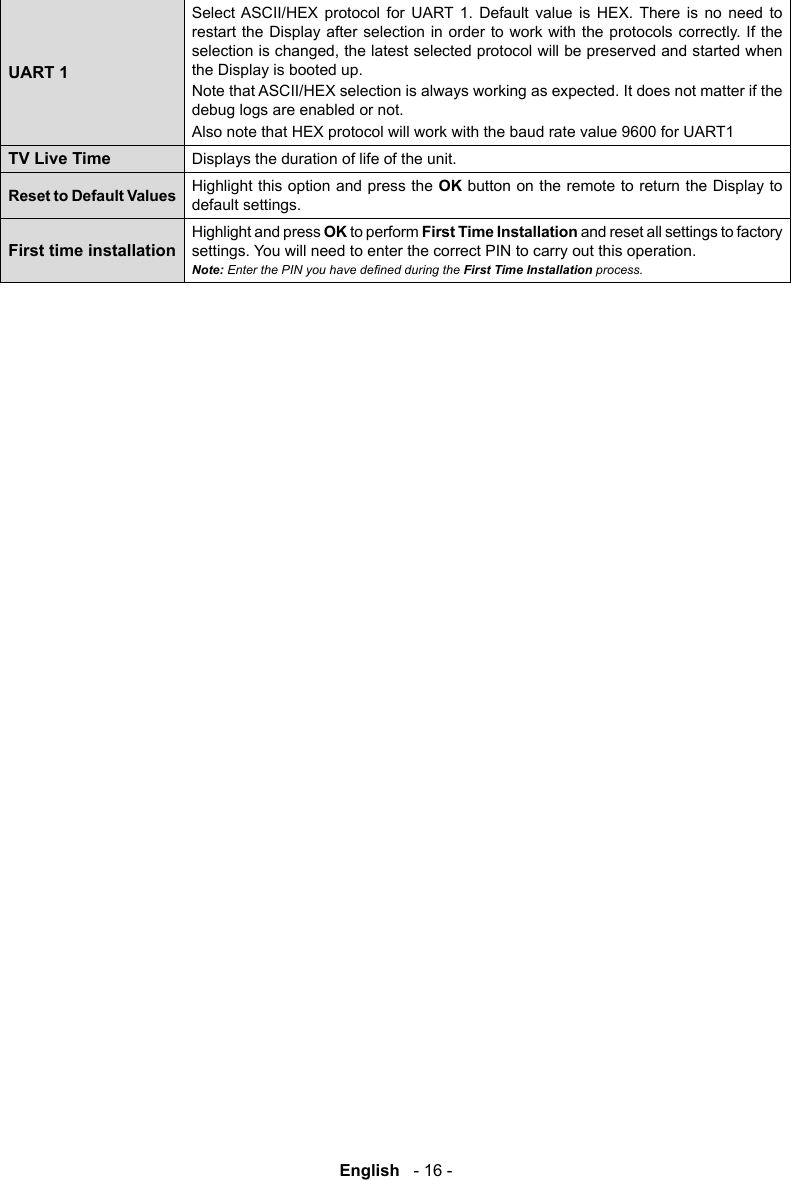


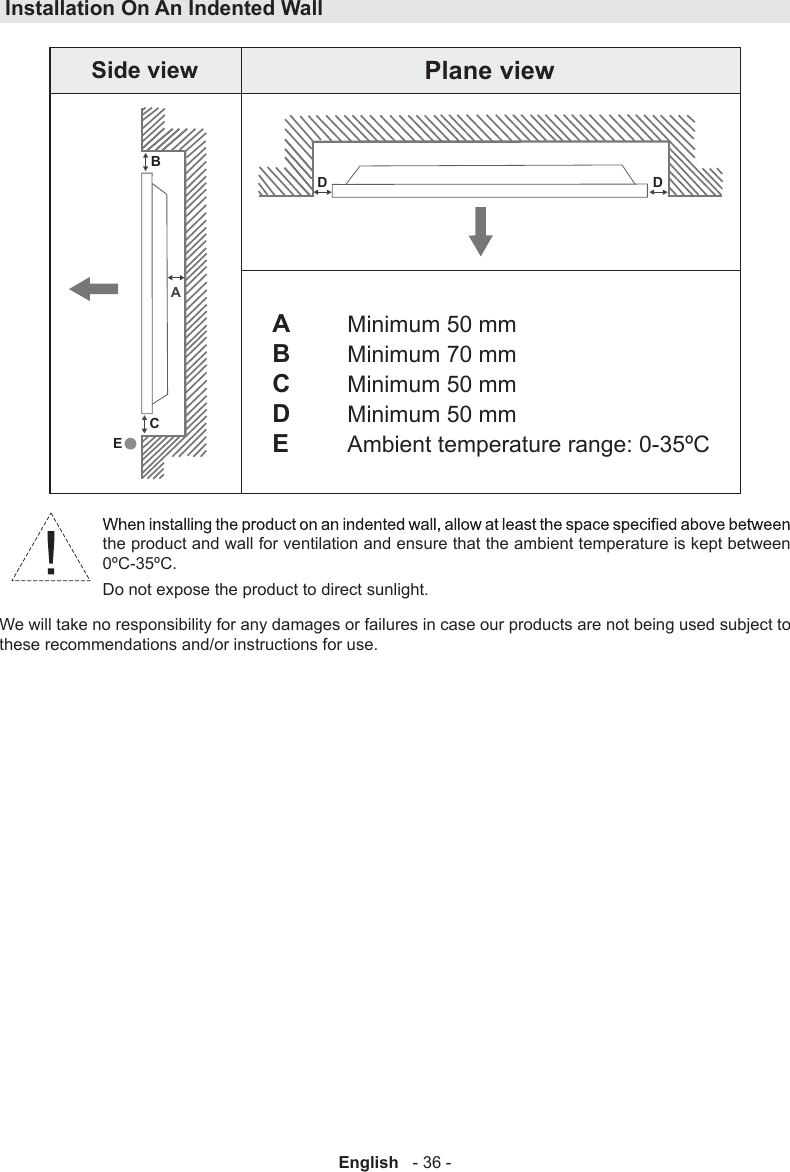
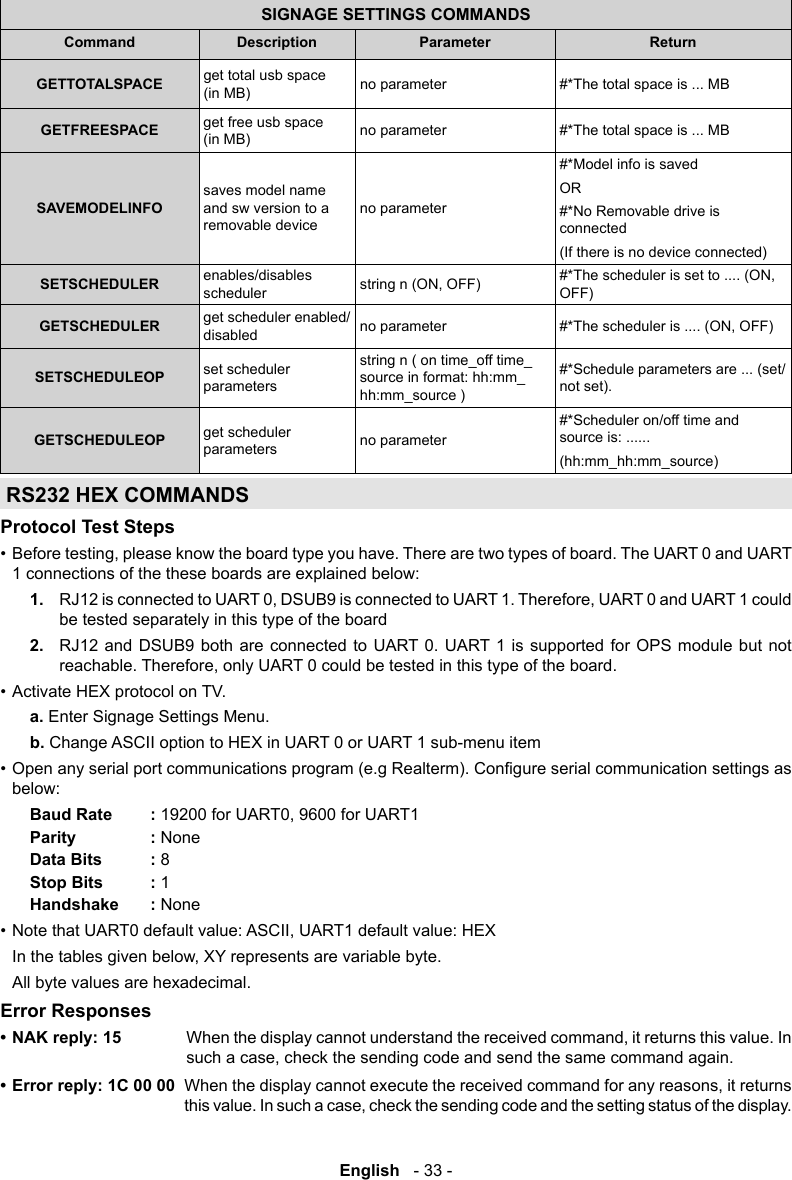
![English - 32 -SETALLVIDEOWALL Set all videowall parameters"parameters for items in following format: picture_mode-contrast-brightness-sharpness-color-powesave_mode-backlight_mode-colortemp-zoom_mode-hdmi_trueblack-picture_hue-volume-headphone_volume"#*... ("set to" for each parameter in order)GETALLVIDEOWALL Get all videowall parameters no parameter#*picture_mode-contrast-brightness-sharpness-color-powesave_mode-backlight_mode-colortemp-zoom_mode-hdmi_trueblack-picture_hue-volume-headphone_volume SETPIXELSHIFT Set pixel shift is enabled or not= off)"#*ACK #*NACK"GETPIXELSHIFT Get pixel shift no parameter #*Pixel Shift is ...SETSIGNAGEID Set Signage ID the Signage ID"#*ACK #*NACK"GETSIGNAGEID Get Signage ID no parameter"#*The signage ID is … no signage id is assigned. 0 is the default value.)"MEDIA BROWSER COMMANDSCommand Description Parameter ReturnSETVIEWSTYLE set view style (Flat or Folder) #*The view style is set to ... (Flat or Folder)GETVIEWSTYLE get view style (Flat or Folder) no parameter #*The view style is ... (Flat or Folder)SETSLIDESHOWINTERVAL set slide show interval #*The slideshow interval is set to ... secondsGETSLIDESHOWINTERVAL get slide show interval no parameter #*The slideshow interval is ... secondsSETUSBAUTOPLAY set usb autoplay mode #*The USB autoplay is set to ... GETUSBAUTOPLAY get usb autoplay mode no parameter OFF)ADMIN PANEL COMMANDSCommand Description Parameter ReturnRST Restart no parameter #Monitor will be restartedSTVparameter value will ve set for volume levelinteger (volume level) #Volume set level= ...STL Set Monitor Language string-int (please look at abbreviations of languages) #Language changed to ...STWA Stop wake up alarm no parameter #WakeupAlarm stopped !!!STEA Stop emergency alarm none #Emergency Alarm is stopped !!!UNP Send Message"string-int (message text - 0) [message content should be ""word1+ word2+word3 ...""]"#Message Sent in SUCCESS !!! GTSURL Get Monitor Portal URL none #StartUp url is ....](https://usermanual.wiki/Christie-Digital-Systems-Canada/UHD751P.User-manual-UHD751P-v2/User-Guide-3591516-Page-33.png)
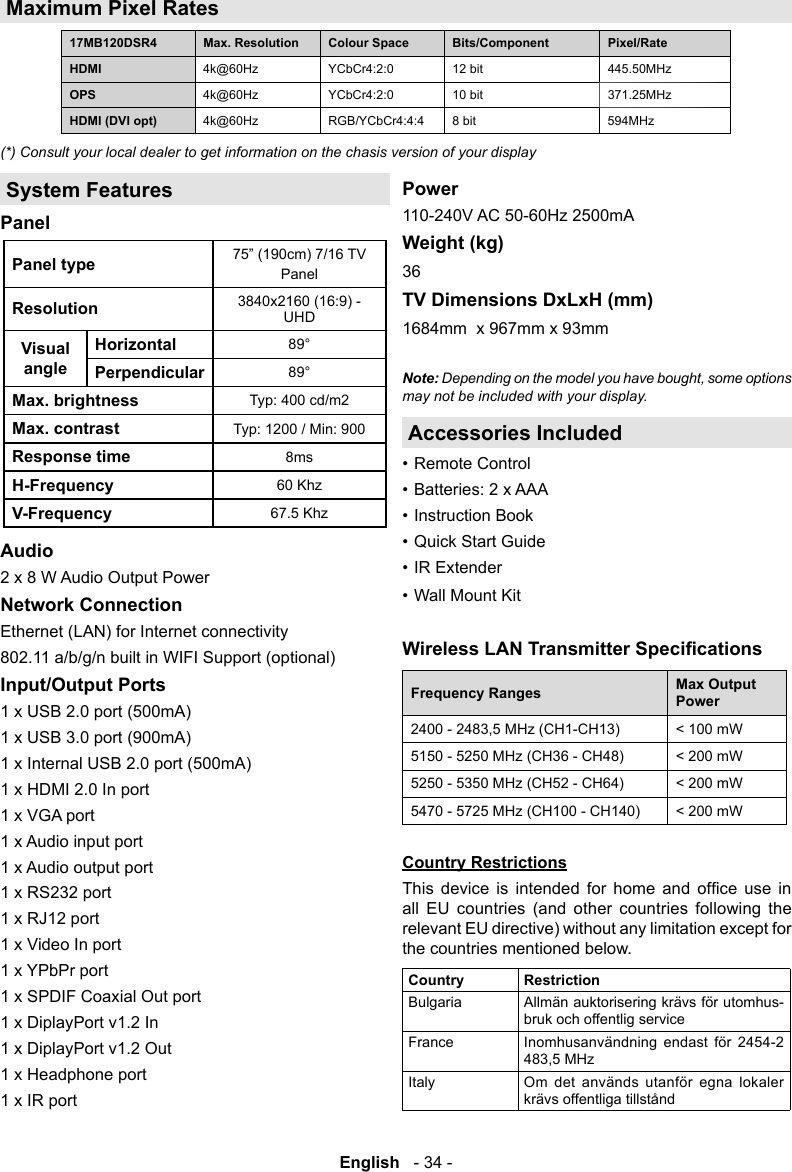
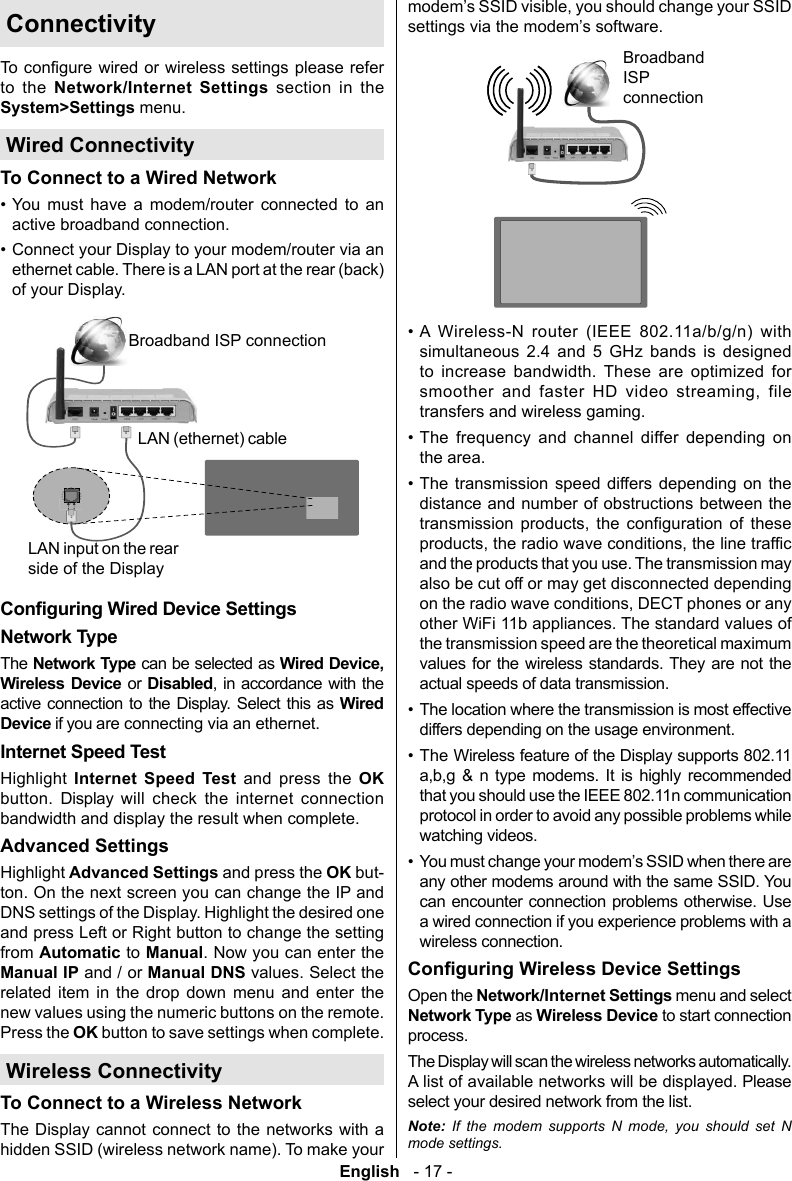
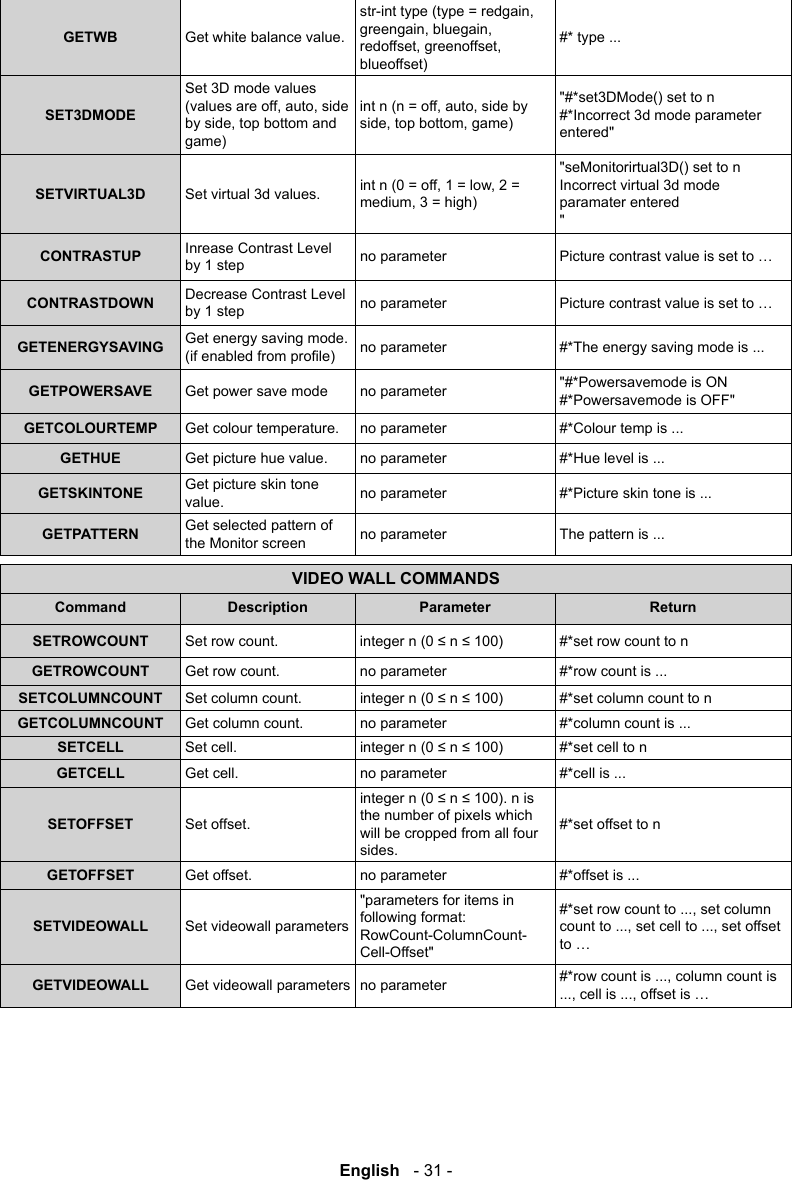
![English - 35 -Greece Inomhusanvändning endast för 5470 MHz to 5725 MHz-bandLuxembourg Allmän auktorisering krävs för nätverks- och serviceförsörjning (inte för spektrum)Norway Radiosändning är förbjuden för det geo-från centrum av Ny-ÅlesundRussian Feder-ationEndast inomhusThe requirements for any country may change at local authorities for the current status of their national Information for Users on Disposal of Old Equipment and Batteries[European Union only]Equipment bearing these symbols should not be disposed as general household waste. You should look for appropriate recycling facilities and systems for the disposal of these products.Notice: The sign Pb below the symbol for batteries indicates that this battery contains lead.ProductsBatteryTRADEMARK ACKNOWLEDGMENT Vesa Wall Mount Measurements Sizes (mm)W H400 200 min. (mm) 7max. (mm) 21 M6 WH](https://usermanual.wiki/Christie-Digital-Systems-Canada/UHD751P.User-manual-UHD751P-v2/User-Guide-3591516-Page-36.png)